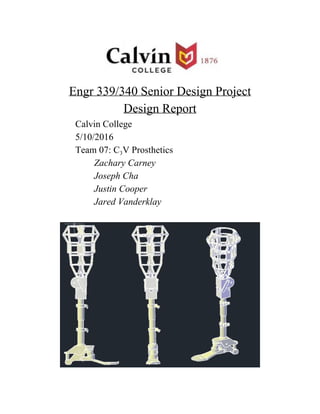
3. Abstract
The goal of this project was to design and build a prosthetic leg versatile enough to fit either a child or
adult. The unique adjustability of this design, coupled with the onedesignfitsall mentality, will allow for
our single prosthetic to be mass produced and fitted to an enormous variety of patients, specifically those
in developing countries. Our design accomplishes this through four key elements: the adjustable
femur/tibia pylon, the adjustable socket/support, the variable foot design, and the affordable and
costeffective knee component. The coinciding of these four features allows our prosthetic to encompass a
range of patients with just a single prosthetic. The knee component was based off an already developed
knee component called the JaipurKnee that was created to be a low costing knee component for amputees
in developing countries. The foot component we have is a multiaxis prosthetic foot that will have the
motion range similar to an actual foot and be adjustable. The height adjustment pylon component of the
prosthetic is based off the concept of a bike seat adjustment shaft. More specifically the prosthetic can be
adjusted by unlocking the clamp and changing to the desired length and locking the clamp when the
adjustment is finished. The socket support includes a silicon lining that is standard for prosthetic sockets
but the outer part is an adjustable support system. This support is able to fold and bend to fit a wide range
of residual limbs which are the part of the leg that remains after amputation.
8. 1.7 Introduction
We are C3V Prosthetic, and we are a team consisting of four mechanical engineering majors that are
currently attending Calvin College. Calvin College is a topranked liberal arts college located in Grand
Rapids, Michigan. Calvin College was founded by the Christian Reformed Church, and still remains a
distinctly Christian institute. The Calvin Engineering department produces a high percentage of students
who complete the FE exam, complete their degree in four years, and find jobs within six months of
graduating. This project was completed in fulfilment of ENGR 339340 which is the Senior Design
Project and the Engineering program’s capstone. For our project we are building a nearly universal
prosthetic leg. It will be able to fit on almost any body type and almost any type of leg amputation within
a range. While it could be marketed in the United States, our main target audience are developing
countries who may not have access to cheaper prosthetics.
Justin Cooper Joseph Cha Zachary Carney Jared Vanderklay
1.7.1 Team Members
1.7.1.1 Joseph Cha
Joseph Cha is a senior mechanical engineer, currently at Calvin College in Grand Rapids. Joseph lives in
L.A, but he came to Calvin a missionary kid from China and has seen and partaken in many voluntary
9. service trips to multiple villages. Joseph has no experience in prosthetics, but hopes to use the complete
product to serve the people in both third world countries and developed countries.
1.7.1.2 Justin Cooper
Justin Cooper is a senior Mechanical Engineering student currently attending Calvin College in Grand
Rapids, Michigan. He is from Ann Arbor, Michigan and currently resides in Grand Rapids, Michigan.
The interest for engineering came in his senior year of high school where he greatly enjoyed a physics
class that was taken which sent him on his path to becoming a mechanical engineer. Justin has not had
any experience in the field of engineering but has worked in a plant in the past so is familiar with some
machinery. Justin has a strong interest in the field of prosthetic and is hoping to work for a prosthetic
company in the future.
1.7.1.3 Zachary Carney
Zachary Carney is the third member of this group. He currently resides in Caledonia, Michigan. At a
young age, he grew fascinated with robots and the field of robotics as a whole. He especially was
interested in robots that were shaped and moved similar to humans. Also, he saw some of the issues with
current prosthetics, particularly how uncomfortable they can be. His goal is to create autonomous robots
that will help humanity as well as prosthetics that feel more natural to their users. He sees this project as a
great stepping stone to that goal.
1.7.1.4 Jared Vanderklay
Jared Vanderklay is a senior mechanical engineering student at Calvin College. He grew up in
Sacramento, California into a family of seven. His interest in mechanical engineering developed out a
fascination with moving parts and problem solving. Although he has no prior experience in prosthetics,
this project provides Jared with a wondrous mechanical problem to be tackled.
10. 1.8 Acknowledgements
We would like to thank Ryan Sheridan, a certified prosthetist that works for Hanger, for educating us on
the basics of prosthetics and giving us feedback on our prosthetic leg design. Ryan also donated several
key components for our prosthetic leg. We would also like to thank Professor Ryan Bebej for the
information on bone structures that led us to gain a better understanding of the human leg in an effort to
mimic its functionality for our prosthetic. We would like to express thanks to our team advisor Ned
Nielsen for all the knowledge and guidance he has shared with us. Finally we would like to thank Phil
Jasperse and Bob De Kraker for their support and knowledge in machining and material acquisition.
11. 2.1 Project Management
2.1.1 Team Organization
For our team no specific roles or titles for each member were assigned. Work assignments were delegated
as need arose. Team meetings were scheduled after every senior design class. Additional meetings
occurred as needed to accommodate upcoming due dates. By completing most of the work in team
meetings, all members stayed up to date and involved in the process. Additionally, individual struggles on
any given assignment could quickly be addressed by the team. All of our documents are kept either on
the engineering scratch drive or on Google docs to allow team members easy access and to facilitate
collaboration. We also have a team email address so that any information or external communication that
needs to be shared, can readily be. Although team members do not have specified roles or titles, we still
have those that are above us that we take direction from. This includes our professors and mentors that
aided us along the way. The organization chart that shows this can be seen in Figure 1 below.
12.
Figure 1: Organization Chart
2.1.2 Schedule
Scheduling matters were primarily decided by the due dates provided through Engr. 339/340. Outside of
these formal constraints, individual assignments and rough due dates were decided in team meetings.
These two scheduling methods allowed us to stay on track. A primary task schedule can be seen in section
2.4.
13. 2.1.3 Budget
In accordance with Engr. 339/340, our team was assigned a maximum budget of $500. Our budget of
$500 is more than enough to buy the material we need to create this prosthetic, except one piece, which is
the foot part of the prosthetic. The price of a senator foot alone is about $700 according to freedom
innovations, a the manufacturing company of the senator’s foot. This is one of the biggest challenges we
have to face during this project.
2.1.4 Method of Approach
Approaching this task, our primary focus was to restore the loss of mobility that amputees had suffered. In
developing countries, the effects felt from limb loss are magnified by the lack of external support
measures to sustain the victims and their families. Simply put, losing a limb can remove one’s ability to
support his or her family. With this in mind, supplying a lostcost and highfunction leg prosthetic
promises to ease financial difficulties for a neglected part of our world. To accomplish this we started
researching common prosthetic designs both in the U.S. and abroad.
14. 2.2 Requirements
Given a primarily thirdworld audience, it became very important to maintain a low cost through the
design and manufacturing procedures. Although this is a low cost product, we do not want it to be a low
quality product. Our design must also be very durable, because living and working in developing
countries is rarely as easy going as the U.S.. We also would like it to be used to perform most physical
activities. While wearing this prosthetic the user would be able to walk on almost all types of terrain and
be able to run. Playing sports may be too difficult with this design. Part of our range of users includes
children, and we want them to be able to wear this prosthetic and not feel so different from other kids.
This will be difficult given all are other requirements, but we will attempt to design the leg so that it will
very similarly resemble a real human leg. With all these requirements we want this prosthetic leg to be
simple enough that the user can perform most of the maintenance themselves. We would like for this leg
to last around 5 years, given an industry average of about 3 years.
2.2.1 Functional Requirements
We want this prosthetic to work almost as well as a natural leg. This will require a knee design that can
almost match the efficiency and functionality of a natural knee. It will also require a strong and durable
frame that can have the dependability of a real leg. Our prosthetic should also be comfortable for our
patients to wear. According to Ryan Sheridan, the two chief complaints about prosthetics are the weight
and the heat. Both of these issues pivot around the design of the socket. Temperature control inside a
prosthetic is a massive project in itself, but the feeling of a heavy prosthetic is largely due to a poor
patient fit. As such, our support design must have enough adjustability for each patient to readily establish
a close and secure support fit.
2.2.2 Performance Requirements
Our performance requirements include the need for the prosthetic to be durable enough for activities such
as running and strong enough to last at least 3 and up to 5 years of very high usage. It should be able to
support the weight of each of our patients with a max weight of about 400 lbs including safety factors.
2.2.3 Environmental Requirements
Our prosthetic should be able to withstand the rough terrain of these developing countries. Large
temperature swings and water damage must be accounted for without risking the safety of the user.
15. 2.2.4 Ease of Use Requirements
We would like our prosthetic to be simple enough for our patients to use and maintain independently. In
order to do that, we would need to make the adjustment mechanisms of the prosthetic rather basic; enough
for our patients to be able to learn on their own once they receive the prosthetic leg. This can reduce the
amount of time and effort for the orthotist and it eliminate the “middle man” part of setting up a
prosthetic. After all the point of all prosthetic is how the patient feels and making sure it fits right, similar
to wearing new shoes.
16. 2.3 Research
Our sources for our research were mainly found online. Specifically, a lot of the sources we found were
from the Heckman Library Engineering Database. This turned out to be a very good database because you
can easily filter out reports and documents that just deal with engineering and whatever topic is needed.
Using the database we were able to find very good sources that deal with prosthetic legs. Another source
we had was Ryan Sheridan who is a Certified Prosthesis and BoardEligible Orthotist with his Masters in
Science of Prosthetics and Orthotics who works for Hanger. All our sources for the PPFS and all other
documents can be seen in 2.10 References/Bibliography.
18. 5/11: Final Report Due
The order of which we complete the tasks are in the order of when they are due. For the tasks such as
research and contacting prosthetic companies for information, they continue throughout the whole
semester. A more detailed explanation of each task this semester will be explained with the order of task
being the order in which the task’s are due and the due date can be seen in the schedule above with the
last day to work on the task being the due date. The first task that needed to be completed was the
selection of the senior design project. This was a fairly easy process because the idea of a designing a
prosthetic was already talked about over the summer, so what was left was to decide on what prosthetic
limb to do. The choice of a prosthetic leg was made because we are all mechanical engineers and dealing
with a leg would involve more of what we have learned in our classes. The task of researching was given
to everyone and would be a continual task. The topics of research involved general prosthetic knowledge,
adjustment and linkage designs for our prosthetic, the actual human leg, different materials, and methods
of prosthetic production. On top of this broad prosthetic research we each broke up the sections of our
prosthetic leg design and had each individual gather more detailed research on that component. This
broke down to
Jared Vanderklay support/socket
Joseph Cha main frame of prosthetic which includes the height adjustment system
Justin Cooper knee component
Zachary Carney foot component
Another very important task was to get into contact with a prosthetic company and talk about our design
in order to get professional feedback. We managed to accomplish this by meeting with Ryan Sheridan .
From this meeting we gained a source that we could continue to go back to if we had more questions or
sought more guidance for our design. The next task was to create an outline for the PPFS. This was done
as a team and completed by the due date. After the outline was completed, the formation of the PPFS draft
was started. This task distributed out by having it be worked on little by little during our meetings. It was
also worked on individually when each team member had extra time available. The next major task was
the oral presentation which was given by Justin Cooper and Jared Vanderklay. The next task that needed
to be completed was the web design. The first thing that was done was to choose which team member
would be in charge of the web design and Zachary volunteered. Using his student ID we gained access to
Dreamweaver and started working on the website. This was also a task that was spread out and worked on
little by little and was completed by the due date. Finally, the finished PPFS was completed in the same
manner as all the other documents. Work was spread out over several weeks with additional work and
19. emphasis during the final week of the fall semester. For the spring semester it consisted of us building a
prosthetic leg and that was spread over the entire semester. With everyone working on their individual
components the need for a schedule was diminished.
20.
2.5 System Architecture
The basic layout of our prosthetic leg can be seen in Figure 2 below. The design consists of five parts the
support (also called the socket), femur and tibia components (also called the pylons), knee, and foot. The
support is where the patient's leg meets the prosthetic. The support will be able to fit wherever the patient
has been amputated. Then depending on if the patient’s amputation is transtibial, below knee, or
transfemoral, above knee, the rest of the prosthetic leg components will be selected. With a transtibial
amputation the only components that will be used would be the support, the pylon, and foot components,
while a transfemoral would use every component. This is the main feature of our prosthetic and it has the
ability to be easily modified so that the same prosthetic can switch from a patient with a transfemoral
amputation to a patient with a transtibial amputation much like a building block pattern. This is
accomplished through a building block design. The fastening system used to connect individual
components is consistent throughout the design. This feature allows the patient to pick and choose which
components are necessary to most closely match the dimensions of the prosthetic to his or her leg.
←Socket
←Knee
←Pylon
←Foot
Figure 2: Diagram of a Typical Prosthetic
21. 2.6 Design
2.6.1 Design Criteria
2.6.1.1 Design Norms
•Caring
•Integrity
•Trust
•Humility
These design norms were chosen because for a leg prosthetic, we need to show that we care for the
patients who need this. We want to boost their confidence, allowing them to stay mobile and ablebodied
despite the loss of their legs. We also need to prove that our product is helpful to the patient in a user
friendly manner and to prove that the product alone is strong enough for them to trust the product. We
want to make sure that our product is reliable enough for them to perform their daily tasks. Last but not
least, we need to understand that we cannot return life to how it was before the amputation, but that does
not mean we will not try to the best of our abilities. Before this design project, we had very little
knowledge on prosthetics and how they are constructed. While we have a better understanding of them
now, we still have much to learn. Being a Calvin College student we hold these design norms in high
regard and have spent the whole year making sure we stay true to them. We are all God’s children and
when we have the opportunity to help other by using our God given abilities we need to make sure we do
that. This goes along with the parable of the talents in Matthew 25:1430. The moral of the story is that
when you are blessed with certain gifts or talents you need to use those to make the world better in some
way not just do nothing. We believe that our group is following this teaching in that we are using the
knowledge that we have been privileged to receive from Calvin College to make the world a little better.
2.6.2 Design Decisions
2.6.2.1 Knee Component
For the knee component in our prosthetic leg, the design we chose came from a previously designed knee
joint called the JaipurKnee. When we were searching for ideas on how we want to design our knee we
came across this design that was made by a student team at Stanford University whose goals were very
similar to ours. This team’s goal was to create a lowcosting, highperformance prosthetic knee joint for
amputees in developing countries. This goal is similar to ours with the only difference being the scope of
the project. The basic layout for the JaipurKnee can be seen in Figure 3.
22.
Figure 3: The Jaipur Knee
The main design that was used in our knee that the Jaipurknee uses is the four bar linkage system. The
four bar linkage system that is used is a Type II, nonGrashof, triple rocker. This linkage system is known
as a “Type II” because the length of the shortest and the longest links, added together, are greater than the
added lengths of the remaining two links. The dimensions for our 4bar linkage system can be seen below.
s + l > p + q
where s is the shortest side, l is the longest side, and p and q are the remaining sides:
s = 0.75 inches l = 2.5 inches p = 1.921 inches q = 0.875 inches
The linkage is considered a triple rocker because no link completes a full 360 degree rotation relative to
another link. This type of four bar linkage works the best because it gives that sturdy support that a knee
should have when standing upright and it allows for the bending motion of a real knee. This will give the
user the ability to safely perform simple actions such as walking and sitting. This goes along with our
design norm of trust because we want people who use our prosthetic to know that it won’t fail on them
while they are using it. The material that was used to create the knee is high density polyethylene which
is the same material as the Jaipurknee. This knee was developed out of a 12 in x 12in x 1in slab of the
polyethylene that cost $20.93. The low cost of the material used to make the knee allows us to keep the
cost of our prosthetic affordable enough for those living in developing countries. A diagram of a triple
rocker linkage systems as well as others can be seen in Figure 4.
24.
2.6.2.2 Foot Component
For the foot component, we initially considered using a dynamic response foot. The design we wanted to
use in particular was based on the senator foot by Freedom Innovations, which is shown in Figure 6. It
was lightweight and was comprised of carbon fiber, allowing for more energy return. However, we found
that this foot design was more geared toward those who were athletically driven. It is also rather poor in
terrain adaptability, which is a necessity for those living in third world countries.
We are now considering using a type foot known as a multiaxis foot. Multiaxis prosthetic feet have a
motion range similar to an actual foot. Our design features an adjustable toe length to function with our
project goals. The toe component will slide to the desired length then a screw will hold it in place. This
design is based on the Trustep foot by College Park, which can be seen in Figure 7, while our modified
design can be seen in Figure 8. The forefoot and heel portions of it will be comprised of carbon fiber,
giving the prosthetic even more energy absorption as well as allow it to move across rough terrain with
little difficulty. The ankle portion, though, will be made of aluminum. This will reduce the cost of the
prosthetic while maintaining support. Size range considerations were established with the minimum
length based upon the average U.S. shoe size for women.
Figure 6: Senator Foot
26. 2.6.2.3 Height adjustment of the Pylon
Regarding the adjustment of height of the pylon, two hollow pipes were used with one that is a smaller
diameter than the other. The inner pipes will have enough space to slide in and out smoothly of the outer
pipe, this is where the main resistive force comes into play. With that the two pipes will have a clamp
where it will lock the two pipes in place and to the required height that the user requires. If the user needs
to change the height of the pylon then the user can unlock the clamp and readjust the height of the two
pipes. This idea is based off of a bike seat adjustment mechanism. The reason why this mechanism is
chosen for this is because on clean and dry surfaces the coefficient of friction of aluminum to aluminum is
between 1.05 and 1.35. The reason why the two tubes are not difficult to remove is because there is not
enough contact with each other due to the clamp being unclamped.
To put it simply, the more contact with the two pipe have together from the clamp’s compressive force,
the more friction that they will both exert. We want the patient to have an easy time to adjust the tubes
rather than having him/her to fight against it, which is why the tubes are required to slide in as easy as
possible, while it snug as much as possible. The clamp will exert a compressive force onto the two tubes.
Based on the stiffness equation,
K = L
AE
Where K is the Stiffness (N/m)
A is the surface area of contact ( )m2
E is the young’s Modulus (N/ )m2
And L is the length of the contact (m)
Along with the given deflection from testing the clamps, the compressive force is given based on this
equation as well.
δ F = K
Where F is the compressive force (N)
is the deflection of the clamp (m) δ
As shown from the equation from above, the higher the deflection of the clamp the higher the
compressive force that it can exert to the two tubes, which will make them have a higher contact with
each other and as of result have a higher friction force between the two tubes.
The pylon will be a tibia length due to the socket will make up for the loss of the femur part. The pylon
lengths vary between sexes, races, or mutations in their growth spurts, which made this quite difficult to
27. capture many of the audience’s bones lengths. For instance, a pylon that can extend from 10 cm to 48 cm
while it can support the patient’s load and it is cheap and easy to manufacture or access while it being
practical is no easy feat. This is also one of the reasons why our objective has changed. As of result
instead of children to adults, the objective is more focus towards teens to adults somewhere the age of 14
to adulthood.
According to Korean Academy of Medical Science, they have recorded over hundreds of childrens from
the age of 3 to 16 of both boys and girls with Xrays. Since this project is more focused on the age of 14
and above, then only a portion of data will be used from their data. On an average 14 year old boy’s tibias
are in the 34 cm mark. The girl’s tibia are about 33 cm as well. To allow that the pylons to fit in both
sexes, the lowest tibia length would be the minimum length of a 14 year old child. The pylons has to
reach the average tibia length of 36.45 cm. As long those values are reachable, then the pylons have met
their length requirements.
As shown in Figure 9, the pylons can reach about a range of 15 to 25 cm with a 3~4 cm discrepancy
because a small portion is required for the clamp to grab onto.
However there is a small issue, there is now a height discrepancy with the knee component and the other
parts of the prosthetic. It is mainly due to the connection parts with a 1.2 inches or a 3.048 cm
discrepancy. Despite the lengths given from the Korean Academy of Medical Science and using replicas
as comparisons in the biology departments. The lengths of the pylons would have to be shorter than the
actual sizes of the tibia.
It would be much more efficient if two pylons were to stack on top of each other and they are able to
change lengths rather than one, since this methods offers more adjustability, especially if there are some
height discrepancies in the prosthetic.
28.
Figure 9: Schematic of Tibia Pylon, Scale 1:2
2.6.2.4 Support / Socket
Adjustability in the support is essential to creating a versatile and comfortable prosthetic. In modern
prosthetics, the two chief complaints from patients are that the prosthetic is too hot and too heavy.
Contrary to the idea of a heavy prosthetic, most of these “heavy” prosthetics are actually lighter than the
limb that they replace. The feeling of additional weight is due both to the moment generated by the
prosthetic and a poor support fit. To accommodate a range of people, our design implements the standard
socket liner and base locking measures. These common components allow for the leg to be securely
fastened to the socket when the leg is lifted. The weight of the individual will be transferred to the socket
liner by a series of 4 multihinged arms. Each arm will be independently adjustable. Once appropriate arm
positions have been determined, the arms will be strapped to both the middle and top of the socket liner.
Finally, an external wrap will prevent the supports from buckling outward. Shown in Figure 10 is an
example of one potential patient fitting. The arms of the support are to be extended to the maximum
29. possible length (with restrictions determined by patient anatomical structure) in order to maximize the
area that the support distributes the load over and minimize the shear forces on the patient's leg tissue.
Figure 10: Schematic of Support
2.6.2.5 Fasteners
Consistency between all locking mechanisms is essential to allow for the building block idea to function.
For the fasteners, we initially considered twistandlock mechanisms. These will be located on the bottom
and top of the individual components. However, we decided to go with an allensocket screw fasteners.
While it does take longer to assemble the parts using these, they offer more stability and overall
versatility, especially in the foot. The two types we used can be shown in Figure 11
30.
Figure 11: Fasteners
2.6.2.6 Assembled Design
Finally, the aforementioned components but be assembled into a cohesive unit. The final unit for
mass production and shipping will consist of a support and liner, the knee component, 2 pylons,
and a foot. This combination of parts will allow for a wide range of patients to assemble the
required parts to fit their needs. Shown in Figure 12 is our first attempt for a possible patient
fitting. Due to further research, though, we found that this design was rather lacking in terms of
versatility, specifically in the foot. Shown in Figure 13 is our redesigned unit.
32. 2.6.2.7 Prototype
The Prototype came out as what most of us expected, each othe “blocks” or modules were able to
meet their conditions. Despite that, the overall the prototype was unable to be fully tested in
terms to walking nor running. At the moment the prosthetic can stand and hold the patient. With
each of the parts meeting their goals, they each also have a flaw that hindered the progress of this
prototype.
Due to time constraints and the large prices on its components, we could not construct our foot
design. Fortunately, thanks to the versatility of our fasteners, we were able to use a dynamic foot
for the prototype and in the future allows many patients to rely on other foot types than one type
of foot. Not only the foot, but the socket, pylon and the knee also has some flaws in their
prototype stage. Due to the height discrepancy, the pylons became shorter than the expected 36.5
cm for the actual tibia length. The reason behind this was that the socket’s range in length was
unknown to me due to unfortunate circumstances with our socket designer.
For the sockets, its linkages requires larger hinges than needed to fit the steel wires that had to be
looped around the leg, which made those hinges even more likely to break under the expected
loads. The linkages were able to take the compression, however we assumed that the linkages
would be in a straight linkage pattern rather than a crooked one. As of result, this allows the
linkages to be more susceptible to breaking. If the links themselves were to be thicker and some
of the links were to be replaced near the base plate, then the links could have able to withstand
the loads. Figure 14 shows our prototype.
For the knee component the motion of the knee with the four bar linkage system worked the way
we design it to be but we were unable to complete a load test for the knee. Therefore our knee
component is fully functional but we do not know the extent of the load it is capable of bearing.
34. 2.7 Integration, Test, Debug
To test our prosthetic we created virtual models in Inventor. This focused mainly on strength, seeing what
materials and designs can provide the support and durability our leg needs. We used a force analysis, first
on the individual parts, then on the whole assembly. We also used the program SolidWorks to test the
motion of our four bar linkage system. Through this we were able to formulate the exact measurements of
our links.
Once this was done and we selected the most cost effective materials and design, we created our
prototype and tested it on four aspects: comfort, horizontal walking, incline walking, and running.
Unfortunately due to time constraints we were unable to perform an extensive test on our prosthetic. What
we had planned was for the comfort test, we would check to see if the support for our prosthetic caused
irritation or discomfort when wearing it. For horizontal walking, we would test how the prosthetic would
act when it’s used on various terrain. That would include gravel, mud, grass, and sidewalk. For incline
walking, we would have tested how the prosthetic acts while walking up and down stairs as well as
various inclines. For running, we would test how the prosthetic would act at various speeds.
35. 2.8 Business Plan
2.8.1 Marketing Study
2.8.1.1 Competition
Throughout the market, there is not much competition for a near universal prosthetic leg that can fully
adjust from the leg to support. Ours is unique in that respect. In the table below, the LIM innovation’s
product, infinite socket, is the closest product that we can compare to our design.
Table 1. Comparison of Features with LIM innovations
Features C3V Solutions Prosthetics LIM innovations infinite
socket
Purposes Fully Adjustable for the entire
leg, while allowing the
prosthetic to provide human like
motion.
Clinicians interested in a
streamlined or mobile fitting
process while also improving
outcomes
Transfemoral and knee
disarticulation users with large
volume changes, discomfort, or
at risk for skin breakdown.
Process of Creation Requires mold and parts to
assemble the parts to create the
leg prosthetic.
A proprietary process for
achieving a wellfitting,
custommolded socket using
measurements and images,
without the requirement of an
impression.
Warranty
Life expectancy of 3 years; and
soft goods for about 6 months.
The Infinite Socket hard goods
are warranted for two years; soft
goods for 6 months
Weight Expected to hold 400 pounds Weight under 250 pounds.
Height Expected to have 30 cm height
adjustment
Minimum of 15 cm height
adjustment
Availability Fast manufacturing process,
similar to Lego production
Depends on clinical
examinations, if it requires or
not.
Comfortability Expected to make it comfortable
and lightweight.
Main function to make it
lightweight and comfortable.
36. Source PPFS and Team 7
documentations
http://www.liminnovations.com/
products/infinitesocket/
Table 2. Comparison of Features with Adjustable prosthetic limb socket
Features C3V Solutions Prosthetics Adjustable prosthetic limb
socket
Purposes Fully Adjustable for the entire
leg, while allowing the
prosthetic to provide human like
motion.
Adjustable prosthetic limb
socket system having a partial
rigid support, a nonelastic,
flexible support and adjustment
means.
Process of Creation Requires mold and parts to
assemble the parts to create the
leg prosthetic.
Requires mold process.
Warranty
Life expectancy of 3 years; and
soft goods for about 6 months.
NA
Weight Expected to hold 400 pounds NA
Height Expected to have 30 cm height
adjustment
NA
Availability Fast manufacturing process,
similar to Lego production
NA
Comfortability Expected to make it comfortable
and lightweight.
The traditional socket is
designed to allow comfortable
weight bearing and prevent soft
tissue damage as weight
pressures are applied to the
residual limb via the prosthetic
socket.
Source PPFS and Team 7
documentations
http://www.google.com/patents/
US20120041567
37. Table 3. Comparison of Features with By the Ball Screw Drive
Features C3V Solutions Prosthetics By the Ball Screw Drive
Purposes Fully Adjustable for the entire
leg, while allowing the
prosthetic to provide human like
motion.
Artificial limb main part is
through motor based on
active control knee flexion
knee actuator, by intelligents
Process of Creation Requires mold and parts to
assemble the parts to create the
leg prosthetic.
NA
Warranty
Life expectancy of 3 years; and
soft goods for about 6 months.
NA
Weight Expected to hold 400 pounds NA
Height Expected to have 30 cm height
adjustment
ballscrew producing 5mm
longitudinal displacement for
each revolution for movement
only.
Availability Fast manufacturing process,
similar to Lego production
NA
Comfortability Expected to make it comfortable
and lightweight.
NA
Source PPFS and Team 7
documentations
http://search.proquest.com/docvi
ew/1443593717/25B9D19DDFF
94B63PQ/15?accountid=9844
38. 2.8.2 Cost Estimate
2.8.2.1 Development
For our senior design project we were given a budget of $500 from Calvin. This cost will need to cover all
materials, equipment and other cost that will go into or design. This budget was more than enough
because with the idea being more for developing countries this whole product is to be as low cost as
possible. Our estimated cost for our prosthetic is shown in Table 4.
Table 4: Senior Design Estimation Cost
This price can be this low because the only need for the money was to buy the material. There will not be
any labor cost because we are the ones building it and we don’t get paid for this. There are no equipment
costs because the metal shop at Calvin was available for use on our project and access is free. We do not
need to pay for any building cost, taxes, or anything else because this is just the production of one
prosthetic leg. If we wanted to mass produce this item on our own many more factors would come into
play and the production cost would be greatly higher and this process will be shown and explained in
section 2.8.2.2.
2.8.2.2 Production
There are two methods that we could choose to mass produce our prosthetic leg and they will both be
looked at. The first method is to do all of production of our prosthetic leg in the U.S. The other method is
to have all production overseas to make the whole production cost lower. Cost estimates for producing in
the U.S. and overseas can be seen in Table 5.
39.
Table 5: Production Cost for Prosthetic Leg
The goal of producing 1000 prosthetic legs is shown for production process in the U.S. and overseas. The
raw materials are assumed the same for both production methods which includes Aluminum, High
Density Polyethylene, and Carbon Fiber. The equipment cost includes the initial cost of the mill and lathe
that is assumed to be the only equipment needed to form the prosthetic leg. It was assumed that the same
equipment could be purchased for almost half the price overseas. The direct labor really shows the
difference of manufacturing overseas and in the U.S. In the U.S. direct labor was done using 5 employees
working 8 hours a day five days a week on a minimum wage of $8.15 an hour. If done this way it would
take roughly 17 months to produce 1000 prosthetic legs. If production was overseas the labor would be 20
employees working 12 hours a day 6 days a week for a wage of $1.15 an hour. Knowing that labor laws
are vastly different in other countries if we took that route we could save more money but we would need
to treat our workers as well as we can to stay with what we believe in as a company and the design norms
that guide us. The repeating costs include rent for the building, utilities, and the marketing costs. A rough
estimate for these were done excluding all cost involving taxes. Looking at the table we can see that the
total cost for production in the U.S. is $211,120 to produce 1000 prosthetic legs and to produce the same
amount but overseas will cost $41,000 and it would only take about 4 months. The large difference in
costs can easily be seen but there are so many more factors that come into play on deciding if production
should be in the U.S. or not and one important factor is who it is sold to. Through discussion, we’ve
decided to first sell our product in the US, then sell overseas. For our analysis, we assumed that the other
country that we would be producing in is China. The same conditions used in our previous analysis will
be applied to the US branch. However for China, the workers will work for about 9 hours a day, 5 days a
week. They will also receive more equipment to meet their quota and prevent bottlenecking.
40.
2.8.2.2.1 Fixed costs
For the US, the fixed cost for goods sold is $7,200 per year and the total fixed operational costs are $1500
per year. Depreciation is $6,288 per year and the interest expense is $3,750 per year. The total fixed costs
are $32,238 per year.
For China, the fixed cost for goods sold is $3,600 per year and the total fixed operational costs are $900
per year. Depreciation is $6,288 per year and the interest expense is $3,750 per year. The total fixed costs
are $25,469.
2.8.2.2.2 Variable costs
For the US, the variable cost for goods sold is $160,200 per year and variable operational costs are
$10,000 per year. The total variable costs are $170,200. The variable cost per unit is $170.20.
For China, the variable cost for goods sold is $68,600 per year and the variable operational costs are
$1000 per year. The total variable costs are $69,600. The variable cost per unit is $69.60.
2.8.2.2.3 Financial summary
For the US, the price per unit is $250.
For China, the price per unit is $140.
2.8.3 Cost Comparison
Table 6: Cost Analysis of Prosthesis with Senator Foot
Cost Analysis
Modules Cost ($)
Senator Foot 700.00
Pylons 50.14
Knee 43.08
Support 100.00
Total 893.22
41.
Table 7: Cost Analysis of Prosthesis with SACH Foot
Cost Analysis
Modules Cost ($)
SACH Foot 13.00
Pylons 50.14
Knee 43.08
Support 100.00
Total 206.22
After taking all the materials accounted for, Table 6 and 7 shows the aftermath of the price of the
prosthetic leg of our designs. Thanks to the versatility of our fasteners, the price of the prosthetics can
vary greatly, as the foot of the prosthetics is at least one of the more expensive part of the prosthetics.
With the SACH foot, the prosthetic is about $200 which is ⅕ cheaper than the current cheapest prosthetic
leg that we have around today. However; carbon fiber feet are a different story as they have different
process and different layers, which increases cost to an absurd level with the current budget. Thankfully,
the parts were donated, from Ryan from Hangar, but this is something that should not be overlooked. This
proves that for our design to be feasible to the developing and 3rd world countries the SACH foot, which
is common in developing and 3rd world countries, is the best choice for the patients there.
42.
2.9 Conclusion
This report discusses all the steps, considerations, and factors that went into the design of our prosthetic
leg. Through our research and talks with our Ryan Sheridan we have managed to create a basic design for
an adjustable prosthetic leg. This design was completed keeping in mind all our many factors, which
include maintaining a low cost, accounting for patient safety and comfort, and manufacturing and
distribution in and to third world countries. In the beginning all the members in this team struggle in
learning prosthetics and to build a foundation to stand upon. This was a learning and a wonderful
experience that we asked for, much like solomon to God. And God said to Solomon in 2 Chronicles 1:11
“Because this was in thine heart, and thou hast not asked riches, wealth, or honor, nor the life of thine
enemies, neither yet hast asked for long life, but hast asked wisdom and knowledge for thyself, that thou
mayest judge My people over whom I have made thee king,“ If it weren't for our motivation and God, we
would have been lost in this project. As of result, C3V Prosthetics has addressed this through the height
and width adjustment in the support, height adjustment in the pylons, a highfunction and lowcost knee
solution, an adjustable dynamic response foot, and a revolutionary building block layout.