FULL ENJOY - 9953040155 Call Girls in Dwarka Mor | Delhi
BATIK MAKING.pptx
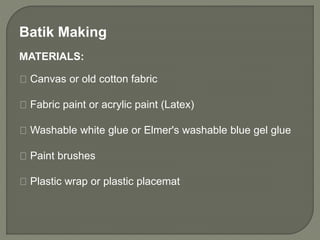
1. Batik Making
MATERIALS:
Canvas or old cotton fabric
Fabric paint or acrylic paint (Latex)
Washable white glue or Elmer's washable blue gel glue
Paint brushes
Plastic wrap or plastic placemat
2. Prepare your fabric by
following the steps carefully:
Procedures :
1. Cut canvas or cotton
fabric into the desired size
3. 2. Sketch a design (optional)
If you are planning on making a detailed
picture, you can lightly sketch your
design onto the fabric. Another option
you can do is to cut out a picture or
template and trace its outline on the
fabric.
3. Make a batik design with glue
Place plastic wrap or a plastic placemat
under your fabric in case the glue seeps
through. Squeeze the glue to make lines and
designs on your fabric. You can make simple
designs like flowers or geometric shapes, or
do a complete picture. If you will use a
sketch, you simply have to apply glue along
the lines of your drawing.
4. 4. Allow the glue to dry
Once you are satisfied with your
design, allow the glue to dry. This
will take around six hours or
more, depending on the weight of
your fabric and the thickness of
the glue lines. When completely
dry, the glue lines will turn
transparent.
5. 5. Prepare your paint
Prepare the colors of fabric paint or acrylic
paint on your palette. Watering down the
paint can create a nice watercolor-like
wash. Be careful with adding too much
water because your batik might look old
and too washed-out. On the other hand,
adding just a little bit of water can give
beautiful deep hues but thick acrylic paint
sometimes chips off from the fabric. The
best way to find the right balance is to try it
out for yourself on a spare swatch of
fabric.
6. 6. Paint the fabric
Classic batik usually makes use of one
or two colors. This puts emphasis on the
lines rather than on the colors, although
multiple colors are not uncommon. When
using two or more colors, you can paint
random splotches of color or paint an
ordered pattern (e.g. stripes).
7. Allow the paint to dry
When you have covered the entire fabric with
colors, let the paint dry completely.
*To find out if the glue has effectively resisted
the paint, check the flip side of your fabric.
The areas with glue should not absorb any of
the colors.
7. A variation you can do is to
use the glue lines as the
borders for the colors, quite
similar to painting any picture.
8. 8. Remove the glue
Soak the fabric in warm water for 15 to
30 minutes. You can do this in a basin
or directly inside a sink or bathtub. The
glue will soften as it soaks longer. You
can speed up the process by rubbing
on the areas with glue. After all the
glue has been removed, hang the
fabric to dry.
9. Another method that does not
involve soaking in water is to
peel off the dry glue lines
directly from the fabric. This
does not work for certain types
of fabric. However, it works
well with canvas batik but not
on cotton tank top.
10. 9. Finishing touches
Once your batik has dried, iron it and it
is ready to be framed or displayed as
an artwork You may also hem the
edges to turn it into a placemat, napkin
or bandana. If you worked on a large
piece of batik, you can sew and
transform it into a bag, pillowcase,
tablecloth, and other projects.
11. Criteria for the Individual
Artworks
5 4 3 2
Quality of craftsmanship All
instructions
were followed
correctly
Some of the
instructions were
not followed
correctly
3 - Most of the
instructions were
not followed
correctly
1 – 2 All of the
instructions were
not followed
correctly
Punctuality Artwork was
submitted on
time
Artwork was
submitted 1 day
late
Artwork was
submitted 2 days
late
Artwork was
submitted 3 days
late
Neatness Artwork
presentation
was neat and
orderly
Artwork
presentation was
mostly neat and
orderly
Artwork
presentation was
somehow neat and
orderly
Artwork
presentation was
disorderly.
Total
We will use the rubrics below to evaluate your work together
with your classmates.