Having fun with painting and drawing - Making an artwork
•Download as PPT, PDF•
3 likes•971 views

Having fun with painting and drawing - Making an artwork

Recommended
More Related Content
What's hot
What's hot (16)
Similar to Having fun with painting and drawing - Making an artwork
Similar to Having fun with painting and drawing - Making an artwork (20)
More from Constellation Art
More from Constellation Art (15)
Recently uploaded
Recently uploaded (20)
Having fun with painting and drawing - Making an artwork
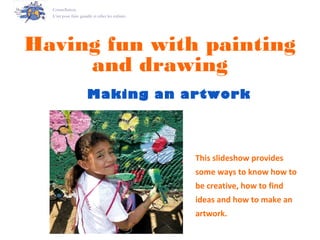
- 1. Having fun with painting and drawing This slideshow provides some ways to know how to be creative, how to find ideas and how to make an artwork. Constellation, L’art pour faire grandir et relier les enfants Making an artwork
- 2. • How do I find ideas? • How do I go about making my piece? • How do I paint my piece? This slideshow will explain how you can make a work with your own personal touch. For that, we’ll need to answer three questions: • I have a choice between multiple techniques:
- 3. How do I find ideas? There are two ways to find your inspiration : I paint from what’s in my mind or I paint by observing what’s around me. The following pages will show some examples and explanations.
- 4. I paint what’s in my mind For example: I can show my fear of AIDS, a deadly disease.
- 5. I paint what’s around me For example, I can paint the landscape around my village.
- 6. I can paint the animals from my region
- 7. I can paint the people from my village or my friends Carefully observe the people you’re drawing and capture all the details of their face and of their clothing as you really see them. Don’t copy what you see on television, in comic books or in cartoons.
- 8. I can paint the festivals I go to or the festivals I’m told about Remember to draw all the details of what happens at the festival (dances, song, food, the audience, the place where the festival is happening… ) that allows you to understand what’s really happening.
- 9. I can paint the traditions, rites, and dances of my country
- 10. I can paint the traditional characters of my country
- 11. I can paint tales from my country Legend from Guatemala: The Quetzal Legend from Nicaragua: la llorona or the crying woman
- 12. I can paint the objects and constructions of my country
- 13. I can paint objects like « still lifes »
- 14. I can paint by taking inspiration from photos or drawings Choose a nice looking drawing (one made by an artist for example). Look closely at the original drawing in order to understand all there really is to draw. Observe the differences in shapes, proportions, and textures. Then put the picture away so you can’t see it anymore. Draw it from memory. (Especially don’t trace. )
- 15. I can paint by taking inspiration from what the great masters have done Use drawings or photos of works the great masters have done; preferably choosing artists from your own country. Carefully look at the drawing or painting as long as necessary. Then put away the work so you can’t look at it anymore. Draw by taking inspiration from what you’ve seen and create YOUR OWN drawing, without trying to copy the master’s work. Based on The Scream by Edvard Munch (Norwegian painter)
- 16. How do I go about making my piece? Painting is CREATION The following pages will show some examples and explanations. Like painters, I paint or draw my ideas in MY way, and I create MY shapes and MY colors. Painting is FREEDOM
- 17. I make my ideas a reality by inventing new things You can invent new shapes , like the great artists do. Don’t hesitate to dedicate part of your workshops to looking at works from local artists.
- 18. Like painters do, I invent characters. I make my ideas a reality by inventing new characters.
- 19. I make my ideas a reality by inventing new characters.
- 20. I make my ideas a reality by telling stories.
- 21. I make my ideas a reality without copying other drawings. Painting is freedom! When I copy, like in the drawing shown here, I don’t express anything about myself and the copy will be less beautiful than the original.
- 22. I make my ideas a reality without EVER tracing. If I trace, I’m not observing. If I trace, I’m not thinking. If I trace, my drawing doesn’t express anything. Here the child didn’t observe what makes up an arm, a leg, how the arm moves with the body…
- 23. How do I make my painting? All childre n are capable of paintin g The following pages will show you some steps to follow to make your painting Group work allows everyone to paint while being respectful
- 24. I make sketches before I paint Making quick sketches, if possible full sized, before painting allows you to relax and gain confidence and skill. A way to defeat your fears.
- 25. I start directly with paint without using pencil before.
- 26. " I first guide the children towards coloring, since it’s motivating and makes them lose their fear. Then, when they have a handle on color, with acrylics, pastels, or crayons, I guide them towards form and the pencil. This way they lost their fear of not being able to draw and going outside of the lines. This led to some good results and, most of all, liberated children!" Sylvia, painter in Ecuador I jump right in with a full page
- 27. With a few exceptions (in some techniques like watercolor) I paint the entire surface of the sheet. The white space of the paper must be colored. I can create a nice white for the sky. I paint the entire surface, without leaving any white space
- 28. The background isn’t an anonymous surface. It corresponds to different large surfaces called sections: the ground, the sky, a house I first paint the background Here, the background is one color The background stands out: the path is a different color Here the background is made up of different large sections: the sky, the grass, the road, the water
- 29. When I paint the background and the bigger sections first, I don’t ruin the details I painted before. To avoid ruining things I should have painted the cornfield then the corn on top, I should have painted the ground then the plants, the figure, and the animal on top.
- 30. The large sections of this painting are the orange of the sky, the green of the forest, the orange of the lake.The houses are drawn afterwards and are painted on top of the background. Example of large sections
- 31. I draw a few strokes with a pencil as guidelines or I paint directly on the paper. I paint from the biggest detail to the smallest, by putting the layers of paint on top of each other. Then, I paint from the biggest details to the smallest.
- 32. After the background, I paint the details. In this painting, the large sections are the red hills, the blue sky and the yellow ground. The figures have been painted directly with a brush on top of the large sections, without using pencil.
- 33. Example of painting with details I paint the large surfaces: blue, pink, purple. Then, I paint all the details (figures, houses, birds…) with a finer brush.
- 34. I decorate the large surfaces I paint the large surfaces. Then, I paint all the details (flowers, fruits, leaves) in the trees and the bushes.
- 35. I draw shapes with the brush «The leader teaches the children to fit everything into geometric shapes. It’s easier and more playful for them. Triangles and squares come from an urban landscape, circles and ovals from a countryside. The same goes for figures, and thus, they advance in their learning.» Sylvia, painter in Ecuador
- 36. If I want, I draw the details before painting them. Once the large surfaces have been placed, the children can draw in the details with a smaller brush, or they can even draw in their figures in pencil on the background before painting them.
- 37. I paint a figure For a figure, the background is the head and the body, and so you paint them first. Then, you put in the face, the clothes, and the details (necklace, flowers on the dress…)
- 38. I create the figures’ movements « I make the circle of the head and then little strokes going in all directions so that the people or animals walk, run, jump, or sleep… » Sylvia
- 39. I paint the silhouettes then the details on top
- 40. I choose my techniques There are a number of different ways to paint: different formats, different materials The following pages will show some examples
- 41. Painting large-scale Allows you to get to the basics Gives freedom Develops brush skills Different formats,
- 42. Painting large-scale, together Painting together: Gives confidence Allows each person to paint without fear Teaches everyone to respect the work of others.
- 43. Making a comic One format, among others, which allows you to create a story and draw characters. Allows you to understand what’s a close-up, the foreground, the background… seen from above, from below, from the side…. Learning to choose is what’s important.
- 44. Using paint and many other materials Paint, thick or diluted, gouache, watercolor, oil, acrylic, inks, chalks…. Different materials
- 45. An example: pastels With pastels, we find a very dynamic way to enter into the world of composition, because they’re similar to crayons and allow children to learn about the organisation of a painting. Sylvia (Ecuador) Different materials: We’ll delve further into the subject of materials in a further chapter.