Gomti Nagar & High Profile Call Girls in Lucknow (Adult Only) 8923113531 Esc...
Unit 3 skills development task 3 luc john raubenheimer
1. Task 3: Start developing the skills and experimenting with them, constantly reviewing progress to inform
future learning.
Checklist
Materials
Recordings
Texts
Scripts
Drafts
Unit 3 – Movie Maker skills development (10A and 11A)
Luc-John Raubenheimer Candidate number:3304
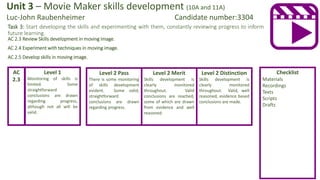
AC 2.3 Review Skills development in moving image.
AC 2.4 Experiment with techniques in moving image.
AC 2.5 Develop skills in moving image.
Level 1
Monitoring of skills is
limited. Some
straightforward
conclusions are drawn
regarding progress,
although not all will be
valid.
Level 2 Pass
There is some monitoring
of skills development
evident. Some valid,
straightforward
conclusions are drawn
regarding progress.
AC
2.3
Level 2 Merit
Skills development is
clearly monitored
throughout. Valid
conclusions are reached,
some of which are drawn
from evidence and well
reasoned.
Level 2 Distinction
Skills development is
clearly monitored
throughout. Valid, well
reasoned, evidence based
conclusions are made.
2. Task 3: Start developing the skills and experimenting with them, constantly reviewing progress to inform
future learning.
Checklist
Materials
Recordings
Texts
Scripts
Drafts
Unit 3 – Movie Maker skills development (10A and 11A)
Luc-John Raubenheimer Candidate number:3304
AC 2.3 Review Skills development in moving image.
AC 2.4 Experiment with techniques in moving image.
AC 2.5 Develop skills in moving image.
Level 1
Some development of
moving image production
skills towards success is
evident.
Level 2 Pass
Some development of
moving image production
skills is evident, meeting
some success criteria.
AC
2.5
Level 2 Merit
Development of moving
Image production skills
has clearly taken place,
meeting most success
criteria.
AC
2.4
Level 1
Evidence that
experimentation has been
attempted.
Level 2 Pass
Limited evidence that
experimentation has
taken place.
Level 2 Merit
Clear evidence that
experimentation has
taken place. Some
experimentation leads to
innovation.
Level 2 Distinction
Development of moving
image production skills
clearly meets success
criteria.
4. Centre Number: 56830_Luc-John Raubenheimer_Candidate number: 3304
Skills development – (2.5 Camera shots & angles / rule of thirds)
These are examples of the rule of thirds. In the first photo you see me, the main focus of the
picture, in the right of the image. The rule of thirds is meant for pictures with two or more objects
inside. You can see that the third picture doesn’t really work with the rule of thirds because only
the computer is in the photo.
Rule Of Thirds
Camera Shots & Angles
This is a medium close up shot. It is
usually used for news reports and
documentaries, that is why I did this
shot, because we chose to make a
documentary style video.
This is the medium shot. it shows some
part of the subject but in more detail,
usually used in movies and tutorials.
https://digital-photography-school.com/
http://www.wikihow.com/Main-Page
14th April 2017
When I started learning about camera shots, camera angles and rule of thirds, I
would say that the grade I was on was a 5, which means I didn’t know anything
about these things. But today I think I am a 3, which means I know some things
about camera shots and angles and rule of thirds.
Assessing my skills
This is the only camera angle in my part of the video, it
is an eye level camera angle and a medium shot.
This is the rule of thirds on this screenshot of my
part of the video. As you can see, I am the main
focus in the screenshot. But I am not in the
middle in the video, the goal of the rule of thirds
is to basically move the main focus in the photo
or video, to another place in the photo or video,
it is more soothing to the eye.
2nd of May 2017
After a lot of trial and error, I would say that my self assess grade is 2-, compared
to my grade on the 14th of April, which was a 3, would say that I have improved
a lot.
14th of September 2017
Today, I am going to give myself a grade 2+, which means I am alright at this skill
but I could still improve it. I was a 3 before, so I have improved a bit since then.
2nd of May 2017
For the first part of my video, there was an error where the camera angle was a low angle
instead of a eye level view angle, I rerecorded this and now I am going to give myself a
grade 2+, which means am good at this skill but I still have room for improvement.
5. Centre Number: 56830_Luc-John Raubenheimer_Candidate number: 3304
Skills development – (2.5 Camera shots & angles / rule of thirds)
http://www.mediacollege.com/video/shots/http://www.mediaknowall.com/camangles.html
These are the Media Know All website and the Media College website, I think these are the best websites for finding out
things about camera shot and angles. Every shot and angle has a picture and a good description.
6. Centre Number: 56830_Luc-John Raubenheimer_Candidate number: 3304
Skills experimentation – (2.4 camera shots and angles)
This is the original camera angle of the entire part two of the video.
Finnan helped me film this after school. But then I thought this was
too simple due to the fact that you can only see me using the
computer and not the computer screen. I had Finnan film the entire
part two again but in a different camera angle.
After a bit of experimenting, this is the camera angle I
went with eventually, but I did not use it for the entire
part wo like the previous version though, I only used it
for one third of the video, and that was the
introduction. The rest of the video was a recording of
the computer screen with my voice over it.
27th September, 2017
7. Centre Number: 56830_Luc-John Raubenheimer_Candidate number: 3304
Area Identify specialist
terms
Explain how used in the creative media industry
Titles 1. Credit titles
2. Subtitles
3. End titles
4. Insert titles
5. Main titles
1.To show the job roles of the people who worked on the video or movie.
2.To let people that only understand a foreign language understand what’s happening in the video or movie.
3.To let people know that’s it’s the end of the video, movie.
4.To make sure the audience know something you probably missed in the video.
5.To let the audience know the name of the movie.
Skills development – (2.5 Titles) 28thAugust 2017
The font in this title is Segoe UI, it is the
default font you start off with after you
open Movie Maker. This is also the
default animation you start off with. I
am definitely not going to use this
because it is too basic for my our video.
This font in this title is Segoe Script, the
animation is pixelate, I think pixelate is
one of the best animations you can find
in Movie Maker.
This font in the title is MS Reference
Sans Serif, and the animation is flip,
which I also think is one of the best
animations in Movie Maker.
https://digital-photography-school.com/
http://www.wikihow.com
8. Centre Number: 56830_Luc-John Raubenheimer_Candidate number: 3304
Skills development – (2.5 Titles)
This is a video about how to add titles on Windows Movie Maker. It was made by
dacookie5, who has 63 subscribers on his channel. He dose not speak in his videos,
which I think is a weak point of his videos. He does however, gives very clear
instructions throughout the video though.
https://www.youtube.com/watch?v=UwqORhJ8GvY
Self assessment.
Before I started learning about titles in the lesson I would give myself a 5, which means I did not know anything about them, except for the fact that I knew that titles are the name of an
article, video, movie, etc.
But now that I have done some research and learnt about titles, I would give myself a 4+, which means I know somethings about titles but there is still a lot to learn about.
Thursday, 14th of September, 2017
Tuesday, 19th of September, 2017
After the research I have done today about titles, I would give myself a grade 3-, which means I am average at this skill and I need to work harder to improve it.
Thursday, 21st of September, 2017
After the improvements I made to my part of the video, I give myself a grade 2+ for adding titles, which means that I am good at adding titles to a video and there is a little
more space for improvements.
Thursday, 14th of October, 2017
After the feedback I got from the rest of the class, I improved my video and created the final version of my video, now, I would give myself a grade 1-, which means that I
am very familiar with this skill.
9. Centre Number: 56830_Luc-John Raubenheimer_Candidate number: 3304
Skills development – (2.5 Titles)
http://www.windowsmoviemakers.net/tutorials/howtointrotitles.aspx
This page was found on the Windows Movie Maker website, it was found in the tips section. It is about how to make better titles, it is very
detailed and it was done by a member of staff at windows. The other one is on a website called Vimeo, the page is called video 101, and it
tells you very about how you should make a title in Windows Movie Maker very clearly.
https://vimeo.com/blog/post/video-101-adding-text-titles-with-windows-live-mov
10. Centre Number: 56830_Luc-John Raubenheimer_Candidate number: 3304
Area Identify specialist
terms
Explain how used in the creative media industry
Captions 1. Font size
2. Font type
3. Font colour
4. captions
1. The size of the captions.
2. Depending on which font type you use, the look of your captions would look
different.
3. The colour of you captions.
4. Extra detail you want to add into your video for the viewer to understand.
Skills development – (2.5 Captions) 8th September 2017
https://answers.microsoft.com/en-
us/windows/forum/windows_vista-pictures/how-
to-add-captions-to-pictures-in-windows-
movie/55c81121-1d7f-41b7-9fa5-
097703128fdf?auth=1
These are the captions that are in version one of the part two Photoshop tutorial. I will add more in the video
but this is what is in the video now.
11. Centre Number: 56830_Luc-John Raubenheimer_Candidate number: 3304
Skills development – (2.5 Captions)
https://www.youtube.com/watch?v=HygFZq5mW1s
This is a video about add captions on Windows Movie
Maker. It was put together by topsalesmax55, who has
454 subscribers. This video is very informative,
although he takes quite a long time to finally start
talking about captions, I found this video very helpful.
He taught me how to add captions into my video and
how to customise the captions as well.
Self Assessment
2nd May, 2017: Before I started learning about captions, I would give myself a grade 5. which means I didn’t
know anything about captions on Movie Maker. But now I would give myself a 4, which means I still don’t
know a lot about captions but I have got some basic knowledge.
12th May, 2017: Now that I have been learning about adding captions for a few days, and I have done a bit
of research, I would give myself a grade 4+, a grade 4+ means that I have improved from the last self
assessment some more, but I still have a very long way to go.
13th May, 2017: I am a quarter way in completing my first version of my part of the video, and I have been
experimenting a lot on movie maker, so I am going to give myself a grade 3-, which means that I have
improved from the last self assessment, and I have some knowledge about adding captions and I need to
work harder to improve my grade.
1st June, 2017: I have completed version one of my part of the video. There are some captions in my video
that I have added in a software called iMovie. I think because the captions I added were not the same with
the agreed house style and font, so I am going to grade myself a 3, I am going to have to change the
caption’s font if I want a higher grade.
12th September, 2017: I have nearly finished improving version one of my video into version two, I have
already improved the captions by changing the font into the agreed one and the font colour to white, which
is also agreed by our group. I grade myself a 2- after this, and that means I know a lot about the skill of
adding captions, but there is still some room for improvement.
4th October, 2017: I have improved my final version of my part of the Photoshop tutorial and have put
together the group’s videos into a final video, I used iMovie to give the captions a special way of appearing
on the screen to improve how the video looks. I grade myself a 1-, because I think I have a lot of knowledge
about adding captions.
12. Centre Number: 56830_Luc-John Raubenheimer_Candidate number: 3304
Skills development – (2.5 Captions)
https://www.digitalcitizen.life/how-add-titles-captions-and-credits-windows-live-movie-maker-2011
http://smallbusiness.chron.com/change-font-color-captions-windows-movie-maker-28470.html
I learnt how to add captions in my video from this website. This website also
taught me to use the correct font type and font colour to fit my theme. I am
going to use Verdana because it is the font our group agreed on.
This website taught me how to change the font size and font colour in
Windows Movie Maker. Which helped a lot because that is what the
other website told me to do but it did not tell me how to do it.
13. Centre Number: 56830_Luc-John Raubenheimer_Candidate number: 3304
Skills experimentation – (2.4 captions)
I experimented around a bit and I finally found out how to
add captions to the video. This was version one of my
captions, I made this on Windows movie maker.
After a bit more experimentation, I found out how you could make the
font thicker and stand out more. This is the second version of my captions,
I made it also in windows movie maker. I made it so that it was more easy
to see, and clearer the viewers of my video.
This is my third version of the captions, I made this one in iMovie
because there is a wider variety of captions in there. I chose this on
because it stands out in my video because its black and white. There is
also a wider variety of font types on iMovie.
The first two captions were both to simple and unclear in my
opinion, I wanted on that could be seen by the viewer of the
video easily, so I went home and used iMovie because I know
how to use iMovie more than Windows Movie Maker, plus
like I said, there is a wider range of both captions and font
type on iMovie.
27th September, 2017
14. Centre Number: 56830_Luc-John Raubenheimer_Candidate number: 3304
Skills development – (2.5 Visual effects) 27thSeptember 2017
Area Identify specialist terms Explain how used in the creative media industry
Visual effects 1. Brightness.
2. Apply to all.
3. Multiple effects.
4. Visual effects
1. To increase the brightness of the video, image and visual effect. Or to decrease the
brightness of the video, image and visual effect.
2. To set the visual effect on all items in the project to be like the effect you chose for
the selected item.
3. To add two or more visual effects to a an item, for example : ripples + black and
white.
4. Effects that are added in outside of the filming of the shot to make it look better and
more professional.
When I started this subject I gave myself a grade five, which means I did not know anything about visual effects, and this was before any
online research. After the lesson in the 5th of April, 2017 ,I felt that I was a grade 4-. I did some research in that lesson as well. Today, the
18th of July, 2017, I would give myself a grade 3-, which means I know a lot more about visual effects than I did before and I have done a lot
of online research to back my knowledge for visual effects on Movie Maker.
Sepia tone makes the video go dark brown/yellowish, I used it because
it looks like an old documentary, and are video’s theme is documentary.
I have only used this in the face cam part of the video because the rest
of the video is a recording of the computer screen.
15. Centre Number: 56830_Luc-John Raubenheimer_Candidate number: 3304
Skills development – (2.5 Visual effects)
This is a video of visual effects on YouTube, it is made by palomaratrc, who has
685 subscribers. This video was short but informative. It helped me find my way
around visual effects on Windows Movie Maker. The video taught me how to add
transitions into my video and how to use them so that it looks natural the way
the visual effects just come in to the video.
https://www.youtube.com/watch?v=ei7AvhfaIkQ
2nd May, 2017: When I started this subject I gave myself a grade 5, which means I did not know
anything about visual effects, and this was before any online research. After the lesson I would give
myself a grade 5+.
5th April, 2017: I think I am a grade 4- after the research in that I did in this lesson. I managed to do
some experimentation on window movie maker in this lesson as well. So that justifies why I gave
myself this grade.
18th July, 2017: I would give myself a grade 3-, which means I know a lot more about visual effects
than I did before and I have done a lot of online research to back my knowledge for visual effects on
Movie Maker.
27th July, 2017: I started planning the first version of my storyboard in today’s lesson. I planned
where each effect should be and which effect to use. After today’s lesson, I grade myself a grade 3
because I have some knowledge of this skill but I still need to do a lot to improve this grade.
7th September, 2017: I have been making my first version of my part of the video, I have already
added in all the visual effects that I need for the video, but I do not really think that is looks very
good. So I am going to grade myself a 3+.
4th October, 2017: I have finished the final version of my video, although there are only two visual
effects in my video, I would say that I have learnt a lot about transitions during this course, and I
grade myself a 2-.
Self Assessment
16. Centre Number: 56830_Luc-John Raubenheimer_Candidate number: 3304
Skills development – (2.5 Visual effects)
https://www.tabletopmedia.org/blogs/editing/7690001-adding-effects-in-windows-live-movie-maker
http://www.digitalcitizen.life/how-add-animations-and-visual-effects-windows-live-movie-maker-2011
I used digital citizen again for visual effects. I learnt how to add visual effects on the
video, and how to use the correct visual effect for your theme. I am going to add the
Sepia tone visual effect to my video because it fits the documentary theme.
This website did not go into too much detail, it only taught me how to add
visual effects in my video. I think I am still going to add the Sepia tone effect
because it fits the documentary theme.
17. Centre Number: 56830_Luc-John Raubenheimer_Candidate number: 3304
Skills experimentation – (2.4 Visual effects) 20thSeptember 2017
Pre-experimentation Post-experimentationExperimentation
Before I started experimentation, the
video looked darker than usual
because I was filming the video in the
classroom at 5 or 6 o’clock in the
evening. But after messing around with
Movie Maker a bit, I finally discovered
the brightness adjuster. Which helped
me made the video brighter and look
much smoother to the eye than it was
before. I also changed the colour of the
documentary part of part two to make
it look more like a documentary.
Pre-experimentation Experimentation Post-experimentation
Pre-experimentation
Experimentation Post-experimentation
19th of September, 2017
These are the experimentations for my version 1 part two.
Sepia toneBlack and white
18. Centre Number: 56830_Luc-John Raubenheimer_Candidate number: 3304
Area Identify specialist
terms
Explain how used in the creative media industry
Slow / fast motion 1. Slow motion.
2. Fast motion.
1. When a frame is captured at a rate much faster than it will be played back.
2. Filmed action that is faster than is normally possible, done by shooting the film at a rate much
slower than it is played back.
Skills development – (2.5 Slow / fast motion) 25thseptember2017
This is the normal version of my part
of the video, at the speed of x1.
This is the slow motion version of my
part of the video, the speed is x0.025.
This is the fast motion version of my
part of the video. The speed is x64.
19. Centre Number: 56830_Luc-John Raubenheimer_Candidate number: 3304
Skills development – (2.5 Slow motion website research)
https://www.wondershare.com/video-editor/windows-movie-maker-slow-motion.html https://www.iskysoft.com/video-editing/windows-movie-maker-slow-motion.html
This website taught me how to put the slow motion effect
into my video, it also taught me how to correctly use the
slow motion effect so that my video does not go frame to
frame. I don’t think I am going to use slow motion though,
since my part of the video is filmed in a documentary
theme.
This website improved my slow motion skills in Windows movie
maker. It gave me more knowledge about the fact that how I need to
use the timer correctly. But I think I am still not going to use slow
motion in my part of the video though.
20. Centre Number: 56830_Luc-John Raubenheimer_Candidate number: 3304
Skills development – (2.5 fast motion Website Research)
http://www.tech-recipes.com/rx/57085/windows-movie-maker-change-video-speed/ https://filmora.wondershare.com/video-editing-tips/fast-and-slow-motion.html
This website teaches people how to change the video speed on
Windows Movie Maker, it taught me the basic skills of using fast
motion. I don’t think I am going to use fast motion because our video
has a documentary theme.
This website talks about slow and fast motion. I used it to do fast
motion research. I still don’t think I am am going to be doing fast
motion or slow motion in my video due to the genre being
documentary.
21. Centre Number: 56830_Luc-John Raubenheimer_Candidate number: 3304
Skills development – (2.5 Slow / fast motion)
https://www.youtube.com/watch?v=MaR5LP1Ss3Q
This is a tutorial on YouTube that teaches you how to use the slow
motion effect and the fast motion effect. It is made by
Jshawnotutorials Jones he has got 290 subscribers, and the video
has 51,426 views. It taught me the basics of using fast and slow
motion in my videos first.
I am still not going to use them because the theme of my video is
documentary, and you don’t really see slow and fast motion in
documentaries.
2nd May, 2017: When I started learning about slow and fast motion I gave myself a grade 5
+, which means I don’t really know anything about slow and fast motion, and this was before any
online research. After the lesson we had today I give myself a grade 5+.
4th April, 2017: I grade myself a grade 4- after the research in that I did in this lesson about slow and
fast motion. I did some experimentation on window movie maker in this lesson. So that is why I gave
myself this grade.
17th July, 2017: I would give myself a grade 3-, which means I know a lot more about slow and fast
motion than I did before and I have done a lot of online research for tutorials on YouTube to improve
my knowledge for slow and fast motion on Windows Movie Maker.
28th July, 2017: I started planning the first version of my storyboard in today’s lesson. I planned
where the slow and fast motion should be used and what speed it should be. After today’s lesson, I
grade myself a grade 3 because I have some knowledge of this skill but I still need to do a lot to
improve this grade.
7th September, 2017: I have been making my first version of my part of the video, I haven’t added in
any slow and fast motion in my video, but I think the slow and fast motion is going to look very good
for the section intro. So I am going to grade myself a 3+.
3rd October, 2017: I have finished the final version of my video, there are two parts where there are
slow and fast motion effects inside my part of the video. So I am going to give myself a grade 2+,
because I really like the section intro and outro I made for my part of the video.
Self Assessment
22. Centre Number: 56830_Luc-John Raubenheimer_Candidate number: 3304
Skills experimentation – (2.4 slow and fast motion) 28thSeptember 2017
I experimented with Movie Maker a bit and found out
that you could slow down and speed up the video. This
ones on the left are the introduction bits of the part two
of the Photoshop tutorial, since the video includes some
speaking it is probably best that I do not use slow motion
or fast motion, otherwise the viewers of the video would
not be able to hear what I am saying correctly and will not
get a good Photoshop tutorial.
Slowed down up by 0.125x of
the introduction.
Slowed down by 0.25x
Slowed down by 0.5x
Sped up by 1.25x
Sped up by 1.5x
Sped up by 1.75x
23. Centre Number: 56830_Luc-John Raubenheimer_Candidate number: 3304
Area Identify specialist terms Explain how used in the creative media industry
Transitions 1. Pixelate
2. Flip
3. Cinematic-Fade
through grey
4. Transition
1.A transition where it goes from pixels to the actual video.
2.A transition where it flips from a dark screen to the video.
3.A transition where it starts off with a grey screen and fades to the video.
4.A transition is when the video moves on from one shot to the other, usually it is done with a
normal cut, but the editor could chose to add in a fade, pixelate, flip etc.
Skills development – (2.5 Transitions) 28thSeptember 2017
Pixelate. This transition makes
the video pixelate, than it
moves on to the next scene.
Flip. This transition makes the
scene that ended flip to the next
scene.
Cinematic-Fade through grey. This is
more of a start than a transition my
opinion, I think it works very well at
the start of the video.
24. Centre Number: 56830_Luc-John Raubenheimer_Candidate number: 3304
Skills development – (2.5 Transitions)
https://www.youtube.com/watch?v=5_D1GTEYOc8
I used this video to learn how to do transitions on Windows Movie Maker.
The channel of this video is called Palomaratrc, it has 681 subscribers. I
thought this video was very clear, it has everything that a starter should
know about transitions on Windows Movie Maker. The video teaches you
how to add transitions into your videos. As well as where to add them so
that your video does not come out looking weird.
2nd May, 2017: Today I started learning about transitions and I gave myself a grade 5
, because I just started learning about this, and a 5 means I don’t really know anything about
transitions.
4th April, 2017: I grade myself a grade 4- after the further research I did in this lesson about
transitions. I played around on movie maker in this lesson.
17th July, 2017: I give myself a grade 3-, this means I know a lot more about transitions than
I did before I started learning about transitions. I have done some online research on
wikiHow to improve my skills for adding transitions on Movie Maker.
28th July, 2017: I started planning the first version of my storyboard in today’s lesson. I
planned where the are going to be and what. After the lesson, I graded myself a grade 3-
because I have some knowledge of this skill but I still need to do a lot to improve this grade.
It is still a 3- because I don’t think I have improved that much.
7th September, 2017: I have been making my first version of my part of the video, I have
added in some transitions into my video, the transitions don’t look that good now but I’m
sure that I am going to improve it in later versions of the video. . So I am going to grade
myself a 3+.
4th October, 2017: I have finished the final version of my video, there are only two
transitions in my part of the video. But am going to give myself a grade 2+, because I think I
have still improved a lot of my skills for adding transitions.
Self Assessment
25. Centre Number: 56830_Luc-John Raubenheimer_Candidate number: 3304
Skills development – (2.5 Transitions)
http://www.wikihow.com/Add-Transitions-in-Movie-Maker http://ccm.net/faq/4106-windows-movie-maker-transitions-and-effects
Wikihow was very informative, it covered the fact that I needed to
correctly sync the music of the video with the transitions. I am
going to use the pixelate transition because I think it would fit with
Dan’s lo-fi hip-hop the most.
This was a Q and A on the CCM website, it taught me how to
add transitions to my video and how to download more
transitions if I needed them, which I don’t think I will need
because I have already decide to use the pixelate transition.
26. Centre Number: 56830_Luc-John Raubenheimer_Candidate number: 3304
Skills experimentation – (2.4 Transitions) 25thSeptember 2017
This is the first time I messed around with the transitions, the pixelate effect looks quite good with the transition from the
brownish yellow to normal colours, but I continued to experiment with movie maker and then I found better ones like the one
below.
This is the one I went for in the end, it is on iMovie, and it is called cross zoom. I used iMovie for this because it has a wider
variety of transitions. I think it works very well because the colours blend in very well in this transitions.
27. Centre Number: 56830_Luc-John Raubenheimer_Candidate number: 3304
Area Identify
specialist
terms
Explain how used in the creative media industry
Intros / Outros 1. Intro
2. Outro
1. An intro is the start of the video, it is very important that you have a good intro because you have
to capture the viewers attention. It usually consists a few scenes from the video itself.
2. An outro is the end of the video, an outro usually consists credits of the people who made the
video.
Skills development – (2.5 Intros / Outros) 28thSeptember 2017
This is the basic intro I made for this task. It has some of the
scenes from my part of the video in it.
28. Centre Number: 56830_Luc-John Raubenheimer_Candidate number: 3304
Skills development – (2.5 Intros / Outros)
https://www.techwalla.com/articles/how-to-create-a-news-intro-in-windows-movie-maker
This webpage teaches you how to make a news style intro on Windows
Movie Maker, which is good because are genre is documentary and the
news has a sort of closer genre with a documentary. I am not going to
use this though, because I am making part two in my video.
http://www.wikihow.com/Make-a-Video-in-Windows-Movie-Maker
This wikihow page teaches you how to make a video in Movie
Maker, it gives a lot of details about the intro and outro. I would
recommended this webpage for the others in my group, because
they are the one doing the intro and outro.
29. Centre Number: 56830_Luc-John Raubenheimer_Candidate number: 3304
Skills development – (2.5 Intros / Outros)
https://www.youtube.com/watch?v=ztQIYep5TxE
Since I am doing part two, and not the intro or the outro. I am just going to research
the very basics of intros and outros. This video tell you how to make a very basic
intro/outro. It was made by Bazxl, a YouTube channel with 268 subscribers, the
video has 63754 views. It taught me how to make a basic intro that is short and
simple. I am not going to use it in my video though, since I am going to do part two.
Self Assessment
28th September, 2017: I am not going to make our groups intro or outro so I just did some
simple research for this task. After the research I did for this task I am going to grade myself a
4.
28th October, 2017: I have finished the final version of my video, I have made two section
intros and outros. After making these I grade myself a grade 3+, because I haven’t really been
concentrating on this particular subject.
30. Centre Number: 56830_Luc-John Raubenheimer_Candidate number: 3304
Skills development – (2.5 Adding music and sound effects) 28thSeptember 2017
Area Identify specialist
terms
Explain how used in the creative media industry
Music and sound
effects
1. Music.
2. Sound effects.
3. Fade in
4. Fade out
5. Volume
6. Pitch
1. Creates an atmosphere for the video and makes the video a bit more soothing to here for the viewers.
2. A sound that is artificially produced and added into the video, usually to make a theatrical effect in movies.
3. Fading in is when you make the music quietly and slowly start playing in your video.
4. Fading out is the opposite of fading in, you make the music slowly end in a certain part of your video.
5. How loud or quiet your video is depends on the volume you put it on.
6. The quality of sound depends on the rate of the vibrations of the waves.
https://www.reference.com/science/pitch-sound-446bccfe0fc3e72a
I put in lo-fi hip-hop that fits with are genre
of music.
Although you cannot see the sound effects
on here, but I have put in quite a few
‘knocking’ sound effects on here, you cannot
see it because I did that on iMovie.
31. Centre Number: 56830_Luc-John Raubenheimer_Candidate number: 3304
Skills development – (2.5 Adding music and sound effects) 28thSeptember 2017
https://www.thoughtco.com/adding-music-sounds-in-windows-movie-maker-2766971
http://www.dummies.com/computers/operating-systems/windows-7/how-to-add-sound-to-a-
movie-using-windows-live-movie-maker/
This website teaches you about adding music and sound effects to
your video on Windows Movie Maker. It made the process
relatively easier for me, because I was struggling to put music into
my part of the Photoshop tutorial. I am going to find some more
sound effects on the website SoundBible.
This webpage teaches you how to add sound effects to
your movie in Windows movie Maker. It is a very simple
explanation for beginners since it is on the “for dummies”
website. It taught me how to add sound effects to my
video.
32. Centre Number: 56830_Luc-John Raubenheimer_Candidate number: 3304
Skills development – (2.5 Adding music and sound effects) 28thSeptember 2017
https://www.youtube.com/watch?v=A8wynCrx8mg
This video on YouTube was made by Mauricio Iraheta and it has 73906
views, this video taught me how to sync the audio of the video with
the music that you choose to put in and the sound effects you decide
to put in. I am going to use the advice he gave me and sync the audio
with the music and sound effects.
I added Dan’s lo-fi Hip-Hop into my part of the video, we
decided to use that genre of music in are video because it
is more soothing to the ear and we would have are own
copyright privileges because Dan made the music.
33. Centre Number: 56830_Luc-John Raubenheimer_Candidate number: 3304
Skills experimentation – (2.4 Adding music and sound effects) 28thSeptember 2017
I looked around on http://soundbible.com/suggest.php?q=knock&x=0&y=0
to find a knocking on door sound effect so that it could sync up with my
captions when they popped out. After my experimentation with testing the
sound effects, I could not find any that sounded good to me and was able to
sync up with the captions on Windows Movie Maker. So I brought my video
home to do it on iMovie because there is a wider range of sound effects on
there, plus my captions were also made on iMovie, I experimented with
iMovie and then quickly found the sound that I wanted, it was not a
knocking on door sound, but a champagne cork sound. It synced with the
captions perfectly. I think that is the one I am going to use for now.
Sound Bible iMovie sound effects
Self Assessment
2nd May, 2017: I started learning how to add music and sound effects, I gave myself a grade 5
, because I don’t really know how to add music and sound effects. After the lesson we had today I
give myself a grade 5+.
5th April, 2017: I grade myself a grade 4- after the research in that I did in this lesson about music
and sound effects. The reason why I did this grade was because I did some experimentation on
window movie maker in this lesson.
17th July, 2017: I give myself a grade 3-, which means I know a lot more about slow and fast motion
than I did before and I have done a lot of online research for tutorials on YouTube to improve my
knowledge adding music and sound effects on Windows Movie Maker.
28th July, 2017: I started planning the first version of my storyboard in today’s lesson. I planned
where the music and sound effects should be added. After today’s lesson, I grade myself a grade 3
because I have some knowledge of this skill.
6th September, 2017: I have been making my first version of my part of the video, I added some
music and sound effects inside so I am going to grade myself a 3+. It does not sound that good yet
though.
4rd October, 2017: I have finished the final version of my video, there aren’t any sound effects inside
my part of the video but I did change the music because the previous sound track had singing in it
and it was covering my voice. So I am going to give myself a grade 2+.
34. Centre Number: 56830_Luc-John Raubenheimer_Candidate number: 3304
Skills development – (2.5 Storyboard) 20thSeptember 2017
Area Identify specialist terms Explain how used in the creative media industry
Storyboard 1. Camera angle/shot
2. transitions
3. Font
4. Music and sound effects
5. Resolution
6. Background image
1.To let the cameraman know how to film the scene.
2.To let the editor know which transition to use.
3.To let the editor know what font, font size, and font colour to use.
4.To let the editor know what sound effects and music to use.
5.To let the editor know what resolution to use.
To let the editor know what background image to use.
This is version two of my storyboard, it has a clear description of what people need to
do if they ever need to make this video. A proper storyboard needs to so clear that
whoever reads it can make the video, movie etc.
This is version one of my storyboard, it has been marked by my
group members so I could improve it and make a better version
two.
35. Centre Number: 56830_Luc-John Raubenheimer_Candidate number: 3304
Skills development – (2.5 Storyboard) 20thSeptember 2017
This is version three of my storyboard, it is the improved version of version two. I
have included things that are in my new version of the video, like the little TV
static intro and the new visual effects that I added into my part of the video.
Storyboard research
Edexcel DiDA Diploma in Digital Application Using UCT by Elaine Topping and Ann Weidmann.
Edexcel DiDA Diploma in Digital Applications Multimedia Kevin Burden, Theo Kuechel and Allan Smith.
This is the research I did in the
books provided for the storyboard,
the names of the books and the
authors. These books taught me
how make a storyboard and I used
the knowledge I learnt from this
book to do the first version of my
storyboard.
36. Centre Number: 56830_Luc-John Raubenheimer_Candidate number: 3304
Skills development – (2.5 Storyboard)
http://www.wikihow.com/Create-a-Storyboard https://www.techwalla.com/articles/how-to-create-a-storyboard
This WikiHow webpage teaches you how to make a good storyboard that
anyone who has the intent of making the video can understand. I used the
information that this website gave me to create a good storyboard that
received positive feedback from other classmates.
This website is all about technology help. Here, it teaches you how to
make a simple storyboard that people can understand easily. I am
going to use the knowledge I learned from this website and the
wikihow webpage to create a website that is easy for the viewer to
understand.
37. Centre Number: 56830_Luc-John Raubenheimer_Candidate number: 3304
Skills development – (2.5 Storyboard)
https://www.youtube.com/watch?v=7cWVdK5xyTs
This YouTube video was made by a YouTuber named Draw With
Jezza his channel has 2 million subscribers. This video is about
him teaching beginners how to make a simple storyboard and
how to make it so that people understand it. He also included a
bit of how to make a storyboard if you are bad at drawing.
Self assessment
2nd May 2017 – We were introduced to storyboarding today, it is quite a hard
skill to learn, but I did some research about it and I am going to grade myself
a grade 5-.
13th June 2017 – After finishing a task in todays lesson, I did some research
about storyboarding and after that I am going to give myself a grade 5.
24th August 2017 – After making the first version of my storyboard, I give
myself a grade 5+, which means I do not know anything about storyboarding.
21th September 2017 - I did my first version of my storyboard today, I think I
did okay, I made a template on PowerPoint and then I printed it off, I am
going to grade myself 4 after today.
28th September 2017 – After the feedback given to me for the first version of
my storyboard, I used the knowledge to make a second storyboard, after that
I gave myself a grade 3+, which means I know some things about
storyboarding and I still need to improve a lot.
4th October 2017 – I made a third version after I got the feedback for the
second version. This was the final version of the storyboard, and I give
myself a grade 2+, which means I know a lot about this skill but there is still
room for some improvements.
38. Centre Number: 56830_Luc-John Raubenheimer_Candidate number: 3304
Skills development – (2.5 Logo) 19thSeptember 2017
Area Identify
specialist terms
Explain how used in the creative media industry
Logo Development 1. Photoshop
2. Magic wand
tool
3. Shape tool
4. Lasso tool
1. Photoshop is used for editing images and creating new images. Examples of the use of
Photoshop are photographers editing out mistakes in a photo to make it look better, to create a
special effect etc.
2. The Magic Wand tool allows you to select an area of an image based on its colour. When you
click an area in an image with the magic wand, all areas which are a similar colour are
selected. You can specify different options to do to the area of selection.
3. The shape tool allows you to put down all kinds of different shapes, this tool helped a lot when
I was making my logo.
4. The lasso tool is useful for marking out the borders of a specific image you want to crop out or
delete, when I made my logo, I had to use this tool to crop out a lot of images I did not need.
This is the logo made for my part of the
video to put at the top right corner. I
was originally going to use this logo but
it was replaced by another logo one of
my group members had made for the
whole video.
This is the original Hove Park
School logo, I put it here just to do
a comparison with the logo I made
for the video.
39. Centre Number: 56830_Luc-John Raubenheimer_Candidate number: 3304
Skills development – (2.5 Logo)
http://www.instructables.com/id/Make-a-cool-logo-in-Photoshop-in-10-minutes-or-les/
This website, called instructables, teaches you how to do all sorts of things
with a computer. On this specific page, it tells you how to make a logo under
ten minutes. I found this webpage helpful because it was very easy to
understand and at the same time it had a very detailed explanation e.g. it tells
you exactly how big an image should be and it shows you the exact colour the
image needs to be.
https://www.wikihow.com/Make-a-Professional-Logo-Using-Photoshop-CC
On wikiHow, this is the page that teaches you how to use Photoshop CC
to create a simple logo. I downloaded the free trial that gives you thirty
days to try the software out. I used the instructions on this page to
create a few pictures. So this wikiHow page did not help me to create a
Hove Park School logo, but it did help me to strengthen my knowledge
about Photoshoping.
40. Centre Number: 56830_Luc-John Raubenheimer_Candidate number: 3304
Skills development – (2.5 Logo)
https://www.youtube.com/watch?v=n6CqjpXgZ30
This video was published by a channel called MyCalStateLA , the
channel has 4300 subscribers and this video has 24198 views. This
video teaches you how to make a simple logo on Adobe Photoshop
CS4 by combining shapes and text, which was very useful for me
because I ended up using this skill to make the logo I made.
Self assessment
23rd August 2017 – I used the knowledge I learned from making a logo for
my website to grade myself a grade 4+ because I thought I wasn’t that
good at Photoshopping.
18th August 2017 – Today, I used the extra time I had to do some more
research about making logos. I also used Photoshop CS4 to make a few
logos that I thought I could use in my video. I grade myself a 3- after that.
27th September 2017 – I experimented with Photoshop a bit by making
some Hove Park School logos, after that I graded myself a grade 3+, which
means that I know a few things about making logos.
28th September 2017 – I downloaded a free trial for Photoshop CC,
because it has a lot more functions. I managed to make a logo that is much
better than the others, however, because of my lack of knowledge on the
new software, I couldn’t make a logo that is up to the standards of my
group mates, I give myself a grade 2- after these events.
3rd October 2017 – This was after I made my final version of the HPS logo, I
grade myself a grade 2+, which means I know a lot about making logos on
Photoshop, but there is still some room for improvements and practice.
4th October 2017 – Today I was told by the people on my group that we will
not be using my logo, I thought that was a good decision, because I didn’t
really like my logo either. I still give myself a grade 2+ because I haven't
really done anything to improve this skill.
41. Centre Number: 56830_Luc-John Raubenheimer_Candidate number: 3304
Skills development – (2.5 Web Optimisation) 4thOctober 2017
Area Identify
specialist
terms
Explain how used in the creative media industry
Web
optimization
1. Mov
2. mp4
1. A file extension used by the QuickTime-wrapped files. The format was created
by Apple Computer to work with multimedia files. Though MOV files are quite
often found in the web, to play them on Windows computer one has to install
an extra component or convert to other format.
www.coolutils.com/Formats/MOV
2. MP4 is short for MPEG-4 Part 14. It is a digital video and audio container
which is commonly used to store and playback video and audio files.
www.answers.com/Q/What_is_MP4
These are the options available on windows movie
maker for optimizing videos for different devices,
websites or it could be modified for email.
42. Centre Number: 56830_Luc-John Raubenheimer_Candidate number: 3304
Skills development – (2.5 Web Optimisation)
https://www.softwarert.com/optimize-videos-youtube/ https://techcrunch.com/2007/07/16/help-key-how-to-optimize-your-video-for-youtube/
This website teaches you how to optimize videos so they
are prepared for uploading to YouTube. It also taught me
how to optimize it for other uses as well, like sending it in
an email on different devices. I am going to use the
information I learnt from this webpage to optimize my part
of the video.
This webpage focuses only on optimizing your video for
uploading onto YouTube. I think because of that it gives a
more detailed description of what you are meant to do. I
am going to use the knowledge I ;earnt from this webpage
and the other to optimize my part of the video.
43. Centre Number: 56830_Luc-John Raubenheimer_Candidate number: 3304
Skills development – (2.5 Web Optimisation)
https://www.youtube.com/watch?v=JcFdUY8uXRs
This video was made by Derrel Eves, he has four hundred and thirty
thousand subscribers and this video has 22439 views. this was the first
research I did for website optimization, he teaches you how to optimize
your video for YouTube, and how to translate the titles and descriptions,
this video is two years old, and the translating thing has already been
updated by YouTube. I am going to use the knowledge I got from this
video to optimize my part of the video.
Self assessment
4rd October 2017 – This was when I first started learning about web
optimising, because of this, I gave myself a grade 4-, even though it was
my first time hearing about it, I still knew what it was kind of about.
5th October 2017 – Today I did some online research about optimising
your video so it can play on different devices. I watched the video on
the right which kind of helped. I am going to grade myself a 3.
18th October 2017 – I had done the web optimisation for my part of the
video, all three of them, computer, tablet and smartphone. Because of
this I had given myself a grade 2+, which seems like a lot but this
subject is actually really easy to understand. So, a 2+, means that I
know a lot about web optimising, but there is some things that I could
still learn about this specific skill.
19th October 2017 – Today I had to do the process all again due to
some mistakes happening in my part of the video. But by doing it all
again I gained some more knowledge about web optimisation.
28th October 2017 – Again, I had to redo the whole process. But this
time it was because of the audio, the video was too quiet for the
viewers to hear my voice.
1st November 2017 – I had to redo the optimisation one last time
today, again, it was because of the audio, Ms listened to it and said it
was too quiet for anyone to hear. So I had to turn the volume up to
max, and then do the whole optimising process. After all that redoing, I
wold say that I am on a grade 1- now, which means I know pretty much
all there is to know now about web optimisation.
44. Centre Number: 56830_Luc-John Raubenheimer_Candidate number: 3304
Version 1 Review. 5thJuly, 2017
Dan Jones – Dan said I needed to make the narration a bit more clear. I agree with that because I filmed my voice with an IPad.
he also said that I should add splits in the video to make it easier to merge with the other part of the video, make the music fade out a
bit when the commentary is on and finally he told me to use different speeds in my part of the video. I don’t really agree with that
feedback, mainly because I’m talking to the camera at first, then it is a recording of the computer screen of me doing the Photoshop
tutorial and talking over it.
Scott Rittman – Scott said that I need to add music that fits with the house style of the other parts of the video under the
Lo-fi Hip-hop genre, I agree with this comment because the house style of the whole video needs to be the same. He also
commented on the sheet that as the music reaches the 808 change the video clip to transition to sync with the music, I don’t really
know what that means but I’m sure if I do some online research like wikihow or YouTube tutorials I would find out. His final comment
was to use slow motion and fast motion effects in. Again I don’t really think that is a good idea considering that because I’m talking
to the camera at first, then it is a recording of the computer screen of me doing the Photoshop tutorial and talking over it.
Things I need to improve on.
Feedback sheet
1. Video length needs to be about three minutes long.
2. Add music that fits with house style.
3. Lower the music volume.
4. Add splits in the video.
(Video length: 1:53:36)
45. Centre Number: 56830_Luc-John Raubenheimer_Candidate number: 3304
Saving the video in three different versions
The brief at the top of this PowerPoint says that our target audiences are year nine students, who generally use iPads, smartphones and
computers. So I have to save my part of the video in three different versions. One for computers, this version can also be viewed by Mrs
to give us feedback, one on tablets because pretty much all of the year nines have an iPad. And finally, one for smart phones, which has
the same reason with the tablet version.
46. Centre Number: 56830_Luc-John Raubenheimer_Candidate number: 3304
Improvements to make/Feedback
Group Feedback Individual Feedback
The feedback that was for my groups video were given to us, and this is
the feedback below.
The first thing that was pointed out was the intro being to short and
poorly made, so what we need to do is put some more effort into the
intro to make it better and longer as well.
The second thing that was noticed by the other groups was spelling and
grammar mistakes, to fix this we need to check through the whole video
and correct any mistakes as we go. Another thing is the narration in part
one and two have not been added to the video.
The credits were a bit too short and there were no Easter egg credits.
The house style of the video needs to be discussed between the group
members.
The first bit of feedback given for me as an individual for my part of the
video was to add a logo at the bottom left corner of the video.
The intro bit of my video was too quick, no one could read it properly.
The music came into the video too slowly, another thing about the music
is that there is a speaking part in it, and when it plays you cannot hear my
voice properly.
Some more captions would make the video seem more professional.
The video could use more sound effects.
Overall tiding up like looking for spelling and grammar mistakes.
1. The same font through the whole video. Done 9/11/2017
2. Change of music or get rid of the speaking part of the theme now. Done 13/11/2017
3. SPaG errors. Done 13/11/2017
4. Transitions. done
5. Make the instructions a bit more clear because the viewers might not be able to see it.
Done 13/11/2017
6. The intro was way too quick, slow it down so people can read it. Done 14/11/2017
7. Add some additional social media links in my part of the video. Done 14/11/2017
47. Centre Number: 56830_Luc-John Raubenheimer_Candidate number: 3304
First Improvement (Font) Tuesday, 17thOctober, 2017
AfterBefore
Before After
Before After
Before, my font type was not the font type we agreed on (the font type we
agreed on is called Payback). So after the feedback given to me I changed the
font type to the agreed font. This makes the video look more clean. I also
agree that this font looks a bit more fun than the previous font, in the brief it
did say that the target audience were year 9 teenagers, so a more fun font
might appeal to them more.
Before, I would give my captioning the rate of 4-, and that means that I was
weak at this skill and I had to work harder to improve it. But now, I think I am
at a 2, which means that I am good at captioning but I could still improve my
captioning skills.
48. Centre Number: 56830_Luc-John Raubenheimer_Candidate number: 3304
Second Improvement (Change of music) Thursday, 26thOctober, 2017
You will not be able to hear it, because it is a power point, but this is the part in the old
sound track that there was someone singing, and you could not really hear my voice over
the singing. This would result in the audience not being able to hear the instructions clear
enough.
To improve this I deleted the old sound track and added in the new one, the new one does
not have any singing in it and is more quiet, so the audience would be able to hear my
narration better and receive the instructions more clearly.
Before I did this I would give myself a grade 4+ on music and sound effects, and that means
that I was weak at the skill of adding music and sound effects and I had to work harder to
improve it. But now, I think I am at a 2-, which means that I am good at this skill but I could
still improve it.
Before
That is the part where someone
starts singing.
After
49. Centre Number: 56830_Luc-John Raubenheimer_Candidate number: 3304
Third Improvement (Spelling and Grammar mistakes) Tuesday, 24thOctober, 2017
Before After
As you can see, in the before picture, I spell covering “covreing”, spelling and
grammar mistakes gives the impression that you did not really put a lot of effort into
checking the video for mistakes, in the improved after version, I not only change the
font to fit in with the house style, I also fix the spelling mistake.
For spelling and grammar mistakes, I gave myself a 2-, now that I have improved this
skill and have made less spelling errors, I give myself a 2+.
Before After
50. Centre Number: 56830_Luc-John Raubenheimer_Candidate number: 3304
Fourth Improvement (Transitions) Tuesday, 24thOctober, 2017
The transition on the left is from the old version of my part of the
video, I had to change it because some people said the old
transition would not be very soothing to the audiences eyes in the
feedback session we had when we watched our videos.
In the old version of the video, there were cross zoom
transitions after every scene, and that cut out some of the
important parts of the video. So as you can see on the right, I
got rid of the transitions.
Before I made these corrections, I gave myself a 3- on transitions, which means that I knew about this skill but need to
practice a lot more to make it better. But know that I have done this again and again, I would give myself a 2-, which
means I can do transitions well but I could use some more practice to make it even more better.
51. Centre Number: 56830_Luc-John Raubenheimer_Candidate number: 3304
Fifth Improvement (Clearer instructions) Tuesday, 28thOctober, 2017
In the video, I might speak a bit too quickly
or a bit too quietly, I made it louder and it
solved the problem. But I still added picture
that zoomed into the icons that are synced
with me talking about the icon, just in case
the viewer cannot hear me or cannot see
the icon I am currently talking about.
For my self assessment, before I made this
improvement, I would give myself a 5+,
which means I do not know anything about
this skill and I really need to improve it. But
know I would say I am a 3-, which means
that I know about this skill but I could still
improve it.
52. Centre Number: 56830_Luc-John Raubenheimer_Candidate number: 3304
Sixth Improvement (Slowing down parts of the video) Tuesday, 28thOctober, 2017
Before After
The small intro and outro for my part of the video, it consists the title that says what my part of the video is about. When
we did the feedback in the video watching session, a lot of my classmates said that they went way too quickly for the
viewer to see what it said. Another thing was that the font type was too unnoticeable for the viewer to see. So I changed
the speed of the intro and the outro from 1x to 1.5x. Now the viewer can see what I have put in the intro and the outro.
Before I made this improvement I gave myself a 3-, which means that I am average at this skill and I need to work much
harder to improve this skill. But know that I have improved these things, I give myself a 2-, which means that I know a lot
about this skill but there is still some room for improvement.
53. Centre Number: 56830_Luc-John Raubenheimer_Candidate number: 3304
Seventh Improvement (adding additional social media links) Tuesday, 28thOctober, 2017
Before After
AfterBefore
When we dis are feedback session, the one thing one
of my classmates pointed out was that there were not
any social media links in my part of the video. So I
added two additional links including the link for
Twitter and the link for the Hove Park School
newsletter at the bottom of my part of the video.
Before I made this improvement I gave myself a 4 for
adding social media links, which meant I didn’t really
add any links in my video. But now that I have done
this improvement I would give myself a grade 3+,
which means I am average at this skill.