
Recommended
More Related Content
What's hot
What's hot (20)
Similar to Guide to tumblr firefox
Similar to Guide to tumblr firefox (20)
Recently uploaded
Recently uploaded (20)
Guide to tumblr firefox
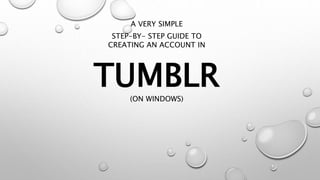
- 1. TUMBLR A VERY SIMPLE STEP-BY- STEP GUIDE TO CREATING AN ACCOUNT IN (ON WINDOWS)
- 2. This is a typical Windows 7 Desktop. To start …
- 3. Next click on your internet browser. You can use any, either Internet Explorer Chrome Firefox
- 4. The default website will come up, on this case it’s Google. Please note that your initial screen might be different. No Worries.
- 5. Next is click on the address bar.
- 7. The “tumblr” screen will come up. The background constantly changes every time you come to the site. So, again no Worries. If you scroll down, it will show what is “tumblr” about and what it can do.
- 8. This …
- 9. This …
- 10. This …
- 11. This …
- 12. And this …
- 13. Which brings us back to the initial screen. Click on “Get Started”.
- 14. This screen will come up. Just fill-up the required information.
- 15. First, type your Email address. If you don’t have one, study my other tutorial on how to create an email account.
- 16. Next, type your password for this site. The password should be 8 characters long.
- 17. Next, type your Username. You can create your own or you can choose one of the suggested names.
- 18. And then click “Sign up”.
- 19. This screen will come up. So …
- 20. Type your age.
- 21. Tick on the box.
- 23. This screen will come up.
- 24. Click on the box. This is to check that somebody is really creating the profile and not some automated program.
- 25. I you’re lucky, you will get this screen. Then you can click “Almost Done”. Then you can skip the next 2 slides. Otherwise, go thru the next 2 slides.
- 26. Again, this is to check that somebody is really creating the profile and not some automated program. Just follow the instructions on what it is asking you to do. So, we will select on the squares with street signs. And …..
- 27. Like so … it will put a tick on the squares you have selected. Once you’re done, click “Verify”
- 28. Once Tumblr is satisfied that you are not a robot, you will finally get this screen. Click “Almost Done”
- 29. Congratulations!! You really are ….. almost done.
- 30. Take not of the “oval” shapes on top as well as the “Select” bar.
- 31. You are now ask to select what you want to follow. For example “parenting”. So click on it.
- 32. Once you have selected a topic, you will asked for a sub-topic. On this case, I selected “Babies”. Also, I selected “Travel” with sub- topic “Vacation”.
- 33. As you noticed. The oval shapes on top are being filled-up with your selection. So does the “Select” bar, is slowly filling-up.
- 34. By the way, there are a lot more choices if you scroll down.
- 35. Like these … since I like “Sports”, I will select that.
- 36. And I selected “Tennis”, like so … and look the “Next” on top is now available. So click it.
- 37. Finally. This is how the homepage will look like. A lot of things to explore.
- 38. But wait. You need to verify your email by checking your email click on the link. In case you didn’t received the email, you click the “Send it Again”.
- 39. You should have this email in your Inbox. Open the email (by clicking on it.
- 40. The will look like this. Click on the link “This is me!”
- 41. The next few slides will show you what are those little icons are about. Like this.
- 42. The next few slides will show you what are those little icons are about. Like this.
- 43. And this.
- 44. And this.
- 45. And this.
- 46. And this.
- 47. And this.
- 48. So, let’s start to explore the icons one-by one.
- 49. This icon is for the home page. This screen is the home page.
- 50. This icon is for exploring Tumblr page. It will show the different blogs.
- 51. This icon is for checking your messages.
- 52. This icon is for chatting with another blogger.
- 53. This icon is for checking of the activities in your own blog.
- 54. This icon is for your account dashboard.
- 55. This icon is for making a post. It will bring you to another screen.
- 56. This is the screen for making a post
- 57. This letter icon is for going back to your homepage or your dashboard.
- 58. This is your search bar. If you want look for specific blogs.
- 59. This is group of icons is also for you to make a blog or post a blog.
- 61. This portion will show one of the blogs which falls in the topic that you choose during set-up.
- 62. This is your profile picture. By default it will assigned a temporary image.
- 63. If you click on the profile icon, it will bring to another screen.
- 64. PAUSE ACTUALLY, THIS IS ONE LEVEL HIGHER
- 65. This screen will let you change the appearance not only your profile picture but also your blog page to your liking.
- 66. By the way, I mentioned blog page. Click on the icon and your blog page will appear.
- 67. This is your blog page. We can change the appearance to this screen the way we like.
- 68. This is your registered blogger name. When you put the mouse over it this will happen …
- 69. It will show you the whole blog address. Actually, this is also a link to your blog page.
- 70. This is your search icon. When you click on it this will happen …
- 71. It will move to the left to give space to type what you want to search.
- 72. This icon is for links to email, twitter and facebook. If you click on it, the links will appear. Like so …
- 73. These are the links to email, twitter and facebook. To know more about it, watch my other tutorial.
- 74. This icon is what this level is all about. Click on it.
- 75. We are now in the basic screen for editing the appearance of your home blog or it is called your Tumblr blog.
- 76. While this icon will bring out the editing header options.
- 77. These two buttons are self- explanatory.
- 78. These two buttons are self- explanatory.
- 79. This option will let you change the header image or picture. Click on it.
- 80. Browse through the folder to select the image or picture you want to use. Like so ….
- 81. Say we select this picture, then click “Open”.
- 82. Say we select this picture, then click “Open”.
- 83. Let’s accept the current position and click “Done”.
- 84. As you can see the header image has changed.
- 85. This function is to reposition header image.
- 86. It is like zooming in and out. Then click “Done” if you want to accept the changes or “Cancel” to discard the changes.
- 87. This is a toggle switch. Either you want the image full stretch or …
- 88. Like this.
- 89. This is also a toggle switch. Either you want the image shown or …
- 90. Like this.
- 91. Next is to change profile photo.
- 92. This function is to let you change the photo. Click and browse through the folder photo you like.
- 93. Say we select this picture, then click “Open”.
- 94. Now you have changed the profile picture.
- 95. This is a toggle switch. Either you want the image shown or …
- 96. Like this.
- 97. Next is the shape which self- explanatory.
- 98. Say we change it to a circle. And you can see, it has changed. Click anywhere outside the options to exit.
- 99. Now let’s change the Description. Click anywhere on the “Untitled”.
- 100. The options for changing the description will pop-up. You should the hang of it now. • The first one is a toggle switch either to show or not. • The second is the font style. • The third is the colour scheme.
- 101. Let’s say we just change the description for now.
- 102. Next is the background.
- 103. This where you can change the background colour. Let’s leave the colour scheme for now.
- 104. And the Accent. Let’s also leave the colour scheme for now.
- 105. And to exit the whole editing mode, click “Save” to accept all the changes or “Cancel” to discard the changes. Let’s click save to save the changes.
- 106. Since we selected not to show the images or photos, it’s like this. So let’s practice what we just learn and switch it to show the phtos. Click “Edit appearance” and test yourself.
- 107. And make sure you have this screen in your monitor.
- 108. THANK YOU CHECK-OUT THE OTHER TUTORIAL(S)