
Recommended
Recommended
More Related Content
Recently uploaded
Recently uploaded (20)
Featured
Featured (20)
Glass Lined Reactor_IM_N1.pptx
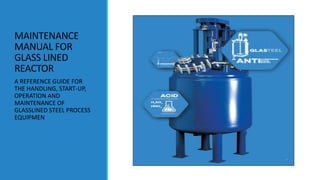
- 1. MAINTENANCE MANUAL FOR GLASS LINED REACTOR A REFERENCE GUIDE FOR THE HANDLING, START-UP, OPERATION AND MAINTENANCE OF GLASSLINED STEEL PROCESS EQUIPMEN
- 2. MAINTENANCE MANUAL FOR GLASS LINED REACTOR TABLE OF CONTENTS SECTION I GENERAL INFORMATION 1.0 Handling and Inspection Thermal Shock 3009 Glass SECTION II INSTALLATION AND START-UP 1.0 Responsibility 2.0 Handling Precautions & Cautions When Using Slings 3.0 Glossary of Terms (Lifting Devices) 4.0 How to Handle SA and GL Series Reactors and Vertical Tanks 5.0 How to Handle CTJ Series Reactors 6.0 How to Handle Horizontal Tanks 7.0 Levelling the Vessel 8.0 Vessel Accessory Installation 9.0 Jacket Piping Connections & Service Hook-Up Diagram 10.0 Start-Up Inspections
- 3. MAINTENANCE MANUAL FOR GLASS LINED REACTOR TABLE OF CONTENTS SECTION III PREVENTIVE MAINTENANCE 1.0 General 2.0 Maintenance Checklist 3.0 Inspection, Testing and Protection of the Glass Lining SECTION IV SHIMMING WITH PTFE ENVELOPE GASKETS SECTION V RECOMMENDED BOLT TORQUES SECTION VI RECOMMENDED SPARE PARTS
- 4. MAINTENANCE MANUAL FOR GLASS LINED REACTOR SECTION I:- GENERAL INFORMATION 1.0 Handling and Inspection Thermal Shock 3009 Glass 1.1 General Guideline 1.Before shipment, all vessels are carefully inspected, tested and securely mounted on strong wooden skids. 2. Special care must be used in handling the equipment during removal and installation. 3. Technical Service Specialists are required to supervise the installation of the equipment for those who are not familiar with this procedure.
- 5. MAINTENANCE MANUAL FOR GLASS LINED REACTOR SECTION I:- GENERAL INFORMATION 1.0 Handling and Inspection Thermal Shock 3009 Glass 1.2 Equipment Identification The nameplate contains the following information 1. Manufacturers Identification Number (Serial Number) 2. National Board Registration Number 3. Vessel Design Pressure 4. Vessel Design Temperature Range 5. Vessel Capacity 6. Year Vessel Fabricated 7. Type of Glass Lining
- 6. MAINTENANCE MANUAL FOR GLASS LINED REACTOR SECTION I:- GENERAL INFORMATION 1.0 Handling and Inspection Thermal Shock 3009 Glass 1.3 Repair Plugs in New Vessels 1. Vessels may occasionally be supplied with one or more factory installed repair plugs. 2. The plugs are normally fabricated out of tantalum. 3. If this material is not satisfactory because of process conditions or the possibility of galvanic corrosion due to two dissimilar metals in the vessel.
- 7. MAINTENANCE MANUAL FOR GLASS LINED REACTOR SECTION I:- GENERAL INFORMATION 1.0 Handling and Inspection Thermal Shock 3009 Glass 1.4 Accepting The Vessel 1. Upon receipt of the vessel a very careful examination should be conducted while the unit is on the truck. 2. Inspection should include the support system for shifting during transit or for any signs of impact to the outside of the vessel. 3. Open the vessel man way and make a complete visual inspection of the glass lining of the vessel and all accessories. 4. If any damage is found during the inspection, immediately bring it to the attention of the carrier’s representative and note the damage in writing to the carrier and supplier. 5. The carrier’s representative should also sign the document indicating damage.
- 8. MAINTENANCE MANUAL FOR GLASS LINED REACTOR SECTION I:- GENERAL INFORMATION 1.0 Handling and Inspection Thermal Shock 3009 Glass 1.5 Operation Limitations The operating limits of a glass-lined steel vessel are based upon the following: 1. Mechanical - Pressure/vacuum, nozzle loading, torqueing, abrasion. 2. Thermal - Operation temperatures, thermal shock, thermal stress. 3. Electrical - Spark testing voltage, static discharge. 4. Chemical - Type, concentration. 5. Specific gravity/viscosity of contents.
- 9. MAINTENANCE MANUAL FOR GLASS LINED REACTOR SECTION I:- GENERAL INFORMATION 1.0 Handling and Inspection Thermal Shock 3009 Glass 1.5 Operation Limitations ▪ The design limits of a vessel are based upon the steel only in accordance with the applicable ASME code. ▪ The design pressure and temperature are stamped on the nameplate of the vessel. ▪ NOTE: Vessels fabricated for lethal service require special attention per ASME Code Section VIII, Division I and ANSI B31.3 (Chemical Plant and Petroleum Piping Code). ▪ DANGER: NEVER OPERATE WITH PRESSURES OR TEMPERATURES EXCEEDING THOSE STAMPED ON THE NAMEPLATE.
- 10. MAINTENANCE MANUAL FOR GLASS LINED REACTOR SECTION I:- GENERAL INFORMATION 1.0 Handling and Inspection Thermal Shock 3009 Glass 1.5 Operation Limitations ▪ Gaskets - All gaskets will withstand most service conditions as 3009 lining. ▪ Mechanical Seals - Supplied seals will meet most conditions of chemical service. For strong oxidizing medium, the rotating carbon faces can be replaced with applicable substitutes such as silicon carbide or tungsten carbide. ▪ Stuffing Box Packing - Packing is used for holder-mounted baffles and on the stems of bottom flush valves. Our standard supply is braided Teflon-impregnated graphite, suitable for most chemical service. Virgin PTFE packing is also available upon request. ▪ Packing Support Ring - Normally supplied as PFA lined steel. ▪ Drives - 980-1 (PTE Philadelphia Mixers). CAUTION: VARIOUS INSTALLED ACCESSORIES SUCH AS MECHANICAL SEALS, VALVES, SIGHT GLASSES, RUPTURE DISC, ETC. MUST BE CONSIDERED WHEN DETERMINING THE MAXIMUM PRESSURE AND TEMPERATURE FOR OPERATION.
- 11. MAINTENANCE MANUAL FOR GLASS LINED REACTOR SECTION I:- GENERAL INFORMATION 1.0 Handling and Inspectio n Thermal Shock 3009 Glass 1.6 Pressure - Temperature Ratings of Accessories I. Convection Type Lubricator - 400 PSI @ 500°F (260°C) II. Sensors A. pH - 150 PSI @ 284°F (140°C) B. Temperature - 300 PSI @ -20°F (- 28.9°C) to 500°F (260°C) C. GlasGuard - 300 PSI @ -20°F (-28.9°C) to 500°F (260°C) MAXIMUM ALLOWABLE THERMAL SHOCK - 3009 GLASS
- 12. MAINTENANCE MANUAL FOR GLASS LINED REACTOR SECTION II:- INSTALLATION AND START-UP 1.0 Responsibility ▪ After you are certain that there is no obvious damage, you or your contractor are now responsible for safe unloading and subsequent handling. ▪ Because careful handling is essential, many customers prefer to employ an experienced rigging contractor for installation of glass-lined equipment. ▪ The contractor then assumes the responsibility for safe installation. Whether a contractor is employed or your own personnel installs the glass- lined equipment, certain logical precautions should be carefully observed during unloading, rigging, general handling and installation.
- 13. MAINTENANCE MANUAL FOR GLASS LINED REACTOR SECTION II:- INSTALLATION AND START-UP 2.0 Handling Precautions & Cautions When Using Slings 2.1 Although the use of two cranes is generally recommended, the main crane should always be adequate to handle the entire weight of the vessel. 2.2 Carefully inspect your crane or other lifting devices before beginning the lift to insure they are adequate for the load and in good condition. Note that the larger the angle between the legs, the greater the reduction in capacity. 2.3 Always use slings, hooks and shackles of adequate capacity. 2.4 Wire rope slings are preferred but polyester or nylon slings with ample safety factor may also be used. 2.5 Carefully inspect all slings prior to use for wear and damage (refer to manufacturers’ guidelines and recommendations).
- 14. MAINTENANCE MANUAL FOR GLASS LINED REACTOR SECTION II:- INSTALLATION AND START-UP 2.0 Handling Precautions & Cautions When Using Slings CAUTION: CHAINS ARE ACCEPTABLE FOR STRAIGHT LIFTING BUT MUST NEVER BE ALLOWED TO CONTACT STEEL SURFACES, WHICH ARE GLASS-LINED ON THE OPPOSITE SIDE (E.G. TOP HEADS ON ALL VESSELS, BOTTOM HEADS OF TANKS). THE UNEVEN PRESSURE OF THE LINKS CAN CAUSE LOCALIZED STRESS LEADING TO GLASS FRACTURING ON THE INSIDE OF THE VESSEL. 2.6 Keep cables, slings and hooks away from nozzles and manways. 2.7 Always insure such openings are properly protected with rubber caps and/or wooden or homasote boards. 2.8 Never use nozzles, cover openings, drives, pipe legs or any other bolted attachments for rigging and supporting.
- 15. MAINTENANCE MANUAL FOR GLASS LINED REACTOR SECTION II:- INSTALLATION AND START-UP 2.0 Handling Precautions & Cautions When Using Slings 2.9 Never bump the vessel with cables, shackles, hooks, clamps, etc. It can damage the internal glass lining. 3.0 Always maintain a smooth, steady lift. Try to avoid any jerking motion when lifting or lowering the vessel. Excessive strain on the lifting lugs may cause glass fracturing. 3.1 A glass-lined vessel must never be bumped into walls or other fixed objects. Be sure to provide adequate ground crew to direct crane operation and vessel handling during installation.
- 16. MAINTENANCE MANUAL FOR GLASS LINED REACTOR SECTION II:- INSTALLATION AND START-UP 2.0 Handling Precautions & Cautions When Using Slings 3.2 Never support a vessel on the ground or uneven flooring even temporarily. Use the shipping cradle/skid for support until the vessel can be set into permanent position. 3.3 Internal cribbing/bracing must remain in place until the vessel is in its final position. After installation of the vessel, remove the cribbing and inspect the glass to insure the lining was not damaged during rigging or removal of the cribbing. 3.4 Glass-lined vessels should be leveled to prevent uneven strains, which could result in damage in the lining. Most agitators must operate in a fully vertical position to avoid drive or seal problems. These vessels should be carefully leveled on installation.
- 17. MAINTENANCE MANUAL FOR GLASS LINED REACTOR SECTION II:- INSTALLATION AND START-UP 2.0 HANDLING PRECAUTIONS & CAUTIONS WHEN USING SLINGS PHYSICAL FACTORS EFFECTING STRENGTH Punctures & Abrasions - These can seriously degrade sling strength. Red core yarns can aid in locating damaged webbing. PHYSICAL FACTORS EFFECTING STRENGTH Foreign Matter - Material such as metal chips, weld spatter, heavy grit, etc. can damage a web sling both internally and externally. PHYSICAL FACTORS EFFECTING STRENGTH Ultraviolet Light - Nylon & polyester web slings are adversely effected by prolonged exposure to UV light, i.e. sunlight or arc welding. PHYSICAL FACTORS EFFECTING STRENGTH Cutting - The number one cause of web sling damage/failure is usually caused by load edge movement against the sling. PHYSICAL FACTORS EFFECTING STRENGTH Temperature - Nylon & polyester are seriously degraded at temperatures above 200°F PHYSICAL FACTORS EFFECTING STRENGTH Improper Loading - Shock loading, unbalanced loading, over loading and inadequate consideration for the effect of angle factors can adversely effect strength.
- 18. MAINTENANCE MANUAL FOR GLASS LINED REACTOR SECTION II:- INSTALLATION AND START-UP 2.0 Handling Precauti ons & Cautions When Using Slings EFFECTS OF ANGLE ON A SLINGS RATED CAPACITY I. When slings are used at an angle (i.e. two slings or one sling in a basket attached to only one crane hook), sling capacity is reduced. How much it is reduced depends on the degree of the angle. II. You can determine whether a sling will be rated high enough if you know the angle between the sling leg and the vertical. Once you know this angle, multiply the sling’s rating by the appropriate factor in the table. This will give you the sling’s reduced rating. III. Sling capacity decreases as the angle from vertical increases. ANGLE DEGREE FACTOR ANGLE DEGREE FACTOR 0 1 40 0.766 5 0.9962 45 0.7071 10 0.9848 50 0.6428 15 0.9659 55 0.5736 20 0.9397 60 0.5 25 0.9063 65 0.4226 30 0.866 70 0.342 35 0.8192 75 0.2588
- 19. MAINTENANCE MANUAL FOR GLASS LINED REACTOR SECTION II:- INSTALLATION AND START-UP 3.0 Glossary of Terms (Lifting Devices) 1. Bail Bar: A length of structural steel, usually an “I” beam, with a loop at the center of the top and a hook or a loop with a clevis at each end of the bottom. 2. Single Sling: A sling with a spliced eye loop at one end and a spliced eye loop and hook at the other end. 3. Two-Legged Sling: Two single slings connected by a link through their eye loops.
- 20. MAINTENANCE MANUAL FOR GLASS LINED REACTOR SECTION II:- INSTALLATION AND START-UP 4.0 How to Handle SA and GL Series Reactors and Vertical Tanks 4.1 General ▪ All SA and GL Series reactors and vertical tanks are equipped with two or four top head lifting lugs equally spaced and corresponding bottom head guiding lugs. ▪ Some reactors also have lifting lugs at the top of the jacket. ▪ Note that bottom head lugs are not intended for lifting but for use as guides to help control the rigging operation.
- 21. MAINTENANCE MANUAL FOR GLASS LINED REACTOR SECTION II:- INSTALLATION AND START-UP 4.0 How to Handle SA and GL Series Reactors and Vertical Tanks 4.2 Preparing For the Lift ▪ SA/GL Series reactors and vertical tanks are shipped in the horizontal position strapped in a wooden shipping cradle/skid. Be sure to free the vessel from the cradle before lifting. ▪ A main crane of sufficient capacity to handle the entire weight of the vessel must be provided. ▪ It is best practice to use a bail bar with two slings of proper strength, but a two-legged sling may also be used. ▪ Connect the bail bar or sling link to the main crane hook as shown in Figure 5.
- 22. MAINTENANCE MANUAL FOR GLASS LINED REACTOR SECTION II:- INSTALLATION AND START-UP 4.0 How to Handle SA and GL Series Reactors and Vertical Tanks 4.2 Preparing For the Lift ▪ A second control crane or other lifting device must be provided to help control, handle, and keep the lower end of the vessel (the bottom head) in the air throughout the lift. ▪ Connect the link of a two-legged sling (preferred) or bail bar to the control crane hook and the sling hooks to the guiding lugs as shown in Figure 5.1.
- 23. MAINTENANCE MANUAL FOR GLASS LINED REACTOR SECTION II:- INSTALLATION AND START-UP 4.0 How to Handle SA and GL Series Reactors and Vertical Tanks 4.2 Preparing For the Lift ▪ Lift the vessel in a horizontal position high enough to allow the control crane to start to lower the bottom head (see Figure 5.2) until the vessel top head has reached a fully vertical position (See Figure 5.3). ▪ The vessel must not touch the ground during this handling. When the vessel is vertical, remove the control slings and install support legs and bases if applicable. The vessel is ready for setting into position.
- 24. MAINTENANCE MANUAL FOR GLASS LINED REACTOR SECTION II:- INSTALLATION AND START-UP 4.0 How to Handle SA and GL Series Reactors and Vertical Tanks 4.2 Preparing For the Lift ▪ The hook of either the bail bar cables or two-legged sling should fit “freely” in the lifting and guiding lugs. If the hook is tight due to being too large as shown in Figure 6. ▪ Remove the hook and use wire rope or nylon/ polyester slings between the hook and lifting/guiding lugs as shown in Figure 7.
- 25. MAINTENANCE MANUAL FOR GLASS LINED REACTOR SECTION II:- INSTALLATION AND START-UP 4.0 How to Handle SA and GL Series Reactors and Vertical Tanks 4.3 Making the Lift ▪ Using both cranes in unison, start tensioning cables very slowly, allowing the vessel to roll in the wooden cradle/skid, then swing the lugs into a horizontal plane as shown in Figures 8 and 9.
- 26. MAINTENANCE MANUAL FOR GLASS LINED REACTOR SECTION II:- INSTALLATION AND START-UP 5.0 How To Handle CTJ Series Reactors (Clamped Top and Flanged Top) 5.1 General ▪ All CTJ Series reactors are equipped with three top head lifting lugs, 120° apart, and two guiding lugs on the bottom head. ▪ All CTJ Series reactors also have three lifting lugs at the top of the jacket. ▪ Note that bottom head lugs are not intended for lifting but for use as guides to help control the rigging operation.
- 27. MAINTENANCE MANUAL FOR GLASS LINED REACTOR SECTION II:- INSTALLATION AND START-UP 5.0 How To Handle CTJ Series Reactors (Clampe d Top and Flanged Top) 5.2 Preparing For the Lift ▪ CTJ Series reactors with capacities of 100 gallons or less are shipped in the vertical position in an open wooden crate. ▪ Large sizes are shipped in the horizontal position strapped in a wooden shipping cradle/skid. Be sure to free the vessel from the cradle before lifting. ▪ A main crane of sufficient capacity to handle the entire weight of the vessel must be provided.
- 28. MAINTENANCE MANUAL FOR GLASS LINED REACTOR SECTION II:- INSTALLATION AND START-UP 5.0 How To Handle CTJ Series Reactors (Clampe d Top and Flanged Top) 5.2 Preparing For the Lift 1. Reactors Shipped in Horizontal Position ▪ Connect the link of a two-legged sling to the main crane or other lifting device and connect the sling hook or cable to the two top head lifting lugs on the reactor that are at the highest elevation. ▪ Connect a single sling having the same leg length as the legs of the two-legged sling to the main crane hook as shown in Figure 10.1.
- 29. MAINTENANCE MANUAL FOR GLASS LINED REACTOR SECTION II:- INSTALLATION AND START-UP 5.0 How To Handle CTJ Series Reactors (Clampe d Top and Flanged Top) 5.2 Preparing For the Lift 1. Reactors Shipped in Horizontal Position ▪ Secure the loose single sling to prevent it from accidentally bumping into the vessel. ▪ A second control crane or other lifting device must be provided to help control the handling and keep the lower end of the vessel (the bottom head) in the air throughout the lift. ▪ Fully engage two pipe legs or short pieces of threaded pipe in the two-legged couplings that are at the highest elevation.
- 30. MAINTENANCE MANUAL FOR GLASS LINED REACTOR SECTION II:- INSTALLATION AND START-UP 5.0 How To Handle CTJ Series Reactors (Clampe d Top and Flanged Top) 5.2 Preparing For the Lift 1. Reactors Shipped in Horizontal Position ▪ Connect the link of a two-legged sling to the control crane hook and the legs of each wire rope or nylon /polyester sling around the reactor leg couplings into which the pipes have been threaded. ▪ The slings should be positioned in a choker hitch so the loops will slip and tighten when the lift is made.
- 31. MAINTENANCE MANUAL FOR GLASS LINED REACTOR SECTION II:- INSTALLATION AND START-UP 5.0 How To Handle CTJ Series Reactors (Clampe d Top and Flanged Top) 5.2 Preparing For the Lift 2. Reactors Shipped in Vertical Position ▪ Connect the link of a three- legged sling to the crane or other lifting device and connect the sling hooks to the three lifting lugs on the top head of the reactor as shown in Figure 11.
- 32. MAINTENANCE MANUAL FOR GLASS LINED REACTOR SECTION II:- INSTALLATION AND START-UP 5.0 How To Handle CTJ Series Reactors (Clampe d Top and Flanged Top) 5.3 Making the Lift 1. CTJ Reactors Shipped in Horizontal Position ▪ Using both cranes in unison, lift the vessel in horizontal position high enough to allow the control crane to start to lower the bottom head until the control sling is loose (see Figure 10.2). ▪ Do not allow the vessel to touch the ground. ▪ Remove the control sling from the reactor leg couplings and control crane.
- 33. MAINTENANCE MANUAL FOR GLASS LINED REACTOR SECTION II:- INSTALLATION AND START-UP 5.0 How To Handle CTJ Series Reactors (Clampe d Top and Flanged Top) 5.3 Making the Lift 1. CTJ Reactors Shipped in Horizontal Position ▪ Spin the vessel and connect the control crane hook to the vacant third top head lifting lug on the reactor. ▪ Slowly raise the control crane hook until the lifting lug to which it is attached is elevated approximately eight inches above the other two lifting lugs. ▪ Connect the free single sling secured to the main crane hook to the reactor lifting lug that is presently being supported by the control crane (see Figure 10.3).
- 34. MAINTENANCE MANUAL FOR GLASS LINED REACTOR SECTION II:- INSTALLATION AND START-UP 5.0 How To Handle CTJ Series Reactors (Clampe d Top and Flanged Top) 5.3 Making the Lift 1. CTJ Reactors Shipped in Horizontal Position ▪ Lower the control crane hook and remove the hook from the reactor lifting lug (see Figure 10.3). ▪ The main crane now supports the full weight of the vessel (see Figure 10.4). ▪ Install support legs and bases, if applicable. ▪ Set the vessel in position and level as outlined as shown in Figure 10.4.
- 35. MAINTENANCE MANUAL FOR GLASS LINED REACTOR SECTION II:- INSTALLATION AND START-UP 5.0 How To Handle CTJ Series Reactors (Clampe d Top and Flanged Top) 5.3 Making the Lift 2. CTJ Reactors Shipped in Vertical Position ▪ Remove the top of the crate and the internal bracing to provide clearance to remove the vessel. ▪ Slowly raise the vessel high enough to clear the crate and install support legs and bases, if applicable. ▪ Carefully move and lower the vessel into position. ▪ Level the vessel as shown in Figure 10.4.
- 36. MAINTENANCE MANUAL FOR GLASS LINED REACTOR SECTION II:- INSTALLATION AND START-UP 6.0 How To Handle Horizontal Tanks 6.1 General ▪ Small horizontal tanks with up to a 14’ 9” total length have two main lifting lugs located on the top of each head and four auxiliary lifting lugs located at 3 and 9 o’clock on each head. ▪ Large horizontal tanks with greater than a 14’ 9” total length have four lifting lugs, two on each head, at 3 and 9 o’clock. (These tanks also have blanked-off lugs at 12 and 6 o’clock which are for factory use only and must not be used by the customer). ▪ Horizontal tanks are shipped strapped in a wooden shipping cradle when leg or side lug supported. ▪ When a wooden shipping cradle is used, the strapping must be removed before the tank is lifted. ▪ When shipped in steel saddles, the saddles should not be removed during tank installation.
- 37. MAINTENANCE MANUAL FOR GLASS LINED REACTOR SECTION II:- INSTALLATION AND START-UP 6.0 How To Handle Horizont al Tanks 6.2 Installing Small Horizontal Tanks ▪ It is preferable to use a bail bar with two single slings of proper strength for making the lift. ▪ A two legged sling may also be used with a maximum of 60° between legs at the crane hook. Use of the two main lifting lugs is preferred (See Figure 12.1). ▪ Alternatively, the four auxiliary lifting lugs can be used employing a bail bar with (2) two-legged slings or (2) two-legged slings from a crane hook.
- 38. MAINTENANCE MANUAL FOR GLASS LINED REACTOR SECTION II:- INSTALLATION AND START-UP 6.0 How To Handle Horizont al Tanks 6.2 Installing Small Horizontal Tanks ▪ With this arrangement, the maximum angle between sling legs is 30 ° and all four lugs must be used simultaneously. ▪ When the tank is lifted, install support legs and bases if applicable and set into position. ▪ Level the tank as shown in Figure 12.1.
- 39. MAINTENANCE MANUAL FOR GLASS LINED REACTOR SECTION II:- INSTALLATION AND START-UP 6.0 How To Handle Horizont al Tanks 6.3 Installing Large Horizontal Tanks ▪ It is preferable to use a bail bar with (2) two-legged slings of proper strength for making the lift. ▪ An alternate (2) two-legged sling set-up may also be used with a maximum of 30° between the opposite two-legged slings. ▪ Both of these methods are shown in Figure 12.2.
- 40. MAINTENANCE MANUAL FOR GLASS LINED REACTOR SECTION II:- INSTALLATION AND START-UP 6.0 How To Handle Horizont al Tanks 6.3 Installing Large Horizontal Tanks ▪ All four lugs must be used simultaneously. ▪ When the tank is lifted, install support legs and bases if applicable and set into position. ▪ Level the tank as shown in Figure 12.2.
- 41. MAINTENANCE MANUAL FOR GLASS LINED REACTOR SECTION II:- INSTALLATION AND START-UP 7.0 Levelling The Vessel 7.1 Vessels with an Agitator/Drive System Installed CAUTION: ECCENTRIC LOADING OF SUPPORTS MAY CAUSE STRESSES OF SUFFICIENT MAGNITUDE TO RESULT IN IMMEDIATE OR DELAYED DAMAGE TO THE GLASS LINING. MAKE CERTAIN THAT ALL SUPPORTS CARRY AN EQUAL SHARE OF THE LOAD AT THE END OF THE LEVELING OPERATION. ▪ Most agitators must operate in a fully vertical position to avoid drive or seal problems. First, rough level the vessel using a long spirit level at four points, 90° apart on the shell or jacket. ▪ Accomplish this by adjusting the threaded leg supports or by shimming the welded leg supports or side lug supports, whichever is applicable.
- 42. MAINTENANCE MANUAL FOR GLASS LINED REACTOR SECTION II:- INSTALLATION AND START-UP 7.0 Levelling The Vessel 7.1 Vessels with an Agitator/Drive System Installed ▪ Final leveling must be made using a torpedo level placed on the top surface of the drive stand at two points 90° apart, on the shell or jacket, using a long spirit level. ▪ Adjust threaded leg supports or shim welded leg supports or side lugs, whichever is applicable, as required. ▪ Locate and install anchor bolts, if required.
- 43. MAINTENANCE MANUAL FOR GLASS LINED REACTOR SECTION II:- INSTALLATION AND START-UP 7.0 Levelling The Vessel 7.2 Vertical Vessels, Non-Agitated ▪ Check the level of the vessel at four points, 90° apart, on the shell or jacket, using a long spirit level. ▪ Adjust the threaded leg supports or shim the welded leg supports or side lugs, whichever is applicable, as required. ▪ Locate and install anchor bolts, if required.
- 44. MAINTENANCE MANUAL FOR GLASS LINED REACTOR SECTION II:- INSTALLATION AND START-UP 7.0 Levelling The Vessel 7.3 Horizontal Vessels, Non-Agitated ▪ With a long spirit level, use the top or bottom of the vessel shell for longitudinal leveling and the largest top nozzle for radial leveling. ▪ Adjust the threaded leg supports or shim the welded leg supports or cradle, whichever is applicable, as required. ▪ Locate and install anchor bolts, if required.
- 45. MAINTENANCE MANUAL FOR GLASS LINED REACTOR SECTION II:- INSTALLATION AND START-UP 8.0 Vessel Accessory Installation 8.1 General ▪ In most situations, all specified accessories have been installed at our facility prior to shipment. ▪ When installing additional accessories or making necessary replacements, use the following guidelines to assist with these procedures.
- 46. MAINTENANCE MANUAL FOR GLASS LINED REACTOR SECTION II:- INSTALLATION AND START-UP 8.0 Vessel Accessory Installation 8.2 Manway and Main Covers ▪ On all openings, check the flange face for warpage (distortion/waviness). CAUTION: RECOMMENDS ONLY AFII TYPE ENVELOPE GASKETS FOR GLASSLINED STEEL NOZZLES AND FLANGES. OTHER TYPES OF GASKET CONSTRUCTION MAY NOT GIVE SATISFACTORY SERVICE AND MAY RESULT IN DAMAGE TO THE GLASS. ▪ After shimming (if necessary), set the gasket on the flange face and oriented properly. ▪ Place the cover in position on the flange, noting correct orientation. ▪ Install the specified number of the correct size clamps. ▪ Tighten the clamps in the pattern with the recommended bolt torques as detailed in Section V.
- 47. MAINTENANCE MANUAL FOR GLASS LINED REACTOR SECTION II:- INSTALLATION AND START-UP 8.0 Vessel Accessory Installation 8.2 Manway and Main Covers DANGER: THE USE OF TOO FEW CLAMP ASSEMBLIES ON A PRESSURE VESSEL IS DANGEROUS AND MAY RESULT IN SEVERE PERSONAL INJURY, DEATH OR EQUIPMENT DAMAGE. DE DIETRICH SPECIFIES THE REQUIRED NUMBER OF CLAMP ASSEMBLIES NECESSARY FOR SAFE OPERATION BASED ON THE ASME PRESSURE VESSEL CODE. IT IS ESSENTIAL THAT ALL EQUIPMENT, BOTH NEW AND USED, FOLLOW THESE SPECIFICATIONS. IF YOU ARE UNAWARE OF THE REQUIRED NUMBER OF CLAMP ASSEMBLIES FOR EQUIPMENT, CONTACT SUPPLIER WITH THE EQUIPMENT SERIAL NUMBER. CAUTION: USING TOO FEW CLAMPS MAY REQUIRE EXCESSIVE TORQUE TO MAINTAIN SEAL PRESSURES. THIS CAN LEAD TO SERIOUS GLASS/GASKET DAMAGE.
- 48. MAINTENANCE MANUAL FOR GLASS LINED REACTOR SECTION II:- INSTALLATION AND START-UP 8.0 Vessel Accessory Installation 8.3 Drive Assembly ▪ For installation instructions, refer to the applicable supplier technical bulletin.
- 49. MAINTENANCE MANUAL FOR GLASS LINED REACTOR SECTION II:- INSTALLATION AND START-UP 8.0 Vessel Accessory Installation 8.4 Process Connections CAUTION: PIPING CONNECTIONS TO GLASS-LINED STEEL NOZZLES MUST BE SUCH THAT NO EXTERNAL LOADING IS PLACED ON IT. THE USE OF EXPANSION JOINTS AND PIPE HANGERS ARE STRONGLY RECOMMENDED. NOTE: The installation of PTFE nozzle liners to all service nozzles will provide additional protection to the glass-lined surface against thermal shock, corrosion and erosion.
- 50. MAINTENANCE MANUAL FOR GLASS LINED REACTOR SECTION II:- INSTALLATION AND START-UP 8.0 Vessel Accessory Installation 8.4 Process Connections DANGER: IF THE VESSEL IS TO BE OPERATED UNDER INTERNAL PRESSURE, CONNECT A PROPERLY DESIGNED SAFETY RELIEF DEVICE AND A PRESSURE GAUGE TO ONE OR MORE TOP OPENINGS. ON JACKETED VESSELS, MAKE SURE A SUITABLE JACKET PRESSURE RELIEF VALVE HAS BEEN INSTALLED. REFER TO ASME BOILER AND PRESSURE VESSEL CODE, SECTION VIII, DIVISION 1, AND PARAGRAPH NG-125. FAILURE TO DO SO COULD RESULT IN SERVER PERSONAL INJURY, DEATH, OR EQUIPMENT DAMAGE. CAUTION: WHEN TIGHTENING BOLTED OR CLAMPED JOINTS, BE CAREFUL TO AVOID STRAINS THAT COULD POSSIBLY DISTORT THE STEEL SUBSTRATE AND CAUSE DAMAGE TO THE GLASS LINING. USE ONLY THE BOLT TORQUES RECOMMENDED IN SECTION V IN CONJUNCTION WITH THE CORRECT NUMBER OF CLEAN LUBRICATED SA-193-B7 BOLTS AND SA-194-2H NUTS, THE PROPER TIGHTENING SEQUENCE AND THE RECOMMENDED DE DIETRICH AFII TYPE GASKETS.
- 51. MAINTENANCE MANUAL FOR GLASS LINED REACTOR SECTION II:- INSTALLATION AND START-UP 9.0 Jacket Piping Connections & Service Hook-Up Diagram 9.1 General ▪ The temperature range in which a glass-lined pressure vessel may be used frequently depends on the chemical process service.
- 52. MAINTENANCE MANUAL FOR GLASS LINED REACTOR SECTION II:- INSTALLATION AND START-UP 9.0 Jacket Piping Connections & Service Hook-Up Diagram 9.2 Heating and Cooling Media ▪ Steam is customarily used for temperatures up to those permitted by the maximum jacket pressure /temperature rating. CAUTION: ALTERNATING STEAM AND HOT WATER CAN CAUSE “WATER HAMMERING” WHICH MAY RESULT IN DAMAGE TO THE GLASS LINING. ▪ Heat transfer fluids are employed for temperatures within the limitations of the glass-lined steel pressure vessel. ▪ These limits are clearly stamped on the attached ASME Code nameplate. Heat transfer fluids usually give better temperature control than steam or other vapor media with reduced corrosive tendencies.
- 53. MAINTENANCE MANUAL FOR GLASS LINED REACTOR SECTION II:- INSTALLATION AND START-UP 9.0 Jacket Piping Connections & Service Hook-Up Diagram 9.2 Heating and Cooling Media ▪ Water should be treated to remove impurities and should contain a corrosive inhibitor. ▪ Brine may be used for cooling, but must be kept at a neutral pH. ▪ The recommended brine concentrations should have a specific gravity of 1.2 and a pH of 8.0 - 8.5. Sodium dichromate in the amount of 1 lb./100 gal should be added. ▪ Never use brine alternately with steam or hot water. This can result in a highly corrosive condition.
- 54. MAINTENANCE MANUAL FOR GLASS LINED REACTOR SECTION II:- INSTALLATION AND START-UP 9.0 Jacket Piping Connections & Service Hook-Up Diagram 9.2 Heating and Cooling Media ▪ Ammonia, glycerol, ethylene glycol, etc., may be used as alternate coolants or heat transfer fluids. DANGER: NEVER USE AMMONIA ALTERNATELY WITH STEAM OR HOT WATER CAUTION: SOME COOLANTS MAY DECOMPOSE TO ACID COMPONENTS WHEN EXPOSED TO HEAT/STEAM, LEADING TO CORROSION OF BOTH THE VESSEL AND JACKET STEEL. THIS TYPE OF ATTACK COULD POTENTIALLY CAUSE A GLASS LINING FAILURE DUE TO NASCENT HYDROGEN DISPERSION. NOTE: Check the nameplate for minimum operation temperature at rated pressure.
- 55. MAINTENANCE MANUAL FOR GLASS LINED REACTOR SECTION II:- INSTALLATION AND START-UP 9.0 Jacket Piping Connections & Service Hook-Up Diagram 9.3.1 Jacket Piping Connections ▪ Jacketed vessels are equipped with service connections of 150 lb. ANSI flanges and/ or 3000 lb. ▪ couplings to afford rigid support for the service lines. ▪ These connections are adequately sized for the service flows for the particular size vessel. ▪ Aside from the regular inlets and outlets, all jacketed vessels are equipped with a vent coupling at the top of the jacket shell and a drain coupling in the lower jacket expansion diaphragm near the vessel outlet.
- 56. MAINTENANCE MANUAL FOR GLASS LINED REACTOR SECTION II:- INSTALLATION AND START-UP 9.0 Jacket Piping Connections & Service Hook-Up Diagram 9.3.1 Jacket Piping Connections ▪ The recommended practice is to connect the top vent line with a valve and vent whenever liquid is first injected into the jacket. ▪ This removes all air and permits full heat transfer. It also prevents corrosion of the upper closure. T ▪ The diaphragm drain should be periodically “blown down” to remove sludge from the expansion ring, to prevent premature failure due to corrosion.
- 57. MAINTENANCE MANUAL FOR GLASS LINED REACTOR SECTION II:- INSTALLATION AND START-UP 9.0 Jacket Piping Connections & Service Hook-Up Diagram 9.3.1 Jacket Piping Connections ▪ Agitating nozzles are available for certain jacket couplings to give direction and turbulence to the flow of liquid medium only. ▪ They are not to be used for vapor medium such as steam. ▪ All jacket couplings are provided with stainless steel impingement plates to protect the inner shell from erosion and direct contact of the heating or cooling medium.
- 58. MAINTENANCE MANUAL FOR GLASS LINED REACTOR SECTION II:- INSTALLATION AND START-UP 9.0 Jacket Piping Connecti ons & Service Hook-Up Diagram 9.3.2 Service Hook-Up Diagram ▪ The two hook-ups “A” and “B”, shown in Figure 13, are typical arrangements where both vapor and liquid service connections are required. ▪ Plan “B” may be used where brine, steam and water are used in the jacket. ▪ This arrangement will permit the removal of scale and rust. ▪ Periodic drainage of the expansion ring should be practiced.
- 59. MAINTENANCE MANUAL FOR GLASS LINED REACTOR SECTION II:- INSTALLATION AND START-UP 9.0 Jacket Piping Connecti ons & Service Hook-Up Diagram 9.3.2 Service Hook-Up Diagram ▪ Provide reliable temperature control instrumentation to prevent thermal shock damage to the glass lining due to excessive temperature differentials. ▪ The use of a liquid heat transfer medium is recommended to minimize this potential. CAUTION: DO NOT CHARGE FULL-PRESSURE STEAM INTO A COLD VESSEL. USE PRESSURE STAGING TO ALLOW TIME FOR THE BOTTOM HEAD AREA TO REACH AN EQUILIBRIUM.
- 60. MAINTENANCE MANUAL FOR GLASS LINED REACTOR SECTION II:- INSTALLATION AND START-UP 10.0 Start-up Inspections 10.1 Removal of Internal Bracing 1. After the vessel is erected, leveled and secured, the internal bracing for the agitator shaft must be removed. 2. Following established OSHA Confined Space and company safety procedures. 3. Prepare the vessel for entry. 4. Use only wooden, fiberglass rope, or rigid ladders to enter the vessel.
- 61. MAINTENANCE MANUAL FOR GLASS LINED REACTOR SECTION II:- INSTALLATION AND START-UP 10.0 Start-up Inspections 10.1 Removal of Internal Bracing 5. All personnel entering the vessel must remove all lose articles from their pockets and belts with large metal buckles. 6. Required footwear must be either clean, dedicated sneakers or rubber totes. 7. Rubber, foam or felt matting should be placed on the bottom head to protect the glass lining during removal of the bracing.
- 62. MAINTENANCE MANUAL FOR GLASS LINED REACTOR SECTION II:- INSTALLATION AND START-UP 10.0 Start-up Inspections 10.2 Spark Test/Visual Inspection 1. Remove all protective matting from the bottom head. 2. Using only a 5 to 6 kv approved tester, spark test the glass lining of the vessel and accessories. 3. No other type of tester is recommended. 4. Carefully inspect the entire glass surface for any chips or fractures, which may have occurred during removal of the bracing and/or assembly of the accessories and process connections. CAUTION: A SMALL CHIP OR EVEN A PINHOLE, IF NOT REPAIRED, CAN LEAD TO CORROSION OF THE STEEL SUBSTRATE. THIS MAY RESULT IN SEVERE EQUIPMENT DAMAGE.
- 63. MAINTENANCE MANUAL FOR GLASS LINED REACTOR SECTION II:- INSTALLATION AND START-UP 10.0 Start-up Inspections 10.3 Drive and Mechanical Seal 1. All drives, except the Lenze model offered on small CTJ reactors, are shipped without oil. 2. For lubricant requirements on the Series 60 drives refer to Technical Bulletin 788- 3, and on the PTE drives refer to Technical Bulletin 980-1. 3. Determine if the mechanical seal is designed for wet or dry-running operation (wet seals are provided with Model 600 lubricators). 4. Wet seals require a lubricant, which is compatible with the chemical process in the reactor.
- 64. MAINTENANCE MANUAL FOR GLASS LINED REACTOR SECTION II:- INSTALLATION AND START-UP 10.0 Start-up Inspections 10.3 Drive and Mechanical Seal 5. Typical specifications are SAE 10/20 grade, 0.5 to 10 cps and rated for above the maximum operating temperature. CAUTION: SOME LUBRICANTS MAY NOT BE COMPATIBLE WITH THE ELASTOMERS USED IN THE MECHANICAL SEAL. THE REACTION MAY RESULT IN A SWELLING OR DETERIORATION OF THE O-RINGS, CAUSING PREMATURE FAILURE. CONSULT DE DIETRICH TO REVIEW THE POTENTIAL EFFECTS WHEN USING A DESIRED LUBRICANT. 6. The dry-running seal requires no liquid medium as a lubricant. 7. A flow of nitrogen or instrument air provides the necessary cooling and pressure for the mechanical seal’s rotating faces.
- 65. MAINTENANCE MANUAL FOR GLASS LINED REACTOR SECTION II:- INSTALLATION AND START-UP 10.0 Start-up Inspections 10.3 Drive and Mechanical Seal DANGER: USING COMPRESSED AIR FOR DRY-RUNNING SEALS MAY SHORTEN THE EXPECTED LIFE OF THE EQUIPMENT AND RESULT IN SEVERE EQUIPMENT DAMAGE. 8. All mechanical seals must be pressurized to provide a differential above the maximum process pressure in the vessel. 9. Recommended differentials are 15-20 psig above for wet running mechanical seals and 5-10 psig above for dry-running mechanical seals.
- 66. MAINTENANCE MANUAL FOR GLASS LINED REACTOR SECTION II:- INSTALLATION AND START-UP 10.0 Start-up Inspections 10.4 Pressure Test 1. Rotate the agitator shaft by hand to make sure it is free. 2. This can easily be performed by turning the motor coupling. 3. Attach a dial indicator on the agitator shaft, just above the mechanical seal housing. 4. Energize the starter and measure the shaft run-out and confirm that the agitator rotates counterclockwise as viewed from the top of the vessel. 5. Acceptable run-out on the Series 60 drive is 0.010" and acceptable run-out on the PTE drive is 0.007".
- 67. MAINTENANCE MANUAL FOR GLASS LINED REACTOR SECTION II:- INSTALLATION AND START-UP 10.0 Start-up Inspections 10.4 Pressure Test 6. Check with De Dietrich for specifications on other models. Fill the vessel with water and perform a hydrostatic pressure test to check for gasket leakage. 7. Do not exceed the design pressure. DANGER: THE MECHANICAL SEAL MUST BE PRESSURIZED WITH THE RECOMMENDED DIFFERENTIAL PRIOR TO HYDROSTATIC PRESSURE TEST OF THE VESSEL. FAILURE TO DO SO MAY RESULT IN MECHANICAL SEAL, HOUSING AND/OR AGITATOR DRIVE END DAMAGE. 8. Pressure check all heating, cooling and plugged jacket connections for leaks. 9. Confirm all bolt torques (see Section V). 10. Retorque after the first operation cycle.
- 68. MAINTENANCE MANUAL FOR GLASS LINED REACTOR SECTION III:- PREVENTIVE MAINTENANCE 1.0 General ▪ With a proper preventive maintenance program, the life of your glass-lined steel vessel can be extended over a long period of time. ▪ Glass-lined steel is a tough material but it must be maintained properly and periodically. ▪ A regular inspection program with early detection of damage in the lining can help to prevent a major failure of your vessel. ▪ An early warning continuous surveillance system of the glass-lining is an invaluable asset to the user. ▪ In addition to maintenance, cleanliness of the equipment and the area in which it is located will help to extend the life of the vessel.
- 69. MAINTENANCE MANUAL FOR GLASS LINED REACTOR SECTION III:- PREVENTIVE MAINTENANCE 2.0 Maintenance Checklist ▪ A preventive maintenance checklist should be prepared listing all the areas that are to be maintained and a time schedule for these procedures. ▪ Depending upon the severity of the process the time intervals for these inspections will vary. ▪ Initially an inspection every six months should be instituted if at all possible. ▪ Keeping accurate records of the inspection procedures will help evaluate the results of the inspections.
- 70. MAINTENANCE MANUAL FOR GLASS LINED REACTOR SECTION III:- PREVENTIVE MAINTENANCE 2.0 MAINTENANCE CHECKLIST CHECKLIST 2.1 Vessel Appearance Internally A. Spark Test B. Glass Thickness Test 2.2 Mechanical Seal And Lubricator (if applicable) 2.3 Motor And Drive Performance 2.4 Vessel Nozzle Connections A. Condition Of Gasket B. Condition Of Connecting Bolts And Clamps 2.5 Vessel Appearance Externally 2.6 Vessel Jacket Connections A. Agitating Nozzles B. Relief Valve
- 71. MAINTENANCE MANUAL FOR GLASS LINED REACTOR SECTION III:- PREVENTIVE MAINTENANCE 2.0 Mainten ance Checklist 2.1 Vessel Appearance Internally ▪ The glass lining should be inspected visually for any signs of loss of fire polish, corrosion, or erosion (especially the agitator blades and the baffle). ▪ In addition, the lining should be spark tested (see Bulletin 883 or 185) for any signs of glass lining failure.
- 72. MAINTENANCE MANUAL FOR GLASS LINED REACTOR SECTION III:- PREVENTIVE MAINTENANCE 2.0 Mainten ance Checklist 2.1 Vessel Appearance Internally ▪ Finally, the glass thickness measurements should be taken randomly and more detailed in areas that are questionable in appearance. ▪ Details of these tests are listed in paragraph 3.0 of this section. DANGER: DO NOT ENTER A VESSEL WITHOUT FIRST PREPARING IT FOR SAFE ENTRY, IN ACCORDANCE WITH OSHA’S CONFINED SPACE ENTRY PROCEDURES. FAILURE TO DO SO CAN RESULT IN SERIOUS INJURY OR DEATH.
- 73. MAINTENANCE MANUAL FOR GLASS LINED REACTOR SECTION III:- PREVENTIVE MAINTENANCE 2.0 Mainten ance Checklist 2.2 Mechanical Seal And Lubricator ▪ Inspect the mechanical seal and lubricator (if applicable), which includes changing the lubricant as required. ▪ Inspect the mechanical seal as per Bulletins 782, 880, 980, 1070 and 1184.
- 74. MAINTENANCE MANUAL FOR GLASS LINED REACTOR SECTION III:- PREVENTIVE MAINTENANCE 2.0 Mainten ance Checklist 2.3 Motor And Drive Performance ▪ Inspect the motor and drive, which includes oil change and lubrication as mentioned in Bulletin 980-1 (for PTE drives) and Bulletin 788-3 (for Series 60 Drive).
- 75. MAINTENANCE MANUAL FOR GLASS LINED REACTOR SECTION III:- PREVENTIVE MAINTENANCE 2.0 Mainten ance Checklist 2.4 Vessel Nozzle Connections ▪ Check all gasketed connections and re-torque or replace leaking gaskets as required. ▪ Check the condition of all clamps and bolts and lubricate as required. ▪ Use Never-Seeze® (or equivalent) to lubricate threads.
- 76. MAINTENANCE MANUAL FOR GLASS LINED REACTOR SECTION III:- PREVENTIVE MAINTENANCE 2.0 Mainten ance Checklist 2.5 Vessel Appearance Externally ▪ Inspect the outside of the vessel for chemical spillage. ▪ Any spills should be immediately neutralized then flushed thoroughly with water and dried. ▪ The vessel should be repainted as required. Clean the inside of the jacket periodically, being sure to drain the lower diaphragm (should be drained weekly).
- 77. MAINTENANCE MANUAL FOR GLASS LINED REACTOR SECTION III:- PREVENTIVE MAINTENANCE 2.0 Mainten ance Checklist 2.6 Vessel Jacket Connections ▪ Remove, clean and inspect the jacket agitating nozzles in jacketed vessels. ▪ They should be replaced when required. ▪ Check any pressure relief devices on the jacket as well as the vessel. Be sure they are in good working condition. ▪ Check the vessel externally for any signs of corrosion, especially on the jacket closure rings. Repaint as required. ▪ Check all connections to jacket nozzles including expansion joints and piping supports.
- 78. MAINTENANCE MANUAL FOR GLASS LINED REACTOR SECTION III:- PREVENTIVE MAINTENANCE 3.0 Inspectio n, Testing and Protectio n of the Glass Lining 3.1 Visual Inspection 1. Carefully inspect the entire glass-lined surface for signs of loss of fire polish, chipping, or staining. 2. Use a lighted magnifier to help identify signs of potential early failure of the lining. CAUTION: A SMALL CHIP OR PINHOLE, IF NOT REPAIRED IMMEDIATELY, CAN LEAD TO THE CORROSION OF THE STEEL SUBSTRATE. THIS MAY RESULT IN SEVERE EQUIPMENT DAMAGE.
- 79. MAINTENANCE MANUAL FOR GLASS LINED REACTOR SECTION III:- PREVENTIVE MAINTENANCE 3.0 Inspectio n, Testing and Protectio n of the Glass Lining 3.1 Visual Inspection 3. Check old repair plugs - if any of them are loose, replace them. Do not retighten them. 4. Be sure to include inspection of the agitator and baffles. Look for signs of erosion as well as corrosion, especially on the leading edge of the agitator blades.
- 80. MAINTENANCE MANUAL FOR GLASS LINED REACTOR SECTION III:- PREVENTIVE MAINTENANCE 3.0 Inspectio n, Testing and Protectio n of the Glass Lining 3.2 Electrical Testing ▪ Spark test the entire glass lining surface including accessories per Bulletin 883 or 185 using GlasTron DC6000 or Model 6000 E (AC) spark testers. ▪ The use of either one of these units will assure that the proper voltage is being applied to the glass lining surface. ▪ All vessels should be spark tested after installation using the maximum 6000 volt tester. ▪ The DC model is the preferred system, however, for agitator blades such as the GlasLock® type, the AC tester must be used. Make repairs as required.
- 81. MAINTENANCE MANUAL FOR GLASS LINED REACTOR SECTION III:- PREVENTIVE MAINTENANCE 3.0 Inspectio n, Testing and Protectio n of the Glass Lining 3.3 Glass Thickness Measurement ▪ Measuring the glass thickness is critical to the life of the vessel. ▪ Periodic measurements of the lining should be taken using a magnetic induction or eddy current type instrument with an accuracy of at least ±5%. ▪ The vessel should be mapped in a grid type of arrangement with readings taken every 24-36" apart. ▪ Areas that exhibit loss of fire polish should be more thoroughly inspected and monitored. ▪ Agitator blades and baffles are more likely to show signs of wearing and therefore require a thickness test more frequently. When the glass thickness reaches 0.028" contact your supplier representative.
- 82. MAINTENANCE MANUAL FOR GLASS LINED REACTOR SECTION III:- PREVENTIVE MAINTENANCE 3.0 Inspectio n, Testing and Protectio n of the Glass Lining 3.4 Record Log ▪ It is recommended that a log be kept for each vessel indicating the date of installation, spark testing results, visual inspection results and glass thickness results. ▪ This log will help determine the estimated service life of the vessel and could help to prevent a failure of the vessel.
- 83. MAINTENANCE MANUAL FOR GLASS LINED REACTOR SECTION III:- PREVENTIVE MAINTENANCE 3.5.1 FIELD REPAIR 3.0 Inspectio n, Testing and Protectio n of the Glass Lining 3.5 Glass Repair ▪ Any damaged areas no matter how small, should be immediately repaired. ▪ There are many different methods of repair such as tantalum repair plugs, patches or sleeves as well as PTFE repair sleeves (KwikFixTM and KwikSleeveTM) that can be used to successfully repair damaged areas of the lining.
- 84. MAINTENANCE MANUAL FOR GLASS LINED REACTOR SECTION III:- PREVENTIVE MAINTENANCE 3.5.2 REGLASSING 3.0 Inspectio n, Testing and Protectio n of the Glass Lining 3.5 Glass Repair ▪ Vessels will have all the glass-lining removed, will be weld repaired (and modified if required) and then be completely relined with our 3009 highly corrosion resistant glass lining. ▪ Contact your local supplier’s representative to help determine if your vessel is reglassable. ▪ A reglassed vessel will have the same glass lining warranty as a new vessel.
- 85. MAINTENANCE MANUAL FOR GLASS LINED REACTOR SECTION III:- PREVENTIVE MAINTENANCE 3.0 Inspection, Testing and Protection of the Glass Lining 3.6 Returning Equipment for Repair/Reglassing Please adhere to the following procedures: 1. Clean the vessel and jacket thoroughly, removing all chemicals and heat transfer fluids. 2. Remove all insulation. 3. Remove all accessories not subject to repair or replacement such as the agitation system, clamps, split flanges, pipes, valves, fittings, etc. 4. If necessary, call a supplier’s representative to pre-qualify the vessel. 5. Prepare the vessel for shipment.
- 86. MAINTENANCE MANUAL FOR GLASS LINED REACTOR SECTION III:- PREVENTIVE MAINTENANCE 3.0 Inspection, Testing and Protection of the Glass Lining 3.6 Returning Equipment for Repair/Reglassing 6. Obtain an R/M number (Return Material Number) and Return Equipment Questionnaire, for each major item, by calling supplier. 7. Indicate the R/M number on the equipment being shipped as well as on all shipping documents and your purchase order. The vessel must have a legible nameplate. 8. Complete the Return Equipment Questionnaire, return it along with MSDS sheets for the vessel and jacket, and send them to supplier location. 9. Ship the equipment freight prepaid to supplier location.
- 87. MAINTENANCE MANUAL FOR GLASS LINED REACTOR SECTION III:- PREVENTIVE MAINTENANCE 3.0 Inspection, Testing and Protection of the Glass Lining 3.7 Acid Spillage on the Outside of the Vessel ▪ Acid spillage can cause major damage to unjacketed areas of a vessel due to hydrogen dispersion resulting in loss of the glass lining.
- 88. MAINTENANCE MANUAL FOR GLASS LINED REACTOR SECTION III:- PREVENTIVE MAINTENANCE 3.0 Inspection, Testing and Protection of the Glass Lining 3.7.1 Precautions 1. Protect the exterior of the vessel. 2. Try to minimize spillage. 3. Immediately neutralize any spillage and thoroughly wash the exterior with water.
- 89. MAINTENANCE MANUAL FOR GLASS LINED REACTOR SECTION III:- PREVENTIVE MAINTENANCE 3.0 Inspection, Testing and Protection of the Glass Lining 3.7.2 Protecting the Exterior of the Vessel 1. The top head of a vessel can be protected with a metallic shield especially if the top head is insulated. If it is not insulated, a suitable coating such as zinc rich epoxy or other chemical resistant systems are available. 2. Recommend a drip ring arrangement located above the jacket top closure ring that can be supplied on new or reglassed vessels. This drip ring does not allow seepage into the insulation when washing material away from the vessel. It also can be used as the top ring for insulation. 3. A procedure that is becoming more common is sheathing the vessel jacket area or the entire vessel in carbon or stainless steel.
- 90. MAINTENANCE MANUAL FOR GLASS LINED REACTOR SECTION III:- PREVENTIVE MAINTENANCE 3.0 Inspection, Testing and Protection of the Glass Lining 3.7.3 Minimizing Spills 1. Avoid spillage on the top head while charging material to the vessel by using removal charging chutes (rubber or PTFE). 2. Periodically check all flange connections to avoid leakage. 3. Use the proper gaskets at all nozzle connections. Use the proper torque for all bolting (clamps as well as bolts). Be sure all bolting is properly lubricated and is bolted in the proper sequence. 4. If any spillage does occur immediately neutralize and wash off.
- 91. MAINTENANCE MANUAL FOR GLASS LINED REACTOR SECTION III:- PREVENTIVE MAINTENANCE 3.0 Inspection, Testing and Protection of the Glass Lining 3.8 Jacket Cleaning ▪ Jackets of vessels are subject to fouling due to a build up of deposits from heating and cooling. ▪ As reactor jackets become fouled with iron oxide corrosion, production is negatively effected. ▪ Over time, internal fouling of the jackets in glass-lined steel reactors reduces heat transfer efficiencies, increases reaction times and decreases yields by as much as 15%. ▪ Periodic inspection of the jacket will extend the life of your vessel.
- 92. MAINTENANCE MANUAL FOR GLASS LINED REACTOR SECTION III:- PREVENTIVE MAINTENANCE 3.0 Inspection, Testing and Protection of the Glass Lining 3.8 Jacket Cleaning ▪ For mild fouling, especially due to brine usage, we also recommend a 15% solution of sodium hypochlorite. NOTE: A 3/4" coupling is normally installed on the lower jacket diaphragm. A drain valve should be connected to this coupling. This drain valve should be opened at least once a week during operation to clean out all accumulated deposits. CAUTION: NEVER USE ACID SOLUTIONS, INHIBITED OR OTHERWISE FOR CLEANING JACKETS OF GLASS-LINED EQUIPMENT. ▪ Inspect all jacket-agitating nozzles after cleaning the jacket and replace them if needed.
- 93. MAINTENANCE MANUAL FOR GLASS LINED REACTOR SECTION III:- PREVENTIVE MAINTENANCE 3.0 Inspection, Testing and Protection of the Glass Lining 3.9 Storage For outdoor storage or areas that are not heated, precaution must be taken to protect glass-lined steel equipment. 1. In areas where the temperature will fall below freezing, all jackets must be drained and plugged to prevent water entry. Where complete drainage is not possible, anti-freeze such as ethylene glycol should be added to the jacket. CAUTION: FOR A SPLIT PIPE COIL VESSEL (HEMICOIL® TYPE) ALL COILS MUST BE COMPLETELY DRAINED. 2. Use a minimum number of well-lubricated clamps for storage - the rest of the clamps should be stored indoors in a dry, environmentally controlled area.
- 94. MAINTENANCE MANUAL FOR GLASS LINED REACTOR SECTION III:- PREVENTIVE MAINTENANCE 3.0 Inspection, Testing and Protection of the Glass Lining 3.9 Storage 3. All vessel nozzles should be covered tightly with rubber caps. 4. All threaded connections should be coated with Never-Seeze® (or an equivalent). 5. Cover the baffle to prevent moisture from entering. 6. If the vessel is stored with an agitation system check Bulletin 980-1 (PTE Drives), Bulletin 788-3 Series 60 Drive) for correct storage of the drive and motor. 7. Inspect the exterior of the vessel periodically and repaint with zinc rich epoxy paint as required. 8. Individual agitators or baffles should be stored in a dry environmentally controlled area.
- 95. MAINTENANCE MANUAL FOR GLASS LINED REACTOR SECTION IV:- SHIMMING WITH DDPS PTFE ENVELOPE TYPE GASKETS 1.0 General ▪ PTFE envelope type gaskets are standard on all glass-lined equipment. ▪ Current design gaskets are comprised of a corrugated 304 stainless steel metal ring between two compressible asbestos-free insert rings, all surrounded by a PTFE envelope. CAUTION: THIS COMPOSITE SHOULD NEVER BE REPLACED WITH ONE OF A DIFFERENT TYPE UNLESS APPROVED BY SUPPLIER. SUBSTITUTIONS MAY RESULT IN GLASS DAMAGE DURING TORQUING OR DUE TO LEAKAGE.
- 96. MAINTENANCE MANUAL FOR GLASS LINED REACTOR SECTION IV:- SHIMMING WITH DDPS PTFE ENVELOPE TYPE GASKETS 1.0 General ▪ As a result of high temperature during the lining process, the glass-lined flanges may warp slightly. ▪ Most frequently, the amount of warpage is insufficient to cause a sealing problem. ▪ If the gap between mating flanges exceeds 1/16" at any point around the circumference, the gasket must be shimmed to reduce the possibility of leakage and prolong the service life of the equipment. ▪ Factory supplied gaskets installed on new vessels are shimmed, if required, prior to shipment from the factory. ▪ If a factory-shimmed gasket was supplied, shimming must be repeated when replacing the gasket in the field.
- 97. MAINTENANCE MANUAL FOR GLASS LINED REACTOR SECTION V:- RECOMMENDED BOLT TORQUES 1.1 General 1. The use of new well lubricated nuts and bolts for nozzles up to 12", larger openings will usually use clamps. 2. The use of Type AFII PTFE envelope gaskets. 3. The torque values for clamps will be valid for up to 300 PSI.
- 98. MAINTENANCE MANUAL FOR GLASS LINED REACTOR SECTION V:- RECOMMENDED BOLT TORQUES 1.2 Conditions 1. Recommended torques are for standard PTFE AFII Type gaskets. 2. Torque values are for nuts, bolts and clamps meeting the following ASME specifications. A. Bolts ASME Spec. SA-193 Grade B7 B. Nuts ASME Spec SA-194 Grade 2H C. Clamps ASME Spec SA-449. 3. All torque values are for nuts and bolts that are free flowing and well lubricated. For situations where lubrication cannot be tolerated, consult supplier. 4. All torque values apply to initial tightening and re-torquing after use.
- 99. MAINTENANCE MANUAL FOR GLASS LINED REACTOR SECTION V:- RECOMMENDED BOLT TORQUES 1.3 Bolting Procedure 1. All flange faces must be parallel with enough room for equal tightening. 2. The use of a torque wrench is strongly recommended so that torque values will not be exceeded. 3. All bolts should be first tightened by hand, then bolts should be tightened ½ turn at a time following the sequence shown here.
- 100. MAINTENANCE MANUAL FOR GLASS LINED REACTOR SECTION V:- RECOMMENDED BOLT TORQUES 1.3 Bolting Procedure NOTE: In connection with the sequence in which the bolts are tightened, it is important that the total amount of final stress desired be applied in small increments, otherwise distortion of the flanges may occur regardless of the sequence followed. Retighten all bolts and clamps after one operating cycle or after at least 24 hours at rest.
- 101. MAINTENANCE MANUAL FOR GLASS LINED REACTOR SECTION V:- RECOMMENDED BOLT TORQUES RECOMMENDED BOLT TORQUES1 (FOOT- POUNDS) FOR ANSI CLASS 150 STANDARD BOLTING NOZZLE SIZE BOLTS NO. SIZE (in) WITH AFII GASKETS MIN. WITH AFII GASKETS MAX. NOZZLE SIZE 1 4 1/2 20 30 1 1-1/2 4 1/2 20 30 1-1/2 2 4 5/8 35 55 2 3 4 5/8 35 65 3 4 8 5/8 35 70 4 6 8 3/4 55 100 6 8 8 3/4 55 110 8 10 12 7/8 70 140 10 12 12 7/8 70 140 12 1.3 Bolting Procedure REFERENCE NOTES: 1. Torques are recommended for well lubricated bolts. 2. ASME Spec. SA-193, Grade B7; identified by “B7” stamped on the bolt head. 3. ASME Spec. SA-194, Grade 2H nuts; identified by “2H” stamped on the top surface.
- 102. MAINTENANCE MANUAL FOR GLASS LINED REACTOR SECTION V:- RECOMMENDED BOLT TORQUES RECOMMENDED BOLT TORQUES1 (FOOT- POUNDS) FOR ANSI CLASS 300 STANDARD BOLTING NOZZLE SIZE BOLTS NO. SIZE (in) WITH AFII GASKETS MIN. WITH AFII GASKETS MAX. NOZZLE SIZE 1 4 5/8 40 50 1 1-1/2 4 3/4 70 80 1-1/2 2 8 5/8 40 60 2 3 8 3/4 70 100 3 4 8 3/4 70 100 4 6 12 3/4 70 100 6 8 12 7/8 110 140 8 10 16 1 170 230 10 12 16 1-1/8 240 300 12 1.3 Bolting Procedure REFERENCE NOTES: 1. Torques are recommended for well lubricated bolts. 2. ASME Spec. SA-193, Grade B7; identified by B7 stamped on bolt head. 3 3. ASME Spec. SA-194, Grade 2H nuts; identified by 2H stamped on top surface.
- 103. MAINTENANCE MANUAL FOR GLASS LINED REACTOR SECTION V:- RECOMMENDED BOLT TORQUES RECOMMENDED BOLT TORQUES1 (FOOT-POUNDS) FOR CLAMPS2,3 AT VESSEL PRESSURES UP THROUGH 300 PSIG CLAMP SIZE (in) WITH AFII GASKETS MIN. WITH AFII GASKETS MAX. 3/4 40 65 7/8 85 110 1.3 Bolting Procedure REFERENCE NOTES: 1.Torques are recommended with well-lubricated bolts. 2.Clamps are used in place of bolts on nozzles with flanges larger than 12”. The number and size of the clamps depends on the vessel’s internal pressure and the size of the opening. 3.ASME Spec. SA-449, identified by “Y” or SA-449 stamped on the J-Bolt.
- 104. MAINTENANCE MANUAL FOR GLASS LINED REACTOR SECTION VI:- RECOMMENDED SPARE PARTS 1.0 General ▪ Many operating plants have a policy to have readily available spare parts in their storage department. ▪ These parts can consist of recommended and optional items. ▪ The items and quantities are normally determined based upon the severity of the process and the number of operating units of like size for part’s interchangeability.
- 105. MAINTENANCE MANUAL FOR GLASS LINED REACTOR SECTION VI:- RECOMMENDED SPARE PARTS 1.1 Highly Recommended Spare Parts 1 AFII Gaskets - Full Set 2 Sight Glass 3 Mechanical Seal Cartridge 4 Bottom Outlet Valve 5 Agitator Shaft 6 GlasLock® Blade 7 Baffle 1.2 Optional Spare Parts 1 Jacket Agitating Nozzle 2 Temperature Sensor 3 Valve Seat 4 Valve Stem 5 Manway Protection Ring 6 Manway Cover 7 Main Cover 8 Drive Parts