
Recommended
More Related Content
Similar to How To Manipulate Word Art.pptx
Similar to How To Manipulate Word Art.pptx (20)
More from AngiH2
More from AngiH2 (8)
Recently uploaded
Recently uploaded (20)
How To Manipulate Word Art.pptx
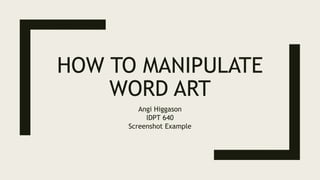
- 1. HOW TO MANIPULATE WORD ART Angi Higgason IDPT 640 Screenshot Example
- 2. Welcome! To navigate through this course, please use the following keys on your computer keyboard: “Right arrow” to go forward “Left arrow” to go back. This lesson is self-paced, so please take your time and review each step as needed before moving on. You may review any step at any time, for as long as needed.
- 3. In this presentation, you will learn two key settings to change that allow you to most easily manipulate Word Art in Microsoft Office Word version 2016. 1. Moving Word Art behind the text 2. Removing the setting “Move with text” 2 Key Settings
- 4. Let’s get started! Please follow along and do each step as it comes. First, you’ll need to open a new document in Microsoft Word. When you’ve got a blank document open, continue to the next slide.
- 5. Start by clicking on the “Insert” tab. This brings up the menu needed to add Word Art.
- 6. Click on the Word Art icon
- 7. When you click on the Word Art icon, this box will pop up. Here is where you choose the font and style you want to use. I’ve chosen this plain outline for today’s lesson.
- 8. The Word Art box will pop up already highlighted. You can simply type whatever you like in the box.
- 9. For me? I love word art!
- 10. Now that you’ve got some Word Art made, we can make the two changes to our settings. To make the changes, click on the Layout Options icon.
- 11. Using “Behind the text” will layer the Word Art behind any text. This allows the typed text to be seen over any Word Art. Click on the “Behind text” icon to highlight the icon. This changes the setting.
- 12. Our second setting change is the one that causes the Word Art to automatically move with any text you type and when you click “enter.”
- 13. You can’t unclick this setting on this screen, so you need to click on “See more…”
- 14. To change the setting, click on the box next to “Move object with text” to remove the checkmark. This keeps the Word Art box in place while you type any text you want, anywhere you want on the page.
- 15. When you’ve unclicked the box, you’re ready to add text to your document.
- 16. Click “OK” to get back to your document.
- 17. Now that you’ve formatted your Word Art, click anywhere on the page outside of the box. This takes you out of the Word Art box and allows you to add any other text or objects that you want on your document.
- 18. When you see the cursor at the top of the page, you know you’re ready to begin typing regular text.
- 19. To test our new settings, let’s type in some text. First, let’s add something at the top. When we click “Enter,” we expect The Word Art to remain in place and not move with the text.
- 20. Success! Our Word Art did not move. Now, to test the placement of the Word Art behind the text, I typed something in the middle of the Word Art. You can see that the text is clearly visible over the Word Art, so more success!
- 21. Finally, let’s type Something at the bottom. This will give us a good amount of text to move our Word Art around.
- 22. To move the Word Art, we first need to activate it by clicking on the Word Art.
- 23. When the box is visible, move the cursor to anywhere on the border of the box. This will bring up the four arrows cursor. Using the four arrows cursor, drag the Word Art box to a place you like it on the page.
- 24. You can easily put the Word Art anywhere on the page now. Since you changed the setting to “Behind text,” you don’t have to worry about being able to see the typed text, no matter where you place the Word Art box.
- 25. To finish your document, click anywhere outside of the Word Art box.
- 26. And there is your finished document with Word Art!
- 27. To review: You first opened a new Microsoft Word document and added a Word Art box. Then, to make the Word Art simple to move, you clicked on the “Layout Options” icon and: 1. Changed setting to “Behind text” 2. Removed the “Move with text” setting
- 28. That is how to change settings to allow for the easiest manipulation of Word Art. I hope you enjoyed our lesson, and I hope you enjoy making your documents more exciting by adding Word Art! This has been “How To Manipulate Word Art,” by Angi Higgason