
Recommended
More Related Content
What's hot
What's hot (20)
Viewers also liked
Viewers also liked (18)
Similar to Phố cổ hội an
Similar to Phố cổ hội an (20)
Phố cổ hội an
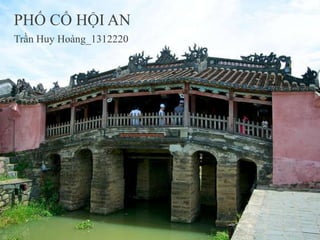
- 1. PHỐ CỔ HỘI AN Trần Huy Hoàng_1312220
- 2. Phố cổ Hội An: 1. Vị trí và tên gọi. 1. 2. 2. Vị trí. Tên gọi. Lịch sử hình thành. 1. Thời kì tiền Hội An. 2. Thời kì Hội An. 3. Thời kì suy vong. 3. Kiến trúc đô thị. 4. Văn hóa. 1. 2. Âm nhạc, diễn xướng trò chơi dân gian. 3. 5. Lễ hội. Ẩm thực. Các địa điểm nổi tiếng của Hội An. 2
- 3. 1. Vị trí & tên gọi. 3
- 4. 1. Vị trí. 4
- 5. Vị trí của tp.Hội An • • • • • Phố cổ Hội An là một đô thị cổ nằm ở hạ lưu sông Thu Bồn. Thuộc vùng đồng bằng ven biển tỉnh Quảng Nam, Việt Nam. Cách thành phố Đà Nẵng khoảng 30 km về phía Nam. TP. Hội An được thành lập ngày 29 tháng 1 năm 2008 Hội An hiện nay đã được công nhận là đô thị loại III, trực thuộc tỉnh Quảng Nam. 5
- 6. 2. Tên gọi. Hội An từng được biết đến trên thương trường quốc tế với nhiều tên gọi khác nhau như Lâm Ấp, Faifo, Hoài Phố và Hội An. gọi Hội An ngày nay được hình thành từ rất lâu trong lịch sử, nhưng chưa xác định chính xác thời điểm ra đời của nó. Tên Người phương Tây xưa kia gọi Hội An bằng cái tên Faifo. 6
- 7. 2. Lịch sử hình thành. 7
- 8. 1. Thời kì tiền Hội An. Do có đặc điểm địa lý thuận lợi nên từ hơn 2000 năm trước, mảnh đất này đã tồn tại và phát triển nền văn hóa Sa Huỳnh muộn. Tiếp sau nền văn hóa Sa Huỳnh, suốt từ thế kỷ 2 đến đến thế kỷ 15, một dải đất miền trung Việt Nam nằm dưới sự thống trị của vương quốc Chăm Pa. Dưới thời vương quốc Chăm Pa, với tên gọi Lâm ấp Phố, Hội An đã từng là cảng thị phát triển. 8
- 9. 2. Thời kì Hội An. Hội An ra đời vào khoảng nửa cuối thế kỷ 16, thời kỳ Việt Nam nằm dưới sự trị vì của nhà Lê. Dưới sự cai quản của Nguyễn Hoàng ở Đàng Trong, Hội An trở thành thương cảng quốc tế sầm uất nhất khu vực ĐNA. với "con đường tơ lụa", "con đường gốm sứ" trên biển hình thành từ trước nên thương thuyền các mước Trung, Nhật, Ấn Độ, Xiêm, Bồ, Hà, Anh, Pháp... tấp nập đến đây giao thương mậu dịch. Cùng 9
- 10. 3. Thời kì suy vong. Thế kỷ 19, cửa sông Cửa Đại ngày càng bị thu hẹp lại và con sông Cổ Cò cũng bị phù sa bồi lấp, khiến các thuyền lớn không còn ghé được cảng Hội An. Triều đình nhà Nguyễn cũng thực hiện chính sách đóng cửa, hạn chế quan hệ với nước ngoài, đặc biệt các quốc gia phương Tây. 10
- 11. 3. Thời kì suy vong. Kết quả: "cảng thị thuyền buồm" Hội An suy thoái dần và mất hẳn, nhường vai trò lịch sử của mình cho " cảng thị cơ khí trẻ"ớ Ðà Nẵng. Hội An đã tránh khỏi được sự biến dạng của một thành thị trung - cận đại dưới tác động của đô thị hóa hiện đại để bảo tồn cho đến ngày nay một quần thể kiến trúc đô thị cổ hết sức độc đáo, tuyệt vời. 11
- 12. 3. Kiến trúc đô thị. 12
- 13. 3. Kiến trúc đô thị. Khu phố cổ: Khu phố cổ nằm trọn trong phường Minh An, diện tích khoảng 2 km², với những con đường ngắn và hẹp, có đoạn uốn lượn, chạy dọc ngang theo kiểu bàn cờ. Do địa hình khu phố nghiêng dần từ Bắc xuống Nam. Đường Trần Phú là con đường chính, nơi tập trung nhiều nhất những công trình kiến trúc quan trọng, cũng như những ngôi nhà cổ điển hình cho kiến trúc Hội An. 13
- 14. 3. Kiến trúc đô thị. Kiến trúc truyền thống: Kiểu nhà ở phổ biến nhất ở Hội An chính là những ngôi nhà phố một hoặc hai tầng với đặc trưng chiều ngang hẹp, chiều sâu rất dài tạo nên kiểu nhà hình ống. Những ngôi nhà ở Hội An hầu hết được làm theo dạng hai mái, đa số nhà chính và nhà phụ không chung một mái mà là hai nếp mái kế tiếp nhau. 14
- 15. Một ngôi hai tầng vách gỗ có ban công 15
- 16. 4. Văn hóa. 16
- 17. 1. Lễ hội. Ở Hội An hiện nay vẫn gìn giữ được nhiều loại hình lễ hội truyền thống: lễ hội đua ghe, lễ hội cầu ngư, … Từ năm 1998, chính quyền Hội An bắt đầu tổ chức Lễ hội đêm rằm phố cổ vào mỗi đêm 14 âm lịch hàng tháng. Ý tưởng độc đáo này xuất phát từ mong ước của kiến trúc sư Ba LanKazimier Kwiatkowski, người đã dành nhiều công sức trong việc bảo tồn hai di sản Hội An và Mỹ Sơn. 17
- 18. 2. Âm nhạc, diễn xướng, trò chơi dan gian. Bài chòi, một thú giải trí đậm nét văn hóa của người dân vùng duyên hải miền Trung, vẫn được diễn đều đặn vào mỗi tối 14 âm lịch hàng tháng. Một hình thức diễn xướng dân gian có vai trò rất lớn trong đời sống tinh thần, tâm linh của cư dân vùng biển Hội An là hát bả trạo. Trình tự một buổi biểu diễn bả trạo có kết cấu như một hoạt cảnh thể hiện những diễn biến từ khi con thuyền ra khơi cho đến khi cập bến an toàn. 18
- 19. 2. Âm nhạc, diễn xướng, trò chơi dan gian. Hội An còn có truyền thống về diễn tấu cổ nhạc trong các dịp hội hè, tang ma hiếu hỉ, và truyền thống ca nhạc tài tử với những nghệ nhân khá nổi tiếng. Những người dân ở đây cũng có rất nhiều thú chơi, tiêu biểu có thể kể đến trò bài tới, trò đỗ xăm hường, trò thai đề xổ cử nhân, trò thả thơ, trò chơi thư pháp. 19
- 20. 2. Âm nhạc, diễn xướng, trò chơi dan gian. Kết luận: hình thức diễn xướng, trò chơi dân gian ở Hội An kết tinh từ quá trình lao động của cư dân địa phương, ngày nay vẫn được gìn giữ và là một phần quan trọng trong đời sống tinh thần nơi đây. Những 20
- 21. 2. Ẩm thực. Với vị trí vùng cửa sông ven biển, nơi gặp nhau của các tuyến giao thông đường thủy và cũng là nơi hội tụ về kinh tế, văn hóa liên tục trong nhiều thế kỷ, Hội An có được một nền ẩm thực đa dạng và mang những sắc thái riêng biệt. 21
- 22. Cao lầu, món ăn nổi tiếng ở Hội An • Nguồn gốc món ăn, cùng như cái tên Cao lầu, ngày nay rất khó xác định. • Trước đây ở Hội An có các tiệm cao lầu ông Cảnh, Năm Cơ rất nổi tiếng, từng đi vào câu ca dao: Hội An có Hạ Uy Di. Chùa Cầu, Âm Bổn, cao lầu Năm Cơ. 22
- 23. 5. Các địa điểm nổi tiếng của Hội An. 23
- 24. Chùa cầu hay còn gọi là cầu Nhật Bản. Dài khoảng 18m, Cầu Nhật Bản có một kiến trúc khá độc đáo, kiểu thượng gia hạ kiều, tức trên là nhà dưới là cầu. Nhà cổ Quân Thắng, là một trong những nhà cổ được đánh giá là đẹp nhất Hội An hiện nay, có niên đại hơn 150 năm Miếu quan công
Editor's Notes
- Animated mountain picture grows into view and shrinks(Advanced)Tip:This slide includes three small pictures and one large version of the top small picture. The small pictures are 1.88” high and 2.5” wide. The large picture is 7.5” high and 10” wide (the dimensions of the slide). Before following the procedures below, size each of the three pictures you will insert into the slide to 7.5” high by 10” wide. You will also need to use drawing guides to position your pictures on the slide. To display and set the drawing guides, do the following:On the Home tab, in the Slides group, click Layout, and then clickBlank. Right-click the slide background area, and then click Grid and Guides.In the Grid and Guides dialog box, underGuidesettings, select Display drawing guides on screen. (Note: One horizontal and one vertical guide will display on the slide at 0.00, the default position. As you drag the guides, the cursor will display the new position.) On the slide, do the following:Press and hold CTRL, select the horizontal guide, and then drag it up to the 2.17 position.Press and hold CTRL, select the horizontal guide, and then drag it down to the 2.17 position.Press and hold CTRL, select the vertical guide, and then drag it right to the 3.50 position.Press and hold CTRL, select the vertical guide, and then drag it left to the 2.50 position.To reproduce the shape effects on this slide, do the following:On the Home tab, in the Drawing group, click Shapes, and then under Rectangles click Snip Diagonal Corner Rectangle (fifth option from the left).On the Home tab, in the Drawing group, click the arrow next to Shape Outline, and then click No Outline.On the Home tab, in the Drawing group, click the arrow next to Shape Fill, point to Gradient, and then click MoreGradients. In the Format Shape dialog box, in the left pane, click Fill, select Gradient fill in the Fill pane, and then do the following:In the Type list, select Linear.Click the button next to Direction, and then click Linear Right(first row, fourth option from the left). Under Gradient stops, click Add gradient stops or Remove gradient stops until two stops appear in the slider.Also under Gradient stops, customize the gradient stops as follows:Select the first stop from the leftin the slider, and then do the following: In the Position box, enter 0%.Click the button next to Color, and then under Theme Colors click Black, Text 1 (first row, second option from the left). In the Transparency box, enter 51%. Select the second stop from the leftin the slider, and then do the following: In the Position box, enter 100%.Click the button next to Color, and then under Theme Colors click Black, Text 1 (first row, second option from the left). In the Transparency box, enter 85%. Under Drawing Tools, on the Format tab, in the Size group, do the following:In the Shape Height box, enter 1.5”.In the Shape Width box, enter 8.42”.Select the rectangle. On the Home tab, in the Clipboard group, click the arrow next to Copy, and then click Duplicate. Repeat this process one more time for a total of three rectangles.Drag the first rectangle and center it vertically on the top horizontal drawing guide (2.17).Drag the second rectangle and center it vertically on the middle horizontal drawing guide (0.00).Drag the third rectangle and center it vertically on the bottom horizontal drawing guide (2.17).Press and hold CTRL, and then select all three rectangles. On the Home tab, in the Drawing group, click Arrange, point to Align, and then do the following:Click Alignto Slide.Click Align Center.To reproduce the picture effects on this slide, do the following:On the Insert tab, in the Images group, click Picture. In the Insert Picture dialog box, select a picture and then click Insert.On the slide, select the picture.UnderPicture Tools, on the Format tab, in the bottom right corner of the Size group, click the Size and Position dialog box launcher. In the Format Picture dialog box, on the Size tab, under Scale, clear the Lock aspect ratio box, and then under Size and rotate, do the following:In the Height box, enter 1.88”. In the Width box, enter 2.5”.UnderPicture Tools, on the Format tab, in the Picture Styles group, click Picture Border, and then do the following:Under Theme Colors click Dark Blue, Text 2, Darker 25% (fifth row, fourth option from the left). Point to Weight, and then click 1 ½ pt.On the slide, drag the picture until it is centered at the intersection of the top horizontal drawing guide (2.17) and the left vertical drawing guide (2.50).Select the picture. On the Home tab, in the Clipboard group, click the arrow next to Copy, and then click Duplicate. Right-click the second picture, and then select ChangePicture. In the Insert Picture dialog box, select a picture and then click Insert.On the slide, drag the second picture until it is centered at the intersection of the center horizontal drawing guide (0.00) and the left vertical drawing guide (2.50).Select the second picture. On the Home tab, in the Clipboard group, click the arrow under Paste, and then click Duplicate. Right-click the third picture, and then select ChangePicture. In the Insert Picture dialog box, select a picture and then click Insert.On the slide, drag the third picture until it is centered at the intersection of the bottom horizontal drawing guide (2.17) and the left vertical drawing guide (2.50).To reproduce the text effects on this slide, do the following:On the Insert tab, in the Text group, click TextBox. On the slide, drag to draw a text box.Type the text you want to appear in the text box, and then select the text. Format the text in the textbox using the following steps:On the Home tab, in the Font group, choose the Calibri font and a font size of 18.Click the arrow next to Font Color, and then under Theme Colors click White, Background 1 (first row, first option from the left).In the Paragraph group, click Align Text Left.Select the text box, and then drag the it to the right of the first picture, above the top horizontal drawing guide (2.17). Select the text box. On the Home tab, in the Clipboard group, click the arrow next to Copy, and then click Duplicate. Click in the second text box, and then type text for the second picture caption.Select the second text box, and then drag the it to the right of the second picture, above the center horizontal drawing guide (0.00). Select the second text box. On the Home tab, in the Clipboard group, click the arrow under Paste, and then click Duplicate. Click in the third text box, and then type for the third picture caption.Select the third text box, and then drag the it to the right of the third picture, above the bottom horizontal drawing guide (2.17).To reproduce the animation effects on this slide, do the following:On the Insert tab, in the Illustrations group, click Picture. In the Insert Picture dialog box, select the 7.5” x 10” version of the picture that fills the top small rectangle on the slide, and then click Insert. On the slide, select the picture. On the Animations tab, in the AdvancedAnimation group, click AddAnimation, and then click More Exit Effects. In the Add Exit Effect dialog box, under Basic, click Disappear, and then click OK.On the Animations tab, in the Timing group, in the Start list, select After Previous.On the slide, select the picture. On the Animations tab, in the AdvancedAnimation group, click AddAnimation, and then click More Emphasis Effects. In the Add EmphasisEffect dialog box, under Basic, click Grow/Shrink, and then click OK.On the Animations tab, in the Timing group, in the Start list, select After Previous.On the Animations tab, in the Animation group, click EffectOptions, and then, under Amount, click Tiny.On the Animations tab, in the Timing group, in the Duration box, enter 0.01. On the slide, select the picture. On the Animations tab, in the AdvancedAnimation group, click AddAnimation, and then click More Entrance Effects. In the Add Exit Effect dialog box, under Basic, click Appear, and then click OK.On the Animations tab, in the Timing group, in the Start list, select On click.On the slide, select the large picture.On the Animations tab, in the AdvancedAnimation group, click AddAnimation, and then click More Emphasis Effects. In the Add Exit Effect dialog box, under Basic, click Grow/Shrink, and then click OK.On the Animations tab, in the Timing group, in the Start list, select With Previous.On the Animations tab, in the Timing group, in the Duration box, enter 2. On the Animations tab, in the Animation group, click Effect Options, and then click Huge.On the slide, select the large picture.On the Animations tab, in the AdvancedAnimation group, click AddAnimation, and then click More Motion Paths. In the Add Motion Path dialog box, under Lines and Curves, click Up, and then click OK.On the Animations tab, in the Timing group, in the Start list, select With Previous.On the Animations tab, in the Timing group, in the Duration box, enter 2. On the slide, selectthe upmotion path. Point to the endpoint (red arrow) until the cursor becomes a two-headed arrow. Drag the endpoint to the intersection of the top horizontal drawing guide (2.17) and the left vertical drawing guide (2.50), at the center of the first small picture. Right-click the up motion path, and then click Reverse Path Direction. On the Animations tab, in the Animation group, click Effect Options, and then click Locked.On the slide, select the large picture.On the Animations tab, in the AdvancedAnimation group, click AddAnimation, and then click More Emphasis Effects. In the Add Emphasis Effect dialog box, under Basic, click Grow/Shrink, and then click OK.On the Animations tab, in the Timing group, in the Start list, select On Click.On the Animations tab, in the Timing group, in the Duration box, enter 2. On the Animations tab, in the Animation group, click Effect Options, and then click Tiny.On the slide, select the large picture.On the Animations tab, in the AdvancedAnimation group, click AddAnimation, and then click More Motion Paths. In the Add Motion Path dialog box, under Lines and Curves, click Up, and then click OK.On the Animations tab, in the Timing group, in the Start list, select With Previous.On the Animations tab, in the Timing group, in the Duration box, enter 2. On the slide, selectthe upmotion path. Point to the endpoint (red arrow) until the cursor becomes a two-headed arrow. Drag the endpoint to the intersection of the top horizontal drawing guide (2.17) and the left vertical drawing guide (2.50), at the center of the first small picture.On the Animations tab, in the Animation group, click Effect Options, and then click Locked.On the slide, select the large picture.On the Animations tab, in the AdvancedAnimation group, click AddAnimation, and then click More Exit Effects. In the Add Exit Effect dialog box, under Basic, click Disappear, and then click OK.On the Animations tab, in the Timing group, in the Start list, select After Previous.On the View tab, in the Show group, clear the Guides checkbox.To reproduce the background effects on this slide, do the following:On the Design tab, in the bottom right corner of the Background group, click theFormat Background dialog box launcher. In the Format Background dialog box, click Fill in the left pane, select Gradient fill in the Fill pane, and then do the following:In the Type list, select Linear.In the Direction list, click Linear Up (second row, second option from the left).Under Gradient stops, click Add gradient stops or Remove gradient stops until three stops appear in the slider.Also under Gradient stops, customize the gradient stops as follows:Select the first stop from the leftin the slider, and then do the following: In the Position box, enter 0%.Click the button next to Color, and then under Theme Colors click Dark Blue, Text 2, Darker 50% (sixth row, fourth option from the left). In the Transparency box, enter 0%. Select the second stop from the leftin the slider, and then do the following: In the Position box, enter 50%.Click the button next to Color, and then under Theme Colors click Dark Blue, Text 2, Lighter 40%(fourth row, fourth option from the left). In the Transparency box, enter 0%. Select the third stop from the leftin the slider, and then do the following: In the Position box, enter 100%.Click the button next to Color, and then under Theme Colors click Dark Blue, Text 2, Darker 25% (fifth row, fourth option from the left). In the Transparency box, enter 0%.