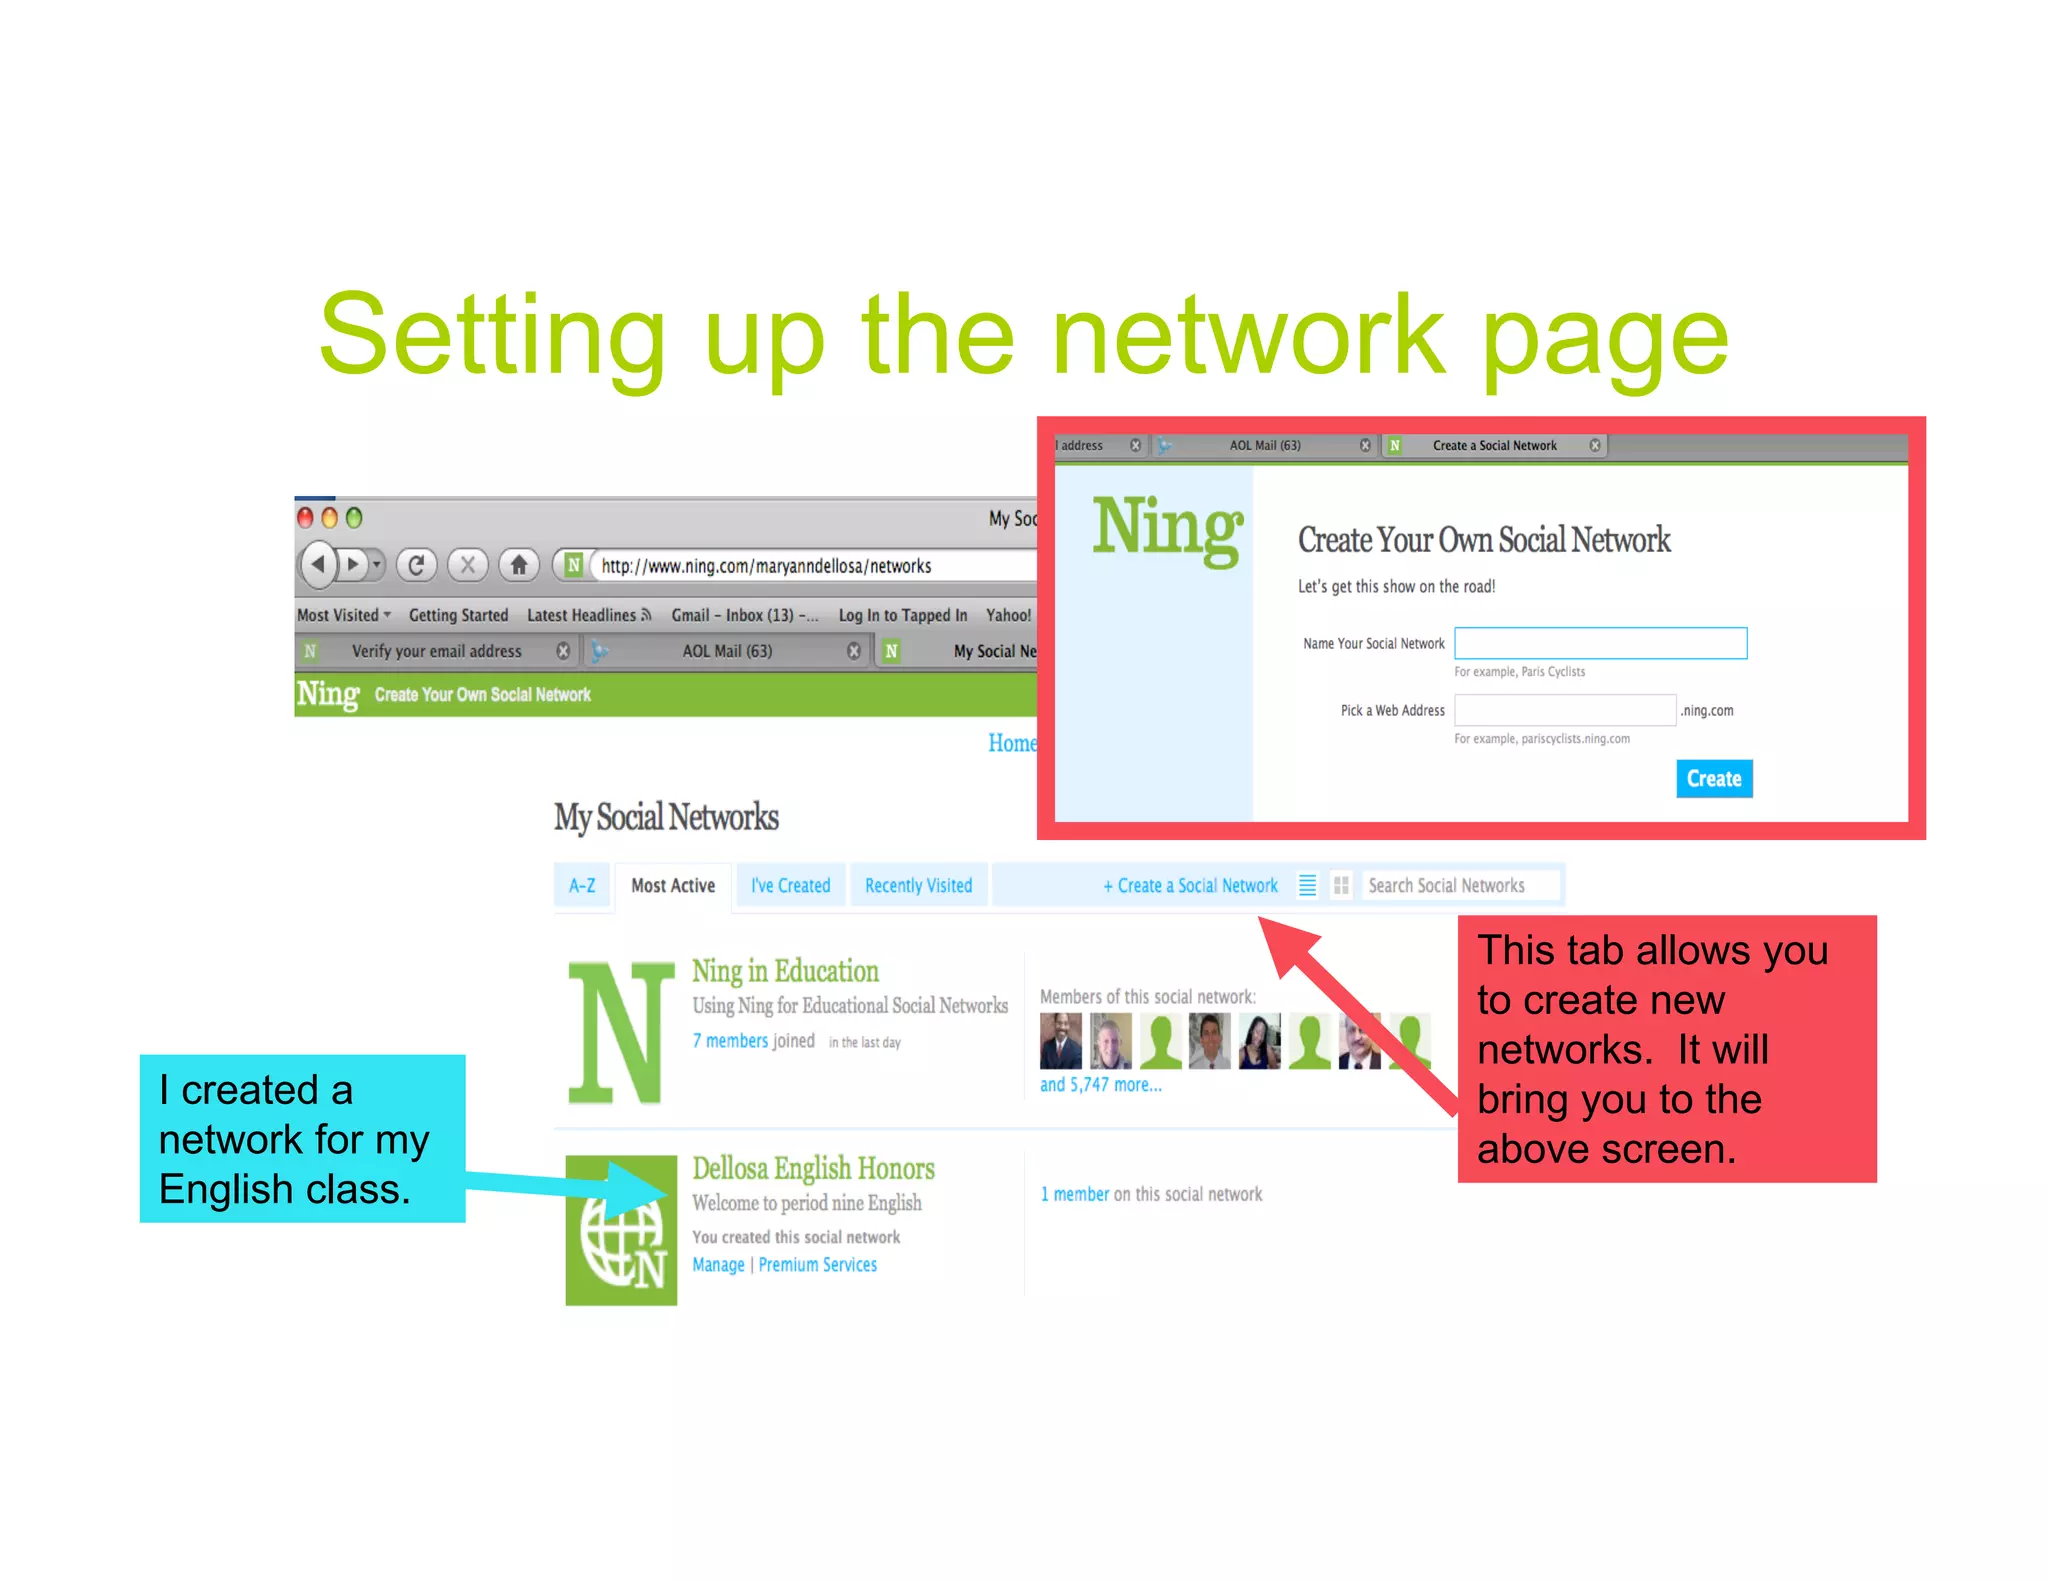
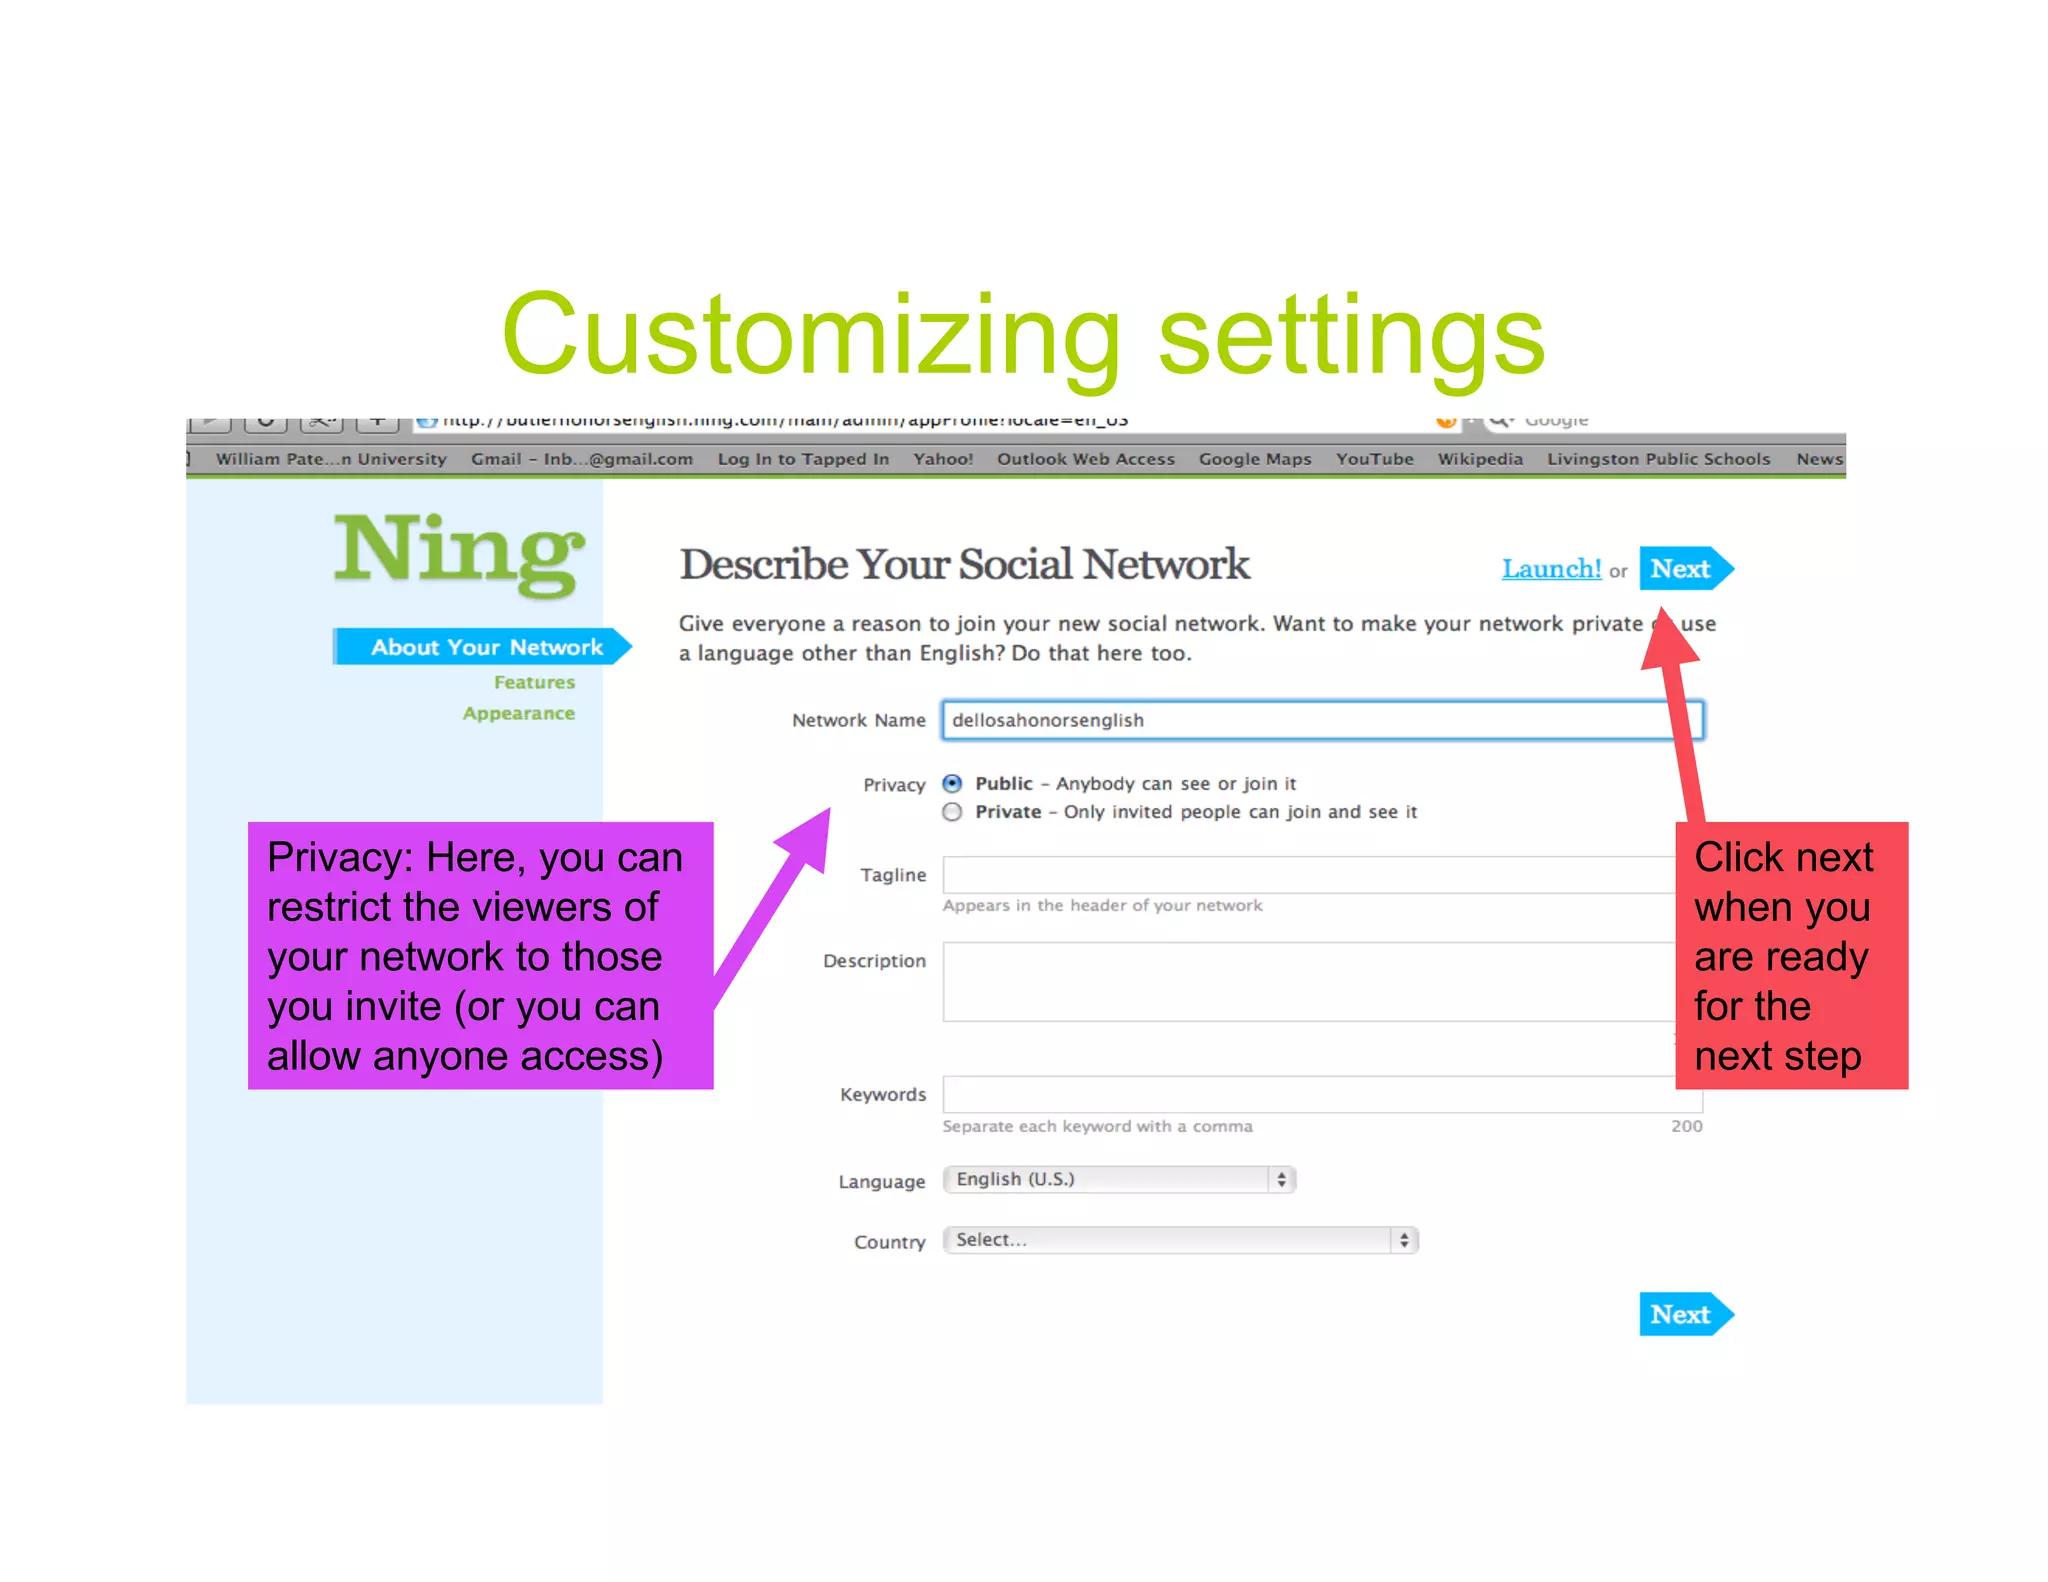
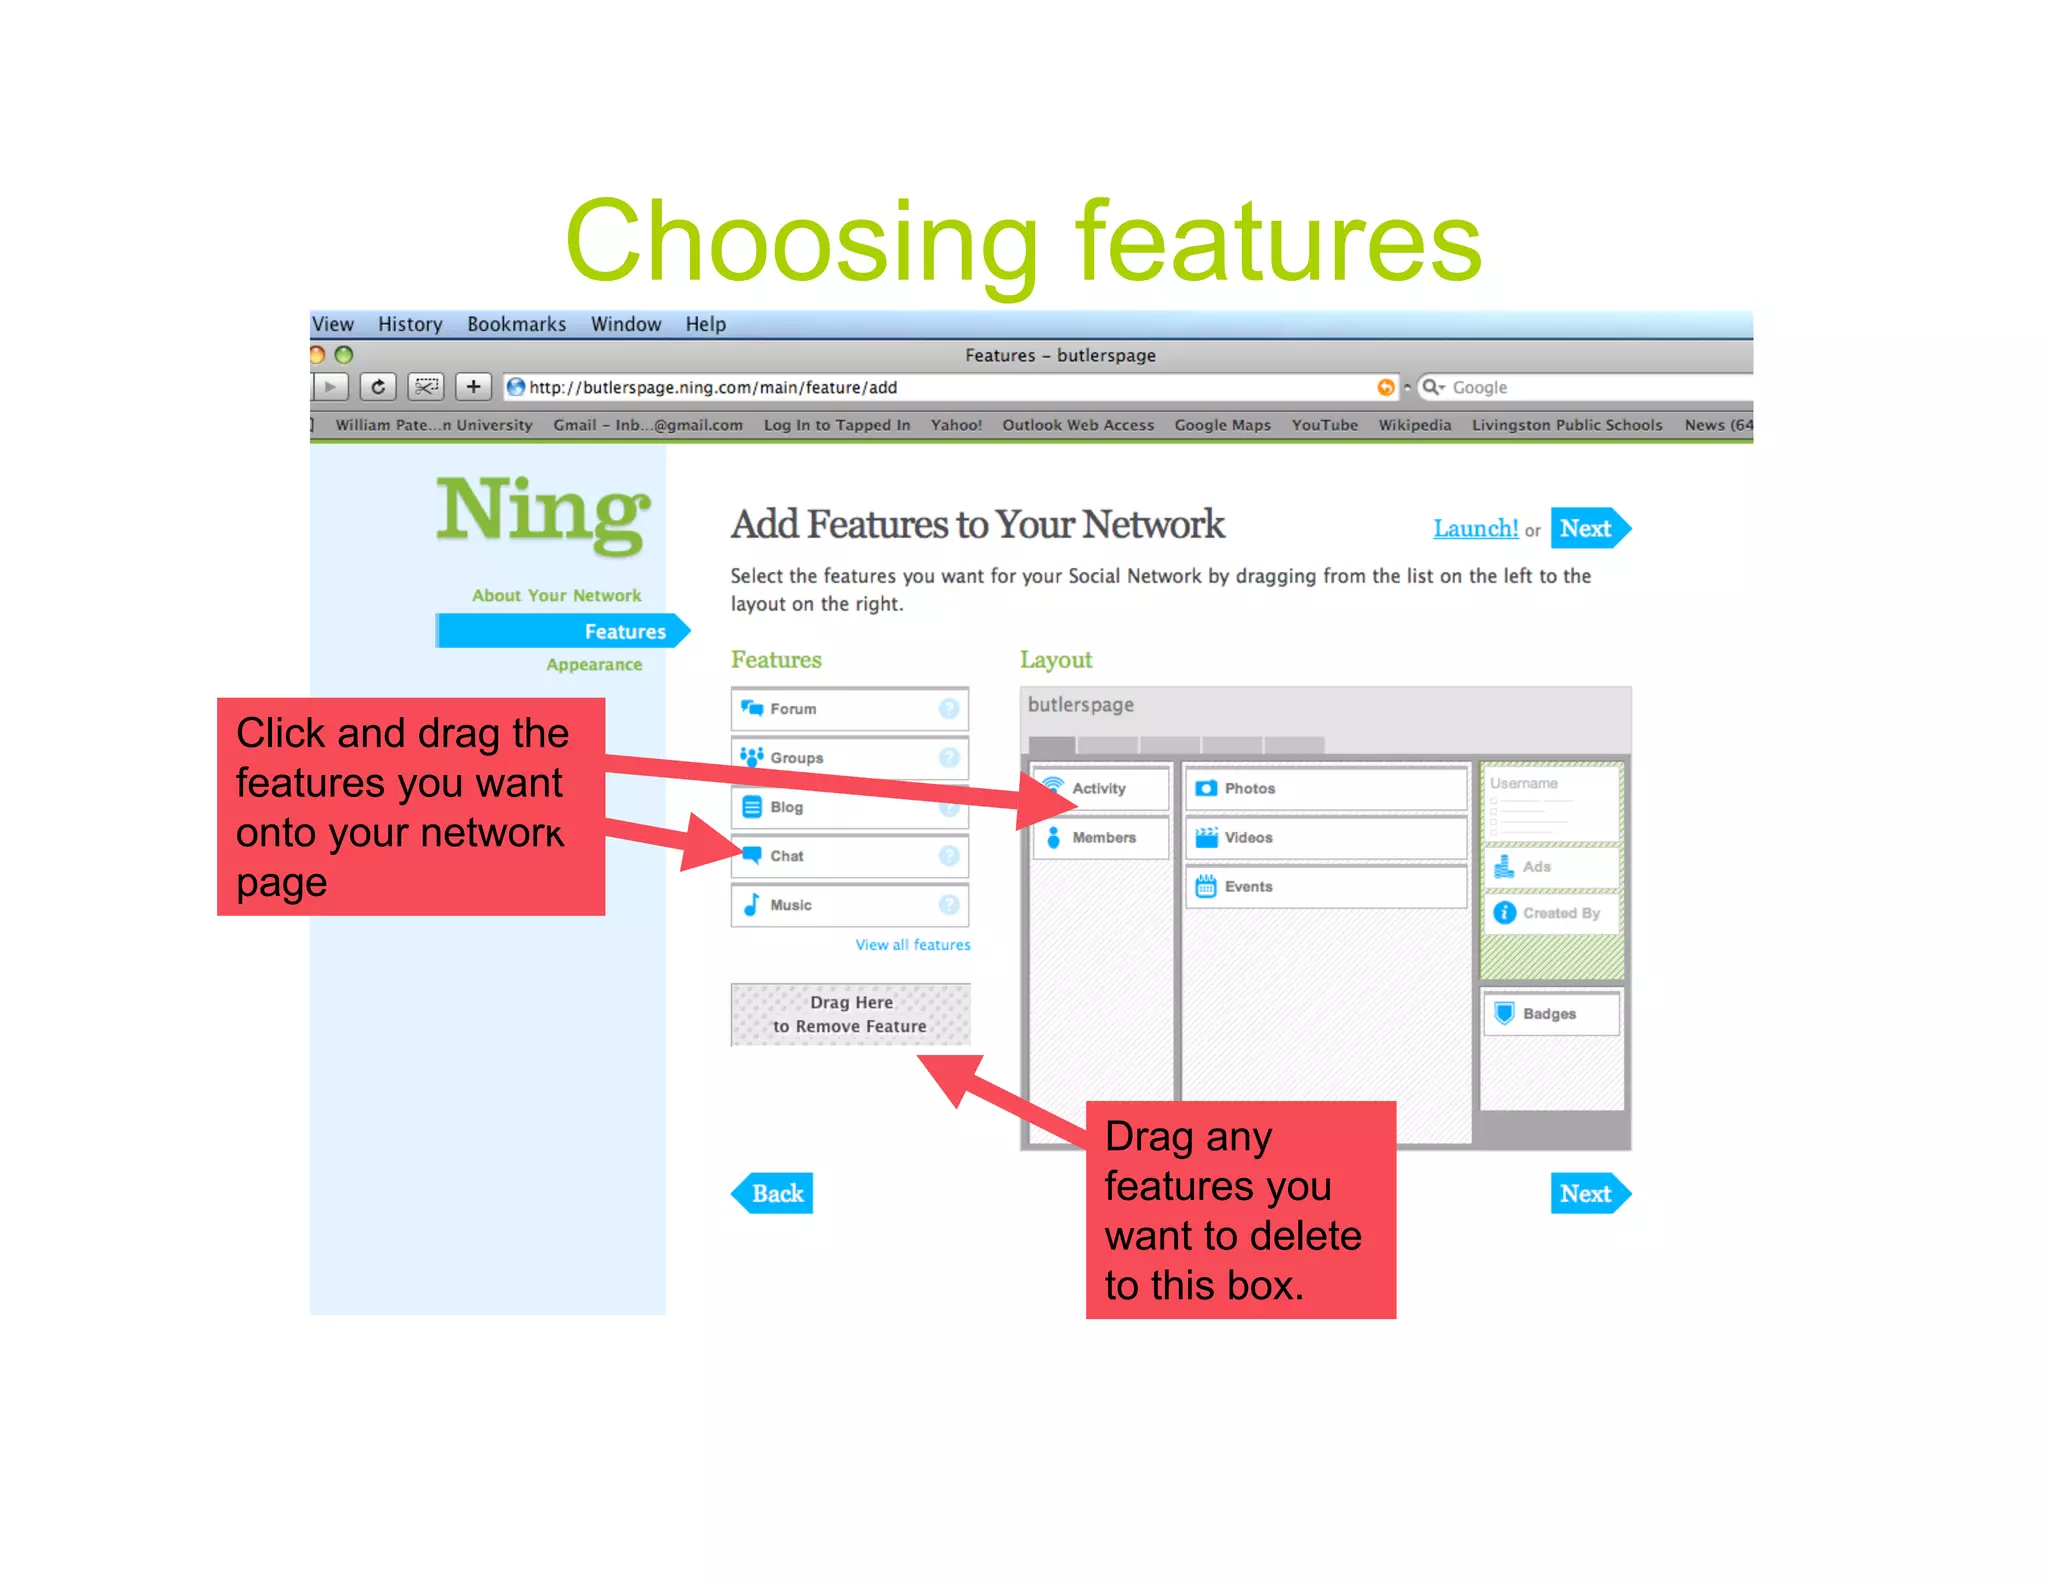
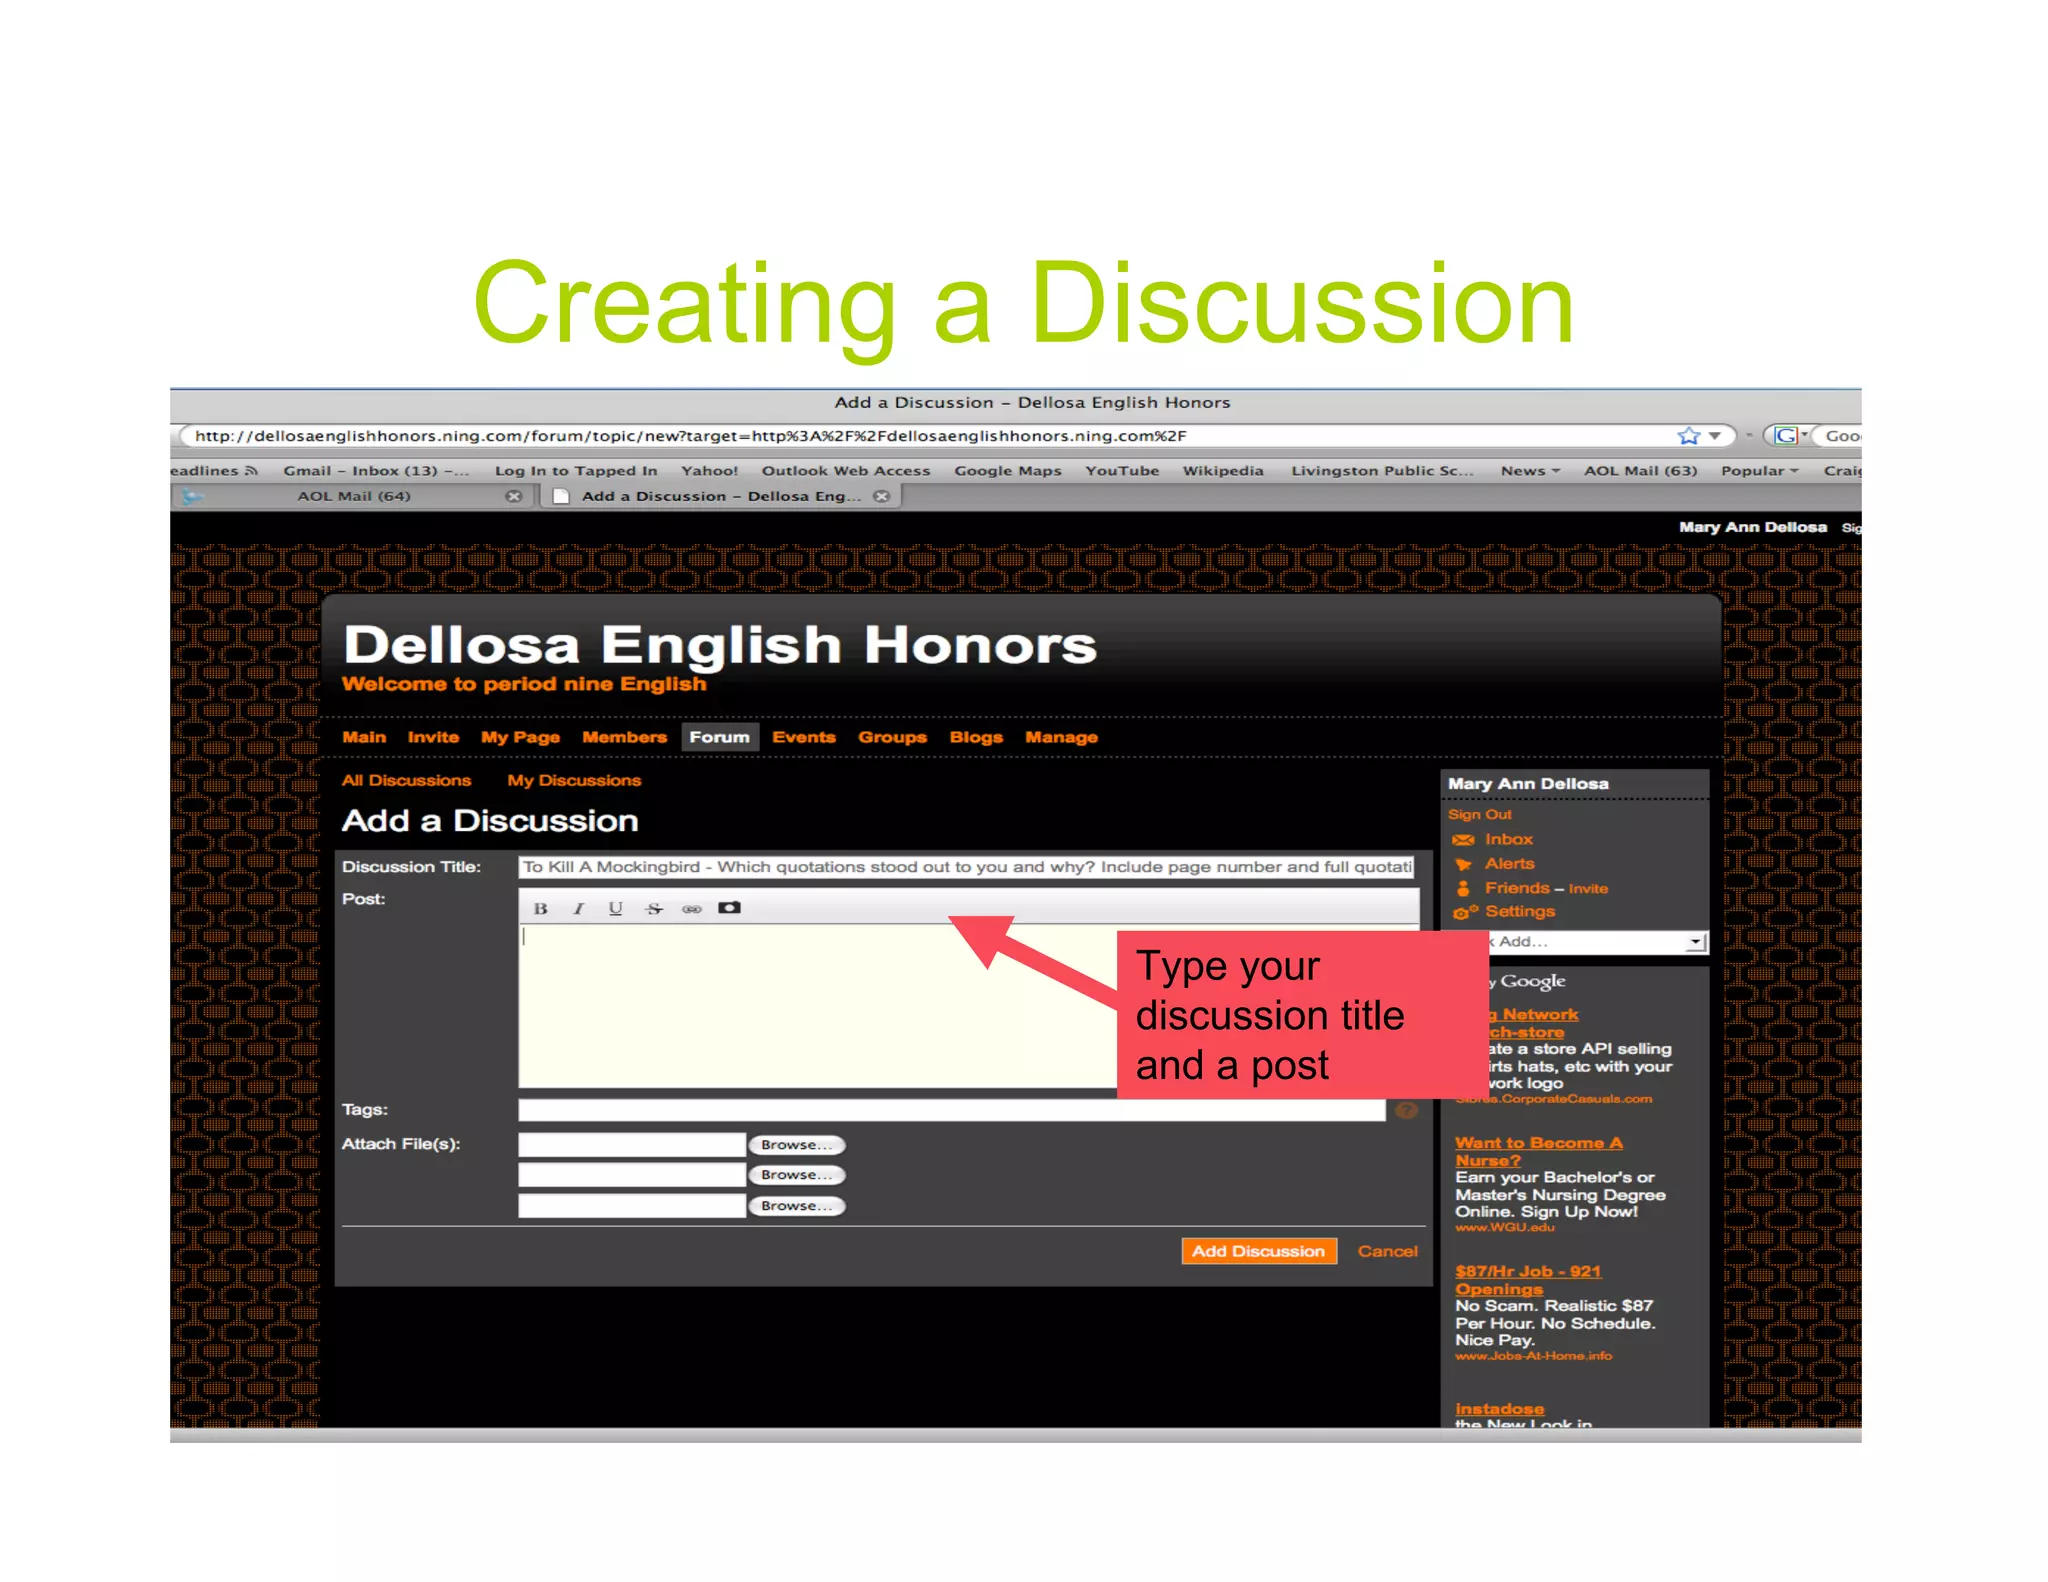
2. Using this tutorial
Red Boxes and arrows
The red boxes will give instructions for you to follow to the next slide.
Arrows will help you find places on the website.
Blue boxes and arrows
Blue boxes will point out other neat features on the screen that you
can explore. However, these instructions, will not lead to the next
slide.
Purple boxes and arrows
Purple boxes will also point out additional features on the page.
3. Introductory screen to create network
Step 1: Join now
(if you are a new user)
- sign in (if you already
have an account)
4. Create User Name
Complete the
form to create
your Ning
account. Ning
will send an
e-mail to your
address to
confirm your
membership.
5. Your Home Page These
commands
bring you to
various page
options. Click
On this profile to
sign in update your
page, status.
you will
see You can create
updates a network for a
for the class you are
various teaching, a
social study group, a
network book club, your
s you daughter’s
have brownie troop,
created etc.
or
joined.
6. Updating your profile
and creating a social network
Click the social
network tab to
get to the social
network screen
I updated my
status here.
7. Setting up the network page
This tab allows you
to create new
networks. It will
I created a bring you to the
network for my above screen.
English class.
8. Customizing settings
Privacy: Here, you can Click next
restrict the viewers of when you
your network to those are ready
you invite (or you can for the
allow anyone access) next step
9. Choosing features
Click and drag the
features you want
onto your network
page
Drag any
features you
want to delete
to this box.
13. Your network page will be updated
with changes and additions
The new discussion
topic appears under
“latest activity” as well
as in the “Forum” area.
14. Explore additional features
Add more text to
describe your page
Invite additional members to view
and participate in your page
Send
messages
to your
contacts
Create a
blog
15. Ideas for Using Ning
• Reading Circles- teachers could assign a topic such as “coming
of age” and break students into small groups. Each group can
read a different work and discuss on this site via the group tool.
All students could post to specific topics via the forum tool.
• Lab reports- Students could discuss scientific findings and ask
questions of their classmates. Diagrams could be scanned and
posted as photos.
• Extra curricular clubs -Clubs could communicate events and
important messages to all members. The discussion forum
could be used to generate new ideas. Photos and videos could
be posted of recent events.
The possibilities are endless!