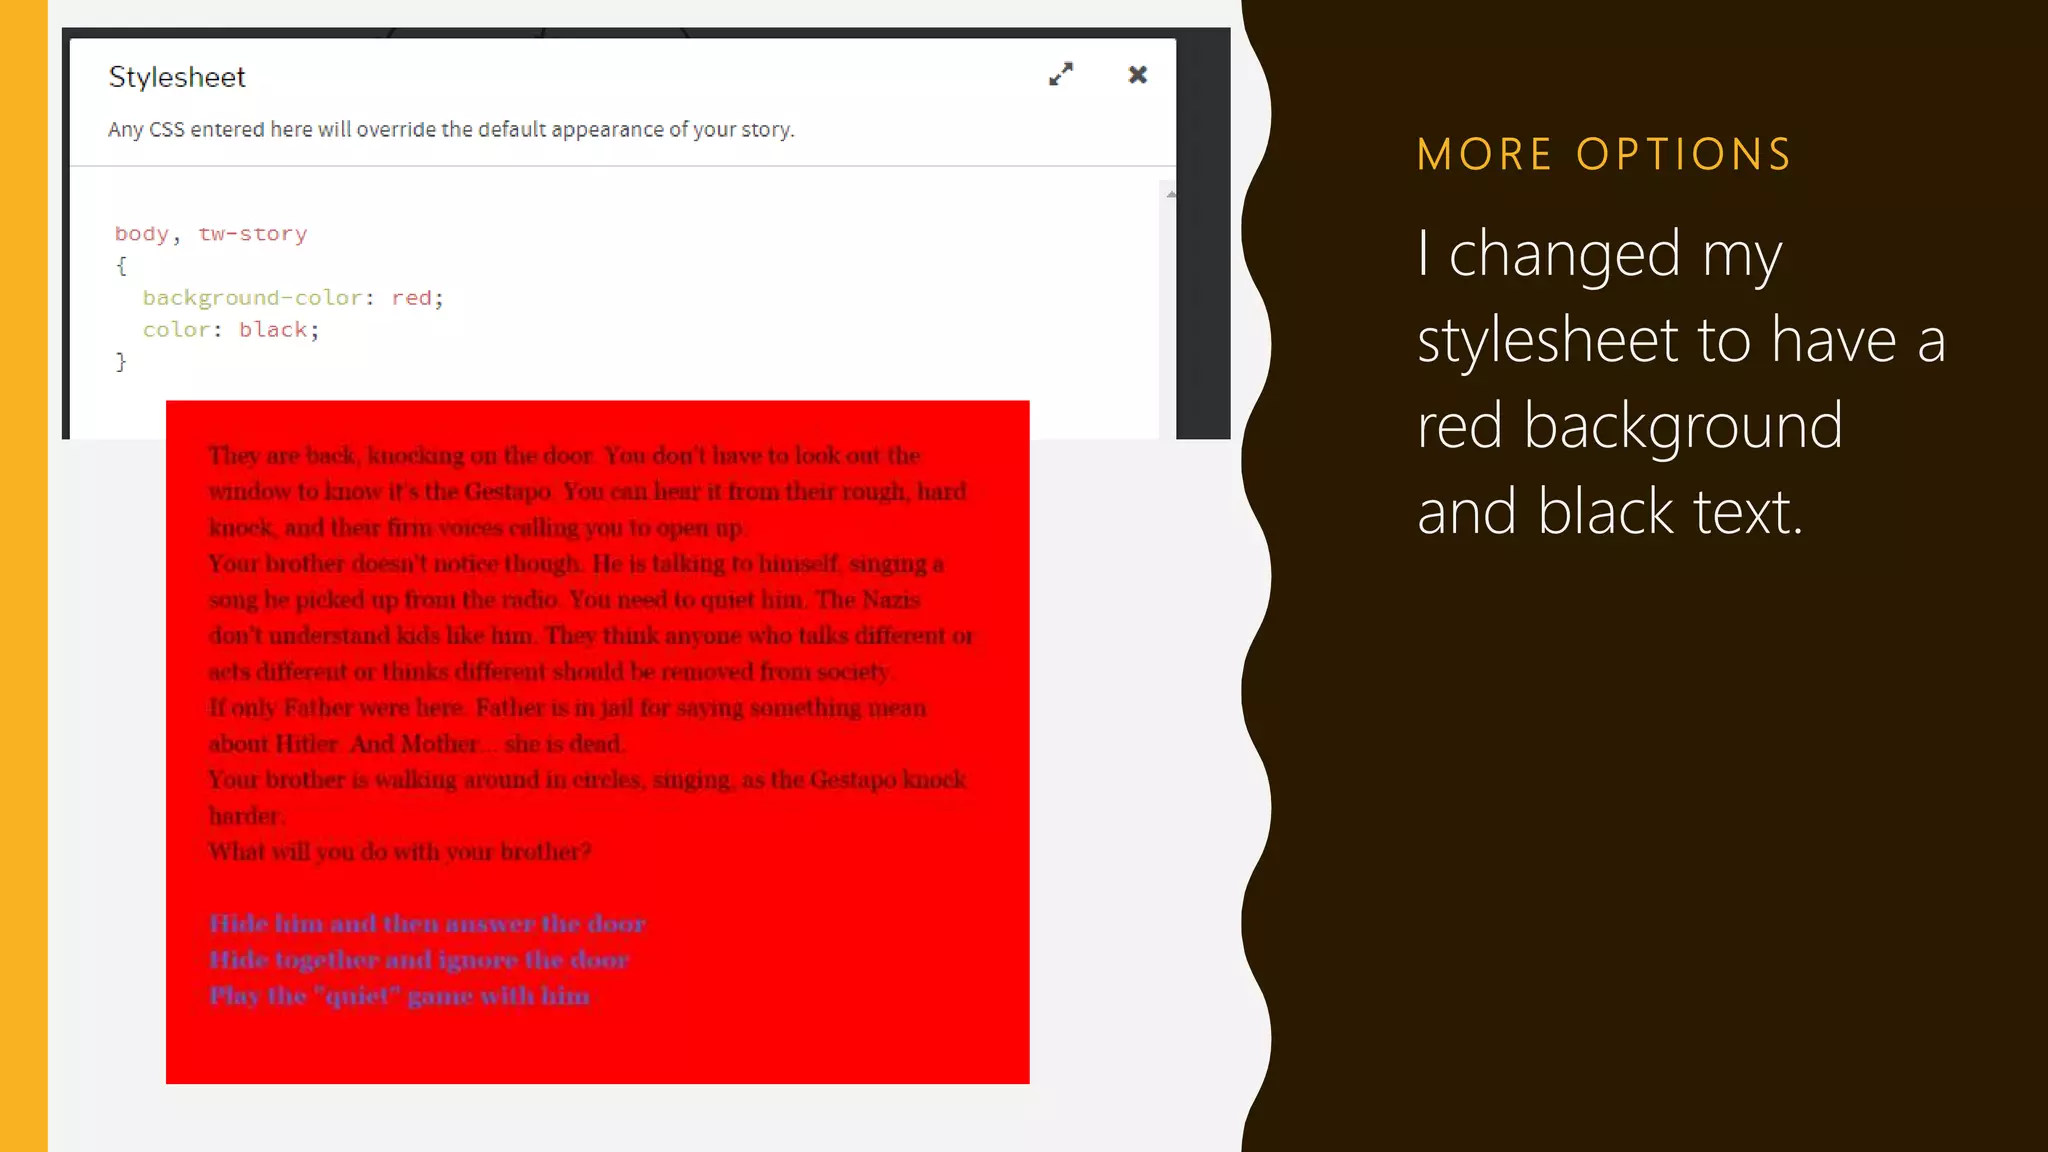
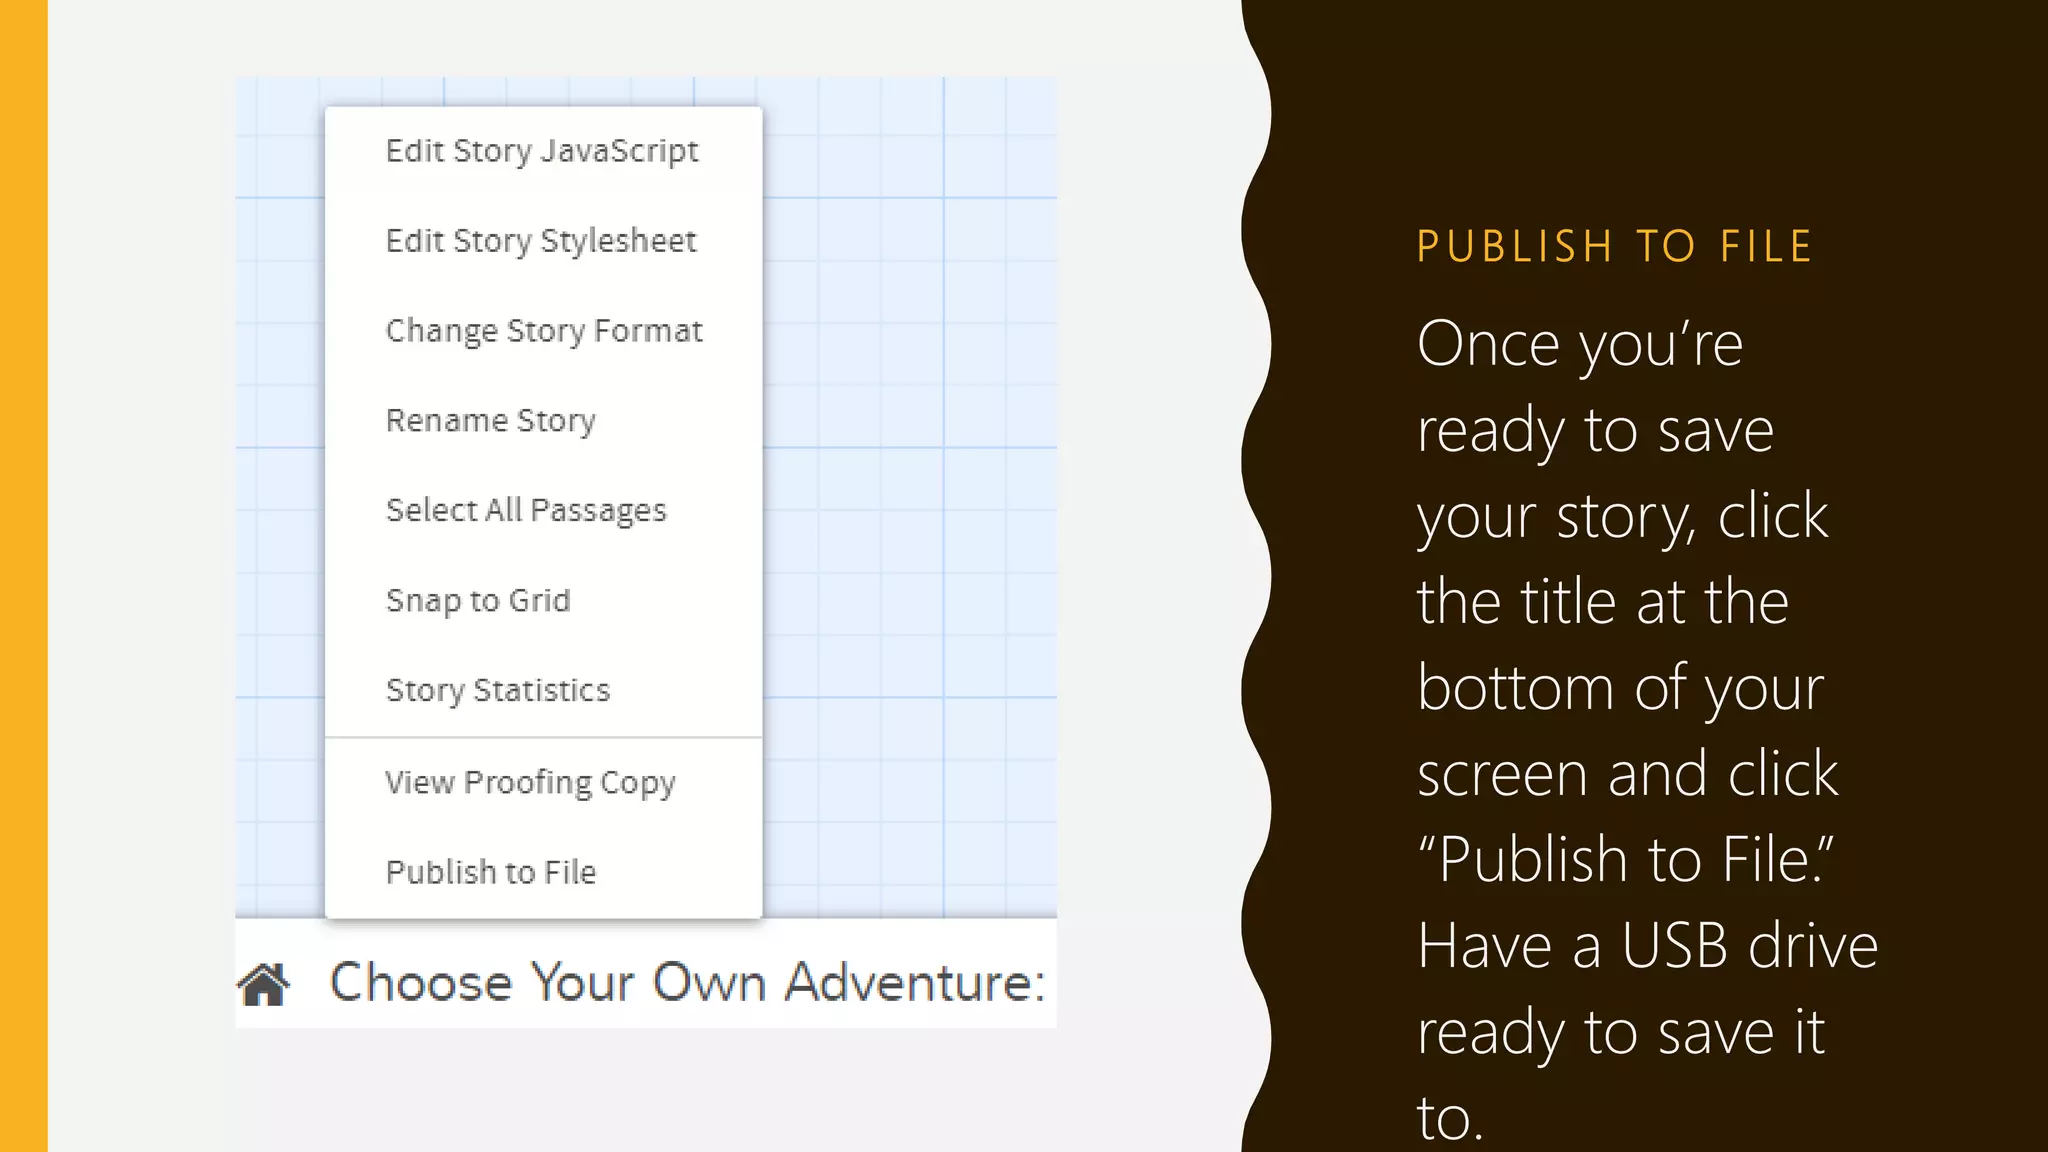
A N N M A R I E H U R TA D O
PA S A D E N A P U B L I C L I B R A R Y
O C T O B E R 1 3 , 2 0 1 8
W R I T I N G A
“ C H O O S E YO U R O W N A D V E N T U R E ”
S TO R Y I N
TWINE
T W I N E R Y. O R G
First, go to
Twinery.org,
and select
whether you’d
like to
download the
software or use
Twine online.
Click “+Story” to
start writing your
new story, or
“Import from File”
to use a story
you’ve already
been working on.
S T A R T A N E W
S T O R Y
Give your story
a name, then
click “+Add”.
The story’s
name can be
changed later if
you want.
W R I T E YO U R F I R S T
PA S S AG E .
Give it a title (your
reader won’t see
this). And give it a
scary or interesting
opening to grab
your reader’s
attention!
Now take a look at
the words in double
brackets…
L I N K I N G
The words you
put inside double
brackets will
instantly become
the title of a new
passage, linked to
this one!
L I N K I N G
Here is what your
reader will see.
Note that the
reader will not see
the brackets, or
your title, or your
tags. Those tools
are for your use as
you design your
story.
YO U R N E W S TO R Y
T R E E
Once you click
outside your first
passage window,
you’ll immediately
see you have a story
tree—your first
passage leads to
three other ones.
Double-click them to
start filling in the text
that the reader will
see for each option.
N E X T L E V E L
Once again, you
can put some
words in brackets
to that the reader
will be taken to
your next screen. In
my sample story, I
decided to make
all of the options
end in the reader
answering the
door.
T H E S TO R Y T R E E
G R O W S …
My story tree
now has three
tiers. You can see
that all three
options from the
first passage will
lead directly to
the passage titled
“answer the door.”
S TA R T I N G A W H O L E
N E W PA S S AG E
If you have an idea
for a passage but
aren’t sure where it
will go in the story
yet, you can click the
“+Passage” button
to create it anyway.
S TA R T I N G A W H O L E
N E W PA S S AG E
You can also search
your passages for
specific text (if you
have forgotten
where you wrote it)
and click “Test” or
“Play” to test your
story out.
A F U L LY G R O W N
S TO R Y T R E E
Now you can see
all the options
that have
developed. You
can click on each
passage and drag
it around so that
its connecting
lines are more
visible.
M O R E O P T I O N S
A stylesheet tells a website
how to display text with
fonts, colors, and
background color. You can
edit the look and feel of
your story by clicking on
your title and then clicking
“Edit stylesheet.” You need
to know CSS coding to make
it work.
For CSS tips, visit:
https://twinery.org/wiki/twin
e2:change_the_font_colors_o
r_appearance
M O R E O P T I O N S
I changed my
stylesheet to have a
red background
and black text.
P U B L I S H TO F I L E
Once you’re
ready to save
your story, click
the title at the
bottom of your
screen and click
“Publish to File.”
Have a USB drive
ready to save it
to.
M O R E CO D E S YO U
C A N U S E
Want to put words in
bold or italics? Want
to display special
characters? Here are
the body text tips,
which you can see
by opening a new
passage and
pressing CTRL and Z
together.
QUESTIONS?
C A L L O R E M A I L M E A N Y T I M E !
A N N M A R I E H U R TA D O, L I B R A R I A N
PA S A D E N A P U B L I C L I B R A R Y
6 2 6 - 7 4 4 - 4 7 2 5
A N H U R TA D O @ C I T Y O F PA S A D E N A . N E T

Writing a Choose Your Own Adventure Story in Twine

  • 1.
    A N NM A R I E H U R TA D O PA S A D E N A P U B L I C L I B R A R Y O C T O B E R 1 3 , 2 0 1 8 W R I T I N G A “ C H O O S E YO U R O W N A D V E N T U R E ” S TO R Y I N TWINE
  • 2.
    T W IN E R Y. O R G First, go to Twinery.org, and select whether you’d like to download the software or use Twine online.
  • 3.
    Click “+Story” to startwriting your new story, or “Import from File” to use a story you’ve already been working on. S T A R T A N E W S T O R Y
  • 4.
    Give your story aname, then click “+Add”. The story’s name can be changed later if you want.
  • 5.
    W R IT E YO U R F I R S T PA S S AG E . Give it a title (your reader won’t see this). And give it a scary or interesting opening to grab your reader’s attention! Now take a look at the words in double brackets…
  • 6.
    L I NK I N G The words you put inside double brackets will instantly become the title of a new passage, linked to this one!
  • 7.
    L I NK I N G Here is what your reader will see. Note that the reader will not see the brackets, or your title, or your tags. Those tools are for your use as you design your story.
  • 8.
    YO U RN E W S TO R Y T R E E Once you click outside your first passage window, you’ll immediately see you have a story tree—your first passage leads to three other ones. Double-click them to start filling in the text that the reader will see for each option.
  • 9.
    N E XT L E V E L Once again, you can put some words in brackets to that the reader will be taken to your next screen. In my sample story, I decided to make all of the options end in the reader answering the door.
  • 10.
    T H ES TO R Y T R E E G R O W S … My story tree now has three tiers. You can see that all three options from the first passage will lead directly to the passage titled “answer the door.”
  • 11.
    S TA RT I N G A W H O L E N E W PA S S AG E If you have an idea for a passage but aren’t sure where it will go in the story yet, you can click the “+Passage” button to create it anyway.
  • 12.
    S TA RT I N G A W H O L E N E W PA S S AG E You can also search your passages for specific text (if you have forgotten where you wrote it) and click “Test” or “Play” to test your story out.
  • 13.
    A F UL LY G R O W N S TO R Y T R E E Now you can see all the options that have developed. You can click on each passage and drag it around so that its connecting lines are more visible.
  • 14.
    M O RE O P T I O N S A stylesheet tells a website how to display text with fonts, colors, and background color. You can edit the look and feel of your story by clicking on your title and then clicking “Edit stylesheet.” You need to know CSS coding to make it work. For CSS tips, visit: https://twinery.org/wiki/twin e2:change_the_font_colors_o r_appearance
  • 15.
    M O RE O P T I O N S I changed my stylesheet to have a red background and black text.
  • 16.
    P U BL I S H TO F I L E Once you’re ready to save your story, click the title at the bottom of your screen and click “Publish to File.” Have a USB drive ready to save it to.
  • 17.
    M O RE CO D E S YO U C A N U S E Want to put words in bold or italics? Want to display special characters? Here are the body text tips, which you can see by opening a new passage and pressing CTRL and Z together.
  • 18.
    QUESTIONS? C A LL O R E M A I L M E A N Y T I M E ! A N N M A R I E H U R TA D O, L I B R A R I A N PA S A D E N A P U B L I C L I B R A R Y 6 2 6 - 7 4 4 - 4 7 2 5 A N H U R TA D O @ C I T Y O F PA S A D E N A . N E T