NYT Product Discovery Activity Guide

(Last change, July 2: Removed as beyond most teams' scope Eyetracking Study, Clickstream Analysis, Usability Benchmarking; Added Live-Data Prototypes, Demand Validation Test, Wizard of Oz Tests) For our teams tasked with building products and features for The New York Times, we face a common challenge with many: how do we figure out what’s worth spending our time on? The answer seems straightforward: test your ideas with real customers, leveraging the expertise of your product, UX, and engineering talent. Figure out the smallest test that you can come up with to test a specific hypothesis, gather data and insights, and keep iterating on it until you know whether the problem is real and your solution will prove valuable, usable, and feasible. As part of our efforts to adopt such a data-driven, experimental approach to product development, we recently kicked off a product discovery pilot program. Small, cross-functional teams were paired with coaches and facilitators over a six week period to demonstrate how product discovery and Lean Startup techniques could work for real-world customer opportunities at The New York Times. One of the first things that we learned about the process from our participants was that they wanted a "toolkit" - something to help them figure out what they should be doing, asking or making to get as quickly as possible towards the validated learning, prototypes and user tests that would have the most impact. To help the facilitate the learning process for our dual-track Agile teams, the Product Architecture team here at The Times (Christine Yom, Jim Lamiell, Josh Turk, Priya Ollapally, and Al Ming) built a "Product Discovery Activity Guide" that rolled up activities, exercises, and testing techniques from all our favorite thought leaders. This included brainstorming exercises from Gamestorming and Innovation Games, testing techniques from traditional user research, and rapid test-and-learn tactics from Google Ventures, Eric Ries (The Lean Startup), Jeff Gothelf (Lean UX), Steve Blank (Customer Development) and our spirit guide, Marty Cagan (Inspired), among others. Our goal was to make it a tool not just for learning how to get started, but to be a living document for teams to share knowledge about the process itself. What techniques worked and didn't work? What tactics did they learn elsewhere that might be worth sharing with the rest of the company? We hope you find it useful, and whether you’d like to share with us what you’re doing with it, or you have suggestions (big or small) to improve it for future product generations, please let us know! (nyt.tech.productarchitecture@nytimes.com) Al Ming July 2015

Recommended
Recommended
More Related Content
What's hot
What's hot (20)
Viewers also liked
Viewers also liked (20)
Similar to NYT Product Discovery Activity Guide
Similar to NYT Product Discovery Activity Guide (20)
Recently uploaded
Recently uploaded (16)
NYT Product Discovery Activity Guide
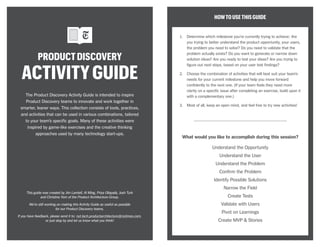
- 1. PRODUCTDISCOVERY ACTIVITYGUIDE HOWTOUSETHISGUIDE 1. Determine which milestone you’re currently trying to achieve: Are you trying to better understand the product opportunity, your users, the problem you need to solve? Do you need to validate that the problem actually exists? Do you want to generate or narrow down solution ideas? Are you ready to test your ideas? Are you trying to figure out next steps, based on your user test findings? 2. Choose the combination of activities that will best suit your team’s needs for your current milestone and help you move forward confidently to the next one. (If your team feels they need more clarity on a specific issue after completing an exercise, build upon it with a complementary one.) 3. Most of all, keep an open mind, and feel free to try new activities! What would you like to accomplish during this session? Understand the Opportunity Understand the User Understand the Problem Confirm the Problem Identify Possible Solutions Narrow the Field Create Tests Validate with Users Pivot on Learnings Create MVP & Stories The Product Discovery Activity Guide is intended to inspire Product Discovery teams to innovate and work together in smarter, leaner ways. This collection consists of tools, practices, and activities that can be used in various combinations, tailored to your team’s specific goals. Many of these activities were inspired by game-like exercises and the creative thinking approaches used by many technology start-ups. This guide was created by Jim Lamiell, Al Ming, Priya Ollapally, Josh Turk and Christine Yom of the Product Architecture Group. We’re still working on making this Activity Guide as useful as possible for our Product Discovery teams. If you have feedback, please send it to: nyt.tech.productarchitecture@nytimes.com, or just stop by and let us know what you think!
- 2. UNDERSTANDTHEOPPORTUNITY OpportunityAssessmentReview Review the Product Opportunity Assessment with the team and stakeholders to ensure that everyone understands the problem, the context, and how we will measure success. Review the Product Opportunity Assessment with the team and stakeholders to ensure everyone understands the problem, the context, and how you will measure success. It describes the problem to be solved, and usually includes a business justification. Its purpose is either to a) prevent the company from wasting time and money on poor opportunities, or b) understand what is required to succeed for those that are good opportunities. This review session is an opportunity to elaborate on any points that are unclear and need further detail. The team also validates that the prospective product or feature seems feasible from a technical or operational perspective. UNDERSTANDTHEOPPORTUNITY Instructions 1. Describe the session goals and the outcome of the session. 2. The team reviews each area of the Product Opportunity Assessment. 3. Everyone asks questions to create clarity on what you want to accomplish. 4. Document the questions. Who had the question? What was the question? What was the answer, if any? e.g. “Jane: What would this need from a recommendation team? A: Unknown at this time.” 5. Document observations, suggestions, or problems. Who said it? What was it (observation, suggestion, complaint, etc.)? Are any action items needed? Participants: Entire team Time: 1 hour+ Objective CC Image courtesy of denkwerk GmbH on Flickr
- 3. UNDERSTANDTHEOPPORTUNITY BusinessModelCanvas Visualize a new business model idea—or rethink your company’s current business model—to highlight key drivers and create a shared understanding. The mapping of an existing business model, including its strengths and weaknesses, is an essential starting point to improve your current model and/or develop new future models. This lightweight tool is helpful when starting a new business or creating a new product line to highlight key risks and frame your work. This is powerful for collaboratively visualizing a business model. Individuals can also use this to quickly sketch out a business idea. At its best, this exercise helps you develop strategic directions for the future by outlining new and/or improved business models. At the very least, it leads to a refined and shared understanding. UNDERSTANDTHEOPPORTUNITY Instructions Mapping business models works best when players work on a poster on the wall. You will need: • Large print of a Business Canvas Poster • Sticky notes in different colors • Flip chart markers • Camera to capture results There are several variations of the Business Model Canvas Poster. The one described here is the most basic one, which is the mapping of an existing business model, its assessment, and the formulation of improved or potential new business models. 1. Start by letting players describe the different customer segments your organization serves. Players should put up different color sticky notes on the Canvas Poster for each segment. A group of customers represents a distinct segment if they have distinct needs and you offer them distinct value propositions (e.g. a newspaper serves readers and advertisers), or if they require different channels, customer relationships, or revenue streams. 2. Players should map out the value propositions that your organization offers each customer segment, using same color sticky notes for value propositions and customer segments that go together. If a value proposition targets two different customer segments, use sticky note colors of both. 3. Then players map out the remaining building blocks of your business model with sticky notes. Always try to use the colors of the related customer segments. 4. When the the whole business model is mapped, players can start assessing its strengths and weaknesses by putting up green (strength) and red (weakness) sticky notes alongside the strong and weak elements. 5. Based on the visualization of your mapped out business model, players can now either try to improve the existing business model or generate new alternative business models. Ideally, players use one or several additional Business Model Canvas Posters to map out improved business models or new alternatives. Gamestorming.com, Strategyzer.com, Leanstack http://www.gamestorming.com/?s=business+model+canvas http://leanstack.com/ Participants: 1-6 Time: 15 min-2 days Objective CC Image courtesy of szwerink on Flickr
- 4. UNDERSTANDTHEOPPORTUNITY LightningDemos Take a look at how competitors’ products are solving similar problems. This exercise helps the team get a large amount of information on the table and quickly build understanding. During the exercise, everyone should be jotting down questions. Use the “how might we” format to capture opportunities that might be interesting to explore. For example, “How might we build trust?” or “How might we figure out the user’s style?” Often, these end up being extremely useful in next steps for the team. UNDERSTANDTHEOPPORTUNITY Instructions Look at competitors’ products. Try capping the discussion at 10 minutes to keep things moving and help everyone pay attention. It can also be helpful to look at non-competitive products that solve a similar kind of problem in a different market. Everyone should be jotting down questions on sticky notes. The “how might we” format can capture opportunities that might be interesting to explore. For example: “How might we build trust?” or “How might we figure out the user’s style?” (Source: Google Ventures) Google Ventures: http://www.gv.com/lib/the-product-design-sprint-understandday-1 Participants: Entire team Time: 10 minutes Objective CC Image courtesy of Bill Roehl on Flickr
- 5. UNDERSTANDTHEOPPORTUNITY ReviewIndustry&MacroResearch Know your markets, competitors, customer wants and needs, and what it takes to be competitive in your market. This exercise helps the team get a large amount of information on the table and quickly build understanding. During the exercise, everyone should be jotting down questions. Use the “how might we” format to capture opportunities that might be interesting to explore. For example, “How might we build trust?” or “How might we figure out the user’s style?” Often, these end up being extremely useful in next steps for the team. UNDERSTANDTHEOPPORTUNITY Instructions 1. To understand your market and target audience, look at both primary research from internal sources and secondary research from external sources, such as industry business publications and market reports. 2. If you have existing internal user research for your product, be sure to review it. If not, talk about whatever data you do know about your customers. 3. Also look at any analytics you have, such as data on feature usage, where customers drop off your site, and conversion rates. 4. Once you’ve gathered all relevant research, a mind-mapping exercise could help organize your research inventory by getting it down on paper, along with any notes you may have. Google Ventures, http://www.gv.com/lib/the-product-design-sprint-understandday-1 Participants: Each team member Time: 10 minutes Objective CC Image courtesy of UCL Institute of Education on Flickr
- 6. UNDERSTANDTHEUSER Proto-Personas Develop a set of quick, ad hoc personas that depict your customers (or those who are encountering this situation or problem). Proto-personas are a variant of the typical persona, which is usually heavily researched. Your team starts with assumptions about who is using your product or service and what is motivating them to do so, and then does research to validate them. You want to capture everyone’s assumptions and encapsulate the organization’s beliefs. Proto-personas provide a starting point for evaluating ideas and early design hypotheses. They help reinforce corporate awareness of the customer’s point of view to ensure it’s included in strategic planning. Coming to a group consensus on the personas helps everyone focus on the customers and empathize with them. UNDERSTANDTHEUSER Instructions Persona Format 1. Sketch proto-personas on paper, using a hand-drawn quadrant. 2. Top left box: Persona’s name and role, with a rough sketch of him/her 3. Top right box: Basic demographic information, with a focus on information that predicts a specific type of behavior 4. Bottom left box: User’s needs and frustrations with the current product or situation, the specific pain points your product is trying to solve, and/or the opportunity you’re trying to address 5. Bottom right box: Feature and solution ideas Persona Creation Process 1. Start with a group brainstorm. Team members offer their opinions on who the project should be targeting and how that would affect each potential user’s use of the product. 2. Once the brainstorming is complete, narrow down the ideas to an initial set of three or four personas you believe are most likely to be the target audience. 3. Try to differentiate the personas around needs and roles, rather than by demographic. Persona Validation Once your proto-personas are created and agreed upon, take them into the field to begin validating their accuracy. As you learn from your ongoing research, you’ll quickly find out how accurate your initial persona guesses are. This will inform you on how to adjust your target audience and persona, which should be revamped and rewritten as needed. http://www.jeffgothelf.com/blog/lean-ux-book/#sthash.7aXWU9Tr.PcpUM1Un.dpbs http://uxmag.com/articles/using-proto-personas-for-executive-alignment Participants: 3-10 Time: 1 hour Objective CC Image courtesy of Rob Enslin on Flickr
- 7. UNDERSTANDTHEUSER EmpathyMap Understand your customers within a given context by creating their profile based on what they think and feel, see and hear, and say and do. This exercise helps your group gain a deeper understanding of a stakeholder in your business ecosystem (a client, prospect, partner, etc.) within a given context, such as a buying decision or an experience using a product. The empathy map can be as simple or complex as you want to make it. If you have a decent understanding of the person and context you want to map, you should be able to make a rough empathy map quickly. If you don’t understand the stakeholder very well, this exercise can help identify gaps in understanding and illuminate the things you don’t yet know. UNDERSTANDTHEUSER Instructions The exercise can be as simple or complex as you want to make it. You should be able to make a rough empathy map quickly, if you have a decent understanding of the person and context you want to map. 1. Start by drawing a circle to represent the person. Give it a name and some identifying information, like a job title. It helps to think of a real person who roughly fits the profile, and keep them in mind as you proceed. In keeping with the idea of a “profile,” think of the circle as the profile of a person’s head and fill in some details. You might want to add eyes, mouth, nose, and maybe glasses or a hairstyle to differentiate the person from other profiles you might want to create. These details will help you project yourself into that person’s experience. 2. Determine a question you have for that stakeholder. What would you want to ask them or understand about a situation in their life? For example, if you want to understand a buying decision, you might ask “Why should I buy X?” 3. Divide the circle into sections that represent aspects of that person’s sensory experience. What are they thinking, feeling, saying, doing, hearing? Label the appropriate sections on the image. 4. Now it’s time for the “empathy” portion of the exercise. Try to project yourself into that person’s experience and the context you want to explore. Start filling in the diagram with real, tangible, sensory experiences. For example, when filling in the “hearing” section, think of what the person might hear and how they would hear it. In the “saying” section, write their thoughts as they would express them; don’t use your own words. The point is to truly understand and empathize with their situation so you can design a better product or service. 5. Check yourself: Ask others to review your map, make suggestions, and add details or context. The more a person can identify with the actual stakeholder, the better. Empathy Map poster template: http://www.slideshare.net/AdilsonJardim/empathy-map-poster-3201288 http://www.gamestorming.com/core-games/empathy-mapping/ Participants: 3-10 Time: 15–20 minutes Objective CC Image courtesy of Oliver Quinlan on Flickr
- 8. UNDERSTANDTHEUSER Pain-GainMap Capture your users’ pains and gains to understand what motivates and influences their decisions. Many decisions often boil down to a person’s basic choices between benefit and harm. This exercise helps develop an understanding of your users’ motivations and decisions. By capturing how they perceive benefit and harm with regard to a certain context, your group may uncover the most relevant points to bring up in presenting to your organization or to influence users’ decisions. This key person may be the ultimate user of a product or may be the leader of an organization whose approval is sought. UNDERSTANDTHEUSER Instructions 1. Start by writing the key person’s name or creating a quick sketch of him on a wall. 2. Ask about this person’s pains first by prompting the group to step inside his mind and think and feel as he does. Capture the answers on one side of the person: • What does a bad day look like for him? • What is he afraid of? • What keeps him awake at night? • What is he responsible for? 3. What obstacles stand in his way? A person’s gains can be the inversion of the pain situation—or can go beyond. Capture these on the opposite side by asking: • What does this person want and aspire to? • How does he measure success? • Given the subject at hand, how could this person benefit? • What can we offer this person? 4. Summarize and prioritize the top pains and gains from the exercise. You can use them when developing presentations, value propositions, or any other instance where you are trying to influence a decision. http://www.gamestorming.com/games-for-design/pain-gain-map/ Participants: 3-10 Time: 10-15 minutes Objective CC Image courtesy of reway2007 on Flickr
- 9. UNDERSTANDTHEUSER ValuePropositionCanvas Map, think though, and discuss your value propositions and how they match your customers’ needs. This thinking and design tool helps you design Value Propositions that match your customers’ needs and aids them in solving their problems. The Value Proposition Canvas guides you to problem- solution fit in a more structured, thoughtful way. It captures core issues around customer problems and potential solutions. The Value Proposition Canvas is based on two blocks from the Business Model Canvas: the Value Proposition and the Customer Segment. This exercise sketches out both in more detail with a simple but powerful structure, which will allow for better strategic conversations and prepare you for testing both building blocks. UNDERSTANDTHEUSER Instructions 1. Before starting the canvas, sketch a profile of your target customers. First, determine what they are trying to accomplish. This could be tasks they are trying to perform and complete, problems they are trying to solve, or needs they are trying to satisfy. Next, describe any negative emotions, costs, and risks that they might experience before, during, and after getting the job done. Then describe the benefits they expect, desire, or would be surprised by, which include utility, social gains, positive emotions, and cost savings. 2. Once the team has completed the customer profile, begin creating the Value Proposition Canvas. Divide a flip-chart sheet of paper into three sections: Products & Services, Gain Creators, and Pain Relievers. See an example of the template: http://www.businessmodelgeneration.com/downloads/value_proposition_canvas.pdf 3. In the Products & Services section: List all the products and services your value proposition is built around. Which products and services do you offer that help your customer get either a functional, social, or emotional job done, or help him/her satisfy basic needs? Rank all products and services according to their importance to your customer—are they crucial or trivial? 4. In the Gain Creators section: Describe how your products and services create customer gains. How do they create benefits your customer expects, desires or would be surprised by, including functional utility, social gains, positive emotions, and cost savings? 5. In the Pain Relievers section: Describe how your products and services alleviate customer pains. How do they eliminate or reduce negative emotions, undesired costs and situations, and risks your customer experiences or could experience before, during, and after getting the job done? 6. You can use the Value Proposition Canvas like the Business Model Canvas: plot it as a poster, post it up on the wall, then use sticky notes to start sketching. Strategyzer.com, Strategyzer AG http://businessmodelalchemist.com/blog/2012/08/achieve-product-market-fit-with-our-brand-new-value- proposition-designer.html http://businessmodelgeneration.com/canvas/vpc?_ga=1.216540690.564012849.1430337420 Participants: 3-10 Time: 45 min–1.5 hours Objective CC Image courtesy of Epicantus on Flickr
- 10. UNDERSTANDTHEUSER CustomerJourneyMap Illustrate the steps your customers go through when engaging with your product or the company, and how they feel at various points along the way. The customer journey map is an oriented graph that describes the journey of a user by representing the different touchpoints that characterize their step-by-step interaction with your product or company. The journey map is meant to engender a shared reference of the experience and consensus of both the good and the bad parts of it. It is also a means to something actionable—ideally something to design around—and not an end in and of itself. Your map should feel like a catalyst, not a conclusion. UNDERSTANDTHEUSER Instructions Your team will be describing a possible scenario or mapping the experience for an existing product or service. 1. You will need a blank journey worksheet that shows the different stages of the customer journey (this is a rough timeline). 2. Choose a persona or create a new proto-persona from scratch. 3. Define a goal for this persona. 4. Look at what’s happening at each stage and the touchpoints that allow the user to reach this goal. 5. Describe the experience flow across the different stages and touchpoints. Some facets you may want to document in your map are: Actions: What is the customer doing at each stage? What actions are they taking to move themselves on to the next stage? (Don’t list what your company or partners such as retailers are doing here. That will come later when we look at touchpoints). Motivations: Why is the customer motivated to keep going to the next stage? What emotions are they feeling? Why do they care? Questions: What are the uncertainties, jargon, or other issues preventing the customer from moving to the next stage? Barriers: What structural, process, cost, implementation, or other barriers stand in the way of moving on to the next stage? 6. After the journey has been mapped, use it to highlight the gaps, pain points and opportunities of the experience, both from the perspective of the user and the company. This is not the only way to create a customer journey. You may want to use a different lens to look at each stage or the journey, or perhaps treat the journey as a storyboard. Service Design Tools; Harvard Business Review; Adaptive Path Participants: 3-10 Time: 10-15 minutes Objective Image courtesy of Richard McMurray/www.service-this.com
- 11. UNDERSTANDTHEUSER JobStories Identify opportunities for growth by deconstructing a job that customers are trying to get done. Writing Job Stories is a powerful way of evaluating the circumstances that arise in customers’ lives. Customers make decisions about what products to use because they find themselves with a problem they would like to solve. With an understanding of the “job” for which customers find themselves “hiring” a product or service, we can more accurately develop and market products and features well-tailored to what customers are already trying to do. UNDERSTANDTHEUSER Instructions When writing job stories it’s important to focus on things such as context, causality and motivations instead of assumptions, subjectiveness, personas and implementations. We start by framing each design problem as a job, focusing on the triggering event or situation, the progress and motivation, and the intended outcome: [ Situation statement ] + [ Progress statement ] + [ Outcome statement ] . Example: [When I’m running late for an appt & worried that I won’t be able to eat before], [I want something filling to eat on the go], [so that I have the energy to perform]. Tips for writing effective job stories: Refine A Situation By Adding Contextual Information The more context we have for the situation, the easier it will be to craft a working solution which also handles any anxieties which can push a customer away from using a product or feature.. Job Stories Come From Real People Not Personas Job stories should be derived from real customer feedback. You must talk to real people and uncover all the anxieties and contexts which were in play when they used your or a competitor’s product. Additionally, comb through any existing research you have on your users, pulling out any contextual or emotional data that might aid you in writing your job stories. Design Modular Job Stories Which Features (solutions) Can Plug Into When writing job stories, it’s important not to commingle the job with solutions. Doing so makes it difficult to figure out what went wrong when customers reject our ideas. Was your persona wrong? Was the feature wrong? Was it the wrong feature for the persona? Add Forces To Motivations In the job story format of Situation — Motivations — Expected Outcomes, the Motivation stage can be enhanced by adding pull and push forces. Adding forces to a motivation is much like adding context to a situation. It’s the emotional component of the job story. By getting in touch with the emotions the customer is feeling we can design solutions that mitigate them. http://alanklement.com/5-tips-job-story Participants: Entire team Time: 1 hour Objective CC Image courtesy of Charles Knowles on Flickr
- 12. UNDERSTANDTHEUSER EthnographicFieldStudies Sit back and silently observe customers use your product in their natural environment. To fully understand your customers, witness how they behave in their natural environment while interacting with your particular product or service. This study is largely a hands-off, observation-based process, resulting in insights that provide a rich and nuanced understanding of the role a product plays in the user’s life. At the end, the team should be able to turn their new wealth of qualitative learnings into approaches for how to understand and potentially address the user’s unique needs and pain points. UNDERSTANDTHEUSER Who is involved? Ethnographic field studies require a recruiter to contact and source potential participants; a note-taker for conducting the field study through observation; and a team dedicated at the end of the study to analyzing results and applying qualitative insights to the next milestone. How is it done? 1. Identify the ideal target user and location for observation and recruit based on those factors. 2. Develop a field guide, which for this kind of research may include instructions for observing the participant and particular behaviors to look out for if they arise. 3. Conduct the ethnography with each recruit individually, acting as the note-taker and quiet observer in their natural environment. The sessions can last from minutes to hours. Be sure to jot down any potentially surprising or unexpected actions, phrasing, or attitudes. 4. After the completion of these interviews, the team will likely spend several days combing through the participant responses, highlighting particularly interesting answers or observations, and collecting them into recommendations for addressing these users’ needs and wants. Objective Participants: 10+ Effort: High Time: Weeks CC Image courtesy of Jens Schott Knudsen on Flickr
- 13. UNDERSTANDTHEUSER ContextualInquiryInterviews Observe users interacting with your product or prototype, asking probing questions into the how and why of their actions. When needing to understand the particular context in which your customers interact with your product or service, employ contextual inquiry interviews to both observe and probe into the specific behaviors you’re curious about. These interviews should include a healthy balance of questions delving into thoughts and emotions at moments of interest, as well as passive observation of the participant demonstrating how the product or prototype is used to achieve their goals. After the interviews, the team should be able to combine responses and observations into key insights that will drive understanding of user, context, and solution. UNDERSTANDTHEUSER Who is involved? Contextual inquiry interviews require a recruiter to find the appropriate participants based on the research goals; a moderator who is capable of understanding and accomplishing that healthy mix of probing questions and passive observation during the interview; a note-taker during the interview, to relieve that burden from the moderator; and a team to comb through, analyze, and identify learnings for understanding the user or proposed solution at the end of the process. How is it done? 1. Identify several appropriate types of users to question and observe — those either currently using your product, or exhibiting the sorts of needs and behaviors that you’re interested in with other products — and recruit them for in-house interviews. If the team would like to engage with users directly in the field instead, spend this time thinking of ideal locations for observing and interviewing participants (outside a store, in a cafe, etc.). 2. Create an interview guide for the sorts of questions you would like to pose to participants, as well as key actions or emotions to watch for during observation. 3. Conduct the interviews with the interview guide in-hand. Be sure to have the note-taker record extensive notes during the interviews, even if you’re in the field, so the moderator can focus on engaging with the participant and responding to facial cues. 4. Review the notes as a team after all the interviews. Pick out insights that can identify any opportunities to solve your user’s needs or problems, or if testing a prototype, determine whether it was validated through user interaction in context. Objective Participants: 10+ Effort: High Time: Weeks CC Image courtesy of K2_UX on Flickr
- 14. UNDERSTANDTHEUSER DiaryStudies Ask customers to keep a daily diary of not just how they use your product, but also their digital lives and habits. Diaries offer a wide range of views into the lives of your target user because the participants recall their usage, behavior, and attitudes while using the product in their natural context. Participants are asked to keep a written or pictorial log of how they interact with, respond to, and feel about a product or service over time (usually a week or so), followed by a summary one-on-one interview to discuss any recurring patterns or follow-up questions. The results of a diary study require a final synthesis and analysis to understand the user, their motivations, and the broad needs and pain points that exist in their lives. UNDERSTANDTHEUSER Who is involved? Diary studies require a recruiter to both source the right kinds of participants, and schedule emails for reminding them about the diary exercises and/or new writing prompts; a moderator and note-taker for the summary one-on-one interviews to follow-up on interesting entries; and the team to comb through the diary entries and interview notes to uncover key insights that inform the next milestone of the process. How is it done? 1. Determine as a team the form the diary will take (digital, pen and paper, etc.), how delivery of entries will be accomplished (email, mail, etc.), and schedule for writing the entries (daily, hourly, etc.). Follow this conversation up with a discussion of what questions or writing prompts you’d like to pose to participants. 2. Recruit participants based on their habits, usage of your product, and willingness to maintain a consistent diary record. 3. Ask the participants to start the diary with the first prompt, once both the mechanics and recruitment pool have been achieved. Keep in mind: if certain participants fail to respond or adequately answer questions in their entries, don’t hesitate to reach out and correct any deviance from expected results. 4. After the diary period has ended (from a couple days to a couple weeks), conduct summary interviews with each participant individually. 5. Sit down as a team and review the interview notes and diary entries to pick out useful qualitative insights on how participants currently use your product or similar competitors, and what underserved problems or needs exist in their lives. Objective Participants: 10+ Effort: High Time: Weeks CC Image courtesy of Kévin Couette on Flickr
- 15. UNDERSTANDTHEUSER FocusGroups Have a conversation between you and a group of your customers to understand their attitudes toward your product. Focus groups are most valuable as guided discussions, between a moderator and a diverse collection of target users, to identify expectations and ideas around a particular product or service. Keep in mind: focus groups are only useful when trying to assess user attitudes and perceptions toward a product; they cannot, however, determine usability, largely because participants can be easily swayed by each other or rely on pure speculation to answer questions on product usage. Find valuable insights from a focus group’s results, but attempt to further validate them with individual participants through one-on-one interviews. UNDERSTANDTHEUSER Who is involved? Focus groups require a recruiter to take careful steps to ensure that participants of the focus group represent a diverse selection of actual users (to prevent an echo-chamber effect); a moderator who can effectively guide the conversation and give every participant a chance to be heard; a note-taker that sits outside the room and listens in, or a video recorder that can be reviewed afterward; and the team to analyze results and propose next steps in understanding the user base. How is it done? 1. Spend the time and effort to find the right kinds of participants for the focus group: diverse, communicative, and willing to participate. 2. Create an interview guide, with potential questions or conversation points, to loosely follow with participants. 3. During the focus group, have the moderator pay close attention to points in the conversation when participants are exhibiting too much influence over others, are relying too much on pure conjecture, or tend to be quiet and evade questions; course-correct when needed, but at the same time try to intervene as little as possible. Ensure that a note-taker or video recorder is capturing results as well. 4. Reconvene after the focus group to pick out insightful ideas or responses from the group and decide on the next steps to validate these through individual interviews or other research methods. Objective Participants: 10+ Effort: Medium Time: Days CC Image courtesy of BSA Badalona on Flickr
- 16. UNDERSTANDTHEUSER SiteInterceptSurveys Present customers in the midst of using your product with a short, engaging survey. Short questionnaires called site intercept surveys can be administered to real users, during moments when they are using the team’s website or application, to get a sense of their attitudes about or behavior with the product. With enough responses — usually one hundred or so; keep in mind that users should be able to opt out of the survey — the team can gain knowledge of who uses the product, why they use it, and whether it served their needs properly at the time and in the context the survey was taken. UNDERSTANDTHEUSER Who is involved? Site intercept surveys require a team to determine what sorts of site or application behavior should qualify a user to receive the survey prompt, as well as what questions should be in the survey itself; a mechanism that allows the delivery of surveys to users (e.g. email; Qualtrics); and again, a team to compile and analyze the results. How is it done? 1. Develop a research plan to get at what your goals are in this phase of product discovery, a set of questions that can provide direction for addressing those goals, and a list of behavioral criteria for selecting users on the site or application to receive this survey. 2. Determine how to build the survey and deploy it to users currently using your product; depending on the complexity of the survey, you may need additional help from other teams. 3. Once the survey has been delivered and enough responses have been received (ideally around one hundred or so), sit down as a team, look at the distribution of answers, and uncover areas for improvement or interesting bits of feedback from your users. Objective Participants: 100+ Effort: Low Time: Hours CC Image courtesy of plings_005 on Flickr
- 17. UNDERSTANDTHEUSER On-the-StreetSurveys Hit the streets as a team and ask passers-by to take a moment out of their day to fill out a short survey. When a team is wrestling with questions around general consumer behavior, on-the-street surveys present a quick opportunity to partly validate those assumptions with real people through a short questionnaire. While some teams may already have detailed user research about their existing customers, on-the-street surveys can offer easy progress for those struggling with understanding whether their assumptions about their product or user are even remotely correct. These types of surveys should produce a few qualitative insights and quotes, acting as a compass for how to further validate the team’s assumptions about the customer. UNDERSTANDTHEUSER Who is involved? On-the-street surveys require a suitable location for doing on-the-street surveys (parks, malls, and other places of leisure are good spots, while transportation hubs or areas with high activity are unsuitable); and a team to get out of the building, engage with the general population, and discuss survey responses and interesting quotes from participants. How is it done? 1. Create a short survey, taking a maximum of five minutes to administer, with a healthy mix of demographic (age, employment, commute, etc.) and open-ended questions (how and why, rather than yes and no). 2. Get out of the building! Keep in mind: many people may decline your request to take the survey, so do not feel discouraged if this happens often. The team should aim at around ten or so survey responses. 3. After the surveys have been completed, sit down as a team and review the responses to pick out compelling quotes and decide which assumptions have been partly validated or invalidated. Objective Participants: 10+ Effort: Medium Time: Hours CC Image courtesy of rjt on Flickr
- 18. UNDERSTANDTHEUSER ModeratedUsabilityStudy Pose tasks and questions to your users to see how successfully they can interact with your product or prototype. A usability study focuses on a user’s ability to achieve a goal or complete a task while using a product or prototype, and gives a sense of whether a user will find the provided functionality helpful or attractive. These studies generally fall into two categories—remote or lab— depending on whether the study participant and moderator are performing tasks and receiving feedback in the same location (like an in-house facility) or separately (via web interface or phone). This method should produce recorded notes, audio, or video that the team can later analyze for opportunities to improve the existing experience. UNDERSTANDTHEUSER Who is involved? Moderated usability studies require a recruiter to find participants that are willing to be interviewed while using the product either in-person and in the building or through webcam; a moderator during the usability test, to issue instructions and follow-up questions; a note-taker or video recorder to jot down interesting remarks or observations; and a team to synthesize the results and determine next steps. How is it done? 1. Create a testing script for instructions that the moderator will follow during the session, including tasks for the participant to complete or questions to answer. Don’t be too detailed, however; moderators can course-correct when needed during the session. 2. Ensure that the product or prototype is fully accessible to the participant, either via an in-house device or through a network outside the building. 3. Recruit participants who are either willing to come in-house and sit with the moderator, or have the necessary equipment to receive and record audio and visual remotely. 4. During the sessions, have the moderator run through the test script, but also deviate when interesting remarks or observations have been made; have the note-taker listen into the session, or record for later usage. 5. Sit down as a team when all participants have been interviewed, and synthesize results to see whether the product or prototype was successfully usable. Objective Participants: 10+ Effort: High Time: Days CC Image courtesy of K2_UX on Flickr
- 19. UNDERSTANDTHEUSER UnmoderatedUsabilityStudy Record users interacting with your product or prototype through webcam or screen recording to see how well they can perform tasks. A usability study focuses on a user’s ability to achieve a goal or complete a task while using a product or prototype, and gives a sense of whether a user will find the provided functionality helpful or attractive. Unmoderated studies are generally remote and unavailable to the team until the participant has completed the series of tasks requested by the team; because of a higher margin for error, this kind of study should be limited in scope, focusing on a few specific features. This method should produce recorded audio or video of the participant’s screen and voice, which the team can later analyze for opportunities to improve the existing experience. UNDERSTANDTHEUSER Who is involved? Unmoderated usability studies require a third-party provider who will both recruit suitable candidates who are in their participant pool and who are capable of communicating without a moderator, as well as deliver and record the session for use afterward; and a team who will take the recorded audio or video and synthesize results to uncover new insights and decide next steps. How is it done? 1. Create a testing script for instructions that the participants will follow by themselves during the session, including tasks for the participant to complete or questions to answer. Be as detailed as possible, due to the lack of moderator. 2. Ensure that the product or prototype is fully accessible to the participant through a network outside the building. 3. Administer the usability tests through the third-party provider, who will be recruiting and delivering the instructions/questions to them remotely. 4. Sit down as a team when all participants have been recorded, and synthesize results to see whether the product or prototype was successfully usable. Objective Participants: 10+ Effort: Medium Time: Days CC Image courtesy of K2_UX on Flickr
- 20. UNDERSTANDTHEPROBLEM ProblemHypotheses Determine and state your most important assumptions about the user problem. Your vision for a product opportunity is a series of untested hypotheses that need to be proven. Before you can test what you think you know, you need to write it down — it starts with stating the assumptions your team is making about the problem. What problem or need are you solving for the business, product, or user? Why do you think the problem exists? What do you think are your customers’ biggest pains? Once you have determined your most important assumptions about the user problem, you will be able to validate whether or not they are true by talking to your customers. UNDERSTANDTHEPROBLEM Instructions 1. On a flip-chart sheet of paper or whiteboard, write down the problem or user need you are trying to solve. 2. Each participant should have a pad of sticky notes. Ask the participants to think about any assumptions they currently have about why this problem exists from the user’s perspective. 3. Take 5 minutes to have participants silently write down all their assumptions, one assumption per sticky note. 4. After everyone has written their assumptions, put everyone’s sticky notes under the problem statement you wrote at the beginning of the session. 5. Once all the sticky notes have been posted, start grouping similar items into clusters. 6. For each cluster, write a statement or category that captures its theme on a new sticky note. These represent the team’s problem hypotheses. 7. Have the group determine which hypotheses are the most important. This will serve as a starting point to get out of the building and talk to customers in order to validate which (if any) of them are true. The Startup Owner’s Manual, by Steve Blank http://leanstack.com/customer-development-checklist-for-my-web-startup-part-1/ Participants: Entire team Time: 45–60 minutes Objective
- 21. UNDERSTANDTHEPROBLEM 5W’s Answer the key questions of who, what, where, when, and why to understand the context of the problem you’re trying to solve. This game helps the team understand the context of a problem more deeply by answering the fundamental questions about the problem: who, what, where, when, and why. Employees often come to meetings with widely different levels of knowledge around a problem. No one knows the information better than the team members themselves, so this gives everyone a chance to externalize and share what’s in their minds. It also allows players to unearth questions they have about the problem. This game sheds some light on a problem, project, or initiative so that team members have a shared knowledge of the problem they are trying to solve, with fewer lingering questions. UNDERSTANDTHEPROBLEM Instructions 1. In a large white space visible to all the players, write the problem and the following words as headers across the top: WHO (are we solving it for)?, WHAT (is the problem we are trying to solve)?, WHERE (is it happening)?, WHEN (is it happening)?, and WHY (is it important to solve it)?. 2. Tell the players that the goal of the game is to understand any and all questions around the problem. Give all players access to sticky notes and markers. 3. Start with the question WHO?. Give the players 5 minutes to silently write down as many items or questions as they can that begin with the word WHO. 4. Ask the players to post their sticky notes in the white space under WHO?, then ask a couple of volunteers to cluster them according to topical similarity. 5. Repeat this process for the remaining four header questions. 6. You may want to write emergent themes near each cluster. This is also helpful for the players to reinforce that they have shared concerns. The themes should be one- to three-word phrases that summarize the general content of the clusters. 7. When the meeting closes, gather all of the questions so that leadership has the opportunity to review them later and respond to important questions that weren’t covered during the meeting. http://www.gamestorming.com/games-for-any-meeting/help-me-understand/ Participants: 5-20 Time: 30 min–1.5 hours Objective
- 22. UNDERSTANDTHEPROBLEM DrawtheProblem Do quick drawings to define the problem in a simple, clear, and compelling way. Problems that are vague or misunderstood have a harder time getting prioritized and therefore go unaddressed and unsolved. Meetings that address problem-solving often skip this critical step: defining the problem in a way that is not only clear but also compelling enough to make people care about solving it. This short drawing exercise at the beginning of a meeting will help participants engage in defining the challenge in a simplified form. This is a first step in bringing your group together under a common purpose and elevate the problem to become something you care to solve. UNDERSTANDTHEPROBLEM Instructions 1. Each participant should have a large index card or letter-sized piece of paper. After introducing the topic of the meeting, ask the participants to think about the problem they are here to solve. As they do so, ask them to write a list of items helping to explain the problem. For example, they may think about a “day in the life” of the problem or an item that represents the problem as a whole. 2. After a few minutes of this thinking and reflection, ask the participants to flip over their paper and draw a picture of the problem, as they would explain it to a peer. They may draw a simple diagram or something more metaphorical; there are no prizes or punishments for good or bad artistry. The drawing should simply assist in explaining the problem. 3. When everyone is finished, have the participants post their drawings on the wall and explain them to each other. While the group shares, note any common elements. After the exercise, the group should reflect on the similarities and differences, and work toward a shared understanding of what the problem looks like to each other. This warm-up does not result in a problem definition that will satisfy a product backlog; rather, it engages participants in defining the challenge in a simplified form. It is a first step in bringing a group together under a common purpose, elevating the problem above the noise to become something they care to solve. http://www.gamestorming.com/games-for-design/draw-the-problem/ Participants: 4-10 Time: 20-30 minutes Objective CC Image courtesy of Mike Rohde on Flickr
- 23. UNDERSTANDTHEPROBLEM Fishbowl Focus on listening to have a more meaningful conversation—one group discusses the problem, while the other group listens and observes. At meetings, there are often stakeholders who aren’t familiar with others’ perspectives or aren’t accustomed to listening to each other without offering an immediate response. In these scenarios, it can be difficult for people to engage in a rich and meaningful conversation. This exercise helps activate attention and engage skills that have become rusty for many: listening, observing, and being accountable for our observations. It primes your listening and observing skills so a more substantive conversation can take place. It may look like the action is happening with the speaking participants, but it is actually happening with the observers. UNDERSTANDTHEPROBLEM Instructions 1. Before the meeting, think of a topic that could be served by a group discussion and write down questions associated with it. Create a handout for the observers to record the major points they hear from the speaking players and any evidence they hear that supports each point. 2. Find a room with a good amount of open space and clear out anything other than chairs. Arrange the chairs in two concentric circles—the inner circle seats the players engaged in conversation; the outer circle seats the players acting as observers. 3. Introduce the game to the group and make it clear that this is a listening and observing exercise. Assign “observer” or “player” status to each person. Give everyone a pen and handout, which will only be used in the observer role. Ask the participants to sit in the circle for their assigned role. 4. Announce the topic and have the speaking players discuss it for 15 minutes. Use the questions you generated before the meeting to guide the conversation. Make sure the speakers know that their responsibility is simply to converse. Make sure the observers know that their role is to pay attention and write down all discussion points and evidence that come out of the conversation. 5. When 15 minutes are up, ask the group to switch seats and switch roles. Then start another 15-minute discussion on the same topic or a different one. 6. After both conversations have completed, ask for volunteers to share the information they gathered and to describe their experiences on the inner versus outer circle. 7. Optional: Have the group talk about their experience of being silent and paying attention. What was difficult about it? What was easy? How did it affect their perception of the topic and the other players? Use the Fishbowl exercise as a segue to a heightened give-and-take between stakeholders. http://www.gamestorming.com/games-for-opening/fishbowl/ Participants: 8-30 Time: 40-45 minutes Objective CC Image courtesy of Travis Isaacs on Flickr
- 24. UNDERSTANDTHEPROBLEM TheFiveWhys Discover the root cause of a problem by drilling down below the surface to relate it to its context. Problems are tackled more sustainably when they’re addressed at the source. This exercise helps to relate a problem to its context so your group can see the bigger picture. The goal is to move beyond the surface of the problem and discover the root cause. By reading more between the lines, you will gain meaningful insights into the source of a problem and get the greatest leverage out of solving it. UNDERSTANDTHEPROBLEM Instructions 1. Before the meeting, choose a problem your team needs to evaluate. Write the problem in an area visible to all the group members. Try to draw something to represent it. 2. Distribute sticky notes to each player and ask them to number five of them 1 through 5. 3. Ask the players to review the problem statement and ask themselves WHY it’s a problem. Encourage them to be honest and to write the first thing that comes to mind each time they ask “Why?”. If they jump immediately to the perceived root of the problem, they may miss the opportunity to see the stages. 4. Have the players write their first response on sticky note 1. 5. Tell the players to ask themselves WHY the answer on sticky note 1 is true and write their next response on sticky note 2. 6. Next, tell the players to ask WHY the answer on sticky note 2 is true and write the response on sticky note 3. 7. Repeat this until every numbered sticky note has a response on it. 8. Below the problem statement, write the word “Why?” five times in a column; draw lines to create columns for each player’s set of notes. Ask the players to post their responses on the wall, starting with 1 at the top and ending with 5 at the bottom. 9. Reviewthe“Why”columnswiththegroupandnotecommonalitiesanddifferences. 10. Allow for discussion. 11. Rewrite the problem statement on a sheet of flip-chart paper. Work with the group to build consensus on which of the five “Whys” offer the most meaningful insight into the problem. Ask a volunteer to rewrite the “Whys”—one per sticky note—as the group agrees on them. Put the stickies in a final column under the problem statement. If you have time, discuss “what’s next.” 12. Note: Five Whys is a good start, but many problems require more or less interrogation to get to the root. Ask “Why?” until you feel the group is getting somewhere. Build longer WHY columns if necessary, and keep going until the players get to meaningful insights. http://www.gamestorming.com/games-for-problem-solving/the-5-whys/ Participants: 5-10 Time: 1+ hours Objective CC Image courtesy of Luke and Kate Bosman on Flickr
- 25. UNDERSTANDTHEPROBLEM ChallengeCards Identify and think through challenges, problems, and potential pitfalls in a product, service, or strategy, then match them with solutions. The goal of this exercise is to improve a product or strategy by thinking through various scenarios and alternatives. By brainstorming features and strengths of the product or solution, along with potential problems or challenges, teams match up challenges with solutions to tell a collaborative story. UNDERSTANDTHEPROBLEM Instructions 1. Divide each group into two teams: • The “solution team” silently brainstorms features and strengths of the product or solution. • The “challenge team” silently brainstorms potential problems or challenges and writes them on index cards, one problem or challenge per card. 2. When play commences, the two teams work together to tell a collaborative story: • The challenge team picks a card from the deck and plays it on the table, describing a scene or event where the issue might realistically arise. • The solution team must then pick a card from their deck that addresses the challenge. 3. If the solution team has a solution, they get a point, and if they don’t, the challenge team gets a point. 4. The teams then work together to design a card that addresses that challenge. 5. Play continues in this fashion, challenge followed by solution followed by challenge, and so on, until the story or scenario reaches a conclusion. 6. Optional: By turning the exercise into a competition as well as a storytelling game, players are more likely to get engaged and immerse themselves in the scenarios. Keeping it lighthearted and fun will increase the energy. It shouldn’t feel like work. http://www.gamestorming.com/games-for-design/challenge-cards/ Participants: 4-10 Time: 30 min-1hour Objective By tableatny via Wikimedia Commons (originally posted to Flickr as BXP135677)
- 26. UNDERSTANDTHEPROBLEM PosterSession Communicate ideas and core concepts using images in a poster format to summarize a challenge or larger topic for further discussion. If a picture is worth a thousand words, what would 50 pictures be worth? What if 50 people could present their most passionate ideas to each other—without any long-winded explanation? This exercise accelerates the presentation process by breaking it down into a simplified format. It forces everyone to think about the best way to compile and communicate their ideas. The goal is to create a set of compelling images that summarize a challenge or topic for further discussion. Creating this set might be an “opening act” that sets the stage for choosing an idea to pursue, or it might be a way to index ideas for a large topic. UNDERSTANDTHEPROBLEM Instructions 1. Everyone will need ample supplies for creating their poster. Flip charts and markers are sufficient, but consider bringing other school supplies, such as stickers, magazines for cutting up, and physical objects. 2. Start by framing the challenge. In any given large group, you could say: “There are more good ideas in everyone’s heads than there is time to understand and address them. By creating posters that explain the ideas, we’ll have a better idea of what’s out there and what we might work on.” 3. The participants’ task is to create a poster that explains their topic. There are two constraints: 1) It must be self-explanatory. Could someone understand it without having you explain it? 2) It must be visual. Words are good, but text alone will not be enough to get people’s attention or help them understand. Participants may be helped by thinking about three kinds of explanation: • Before and After: Describe “why” someone should care in terms of the today and tomorrow of the idea. • System: Describe the “what” of an idea in terms of its parts and their relationships. • Process: Describe the “how” of an idea in terms of a sequence of events. 4. Give participants 20 minutes to create their posters. When they have finished, post them on the wall to create a “gallery.” Ask the group to circulate and walk the gallery. Some posters will attract and capture more attention than others. From here, it may be worthwhile to have participants dot vote (see Dot Voting) to decide what ideas to pursue further. Optional: The posters may be created in small groups. In this case, it’s important for the group to decide ahead of time what their topic will be and to give more time to come to a consensus on what they will draw and how they will draw it. A small group of experts may create posters to explain their different points of view at the start of a meeting, and to make their models of the world, their vocabulary, and their interests clear and explicit. http://www.gamestorming.com/games-for-any-meeting/poster-session/ Participants: 10-100 Time: 20 minutes Objective CC Image courtesy of Swedish Pavilion at Shanghai Expo 2010 on Flickr
- 27. UNDERSTANDTHEPROBLEM SWOTAnalysis Evaluate your team’s likelihood of success relative to an objective by examining strengths, weaknesses, opportunities, dangers, and conditions that may affect your future. In business, it can be easier to have certainty around what you want, but more difficult to understand what’s impeding you from getting it. The SWOT Analysis is a long-standing technique of looking at what’s working well for the business and what could be improved upon, with respect to a desired end state. This exercise provides the group with the opportunity to gauge approaching opportunities and dangers, and assess the seriousness of the conditions that affect the future. By understanding those conditions, the group can influence what comes next. UNDERSTANDTHEPROBLEM Instructions 1. Before the meeting, write “Desired End State” and draw a picture of what it might look like on a piece of flip-chart paper. 2. Create a 4-square quadrant using 4 sheets of flip-chart paper. Create more quadrants if you think the complexity of the discussion and the number of players warrant it. 3. Top left quadrant: Write the word “STRENGTHS” and draw a picture depicting that concept. Players should take 5–10 minutes to quietly generate ideas about strengths with respect to the desired end state and write one idea per sticky note. 4. Bottom left quadrant: Write “WEAKNESSES” and draw a picture depicting it. Take 5–10 minutes to write ideas about weaknesses. 5. Top right quadrant: Write “OPPORTUNITIES” and draw a picture. Take 5–10 minutes to write ideas about opportunities. 6. Bottom right quadrant: Write “THREATS” and draw a picture. Take 5–10 minutes to write ideas about perceived threats. 7. Post everyone’s sticky notes near the corresponding quadrants. 8. Starting with STRENGTHS, sort the ideas based on their affinity to each other and cluster them together until you have clustered the majority of them. Place outliers separate from the clusters but still in playing range. Repeat this for the other categories in this order: WEAKNESSES, OPPORTUNITIES, and THREATS. 9. After the clustering is complete, have the group create a broad category for each smaller cluster. Write the categories in the quadrants as the group agrees on them. 10. Have the players dot vote on 2-3 categories in each square for the items they believe are most relevant. Highlight the ones with the most votes. 11. As a group, discuss implications around the desired end state. Evaluate weaknesses and threats positively, like their presence is doing a favor. Ask questions, like “What if our competition didn’t exist?” and “How can this threat make the organization stronger?” http://www.gamestorming.com/games-for-fresh-thinking-and-ideas/swot-analysis/ http://www.innovationgames.com/swot-analysis-game/ Participants: 5-20 Time: 1-2 hours Objective CC Image courtesy of Ahmed Hashim on Flickr
- 28. UNDERSTANDTHEPROBLEM PostthePath Define your group’s existing process at a high level and get a better understanding of the current process. Often, there is a sense of confusion about who does what and when. The team is using different terms to describe their process; there is no documented process; things seem to happen arbitrarily, invisibly, or by chance. Thisexercisehelpstoquicklydiagnoseyourgroup’slevelofunderstanding of the steps in a process. The group will define an existing process at a high level and uncover areas of confusion or misunderstanding. In most cases, this can flow naturally into a discussion of what to do about those unclear areas. This will not generally result in a new or better process, but rather a better understanding of the current one. UNDERSTANDTHEPROBLEM Instructions Introduce the exercise by framing the objective: “This is a group activity, where we will create a picture of how we create [x].” X in this case is the output of the process; it may be a document, a product, an agreement, or the like. Write or draw the output of the process on the wall. Establish a common starting point of the process with the group. This could sound like “the beginning of the day” or “the start of a quarter” or “after we finished the last one.” This is the trigger or triggers that kick off the process. If you believe the group will have a hard time with this simple step, decide it for them in advance and present it as a best guess. Write this step on a sticky note, put it on the wall, and then proceed with the exercise. 1. Instruct participants to think about the process from beginning to end. Then give them the task: write down the steps in the process. They can use as many notes as they like, but each step must be a separate note. 2. After the participants have brainstormed their version of the steps, ask them to come up to the wall and post them to compare. The group should place their steps above and below one another’s so that they can compare their versions of steps 1, 2, and so on. 3. Prompt the group to find points of agreement and confusion. Look for terminology problems, where participants may be using different words to describe the same step. Points of confusion may surface where “something magical happens” or no one is really clear on a step. 4. The group will draw their own conclusions about what the different versions of the process mean and what they can or should do about it. For a larger group, you may want to avoid individual readouts and instead have people post up simultaneously. If you sense in advance that the group will get caught up in the details, ask them to produce a limited number of steps — try 10. http://www.gamestorming.com/games-for-design/post-the-path/ Participants: 2-10 Time: 30 min-1 hour Objective CC Image courtesy of Roo Reynolds on Flickr
- 29. UNDERSTANDTHEPROBLEM ValuePropositionCanvas Map, think though, and discuss your value propositions and how they match your customers’ needs. This thinking and design tool helps you design Value Propositions that match your customers’ needs and aids them in solving their problems. The Value Proposition Canvas guides you towards the problem-solution fit in a more structured, thoughtful way. It captures core issues around customer problems and potential solutions. The Value Proposition Canvas is based on two blocks from the Business Model Canvas: the Value Proposition and the Customer Segment. This exercise sketches out both in more detail with a simple but powerful structure, which will allow for better strategic conversations and prepare you for testing both building blocks. UNDERSTANDTHEPROBLEM Instructions 1. Before starting the canvas, sketch a profile of your target customers. First, determine what they are trying to accomplish. This could be tasks they are trying to perform and complete, problems they are trying to solve, or needs they are trying to satisfy. Next, describe any negative emotions, costs, and risks that they might experience before, during, and after getting the job done. Then describe the benefits they expect, desire, or would be surprised by, which include utility, social gains, positive emotions, and cost savings. 2. Once the team has completed the customer profile, begin creating the Value Proposition Canvas. Divide a flip-chart sheet of paper into three sections: Products & Services, Gain Creators, and Pain Relievers. See an example of the template: http://www.businessmodelgeneration.com/downloads/value_proposition_canvas.pdf 3. In the Products & Services section: List all the products and services your value proposition is built around. Which products and services do you offer that help your customer get either a functional, social, or emotional job done, or help him/her satisfy basic needs? Rank all products and services according to their importance to your customer—are they crucial or trivial? 4. In the Gain Creators section: Describe how your products and services create customer gains. How do they create benefits your customer expects, desires or would be surprised by, including functional utility, social gains, positive emotions, and cost savings? 5. In the Pain Relievers section: Describe how your products and services alleviate customer pains. How do they eliminate or reduce negative emotions, undesired costs and situations, and risks your customer experiences or could experience before, during, and after getting the job done? 6. You can use the Value Proposition Canvas like the Business Model Canvas: plot it as a poster, post it up on the wall, then use sticky notes to start sketching. Strategyzer.com, Strategyzer AG http://businessmodelalchemist.com/blog/2012/08/achieve-product-market-fit-with-our-brand-new-value- proposition-designer.html http://businessmodelgeneration.com/canvas/vpc?_ga=1.216540690.564012849.1430337420 Participants: 3-10 Time: 45 min–1.5 hours Objective CC Image courtesy of Epicantus on Flickr
- 30. CONFIRMTHEPROBLEM TreeTesting Find gaps between your product’s current navigation and what your users actually expect. Tree testing is used to determine how users find items within an existing navigational structure, when given a particular task or series of tasks to complete. The test usually involves grouping items based on hierarchy and naming alone — often with each item on index cards or paper rather than via a digital medium — so that findability can be judged without interference from other factors like visual design. Teams can leverage the results from this technique to decide whether parts or the entirety of a chosen navigation can successfully accommodate the kinds of user activities the product is expected to support. CONFIRMTHEPROBLEM Who is involved? Tree testing requires a recruiter to find existing users who exhibit the type of behaviors that would involve navigating through the current product; a moderator to give instructions, ask the participant to do a sample task, and organize the index cards with navigational options on them as the participant answers; and a team to analyze and validate (or invalidate) the findability of important options within the current structure. How is it done? 1. Recruit current users who are most likely familiar with the type of sample tasks you’ll be asking them to complete during the tree testing. 2. Create a series of index cards with the names of current or proposed navigational options on them, to show to the participant during the test. 3. During the session, have the moderator present a sample task (such as, “Find an article involving Syria”) and lay out the cards with the first-level navigation options on them (e.g. “World”, “U.S.”, and “New York”). As the participant moves through navigational levels, more cards are added onto the table until the participant is confident they are at the page where they can complete the task. Keep in mind: participants are allowed to backtrack through the levels. 4. After each participant’s navigational tree has been recorded, sit down as a team to analyze where frustrations and navigational pain points are most evident and plan your next steps. Objective Participants: 10+ Effort: Medium Time: Days CC Image courtesy of Seongbin Im on Flickr
- 31. CONFIRMTHEPROBLEM StakeholderInterviews Reach out to stakeholders to uncover the varied business needs and motivations involving your product. Interviewing project stakeholders is an invaluable resource for uncovering the goals, needs, and frustrations of those external to the core team but who have a vested interest in the outcome of the product discovery process. Perform these interviews to both understand the breadth of requirements andactivitiesbehindtheeffortstoimproveyour product,as wellas assess the current organizational knowledge of user needs and problems. This overview should result in materials describing, at a high-level, the user, business, and organizational problems currently experienced by stakeholders, as well as their plans or hopes for improving the team’s product. CONFIRMTHEPROBLEM Who is involved? Stakeholder interviews require a product team capable of identifying and recruiting stakeholders internally, moderating and note-taking during the interview, and combing through the responses to understand the wider range of business needs and goals involving your product. How is it done? 1. Create an interview guide listing the general or department-specific questions you’d like to pose to individual stakeholders. 2. Recruit based on willingness to chat with the product team, and be sure to schedule as much in advance as possible, given that your stakeholders are most likely very busy. 3. During the one-on-one interviews, spend some time at the beginning briefly introducing the purpose of the interviews and what sorts of questions you’ll be asking; they should last 30 minutes to an hour. The team moderator should feel free to deviate from the guide whenever an interesting topic has been broached. 4. Sit down as a team and uncover key insights, powerful quotes, and stakeholder needs from your notes; these will inform how your team understands the product within the larger organizational goals. Objective Participants: 10+ Effort: Medium Time: Days CC Image courtesy of mobology on Flickr
- 32. CONFIRMTHEPROBLEM Go/No-GoDecision Discuss and decide whether the problem is a valid one to pursue further. Now the team has reached a critical point—deciding whether to proceed with pursuing the problem. Everything the team has done until now will feed into this decision. In the Go/No-Go Decision, the team evaluates all the available evidence to determine the fate of the problem, in its current incarnation. CONFIRMTHEPROBLEM Instructions After having done the necessary work to understand if your solution is usable and valuable, the team is faced with one of two outcomes: 1. You’ve validated the solution(s) with your customers. If this is the case, it is ready to be added to the product backlog. 2. You’ve concluded that one or more of the solutions you’ve tested does not resonate with users. If this is the case, the team must decide to either pivot and test new solution ideas, or move on to a new opportunity altogether. Objective Participants: Entire team Time: 1 hour
- 33. IDENTIFYPOSSIBLESOLUTIONS MindMapping Take your ideas, mix them with notes you’ve taken, and loosely organize them on paper. Now you’re going to add all the other ideas that are in your head, mix them with the notes you just took, and loosely organize them on paper. The mind map is going to be your “cheat sheet” you can use when you’re sketching UI ideas. IDENTIFYPOSSIBLESOLUTIONS Instructions 1. This will entail quiet individual brainstorming. Each person writes down everything in their head with no specific formatting. 2. You can write words and connect them, or not. You can draw pictures, or not. You basically can’t do it wrong. 3. The important thing is that everyone is getting every solution, old and new, out of their head and onto paper at very low fidelity. Google Ventures: http://www.gv.com/lib/the-product-design-sprint-divergeday2 Participants: 1-10 Time: 10–15 minutes Objective CC Image courtesy of Balanced Team on Flickr
- 34. IDENTIFYPOSSIBLESOLUTIONS Post-Up Generate ideas individually about a given topic on sticky notes, then quickly present them to the group. This exercise is used to generate many ideas from the group with silent sticky note writing. It is intended to be an opening activity, and a first step to help guide next steps for your group. From here you can move on to another gamestorming exercise. For example, the group may want to create an Affinity Map or further organize and prioritize everyone’s thoughts using Forced Ranking. IDENTIFYPOSSIBLESOLUTIONS Instructions There are many ways to work with ideas using sticky notes. Generating ideas is the most basic play, and it starts with a question that your group will be brainstorming answers to. For example: “What are possible uses for Product X?” Write the question or topic on a whiteboard. Ask the group to brainstorm answers individually, silently writing their ideas on separate sticky notes. The silence lets people think without interruption, and putting items on separate notes ensures that they can later be shuffled and sorted as distinct thoughts. After a set amount of time, ask the members of the group to stick their notes to the whiteboard and quickly present them. If anyone’s items inspire others to write more, they can stick those up on the wall too, after everyone has presented. Harry Brignall at the 90% of Everything blog makes a great suggestion: “When doing a post-up activity with sticky notes in a workshop, you may want to use the FOG method: mark each note with F (fact), O (opinion) or G (guess). It’s such a simple thing to do, but it adds a great deal of clarity to the decision-making process.” http://www.gamestorming.com/core-games/post-up/ Participants: 1-50 Time: 10 minutes–1 hour Objective CC Image courtesy of Robert van Geenhuizen on Flickr
- 35. IDENTIFYPOSSIBLESOLUTIONS 6-8-5Sketching Create 6 to 8 sketches in 5 minutes to get down initial ideas, generate many ideas, and iterate on the best ones. One reason we end up with under-developed ideas is that we stick with our first good idea, rather than taking time to explore other approaches. In this exercise, participants quickly generate many ideas without worrying about details. This can be used for any concept that you want to brainstorm early in the ideation process, and has the best results with a diverse group (including product, marketing, engineering, design, etc.). It can be repeated to hone a few of the best ideas, and is often followed by a debrief session or another gamestorming exercise to focus on the most fruitful ideas. IDENTIFYPOSSIBLESOLUTIONS Instructions 1. Prepare several sheets of paper with a 2×2 or 2×3 grid. You want to create boxes big enough for players to sketch their ideas in, but small enough to constrain them to one idea per box. Prepare enough paper for everyone to have about 10 boxes per round. 2. As the group is gathering, distribute sheets of paper to each player. Or instruct the group on how to make their own 2×2 grid by drawing lines in their notebook. 3. Introduce the game and remind players of the objective for the meeting. Tell players that the goal with 6-8-5 is to generate between 6-8 ideas (related to the meeting objective) in 5 minutes. 4. Next, set a timer for 5 minutes. 5. Tell the players to sit silently and sketch out as many ideas as they can until the timer ends — with the goal of reaching 6-8 ideas. The sketches can and should be very rough — nothing polished in this stage. 6. When the time runs out, the players should share their sketches with the rest of the group. The group can ask questions of each player, but this is not a time for a larger brainstorming session. Make sure every player presents his/her sketches. 7. With time permitting, repeat another few rounds of 6-8-5. Players can further develop any ideas that were presented by the group as a whole or can sketch new ideas that emerged since the last round. They can to work on separate ideas, or begin working on the same idea. But the 5-minute sketching sprint should always be done silently and independently. 6-8-5 is intended to help players generate many ideas in succession, without worrying about the details or implementation of any particular idea. It’s designed to keep players on task by limiting them to sketch in small boxes and work fast in a limited amount of time. 6-8-5 can be used on any product or concept that you want to brainstorm, and it has the best results when done with a heterogenous group (people from product, marketing, engineering, design, etc.). http://www.gamestorming.com/games-for-fresh-thinking-and-ideas/6-8-5s/ Participants: 2+ Time: 30 minutes–1 hour Objective CC Image courtesy of Juhan Sonin on Flickr
- 36. IDENTIFYPOSSIBLESOLUTIONS Brainwriting Generate multiple ideas individually, share them with each other, and then build on them together. Some of the best ideas are compilations from multiple contributors. Brainwriting is a simple way to generate ideas, share them, and subsequently build on them within a group. Access to multiple hands, eyes, and minds can yield the most interesting results. This exercise is intentionally silent, which gives quieter participants the opportunity to generate ideas without having to verbalize to everyone, and it guarantees input from every participant in the room. Brainwriting allows ideas to emerge before being critiqued and creates a space for them to be co-created, with multiple owners, and therefore a greater chance of follow-through. IDENTIFYPOSSIBLESOLUTIONS Instructions 1. In a space visible to the players, write the topic around which you need to generate ideas and draw a picture of it. An example of a topic might be “Employee Recognition Program.” 2. Distribute index cards to each player and ask them to silently generate ideas related to the topic and write them on the cards. 3. As they complete each idea, ask the players to pass that idea to the person on their right. 4. Tell the players to read the card they received and think of it as an “idea stimulation” card. Ask them to add an idea inspired by what they just read or to enhance the idea and then pass again to their right. 5. Continue this process of “brainwriting” and passing cards to the right until there are various ideas on each card. Optional activity: Ask the players to write an idea on a piece of paper and then fold it into an airplane and fly it to another participant. Continue writing and flying the planes until each piece of paper has several ideas. Conclude with steps 6 and 7. 6. Once finished, collect the cards and ask for help taping them to the wall around the topic and its picture. 7. Have the group come to the wall to review the ideas and draw stars next to the ones they find most compelling. Discuss. Optional activity: Create an idea gallery in the room using flip-chart pads and stands. Ask players to write as many ideas on the sheet as they can and then wander around the room and add ideas to the other sheets. Continue this process until each sheet has a good number of ideas. http://www.gamestorming.com/games-for-design/brainwriting/ Participants: 5-15 Time: 30–45 minutes Objective
- 37. IDENTIFYPOSSIBLESOLUTIONS Start,Stop,Continue Examine the current situation, goal, or product by brainstorming what you want to start doing, what should be stopped, and what works well now. This exercise examines three key aspects of your current situation: 1) What should you start doing? 2) What isn’t working that you should discontinue? 3) What’s working well now that you should continue doing? Participants brainstorm individually, which frames the discussion with the larger group. This is useful for guiding “problem-solving” meetings or for conceptualizing aspirational steps toward a vision. IDENTIFYPOSSIBLESOLUTIONS Instructions Ask the group to consider the current situation or goal and individually brainstorm actions in these three categories: Start: What are things that we need to START doing? Stop: What are we currently doing that we can or should STOP? Continue: What are we doing now that works and should CONTINUE? Have individuals share their results. Strategy This exercise is broad enough to work well as an opening or closing exercise. It’s useful in framing discussion at “problem-solving” meetings, or as a way to brainstorm aspirational steps toward a vision. http://www.gamestorming.com/games-for-decision-making/start-stop-continue/ Participants: 1-10 Time: 10 minutes–1 hour Objective CC Image courtesy of ykanazawa1999 on Flickr
- 38. IDENTIFYPOSSIBLESOLUTIONS TheAnti-Problem When the team is running out of ideas for solutions for a problem, get unstuck by identifying ways to solve the opposite problem. When the team is already working on a problem, but running out of ideas for solutions, this exercise helps your group get unstuck. By asking everyone to identify ways to solve the problem opposite to the current one, it becomes easier to see where a current solution might be going astray or where an obvious solution isn’t being applied. Make the anti-problem more extreme than it really is—this better helps to break out of existing patterns. The intention is not to eliminate a complex problem or come up with a viable solution in 30 minutes; it is to give your team a new approach that can lead to a solution after the session. IDENTIFYPOSSIBLESOLUTIONS Instructions 1. Before the meeting, find a situation that needs to be resolved or a problem that needs a solution. 2. Give players access to sticky notes, markers, index cards, pipe cleaners, modeling clay—any supplies you have around the office that they could use to design and describe solutions. 3. Break large groups into smaller groups of three to four people and describe what they’ll tackle together: the anti-problem, or the current problem’s opposite. (For example, if the problem is sales conversion, the players would brainstorm ways to get customers to avoid buying the product.) The more extreme the problem’s opposite, the better. Optional activity: Bring a list of smaller problems and decrease the amount of time allotted to solve them. Make it a race to come up with as many solutions as the group can churn out—even if they’re outlandish. 4. Give the players 15–20 minutes to generate and display various ways to solve the anti-problem. Encourage fast responses and a volume of ideas. There are no wrong solutions. 5. When the time is up, ask each group to share their solutions to the anti-problem. They should stand and display any visual creations they have at this time or ask the others to gather around their table to see their solutions. 6. Discuss any insights the players have gained or any discoveries they have made. http://www.gamestorming.com/games-for-fresh-thinking-and-ideas/the-anti-problem/ Participants: 5-20 Time: 30–45 minutes Objective CC Image courtesy of Cecilia Espinoza on Flickr
- 39. IDENTIFYPOSSIBLESOLUTIONS Storyboarding Take the ideas you’ve generated so far, and sketch how a user would move through part of a user story. After the team has done some mind-mapping and quickly sketched ideas, make that user story diagram more concrete. The goal is to take the ideas you’ve generated so far and sketch an actual UI showing how a user would move through this part of the story — where they click, what info they enter, what they think, etc. These storyboards will be shared anonymously and critiqued by the group. IDENTIFYPOSSIBLESOLUTIONS Instructions 1. Start with a blank sheet of paper, and put 3 sticky notes on it. Each sticky note is one frame in the storyboard. It’s kind of like a comic book that you’re going to fill in. 2. Look back at your mind map and your sketches to find the best ideas, the ones you’d like to illustrate in more detail. 3. Draw UI in the three frames of their storyboard showing a progression: first this, then that, then that. 4. There are three important storyboard rules: Make it stand alone. Just like a real product, your drawing has to make sense by itself, without you there to pitch it. In the next steps, people will be looking at these, but you won’t have a chance to talk about your idea until the end. Keep it anonymous. Don’t write your name on your drawing. You’ll want all ideas to start on a level playing field and it can be distracting to know which one was drawn by the CEO. Give it a name. Come up with a catchy title for your idea. That makes it easier to discuss and compare later. 5. When you finish the storyboards, hang them on the wall. 6. Have the team silently critique or dot vote on the most interesting concepts to move forward with. Google Ventures, http://www.gv.com/lib/the-product-design-sprint-divergeday2 Participants: 1-10 Time: 10–20 minutes Objective CC Image courtesy of CannedTuna on Flickr
- 40. IDENTIFYPOSSIBLESOLUTIONS ElevatorPitch Use madlibs to create a compelling elevator pitch for your product, service, or idea. Whether developing a service, a company-wide initiative, or just a good idea that merits spreading, a group will benefit from collaborating on what is—and isn’t—in the pitch. This is often the most difficult task in developing a new idea. The better and bigger the idea, the harder the pitch is to write. The elevator pitch must be unique, believable and important. It should be a short and compelling description of the problem, for whom you’re solving it, and the key benefit that distinguishes the solution from competitors. IDENTIFYPOSSIBLESOLUTIONS Instructions To set up, write the following questions on flipcharts, one question per page: Who is the target customer? What is the customer need? What is the product name? What is its market category? What is its key benefit? Who or what is the competition? What is the product’s unique differentiator? These are the elements of the pitch, following a formula: For (target customer) who has (customer need), (product name) is a (market category) that (one key benefit). Unlike (competition), the product (unique differentiator). Then, explain the elements and their connections: The target customer and customer need are simple. Any relatively good idea or product will have many potential customers and address many needs. Fix the product name in advance—this will help contain the scope of the conversation. The market category should be an easily understood description of the type of idea or product. It may be like “training program” or “peer-to-peer community.” The key benefit is the single most compelling reason a target customer would buy into the idea. The competition and unique differentiator are final punctuation of the pitch. Who or what will the target customer compare this idea to, and why is it unique? To play: First, participants brainstorm ideas on sticky notes that fit under each of the headers, without discussion. Next, the group may discuss areas where they have the most trouble. Dot voting or affinity mapping can help prioritize ideas. After this, in small groups, pairs, or as individuals, participants write out possible elevator pitches, based on the ideas on the flipcharts. After a set amount of time (ex: 15 minutes) the groups reconvene and present their draft pitches. The group may choose to role play as target customers while listening, commenting or asking questions. The group may craft distinct pitches for different target customers. The exercise is complete when there is a strong direction among the group on what the pitch should and should not contain. http://www.gamestorming.com/games-for-design/elevator-pitch/ Participants: 1-5 Time: 1.5+ hours Objective CC Image courtesy of Wayan Vota on Flickr
- 41. IDENTIFYPOSSIBLESOLUTIONS TheVCPitch Imagine you’re entrepreneurs pitching your idea to venture capitalists—present your key selling points, how the idea can make money, and why people will buy it. It’s easy to generate concepts where money, time and technical capacity are unlimited, or ideas that look good in theory, but are impractical in reality. This exercise brings attention back to the real world. You play the role of entrepreneurs who need to sell your idea to a group of venture capitalists (VCs) by focusing on feasibility and viability. What are the key selling points? How can this make money? Why will people buy it? This exercise captures the different perspectives that different groups have about a concept, product, service, or prototype, and also the type of language everyone uses to define it. The questions the VCs ask usually expose weak points or help clarify ideas, which can then be discussed by the larger group. IDENTIFYPOSSIBLESOLUTIONS Instructions 1. Divide people into small groups, ideally pairs or triads. One group should take the role the VCs, while the others are ‘entrepreneurs’. 2. A product or service is defined and agreed on by the group. 3. Individually, each group spends 10 minutes formulating their pitch to be presented to the VCs. They can write, draw and rehearse: the creation is really up to each group. Ideally they should be in separate rooms or breakout spaces while creating the pitches. 4. All groups should be aware that one or two representatives will present the pitch verbally to the VCs but the whole group will answer their questions. It is also important to cap preparation time (around 10 minutes is good), since over-elaborating an idea can take away the true nature of their thoughts. 5. Towards the end of the preparation time, the VCs give groups a time-warning: ‘You have 2 minutes prep remaining’. 6. Each group then presents their pitch – a time limit (3 minutes) is given for each presentation and the VCs can ask up to two questions each. 7. It’s not essential, but to add a sense of competition, the VCs can decide which pitch is the winner at the end. http://www.gamestorming.com/games-for-design/the-pitch/ Participants: 4-12 Time: 30 min–1.5 hours Objective CC Image courtesy of Fresh Tilled Soil on Flickr
- 42. IDENTIFYPOSSIBLESOLUTIONS ParticipatoryDesign Bring your customers into the building to collaboratively build their perfect product with the team. Participatory design is a collaborative way to bring stakeholders and potential users into the design process, giving them a chance to share their ideas with the team through solution-building activities rather than verbal communication alone. Usingphysicalmaterials—pen,paper,tape,etc.—andactivediscussion, the team partners with real users, learns about their needs and wants, and identifies possible solutions to prototype and validate in future milestones. Participatory design results in not only rich understanding of the target user, but also in powerful artifacts and narratives to inspire the team in later stages. IDENTIFYPOSSIBLESOLUTIONS Who is involved? Participatory design requires a recruiter to source either target users or stakeholders that share an interest in influencing your product; a moderator to guide the participants through the design exercises; and the team to decide on research goals, plan the exercises, and document findings to identify possible directions for your solution. How is it done? 1. Frame the goals, objectives, and questions for the design exercise. What are you trying to achieve by letting them design their perfect experience? What should we ask participants to design? 2. Recruit participants who are open to sharing their perspectives through creative exercises in-house. 3. On the day of the sessions (participatory design should be one-on- one with recruits), invite each participant into a large room with enough space to be creative, and enough materials to fully express their ideas for your product. Sessions may last an hour or so. 4. Afterwards, take the numerous photos, designs, and quotes from the sessions, lay them out for the team to analyze, and use them as sources of inspiration for the solution ideation phase. Objective Participants: 10+ Effort: High Time: Weeks CC Image courtesy of Robert van Geenhuizen on Flickr
- 43. NARROWTHEFIELD Silent/3-MinCritique Converge on the most promising storyboards using an individual critique followed by voting. After creating storyboards of user stories, which show how a user would move through part of the story, you’ll discuss and evaluate them. The critiques will also provide an opportunity to ask questions you may have about any of the storyboards. Determining which storyboards (or parts of storyboards) everyone liked best will help the team decide where to focus and which pieces will go into the prototype. NARROWTHEFIELD Instructions 1. For the Silent Critique, participants are given a bunch of dot stickers. Everyone silently looks at the storyboards and puts a sticker on every idea or part of an idea they like. There are no limits to how many stickers you can use, and you can vote for your own ideas. By the end, you’ve got a heat map of ideas. 2. For the Three-Minute Critiques, everybody gathers around the storyboards one at a time. First, people talk about what they liked, then we ask the person who drew it if we missed anything important. Usually the best ideas are the ones people can understand without an explanation. This process works far better than letting people explain their ideas first — which almost always uses up a lot of time. • You might opt to do the three-minute critiques on a projector, especially if there are a lot of ideas to get through. Take photos of each storyboard, upload them to a shared drive, put them in an editable file, then make notes about parts we like with outlines and text labels as you go through. This is easier for everyone to see, and you have a digital artifact of the ideas. Count on 15 extra minutes to capture and upload photos. 3. Super Vote: Once you’ve looked at all the ideas, everybody gets a few “special” stickers (which can be the same dot stickers with a pen mark on them). These are “super votes” for the ideas you think are the best. Between the original and super votes, it’s easy to see the strongest concepts. The super votes can reflect the decision-making structure of your team or company. Does your CEO make all final product decisions? If that’s the case, be honest, and give her three super votes and everybody else one. The simple rule is to give the deciders extra votes. By default, this process will be a meritocracy, but that’s not always the way companies work and consensus can lead to poor design decisions. The last thing you want are decisions that the deciders don’t truly support. Don’t be surprised if it feels a bit awkward to bring this up. Google Ventures, http://www.gv.com/lib/the-product-design-sprint-divergeday2 Objective Participants: 1+ Time: 5-10 minutes CC Image courtesy of Balanced Team on Flickr
- 44. NARROWTHEFIELD IdentifyConflicts Comb through your storyboards and look for conflicts—where there are two or more different approaches to solving the same problem. Comb through everyone’s storyboards from your storyboarding session (refer to storyboarding exercise), and look for conflicts. A conflict is a place where there are two or more different approaches to solving the same problem. Conflicting approaches are super helpful because they illuminate the choices for your product. Each conflict is like a little gold mine. In business-as-usual design, designers often end up picking one approach and going straight to high resolution. NARROWTHEFIELD Instructions 1. Post everyone’s storyboards up on the wall, side-by-side. 2. Every time you find a conflict, write it down. 3. Put the topic and solutions on sticky notes. 4. Map out your decision points, and you may even want to explore a few conflicting ideas in parallel instead of immediately committing to a safe choice. Google Ventures, http://www.gv.com/lib/the-product-design-sprint-decideday3 Objective Participants: Entire team Time: 30–60 minutes CC Image courtesy of Rob Enslin on Flickr