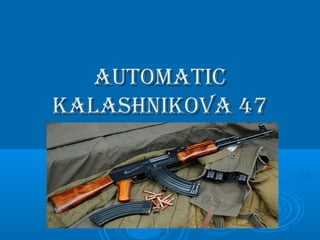
Automatic Kalashnikova 47
•Download as PPT, PDF•
2 likes•901 views

The document provides instruction on operating an AK-47 assault rifle. It discusses the history and development of the AK-47, safety procedures, parts of the rifle, and how to disassemble and assemble it. It also covers shooting fundamentals, including proper grip, stance, sight alignment, trigger squeeze, and readiness positions. The overall purpose is to teach students to safely handle, operate, and shoot the AK-47 rifle according to standard procedures.

Recommended
More Related Content
What's hot
What's hot (20)
Viewers also liked
Viewers also liked (19)
Automatic Kalashnikova 47
- 2. The Outcomes & Scope of thisThe Outcomes & Scope of this lesson.lesson. At the end of this lesson the learner willAt the end of this lesson the learner will demonstrate the following in terms of the unitdemonstrate the following in terms of the unit standard no,10750 :standard no,10750 : Identify the AK 47 assault seriesIdentify the AK 47 assault series Know the parts & their function of the AK 47Know the parts & their function of the AK 47 Disassemble & assemble the AK 47Disassemble & assemble the AK 47 Shooting fundamentals with the AK 47Shooting fundamentals with the AK 47 Different stances & readiness with the AK 47Different stances & readiness with the AK 47
- 3. ImportanceImportance As a learner you are required to know theAs a learner you are required to know the above mentioned scope about the LM. You areabove mentioned scope about the LM. You are going to be assessed against it and if foundgoing to be assessed against it and if found that you don’t know any of the above,that you don’t know any of the above, mentioned scope, you will be considered notmentioned scope, you will be considered not yet competent! You cannot be give a firearmyet competent! You cannot be give a firearm that you cannot operate, you might pullthat you cannot operate, you might pull Ads!Ads!
- 4. Ground RulesGround Rules Please be on time for the class.Please be on time for the class. If there is something you don’t understand, feel freeIf there is something you don’t understand, feel free to ask a question.to ask a question. No cell phones/disruptive learners in the class.No cell phones/disruptive learners in the class. No eating, drinking & smoking in class.No eating, drinking & smoking in class. No live ammunition in class.No live ammunition in class. There will be 5-10min breaks after 30-45min of theThere will be 5-10min breaks after 30-45min of the lesson.lesson. Please commit to these ground rules.Please commit to these ground rules.
- 5. Ice Breaker!Ice Breaker! A paper ruffle/introductions.A paper ruffle/introductions. The learners writes on paper their details, academicThe learners writes on paper their details, academic achievements, hopes out of the course, interest in lifeachievements, hopes out of the course, interest in life and what makes you happy. All of the papers areand what makes you happy. All of the papers are collected into one box. One learner takes one papercollected into one box. One learner takes one paper and calls out the person’s name to the front of theand calls out the person’s name to the front of the class and introduces the person to the class. The classclass and introduces the person to the class. The class may ask one question to the learner being introducedmay ask one question to the learner being introduced and then he picks one paper out of the box does theand then he picks one paper out of the box does the same thing.same thing.
- 6. The Automatic Kalashnikova 1947The Automatic Kalashnikova 1947 TheThe AK-47AK-47 (or(or Avtomat KalashnikovaAvtomat Kalashnikova) is a) is a selective fireselective fire,, gas operatedgas operated 7.62mm7.62mm assault rifleassault rifle. The original AK-47 and its. The original AK-47 and its numerous variants are the most widely used and popularnumerous variants are the most widely used and popular assault rifles in the world. It was first developed in theassault rifles in the world. It was first developed in the Soviet UnionSoviet Union byby Mikhail KalashnikovMikhail Kalashnikov in the 1940s. Thein the 1940s. The designation AK-47 stands for Kalashnikov automatic rifle,designation AK-47 stands for Kalashnikov automatic rifle, model of 1947 (model of 1947 (RussianRussian:: Автомат Калашникова 47Автомат Калашникова 47,, tr.tr. Avtomat Kalashnikova 47Avtomat Kalashnikova 47). It was used in service by the). It was used in service by the Soviet Union and the majority of the member states of theSoviet Union and the majority of the member states of the formerformer Warsaw PactWarsaw Pact. The AK-47 fires the. The AK-47 fires the 7.62x39mm7.62x39mm cartridge which produces significant wounding (includingcartridge which produces significant wounding (including remote wounding effects known as hydrostatic shock) in casesremote wounding effects known as hydrostatic shock) in cases where the bullet tumbles and fragments in tissue, but whichwhere the bullet tumbles and fragments in tissue, but which produces relatively minor wounds in cases where the bulletproduces relatively minor wounds in cases where the bullet exits before beginning to yawexits before beginning to yaw
- 7. Background HistoryBackground History During World War II, it was the Germans that firstDuring World War II, it was the Germans that first developed the assault rifle concept, based upondeveloped the assault rifle concept, based upon research that showed that most firefights happen atresearch that showed that most firefights happen at close range, within 300 meters. The power and rangeclose range, within 300 meters. The power and range of contemporary rifle cartridges was excessive forof contemporary rifle cartridges was excessive for most small arms firefights. As a result, armies soughtmost small arms firefights. As a result, armies sought a cartridge and rifle combining submachine guna cartridge and rifle combining submachine gun features (large-capacity magazine, selective-fire) withfeatures (large-capacity magazine, selective-fire) with an intermediate-power cartridge effective to 300an intermediate-power cartridge effective to 300 meters.meters.
- 8. Background HistoryBackground History Continue.Continue. Mikhail Kalashnikov began his career as a weaponMikhail Kalashnikov began his career as a weapon designer while in a hospital after he was shot in thedesigner while in a hospital after he was shot in the shoulder during the Battle of Bryansk.[9] Aftershoulder during the Battle of Bryansk.[9] After tinkering with a sub-machine gun design, he entered atinkering with a sub-machine gun design, he entered a competition for a new weapon that would chambercompetition for a new weapon that would chamber the 7.62x41mm cartridge developed by Elisarov andthe 7.62x41mm cartridge developed by Elisarov and Semin in 1943 (the 7.62x41mm cartridge predated theSemin in 1943 (the 7.62x41mm cartridge predated the current 7.62x39mm M1943). A particularcurrent 7.62x39mm M1943). A particular requirement of the competition was the reliability ofrequirement of the competition was the reliability of the firearm in the muddy, wet, and frozen conditionsthe firearm in the muddy, wet, and frozen conditions of the Soviet frontline.of the Soviet frontline.
- 9. Safety measure & Precautions.Safety measure & Precautions. Never ever,Never ever, in your life, take a firearm and holster it or do anything with itin your life, take a firearm and holster it or do anything with it without making it safe!without making it safe! Always treat every firearm as if it were loadedAlways treat every firearm as if it were loaded because you do not know the status of it!!!because you do not know the status of it!!! There are four times that we need to make a firearm safeThere are four times that we need to make a firearm safe:: When Receiving it.When Receiving it. When Handing it over to another person.When Handing it over to another person. Before cleaning it; andBefore cleaning it; and After a shooting exercise.After a shooting exercise. Safe direction.Safe direction. A safe direction is anywhere there is a 180 Degrees clear area in frontA safe direction is anywhere there is a 180 Degrees clear area in front of you where there is no person or animal or you can not damage anyof you where there is no person or animal or you can not damage any property, it can be anything that can absorbed a round.property, it can be anything that can absorbed a round.
- 10. Safety measure & Precautions.Safety measure & Precautions. Continue.Continue. Examples of a Safe Direction:Examples of a Safe Direction: Big rubber, like a tractor tyre.Big rubber, like a tractor tyre. A big tree.A big tree. Sand with no rocks & stones.Sand with no rocks & stones.
- 11. Safe making procedures of theSafe making procedures of the AK-47AK-47 Assault Rifle.Assault Rifle. Step 1.Step 1. Identify a safe direction.Identify a safe direction. Step 2.Step 2. Point the rife into the safe direction.Point the rife into the safe direction. Step 3.Step 3. Keep the finger off the trigger.Keep the finger off the trigger. Step 4.Step 4. Engage the safety catch .Engage the safety catch .
- 12. Safe making procedures of theSafe making procedures of the AK-47AK-47 Assault Rifle.Assault Rifle. Continue.Continue. Step 5Step 5 Release the magazine.Release the magazine. Step 6Step 6 Disengage the safety catch.Disengage the safety catch. Step 7Step 7 Cock & hold.Cock & hold. Step 8Step 8 CheckCheck chamberchamber & check& check magazine housingmagazine housing..
- 13. Safe making procedures of theSafe making procedures of the AK-47AK-47 Assault Rifle.Assault Rifle. Continue.Continue. Step 9Step 9 Release the cocking grip.Release the cocking grip. Step 10Step 10 Take an aimed dry shot.Take an aimed dry shot. Step 11Step 11 Engage the safety catch.Engage the safety catch. Step 12Step 12 Shoulder the rifle immediately.Shoulder the rifle immediately. The Rifle is now safe!The Rifle is now safe!
- 14. TechnicalTechnical DetailsDetails Place of OriginPlace of Origin :: Soviet UnionSoviet Union DesignerDesigner :: Makhail KhalashnikovMakhail Khalashnikov DesignedDesigned :: 1940 - 19471940 - 1947 TypeType :: Assault RifleAssault Rifle Cartridge/CaliberCartridge/Caliber :: 7.62x39mm M437.62x39mm M43 ActionAction :: Gas operated, rotating boltGas operated, rotating bolt Rate of FireRate of Fire :: 600 rounds/min600 rounds/min Muzzle VelocityMuzzle Velocity :: 715 m/s715 m/s
- 15. TechnicalTechnical DetailsDetails Continue.Continue. Effective RangeEffective Range :: 300 meters full automatic300 meters full automatic 400 meters semi automatic400 meters semi automatic Barrel LengthBarrel Length :: 415 mm415 mm LengthLength :: 870mm fixed wood stock870mm fixed wood stock WeightWeight :: 4.3kg with empty maga4.3kg with empty maga Magazine CapaMagazine Capa :: 30,40 detach box maga30,40 detach box maga 75 detachable drum maga75 detachable drum maga SightsSights :: 100-1000m adj sights100-1000m adj sights
- 16. Parts of the AK - 47
- 17. Disassembling & Assembling of the Rifle Disassemble the Rifle Step 1 Make the rifle safe. Cock the rifle once. Step 2 With the thumb of the weak hand press the disassembling button in and with your weak hand push the dust cover over to the right hand side and simultaneously lift it up. Step 3 Push the recoil spring and guide rode forward and lift it up and pull it back. Step 4 Safely pull the bolt carrier group all the way to the back until it is released from the body and then remove from the body. Separate the bolt from the bolt carrier group by pushing it back and turning it anticlockwise and pull out.
- 18. Disassembling & Assembling of the Rifle. Continues. Step 5 Slid the gas tube backwards and lift out of the body. The rifle is now Disassembled
- 19. Disassembling & Assembling of the Rifle. Continues. Assemble the rifle Step 1 Make sure that the internal hammer is cocked. Slide the rear of the gas tube into its guide grooves and the front end over the gas block. Make sure that it is properly secured. Step 2 Replace the bolt in the bolt carrier by putting it in its position, turn it clockwise and pull it towards the pistons until it locks in position. Replace the carrier group in the body of the rifle by firstly guiding the pistons inside the gas tube and the rear must be pressed down in the grooves of the body and slide forward. Step 3 Insert the front end of the recoil spring and guide rode in the opening at the rear of the bolt carrier. Push the rear of the guide rode just beyond its retaining slots at the rear of the body of the rifle.
- 20. Disassembling & Assembling of the Rifle. Continues. Step 4 The front end of the dust cover must be fitted in the grooves at the rear of the gas tube and rear of the cover must be fitted in the rear of the rifle body. The disassembling button should now be visible on the opening at the cover. Press down on the dust cover with the thumb of the weak hand and cock once with the weak hand to ensure that the rear of the guide rode slides into position and the disassembling button pops out through the opening at the rear of the dust cover . Step 5 After replacing all the parts and everything is in place, the rifle must be cocked twice to test for proper operation. Aim and take a dry shot. The rifle is now Assembled
- 21. Shooting Fundamentals with the AK - 47 There are a few items involved under this topic: Grip of the rifle. Stance with the rifle. Sight alignment and sight picture. Trigger squeeze. Readiness with the AK - 47.
- 22. Shooting Fundamentals with the AK - 47 Continues The Grip of the Rifle. The name of the grip used on the rifle is called the FOUR PIONT GRIP. The strong hand of the shooter grips firmly on the pistol grip, the weak hand grips in the fore-end grip, the shoulder piece is positioned in the strong hand’s shoulder and the cheek of the strong eye grips on the butt to keep the rifle stable during the shooting exercise. Sight alignment and Sight picture. There are four things that must be aligned: The Strong Eye, The Rear Pip Sight, The front pillar Sight & The Centre of the Target.
- 23. Shooting Fundamentals with the AK - 47 Continues Sight alignment and Sight picture. Close your weak eye and position your strong eye behind the rear pip sight, through the rear pip sight you must see the front pillar sight. This is referred to as sight alignment. Sight Picture, it is when through the rear pip sight you see the front pillar sight in the centre of the target. Trigger Squeeze. This sub-topic is self explainer. It is only in the movies that the hero pulls the trigger. To place a perfect shot you must squeeze the trigger. Place the middle of the first segment of the finger on the trigger. You firstly must pick up the slag (the free movement of the trigger.) and when it begins to be hard, you gently squeeze all the way to the back until the shot goes off. Slowly realize the trigger until you here or feel “Click” from the trigger mechanism and the firearm is ready for the next shot.
- 24. Shooting Fundamentals with the AK - 47 Continues Stance. There are three stances that the shooter can shoot from, namely: Standing, Kneeling & Prone. Standing Position. This stance is better referred to as the “Cat Stance”. This stance is performed with the feet of the shooter standing parallel next to each other, toes facing towards the target, knees slightly bent and the body mass must learn forward.
- 25. Shooting Fundamentals with the AK - 47 Continues Kneeling Position. This stance is performed with the shooter kneeling on the ground with the strong knee. The standing weak knee supports the elbow of the weak hand for stability in the shooting exercise. Prone Position. Shooting in this position is performed by a shooter laying down with his stomach on the ground. The feet must be flat on the ground, elbows must point to the ground like bio pods and keep the rifle stable during the shooting exercise.
- 26. Shooting Fundamentals with the AK - 47 Continues Readiness with the AK - 47 There is a position of readiness with the L.M that makes the shooter very fast when responding to an attack. It is known as “Tactical Ready”, ready for action. It is a combination of all the shooting fundamentals; The stance, the grip, sight alignment. It is performed with the shooter in his cat stance, holding on to his fully loaded rifle with his four point grip. The difference in the grip in this case is that the weak hand is griping on the cocking grip and the muzzle points 45 degrees to the ground.
- 27. The firing sequence of the AK - 47 To fire, the operator inserts a loaded magazine, moves the selector lever to the lowest position, pulls back and releases the charging handle, aims, and then squeeze the trigger. In this setting, the rifle fires only once (semi- automatic), requiring the trigger to be released and depressed again for the next shot. With the selector in the middle position (full-automatic), the rifle continues to fire, automatically cycling fresh rounds into the chamber, until the magazine is exhausted or pressure is released from the trigger. As each bullet travels through the barrel, a portion of the gases expanding behind it is diverted into the gas tube above the barrel, where it impacts the gas piston. The piston, in turn, is driven backward, pushing the bolt carrier, which causes the bolt to move backwards, ejecting the spent round, and chambering a new round when the recoil spring pushes it back and ready to fire again.
- 28. The firing sequence of the AK - 47
- 29. Automatic Kalashnicova 47 Questions and Answers!