Introductory procedural document on soil sampling created during Professional Technical Writing certificate program at University of Washington, September 2015 – June 2016.
More than Just Lines on a Map: Best Practices for U.S Bike Routes
Soil Sampling by Galen Davis
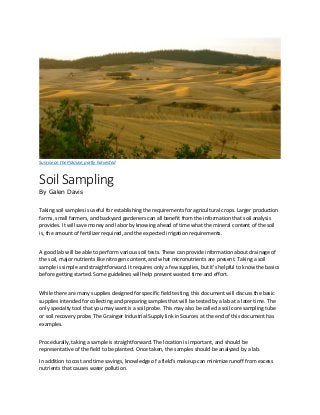
1. Sunrise on the Palouse, partly harvested
Soil Sampling
By Galen Davis
Taking soil samples is useful for establishing the requirements for agricultural crops. Larger production
farms, small farmers, and backyard gardeners can all benefit from the information that soil analysis
provides. It will save money and labor by knowing ahead of time what the mineral content of the soil
is, the amount of fertilizer required, and the expected irrigation requirements.
A good lab will be able to perform various soil tests. These can provide information about drainage of
the soil, major nutrients like nitrogen content, and what micronutrients are present. Taking a soil
sample is simple and straightforward. It requires only a few supplies, but it’s helpful to know the basics
before getting started. Some guidelines will help prevent wasted time and effort.
While there are many supplies designed for specific field testing, this document will discuss the basic
supplies intended for collecting and preparing samples that will be tested by a lab at a later time. The
only specialty tool that you may want is a soil probe. This may also be called a soil core sampling tube
or soil recovery probe. The Grainger Industrial Supply link in Sources at the end of this document has
examples.
Procedurally, taking a sample is straightforward. The location is important, and should be
representative of the field to be planted. Once taken, the samples should be analyzed by a lab.
In addition to cost and time savings, knowledge of a field’s makeup can minimize runoff from excess
nutrients that causes water pollution.
2. Supplies
clean sample bags or buckets
clean trowel, spade, or soil probe
measuring tape
Location
Areas that will be used for different
purposes should be sampled separately.
For example, areas that will be planted
with different major crops will have
different requirements.
Fields will vary. Perform separate samples
on areas that have different soil types or
fertilizer history. (Figure 1.)
Choose locations that do not have any contaminating chemical spills, such as lime or unusual
concentrations of fertilizer. Avoid unusual "patches". The final collection of samples will be combined
to give an average.
It is important to take a representative
sample. Several samples should be taken
from an area that is as uniform as possible.
Gather 10-20 cores of 1/2 in. thick slices
from 15-20 acres in a uniform zig-zag
pattern. (Figure 2.)
Timing
In order to get a baseline, it is best to sample fields that have not been recently fertilized. Sample
before fertilizing for the new crop. Sample after irrigation, if pre-irrigation is used.
Figure 1
Figure 2
3. Procedure
1. Move aside any non-decomposed plant materials
from the surface.
2. Take samples 6 to 8 in. deep. (Figure 3.)
3. Use a soil probe to take cores, or use a spade or
trowel to take 1/2 in. thick slices, and trim the sides,
leaving a 1 in. strip. (Figure 4.)
4. Dump the cores or strips into a clean bag or bucket
5. Break clods by rolling and "kneading" the bag of soil or
mix in the bucket.
6. Prepare 1 quart of well-mixed soil for each 15-20
acres to the lab
7. Label the sample for the lab with name, address,
sample number, and origin.
8. Write down relevant history of the fields for the
samples:
past crops
herbicides
insecticides
nematode or disease problems
quantity and type of fertilizer
Lab
Refer to a reputable lab. "Free" soil tests may not be reliable, and can cost you more in the long run.
Getting reliable results requires that the samples are taken carefully, and that the lab uses the correct
test methods. Many universities have soil testing labs. See the Sources section at the end of this
document.
Once you have found a lab, choose the appropriate soil tests. Depending on the crops being grown,
some of the tests to consider include:
drainage and saturation in soil
types: sand, loam, silt, clay, peat
pH (acidity/alkalinity)
nitrogen content
salinity, Sodium Adsorption Ratio (SAR)
nitrates (NO3-N)
phosphorus content
potassium (K) content
calcium (Ca) content
magnesium (Mg) content
boron (B) content
micronutrient content: zinc (Zn), iron (Fe),
manganese (Mn) and copper (Cu)
cation exchange capacity (CEC)
An additional consideration is plant tissue tests during crop growth. Monitoring the actual crops is
another aspect of agriculture evaluation not described here. For further information, refer to the
Sources section at the end of this document.
Figure 3
Figure 4
4. Galen Davis 12/14/2015
Taking soil samples is a valuable way to determine the makeup of a field, its needs and shortcomings.
With a few simple supplies and access to a good lab, you can discover irrigation, fertilizer and other
amendments that will save time and money that could be lost to failed crops and wasted inputs.
Environmental pollution can also be minimized with knowledge of a field’s requirements.
Sources
How to Take a Soil Sample (pdf)
Testing Your soil How to Collect and Send Samples (pdf)
Soil Sampling - UC Small Farm Program
Wikimedia Commons
Recommended Chemical Soil Test Procedures (pdf)
Ordering Information - UMass Amherst Soil and Plant Tissue Testing Laboratory
Soil Testing - Lab Supplies - Grainger Industrial Supply
USDA - Natural Resources Conservation Service - Web Soil Survey