SlideShare a Scribd company logo
1 of 6
Download to read offline
E120TECH

 Technical Instructions                         Printer Supplies.                           OEM Info                                        Tools   1
           CORPORATE                  12015SA                           Part Number: 23S0300                       Tools Needed:
           LOS ANGELES, USA           2,000 page Return Program Toner   Technology: Laser                          Needle nose pliers
           US 1 800 394.9900          Cartridge                         Print Speed: Up to 20ppm                   Small Phillips screwdriver
           Int’l +1 818 837.8100                                        Resolution: 1200 image quality             #2 Phillips screwdriver
           FAX 1 800 394.9910         12035SA                           printing                                   Small flat blade screwdriver
           Int’l +1 818 838.7047      2,000 page Toner Cartridge        First page out: As fast as 8 seconds
                                                                        Processor: 183 MHz                         Supplies Needed:
           ATLANTA, USA               12026XW                           Memory: 16MB (std./max)                    99% Alcohol
           US 1 877 676.4223          25000 page Photoconductor Kit     Footprint: 15.3W x 14D x 9.8H              Lint-free cloth
           Int’l +1 678 919.1189                                        Duty Cycle: Up to 10,000 pages             Cotton swabs
           FAX 1 877 337.7976                                           per month                                  Toner
           Int’l +1 770 516.7794                                                                                   Doctor bar (if needed)
                                                                                                                   Drum (if needed)
           KANSAS CITY, USA
           US 1 913 871.1700
           FAX 1 913 888.0626
                                      Photo 1
           MIAMI, USA                                                                       Toner Hopper Remanufacturing Instructions:
           US 1 800 595.4297
           Int’l +1 305 594.3396
           FAX 1 800 522.8640
           Int’l +1 305 594.3309

           NEW YORK, USA
           US 1 800 431.7884
           Int’l +1 631 588.7300
           FAX 1 800 431.8812
           Int’l +1 631 588.7333
                                                                                            Step 1
           TORONTO, CAN                                                                     Remove the small Phillips screw that holds the
           CAN 1 877 848.0818                                                               doctor blade positioning plate.
           Int’l +1 905 712.9501
           FAX 1 877 772.6773                                                               (See Photo 1)
           Int’l +1 905 712.9502

           BUENOS AIRES, ARG          Photo 2
           ARG 0810 444.2656                                                                Step 2
           Int’l +011 4583.5900
           FAX +011 4584.3100
                                                                                            The doctor blade positioning plate has two align-
                                                                                            ment pins on each side of the plate that holds the
           MELBOURNE, AUS                                                                   doctor blade in the correct position. Carefully
           AUS 1 800 003. 100                                                               bend the plate and slide the alignment pins from
           Int’l +62 03 9561.8102
           FAX 1 800 004.302
                                                                                            the gear side of the toner hopper.
           Int’l +62 03 9561-7751                                                           (See Photo 2)

           SYDNEY, AUS
           AUS 1 800 003.100
           Int’l +62 02 9648.2630
           FAX 1800 004.302
           Int’l +62 02 9548.2635

           MONTEVIDEO, URY            Photo 3
           URY 02 902.2001
           Int’l +5982 902.2001
                                                                                            Step 3
           FAX +5982 900.0858                                                               Slide the positioning plate toward the gear side
           JOHANNESBURG, S.A.                                                               of the hopper to remove the alignment pins from
           S.A. +27 11 974.6155                                                             the contact side of the toner hopper.
           FAX +27 11 974.3593                                                              (See Photo 3)
           SÃO PAULO, BRAZIL
           Int’l +55 11 5524.8000

           RAANANA, ISRAEL
           ISR 09 760.12.39
           Int’l +972 9760.12.39
           ISR 052.38.555.82
           Int’l +972 5238.555.82

 E-mail: info@futuregraphicsllc.com                                                                            Website: www.futuregraphicsllc.com
REV. 9/14/06
2                                                                E120 Technical Instructions

                                         Photo 7
                                                    Step 6
                                                    Clean the doctor blade using dry compressed
                                                    air. (Lexmark is using the new style doctor
Step 4                                              blades in the E120n cartridges. These blades
Using needle nose pliers, grab the                  have a foam core with a textured coated strip
leaf spring towards its center.                     on the working edge.) Clean the blade using a
Carefully press downward, removing                  lint-free cloth and alcohol. (See Photo 7)
the spring from the spring’s locking
cradle. (See Photo 4) Remove the         Photo 8
leaf spring.                                        Step 7
                                                    Rotate the toner hopper so the gear end is
                                                    facing you. Using a spring hook, remove the
Photo 4                                             locking washer and the washer that holds the
                                                    black drive gear to the toner hopper.
                                                    (See Photo 8)


                                         Photo 9
                                                    Step 8
                                                    Remove the gear.
                                                    (See Photo 9)


Step 5
Lift the doctor blade from the gear
side of the toner hopper. (See Photo
5) Slide the contact end of the doctor
blade out from the contact side of
the toner hopper. (See Photo 5)          Photo 10
NOTE: Be careful not to bend the                    Step 9
doctor blade contact while removing                 Using a small flat blade screwdriver, remove
the blade.                                          the locking bar that holds developer roller
                                                    bushing. (See Photo 10)


Photo 5


                                         Photo 11
                                                    Step 10
                                                    Rotate the developer roller bushing counter-
                                                    clockwise. (See Photo 11)


Photo 6

                                         Photo 12
                                                    Step 11
                                                    Lift up the end of the roller and slide the
                                                    developer roller bushing from the shaft of the
                                                    roller. (See Photo 12)
Lexmark E120 Technical Instructions                                                                                           3
Photo 13
                                       Step 12
                                       Holding the developer roller in place, rotate the
                                       developer roller drive gear clockwise. This will
                                       unlock the drive gear from the shaft of the          Step 18
                                       developer roller. (See Photo 13) NOTE: You may       While holding the developer roller
                                       need to hold the shaft of the developer roller       by the shaft, install the keyed end
                                       using needle nose pliers and rotate while hold-      of the shaft into the gear end of the
                                       ing the drive gear in order to remove the rollers    toner hopper. (See Photos 19)
                                       drive gear.

Photo 14
                                                                                           Photo 19
                                       Step 13
                                       Remove the developer roller drive gear from the
                                       shaft of the roller.
                                       (See Photo 14)


                                       Step 14
Photo 15                               Lift up the shaft of the developer roller on the
                                       contact side of the toner hopper. Slide the          Step 19
                                       shaft of the developer roller from the gear end      Lift up on the shaft of the developer
                                       of the toner hopper. (See Photo 15). Clean the       roller. Install the bushing on to the
                                       developer roller using distilled water and a         end of the developer roller. Rotate
                                       lint-free cloth. (See Photo 16).                     the developer roller clockwise,
                                       NOTE: Make sure the developer roller is com-         locking the bushing in place.
                                       pletely dry before it is reinstalled in the toner    (See Photo 20)
                                       hopper.


                                                                                           Photo 20
Photo 16


                                       Step 15
Photo 17                               Remove the warranty sticker covering the toner
                                       hopper fill plug. Remove the fill plug from the      Step 20
                                       toner hopper. (See Photo 17)                         Place the locking bar onto the end
                                                                                            of the developer roller bushing.
                                       Step 16                                              (See Photo 21)

                                       Dump the remaining toner from the toner
                                       hopper. Clean the hopper using dry,
                                       compressed air or a vacuum.                         Photo 21

Photo 18
                                       Step 17
                                       Clean the developer roller end seals using a
                                       cotton swab and alcohol.
                                       (See Photo 18)
4                                                     Lexmark E120 Technical Instructions

                                         Photo 25
                                                    Step 24
                                                    Position one end of the leaf spring onto the
 Step 21                                            doctor bar. Using needle nose pliers, carefully
 Install the white developer roller                 place the opposite end of the spring onto the
 drive gear onto the shaft of the                   doctor bar. (See Photo 25)
 roller. Rotate the gear counter-
 clockwise to lock the gear onto the
 shaft of the developer roller.
 (See Photo 22)


Photo 22                                 Photo 26
                                                    Step 25
                                                    Slide the two alignment pins on the left side of
                                                    the positioning plate into the two holes on the
                                                    contact side of the toner hopper. (See Photo 26)


 Step 22
 Place the black drive gear onto the
 alignment post on the gear end of       Photo 27
 the toner hopper. Install the washer               Step 26
 and locking washer onto the align-
 ment post. (See Photo 23)                          Carefully bend the plate and slide the two
                                                    alignment pins into the two alignment holes on
                                                    the gear end of the toner hopper.
                                                    (See Photo 27)
Photo 23


                                         Photo 28
                                                    Step 27
                                                    Install the small Phillips screw that holds the
                                                    positioning plate in place. (See Photo 28)
 Step 23
 Install the cleaned or new doctor bar
 onto the toner hopper, making sure
 the positioning post on the doctor
 bar is properly seated into the end
 of the toner hopper. (See Photo 24)
 NOTE: Make sure the doctor blade
 contact is touching the doctor
 blade.                                  Photo 29
                                                    Step 28
                                                    Fill the toner hopper with toner. Place the fill
Photo 24                                            plug back onto the toner hopper.

                                                    Step 29
                                                    Remove the Phillips screw that holds the
                                                    cartridge chip that sits atop the toner hopper.
                                                    Remove the chip.
                                                    (See Photo 29)


E-mail: info@futuregraphicsllc.com                            Website: www.futuregraphicsllc.com
Lexmark E120 Technical Instructions                                                                                         5

Photo 30
                                       Step 30
                                       Place a new chip onto the toner hopper and
                                       install the screw that holds the chip in place.
                                       (See Photo 30) Post-test your cartridge.
                                                                                           Step 5
                                                                                           Remove the two screws that hold
                                                                                           the wiper blade. (See Photo 6)


                                       Remanufacturing the E120n Drum Unit:


Photo 1                                                                                   Photo 6


                                       Step 1
                                       Using a small flat blade screwdriver remove
                                       the E-ring from the drum axle.
                                       (See Photo 1)
                                                                                           Step 6
                                                                                           Lift out the wiper blade. (See Photo
Photo 2                                                                                    7) Clean the wiper blade and the
                                       Step 2                                              waste hopper using dry compressed
                                                                                           air or a vacuum.
                                       Slide the drum axle from the drum on the
                                                                                           NOTE: Be careful not to lose the
                                       opposite side of the waste hopper.
                                                                                           wiper blade end foams that sit on
                                       (See Photo 2)
                                                                                           each side of the waste hopper.


                                                                                          Photo 7

Photo 3
                                       Step 3
                                       Carefully lift out the drum. (See Photo 3) Clean
                                       the drum using a soft cloth. Place the drum in
                                       a protected area away from the light.


                                       Step 4                                              Step 7
Photo 4
                                       Carefully lift out the PCR. (See Photo 4)           Apply padding powder to the wiper
                                       Remove the two spacers from the shaft of the        blade. Place the wiper blade onto
                                       PCR. (See Photo 5). Clean the PCR using a           the waste hopper and install the two
                                       lint-free cloth and distilled water.                screws that hold the blade in place.
                                                                                           (See Photo 8)


Photo 5                                                                                   Photo 8
6                                                   Lexmark E120 Technical Instructions

                                       Photo 12
                                                  Step 11
                                                  Install the loop of the drum’s torsion spring,
                                                  located on the non-gear side of the drum, into
 Step 8                                           the slot on the side of the waste hopper.
 Clean the PCR saddles using a                    (See Photo 12)
 cotton swab and alcohol.
 (See Photo 9)


Photo 9

                                       Photo 13
                                                  Step 12
                                                  Slide the drum axle through the drum starting
                                                  on the non-gear side of the drum.
                                                  (See Photo 13)


 Step 9
 Place the spacers onto the shaft of
 the PCR (See Photo 10)
                                       Photo 14
                                                  Step 13
                                                  Install the E-ring onto the end of the drum axle.
                                                  (See Photo 14)
Photo 10


                                       Photo 15
                                                  Step 14
                                                  Post-test the drum unit.

                                                  Step 15
 Step 10                                          Rotate the spacers on each end of the PCR so
                                                  the legs of the spacer are facing up.
 Install the PCR into the saddles.                (See Photo 15) This will pull the PCR away
 (See Photo 11)                                   from the drum and prevent flat spots for form-
                                                  ing on the PCR.


                                                  Drum Reset Procedures:
Photo 11
                                                  Step 1: Open the front door and hold the
                                                  Cancel button until all lights begin to cycle.

                                                  Step 2: Close the front door. The warning
                                                  clears and the counter resets to zero.

                                                  Step 3: Press Continue to resume printing.


E-mail: info@futuregraphicsllc.com                           Website: www.futuregraphicsllc.com

More Related Content

What's hot

Manual de Recarga Samsung ML 1630 | SCX 4500
Manual de Recarga Samsung ML 1630 | SCX 4500Manual de Recarga Samsung ML 1630 | SCX 4500
Manual de Recarga Samsung ML 1630 | SCX 4500Valejet
 
Hp 3500 3700
Hp 3500 3700Hp 3500 3700
Hp 3500 3700Valejet
 
Canon mf6500
Canon mf6500Canon mf6500
Canon mf6500Valejet
 
Hp 5200
Hp 5200Hp 5200
Hp 5200Valejet
 
Manual de Recarga Lexmark T420
Manual de Recarga Lexmark T420Manual de Recarga Lexmark T420
Manual de Recarga Lexmark T420Valejet
 
Manual de Recarga Ricoh Type 1135
Manual de Recarga Ricoh Type 1135Manual de Recarga Ricoh Type 1135
Manual de Recarga Ricoh Type 1135Valejet
 
Hp 1160 1320 p2015
Hp 1160 1320 p2015Hp 1160 1320 p2015
Hp 1160 1320 p2015Valejet
 
Hp 5000
Hp 5000Hp 5000
Hp 5000Valejet
 
Hp 4500 drum
Hp 4500 drumHp 4500 drum
Hp 4500 drumValejet
 
Brother 720 dr 200
Brother 720 dr 200Brother 720 dr 200
Brother 720 dr 200Valejet
 
Manual de Recarga HP Canon WX C3909A.
Manual de Recarga HP Canon WX C3909A.Manual de Recarga HP Canon WX C3909A.
Manual de Recarga HP Canon WX C3909A.Valejet
 
Hp 2400
Hp 2400Hp 2400
Hp 2400Valejet
 
Brother hl 1240 drum
Brother hl 1240 drumBrother hl 1240 drum
Brother hl 1240 drumValejet
 
Hp 1200 1300
Hp 1200 1300Hp 1200 1300
Hp 1200 1300Valejet
 
Manual de Recarga HP P1005 P1006 P1505.
Manual de Recarga HP P1005 P1006 P1505.Manual de Recarga HP P1005 P1006 P1505.
Manual de Recarga HP P1005 P1006 P1505.Valejet
 
Manual de Recarga Lexmark E310.
Manual de Recarga Lexmark E310.Manual de Recarga Lexmark E310.
Manual de Recarga Lexmark E310.Valejet
 
Manual de Recarga Samsung ML 1650 | ML 1651N | ML1650D8
Manual de Recarga Samsung ML 1650 | ML 1651N | ML1650D8Manual de Recarga Samsung ML 1650 | ML 1651N | ML1650D8
Manual de Recarga Samsung ML 1650 | ML 1651N | ML1650D8Valejet
 

What's hot (17)

Manual de Recarga Samsung ML 1630 | SCX 4500
Manual de Recarga Samsung ML 1630 | SCX 4500Manual de Recarga Samsung ML 1630 | SCX 4500
Manual de Recarga Samsung ML 1630 | SCX 4500
 
Hp 3500 3700
Hp 3500 3700Hp 3500 3700
Hp 3500 3700
 
Canon mf6500
Canon mf6500Canon mf6500
Canon mf6500
 
Hp 5200
Hp 5200Hp 5200
Hp 5200
 
Manual de Recarga Lexmark T420
Manual de Recarga Lexmark T420Manual de Recarga Lexmark T420
Manual de Recarga Lexmark T420
 
Manual de Recarga Ricoh Type 1135
Manual de Recarga Ricoh Type 1135Manual de Recarga Ricoh Type 1135
Manual de Recarga Ricoh Type 1135
 
Hp 1160 1320 p2015
Hp 1160 1320 p2015Hp 1160 1320 p2015
Hp 1160 1320 p2015
 
Hp 5000
Hp 5000Hp 5000
Hp 5000
 
Hp 4500 drum
Hp 4500 drumHp 4500 drum
Hp 4500 drum
 
Brother 720 dr 200
Brother 720 dr 200Brother 720 dr 200
Brother 720 dr 200
 
Manual de Recarga HP Canon WX C3909A.
Manual de Recarga HP Canon WX C3909A.Manual de Recarga HP Canon WX C3909A.
Manual de Recarga HP Canon WX C3909A.
 
Hp 2400
Hp 2400Hp 2400
Hp 2400
 
Brother hl 1240 drum
Brother hl 1240 drumBrother hl 1240 drum
Brother hl 1240 drum
 
Hp 1200 1300
Hp 1200 1300Hp 1200 1300
Hp 1200 1300
 
Manual de Recarga HP P1005 P1006 P1505.
Manual de Recarga HP P1005 P1006 P1505.Manual de Recarga HP P1005 P1006 P1505.
Manual de Recarga HP P1005 P1006 P1505.
 
Manual de Recarga Lexmark E310.
Manual de Recarga Lexmark E310.Manual de Recarga Lexmark E310.
Manual de Recarga Lexmark E310.
 
Manual de Recarga Samsung ML 1650 | ML 1651N | ML1650D8
Manual de Recarga Samsung ML 1650 | ML 1651N | ML1650D8Manual de Recarga Samsung ML 1650 | ML 1651N | ML1650D8
Manual de Recarga Samsung ML 1650 | ML 1651N | ML1650D8
 

Similar to Manual de Recarga Lexmark E120.

Manual de Recarga HP Canon PX 92274A.
Manual de Recarga HP Canon PX 92274A.Manual de Recarga HP Canon PX 92274A.
Manual de Recarga HP Canon PX 92274A.Valejet
 
Manual de Recarga Lexmark T430
Manual de Recarga Lexmark T430Manual de Recarga Lexmark T430
Manual de Recarga Lexmark T430Valejet
 
Manual de Recarga Xerox Phaser 5400 13R495
Manual de Recarga Xerox Phaser 5400 13R495Manual de Recarga Xerox Phaser 5400 13R495
Manual de Recarga Xerox Phaser 5400 13R495Valejet
 
Hp 4000
Hp 4000Hp 4000
Hp 4000Valejet
 
Manual de Recarga HP Canon EX 92298A.
Manual de Recarga HP Canon EX 92298A.Manual de Recarga HP Canon EX 92298A.
Manual de Recarga HP Canon EX 92298A.Valejet
 
Manual de Recarga HP Canon AX C3906A.
Manual de Recarga HP Canon AX C3906A.Manual de Recarga HP Canon AX C3906A.
Manual de Recarga HP Canon AX C3906A.Valejet
 
Manual de Recarga Samsung 5050 | 5100 | 5500 | ML 5000
Manual de Recarga Samsung 5050 | 5100 | 5500 | ML 5000Manual de Recarga Samsung 5050 | 5100 | 5500 | ML 5000
Manual de Recarga Samsung 5050 | 5100 | 5500 | ML 5000Valejet
 
Hp 4500 cmy
Hp 4500 cmyHp 4500 cmy
Hp 4500 cmyValejet
 
Manual de Recarga Samsung CLP 600 CLP 650
Manual de Recarga Samsung CLP 600 CLP 650Manual de Recarga Samsung CLP 600 CLP 650
Manual de Recarga Samsung CLP 600 CLP 650Valejet
 
Hp 1012
Hp 1012Hp 1012
Hp 1012Valejet
 
Hp 5500 c olor
Hp 5500 c olorHp 5500 c olor
Hp 5500 c olorValejet
 
Brother hl 1240 toner tn-430
Brother hl 1240 toner tn-430Brother hl 1240 toner tn-430
Brother hl 1240 toner tn-430Valejet
 
Hp 4500 black
Hp 4500 blackHp 4500 black
Hp 4500 blackValejet
 
Hp 1300
Hp 1300Hp 1300
Hp 1300Valejet
 
Fuji xerox p 880
Fuji xerox p 880Fuji xerox p 880
Fuji xerox p 880Valejet
 
Manual de Recarga Lexmark E320 | E322
Manual de Recarga Lexmark E320 | E322Manual de Recarga Lexmark E320 | E322
Manual de Recarga Lexmark E320 | E322Valejet
 
Hp 8100
Hp 8100Hp 8100
Hp 8100Valejet
 

Similar to Manual de Recarga Lexmark E120. (17)

Manual de Recarga HP Canon PX 92274A.
Manual de Recarga HP Canon PX 92274A.Manual de Recarga HP Canon PX 92274A.
Manual de Recarga HP Canon PX 92274A.
 
Manual de Recarga Lexmark T430
Manual de Recarga Lexmark T430Manual de Recarga Lexmark T430
Manual de Recarga Lexmark T430
 
Manual de Recarga Xerox Phaser 5400 13R495
Manual de Recarga Xerox Phaser 5400 13R495Manual de Recarga Xerox Phaser 5400 13R495
Manual de Recarga Xerox Phaser 5400 13R495
 
Hp 4000
Hp 4000Hp 4000
Hp 4000
 
Manual de Recarga HP Canon EX 92298A.
Manual de Recarga HP Canon EX 92298A.Manual de Recarga HP Canon EX 92298A.
Manual de Recarga HP Canon EX 92298A.
 
Manual de Recarga HP Canon AX C3906A.
Manual de Recarga HP Canon AX C3906A.Manual de Recarga HP Canon AX C3906A.
Manual de Recarga HP Canon AX C3906A.
 
Manual de Recarga Samsung 5050 | 5100 | 5500 | ML 5000
Manual de Recarga Samsung 5050 | 5100 | 5500 | ML 5000Manual de Recarga Samsung 5050 | 5100 | 5500 | ML 5000
Manual de Recarga Samsung 5050 | 5100 | 5500 | ML 5000
 
Hp 4500 cmy
Hp 4500 cmyHp 4500 cmy
Hp 4500 cmy
 
Manual de Recarga Samsung CLP 600 CLP 650
Manual de Recarga Samsung CLP 600 CLP 650Manual de Recarga Samsung CLP 600 CLP 650
Manual de Recarga Samsung CLP 600 CLP 650
 
Hp 1012
Hp 1012Hp 1012
Hp 1012
 
Hp 5500 c olor
Hp 5500 c olorHp 5500 c olor
Hp 5500 c olor
 
Brother hl 1240 toner tn-430
Brother hl 1240 toner tn-430Brother hl 1240 toner tn-430
Brother hl 1240 toner tn-430
 
Hp 4500 black
Hp 4500 blackHp 4500 black
Hp 4500 black
 
Hp 1300
Hp 1300Hp 1300
Hp 1300
 
Fuji xerox p 880
Fuji xerox p 880Fuji xerox p 880
Fuji xerox p 880
 
Manual de Recarga Lexmark E320 | E322
Manual de Recarga Lexmark E320 | E322Manual de Recarga Lexmark E320 | E322
Manual de Recarga Lexmark E320 | E322
 
Hp 8100
Hp 8100Hp 8100
Hp 8100
 

More from Valejet

Manual de Recarga Xerox Phaser 6130 1320 106R01278
Manual de Recarga Xerox Phaser 6130 1320 106R01278Manual de Recarga Xerox Phaser 6130 1320 106R01278
Manual de Recarga Xerox Phaser 6130 1320 106R01278Valejet
 
Manual de Recarga Xerox N24 N32 N40 113R173
Manual de Recarga Xerox N24 N32 N40 113R173Manual de Recarga Xerox N24 N32 N40 113R173
Manual de Recarga Xerox N24 N32 N40 113R173Valejet
 
Manual de Recarga Xerox 4118 6R1278
Manual de Recarga Xerox 4118 6R1278Manual de Recarga Xerox 4118 6R1278
Manual de Recarga Xerox 4118 6R1278Valejet
 
Manual de Recarga Sharp 1010 | 1020 | 1041 | 1200 | 1220 | 1250 | AL1000
Manual de Recarga Sharp  1010 | 1020 | 1041 | 1200 | 1220 | 1250 | AL1000Manual de Recarga Sharp  1010 | 1020 | 1041 | 1200 | 1220 | 1250 | AL1000
Manual de Recarga Sharp 1010 | 1020 | 1041 | 1200 | 1220 | 1250 | AL1000Valejet
 
Manual de Recarga Samsung 4725ELS | 4725F | 4725FN | SCX-4725
Manual de Recarga Samsung 4725ELS | 4725F | 4725FN | SCX-4725Manual de Recarga Samsung 4725ELS | 4725F | 4725FN | SCX-4725
Manual de Recarga Samsung 4725ELS | 4725F | 4725FN | SCX-4725Valejet
 
Manual de Recarga Samsung ML 1440 | ML 1450 | ML 1451 | ML 6040 | ML6060D6
Manual de Recarga Samsung ML 1440 | ML 1450 | ML 1451 | ML 6040 | ML6060D6Manual de Recarga Samsung ML 1440 | ML 1450 | ML 1451 | ML 6040 | ML6060D6
Manual de Recarga Samsung ML 1440 | ML 1450 | ML 1451 | ML 6040 | ML6060D6Valejet
 
Manual de Recarga Samsung ML 1710 | SCX 4216 | SCX 4200 | SCX 4100
Manual de Recarga Samsung ML 1710 | SCX 4216 | SCX 4200 | SCX 4100Manual de Recarga Samsung ML 1710 | SCX 4216 | SCX 4200 | SCX 4100
Manual de Recarga Samsung ML 1710 | SCX 4216 | SCX 4200 | SCX 4100Valejet
 
Manual de Recarga Samsung ML 1210 | ML 1510 | ML 1610 | ML 1710 | ML 2010
Manual de Recarga Samsung ML 1210 | ML 1510 | ML 1610 | ML 1710 | ML 2010Manual de Recarga Samsung ML 1210 | ML 1510 | ML 1610 | ML 1710 | ML 2010
Manual de Recarga Samsung ML 1210 | ML 1510 | ML 1610 | ML 1710 | ML 2010Valejet
 
Manual de Recarga Samsung ML 2251N | ML 2251NP | ML 2251W | ML 2250
Manual de Recarga Samsung ML 2251N | ML 2251NP | ML 2251W | ML 2250Manual de Recarga Samsung ML 2251N | ML 2251NP | ML 2251W | ML 2250
Manual de Recarga Samsung ML 2251N | ML 2251NP | ML 2251W | ML 2250Valejet
 
Manual de Recarga Samsung CLP 610N | CLP 660N | CLP 610 CLP 660 Espanhol
Manual de Recarga Samsung CLP 610N | CLP 660N | CLP 610 CLP 660 EspanholManual de Recarga Samsung CLP 610N | CLP 660N | CLP 610 CLP 660 Espanhol
Manual de Recarga Samsung CLP 610N | CLP 660N | CLP 610 CLP 660 EspanholValejet
 
Manual de Recarga Samsung CLP 600
Manual de Recarga Samsung CLP 600Manual de Recarga Samsung CLP 600
Manual de Recarga Samsung CLP 600Valejet
 
Manual de Recarga Samsung CLP 500 CLP 550
Manual de Recarga Samsung CLP 500 CLP 550Manual de Recarga Samsung CLP 500 CLP 550
Manual de Recarga Samsung CLP 500 CLP 550Valejet
 
Manual de Recarga Okidata C7000 | C7100 Espanhol
Manual de Recarga Okidata C7000 | C7100 EspanholManual de Recarga Okidata C7000 | C7100 Espanhol
Manual de Recarga Okidata C7000 | C7100 EspanholValejet
 
Manual de Recarga Okidata C5500 | 6100 Espanhol
Manual de Recarga Okidata C5500 | 6100 EspanholManual de Recarga Okidata C5500 | 6100 Espanhol
Manual de Recarga Okidata C5500 | 6100 EspanholValejet
 
Manual de Recarga Okidata C5100 Espanhol
Manual de Recarga Okidata C5100 EspanholManual de Recarga Okidata C5100 Espanhol
Manual de Recarga Okidata C5100 EspanholValejet
 
Manual de Recarga Okidata C3400
Manual de Recarga Okidata C3400Manual de Recarga Okidata C3400
Manual de Recarga Okidata C3400Valejet
 
Manual de Recarga Okidata 9000 Espanhol
Manual de Recarga Okidata 9000 EspanholManual de Recarga Okidata 9000 Espanhol
Manual de Recarga Okidata 9000 EspanholValejet
 
Manual de Recarga Okidata 7100 Espanhol.
Manual de Recarga Okidata 7100 Espanhol.Manual de Recarga Okidata 7100 Espanhol.
Manual de Recarga Okidata 7100 Espanhol.Valejet
 
Manual de Recarga Minolta QMS 2400
Manual de Recarga Minolta QMS 2400Manual de Recarga Minolta QMS 2400
Manual de Recarga Minolta QMS 2400Valejet
 
Manual de Recarga Minolta 2300 DL
Manual de Recarga Minolta 2300 DLManual de Recarga Minolta 2300 DL
Manual de Recarga Minolta 2300 DLValejet
 

More from Valejet (20)

Manual de Recarga Xerox Phaser 6130 1320 106R01278
Manual de Recarga Xerox Phaser 6130 1320 106R01278Manual de Recarga Xerox Phaser 6130 1320 106R01278
Manual de Recarga Xerox Phaser 6130 1320 106R01278
 
Manual de Recarga Xerox N24 N32 N40 113R173
Manual de Recarga Xerox N24 N32 N40 113R173Manual de Recarga Xerox N24 N32 N40 113R173
Manual de Recarga Xerox N24 N32 N40 113R173
 
Manual de Recarga Xerox 4118 6R1278
Manual de Recarga Xerox 4118 6R1278Manual de Recarga Xerox 4118 6R1278
Manual de Recarga Xerox 4118 6R1278
 
Manual de Recarga Sharp 1010 | 1020 | 1041 | 1200 | 1220 | 1250 | AL1000
Manual de Recarga Sharp  1010 | 1020 | 1041 | 1200 | 1220 | 1250 | AL1000Manual de Recarga Sharp  1010 | 1020 | 1041 | 1200 | 1220 | 1250 | AL1000
Manual de Recarga Sharp 1010 | 1020 | 1041 | 1200 | 1220 | 1250 | AL1000
 
Manual de Recarga Samsung 4725ELS | 4725F | 4725FN | SCX-4725
Manual de Recarga Samsung 4725ELS | 4725F | 4725FN | SCX-4725Manual de Recarga Samsung 4725ELS | 4725F | 4725FN | SCX-4725
Manual de Recarga Samsung 4725ELS | 4725F | 4725FN | SCX-4725
 
Manual de Recarga Samsung ML 1440 | ML 1450 | ML 1451 | ML 6040 | ML6060D6
Manual de Recarga Samsung ML 1440 | ML 1450 | ML 1451 | ML 6040 | ML6060D6Manual de Recarga Samsung ML 1440 | ML 1450 | ML 1451 | ML 6040 | ML6060D6
Manual de Recarga Samsung ML 1440 | ML 1450 | ML 1451 | ML 6040 | ML6060D6
 
Manual de Recarga Samsung ML 1710 | SCX 4216 | SCX 4200 | SCX 4100
Manual de Recarga Samsung ML 1710 | SCX 4216 | SCX 4200 | SCX 4100Manual de Recarga Samsung ML 1710 | SCX 4216 | SCX 4200 | SCX 4100
Manual de Recarga Samsung ML 1710 | SCX 4216 | SCX 4200 | SCX 4100
 
Manual de Recarga Samsung ML 1210 | ML 1510 | ML 1610 | ML 1710 | ML 2010
Manual de Recarga Samsung ML 1210 | ML 1510 | ML 1610 | ML 1710 | ML 2010Manual de Recarga Samsung ML 1210 | ML 1510 | ML 1610 | ML 1710 | ML 2010
Manual de Recarga Samsung ML 1210 | ML 1510 | ML 1610 | ML 1710 | ML 2010
 
Manual de Recarga Samsung ML 2251N | ML 2251NP | ML 2251W | ML 2250
Manual de Recarga Samsung ML 2251N | ML 2251NP | ML 2251W | ML 2250Manual de Recarga Samsung ML 2251N | ML 2251NP | ML 2251W | ML 2250
Manual de Recarga Samsung ML 2251N | ML 2251NP | ML 2251W | ML 2250
 
Manual de Recarga Samsung CLP 610N | CLP 660N | CLP 610 CLP 660 Espanhol
Manual de Recarga Samsung CLP 610N | CLP 660N | CLP 610 CLP 660 EspanholManual de Recarga Samsung CLP 610N | CLP 660N | CLP 610 CLP 660 Espanhol
Manual de Recarga Samsung CLP 610N | CLP 660N | CLP 610 CLP 660 Espanhol
 
Manual de Recarga Samsung CLP 600
Manual de Recarga Samsung CLP 600Manual de Recarga Samsung CLP 600
Manual de Recarga Samsung CLP 600
 
Manual de Recarga Samsung CLP 500 CLP 550
Manual de Recarga Samsung CLP 500 CLP 550Manual de Recarga Samsung CLP 500 CLP 550
Manual de Recarga Samsung CLP 500 CLP 550
 
Manual de Recarga Okidata C7000 | C7100 Espanhol
Manual de Recarga Okidata C7000 | C7100 EspanholManual de Recarga Okidata C7000 | C7100 Espanhol
Manual de Recarga Okidata C7000 | C7100 Espanhol
 
Manual de Recarga Okidata C5500 | 6100 Espanhol
Manual de Recarga Okidata C5500 | 6100 EspanholManual de Recarga Okidata C5500 | 6100 Espanhol
Manual de Recarga Okidata C5500 | 6100 Espanhol
 
Manual de Recarga Okidata C5100 Espanhol
Manual de Recarga Okidata C5100 EspanholManual de Recarga Okidata C5100 Espanhol
Manual de Recarga Okidata C5100 Espanhol
 
Manual de Recarga Okidata C3400
Manual de Recarga Okidata C3400Manual de Recarga Okidata C3400
Manual de Recarga Okidata C3400
 
Manual de Recarga Okidata 9000 Espanhol
Manual de Recarga Okidata 9000 EspanholManual de Recarga Okidata 9000 Espanhol
Manual de Recarga Okidata 9000 Espanhol
 
Manual de Recarga Okidata 7100 Espanhol.
Manual de Recarga Okidata 7100 Espanhol.Manual de Recarga Okidata 7100 Espanhol.
Manual de Recarga Okidata 7100 Espanhol.
 
Manual de Recarga Minolta QMS 2400
Manual de Recarga Minolta QMS 2400Manual de Recarga Minolta QMS 2400
Manual de Recarga Minolta QMS 2400
 
Manual de Recarga Minolta 2300 DL
Manual de Recarga Minolta 2300 DLManual de Recarga Minolta 2300 DL
Manual de Recarga Minolta 2300 DL
 

Recently uploaded

Connect Wave/ connectwave Pitch Deck Presentation
Connect Wave/ connectwave Pitch Deck PresentationConnect Wave/ connectwave Pitch Deck Presentation
Connect Wave/ connectwave Pitch Deck PresentationSlibray Presentation
 
Build your next Gen AI Breakthrough - April 2024
Build your next Gen AI Breakthrough - April 2024Build your next Gen AI Breakthrough - April 2024
Build your next Gen AI Breakthrough - April 2024Neo4j
 
Swan(sea) Song – personal research during my six years at Swansea ... and bey...
Swan(sea) Song – personal research during my six years at Swansea ... and bey...Swan(sea) Song – personal research during my six years at Swansea ... and bey...
Swan(sea) Song – personal research during my six years at Swansea ... and bey...Alan Dix
 
Are Multi-Cloud and Serverless Good or Bad?
Are Multi-Cloud and Serverless Good or Bad?Are Multi-Cloud and Serverless Good or Bad?
Are Multi-Cloud and Serverless Good or Bad?Mattias Andersson
 
Bluetooth Controlled Car with Arduino.pdf
Bluetooth Controlled Car with Arduino.pdfBluetooth Controlled Car with Arduino.pdf
Bluetooth Controlled Car with Arduino.pdfngoud9212
 
SIEMENS: RAPUNZEL – A Tale About Knowledge Graph
SIEMENS: RAPUNZEL – A Tale About Knowledge GraphSIEMENS: RAPUNZEL – A Tale About Knowledge Graph
SIEMENS: RAPUNZEL – A Tale About Knowledge GraphNeo4j
 
Transcript: #StandardsGoals for 2024: What’s new for BISAC - Tech Forum 2024
Transcript: #StandardsGoals for 2024: What’s new for BISAC - Tech Forum 2024Transcript: #StandardsGoals for 2024: What’s new for BISAC - Tech Forum 2024
Transcript: #StandardsGoals for 2024: What’s new for BISAC - Tech Forum 2024BookNet Canada
 
My Hashitalk Indonesia April 2024 Presentation
My Hashitalk Indonesia April 2024 PresentationMy Hashitalk Indonesia April 2024 Presentation
My Hashitalk Indonesia April 2024 PresentationRidwan Fadjar
 
Bun (KitWorks Team Study 노별마루 발표 2024.4.22)
Bun (KitWorks Team Study 노별마루 발표 2024.4.22)Bun (KitWorks Team Study 노별마루 발표 2024.4.22)
Bun (KitWorks Team Study 노별마루 발표 2024.4.22)Wonjun Hwang
 
Understanding the Laravel MVC Architecture
Understanding the Laravel MVC ArchitectureUnderstanding the Laravel MVC Architecture
Understanding the Laravel MVC ArchitecturePixlogix Infotech
 
"Federated learning: out of reach no matter how close",Oleksandr Lapshyn
"Federated learning: out of reach no matter how close",Oleksandr Lapshyn"Federated learning: out of reach no matter how close",Oleksandr Lapshyn
"Federated learning: out of reach no matter how close",Oleksandr LapshynFwdays
 
Streamlining Python Development: A Guide to a Modern Project Setup
Streamlining Python Development: A Guide to a Modern Project SetupStreamlining Python Development: A Guide to a Modern Project Setup
Streamlining Python Development: A Guide to a Modern Project SetupFlorian Wilhelm
 
Scanning the Internet for External Cloud Exposures via SSL Certs
Scanning the Internet for External Cloud Exposures via SSL CertsScanning the Internet for External Cloud Exposures via SSL Certs
Scanning the Internet for External Cloud Exposures via SSL CertsRizwan Syed
 
Snow Chain-Integrated Tire for a Safe Drive on Winter Roads
Snow Chain-Integrated Tire for a Safe Drive on Winter RoadsSnow Chain-Integrated Tire for a Safe Drive on Winter Roads
Snow Chain-Integrated Tire for a Safe Drive on Winter RoadsHyundai Motor Group
 
Transcript: New from BookNet Canada for 2024: BNC BiblioShare - Tech Forum 2024
Transcript: New from BookNet Canada for 2024: BNC BiblioShare - Tech Forum 2024Transcript: New from BookNet Canada for 2024: BNC BiblioShare - Tech Forum 2024
Transcript: New from BookNet Canada for 2024: BNC BiblioShare - Tech Forum 2024BookNet Canada
 
Advanced Test Driven-Development @ php[tek] 2024
Advanced Test Driven-Development @ php[tek] 2024Advanced Test Driven-Development @ php[tek] 2024
Advanced Test Driven-Development @ php[tek] 2024Scott Keck-Warren
 
Tech-Forward - Achieving Business Readiness For Copilot in Microsoft 365
Tech-Forward - Achieving Business Readiness For Copilot in Microsoft 365Tech-Forward - Achieving Business Readiness For Copilot in Microsoft 365
Tech-Forward - Achieving Business Readiness For Copilot in Microsoft 3652toLead Limited
 

Recently uploaded (20)

Connect Wave/ connectwave Pitch Deck Presentation
Connect Wave/ connectwave Pitch Deck PresentationConnect Wave/ connectwave Pitch Deck Presentation
Connect Wave/ connectwave Pitch Deck Presentation
 
Hot Sexy call girls in Panjabi Bagh 🔝 9953056974 🔝 Delhi escort Service
Hot Sexy call girls in Panjabi Bagh 🔝 9953056974 🔝 Delhi escort ServiceHot Sexy call girls in Panjabi Bagh 🔝 9953056974 🔝 Delhi escort Service
Hot Sexy call girls in Panjabi Bagh 🔝 9953056974 🔝 Delhi escort Service
 
Build your next Gen AI Breakthrough - April 2024
Build your next Gen AI Breakthrough - April 2024Build your next Gen AI Breakthrough - April 2024
Build your next Gen AI Breakthrough - April 2024
 
Swan(sea) Song – personal research during my six years at Swansea ... and bey...
Swan(sea) Song – personal research during my six years at Swansea ... and bey...Swan(sea) Song – personal research during my six years at Swansea ... and bey...
Swan(sea) Song – personal research during my six years at Swansea ... and bey...
 
Are Multi-Cloud and Serverless Good or Bad?
Are Multi-Cloud and Serverless Good or Bad?Are Multi-Cloud and Serverless Good or Bad?
Are Multi-Cloud and Serverless Good or Bad?
 
Bluetooth Controlled Car with Arduino.pdf
Bluetooth Controlled Car with Arduino.pdfBluetooth Controlled Car with Arduino.pdf
Bluetooth Controlled Car with Arduino.pdf
 
SIEMENS: RAPUNZEL – A Tale About Knowledge Graph
SIEMENS: RAPUNZEL – A Tale About Knowledge GraphSIEMENS: RAPUNZEL – A Tale About Knowledge Graph
SIEMENS: RAPUNZEL – A Tale About Knowledge Graph
 
Vulnerability_Management_GRC_by Sohang Sengupta.pptx
Vulnerability_Management_GRC_by Sohang Sengupta.pptxVulnerability_Management_GRC_by Sohang Sengupta.pptx
Vulnerability_Management_GRC_by Sohang Sengupta.pptx
 
Transcript: #StandardsGoals for 2024: What’s new for BISAC - Tech Forum 2024
Transcript: #StandardsGoals for 2024: What’s new for BISAC - Tech Forum 2024Transcript: #StandardsGoals for 2024: What’s new for BISAC - Tech Forum 2024
Transcript: #StandardsGoals for 2024: What’s new for BISAC - Tech Forum 2024
 
My Hashitalk Indonesia April 2024 Presentation
My Hashitalk Indonesia April 2024 PresentationMy Hashitalk Indonesia April 2024 Presentation
My Hashitalk Indonesia April 2024 Presentation
 
Bun (KitWorks Team Study 노별마루 발표 2024.4.22)
Bun (KitWorks Team Study 노별마루 발표 2024.4.22)Bun (KitWorks Team Study 노별마루 발표 2024.4.22)
Bun (KitWorks Team Study 노별마루 발표 2024.4.22)
 
Understanding the Laravel MVC Architecture
Understanding the Laravel MVC ArchitectureUnderstanding the Laravel MVC Architecture
Understanding the Laravel MVC Architecture
 
E-Vehicle_Hacking_by_Parul Sharma_null_owasp.pptx
E-Vehicle_Hacking_by_Parul Sharma_null_owasp.pptxE-Vehicle_Hacking_by_Parul Sharma_null_owasp.pptx
E-Vehicle_Hacking_by_Parul Sharma_null_owasp.pptx
 
"Federated learning: out of reach no matter how close",Oleksandr Lapshyn
"Federated learning: out of reach no matter how close",Oleksandr Lapshyn"Federated learning: out of reach no matter how close",Oleksandr Lapshyn
"Federated learning: out of reach no matter how close",Oleksandr Lapshyn
 
Streamlining Python Development: A Guide to a Modern Project Setup
Streamlining Python Development: A Guide to a Modern Project SetupStreamlining Python Development: A Guide to a Modern Project Setup
Streamlining Python Development: A Guide to a Modern Project Setup
 
Scanning the Internet for External Cloud Exposures via SSL Certs
Scanning the Internet for External Cloud Exposures via SSL CertsScanning the Internet for External Cloud Exposures via SSL Certs
Scanning the Internet for External Cloud Exposures via SSL Certs
 
Snow Chain-Integrated Tire for a Safe Drive on Winter Roads
Snow Chain-Integrated Tire for a Safe Drive on Winter RoadsSnow Chain-Integrated Tire for a Safe Drive on Winter Roads
Snow Chain-Integrated Tire for a Safe Drive on Winter Roads
 
Transcript: New from BookNet Canada for 2024: BNC BiblioShare - Tech Forum 2024
Transcript: New from BookNet Canada for 2024: BNC BiblioShare - Tech Forum 2024Transcript: New from BookNet Canada for 2024: BNC BiblioShare - Tech Forum 2024
Transcript: New from BookNet Canada for 2024: BNC BiblioShare - Tech Forum 2024
 
Advanced Test Driven-Development @ php[tek] 2024
Advanced Test Driven-Development @ php[tek] 2024Advanced Test Driven-Development @ php[tek] 2024
Advanced Test Driven-Development @ php[tek] 2024
 
Tech-Forward - Achieving Business Readiness For Copilot in Microsoft 365
Tech-Forward - Achieving Business Readiness For Copilot in Microsoft 365Tech-Forward - Achieving Business Readiness For Copilot in Microsoft 365
Tech-Forward - Achieving Business Readiness For Copilot in Microsoft 365
 

Manual de Recarga Lexmark E120.

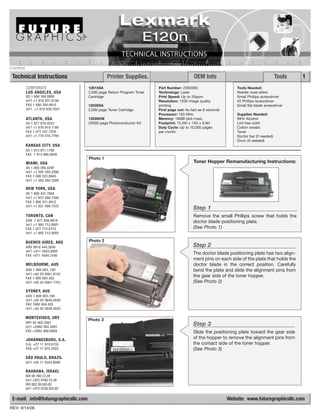
  • 1. E120TECH Technical Instructions Printer Supplies. OEM Info Tools 1 CORPORATE 12015SA Part Number: 23S0300 Tools Needed: LOS ANGELES, USA 2,000 page Return Program Toner Technology: Laser Needle nose pliers US 1 800 394.9900 Cartridge Print Speed: Up to 20ppm Small Phillips screwdriver Int’l +1 818 837.8100 Resolution: 1200 image quality #2 Phillips screwdriver FAX 1 800 394.9910 12035SA printing Small flat blade screwdriver Int’l +1 818 838.7047 2,000 page Toner Cartridge First page out: As fast as 8 seconds Processor: 183 MHz Supplies Needed: ATLANTA, USA 12026XW Memory: 16MB (std./max) 99% Alcohol US 1 877 676.4223 25000 page Photoconductor Kit Footprint: 15.3W x 14D x 9.8H Lint-free cloth Int’l +1 678 919.1189 Duty Cycle: Up to 10,000 pages Cotton swabs FAX 1 877 337.7976 per month Toner Int’l +1 770 516.7794 Doctor bar (if needed) Drum (if needed) KANSAS CITY, USA US 1 913 871.1700 FAX 1 913 888.0626 Photo 1 MIAMI, USA Toner Hopper Remanufacturing Instructions: US 1 800 595.4297 Int’l +1 305 594.3396 FAX 1 800 522.8640 Int’l +1 305 594.3309 NEW YORK, USA US 1 800 431.7884 Int’l +1 631 588.7300 FAX 1 800 431.8812 Int’l +1 631 588.7333 Step 1 TORONTO, CAN Remove the small Phillips screw that holds the CAN 1 877 848.0818 doctor blade positioning plate. Int’l +1 905 712.9501 FAX 1 877 772.6773 (See Photo 1) Int’l +1 905 712.9502 BUENOS AIRES, ARG Photo 2 ARG 0810 444.2656 Step 2 Int’l +011 4583.5900 FAX +011 4584.3100 The doctor blade positioning plate has two align- ment pins on each side of the plate that holds the MELBOURNE, AUS doctor blade in the correct position. Carefully AUS 1 800 003. 100 bend the plate and slide the alignment pins from Int’l +62 03 9561.8102 FAX 1 800 004.302 the gear side of the toner hopper. Int’l +62 03 9561-7751 (See Photo 2) SYDNEY, AUS AUS 1 800 003.100 Int’l +62 02 9648.2630 FAX 1800 004.302 Int’l +62 02 9548.2635 MONTEVIDEO, URY Photo 3 URY 02 902.2001 Int’l +5982 902.2001 Step 3 FAX +5982 900.0858 Slide the positioning plate toward the gear side JOHANNESBURG, S.A. of the hopper to remove the alignment pins from S.A. +27 11 974.6155 the contact side of the toner hopper. FAX +27 11 974.3593 (See Photo 3) SÃO PAULO, BRAZIL Int’l +55 11 5524.8000 RAANANA, ISRAEL ISR 09 760.12.39 Int’l +972 9760.12.39 ISR 052.38.555.82 Int’l +972 5238.555.82 E-mail: info@futuregraphicsllc.com Website: www.futuregraphicsllc.com REV. 9/14/06
  • 2. 2 E120 Technical Instructions Photo 7 Step 6 Clean the doctor blade using dry compressed air. (Lexmark is using the new style doctor Step 4 blades in the E120n cartridges. These blades Using needle nose pliers, grab the have a foam core with a textured coated strip leaf spring towards its center. on the working edge.) Clean the blade using a Carefully press downward, removing lint-free cloth and alcohol. (See Photo 7) the spring from the spring’s locking cradle. (See Photo 4) Remove the Photo 8 leaf spring. Step 7 Rotate the toner hopper so the gear end is facing you. Using a spring hook, remove the Photo 4 locking washer and the washer that holds the black drive gear to the toner hopper. (See Photo 8) Photo 9 Step 8 Remove the gear. (See Photo 9) Step 5 Lift the doctor blade from the gear side of the toner hopper. (See Photo 5) Slide the contact end of the doctor blade out from the contact side of the toner hopper. (See Photo 5) Photo 10 NOTE: Be careful not to bend the Step 9 doctor blade contact while removing Using a small flat blade screwdriver, remove the blade. the locking bar that holds developer roller bushing. (See Photo 10) Photo 5 Photo 11 Step 10 Rotate the developer roller bushing counter- clockwise. (See Photo 11) Photo 6 Photo 12 Step 11 Lift up the end of the roller and slide the developer roller bushing from the shaft of the roller. (See Photo 12)
  • 3. Lexmark E120 Technical Instructions 3 Photo 13 Step 12 Holding the developer roller in place, rotate the developer roller drive gear clockwise. This will unlock the drive gear from the shaft of the Step 18 developer roller. (See Photo 13) NOTE: You may While holding the developer roller need to hold the shaft of the developer roller by the shaft, install the keyed end using needle nose pliers and rotate while hold- of the shaft into the gear end of the ing the drive gear in order to remove the rollers toner hopper. (See Photos 19) drive gear. Photo 14 Photo 19 Step 13 Remove the developer roller drive gear from the shaft of the roller. (See Photo 14) Step 14 Photo 15 Lift up the shaft of the developer roller on the contact side of the toner hopper. Slide the Step 19 shaft of the developer roller from the gear end Lift up on the shaft of the developer of the toner hopper. (See Photo 15). Clean the roller. Install the bushing on to the developer roller using distilled water and a end of the developer roller. Rotate lint-free cloth. (See Photo 16). the developer roller clockwise, NOTE: Make sure the developer roller is com- locking the bushing in place. pletely dry before it is reinstalled in the toner (See Photo 20) hopper. Photo 20 Photo 16 Step 15 Photo 17 Remove the warranty sticker covering the toner hopper fill plug. Remove the fill plug from the Step 20 toner hopper. (See Photo 17) Place the locking bar onto the end of the developer roller bushing. Step 16 (See Photo 21) Dump the remaining toner from the toner hopper. Clean the hopper using dry, compressed air or a vacuum. Photo 21 Photo 18 Step 17 Clean the developer roller end seals using a cotton swab and alcohol. (See Photo 18)
  • 4. 4 Lexmark E120 Technical Instructions Photo 25 Step 24 Position one end of the leaf spring onto the Step 21 doctor bar. Using needle nose pliers, carefully Install the white developer roller place the opposite end of the spring onto the drive gear onto the shaft of the doctor bar. (See Photo 25) roller. Rotate the gear counter- clockwise to lock the gear onto the shaft of the developer roller. (See Photo 22) Photo 22 Photo 26 Step 25 Slide the two alignment pins on the left side of the positioning plate into the two holes on the contact side of the toner hopper. (See Photo 26) Step 22 Place the black drive gear onto the alignment post on the gear end of Photo 27 the toner hopper. Install the washer Step 26 and locking washer onto the align- ment post. (See Photo 23) Carefully bend the plate and slide the two alignment pins into the two alignment holes on the gear end of the toner hopper. (See Photo 27) Photo 23 Photo 28 Step 27 Install the small Phillips screw that holds the positioning plate in place. (See Photo 28) Step 23 Install the cleaned or new doctor bar onto the toner hopper, making sure the positioning post on the doctor bar is properly seated into the end of the toner hopper. (See Photo 24) NOTE: Make sure the doctor blade contact is touching the doctor blade. Photo 29 Step 28 Fill the toner hopper with toner. Place the fill Photo 24 plug back onto the toner hopper. Step 29 Remove the Phillips screw that holds the cartridge chip that sits atop the toner hopper. Remove the chip. (See Photo 29) E-mail: info@futuregraphicsllc.com Website: www.futuregraphicsllc.com
  • 5. Lexmark E120 Technical Instructions 5 Photo 30 Step 30 Place a new chip onto the toner hopper and install the screw that holds the chip in place. (See Photo 30) Post-test your cartridge. Step 5 Remove the two screws that hold the wiper blade. (See Photo 6) Remanufacturing the E120n Drum Unit: Photo 1 Photo 6 Step 1 Using a small flat blade screwdriver remove the E-ring from the drum axle. (See Photo 1) Step 6 Lift out the wiper blade. (See Photo Photo 2 7) Clean the wiper blade and the Step 2 waste hopper using dry compressed air or a vacuum. Slide the drum axle from the drum on the NOTE: Be careful not to lose the opposite side of the waste hopper. wiper blade end foams that sit on (See Photo 2) each side of the waste hopper. Photo 7 Photo 3 Step 3 Carefully lift out the drum. (See Photo 3) Clean the drum using a soft cloth. Place the drum in a protected area away from the light. Step 4 Step 7 Photo 4 Carefully lift out the PCR. (See Photo 4) Apply padding powder to the wiper Remove the two spacers from the shaft of the blade. Place the wiper blade onto PCR. (See Photo 5). Clean the PCR using a the waste hopper and install the two lint-free cloth and distilled water. screws that hold the blade in place. (See Photo 8) Photo 5 Photo 8
  • 6. 6 Lexmark E120 Technical Instructions Photo 12 Step 11 Install the loop of the drum’s torsion spring, located on the non-gear side of the drum, into Step 8 the slot on the side of the waste hopper. Clean the PCR saddles using a (See Photo 12) cotton swab and alcohol. (See Photo 9) Photo 9 Photo 13 Step 12 Slide the drum axle through the drum starting on the non-gear side of the drum. (See Photo 13) Step 9 Place the spacers onto the shaft of the PCR (See Photo 10) Photo 14 Step 13 Install the E-ring onto the end of the drum axle. (See Photo 14) Photo 10 Photo 15 Step 14 Post-test the drum unit. Step 15 Step 10 Rotate the spacers on each end of the PCR so the legs of the spacer are facing up. Install the PCR into the saddles. (See Photo 15) This will pull the PCR away (See Photo 11) from the drum and prevent flat spots for form- ing on the PCR. Drum Reset Procedures: Photo 11 Step 1: Open the front door and hold the Cancel button until all lights begin to cycle. Step 2: Close the front door. The warning clears and the counter resets to zero. Step 3: Press Continue to resume printing. E-mail: info@futuregraphicsllc.com Website: www.futuregraphicsllc.com