More Related Content
Similar to Virtualization_with_PowerVM (1).pdf (20)
More from ssuserecfcc8 (6)
Virtualization_with_PowerVM (1).pdf
- 1.
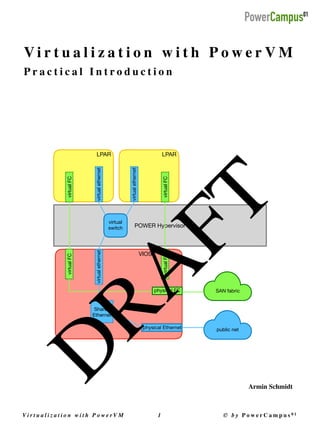
Vi r t u a l i z a t i o n w i t h P o w e r V M

1 © b y P o w e r C a m p u s 0 1
V i r t u a l i z a t i o n w i t h P o w e r V
M
P r a c t i c a l I n t r o d u c t i o n
LPAR
POWER Hypervisor
LPAR
virtual
switch
virtual
FC
virtual
FC
virtual
FC
virtual
FC
public net
SAN fabric
virtual
ethernet
virtual
ethernet
virtual
ethernet
VIOS
physical Ethernet
physical FC
Shared
Ethernet
D
R
A
F
T
Armin Schmidt
- 2. Copyright © 2021 by PowerCampus01
This manual is the intellectual property of PowerCampus01
.
It may be copied and also printed out as a whole or in parts, as long as no parts are changed
.
All information contained in this manual has been compiled with great care. However, incorrect information cannot
be completely ruled out. PowerCampus01 is not liable for any errors and their consequences. The content can be
changed at any time without notice
.
Software and hardware names in this manual are in many cases registered trademarks and are subject to the copyright
of the respective manufacturer
.
https://www.powercampus.de
https://www.powercampus01.com
First edition (June 2021
)
This version of the document refers to version 1.6.4.0 of the LPAR tool
.
Vi r t u a l i z a t i o n w i t h P o w e r V M

2 © b y P o w e r C a m p u s 0 1
- 3. Foreword
9
........................................................................................................
Introduction 9
..............................................................................................................
Additional Information 9
..............................................................................................
1. Introduction to IBM PowerVM
10
.................................................................
1.1. PowerVM Features 10
........................................................................................
1.2. The POWER Hypervisor 11
................................................................................
1.3. PowerVM Editions 12
.........................................................................................
1.3.1. PowerVM Standard Edition 12
....................................................................................................................................
1.3.2. PowerVM Enterprise Edition 13
...................................................................................................................................
1.3.3. IBM PowerVM, Linux Edition 13
..................................................................................................................................
1.3.4. PowerVM Express Edition 14
.......................................................................................................................................
2. Introduction to the LPAR tool
15
...................................................................
2.1. Requirements 16
................................................................................................
2.2. Downloading the LPAR tool 16
...........................................................................
2.3. License for the LPAR tool 16
...............................................................................
2.4. The Commands of the LPAR tool 17
....................................................................
2.4.1. The Command hmc 17
...............................................................................................................................................
2.4.2. The Command ms 18
.................................................................................................................................................
2.4.3. The Command lpar 19
...............................................................................................................................................
2.4.4. The Command vios 21
...............................................................................................................................................
2.4.5. The Online Documentation 23
....................................................................................................................................
2.4.6. The „verbose“ Mode 25
.............................................................................................................................................
2.4.7. Logging of the Command Calls 25
.............................................................................................................................
3. Components of a PowerVM Environment
27
................................................
3.1. Hardware Management Console (HMC) 28
........................................................
3.2. Managed Systems 30
........................................................................................
3.3. PowerVC 31
......................................................................................................
4. Overview of a PowerVM Environment
32
....................................................
4.1. What LPARs are out there? 32
............................................................................
4.2. Status of LPARs 33
.............................................................................................
4.3. Activating an LPAR 34
.......................................................................................
Vi r t u a l i z a t i o n w i t h P o w e r V M

3 © b y P o w e r C a m p u s 0 1
- 4. 4.4. Shutting down an LPAR 35
.................................................................................
4.5. Console for an LPAR 36
.....................................................................................
4.6. Status of Managed Systems 37
..........................................................................
4.7. System Firmware Version of Managed Systems 37
...............................................
4.8. Physical Hardware of Managed Systems 38
........................................................
5. Processor Virtualization
40
..........................................................................
5.1. Dedicated Processors 40
....................................................................................
5.1.1. Adding Dedicated Processors 42
.................................................................................................................................
5.1.2. Removing Dedicated Processors 44
............................................................................................................................
5.2. Shared Processors (Micro-Partitioning) 45
...........................................................
5.2.1. Processor Sharing Mode 51
........................................................................................................................................
5.2.2. Sharing Mode cap 52
.................................................................................................................................................
5.2.3. Sharing Mode uncap and uncapped_weight 53
.........................................................................................................
5.2.4. Adding Virtual Processors and Processing Units 56
.....................................................................................................
5.2.5. Removing Virtual Processors and Processing Units 57
.................................................................................................
5.3. Processors, Processor Cores and Simultaneous Multi-Threading 57
.......................
5.3.1. POWER Processors 58
................................................................................................................................................
5.3.2. Simultaneous Multi-Threading 58
..............................................................................................................................
5.4. Shared Dedicated Capacity 59
..........................................................................
5.5. Multiple Shared Processor Pools 61
....................................................................
5.5.1. Physical Shared Processor Pool 62
.............................................................................................................................
5.5.2. Multiple Shared Processor Pools 62
............................................................................................................................
5.5.3. Con
fi
guring a Shared Processor Pool (Maximum Pool Capacity) 63
............................................................................
5.5.4. Assigning of a Shared Processor Pool 64
....................................................................................................................
5.5.5. Entitled Pool Capacity (EPC) 66
..................................................................................................................................
5.5.6. Reserved Pool Capacity (RPC) 70
...............................................................................................................................
5.5.7. Deactivating a Shared Processor Pool 71
....................................................................................................................
6. Memory Virtualization
72
............................................................................
6.1. Dedicated Memory 72
......................................................................................
6.1.1. Adding Memory 75
....................................................................................................................................................
6.1.2. Removing Memory 76
................................................................................................................................................
Vi r t u a l i z a t i o n w i t h P o w e r V M

4 © b y P o w e r C a m p u s 0 1
- 5. 6.2. Active Memory Sharing (AMS) 77
.....................................................................
6.2.1. Creation of a Shared Memory Pool 79
.......................................................................................................................
6.2.2. Adding a Paging Device 80
........................................................................................................................................
6.2.3. Creation of LPARs with Shared Memory 81
.................................................................................................................
6.2.4. Changing a Dedicated Memory LPAR to Shared Memory 83
........................................................................................
6.2.5. Logical Memory and Paging 84
.................................................................................................................................
6.2.6. Monitoring of the Logical Memory 86
........................................................................................................................
6.2.7. Changing a Shared Memory Pool 88
..........................................................................................................................
6.2.8. Switch-over of a Redundant Paging Device 89
............................................................................................................
6.2.9. I/O Entitled Memory 89
............................................................................................................................................
6.2.10. Removing a Paging Device 90
....................................................................................................................................
6.2.11. Removing a Shared Memory Pool 91
.........................................................................................................................
6.3. Active Memory Expansion (AME) 92
..................................................................
6.3.1. Con
fi
guring AME 93
...................................................................................................................................................
6.3.2. Active Memory Expansion Planning Tool (amepat) 94
................................................................................................
6.3.3. Monitoring and Memory De
fi
cit 95
............................................................................................................................
6.3.4. Changing the AME Factor 97
......................................................................................................................................
6.3.5. Adding and Removing Memory 97
.............................................................................................................................
6.3.6. Active Memory Expansion and Active Memory Sharing 97
..........................................................................................
7. I/O Virtualization
98
....................................................................................
7.1. Virtual Slots 99
.................................................................................................
7.2. Virtual Serial Adapter 100
.................................................................................
7.2.1. Console using a Virtual I/O Server 102
......................................................................................................................
7.3. Virtual Ethernet 104
..........................................................................................
7.3.1. VLANs and VLAN Tagging 105
....................................................................................................................................
7.3.2. Adding a Virtual Ethernet Adapter 107
.......................................................................................................................
7.3.3. Virtual Ethernet Switches 109
.....................................................................................................................................
7.3.4. Virtual Ethernet Bridge Mode (VEB) 112
.....................................................................................................................
7.3.5. Virtual Ethernet Port Aggregator Mode (VEPA) 112
.....................................................................................................
7.3.6. Virtual Networks 113
.................................................................................................................................................
7.3.7. Adding and Removing VLANs to/from an Adapter 115
................................................................................................
Vi r t u a l i z a t i o n w i t h P o w e r V M

5 © b y P o w e r C a m p u s 0 1
- 6. 7.3.8. Changing Attributes of a Virtual Ethernet Adapter 116
................................................................................................
7.3.9. Removing a Virtual Ethernet Adapter 117
...................................................................................................................
7.4. Virtual FC 118
...................................................................................................
7.4.1. NPIV-fähige FC-Adapter 120
.......................................................................................................................................
7.4.2. Adding a Virtual FC Adapter 121
................................................................................................................................
7.4.3. Assigning a Physical FC Port (Mapping) 124
...............................................................................................................
7.4.4. Adding LUNs 127
.......................................................................................................................................................
7.4.5. Adding a Virtual FC Adapter with Mapping 128
..........................................................................................................
7.4.6. Changing Attributes of a Virtual FC Adapter 128
.........................................................................................................
7.4.7. Removing an NPIV Mapping 129
................................................................................................................................
7.4.8. Changing an NPIV Mapping 130
.................................................................................................................................
7.4.9. Removing a Virtual FC Adapter 133
............................................................................................................................
7.4.10. Assigning Prede
fi
ned WWPNs 136
..............................................................................................................................
7.5. Virtual SCSI 137
................................................................................................
7.5.1. Adding a Virtual SCSI Adapter 138
.............................................................................................................................
7.5.2. Assignment of Virtual Target Devices (Mapping) 141
..................................................................................................
7.5.3. Removing a VSCSI Mapping 145
.................................................................................................................................
7.5.4. Removing a Virtual SCSI Adapter 147
.........................................................................................................................
7.6. SR-IOV 151
.......................................................................................................
7.6.1. Activating Shared Mode 152
......................................................................................................................................
7.6.2. Con
fi
guration of Physical SR-IOV Ports 153
.................................................................................................................
7.6.3. Adding Logical SR-IOV Ports 155
.................................................................................................................................
7.6.4. Changing a Logical SR-IOV Port 157
...........................................................................................................................
7.6.5. Removing Logical SR-IOV Ports 158
............................................................................................................................
7.6.6. Setting an SR-IOV Adapter from Shared back to Dedicated 158
...................................................................................
7.7. Virtual Network Interface Controller (vNIC) 159
.................................................
7.7.1. Creating a vNIC Adapter 160
......................................................................................................................................
7.7.2. Changing a vNIC Adapter 163
....................................................................................................................................
7.7.3. Adding a vNIC Backing Device 163
.............................................................................................................................
7.7.4. Changing a vNIC Backing Device 165
.........................................................................................................................
7.7.5. vNIC Failover 166
......................................................................................................................................................
Vi r t u a l i z a t i o n w i t h P o w e r V M

6 © b y P o w e r C a m p u s 0 1
- 7. 7.7.6. Manual Activation of a vNIC Backing Device 169
........................................................................................................
7.7.7. Removing a vNIC Backing Device 169
.........................................................................................................................
7.7.8. Removing a vNIC Adapter 171
....................................................................................................................................
8. Virtual I/O Server
172
..................................................................................
8.1. Planning and Creation of a Virtual I/O Server 172
..............................................
8.2. Installation a Virtual I/O Server 175
...................................................................
8.2.1. Installation using a CD or DVD 175
............................................................................................................................
8.3. Device management 186
...................................................................................
8.3.1. Viewing Available Devices 187
...................................................................................................................................
8.3.2. Adding Devices 190
...................................................................................................................................................
8.3.3. Changing Devices 191
................................................................................................................................................
8.3.4. Removing Devices 191
...............................................................................................................................................
8.4. Error Report 192
...............................................................................................
8.5. Shared Ethernet Adapter 194
.............................................................................
8.5.1. SEA without VLAN Tagging 196
..................................................................................................................................
8.5.2. SEA with VLAN Tagging 198
.......................................................................................................................................
8.5.3. Some SEA Attributes 211
............................................................................................................................................
8.5.4. Con
fi
guring an IP Address on a SEA 212
.....................................................................................................................
8.5.5. Adding and Removing VLANs (not HA) 214
.................................................................................................................
8.5.6. Adding and Removing Trunking Adapters (not HA) 215
..............................................................................................
8.5.7. Removing a Shared Ethernet Adapter (not HA) 216
....................................................................................................
8.5.8. HA-SEA with Failover 218
...........................................................................................................................................
8.5.9. Creating SEAs with HA Mode (HA-SEA) 221
.................................................................................................................
8.5.10. HA-Modes auto and standby 223
...............................................................................................................................
8.5.11. Adding and Removing VLANs (HA-SEA) 224
................................................................................................................
8.5.12. Adding and Removing Trunking Adapters (HA-SEA) 226
.............................................................................................
8.5.13. Removing HA-SEAs 227
..............................................................................................................................................
8.5.14. HA-SEA with Load Sharing 228
...................................................................................................................................
8.5.15. Creation of SEAs with Load Sharing 229
.....................................................................................................................
8.5.16. Adding and Removing VLANs (Load Sharing) 232
......................................................................................................
8.5.17. Adding and Removing Trunking Adapters (Load Sharing) 234
....................................................................................
Vi r t u a l i z a t i o n w i t h P o w e r V M

7 © b y P o w e r C a m p u s 0 1
- 8. 8.5.18. Change the HA Mode between Failover and Load Sharing 236
....................................................................................
8.5.19. Deleting SEAs (Load Sharing) 237
.............................................................................................................................
8.6. Storage Pools 239
.............................................................................................
8.6.1. Creation of a Logical Volume Storage Pool 241
...........................................................................................................
8.6.2. Creation of Backing Devices 243
................................................................................................................................
8.6.3. Extending a Backing Device 246
................................................................................................................................
8.6.4. Removing a Backing Device 248
................................................................................................................................
8.6.5. Extending and Reducing a Logical Volume Storage Pool 249
.......................................................................................
8.6.6. Deleting a Logical Volume Storage Pool 251
...............................................................................................................
8.6.7. Creating a File Storage Pool 253
................................................................................................................................
8.6.8. Extending a File Storage Pool 254
.............................................................................................................................
8.6.9. Deleting a File Storage Pool 254
................................................................................................................................
8.7. Virtual Optical Media Library 255
.....................................................................
8.8. Link Aggregations 259
.......................................................................................
9. Live Partition Mobility (LPM)
260
.................................................................
Vi r t u a l i z a t i o n w i t h P o w e r V M

8 © b y P o w e r C a m p u s 0 1
- 9. F o r e w o r
d
I n t r o d u c t i o
n
IBM PowerVM is a virtualization solution from IBM for IBM Power Systems. The LPAR tool is a command line
based tool from PowerCampus 01 for the simple administration of IBM PowerVM environments
.
The aim of the manual is to introduce and explain the virtualization concepts of IBM PowerVM, as well as to show
the con
fi
guration and administration of IBM PowerVM. The LPAR tool is used at all points, which means that the
manual can also serve as an introduction to the LPAR tool. The focus, however, is on PowerVM virtualization
.
Since this is an introduction to virtualization with PowerVM, the topics are not shown down to the last detail. The
IBM documentation should be consulted for more detailed information
.
The manual assumes the following
:
• basic knowledge of working on the command line of a UNIX syste
m
• a basic understanding of virtualization is helpful, but not require
d
This manual can be downloaded from the download area on the PowerCampus01 website
:
• https://www.powercampus.de or https://www.powercampus01.com
A d d i t i o n a l I n f o r m a t i o
n
Further information on the LPAR tool is available in the product area on the PowerCampus01 website
:
• https://www.powercampus.de oder https://www.powercampus01.com
More information about IBM PowerVM can be found on the IBM website
:
• https://www.ibm.com
Vi r t u a l i z a t i o n w i t h P o w e r V M

9 © b y P o w e r C a m p u s 0 1
- 10. 1. I n t r o d u c t i o n t o I B M P o w e r V
M
IBM PowerVM is a virtualization solution from IBM especially for power systems. It consists of a combination of
special hardware and software. The main components of IBM PowerVM are as follows
:
- Special POWER hardware with
fi
rmware (POWER hypervisor), which enables the sharing of resources and other
features
.
- The virtual I/O server, as a special service partition, which enables the sharing of disk and network resources. For
increased redundancy, several virtual I/O servers can be con
fi
gured on one POWER system
.
The guest systems created by PowerVM are often referred to as LPARs (Logical PARtition). Recently, however, the
term VM (virtual machine) has also been used frequently here. We have retained the term LPAR instead of VM
throughout this document. AIX, IBM i and Linux can be used as guest operating systems, whereby Linux is then a
POWER-based Linux
.
1.1. P o w e r V M F e a t u r e
s
Below are some of the technologies and features of PowerVM
.
PowerVM Hypervisor (PHYP): This functionality is made available by the hardware platform in combination with
system
fi
rmware for the POWER server. The hypervisor is ultimately the basis for any virtualization on a POWER
system
.
Logical Partition (LPAR): LPARs are provided through the hypervisor. Originally, only dedicated hardware
components and complete processors could be allocated to an LPAR; only the memory was shared. In the course of
the Power Systems generations, the possibilities have been expanded further and further (micro-partition, dynamic
logical partition), although the term LPAR has been retained
.
Micro Partition: The micro partition allows a processor to be shared between different partitions. The micro
partitions are assigned parts of a processor, which is also referred to as shared processor partitions
.
Dynamic Logical Partition (DLPAR): Virtual resources (CPU, memory, physical adapters and virtual adapters) can
be added to or removed from the partition at runtime (provided that the operating system supports it). This means that
resources can be dynamically adapted to the needs of a partition
.
Shared Prozessor Pools (SPP): Partitions can be assigned to shared processor pools, so that the consumption of
processor resources by partitions can be limited to the resources available in the pool
.
Virtual I/O Server (VIOS): This is a special service partition with an AIX-based, specially extended operating
system for supporting a range of virtualization functions. Network adapters (Virtual Ethernet) and I/O adapters
(Virtual SCSI and Virtual FC) can be virtualized via virtual I/O servers
.
Virtual Ethernet (VETH): Client partitions can communicate in the network with the help of virtual Ethernet
adapters without having their own physical Ethernet adapters
.
Vi r t u a l i z a t i o n w i t h P o w e r V M

1 0 © b y P o w e r C a m p u s 0 1
- 11. Virtual SCSI (VSCSI): With the help of the virtual I/O server, client partitions can access disks via a virtual SCSI
adapter without having their own physical I/O adapter. The necessary physical adapters belong to the virtual I/O
servers and can therefore be shared by many partitions. The disks must be assigned to the virtual SCSI adapters
.
Virtual FC (VFC): In contrast to Virtual SCSI, Virtual FC allows a virtual FC adapter to be assigned directly to a
physical FC adapter. Unlike with VSCSI, the individual disks no longer have to be assigned to the virtual adapters,
which makes administration much easier
.
Live Partition Mobility (LPM): This feature allows an active partition to be moved online from one power system
to another power system. All applications and the operating system simply continue to run during the online move.
From the point of view of the applications, the move is transparent
.
Active Memory Expansion (AME): By compressing main memory, additional available main memory can be
obtained. The desired compression can be speci
fi
ed. With this, for example, from 32 GB of physical main memory
and a compression factor (AME factor) of 1.5, 48 GB of main memory can be obtained for one partition. The
operating system and all applications see 48 GB of available main memory
.
Single Root I/O Virtualization (SR-IOV): With this type of virtualization, a virtual I/O server is no longer required.
The virtualization takes place in hardware directly on the physical adapter. With PowerVM this is currently limited to
SR-IOV capable network adapters. The bandwidth of the SR-IOV Ethernet ports can be divided between the
individual partitions
.
Virtual Network Interface Controller (vNIC): Allows automatic failover to another SR-IOV Ethernet port if one
SR-IOV Ethernet port fails. For this, however, the support of virtual I/O servers is required again
.
Some other features of PowerVM were not included in this overview
.
1.2. T h e P O W E R H y p e r v i s o
r
Most virtualization functions are only possible through the POWER hypervisor. The hypervisor offers the possibility
of dividing physical resources and making them available to the partitions. The hypervisor ensures that each partition
has only access to its own resources, it isolates the individual partitions from each other. Each of the partitions can
use its own instance of an operating system; the supported operating systems are AIX, IBM i and Linux, or virtual I/
O servers
.
Figure 1.1 shows the virtualization using a hypervisor. The hardware layer, with all physical resources such as CPUs,
memory and physical slots, is below the hypervisor. Partitions do not have direct access to the hardware layer. Access
is only possible via the hypervisor. The hypervisor can assign dedicated resources for exclusive use by an LPAR, e.g.
dedicated CPUs or physical slots or physical memory areas, but depending on the type of resource it can also allow
shared use by several LPARs, e.g. shared processors or active memory sharing. In the case of shared processors, an
LPAR only gets a speci
fi
ed share of a processor, it can then only use the processor temporarily. The distribution to the
various LPARs is carried out by the hypervisor in a time slice process
.
Vi r t u a l i z a t i o n w i t h P o w e r V M

11 © b y P o w e r C a m p u s 0 1
- 12. No special processor resources are assigned to the POWER Hypervisor. LPARs communicate with the POWER
hypervisor via hypervisor calls (hcalls). Under AIX, this can be monitored more closely with the lparstat command
(option “-h” or “-H”)
.
1.3. P o w e r V M E d i t i o n
s
There are 3 different editions of PowerVM. These differ in the scope of the supported virtualization functions
.
1.3.1. P o w e r V M S t a n d a r d E d i t i o
n
PowerVM Standard Edition supports the following features
:
• micro partitionin
g
• virtual I/O server (VIOS
)
• Shared Processor Pool
s
• N-Port ID Virtualization (NPIV
)
• Shared Storage Pool
s
• Single Root I/O Virtualization (SR-IOV
)
POWER Hypervisor
CPU
I/O Slot
I/O Slot
Mem
Mem
LPAR
CPU CPU
I/O Slot
I/O Slot
Mem
LPAR
CPU
Hardware Resources
CPU CPU CPU CPU
I/O Slot
I/O Slot
I/O Slot
I/O Slot
I/O Slot
I/O Slot
Mem
Mem
Mem
Mem
Mem
Mem
Figure 1.1: PowerVM environment
Vi r t u a l i z a t i o n w i t h P o w e r V M

1 2 © b y P o w e r C a m p u s 0 1
- 13. • virtual Network Interface Controller adapter (vNIC
)
• thin provisionin
g
• suspend and resume on POWER8 (or higher) system
s
• PowerVM NovaLin
k
1.3.2. P o w e r V M E n t e r p r i s e E d i t i o
n
The PowerVM Enterprise Edition supports the following features
:
• Live Partition Mobility (LPM
)
• Active Memory Sharing (AMS
)
• Remote Restar
t
• Power Virtualization Performance (PowerVP
)
• micro partitionin
g
• virtual I/O server (VIOS
)
• Shared Processor Pool
s
• N-Port ID Virtualization (NPIV
)
• Shared Storage Pool
s
• Single Root I/O Virtualization (SR-IOV
)
• virtual Network Interface Controller adapter (vNIC
)
• thin provisionin
g
• suspend and resume on POWER8 (or higher) system
s
• PowerVM NovaLin
k
1.3.3. I B M P o w e r V M , L i n u x E d i t i o
n
PowerVM Standard Edition supports the following features
:
• Active Memory Sharing (AMS
)
• Live Partition Mobility (LPM
)
• Remote Restar
t
• Power Virtualization Performance (PowerVP
)
• micro partitionin
g
• virtual I/O server (VIOS
)
• Shared Processor Pool
s
• N-Port ID Virtualization (NPIV
)
• Shared Storage Pool
s
• Single Root I/O Virtualization (SR-IOV
)
Vi r t u a l i z a t i o n w i t h P o w e r V M

1 3 © b y P o w e r C a m p u s 0 1
- 14. • virtual Network Interface Controller adapter (vNIC
)
• thin provisionin
g
• suspend and resume on POWER8 (or higher) system
s
• PowerVM NovaLin
k
1.3.4. P o w e r V M E x p r e s s E d i t i o
n
The previously offered PowerVM Express Edition with a minimal number of features is no longer offered
.
Vi r t u a l i z a t i o n w i t h P o w e r V M

1 4 © b y P o w e r C a m p u s 0 1
- 15. 2. I n t r o d u c t i o n t o t h e L PA R t o o l
The LPAR tool is a command line based tool for the simple administration of PowerVM environments. PowerVM
environments of any size with multiple HMCs and any number of managed systems can be managed. The LPAR tool
was developed with the following objectives
:
- Ease of use: The LPAR tool should be easy and intuitive to use. Sensible defaults are stored for all commands so
that not every detail has to be speci
fi
ed on the command line. This means that even a less experienced user should
be able to administer PowerVM without any problems
.
- High speed: Most commands take less than a second to execute. This means there is no annoying lengthy wait for
a command to be completed
.
- Online documentation: All functions of the LPAR tool are documented online. Nothing is more annoying in day-to-
day work than constantly looking up information in external documentation. (Of course, there is still a detailed
documentation in case the online documentation should not be suf
fi
cient.
)
- Feature for the PowerVM expert: With the LPAR tool, the expert can dive into the depths of PowerVM
.
- Selectable output format: When printing information, in addition to the standard output, output in JSON, YAML or
Stanza format can also be selected
.
- Use in scripts: The use in scripts for the automation of processes is very easy
.
The LPAR tool can be installed on one or more systems. Since the LPAR tool uses OpenSSH to communicate with the
HMCs, an SSH connection to the HMCs must be possible from these systems. The LPAR tool is available for the
following operating systems
:
- AI
X
- Linux x8
6
- MacO
S
The following manuals are available from the download area https://powercampus.de/download
:
• LPAR-Tool 1.6.0.x What’s New (PDF
)
• LPAR-Tool 1.6.0.x Getting Started (PDF
)
• LPAR-Tool 1.6.0.x User Guide (PDF
)
Vi r t u a l i z a t i o n w i t h P o w e r V M

1 5 © b y P o w e r C a m p u s 0 1
- 16. 2.1. R e q u i r e m e n t
s
The LPAR tool uses OpenSSH to connect to the HMCs, i.e. a working version of OpenSSH must be installed on the
target system
.
In order that PowerVM can be administered with the LPAR tool, the HMCs to be administered must be accessible
from the target system via OpenSSH. This means that if a
fi
rewall is used between the target system and the HMC,
OpenSSH must be enabled from the target system to the HMC
.
To use the LPAR tool, a valid account on the HMC is required. If desired, the hscroot account can also be used.
However, the recommendation is that all users should use their own HMC account
.
If DLPAR operations or Live Partition Mobility are to be used, the LPARs must have an active RMC connection to
the HMCs. Without this requirement, PowerVM cannot perform these operations (this is a limitation of PowerVM)
.
2.2. D o w n l o a d i n g t h e L PA R t o o l
The LPAR tool can be downloaded from the download area of the website https://powercampus.de or https://
powercampus01.com. Depending on the operating system, there are one or two versions of the LPAR tool
.
AIX: For the AIX operating system, the LPAR tool can be downloaded either as a tar
fi
le or as a BFF
fi
leset. If you
don't want to install the LPAR tool permanently, but only want to try it out once, it is advisable to download the
version as a tar
fi
le. This can be unpacked at any place (e.g. in your own home directory)
.
Linux (x86): For Linux there is also a version as a tar
fi
le and an RPM package. Here, too, we recommend using the
tar
fi
le for a test installation
.
MacOS: For the Mac there is currently only one version as a tar
fi
le that can be extracted at any location
.
If the BFF
fi
leset or the RPM package is installed, the LPAR tool can be found in the /opt/pwrcmps/bin directory on
the target system
.
2.3. L i c e n s e f o r t h e L PA R t o o l
As a commercial product, the LPAR tool requires a license that must be entered in a
fi
le on the target system (/opt/
pwrcmps/etc/lpar.lic or ~/.lpar.lic). The LPAR tool may not be used productively without a valid subscription
(contains a license)
.
The LPAR tool can also be used for test and evaluation purposes without a valid subscription. To make this as easy as
possible, the latest version contains a time-limited test license. This means that the software can be tried out
immediately after the download and installation without having to request a license. The integrated test license has a
limited validity of usually 2 months from the build date of the version. On the download page it is noted until when
the integrated test license is valid
.
Vi r t u a l i z a t i o n w i t h P o w e r V M

1 6 © b y P o w e r C a m p u s 0 1
- 17. The integrated test license supports up to 10 HMCs, up to 100 managed systems and up to 1000 LPARs
.
For more extensive tests, it is possible to request a trial license
.
2.4. T h e C o m m a n d s o f t h e L PA R t o o l
The LPAR tool contains 4 commands, which are named after the components of a PowerVM environment: hmc, ms,
lpar and vios. Each of these 4 commands supports a variety of functions, more than 200 in total. This covers all areas
of PowerVM administration
.
2.4.1. T h e C o m m a n d h m c
The available HMCs can be managed with the hmc command. The administration of users on the HMCs as well as
the administration of roles (task and resource roles) are covered. In addition, a large amount of information from the
HMCs can be displayed. A complete list of the functions can be obtained by starting the command without
arguments
:
$ hm
c
USAGE
:
hmc [<option> ...] <keyword> [<option> ...] [<argument> ...
]
hmc -L|-
V
Recognized keywords
:
add - Register HMC(s) with LPAR too
l
addauthkeys - Add an authorized SSH ke
y
chhmcfs - Free space in HMC file system
s
chhmcusr - Change attributes of HMC user accoun
t
chresourcerole - Change managed resource rol
e
chtaskrole - Change managed task rol
e
chsvcevent - Update serviceable event on HM
C
cmd - Execute command on HM
C
connections - Display state of ssh master connection
s
disconnect - Exit a ssh master connectio
n
flrt - Show FLRT repor
t
history - Show state or configuration change
s
list - List names of specified HMC(s
)
lsauthkeys - List authorized SSH key
s
lshmcfs - List HMC file system informatio
n
lshmcusr - Show HMC user account
s
lslic - List LIC levels available in hard disk repositor
y
lslogon - Show logon informations for HM
C
lslparmigr - List partiton mobility capabilitie
s
lsnet - Display HMC network configuratio
n
lsresource - Show all managed resource objects on the specified HM
C
lsresourcerole - Show managed resource roles on the specified HM
C
lssvcevents - Displays console or serviceable event
s
lssysconn - List all systems connected to the specified HM
C
lstaskrole - Show managed task roles on the specified HM
C
mkhmcusr - Create HMC user accoun
t
mkresourcerole - Create managed resource rol
e
mktaskrole - Create managed task rol
e
passwd - Change passwor
d
remove - Unregister HMC(s) from LPAR too
l
Vi r t u a l i z a t i o n w i t h P o w e r V M

1 7 © b y P o w e r C a m p u s 0 1
- 18. rescan - Rereads cached informations from HMC(s
)
rmauthkeys - Remove an authorized SSH ke
y
rmhmcusr - Remove HMC user accoun
t
rmresourcerole - Remove managed resource rol
e
rmtaskrole - Remove managed task rol
e
show - Show specified HMC(s
)
shutdown - Shut down or reboo
t
termtask - Terminate a tas
k
version - Shows the HMC software versio
n
help [{<category>|<keyword>|usage}
]
$
2.4.2. T h e C o m m a n d m s
The command ms (managed system) allows the administration of managed systems. Among other things, the
following areas of administration are covered
:
- Management of virtual networks and switche
s
- Administration of SR-IO
V
- Entering update access keys (UAK
)
- Status of managed system
s
- Power-on and power-off of managed system
s
- Dynamic Plattform Optimisatio
n
- Pro
fi
le backup
s
- View processor, memory, and I/O informatio
n
-
…
A complete list of the supported functions is displayed if the ms command is started without arguments
:
$ m
s
USAGE
:
ms [<option> ...] <keyword> [<option> ...] [<argument> ...
]
ms -L|-
V
Recognized keywords
:
addvnetwork - Add virtual networ
k
addvswitch - Add virtual switc
h
bkprofdata - Back up profile dat
a
chattr - Change attribute
s
cheth - Changes virtual ethernet attributes of a managed syste
m
chled - Change state of an LE
D
chlparmigr - Changes partition migration attributes of managed syste
m
chlparutil - Change sample rate for utilization data collectio
n
chmem - Change memory attribute
s
chprocpool - Change shared processor pool attribute
s
chsriov - Switch SR-IOV adapter either to dedicated or shared mod
e
flrt - List FLR
T
Vi r t u a l i z a t i o n w i t h P o w e r V M

1 8 © b y P o w e r C a m p u s 0 1
- 19. chvnetwork - Change attributes of a virtual networ
k
chvswitch - Change attributes of a virtual switc
h
enteruak - Enter new Update Access Key (UAC
)
history - Show state or configuration change
s
initprofdata - Initialize profile dat
a
list - Show names for specified managed system
s
lsattr - List attribute
s
lseth - Display virtual ethernet attributes of managed syste
m
lsfc - List virtual FC information
s
lsled - Display state of system attention LED
s
lslic - List LIC level
s
lslparmigr - Display partition migration attributes of managed syste
m
lslparutil - Show sample rate for utilization data collectio
n
lsmem - Display informations about memor
y
lsmemopt - Show memory affinity score
s
lsproc - Show processing resource
s
lsprocpool - Show shared processor pool
s
lsprofdata - Lists profile data backup
s
lspwrmgmt - Show power management setting
s
lsrefcode - List reference codes for a service processo
r
lsslot - List physical I/O slot
s
lssriov - List informations for SR-IOV adapters, physical ports or logical port
s
lssysprof - List system profile
s
lsunit - List physical I/O unit
s
lsvnetwork - List virtual network
s
lsvswitch - List virtual switche
s
mksysprof - Create system profil
e
procstat - Show physical processor pool utilization dat
a
poweroff - Power off managed syste
m
poweron - Power on managed syste
m
rename - Rename managed syste
m
rmprofdata - Remove profile data backu
p
rmsysprof - Remove system profil
e
rmvnetwork - Remove virtual networ
k
rmvswitch - Remove virtual switc
h
rstprofdata - Restore profile dat
a
show - Show basic information
s
startmemopt - Start DPO or mirrored memory defragmentatio
n
stopmemopt - Stop DPO or mirrored memory defragmentatio
n
status - Display status of managed syste
m
help [{<category>|<keyword>|usage}
]
$
2.4.3. T h e C o m m a n d l p a r
All PowerVM functions that affect an LPAR can be carried out with the lpar command. The LPAR tool covers the
following areas of LPAR administration, among others
:
- Activate and deactivate of LPAR
s
- Access to the console of an LPA
R
- Administration of virtual adapters (serial, Ethernet, FC, SCSI, SR-IOV, vNIC
)
- Administration of memory and processor
s
- Creation and deletion of LPAR
s
Vi r t u a l i z a t i o n w i t h P o w e r V M

1 9 © b y P o w e r C a m p u s 0 1
- 20. - View performance dat
a
- Live Partition Mobility (validation and migration
)
- Manage partition pro
fi
le
s
-
…
An overview of the available functions is displayed when the lpar command is started without arguments
:
$ lpa
r
USAGE
:
lpar [<option> ...] <keyword> [<option> ...] [<argument> ...
]
lpar -L|-
V
Recognized keywords
:
activate - Activate AIX, Linux, IBM i or virtual I/O server partitio
n
actvnicbkdev - Make virtual NIC backing device activ
e
addeth - Add virtual ethernet adapte
r
addfc - Add virtual FC client adapte
r
addmem - Add memor
y
addprocs - Add dedicated or shared processor
s
addprocunits - Add processing unit
s
addscsi - Add virtual SCSI client adapte
r
addserial - Add virtual serial adapte
r
addslot - Add physical I/O slo
t
addsriov - Add SR-IOV logical por
t
addvlan - Add VLAN to virtual ethernet adapte
r
addvnic - Add vNIC adapte
r
addvnicbkdev - Add a backing device to a virtual NIC adapter of an LPA
R
applyprof - Apply partition profil
e
backup - Create backu
p
chattr - Change attribute
s
cheth - Change attributes of virtual ethernet adapte
r
chfc - Change virtual FC adapte
r
chled - Change state of LE
D
chmem - Change memory attribute
s
chproc - Change processor attribute
s
chprocpool - Change shared processor poo
l
chscsi - Change virtual SCSI adapte
r
chserial - Change virtual serial adapte
r
chsriov - Change attributes of SR-IOV logical por
t
chvnic - Change a vNIC adapter assigned to an LPAR
.
chvnicbkdev - Change attributes of a backing device for a virtual NI
C
clearvnicbkdev - Clear virtual NIC backing device erro
r
clone - Create clon
e
console - Open virtual console session for AIX, Linux or virtual I/O server partitio
n
create - Create AIX, Linux, IBM i or virtual I/O server partitio
n
delete - Remove partitio
n
disableeth - Disable virtual ethernet adapte
r
display - Display detailed information
s
dumprestart - Dump and restart a partitio
n
enableeth - Enable virtual ethernet adapte
r
flrt - List FLR
T
history - Show state or configuration change
s
list - Show names of specific LPAR
s
lsattr - List partition or profile attribute
s
lseth - Show virtual ethernet adapter
s
lsfc - Show virtual FC adapter
s
lsled - Display state of system attention LE
D
lslparmigr - List partition migration informatio
n
lsmem - Show memor
y
Vi r t u a l i z a t i o n w i t h P o w e r V M

2 0 © b y P o w e r C a m p u s 0 1
- 21. lsmemopt - Show DPO memory affinity score
s
lsproc - Show processing resource
s
lsprof - List partition profile
s
lsrefcode - List reference codes for an LPA
R
lsscsi - Show virtual SCSI adapter
s
lsserial - Show virtual serial adapter
s
lsslot - Show physical I/O slot
s
lssriov - Show SR-IOV logical port
s
lsvnic - Show vNIC adapter
s
lsvslot - Show virtual slot
s
migrate - Perform partition migratio
n
mkblueprint - Create blueprin
t
osshutdown - Issue OS shutdown command to shut down a partitio
n
procstat - Show utilization dat
a
rename - Rename LPA
R
rmconsole - Close virtual console session for AIX, Linux or virtual I/O server partitio
n
rmeth - Remove virtual ethernet adapte
r
rmfc - Remove virtual FC client adapte
r
rmmem - Remove memor
y
rmprocs - Remove dedicated or shared processor
s
rmprocunits - Remove processing unit
s
rmprof - Remove partition profil
e
rmscsi - Remove virtual SCSI client adapte
r
rmserial - Remove virtual serial adapte
r
rmslot - Remove physical I/O slo
t
rmsriov - Remove SR-IOV logical por
t
rmvlan - Remove VLAN from virtual ethernet adapte
r
rmvnic - Remove a vNIC adapter from an LPAR
.
rmvnicbkdev - Removes a backing device from a virtual NIC adapter of an LPA
R
savecurrcfg - Save current configuration of an LPAR to profil
e
show - Show basic information
s
shutdown - Shutdown AIX, Linux, IBM i or virtual I/O server partitio
n
status - Display current statu
s
stopmigr - Stop partition migratio
n
validate - Perform partition migration validatio
n
help [{<category>|<keyword>|usage}
]
$
2.4.4. T h e C o m m a n d v i o s
The virtualization functions of the virtual I/O server can be administered with the vios (virtual I/O server) command.
A direct login on the virtual I/O servers is not required. An active RMC connection between the virtual I/O server and
the associated HMCs is suf
fi
cient
.
In particular, the following PowerVM functionalities of a virtual I/O server can be administered
:
- Shared Ethernet Adapter (SEA
)
- NPIV mapping
s
- SCSI mapping
s
- Virtual Optical Media Repositor
y
- Storage Pool
s
Vi r t u a l i z a t i o n w i t h P o w e r V M

2 1 © b y P o w e r C a m p u s 0 1
- 22. - Link Aggregation
s
- Device management (display and setting of attributes
)
Here, too, you can get a complete overview of the supported functions by starting the vios command without
arguments
:
$ vio
s
USAGE
:
vios [<option> ...] <keyword> [<option> ...] [<argument> ...
]
vios -L|-
V
Recognized keywords
:
addfc - Add virtual FC server adapte
r
addlnaggadapter - Add adapter to Link Aggregatio
n
addscsi - Add virtual SCSI server adapte
r
addsppv - Add physical volume to storage poo
l
cfgdev - Configures devices in the Virtual I/O Serve
r
chdev - Changes the characteristics of a devic
e
chkdev - Check devices for virtual device provisioning capabilit
y
chlnagg - Change Link Aggregation attribute
s
chmedia - Change virtual optical medi
a
chrep - Change Virtual Media Repositor
y
chbdsp - Change attributes of backing devic
e
chsp - Change storage poo
l
cmd - Execute ioscli comman
d
errlog - Display error lo
g
fcstat - Show FC statistic
s
failoverlnagg - Failover Link Aggregatio
n
ioslevel - Display the Virtual I/O Server leve
l
list - Show names of specific virtual I/O server
s
loadopt - Load virtual optical media into virtual optical devic
e
lsattr - Show device attribute
s
lsbdsp - Show backing device
s
lsdev - Show device
s
lslnagg - Show Link Aggregation adapter
s
lsmedia - Show virtual optical medi
a
lsnpiv - Show NPIV mapping
s
lsnports - List available NPIV capable port
s
lspv - Display physical volume(s
)
lsrep - Show Virtual Media Repositor
y
lssea - Show shared Ethernet adapter
s
lssp - Show storage poo
l
lstcpip - Display TCP/IP settings and parameter
s
lsvopt - Show virtual optical device
s
lsvscsi - Show VSCSI mapping
s
map - Map backing device to virtual SCSI server adapte
r
mkbdsp - Create and/or map backing device from storage poo
l
mklnagg - Create Link Aggregation adapte
r
mkmedia - Create virtual optical media dis
k
mkrep - Create Virtual Media Repositor
y
mksea - Create Shared Ethernet Adapte
r
mksp - Create storage poo
l
mkvopt - Create virtual optical devic
e
rmbdsp - Remove backing devic
e
rmdev - Remove device from the syste
m
rmfc - Remove virtual FC server adapte
r
rmlnagg - Remove Link Aggregation adapte
r
rmlnaggadapter - Remove adapter from Link Aggregatio
n
rmmedia - Remove virtual optical medi
a
rmrep - Remove Virtual Media Repositor
y
rmscsi - Remove virtual SCSI server adapte
r
rmsea - Remove shared Ethernet adapte
r
Vi r t u a l i z a t i o n w i t h P o w e r V M

2 2 © b y P o w e r C a m p u s 0 1
- 23. rmsp - Remove file storage poo
l
rmsppv - Remove physical volume from storage poo
l
rmvopt - Remove virtual optical devic
e
seastat - Show or clear SEA client statistic
s
show - Show basic information
s
unloadopt - Remove virtual optical media from virtual optical devic
e
unmap - Unmap backing device from virtual SCSI server adapte
r
vfcmap - Map virtual FC adapter to physical FC por
t
vfcunmap - Unmap virtual FC adapter from physical FC por
t
help [{<category>|<keyword>|usage}
]
$
2.4.5. T h e O n l i n e D o c u m e n t a t i o
n
All 4 commands offer a detailed online help. All functions are organized in categories, such as SCSI, SEA, memory,
etc. Which categories are available for one of the 4 commands can be shown by using the argument (keyword)
"help", e.g.
:
$ lpar help
Help is available for the following categories
:
lpar help blueprint eth fc io led lic lp
m
lpar help mem memory power proc processor prof profil
e
lpar help scsi serial sriov vni
c
Specific help is available for each of the supported keywords
:
lpar help <keyword
>
For a complete list of all keywords try
:
lpar help usag
e
$
All functions (keywords) that belong to a category can be displayed by specifying one of the available categories
after the keyword "help", here e.g. the category "mem" with the command lpar
:
$ lpar help me
m
USAGE: lpar [<option> ...] <keyword> [<option> ...] [<argument> ...
]
Recognized keywords for topic 'mem' are
:
[-h <hmc>] [-m <ms>] [-p <profile>] addmem [-d] [-f] [-l <detail_level>] [-w
<wait_time>] [-v] <lpar> <mem>[k|K|m|M|g|G|t|T
]
[-h <hmc>] [-m <ms>] [-p <profile>] chmem [-d] [-f] [-l <detail_level>] [-w <wait_time>]
[-v] <lpar> <attributes> ..
.
[-h <hmc>] [-m <ms>] [-p <profile>|-H] lsmem [{-o <format>|-f|-j|-y}] [-F <fields>] [-s
<selections>] [-v] [<lpar> ...
]
[-h <hmc>] [-m <ms>] [-p <profile>] lsmemopt [{-o <format>|-f|-j|-y}] [-F <fields>] [-s
<selections>] [-v] [<lpar> ...
]
[-h <hmc>] [-m <ms>] [-p <profile>] rmmem [-d] [-f] [-l <detail_level>] [-w <wait_time>]
[-v] <lpar> <mem>[k|K|m|M|g|G|t|T
]
$
Detailed information on a speci
fi
c function (keyword) can be obtained through "help" and the speci
fi
cation of the
keyword, here e.g. for the keyword "chmem"
:
$ lpar help chme
m
USAGE
:
Vi r t u a l i z a t i o n w i t h P o w e r V M

2 3 © b y P o w e r C a m p u s 0 1
- 24. lpar [-h <hmc>] [-m <ms>] [-p <profile>] chmem [-d] [-f] [-l <detail_level>] [-w
<wait_time>] [-v] <lpar> <attributes> ..
.
DESCRIPTIO
N
Change memory attributes for an LPAR. If no option '-d' or '-p' i
s
specified, the command tries to change the attributes by a DLPA
R
operation and by changing the current profile
.
Since most of the attributes are either valid only for DLPAR o
r
the profile, but not both, this makes changing memory related attribute
s
somewhat complicated. To ease usage, the following filtering is applied
:
- If a specified attribute can not be changed by a DLPAR operation, th
e
attribute is skipped from the DLPAR operation
.
- If a specified attribute can not be changed in a profile, the attribut
e
is skipped from the operation
.
When skipping attibutes, a hint is shown to the user
!
-d : only DLPAR operation, don't update profil
e
-f : force operation, even if there is no RMC connectio
n
-l : level of detail (1-4
)
-p : update the specified profile onl
y
-w : time (minutes) to wait for operation to finis
h
valid attributes for DLPAR and profile
:
mem_weigh
t
mem_expansio
n
0 - disable memory expansion (profile only
)
1.00 to 10.00 - memory expansion facto
r
valid attributes for DLPAR only
:
hardware_mem_encryptio
n
0 - disable hardware-accelerated encryptio
n
1 - enable hardware-accelerated encryptio
n
hardware_mem_expansio
n
0 - disable hardware-accelerated memory expansio
n
1 - enable hardware-accelerated memory expansio
n
valid attributes for profile only
:
mem_mode : memory sharing mod
e
ded - dedicated memor
y
shared -shared memor
y
min_mem : minimum number of megabyte
s
desired_mem : desired number of megabyte
s
max_mem : maximum number of megabyte
s
min_num_huge_pages : minimum number of huge pages (only AIX and Linux
)
desired_num_huge_pages : desired number of huge pages (only AIX and Linux
)
max_num_huge_pages : maximum number of huge pages (only AIX and Linux
)
NOTE
S
When the attribute 'mem_expansion' is set to '0', to disable active memor
y
expansion, the value of '0' is replaced by '1.0' in a DLPAR operation, sinc
e
active memory expansion can only be disabled in the profile
.
Although the attribute 'desired_mem' is valid only in a profile, it i
s
interpreted as meaning the current amount of memory in a DLPAR operation
.
The values for 'min_mem', 'desired_mem' and 'max_mem' can be specified wit
h
a suffix indicating KB, MB, GB or TB. See 'lpar help addmem' for an overvie
w
of the possibles suffixes
.
EXAMPLE
S
Change memory expansion factor of LPAR lpar01 to 1.25:
,
lpar chmem lpar01 mem_expansion=1.2
5
Turn off memory expansion for LPAR lpar01:
,
Vi r t u a l i z a t i o n w i t h P o w e r V M

2 4 © b y P o w e r C a m p u s 0 1
- 25. lpar chmem lpar01 mem_expansion=
0
(Memory expansion is turned off in the current profile, and is set to 1.
0
by the DLPAR operation.
)
Turn on hardware-accelerated memory expansion dynamically on for LPAR lpar03
:
lpar chmem -d lpar03 hardware_mem_expansion=1 # o
r
lpar chmem lpar03 hardware_mem_expansion=
1
(Since 'hardware_mem_expansion' is only valid for a DLPAR operation, the updat
e
of the current profile is simply skipped in the second case!
)
Change in profile 'standard' of lpar01 the memory sharing mode to 'shared'
,
and the maximum memory size to 16 gigabytes
:
lpar -p standard chmem lpar01 mem_mode=shared max_mem=16
G
$
In addition to an overview of the syntax, there is a brief description of the functionality for each keyword. A list and
description of the available options and attributes of the command, as well as a number of examples, which show ho
to use the keyword
.
2.4.6. T h e „ v e r b o s e “ M o d
e
By using the "-v" option, the LPAR tool allows for a function to display, what exactly this function would perform in
terms of commands on one or more HMCs, without actually executing the commands. The commands are displayed,
but no commands that make a change are executed. E.g.
:
$ lpar -v status aixni
m
hmc02: lssyscfg -r lpar -m s82
2
hmc02: lshwres -r mem -m s822 --level lpa
r
hmc02: lshwres -r proc -m s822 --level lpa
r
$
2.4.7. L o g g i n g o f t h e C o m m a n d C a l l
s
By default, the LPAR tool logs all command calls in the
fi
le lpar.log in the user's home directory. The time is
recorded, the version of the LPAR tool, the command that was started and all commands on the HMCs that were
executed as a result of the command of the LPAR tool
:
$ cat ~/lpar.lo
g
…
[12.09.20 11:15:56
]
Version: 1.5.1.0 (20200801
)
Command: lpar activate -p standard aix0
3
hmc02: chsysstate -m s822 -r lpar -o on -n aix03 -f standar
d
[12.09.20 11:16:05
]
Version: 1.5.1.0 (20200801
)
Command: lpar statu
s
hmc02: lssyscfg -r lpar -m s822
hmc02: lshwres -r mem -m s822 --level lpa
r
hmc02: lshwres -r proc -m s822 --level lpa
r
$
Vi r t u a l i z a t i o n w i t h P o w e r V M

2 5 © b y P o w e r C a m p u s 0 1
- 26. If an error occurs while executing a command, the error message is also recorded in the log
fi
le
.
If the
fi
le gets too big, it can be deleted at any time. The log
fi
le serves the sole purpose of keeping a record of the
activities that the user has carried out with the LPAR tool
.
Vi r t u a l i z a t i o n w i t h P o w e r V M

2 6 © b y P o w e r C a m p u s 0 1
- 27. 3. C o m p o n e n t s o f a P o w e r V M
E n v i r o n m e n
t
In addition to the POWER systems, a PowerVM environment typically also has so-called Hardware Management
Consoles (HMC). The Hardware Management Console (HMC) is a dedicated hardware appliance, but since recently
it can also be a virtual appliance (vHMC). Each POWER system can be connected to one or two HMCs. The
POWER systems and LPARs are then administered via the HMC. Several POWER systems can be connected to a
single HMC. This allows the administration of many POWER systems to be centralized via a few HMCs
.

Each POWER system has 2 special HMC ports for connecting up to 2 HMCs. Figure 1.2 shows 3 POWER systems,
each of which is connected to both HMCs. The HMC and POWER system are connected to one another via private
networks. External access to the HMCs is via a public network
.
HMC1 HMC2
Power
System
Power
System
Power
System
private net
HMC1
private net
HMC2
public net
admin
system
Figure 1.2: PowerVM environment
Vi r t u a l i z a t i o n w i t h P o w e r V M

2 7 © b y P o w e r C a m p u s 0 1
- 28. 3.1. H a r d w a r e M a n a g e m e n t C o n s o l e ( H M C
)
The connected POWER systems can be completely managed by the HMC. All possibilities of the PowerVM
virtualization can be con
fi
gured and administered using the connected HMCs. POWER systems connected to an
HMC are also referred to as so-called managed systems, since the HMC 'manages' these POWER systems. In the
following we will mostly use the term managed system instead of POWER system, in both cases the physical server
is ultimately meant
.
The HMC offers two different administration options
:
• A web-based GUI: access is via a browser
.
• And a CLI on the HMC: access is typically via a login using OpenSSH
.
Typically, most users use the web GUI. It is intuitive to use and all activities can be carried out using the GUI
.
Only a few users use the CLI. The syntax of the commands is not always that simple and very long commands with
many options quickly have to be used even for smaller tasks. This usually requires to look through the documentation
frequently, as many options are very dif
fi
cult to remember. Most of the time, however, every POWER administrator
has a small set of CLI commands that he uses regularly, as this is often faster than using the GUI
.
The LPAR tool uses OpenSSH and the HMC's CLI. As a rule, you do not have to specify any options, as the LPAR
tool automatically speci
fi
es the necessary options
.
The following account is available on an HMC by default
:
• hscroot with password ‚abc123‘
.
This account has the role hmcsuperadmin and thus has the maximum (almost) of rights on an HMC. Additional
accounts can (and should) be created for users. We will go into more detail on the topic of HMC accounts and roles
later, for the moment we assume that either an account for the user already exists or the hscroot account is used
.
The HMCs known to the LPAR tool can be listed with the "hmc show" command
:
$ hmc sho
w
NAME SERIAL_NUM TYPE_MODE
L
$
If no HMC has yet been registered, the output is empty, as in the example output above
.
Each HMC must be registered once for use with the LPAR tool. This is done with the "hmc add" command by
specifying one or more HMCs. In our example the HMC registered is called hmc01
:
$ hmc add hmc01
hmc01:
ms01
> lpar01
> ms01-vio1
> ms01-vio2
ms02
> aix0
1
Vi r t u a l i z a t i o n w i t h P o w e r V M

2 8 © b y P o w e r C a m p u s 0 1
- 29. > aix0
3
> aixnim
> ms02-vio1
> ms02-vio2
ms03
> aix0
2
> aix04
> ms03-vio1
> ms03-vio2
$
Registering an HMC typically only takes 1 or 2 seconds. As can be seen from the example output, the connected
managed systems and the LPARs on the managed systems are recognized and also registered. The 3 managed
systems ms01, ms02 and ms03 are connected to our HMC hmc01
.
If only the name of the HMC is speci
fi
ed for "hmc add", the LPAR tool assumes that the account on the HMC
corresponds to the local user name. If this is not the case, the desired account can also be speci
fi
ed explicitly, as in the
following example
:
$ hmc add hscroot@hmc01
hmc01:
ms01
> lpar01
> ms01-vio1
> ms01-vio2
ms02
> aix0
1
> aix0
3
> aixnim
> ms02-vio1
> ms02-vio2
ms03
> aix0
2
> aix04
> ms03-vio1
> ms03-vio2
$
This means that the hscroot account will always be used for the speci
fi
ed HMC
.
All other HMCs should then be registered once in the same way
.
Now that at least one HMC has been registered, it can be displayed using "hmc show"
:
$ hmc show
HMC SERIAL MODEL
hmc01 12BEEF 7042-CR9
$
Our HMC has the serial number 12BEEF and is of the type 7042-CR9 (this is the last model based on x86)
.
If an HMC, including the connected managed systems and their LPARs, is no longer to be managed by the LPAR
tool, the HMC can easily be deregistered. For this purpose the command "hmc remove“ is used
:
$ hmc remove hmc0
1
Vi r t u a l i z a t i o n w i t h P o w e r V M

2 9 © b y P o w e r C a m p u s 0 1
- 30. $
Of course, this does not change anything about the HMC, one of the connected managed systems or one of the
LPARs! It just means that the HMC is no longer known to the LPAR tool. The attempt to address the HMC with the
LPAR tool results in a corresponding error message
:
$ hmc lssysconn hmc01
ERROR: hmc01 is not a known HMC
USAGE:
hmc lssysconn [-o <format>] [{-f|-j|-y}] [-F <fields>] [-s <selections>] [-v] <hmc>
$
Of course, the HMC can be registered again at any time using "hmc add" and can then be administered again using
the LPAR tool
.
3.2. M a n a g e d S y s t e m
s
Which managed systems are connected to the HMC can be queried with the command "hmc lssysconn", here is an
example output from hmc01
:
$ hmc lssysconn hmc01
TYPE_MODEL_SERIAL_NUM STATE RESOURCE_TYPE IPADDR ALT_IPADDR
SP SP_PHYS_LOC
8286-41A*32C4D4W Connected sys 172.16.100.13 unavailable
primary U78C9.001.VYR0UCG-P1
8284-22A*326E12W Connected sys 172.16.100.12 unavailable
primary U78CB.001.VYR0AI4-P1
8284-22A*326E13W Connected sys 172.16.100.15 unavailable
primary U78CB.001.VYR0DM6-P1
$
There are 2 managed systems of the type 8284-22A (S822) and one 8286-41A (S814). Since the managed systems
were registered by the LPAR tool and are therefore known, they can also be displayed more easily using "ms show"
:
$ ms show
NAME SERIAL_NUM TYPE_MODEL HMCS MODEL_NAME
ms01 326E12W 8284-22A hmc01 IBM Power System S822
ms02 326E13W 8284-22A hmc01 IBM Power System S822
ms03 32C4D4W 8286-41A hmc01 IBM Power System S814
$
The model name is then also displayed in this output
.
Vi r t u a l i z a t i o n w i t h P o w e r V M

3 0 © b y P o w e r C a m p u s 0 1
- 31. 3.3. P o w e r V
C
PowerVC is an advanced virtualization and cloud management solution. PowerVC is based on OpenStack and is
intended to simplify the management and deployment of AIX, IBM i and Linux on Power systems
.
The LPAR tool is not fully compatible with PowerVC (at least in the current version). The LPAR tool can still be used
on systems managed by PowerVC, but there are some limitations
:
• Some commands cannot be called or return an error when called
.
• Some commands cannot be called with all options and arguments, or have to be called with certain options and
arguments
.
This is because on HMCs that are managed by PowerVC, a so-called co-management mode is used, which brings a
number of restrictions to the commands on the HMC
.
Regardless of this, however, the use of the LPAR tool can also be useful in PowerVC environments, since the LPAR
tool can deliver a lot of information faster and more easily
.
Vi r t u a l i z a t i o n w i t h P o w e r V M

3 1 © b y P o w e r C a m p u s 0 1
- 32. 4. O v e r v i e w o f a P o w e r V M E n v i r o n m e n
t
This chapter is intended to show how you can get an overview of a PowerVM environment. It is shown how some
questions can be answered, such as
:
• How many and which LPARs are there in the PowerVM environment
.
• What is the status of the LPARs and the associated managed systems
.
• Which
fi
rmware versions are installed
.
• What is the hardware con
fi
guration of a managed system?
.
In addition, some administrative activities are presented as examples
:
• Activating an LPAR
.
• Shutting down an LPAR
.
• Console for an LPAR
.
4.1. W h a t L PA R s a r e o u t t h e r e
?
A list of all LPARs in a PowerVM environment can be printed with the "lpar show" command
:
$ lpar sho
w
NAME ID SERIAL LPAR_ENV MS HMC
S
aix01 3 12AF033 aixlinux ms03 hmc01,hmc0
2
aix02 3 12BF033 aixlinux ms04 hmc01,hmc0
2
aix03 11 12AF03B aixlinux ms03 hmc01,hmc0
2
aix04 19 12BF03J aixlinux ms04 hmc01,hmc0
2
aix05 4 7830W44 aixlinux ms07 hmc0
3
…
$
General information such as name, LPAR ID, serial number, type of LPAR, associated managed system and the
associated HMC(s) are displayed for each LPAR. This information is saved locally in a cache by the LPAR tool
(default: ~/lpar.list). The cache can be updated with the help of the command "hmc rescan". All known HMCs are
queried and a list of all managed systems and LPARs is created and saved locally
.
$ hmc resca
n
hmc01:
ms03
> aix01
> aix03
> lpar17
> ms03-vio2
> ms03-vio1
ms04
> aix02
Vi r t u a l i z a t i o n w i t h P o w e r V M

3 2 © b y P o w e r C a m p u s 0 1
- 33. > aix04
> lpar18
…
$
Depending on the size of the environment, this can take a few seconds because a large number of commands have to
be issued on the HMCs
.
If you only need information about certain LPARs, the LPARs of interest can be given as arguments
:
$ lpar show aix01 aix0
5
NAME ID SERIAL LPAR_ENV MS HMC
S
aix01 3 12AF033 aixlinux ms03 hmc01,hmc0
2
aix05 4 7830W44 aixlinux ms07 hmc0
3
$
The possibility of using wildcards is very useful, for example, it is easy to list all LPARs whose names begin with
"aix"
:
$ lpar show „aix*
“
NAME ID SERIAL LPAR_ENV MS HMC
S
aix01 3 12AF033 aixlinux ms03 hmc01,hmc0
2
aix02 3 12BF033 aixlinux ms04 hmc01,hmc0
2
aix03 11 12AF03B aixlinux ms03 hmc01,hmc0
2
aix04 19 12BF03J aixlinux ms04 hmc01,hmc0
2
aix05 4 7830W44 aixlinux ms07 hmc0
3
…
$
(The quotation marks can also be omitted if there are no
fi
les in the current directory that match the wildcard.
Without quotation marks, a wildcard is interpreted by the shell and replaced by the result of the matching.
)
Often only the LPARs on a certain managed system are of interest, for this purpose the “lpar show” command offers
the option of specifying the managed system of interest with the “-m” option
:
$ lpar show -m ms0
4
NAME ID SERIAL LPAR_ENV MS HMC
S
aix02 3 12BF033 aixlinux ms04 hmc01,hmc0
2
aix04 19 12BF03J aixlinux ms04 hmc01,hmc0
2
ms04-vio1 1 12BF031 vioserver ms04 hmc01,hmc0
2
ms04-vio2 2 12BF032 vioserver ms04 hmc01,hmc0
2
$
4.2. S t a t u s o f L PA R
s
It is very easy to determine whether an LPAR is currently active or powered off by printing the status of an LPAR.
The “lpar status” command can be used to display the status of a single LPAR or the status of several LPARs (or all
LPARs)
:
Vi r t u a l i z a t i o n w i t h P o w e r V M

3 3 © b y P o w e r C a m p u s 0 1
- 34. $ lpar status aix
*
NAME LPAR_ID LPAR_ENV STATE PROFILE SYNC RMC PROCS PROC_UNITS
MEM OS_VERSION
aix01 3 aixlinux Running standard 0 active 4 0.4
33792 AIX 7.1 7100-04-05-172
0
aix02 3 aixlinux Running standard 0 inactive 1 0.2
16384 AIX 7.1 7100-04-05-172
0
aix03 11 aixlinux Running standard 0 active 2 0.3
32768 AIX 7.1 7100-04-05-172
0
aix04 19 aixlinux Not Activated standard 0 inactive 4 0.4
33792 AIX 7.1 7100-04-05-1720
…
$
The STATE column shows that the LPARs aix01, aix02 and aix03 are active, whereas the LPAR aix04 is powered off
(Not Activated). The LPARs aix01 and aix03 have an active RMC connection to at least one of the HMCs, the two
LPARs aix02 and aix04 do not have an active RMC connection. The reason for the LPAR aix04 is clear - it is
powered off and therefore cannot have an active RMC connection. With LPAR aix02, however, there seems to be a
problem because RMC is not active, although the LPAR is active
.
In addition to the status, information on the number of processors (as well as entitlement for shared processor
LPARs) and the main memory size are displayed. Finally, the operating system used and the version of the operating
system are displayed. However, this information is only available if there is an active RMC connection or has existed
at some point in time
.
4.3. A c t i v a t i n g a n L PA
R
If an LPAR is powered off (Status Not Activated), the LPAR can be activated with the command "lpar activate". If an
LPAR is activated for the
fi
rst time after it has been created, the "-p" option and a pro
fi
le name must be speci
fi
ed
:
$ lpar -p standard activate aix0
4
$
The LPAR is then activated and an attempt is made to boot the operating system
.
Most of the con
fi
guration of an LPAR is stored in pro
fi
les. An LPAR can have several pro
fi
les if required, but it can
only use one of its pro
fi
les at a time. A pro
fi
le of an LPAR is always permanently assigned to the LPAR and cannot be
used for another LPAR. If two LPARs have pro
fi
les with the name "mypro
fi
le", then these are 2 different pro
fi
les,
even if the name is the same. Each of the two pro
fi
les is clearly assigned to exactly one of the LPARs and can only be
used by this LPAR. Which pro
fi
les have been created for an LPAR can be displayed with the command “lpar lsprof”
(list pro
fi
les)
:
$ lpar lsprof aix0
4
NAME MEM_MODE MEM PROC_MODE PROCS PROC_COMPA
T
last*valid*configuration ded 33792 shared 4 defaul
t
ostandard ded 16384 shared 2 defaul
t
standard ded 33792 shared 4 defaul
t
$
Vi r t u a l i z a t i o n w i t h P o w e r V M

3 4 © b y P o w e r C a m p u s 0 1
- 35. The last*valid*con
fi
guration pro
fi
le is managed by PowerVM. This pro
fi
le always contains the current con
fi
guration
(if the LPAR is currently active) or the last active con
fi
guration (if the LPAR is not activated). The existence of this
special pro
fi
le indicates that the LPAR is either active or has already been active. The LPAR can then be activated
without specifying a pro
fi
le; the con
fi
guration of the last*valid*con
fi
guration pro
fi
le is then used. For a newly
created LPAR, the last*valid*con
fi
guration pro
fi
le does not exist before the
fi
rst activation
.
4.4. S h u t t i n g d o w n a n L PA
R
If you want to shut down a running LPAR, you should shut down the LPAR via the operating system used, by
logging in and shutting down the operating system as the administrator. With AIX, this can be done with the
shutdown command, for example
:
aix02 # shutdown
SHUTDOWN PROGRA
M
Mon May 3 11:57:07 CEST 202
1
Broadcast message from root@aix02 (tty) at 11:57:07 ...
PLEASE LOG OFF NOW ! !
!
All processes will be killed in 1 minute
.
Broadcast message from root@aix02 (vty0) at 11:58:07 ...
! ! ! SYSTEM BEING BROUGHT DOWN NOW ! !
!
Stopping IBM.ConfigRM..
.
0513-044 The IBM.ConfigRM Subsystem was requested to stop
.
…
Unmounting the file systems..
.
Unmounting the file systems..
.
Bringing down network interfaces: en0 lo
0
open: No such file or director
y
May 3 11:58:35 portmap: terminating on signal
.
....Halt completed…
.
Any errors that occur when shutting down the LPAR are displayed and do not go unnoticed
.
It is of course still possible to shut down the operating system with PowerVM. For this purpose there is the command
"lpar osshutdown" (shutdown operating system)
:
$ lpar osshutdown aix0
2
$
Vi r t u a l i z a t i o n w i t h P o w e r V M

3 5 © b y P o w e r C a m p u s 0 1
- 36. PowerVM executes the following command on the LPAR
:
- AIX: the shutdown command is executed
.
- Linux: the command “shutdown -h +1” is executed
.
- VIOS: the shutdown command is executed (as user padmin)
.
The LPAR is then in the Not Activated state
:
$ lpar status aix0
4
NAME LPAR_ID LPAR_ENV STATE PROFILE SYNC RMC PROCS PROC_UNITS
MEM OS_VERSIO
N
aix02 3 aixlinux Not Activated standard 0 inactive 1 0.2
16384 AIX 7.1 7100-04-05-172
0
$
To reboot the LPAR, the option “-r” can be used for “lpar osshutdown”
:
$ lpar osshutdown -r aix0
2
$
Note: In the event of a reboot, the LPAR remains activated, it is not deactivated and therefore not reactivated with
any of its pro
fi
les. This means in particular that a change in one of the pro
fi
les does not change the con
fi
guration of
the LPAR. To do this, the LPAR must be shut down (deactivated) and reactivated by specifying the changed pro
fi
le
!
4.5. C o n s o l e f o r a n L PA
R
Occasionally, as an administrator, you need a console for an LPAR, e.g. because there is a network problem, you
want to follow messages when booting the LPAR or you want to view the messages when an LPAR is shut down. In
all these cases, a console for any LPAR can be started immediately with the “lpar console” command
:
$ lpar console aix0
4
Open in progress
Open Completed.
AIX Version
7
Copyright IBM Corporation, 1982, 2020
.
Console login: root
root's Password
:
******************************************************************************
*
*
*
*
*
Vi r t u a l i z a t i o n w i t h P o w e r V M

3 6 © b y P o w e r C a m p u s 0 1
- 37. * Welcome to AIX Version 7.1!
*
*
*
*
*
* Please see the README file in /usr/lpp/bos for information pertinent to
*
* this release of the AIX Operating System.
*
*
*
*
*
******************************************************************************
*
aix04:/root>
aix04:/root>
If the console is no longer required, you should
fi
rst log out of the operating system (e.g. using the exit command).
The console session can then be ended with the key combination "~."
.
4.6. S t a t u s o f M a n a g e d S y s t e m
s
The status of one or more managed systems can be displayed with the "ms status" command. If no managed system is
given as an argument, the status of all managed systems is shown
:
$ ms statu
s
NAME STATE DETAILS IPADDR SECONDARY KEYLOCK SERVICE_LPAR_I
D
ms01 Operating None 10.0.0.245 - norm non
e
ms03 Operating None 10.0.0.244 - norm non
e
ms04 Operating None 10.0.0.241 - norm non
e
ms05 Operating None 10.0.0.242 - norm non
e
ms06 Operating None 10.0.0.240 10.0.0.239 norm non
e
ms07 Operating None 10.0.0.234 - norm non
e
ms08 Operating None 10.0.0.252 - norm non
e
$
The current status of the managed system is displayed in the STATE column, here, all managed systems are currently
Operating. The IP addresses of the service processors and other information are also displayed
.
4.7. S y s t e m F i r m w a r e Ve r s i o n o f M a n a g e d S y s t e m
s
The POWER hypervisor is partly implemented in the form of system
fi
rmware on the managed systems. From time
to time, IBM may release new versions of the system
fi
rmware with bug
fi
xes and new PowerVM features. Which
system
fi
rmware is installed on a managed system, IBM speaks of the so-called Licensed Internal Code (LIC), can be
displayed with the command "ms lslic"
.
$ ms lsli
c
NAME LIC_TYPE ECNUMBER INSTALLED ACTIVATED ACCEPTED DEFERRED IPL UA
K
ms01 Managed System 01AL770 126 126 116 None 126
-
ms03 Managed System 01SV860 215 215 138 None 215 08/07/202
1
ms04 Managed System 01SV860 215 215 138 None 215 07/24/202
1
ms05 Managed System 01SV860 215 215 138 None 215 08/14/202
1
ms06 Managed System 01SV860 215 215 138 None 215 10/03/202
1
Vi r t u a l i z a t i o n w i t h P o w e r V M

3 7 © b y P o w e r C a m p u s 0 1
- 38. ms07 Managed System 01VL940 50 50 50 None 50 11/05/202
1
ms08 Managed System 01VL940 50 50 50 None 50 01/27/202
2
$
Managed systems can also be speci
fi
ed explicitly here, otherwise all managed systems are listed
.
In addition to the installed system
fi
rmware, e.g. SV860_215 for the managed system ms04, the output also shows
which version is activated (ACCEPTED). For POWER8 or higher, the expiration date of the update access key
(UAK) is also shown in the last column
.
4.8. P h y s i c a l H a r d w a r e o f M a n a g e d S y s t e m
s
In addition to processors and memory, every POWER system has a number of I/O slots for PCI adapters. How many
I/O slots are available depends on the speci
fi
c model of the POWER system. As a rule, POWER systems are already
purchased with a range of FC and Ethernet adapters. Which PCI adapter a speci
fi
c managed system has can be listed
with the command "ms lsslot" (list slots)
:
$ ms lsslot ms0
7
DRC_NAME DRC_INDEX IOPOOL LPAR_NAME DESCRIPTIO
N
U78C7.001.LJD4A99-P1-C10 21010010 none - PCIe2 16Gb 2-Port Fibre Channel
Adapte
r
U78C7.001.LJD4A99-P3-R2 21010011 none ms07-vio2 RAID Controlle
r
U78C7.001.LJD4A99-P1-C11 21010018 none - PCIe2 4-port (10Gb FCoE & 1GbE)
SR&RJ45 Adapte
r
U78C7.001.LJD4A99-P1-C12 21010019 none ms07-vio1 PCIe2 16Gb 2-Port Fibre Channel
Adapte
r
U78C7.001.LJD4A99-P1-C8 21010020 none ms07-vio2 PCIe2 16Gb 2-Port Fibre Channel
Adapte
r
U78C7.001.LJD4A99-P3-R1 21010021 none ms07-vio1 RAID Controlle
r
U78C7.001.LJD4A99-P1-C9 21010028 none - PCIe2 4-port (10Gb FCoE & 1GbE)
SR&RJ45 Adapte
r
U78C7.001.LJD4A99-P1-T1 2101002B none - Universal Serial Bus UHC Spe
c
U78C7.001.LJD4A99-P1-C6 2102002C none - 1 Gigabit Ethernet (UTP) 4 Port
Adapter PCIE-4x/Shor
t
U78C7.001.LJD4A99-P1-C7 2103002D none - PCIe2 16Gb 2-Port Fibre Channel
Adapte
r
U78C7.001.LJD4A99-P1-C3 21010030 none - PCIe3 4-port 10GbE SR Adapte
r
U78C7.001.KIC3988-P1-C4 21010038 none ms07-vio1 Quad 8 Gigabit Fibre Channel LP
Adapte
r
U78C7.001.LJD4A99-P1-C1 21010040 none - PCIe3 4-port 10GbE SR Adapte
r
U78C7.001.LJD4A99-P1-C2 21010048 none ms07-vio2 Quad 8 Gigabit Fibre Channel LP
Adapte
r
$
In addition to the physical location code (column DRC_NAME), the so-called DRC_INDEX is displayed. The latter is
used to assign an I/O adapter to an LPAR. As a rule, physical I/O adapters are assigned usually to a virtual I/O server;
in the example output, some of the I/O adapters are divided between the two virtual I/O servers ms07-vio1 and ms07-
vio2 . The last column contains a description of the I/O adapter
.
Processor or memory resources of a managed system can be displayed with "ms lsproc" (list processors) or "ms
lsmem" (list memory)
:
Vi r t u a l i z a t i o n w i t h P o w e r V M

3 8 © b y P o w e r C a m p u s 0 1
- 39. $ ms lsproc ms07
NAME INSTALLED CONFIGURABLE AVAIL MAX_SHARED_PROC_POOL
S
ms07 48.0 48.0 1.15 6
4
$
$
$ ms lsmem ms0
7
NAME INSTALLED FIRMWARE CONFIGURABLE AVAIL MEM_REGION_SIZ
E
ms07 2097152 43776 2097152 859392 25
6
$
Both outputs also show how much of the resource is still available (e.g. for further LPARs)
.
Vi r t u a l i z a t i o n w i t h P o w e r V M

3 9 © b y P o w e r C a m p u s 0 1
- 40. 5. P r o c e s s o r V i r t u a l i z a t i o
n
PowerVM offers a number of different options for using processor resources in LPARs. In the simplest case,
dedicated processors are assigned to an LPAR. The LPAR can then use 100% of the assigned dedicated processors
and does not have to compete with other LPARs for processor resources. In most cases, processors (or processor
cores) are shared between LPARs in order to achieve better utilization of the processors. One then speaks of so-called
shared processors, in contrast to dedicated processors. The division of a shared processor into parts, which are then
assigned to the LPARs, is called micro-partitioning. The POWER Hypervisor divides the shared processors to the
associated LPARs using a time slice method
.
There are further con
fi
guration options for both variants. In particular, pools of shared processors can be con
fi
gured
and LPARs can then be assigned to one of the pools
.
5.1. D e d i c a t e d P r o c e s s o r
s
An LPAR can either use only dedicated processors or only shared processors, but not both at the same time. If
dedicated processors are used, these are only available to one LPAR (exceptions later) and cannot be used by other
LPARs
.

Figure 5.1 shows an LPAR with 2 dedicated processors (blue). When creating a new LPAR, the proc_mode attribute
can be used to specify whether dedicated processors or shared processors are to be used
:
POWER Hypervisor
CPU
Hardware Resources
CPU CPU CPU CPU CPU CPU CPU CPU CPU
CPU
CPU
LPAR
CPU
dedicated
dedicated
Figure 5.1: Partitioning with dedicated processors
Vi r t u a l i z a t i o n w i t h P o w e r V M

4 0 © b y P o w e r C a m p u s 0 1
- 41. proc_mode : processor mod
e
ded - dedicated processor
s
shared - shared processor
s
A new LPAR can be created with the "lpar create" command. To use dedicated processors, the attribute proc_mode
must be speci
fi
ed with the value ded on the command line
:
$ lpar -m ms02 create lpar1 proc_mode=ded
.
> lpar1
$
The option "-m" with the target managed system must be speci
fi
ed, it de
fi
nes on which of the managed systems the
LPAR is to be created. The LPAR name, here lpar1, is optional. If no name is given, the LPAR tool generates a
unique name
.
A newly created LPAR is initially not activated. The greater part of the LPAR con
fi
guration is stored in a pro
fi
le that
is created when the LPAR is generated. By default, the name standard is used for the pro
fi
le, but a different default
can also be stored. A look at the standard pro
fi
le shows that the LPAR was con
fi
gured with a dedicated processor
:
$ lpar -p standard lsproc lpar1
PROC PROCS PROC_UNITS UNCAP PROC
LPAR_NAME MODE MIN DESIRED MAX MIN DESIRED MAX SHARING_MODE WEIGHT POOL
lpar1 ded 1 1 1 - - - keep_idle_procs - -
$
If an LPAR is to have more than one dedicated processor, the desired number of dedicated processors can be
speci
fi
ed using the desired_procs attribute
:
$ lpar create -m ms02 lpar2 proc_mode=ded desired_procs=2
> lpar2
$
In the standard pro
fi
le of the LPAR lpar2, 2 dedicated processors are con
fi
gured as desired
:
$ lpar -p standard lsproc lpar
2
PROC PROCS PROC_UNITS UNCAP PRO
C
LPAR_NAME MODE MIN DESIRED MAX MIN DESIRED MAX SHARING_MODE WEIGHT POO
L
lpar2 ded 1 2 2 - - - keep_idle_procs -
-
$
In addition to the desired_procs attribute for the desired number of dedicated processors, there are two other
attributes, namely min_procs and max_procs. Just like desired_procs, these attributes can also be speci
fi
ed on the
command line when creating an LPAR. The value of min_procs must be less than or equal to the value desired_procs,
which in turn must be less than or equal to the value max_procs
:
min_procs <= desired_procs <= max_proc
s
Vi r t u a l i z a t i o n w i t h P o w e r V M

4 1 © b y P o w e r C a m p u s 0 1
- 42. The value of min_procs comes into play at least in the following two situations
:
• An LPAR is activated, but not as many processors are available as required by desired_procs. In this case,
PowerVM reduces the number of processors allocated to the LPAR to a smaller number. However, the value of
min_procs must not be undercut
.
• With an active LPAR with the operating system running, processors can be dynamically added or removed without
having to stop the operating system or applications. The number of processors can be increased to a maximum of
the value of max_procs or reduced to a minimum of the value of min_procs
.
As just described, the value of max_procs is taken into account when dynamically increasing the number of
processors
.
Which attributes can be speci
fi
ed and which possible values these attributes have, can be looked up in the online
help
:
$ lpar help creat
e
USAGE
:
lpar [-h <hmc>] [-m <ms>] [-p <profile>] create [{-b <blueprint>|-s <source_lpar>}] [-v]
[<lpar>] [<attributes> ...
]
DESCRIPTIO
N
Create a new LPAR on a managed system
.
-b : blueprint to use for creation
'
-s : source LPAR to use as blueprint
'
Valid attributes
:
name : name for the LPA
R
lpar_id : the ID of the LPA
R
profile_name : name of the default profil
e
lpar_env : type of LPA
R
aixlinux - AIX or Linux (default
)
os400 - IBM
i
vioserver - virtual I/O serve
r
min_mem : minimum amount of memory in M
B
desired_mem : desired amount of memory in M
B
max_mem : maximum amount of memory in M
B
mem_expansion : Active Memory Expansio
n
0 - disable AM
E
1.00-10.00 - expansion facto
r
…
$
5.1.1. A d d i n g D e d i c a t e d P r o c e s s o r
s
If a dedicated LPAR has an active RMC connection to the HMCs, dedicated processors can be added (and of course
removed) during operation. Two conditions must be met for this
:
1. The current number of dedicated processors must be less than the maximum permitted number of dedicated
processors for the LPAR
.
2. The desired number of processors must also still be available
.
Vi r t u a l i z a t i o n w i t h P o w e r V M

4 2 © b y P o w e r C a m p u s 0 1
- 43. How many dedicated processors are currently assigned to an LPAR and how many are possible can easily be
determined using "lpar lsproc"
:
$ lpar lsproc aix0
2
PROC PROCS PROC_UNITS UNCAP PRO
C
LPAR_NAME MODE MIN DESIRED MAX MIN DESIRED MAX CURR_SHARING_MODE WEIGHT POO
L
aix02 ded 1 2 4 - - - keep_idle_procs -
-
$
The LPAR aix02 currently has 2 dedicated processors and can be expanded to up to 4 dedicated processors. The
number of processors can of course also be determined from the LPAR operating system
:
aix02 # lsdev -l proc
*
proc0 Available 00-00 Processo
r
proc8 Available 00-08 Processo
r
aix02 #
There are currently 10.15 processors available on the underlying managed system (ms06)
:
$ ms lsproc ms0
6
NAME INSTALLED CONFIGURABLE AVAIL MAX_SHARED_PROC_POOL
S
ms06 20.0 20.0 10.15 6
4
$
This means that 1 or 2 dedicated processors can be added to the LPAR aix02 without any problems. The command
for this is "lpar addprocs" (add processors)
:
$ lpar addprocs aix02
1
$
In the example, one dedicated processor was added. The processor is immediately available to the operating system;
no further con
fi
guration is necessary on the AIX LPAR
:
aix02 # lsdev -l proc
*
proc0 Available 00-00 Processo
r
proc8 Available 00-08 Processo
r
proc16 Available 00-16 Processo
r
aix02 #
If an LPAR is powered off or has no active RMC connection to the HMCs, the number of dedicated processors can
only be changed in the pro
fi
le of the LPAR
:
$ lpar -p standard addprocs aix02
1
$
However, the change only takes effect when the LPAR is reactivated (specifying the changed pro
fi
le)
.
Vi r t u a l i z a t i o n w i t h P o w e r V M

4 3 © b y P o w e r C a m p u s 0 1