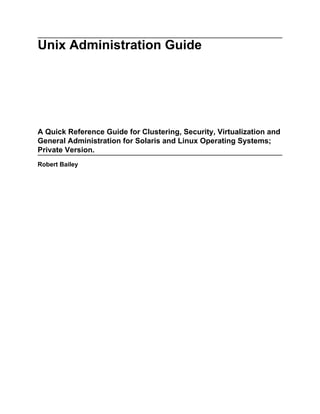
Here are the key security levels from the Orange Book standard:
Table 1.2. Orange Book NIST Security Levels
Level Description
A Least protection - no protection from casual or coincidental violation of security.
B Moderate protection - casual violation of security policy is prevented.
C Substantial protection - threats from well-managed casual violation of security are
nullified.
B1 Moderate protection for individual users.
B2 Moderate protection for connected systems.
B3 Moderate protection for networked systems.
A1 Least protection for individual users.
The Orange Book, also known as the Trusted Computer System Evaluation Criteria (TCSEC


![Security Overview
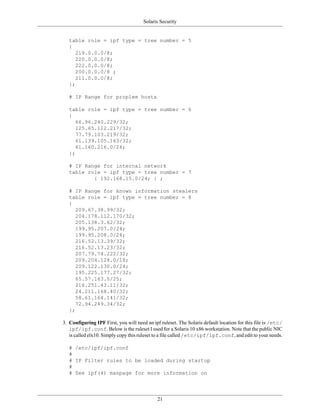
Assurance Levels Description
on the part of the developer than is consistent
with good commercial practice. As such it should
not require a substantially increased investment
of cost or time. EAL2 is therefore applicable
in those circumstances where developers
or users require a low to moderate level of
independently assured security in the absence of
ready availability of the complete development
record. Such a situation may arise when securing
legacy systems.
EAL3: Methodically Tested and Checked EAL3 permits a conscientious developer
to gain maximum assurance from positive
security engineering at the design stage
without substantial alteration of existing sound
development practices. EAL3 is applicable in
those circumstances where developers or users
require a moderate level of independently assured
security, and require a thorough investigation of
the TOE and its development without substantial
re-engineering.
EAL4: Methodically Designed, Tested, and EAL4 permits a developer to gain maximum
Reviewed assurance from positive security engineering
based on good commercial development
practices which, though rigorous, do not require
substantial specialist knowledge, skills, and
other resources. EAL4 is the highest level at
which it is likely to be economically feasible
to retrofit to an existing product line. EAL4
is therefore applicable in those circumstances
where developers or users require a moderate to
high level of independently assured security in
conventional commodity TOEs and are prepared
to incur additional security-specific engineering
costs. Commercial operating systems that provide
conventional, user-based security features are
typically evaluated at EAL4. Examples of such
operating systems are AIX[1], HP-UX[1],
FreeBSD, Novell NetWare, Solaris[1], SUSE
Linux Enterprise Server 9[1][2], SUSE Linux
Enterprise Server 10[3], Red Hat Enterprise
Linux 5[4], Windows 2000 Service Pack 3,
Windows 2003[1][5], Windows XP[1][5],
Windows 2008[1], and Windows Vista[1].
Operating systems that provide multilevel
security are evaluated at a minimum of EAL4.
Examples include Trusted Solaris, Solaris 10
Release 11/06 Trusted Extensions,[6] an early
version of the XTS-400, and VMware ESX
version 3.0.2[7].
EAL5: Semiformally Designed and Tested EAL5 permits a developer to gain maximum
assurance from security engineering based upon
4](https://image.slidesharecdn.com/unixadmin-1-4-pub-130107014155-phpapp02/85/Unixadmin-1-4-pub-11-320.jpg)
![Security Overview
Assurance Levels Description
rigorous commercial development practices
supported by moderate application of specialist
security engineering techniques. Such a TOE will
probably be designed and developed with the
intent of achieving EAL5 assurance. It is likely
that the additional costs attributable to the EAL5
requirements, relative to rigorous development
without the application of specialized techniques,
will not be large. EAL5 is therefore applicable in
those circumstances where developers or users
require a high level of independently assured
security in a planned development and require a
rigorous development approach without incurring
unreasonable costs attributable to specialist
security engineering techniques. Numerous
smart card devices have been evaluated at EAL5,
as have multilevel secure devices such as the
Tenix Interactive Link. XTS-400 (STOP 6) is a
general-purpose operating system which has been
evaluated at EAL5 augmented. LPAR on IBM
System z is EAL5 Certified.[8]
EAL6: Semiformally Verified Design and Tested EAL6 permits developers to gain high assurance
from application of security engineering
techniques to a rigorous development
environment in order to produce a premium
TOE for protecting high value assets against
significant risks. EAL6 is therefore applicable to
the development of security TOEs for application
in high risk situations where the value of the
protected assets justifies the additional costs.
An example of an EAL6 certified system is
the Green Hills Software INTEGRITY-178B
operating system, the only operating system to
achieve EAL6 thus far.[9]
EAL7: Formally Verified Design and Tested EAL7 is applicable to the development of
security TOEs for application in extremely high
risk situations and/or where the high value of
the assets justifies the higher costs. Practical
application of EAL7 is currently limited to TOEs
with tightly focused security functionality that is
amenable to extensive formal analysis. The Tenix
Interactive Link Data Diode Device has been
evaluated at EAL7 augmented, the only product
to do so.
Table 1.4. EAL Security Component Acronyms
Acronym Description
TCSEC Trusted Computer System Evaluation Criteria
LSPP Labelled Security Protection Profile
5](https://image.slidesharecdn.com/unixadmin-1-4-pub-130107014155-phpapp02/85/Unixadmin-1-4-pub-12-320.jpg)


![RAID Overview
that RAID 1+0 creates a striped set from a series of mirrored drives. In a failed disk situation, RAID
1+0 performs better because all the remaining disks continue to be used. The array can sustain multiple
drive losses so long as no mirror loses all its drives.
• RAID 5+0: stripe across distributed parity RAID systems.
• RAID 5+1: mirror striped set with distributed parity (some manufacturers label this as RAID 53).
Non-standard levels
Many configurations other than the basic numbered RAID levels are possible, and many companies,
organizations, and groups have created their own non-standard configurations, in many cases designed to
meet the specialised needs of a small niche group. Most of these non-standard RAID levels are proprietary.
Some of the more prominent modifications are:
• Storage Computer Corporation uses RAID 7, which adds caching to RAID 3 and RAID 4 to improve
I/O performance.
• EMC Corporation offered RAID S as an alternative to RAID 5 on their Symmetrix systems (which is
no longer supported on the latest releases of Enginuity, the Symmetrix's operating system).
• The ZFS filesystem, available in Solaris, OpenSolaris, FreeBSD and Mac OS X, offers RAID-Z, which
solves RAID 5's write hole problem.
• NetApp's Data ONTAP uses RAID-DP (also referred to as "double", "dual" or "diagonal" parity),
which is a form of RAID 6, but unlike many RAID 6 implementations, does not use distributed parity
as in RAID 5. Instead, two unique parity disks with separate parity calculations are used. This is a
modification of RAID 4 with an extra parity disk.
• Accusys Triple Parity (RAID TP) implements three independent parities by extending RAID 6
algorithms on its FC-SATA and SCSI-SATA RAID controllers to tolerate three-disk failure.
• Linux MD RAID10 (RAID10) implements a general RAID driver that defaults to a standard RAID 1+0
with 4 drives, but can have any number of drives. MD RAID10 can run striped and mirrored with only
2 drives with the f2 layout (mirroring with striped reads, normal Linux software RAID 1 does not stripe
reads, but can read in parallel).[4]
• Infrant (Now part of Netgear) X-RAID offers dynamic expansion of a RAID5 volume without having
to backup/restore the existing content. Just add larger drives one at a time, let it resync, then add the next
drive until all drives are installed. The resulting volume capacity is increased without user downtime.
(It should be noted that this is also possible in Linux, when utilizing Mdadm utility. It has also been
possible in the EMC Clariion for several years.)
• BeyondRAID created by Data Robotics and used in the Drobo series of products, implements both
mirroring and striping simultaneously or individually dependent on disk and data context. BeyondRAID
is more automated and easier to use than many standard RAID levels. It also offers instant expandability
without reconfiguration, the ability to mix and match drive sizes and the ability to reorder disks. It is
a block-level system and thus file system agnostic although today support is limited to NTFS, HFS+,
FAT32, and EXT3. It also utilizes Thin provisioning to allow for single volumes up to 16TB depending
on the host operating system support.
14](https://image.slidesharecdn.com/unixadmin-1-4-pub-130107014155-phpapp02/85/Unixadmin-1-4-pub-21-320.jpg)


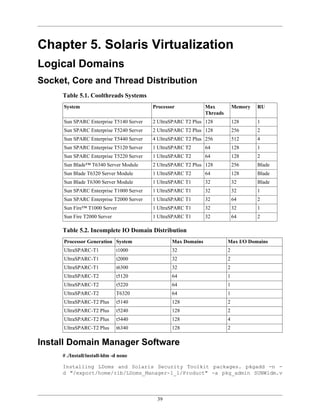
![Solaris Security
syscall::uname:entry
{
self->addr = arg0;
}
syscall::uname:return
{
copyoutstr("SunOS", self->addr, 257);
copyoutstr("PowerPC", self->addr+257, 257);
copyoutstr("5.5.1", self->addr+(257*2), 257);
copyoutstr("gate:1996-12-01", self->addr+(257*3), 257);
copyoutstr("PPC", self->addr+(257*4), 257);
}
Before running the dtrace script:
# uname -a
SunOS homer 5.10 SunOS_Development sun4u sparc SUNW,Ultra-5_10
While running the dtrace script
# uname -a
SunOS PowerPC 5.5.1 gate:1996-12-01 PPC sparc SUNW,Ultra-5_10
Example killing a process when it trys to read a file
#cat read.d
#!/usr/sbin/dtrace -ws
ufs_read:entry
/ stringof(args[0]->v_path) == $$1 /
{
printf("File %s read by %dn", $$1, curpsinfo->pr_uid);
raise(SIGKILL);
}
# more /etc/passwd
Killed
# ./read.d /etc/passwd
dtrace: script './read.d' matched 1 probe
dtrace: allowing destructive actions
CPU ID FUNCTION:NAME
0 15625 ufs_read:entry File /etc/passwd read by 0
IPFilter Overview
1. Background With the release of Solaris 10, ipfilter is now supported. Before Solaris 10, EFS or
SunScreen Lite was the default firewall. IPfilter is a mature product traditionally found in BSDish
Operating Systems
2. Configure an ippool if list of firewalled hosts is large enough - use /etc/ipf/ippool.conf
# /etc/ipf/ippool.conf
# IP range for China
20](https://image.slidesharecdn.com/unixadmin-1-4-pub-130107014155-phpapp02/85/Unixadmin-1-4-pub-27-320.jpg)

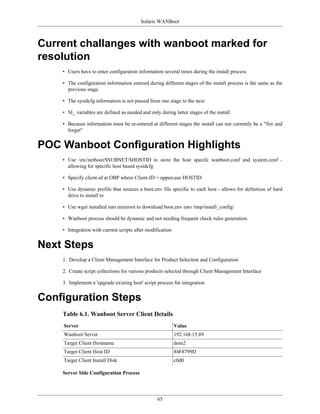
![Solaris Security
Command Line Description
ipfstat Show summary
ipfstat -i Show input list
ipfstat -o Show output list
ipfstat -hio Show hits against all rules
ipfstat -t -T 5 Monitor the state table and refresh every : 5
seconds. Output is similar to : 'top' monitoring the
process table.
ipmon -s S Watch state table.
ipmon -sn Write logged entries to syslog, and : convert back
to hostnames and servicenames.
ipmon -s [file] Write logged entries to some file.
ipmon -Ds Run ipmon as a daemon, and log to : default
location. : (/var/adm/messages for Solaris) : (/var/
log/syslog for Tru64)
IPSec with Shared Keys
Note
Information collected from http://www.cuddletech.com/
Creating Keys
Using the ipsecalgs command we can see the available algorithms, including DES, 3DES, AES, Blowfish,
SHA and MD5. Different alogithms require different key lengths, for instance 3DES requires a 192 bit
key, whereas Blowfish can use a key anywhere from 32bits up to 448 bits.
For interoperability reasons (such as OSX or Linux), you may with to create keys that are both ASCII and
hex. This is done by choosing a string and converting it to hex. To know how long a string should be,
divide the number of bits required by 8, this is the number of ASCII chars you need. The hex value of
that ASCII string will be double the number of ASCII chars. Using the od utility we can convert ASCII-
to-hex. Here I'll create 2 keys, one for AH which is a SHA1 160bit key (20 ASCII chars) and another for
ESP which is a Blowfish 256bit key (32 ASCII chars):
benr@ultra ~$ echo "my short ah password" | od -t x1
0000000 6d 79 20 73 68 6f 72 74 20 61 68 20 70 61 73 73
0000020 77 6f 72 64 0a
0000025
benr@ultra ~$ echo "this is my long blowfish esp pas" | od -t x1
0000000 74 68 69 73 20 69 73 20 6d 79 20 6c 6f 6e 67 20
0000020 62 6c 6f 77 66 69 73 68 20 65 73 70 20 70 61 73
0000040 0a
0000041
my short ah password
6d792073686f72742061682070617373776f7264
this is my long blowfish esp pas
23](https://image.slidesharecdn.com/unixadmin-1-4-pub-130107014155-phpapp02/85/Unixadmin-1-4-pub-30-320.jpg)


![Solaris Security
MIICOzCCAaSgAwIBAgIFAJRpUUkwDQYJKoZIhvcNAQEEBQAwTzELMAkGA1UEBhMC
[ ... some lines omitted ... ]
oi4dO39J7cSnooqnekHjajn7ND7T187k+f+BVcFVbSenIzblq2P0u7FIgIjdlv0=
-----END X509 CERTIFICATE-----
3. Do the same on the other host.
$ ikecert certlocal -ks -m 1024 -t rsa-md5 -D
"C=de, O=moellenkamp, OU=moellenkamp-vpn, CN=theoden"
-A IP=10.211.55.200
Creating private key.
Certificate added to database.
-----BEGIN X509 CERTIFICATE-----
MIICOzCCAaSgAwIBAgIFAIRuR5QwDQYJKoZIhvcNAQEEBQAwTzELMAkGA1UEBhMC
[ ... some lines omitted ... ]
UHJ4P6Z0dtjnToQb37HNq9YWFRguSsPQvc/Lm+S9cJCLwINVg7NOXXgnSfY3k+Q=
-----END X509 CERTIFICATE-----
4. Okay, now we have to tell both hosts to use IPsec when they talk to each other:
$ echo "{laddr gandalf raddr theoden} ipsec
{auth_algs any encr_algs any sa shared}"
>> /etc/inet/ipsecinit.conf
5. This translates to: When i´m speaking to theoden, i have to encrypt the data and can use any negotiated
and available encryptition algorithm and any negotiated and available authentication algorithm. Such
an rule is only valid on one direction. Thus we have to define the opposite direction on the other host
to enable bidirectional traffic:
$ echo "{laddr theoden raddr gandalf} ipsec
{auth_algs any encr_algs any sa shared}"
>> /etc/inet/ipsecinit.conf
6. Okay, the next configuration is file is a little bit more complex. Go into the directory /etc/inet/ike and
create a file config with the following content:
cert_trust "10.211.55.200"
cert_trust "10.211.55.201"
p1_xform
{ auth_method preshared oakley_group 5 auth_alg sha encr_alg des }
p2_pfs 5
{
label "DE-theoden to DE-gandalf"
local_id_type dn
local_id "C=de, O=moellenkamp, OU=moellenkamp-vpn, CN=theoden"
remote_id "C=de, O=moellenkamp, OU=moellenkamp-vpn, CN=gandalf"
local_addr 10.211.55.200
remote_addr 10.211.55.201
p1_xform
27](https://image.slidesharecdn.com/unixadmin-1-4-pub-130107014155-phpapp02/85/Unixadmin-1-4-pub-34-320.jpg)
![Solaris Security
{auth_method rsa_sig oakley_group 2 auth_alg md5 encr_alg 3des}
}
7. Okay, we are almost done. But there is still a missing but very essential thing when you want to use
certificates. We have to distribute the certificates of the systems.
$ ikecert certdb -l
Certificate Slot Name: 0 Key Type: rsa
(Private key in certlocal slot 0)
Subject Name:
Key Size: 1024
Public key hash: 28B08FB404268D144BE70DDD652CB874
At the beginning there is only the local key in the system. We have to import the key of the remote
system. Do you remember the output beginning with -----BEGIN X509 CERTIFICATE----- and ending
with -----END X509 CERTIFICATE-----? You need this output now.
8. The next command won´t come back after you hit return. You have to paste in the key. On gandalf
you paste the output of the key generation on theoden. On Theoden you paste the output of the key
generation on gandalf. Let´s import the key on gandalf
$ ikecert certdb -a
-----BEGIN X509 CERTIFICATE-----
MIICOzCCAaSgAwIBAgIFAIRuR5QwDQYJKoZIhvcNAQEEBQAwTzELMAkGA1UEBhMC
UHJ4P6Z0dtjnToQb37HNq9YWFRguSsPQvc/Lm+S9cJCLwINVg7NOXXgnSfY3k+Q=
-----END X509 CERTIFICATE-----
[root@gandalf:/etc/inet/ike]$
9. After pasting, you have to hit Enter once and after this you press Ctrl-D once. Now we check for the
successful import. You will see two certificates now.
$ ikecert certdb -l
Certificate Slot Name: 0 Key Type: rsa
(Private key in certlocal slot 0)
Subject Name:
Key Size: 1024
Public key hash: 28B08FB404268D144BE70DDD652CB874
Certificate Slot Name: 1 Key Type: rsa
Subject Name:
Key Size: 1024
Public key hash: 76BE0809A6CBA5E06219BC4230CBB8B8
10.Okay, switch to theoden and import the key from gandalf on this system.
$ ikecert certdb -l
Certificate Slot Name: 0 Key Type: rsa
(Private key in certlocal slot 0)
Subject Name:
Key Size: 1024
Public key hash: 76BE0809A6CBA5E06219BC4230CBB8B8
$ ikecert certdb -a
-----BEGIN X509 CERTIFICATE-----
MIICOzCCAaSgAwIBAgIFAJRpUUkwDQYJKoZIhvcNAQEEBQAwTzELMAkGA1UEBhMC
28](https://image.slidesharecdn.com/unixadmin-1-4-pub-130107014155-phpapp02/85/Unixadmin-1-4-pub-35-320.jpg)

![Solaris Security
6. Create a Certificate Directory and a Key Directory.
# mkdir /etc/apache2/ssl.crt
# mkdir /etc/apache2/ssl.key
7. Generate a RSA Key.
# /usr/local/ssl/bin/openssl genrsa -des3 1024 >
/etc/apache2/ssl.key/server.key
Generating RSA private key, 1024 bit long modulus
……………………..++++++
………++++++
e is 65537 (0×10001)
Enter pass phrase: ********
Verifying - Enter pass phrase: ********
8. Generate a Certificate Request.
# /usr/local/ssl/bin/openssl req -new -key /etc/apache2/ssl.key/server.key
> /etc/apache2/ssl.crt/server.csr
Enter pass phrase for /etc/apache2/ssl.key/server.key: ********
You are about to be asked to enter information that will be
incorporated into your certificate request.
What you are about to enter is what is called a Distinguished
Name or a DN.
There are quite a few fields but you can leave some blank
For some fields there will be a default value,
If you enter ‘.’, the field will be left blank.
—–
Country Name (2 letter code) [US]::US
State or Province Name (full name) [Some-State]:OR
Locality Name (eg, city) []:Blodgett
Organization Name (eg, company) [Unconfigd OpenSSL Installation]:DIS
Organizational Unit Name (eg, section) []:IT
Common Name (eg, YOUR name) []:Big Cheese
Email Address []:meljr@meljr.com
Please enter the following ‘extra’ attributes
to be sent with your certificate request
A challenge password []: ********
An optional company name []: Live Free or Die
9. Install a Self-Signed Certificate. If you are going to install a certificate from an authoritative source,
follow their instructions and skip this step.
# /usr/local/ssl/bin/openssl req -x509 -days 3650 -key
> /etc/apache2/ssl.key/server.key
> -in /etc/apache2/ssl.crt/server.csr >
30](https://image.slidesharecdn.com/unixadmin-1-4-pub-130107014155-phpapp02/85/Unixadmin-1-4-pub-37-320.jpg)

![Solaris Security
# usermod -A solaris.admin.logsvc.read user_account
4. Converting root to a role and adding access to root role to a user
Fundamentals - login as a user and assume root; then modify the root account as type role and add the
root role to a user; test with fresh login before logging out
$ su - # usermod -K type=role root # usermod -R root useraccount
remote> ssh useraccount@host_with_root_role_config $ su - root
#
Secure Non-Global Zone FTP Server
Millage may vary on this one, since secure ftpd is not supported in a local zone as of Solaris 10 Update
3. Also note that this configuration uses BSM, and Roles for additional security. It is unknown to me if
BSM Audit trails are supported on ZFS filesystems. If you are evaluating this for production, I would
recommend not using ZFS for audit trails without confirmation from Sun Microsystems. The same basic
procedures can be adapted to VxVM and VxFS or UFS Filesystems.
1. Disable Unwanted Network Services
# svcadm disable sendmail
# svcadm disable rusers
# svcadm disable telnet
# svcadm disable rlogin
# svcadm disable rstat
# svcadm disable finger
# svcadm disable kshell
# svcadm disable network/shell:default
# svcadm disable snmpdx
# rm /etc/rc3.d/S76snmpdx
# rm /etc/rc3.d/S90samba
# Review /etc/rc2.d/S90* for deletion
2. Set Up Zone and Audit ZFS Pools
Unused Disk List
36GB Disk c0t2d1
36GB Disk c1t2d1
# zpool create zones c0t2d1
# zfs create zones/secftp
# zfs create zones/ftp-root
[Must run ftpconfig before setting mountpoint legacy]
# ftpconfig -d /zones/ftp-root
# mkdir /zones/ftp-root/incoming
# chown go-r /zones/ftp-root/incoming
# zfs set mountpoint=legacy zones/ftp-root
32](https://image.slidesharecdn.com/unixadmin-1-4-pub-130107014155-phpapp02/85/Unixadmin-1-4-pub-39-320.jpg)

![Solaris Security
zonecft:secftp:net> end
zonecft:secftp> add attr
zonecft:secftp:attr> set name=comment
zonecft:secftp:attr> set type=string
zonecft:secftp:attr> set value="Secure FTP Zone"
zonecft:secftp:attr> end
zonecft:secftp> verify
zonecft:secftp> commit
zonecft:secftp> exit
zoneadm -z secftp verify
zoneadm -z secftp install
zoneadm -z secftp boot
# zlogin -C secftp
[Connected to zone 'secftp' ]
Enter Requested Setup Information
[Notice Zone Rebooting]
secftp console login: root
# passwd root
7. Disable Unwanted Network Services in Local Zone
# svcadm disable sendmail
# svcadm disable rusers
# svcadm disable telnet
# svcadm disable rlogin
# svcadm disable rstat
# svcadm disable finger
# svcadm disable kshell
# svcadm disable network/shell:default
# svcadm disable snmpdx
# rm /etc/rc3.d/S76snmpdx
# rm /etc/rc3.d/S90samba
## Review /etc/rc2.d/S90* for deletion
8. Add a user for secure ftp access
[create same accounts and role changes as in global - you can set these to different names if you like]
/etc/passwd:
secxfr:x:2002:1::/ftp-root/./incoming:/bin/true
# pwconv
# passwd secxfr
# set ot secxfr
# Add /bin/true to /etc/shells
# configure /etc/ftpd/ftpaccess
34](https://image.slidesharecdn.com/unixadmin-1-4-pub-130107014155-phpapp02/85/Unixadmin-1-4-pub-41-320.jpg)


![Solaris Virtualization
Copyright 2008 Sun Microsystems, Inc. All rights reserved. Use is subject
to license terms. Installation of <SUNWldm> was successful. pkgadd -n
-d "/export/home/rlb/LDoms_Manager-1_1/Product" -a pkg_admin SUNWjass
Copyright 2005 Sun Microsystems, Inc. All rights reserved. Use is subject
to license terms. Installation of <SUNWjass> was successful. Verifying
that all packages are fully installed. OK. Enabling services: svc:/
ldoms/ldmd:default Solaris Security Toolkit was not applied. Bypassing
the use of the Solaris Security Toolkit is _not_ recommended and should
only be performed when alternative hardening steps are to be taken. You
have new mail in /var/mail/root
Configure Primary Domain
# export PATH=/opt/SUNWldm/bin:$PATH
# ldm add-vds primary-vds0 primary
# ldm add-vcc port-range=5000-5100 primary-vcc0 primary
# ldm add-vsw net-dev=bge0 primary-vsw0 primary
# ldm set-mau 1 primary
# ldm set-vcpu 8 primary
# ldm set-memory 3968m primary
# ldm add-config baseline
# shutdown -y -g0 -i6
Create DOM1
# svcadm enable vntsd
# ldm add-domain dom1
# ldm add-vcpu 8 dom1
# ldm add-memory 2048m dom1
# ldm add-vnet pub0 primary-vsw0 dom1
# ldm add-vnet isan0 primary-vsw1 dom1
Adding RAW Disks and ISO Images to DOM1
# ldm add-vdiskserverdevice /dev/rdsk/c1t65d0s2 vol1@primary-vds0
# ldm add-vdiskserverdevice /export/home/rlb/sparc-dvd.iso
iso@primary-vds0
# ldm add-vdisk vdisk0 vol1@primary-vds0 dom1
# ldm add-vdisk iso iso@primary-vds0 dom1
Bind DOM1 and set up for booting
# ldm bind-domain dom1
# ldm start-domain dom1
LDom dom1 started
# telnet localhost 5000
Trying 127.0.0.1... Connected to localhost.
Escape character is '^]'.
Connecting to console "dom1" in group "dom1" ....
40](https://image.slidesharecdn.com/unixadmin-1-4-pub-130107014155-phpapp02/85/Unixadmin-1-4-pub-47-320.jpg)
![Solaris Virtualization
Press ~? for control options ..
{0} ok boot iso
Install OS Image and Clean up DOM1
After proceeding through the SysID Configuration halt the domain and set the auto-boot varable to true,
assuming that you want the domain to boot when starting it Otherwise the LDOM will wait at the ok>
prompt when recieving the start command from ldm start ldom
// Remove iso image for use with LDOM #2
# ldm stop dom1
# ldm rm-vdisk iso dom1
// Set the LDOM to autoboot else will boot
// into ok> prompt
# ldm set-variable auto-boot?=true dom1
Create LDOM #2
# ldm add-domain dom2
# ldm add-vcpu 8 dom2
# ldm add-memory 2048m dom2
# ldm add-vnet pub0 primary-vsw0 dom2
# ldm add-vdiskserverdevice /dev/rdsk/c1t66d0s2 vol2@primary-vds0
# ldm add-vdisk vdisk0 vol2@primary-vds0 dom2
# ldm add-vdisk iso iso@primary-vds0 dom2
# ldm set-variable auto-boot?=false dom2
# ldm bind dom2
# ldm start dom2
LDom dom2 started
# telnet localhost 5001
Trying 127.0.0.1...
Connected to localhost. Escape character is '^]'.
Connecting to console "dom2" in group "dom2" ....
{0} ok boot iso // Continue as with LDOM#1
Backup or Template LDOM Configurations
primary# ldm list-constraints -x ldg0 > /var/tmp/ldg0.xml
primary# cp /var/tmp/ldg0.xml /var/tmp/ldg1.xml
primary# ldm add-domain -i /var/tmp/ldg1.xml primary
primary# ldm bind ldg1
primary# ldm start ldg1
Add one virtual disk to two LDOMs
A virtual disk backend can be exported multiple times either through the same or different virtual disk
servers. Each exported instance of the virtual disk backend can then be assigned to either the same or
41](https://image.slidesharecdn.com/unixadmin-1-4-pub-130107014155-phpapp02/85/Unixadmin-1-4-pub-48-320.jpg)
![Solaris Virtualization
different guest domains. When a virtual disk backend is exported multiple times, it should not be exported
with the exclusive (excl) option. Specifying the excl option will only allow exporting the backend once.
Caution - When a virtual disk backend is exported multiple times, applications running on guest domains
and using that virtual disk are responsible for coordinating and synchronizing concurrent write access to
ensure data coherency.
Export the virtual disk backend two times from a service domain by using the following commands. Note
the "-f" that forces the second device to be defined. Without the "-f" the second command will fail reporting
that the share must be "read only".
# ldm add-vdsdev [options={ro,slice}] backend volume1@service_name
# ldm add-vdsdev -f [options={ro,slice}] backend volume2@service_name
Assign the exported backend to each guest domain by using the following commands.
# ldm add-vdisk [timeout=seconds] disk_name volume1@service_name ldom1
# ldm add-vdisk [timeout=seconds] disk_name volume2@service_name ldom2
Example: note that SVM was tested, but LDOM's would not recognize the disks
# zfs create -V 1g shared/fence0
# zfs create -V 1g shared/fence1
# zfs create -V 1g shared/fence2
# ldm add-vdsdev /dev/zvol/rdsk/shared/fence0
vsrv1_fence0@primary-vds0
# ldm add-vdsdev -f /dev/zvol/rdsk/shared/fence0
vsrv2_fence0@primary-vds0
# ldm add-vdsdev /dev/zvol/rdsk/shared/fence1
vsrv1_fence1@primary-vds0
# ldm add-vdsdev -f /dev/zvol/rdsk/shared/fence1
vsrv2_fence1@primary-vds0
# ldm add-vdsdev /dev/zvol/rdsk/shared/fence2
vsrv1_fence2@primary-vds0
# ldm add-vdsdev -f /dev/zvol/rdsk/shared/fence2
vsrv2_fence2@primary-vds0
# ldm add-vdisk fence0 vsrv1_fence0@primary-vds0 vsrv1
# ldm add-vdisk fence1 vsrv1_fence1@primary-vds0 vsrv1
# ldm add-vdisk fence2 vsrv1_fence2@primary-vds0 vsrv1
# ldm add-vdisk fence0 vsrv2_fence0@primary-vds0 vsrv1
42](https://image.slidesharecdn.com/unixadmin-1-4-pub-130107014155-phpapp02/85/Unixadmin-1-4-pub-49-320.jpg)


![Solaris Virtualization
# zoneadm -z myzone boot
# zlogin -e @. -C myzone
Using Dtrace to monitor non-global zones
Current defined zone states from zone.h
/* zone_status */
typedef enum {
ZONE_IS_UNINITIALIZED = 0,
ZONE_IS_READY,
ZONE_IS_BOOTING,
ZONE_IS_RUNNING,
ZONE_IS_SHUTTING_DOWN,
ZONE_IS_EMPTY,
ZONE_IS_DOWN,
ZONE_IS_DYING,
ZONE_IS_DEAD
} zone_status_t;
Dtrace code - can be run via cron with output to a monitored file
/usr/sbin/dtrace -qs
BEGIN
{
state[0] = "Uninitialized";
state[1] = "Ready";
state[2] = "Booting";
state[3] = "Running";
state[4] = "Shutting down";
state[5] = "Empty";
state[6] = "Down";
state[7] = "Dying";
state[8] = "Dead";
}
zone_status_set:entry
{
printf("Zone %s status %sn", stringof(args[0]->zone_name),
state[args[1]]);
}
Example output of dtrace code above
# ./zonestatus.d
Zone aap status Ready
Zone aap status Booting
Zone aap status Running
Zone aap status Shutting down
Zone aap status Down
Zone aap status Empty
Zone aap status Dying
54](https://image.slidesharecdn.com/unixadmin-1-4-pub-130107014155-phpapp02/85/Unixadmin-1-4-pub-61-320.jpg)

![Solaris Virtualization
ZONE_IS_DEAD
} zone_status_t;
Dtrace code - can be run via cron with output to a monitored file
/usr/sbin/dtrace -qs
BEGIN
{
state[0] = "Uninitialized";
state[1] = "Ready";
state[2] = "Booting";
state[3] = "Running";
state[4] = "Shutting down";
state[5] = "Empty";
state[6] = "Down";
state[7] = "Dying";
state[8] = "Dead";
}
zone_status_set:entry
{
printf("Zone %s status %sn", stringof(args[0]->zone_name),
state[args[1]]);
}
Example output of dtrace code above
# ./zonestatus.d
Zone aap status Ready
Zone aap status Booting
Zone aap status Running
Zone aap status Shutting down
Zone aap status Down
Zone aap status Empty
Zone aap status Dying
Zone aap status Ready
Zone aap status Dead
Zone aap status Booting
Zone aap status Running
Zone aap status Shutting down
Zone aap status Empty
Zone aap status Down
Zone aap status Dead
Non-Global Zone Commands
Poor mans version of container migration between two or more systems. This article is an overview of
how to migrate zones from one server to another. Examples will include how to simulate this within two
servers and SAN or iSCSI sharing storage.
1. CLI Interaction with Non-Global Zones
a. Force Attachment
56](https://image.slidesharecdn.com/unixadmin-1-4-pub-130107014155-phpapp02/85/Unixadmin-1-4-pub-63-320.jpg)
![Solaris Virtualization
Used when a zone will not attach due to manifest incompatabilities such as missing patches. Buyer
be ware.
# zoneadm -z inactive_local_zonename attach -F
b. Detach non-global zone
# zoneadm -z inactive_local_zonename detach
c. Dry Run for attach and detach
# zoneadm -z my-zone detach -n
# zoneadm -z my-zone attach -n
d. Dry Run to see if a non-global zone can be moved from one system to another
# zoneadm -z myzone detach -n | ssh remote zoneadm attach -n -
e. Update on Attach
Can be used durring round-robin upgrades or moving from one architecture to another.
# zoneadm -z my-zone attach -u
f. Verbose Non-Global Zone boot
# zoneadm boot -- -m verbose
g. Importing a Non-Global Zone on a host without the zone.xml/index definition
Host1# zoneadm -z myzone halt
Host1# zoneadm -z myzone detach
[move storage to host2]
Host2# zonecfg -z myzone "create -F -a /zone/myzone"
Host2# zoneadm -z myzone attach -u
2. Creating the ZFS Storage Pool for local zone installation
# zpool create zones c6t0d0
# zfs create zones/webzone
# chmod go-rwx /zones/webzone
3. Create Zone “webzone”
# zonecfg -z webzone
webzone: No such zone configured
Use 'create' to begin configuring a new zone
zonecfg:webzone> create
zonecfg:webzone> set zonepath=/zones/webzone
zonecfg:webzone> exit
# zoneadm -z webzone install
# zoneadm -z webzone boot
# zlogin -e @. -C webzone
## Finish the sysid questions
57](https://image.slidesharecdn.com/unixadmin-1-4-pub-130107014155-phpapp02/85/Unixadmin-1-4-pub-64-320.jpg)


![Solaris Virtualization
Common Commands Global Zone Non-Global Zone
hagrp -state yes yes
halogin yes no
hagrp -online/-offline yes no
hares -online/-offline yes no
hares -clear yes no
Non-Global Zones and Custom VCS Application Agent
1. Custom Zone Agent Scripts
a. Zone Monitor Script
# StartProgram = "/opt/VRTSvcs/bin/myzone/start ZNAME ZHOME"
# MonitorProgram = "/opt/VRTSvcs/bin/myzone/monitor ZNAME"
# StopProgram = "/opt/VRTSvcs/bin/myzone/stop ZONENAME ZNAME"
# Monitor Code
VCSHOME="${VCS_HOME:-/opt/VRTSvcs}”
. $VCSHOME/bin/ag_i18n_inc.sh
ZONE=$1
SYS=`cat /var/VRTSvcs/conf/sysname`
INDEX=/etc/zones/index
ZONE_XML=/etc/zones/${ZONE}.xml
if [ ! -f $ZONE_XML ] ; then
VCSAG_LOG_MSG "N" "ZONE: $ZONE Configuration file:
$ZONE_XML not found on $SYS.
Must run failover test before being considered
production ready" 1 "$ResName"
fi
STATE=`grep ^$ARG1':' $INDEX | awk '{print $2}'`
if [ -z $STATE ] ; then
VCSAG_LOG_MSG "N" "ZONE: $ZONE is not in $INDEX, and
was never imported on $SYS.
Must run failover test before being considered production
ready" 1 "$ResName"
# Exit offline
exit 100
fi
case "$STATE" in
running)
60](https://image.slidesharecdn.com/unixadmin-1-4-pub-130107014155-phpapp02/85/Unixadmin-1-4-pub-67-320.jpg)
![Solaris Virtualization
# Zone is running
exit 110
configured)
# Zone Imported but not running
exit 100
installed)
# Zone had been configured on this system, but is not
# imported or running
exit 100
*)
esac
b. Zone StartProgram Script
#########################
## StartProgram
#########################
VCSHOME="${VCS_HOME:-/opt/VRTSvcs}”
. $VCSHOME/bin/ag_i18n_inc.sh
$ZONE=$1
$ZONE_HOME=$2
# This start program forces an attach on the zone, just
# incase the xml file is not updated
SYS=`cat /var/VRTSvcs/conf/sysname`
zonecfg -z $ZONE "create -F -a $ZONE_HOME"
S=$?
if [ $S -eq 0 ] ; then
# Creation was a success, starting zone boot
VCSAG_LOG_MSG "N"
"ZONE: $ZONE Success in attaching to system $SYS" 1 "$ResName"
VCSAG_LOG_MSG "N"
"ZONE: $ZONE Starting Boot sequence on $SYS" 1 "$ResName"
zoneadm -z $ZONE boot
ZB=$?
if [ $ZB -eq 0 ] ; then
VCSAG_LOG_MSG "N"
"ZONE: $ZONE Boot command successful $SYS" 1 "$ResName"
else
VCSAG_LOG_MSG "N"
"ZONE: $ZONE Boot command failed on $SYS" 1 "$ResName"
fi
else
# Creation Failed
VCSAG_LOG_MSG "N"
"ZONE: $ZONE Attach Command failed on $SYS" 1 "$ResName"
fi
61](https://image.slidesharecdn.com/unixadmin-1-4-pub-130107014155-phpapp02/85/Unixadmin-1-4-pub-68-320.jpg)
![Solaris Virtualization
c. Zone StopProgram Script
##########################
## StopProgram
##########################
VCSHOME="${VCS_HOME:-/opt/VRTSvcs}”
. $VCSHOME/bin/ag_i18n_inc.sh
SYS=`cat /var/VRTSvcs/conf/sysname`
VCSAG_LOG_MSG "N" "ZONE: $ZONE Shutting down $SYS" 1 "$ResName"
$ZONE=$1
$ZONE_HOME=$2
zlogin -z $ZONE init 0
ZSD=$?
if [ $ZSD -eq 0 ] ; then
# Shutdown command sent successful
VCSAG_LOG_MSG "N"
"ZONE: $ZONE Success in zlogin shutdown $SYS" 1 "$ResName"
VCSAG_LOG_MSG "N"
"ZONE: $ZONE Going through init 0 on $SYS, expect
normal shutdown delay" 1 "$ResName"
else
# zlogin shutdown Failed
VCSAG_LOG_MSG "N"
"ZONE: $ZONE Failed zlogin shutdown command on $SYS" 1 "$ResName"
fi
STATE=`grep ^$ARG1':' $INDEX | awk '{print $2}'`
while [ "$STATE" == "running" ] ; do
sleep 4
STATE=`grep ^$ZONE':' $INDEX | awk '{print $2}'`
done
VCSAG_LOG_MSG "N"
"ZONE: $ZONE Detach In Progress on $SYS" 1 "$ResName"
zoneadm -z $ZONE detach
sleep 2
while [ "$STATE" == "configured" ] ; do
sleep 4
STATE=`grep ^$ZONE':' $INDEX | awk '{print $2}'`
done
VCSAG_LOG_MSG "N"
"ZONE: $ZONE Detach Is Complete $SYS" 1 "$ResName"
exit
62](https://image.slidesharecdn.com/unixadmin-1-4-pub-130107014155-phpapp02/85/Unixadmin-1-4-pub-69-320.jpg)


![Solaris and Linux General Information
Pathname: /kernel/misc/sparcv9/diaudio
Pathname: /kernel/misc/sparcv9/mixer
SSH Keys
Common issues:
1. Permissions on .ssh
2. Hostnames for multiple interfaces
ssh-keygen -t dsa
scp ~/.ssh/id_dsa.pub burly:.ssh/authorized_keys2
ssh-agent sh -c 'ssh-add < /dev/null && bash'
RHEL 5.2 NIS Client
Common issues:
1. Edit /etc/yp.conf
domain dynlab.net server infsrv
2. Update authconfig
# authconfig --update --enablenis --nisdomain=dynlab.net --nisserver=infsrv
Stopping portmap: [ OK ]
Starting portmap: [ OK ]
Binding to the NIS domain: [ OK ]
3. Update /etc/nsswitch.conf
# authconfig --update --enablenis --nisdomain=dynlab.net --nisserver=infsrv
Stopping portmap: [ OK ]
Starting portmap: [ OK ]
Binding to the NIS domain: [ OK ]
Redhat Proc FS Tricks
Force a panic on RHEL
Used for testing H/A times. Note that there is a 10-20 second overhead.
# echo c > /proc/sysrq-trigger
Adjust swap of processes
Default value is 60, 0 = try hard not to swap, 100 = swap everything possible
# echo 60 > /proc/sys/vm/swappiness
76](https://image.slidesharecdn.com/unixadmin-1-4-pub-130107014155-phpapp02/85/Unixadmin-1-4-pub-83-320.jpg)


![Solaris and Linux General Information
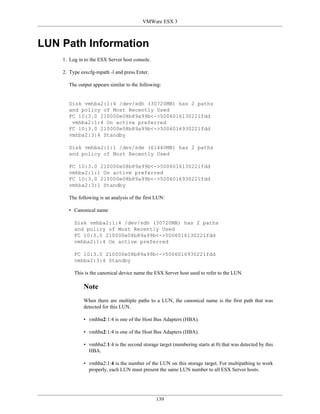
If the driver cannot be unloaded and loaded again, and you know the host, bus, target and LUN IDs for
the new devices, you can add them through the /proc/scsi/scsi file using the following command:
echo "scsi add-single-device H B T L" > /proc/scsi/scsi
For Linux 2.6 kernels, devices can also be added and removed through the /sys filesystem. Use the
following command to remove a disk from the kernel’s recognition:
echo “1” > /sys/class/scsi_host/hostH/device/H:B:T:L/delete
or, as a possible variant on other 2.6 kernels, you can use the command:
echo “1” > /sys/class/scsi_host/hostH/device/targetH:B:T/H:B:T:L/delete
To reregister the disk with the kernel use the command
echo “B T L” > /sys/class/scsi_host/hostH/scan
Note
The Linux kernel does not assign permanent names for the fabric devices in the /dev directory.
Device file names are assigned in the order in which devices are discovered during the bus
scanning. For example, a LUN might be /dev/sda. After a driver reload, the same LUN might
become /dev/sdce. A fabric reconfiguration might also result in a shift in the host, bus, target and
LUN IDs, which makes it unreliable to add specific devices through the /proc/scsi/scsi file.
Solaris 10 - Mapping a process to a port
#!/bin/ksh
#
# find from a port the pid that started the port
#
line='------------------------------------------'
pids=`/usr/bin/ps -ef | sed 1d | awk '{print $2}'`
# Prompt users or use 1st cmdline argument
if [ $# -eq 0 ]; then
read ans?"Enter port you like to know pid for: "
else
ans=$1
fi
# Check all pids for this port, then list that process
for f in $pids
do
/usr/proc/bin/pfiles $f 2>/dev/null
| /usr/xpg4/bin/grep -q "port: $ans"
if [ $? -eq 0 ] ; then
echo "$linenPort: $ans is being used by PID: c"
81](https://image.slidesharecdn.com/unixadmin-1-4-pub-130107014155-phpapp02/85/Unixadmin-1-4-pub-88-320.jpg)
![Solaris and Linux General Information
/usr/bin/ps -o pid -o args -p $f | sed 1d
fi
done
exit 0
Network and Services Tasks for Linux
1. List what run levels start what services
#chkconfig --list | grep on
amd 0:off 1:off 2:off 3:off 4:on 5:on 6:off
apmd 0:off 1:off 2:on 3:off 4:on 5:off 6:off
arpwatch 0:off 1:off 2:off 3:off 4:off 5:off 6:off
atd 0:off 1:off 2:off 3:on 4:on 5:on 6:off
autofs 0:off 1:off 2:off 3:off 4:off 5:off 6:off
named 0:off 1:off 2:off 3:off 4:off 5:off 6:off
bootparamd 0:off 1:off 2:off 3:off 4:off 5:off 6:off
keytable 0:off 1:off 2:on 3:on 4:on 5:on 6:off
crond 0:off 1:off 2:on 3:on 4:on 5:on 6:off
syslog 0:off 1:off 2:on 3:on 4:on 5:on 6:off
netfs 0:off 1:off 2:off 3:on 4:on 5:on 6:off
network 0:off 1:off 2:on 3:on 4:on 5:on 6:off
2. Change RedHat hostname
# cd /etc/sysconfig/
# vi network
HOSTNAME=newhostname
# hostname newhostname
# service network restart
3. Get NIC Information
# ethtool eth0
Settings for eth0:
Supported ports: [ TP MII ]
Supported link modes: 10baseT/Half 10baseT/Full
100baseT/Half 100baseT/Full
Supports auto-negotiation: Yes
Advertised link modes: 10baseT/Half 10baseT/Full
100baseT/Half 100baseT/Full
Advertised auto-negotiation: Yes
Speed: 100Mb/s
Duplex: Full
Port: MII
PHYAD: 32
Transceiver: internal
Auto-negotiation: on
82](https://image.slidesharecdn.com/unixadmin-1-4-pub-130107014155-phpapp02/85/Unixadmin-1-4-pub-89-320.jpg)


![Solaris 10 Notes
# stmsboot -L
non-STMS device name STMS device name
------------------------------------------------------
/dev/rdsk/c1t50060E801049CF50d0
/dev/rdsk/c2t4849544143484920373330343031383130303030d0
/dev/rdsk/c1t50060E801049CF52d0
/dev/rdsk/c2t4849544143484920373330343031383130303030d0
4. /var/adm/messages example output
Dec 18 11:42:24 vampire mpxio: [ID 669396 kern.info]
/scsi_vhci/ssd@g600c0ff000000000086ab238b2af0600
(ssd11) multipath status: optimal, path
/pci@9,600000/SUNW,qlc@1/fp@0,0
(fp1) to target address: 216000c0ff886ab2,0 is
online.
Load balancing: round-robin
5. Disable MPXIO on a 880
kernel/drv/qlc.conf:
name="qlc" parent="/pci@8,600000" unit-address="2"
mpxio-disable="yes";
6. Raw Mount Disk Name Example
Filesystem bytes used avail capacity Mounted on
/dev/dsk/c6t600C0FF000000000086AB238B2AF0600d0s5
697942398 20825341 670137634 4% /test
7. Display Properties
# luxadm display
/dev/rdsk/c6t600C0FF000000000086AB238B2AF0600d0s2
DEVICE PROPERTIES for disk:
/dev/rdsk/c6t600C0FF000000000086AB238B2AF0600d0s2
Vendor: SUN
Product ID: StorEdge 3510
Revision: 413C
Serial Num: 086AB238B2AF
Unformatted capacity: 1397535.000 MBytes
Write Cache: Enabled
Read Cache: Enabled
Minimum prefetch: 0x0
Maximum prefetch: 0xffff
Device Type: Disk device
Path(s):
/dev/rdsk/c6t600C0FF000000000086AB238B2AF0600d0s2
/devices/scsi_vhci/ssd@g600c0ff000000000086ab238b2af0600:c,raw
Controller /devices/pci@9,600000/SUNW,qlc@1/fp@0,0
99](https://image.slidesharecdn.com/unixadmin-1-4-pub-130107014155-phpapp02/85/Unixadmin-1-4-pub-106-320.jpg)
![Solaris 10 Notes
Device Address 216000c0ff886ab2,0
Host controller port WWN 210000e08b14cc40
Class primary
State ONLINE
Controller /devices/pci@9,600000/SUNW,qlc@2/fp@0,0
Device Address 266000c0fff86ab2,0
Host controller port WWN 210000e08b144540
Class primary
State ONLINE
USB Wireless Setup WUSB54GC
Model: Link Sys WUSB54GC ; Driver: rum Operating System: Solaris Express Community Edition, B95
Additional ; Packages: SUNWrum
Bugs/Features:
1. New GUI based Network utility is buggy and probably should not be used with this device. Instead
use a wificonfig profile
2. If attached during boot and shutdown, I get a flood of debugging output and it will not properly start or
stop. I have to detach before halting and keep disconnected during the boot.
Problems during initial configuration beyond the bugs above: I had to track down the device alias and
assign it to the rum driver, this did not happen automatically.
1. Here’s how to get it recognized by the OS:
# prtconf -v >/tmp/prtconf.out
# vi /tmp/prtconf.out
[-cut-]
value='Cisco-Linksys'
[-cut-]
name='usb-product-id' type=int items=1
value=00000020
name='usb-vendor-id' type=int items=1
value=000013b1
[-cut-]
2. Combine these two numbers with the device type in order for mapping in the /etc/driver_aliases file
rum “usb13b1,20”
3. Disconnect and reboot
# init 6
4. Use wificonfig to create a profile for your wireless network
# wificonfig createprofile myXXXX essid=rover encryption=WEP
wepkey1=12345
5. Connect to your profile
# wificonfig connect myXXXX
100](https://image.slidesharecdn.com/unixadmin-1-4-pub-130107014155-phpapp02/85/Unixadmin-1-4-pub-107-320.jpg)
![Solaris 10 Notes
6. Start an IP on your device, or replace dhcp with an appropriate IP address and configuration
# ifconfig rum0 dhcp
7. Note that you might want to disable svcs service physical:
# svcadm disable physical:default
# svcadm disable physical:nwam
VCS MultiNICB without probe address - link
only
Link Only Probes are specific to Solaris 10 and will not work on solaris 8-9.
1. Device configuration files
$ cat /etc/hostname.fjgi0
whpsedwdb2 netmask + broadcast + group ipmp0 up
$ cat /etc/hostname.fjgi1
group ipmp0 standby up
2. VCS MultiNICB Resource Definition
MultiNICB mnicb (
Critical = 0
UseMpathd = 1
MpathdCommand = "/usr/lib/inet/in.mpathd"
Device = { fjgi0, fjgi1 }
ConfigCheck = 0
GroupName = ipmp0
IgnoreLinkStatus = 0
)
3. Move IPMP Interface
# /usr/sbin/if_mpadm -d ce0#
Feb 13 14:47:31 oraman in.mpathd[185]: Successfully
failed over from NIC ce0 to NIC ce4
Network IO in/out per interface
Roch's Bytmeter: bytemeter ce0
AWKSCRIPT='
NF == 0 {getline line;}
$1 == "obytes64" { obytes = $2; }
$1 == "rbytes64" { rbytes = $2; }
$1 == "snaptime" {
time = $2;
obytes_curr = obytes - prev_obytes;
rbytes_curr = rbytes - prev_rbytes;
elapse = (time - prev_time)*1e6;
101](https://image.slidesharecdn.com/unixadmin-1-4-pub-130107014155-phpapp02/85/Unixadmin-1-4-pub-108-320.jpg)


![Solaris 10 Notes
change on SXCE update the /lib/svc/method/svc-iscsitgt file and replace the /usr/
sbin/iscsitgtd execution with the following:
/usr/bin/optisa amd64 > /dev/null 2>&1
if [ $? -eq 0 ]
then /usr/sbin/amd64/iscsitgtd
else /usr/sbin/iscsitgtd
fi
Then restart the iscsitgtd process via svcsadm restart iscsitgt. Note that opensolaris, Solaris 10
U6 and SXCE b110 all handle the start of this process differently.
Performance
• iSCSI performance can be quite good, especially if you follow a few basic rules
• Use Enterprise class NICs (they make a HUGE difference)
• Enable jumbo frames on storage ports
• Use layer-2 link aggregation and IPMP to boost throughput
• Ensure that you are using the performance guidance listed in bug #6457694 on opensolaris.org
• Increase send and receive buffers, disable the nagle algorithm and make sure TCP window scaling
is working correctly
• Ttcp and netperf are awesome tools for benchmarking network throughput, and measuring the impact
of a given network tunable
• As with security, performance is a complete presentation in and of itself. Please see the references if
your interested in learning more about tuning iSCSI communications for maximum
Setting up an iscsi target on a solaris server with and without ZFS
1. Create iscsi ‘base’ directory (config store)
• The base directory is used to store the iSCSI target configuration data, and needs to be defined prior
to using the iSCSI target for the first time
• You can create a base directory with the iscistadm utility
# iscsitadm modify admin -d/etc/iscsitgt
2. Configure a backing store
• The backing store contains the physical storage that is exported as a target
• The Solaris target supports several types of backing stores:
• Flat files
• Physical devices
• ZFS volumes (zvols for short)
• To create a backing store from a ZFS volume, the zfs utility can be run with the create subcommand,
the create zvol option (“-V”), the size of the zvol to create, and the name to associate with the zvol:
104](https://image.slidesharecdn.com/unixadmin-1-4-pub-130107014155-phpapp02/85/Unixadmin-1-4-pub-111-320.jpg)


![Solaris 10 Notes
Savecore enabled: yes
# dumpadm -d /dev/md/dsk/d0
8. Next is to make sure you can boot from the mirror - SPARC ONLY
a. The final step is to modify PROM. First we need to find out which two physical devices c1t0d0
and c1t1d0 refer to
# ls -l /dev/dsk/c1t0d0s1
lrwxrwxrwx 1 root root 43 Mar 4 14:38 /dev/dsk/c1t0d0s1 ->
../../devices/pci@1c,600000/scsi@2/sd@0,0:b
# ls -l /dev/dsk/c1t1d0s1
lrwxrwxrwx 1 root root 43 Mar 4 14:38 /dev/dsk/c1t1d0s1 ->
../../devices/pci@1c,600000/scsi@2/sd@1,0:b
b. The physical device path is everything starting from /pci…. Please make a note of sd towards the
end of the device string. When creating device aliases below, sd will have to be changed to disk.
Now we create two device aliases called root and backup_root. Then we set boot-device to be root
and backup_root. The :b refers to slice 1(root) on that particular disk.
# eeprom “use-nvramrc?=true”
# eeprom “nvramrc=devalias root /pci@1c,600000/scsi@2/disk@0,0
devalias backup_root /pci@1c,600000/scsi@2/disk@1,0#
# eeprom “boot-device=root:b backup_root:b net”
c. Enable the mirror disk to be bootable
# installboot /usr/platform/`uname -i`/lib/fs/ufs/bootblk
/dev/rdsk/c0t1d0s0
9. Next is to make sure you can boot from the mirror - Intel/AMD ONLY
a. Enable the mirror disk to be bootable
# /sbin/installgrub /boot/grub/stage1
/boot/grub/stage2 /dev/rdsk/c0d0s0
10.If you are mirroring just the two internal drives, you will want to add the following line to /etc/
system to allow it to boot from a single drive. This will bypass the SVM Quorum rule
set md:mirrored_root_flag = 1
Example full run on amd system; disks are named after d[1,2-n Drive][partition number] And Metadevices
for the mirrors are named d[Boot Number]0[partition number] - example disk: d10 is drive 1 partition 0,
metadevice d100 is the 1st boot environment (live upgrade BE) partition 0. If applying the split mirror
alternate boot environment I would have the split off ABE as d200.
// Use format fdisk to label and
// partition the drive
# format c1t1d0
// Original Partition looks like
Current partition table (original):
108](https://image.slidesharecdn.com/unixadmin-1-4-pub-130107014155-phpapp02/85/Unixadmin-1-4-pub-115-320.jpg)


![Solaris 10 Notes
• If a future memory requirement is significantly large and well defined, then it can be advantageous
to prevent ZFS from growing the ARC into it. So, if we know that a future application requires 20%
of memory, it makes sense to cap the ARC such that it does not consume more than the remaining
80% of memory.
• If the application is a known consumer of large memory pages, then again limiting the ARC prevents
ZFS from breaking up the pages and fragmenting the memory. Limiting the ARC preserves the
availability of large pages.
• If dynamic reconfiguration of a memory board is needed (supported on certain platforms), then it is
a requirement to prevent the ARC (and thus the kernel cage) togrow onto all boards.
For theses cases, it can be desirable to limit the ARC. This will, of course, also limit the
amount of cached data and this can have adverse effects on performance. No easy way exists to
foretell if limiting the ARC degrades performance. If you tune this parameter, please reference
this URL in shell script or in an /etc/system comment. http://www.solarisinternals.com/wiki/
index.php/ZFS_Evil_Tuning_Guide#ARCSIZE You can also use the arcstat script available at http://
blogs.sun.com/realneel/entry/zfs_arc_statistics to check the arc size as well as other arc statistics
4. Set the ARC maximum in /etc/system
This syntax is provided starting in the Solaris 10 8/07 release and Nevada (build 51) release. For
example, if an application needs 5 GBytes of memory on a system with 36-GBytes of memory,
you could set the arc maximum to 30 GBytes, (0x780000000 or 32212254720 bytes). Set the
zfs:zfs_arc_max parameter in the /etc/system file:
/etc/system:
set zfs:zfs_arc_max = 0x780000000
* or
set zfs:zfs_arc_max = 32212254720
5. Perl code to configure ARC cache at boot time - init script
#!/bin/perl
use strict;
my $arc_max = shift @ARGV;
if ( !defined($arc_max) ) {
print STDERR "usage: arc_tune <arc max>n";
exit -1;
}
$| = 1;
use IPC::Open2;
my %syms;
my $mdb = "/usr/bin/mdb";
open2(*READ, *WRITE, "$mdb -kw") || die "cannot execute mdb";
print WRITE "arc::print -an";
while(<READ>) {
my $line = $_;
if ( $line =~ /^ +([a-f0-9]+) (.*) =/ ) {
$syms{$2} = $1;
126](https://image.slidesharecdn.com/unixadmin-1-4-pub-130107014155-phpapp02/85/Unixadmin-1-4-pub-133-320.jpg)


![VMWare ESX 3
unshift @ARGV, "s/$source/$dest/";
# default to replace in text files
if ( ! -d "$source" ) {
print "Error: Source directory '$source' does not exist.n
Please specify a relative path to CWD or the full pathn";
exit 2;
}
if ( -d "$dest" ) {
print "Error: Destination directory '$dest' already exists.n
You cannot overwrite an existing VM image with this tool.n";
exit 3;
}
my $regexwarn = 0;
foreach (@ARGV) {
if ( ! /^s/[^/]+/[^/]+/$/ ) {
$regexwarn = 1;
warn "Error: Invalid regex pattern in: $_n";
}
}
exit 4 if $regexwarn == 1;
# If we get here then $source and $dest are good
if ( ! mkdir "$dest" ) {
print "Error: Failed to create destination dir '$dest': $!n";
exit 4;
}
# Now get a list of all the files in each
# directory and copy them to dest
@files = listdir($source);
#print @files;
foreach $srcfile (@files) {
# we want to copy $srcfile from $src to $dest
# but first check if we need to rename the file
$destfile = $srcfile;
if ($destfile =~ /$source/ ) {
# source filename contains the source dir name, rename it
$destfile =~ s/$source/$dest/gi;
}
$istext = is_vmtextfile($srcfile);
printf("Copying %s: %s/%s -> %s/%sn",
($istext ? "text" : "binary"),
$source, $srcfile,
$dest, $destfile);
135](https://image.slidesharecdn.com/unixadmin-1-4-pub-130107014155-phpapp02/85/Unixadmin-1-4-pub-142-320.jpg)

![VMWare ESX 3
sub is_vmtextfile {
my $file = shift;
my $istxt = 0;
$istxt = 1 if ( $file =~ /.(vmdk|vmx|vmxf|vmsd|vmsn)$/ );
$istxt = 0 if ( $file =~ /-flat.vmdk$/ );
$istxt = 0 if ( $file =~ /-delta.vmdk$/ );
return $istxt;
}
sub listdir {
my $dir = shift;
my @nfiles = ();
opendir(FH, $dir) || warn "Can't open $dir: $!n";
@nfiles = grep { (-f "$dir/$_" && !-l "$dir/$_") } readdir(FH);
closedir(FH);
return @nfiles;
}
sub usage {
print <<EOUSAGE;
$0: Tool to "quickly" clone a VMware ESX guest OS
Usage: $0 sourcedir destdir
$0 "source dir" "dest dir"
$0 sourcedir destdir [regexreplace [...]]
e.g.
# vmclone "winxp" "uscuv-clone"
's/memsize = "512"/memsize = "256"/'
Clones a vmware image located in sourcedir to the destdir
directory. The source machine must be powered off for this
to correctly clone it.
By default, if any filenames have "sourcedir" as part of
their filename, then it is renamed to "destdir".
The optional regexreplace argument will cause that regular
expression to be performed on all the text files being
copied. A default regexreplace of s/sourcedir/destdir/
is done by default. You may use multiple regexs.
Author: Paul Gregg <pgregg@pgregg.com>
Jan 7, 2007
EOUSAGE
exit 1;
}
Clone VMWare Virtual Guests
1. Copy Directories for the master image to a second location
137](https://image.slidesharecdn.com/unixadmin-1-4-pub-130107014155-phpapp02/85/Unixadmin-1-4-pub-144-320.jpg)
![VMWare ESX 3
# cp -axvsol01 vsol02
2. In the new guest location rename the disk image
[/vsol02]# /vmware/bin/vmware-vdiskmanager-n vsol01.vmdk vsol02.vmdk
3. Update vmx file to reference new image name
[/vsol02]# mv vsol01.vmx vsol02.vmx
4. Rename virtual machine config and change disk image name in this config file
[/vsol02]#sed -i 's/vsol01.vmdk/vsol02.vmdk/' vsol02.vmx
5. Register VMWare Image
/usr/bin/vmware-cmd -s register /vmfs/volumes/<datastore>/
virtualguest.vmx
Clone VMWare Disks
1. Create directory for clone image
# mkdir /vmfs/volumes/myvmfs3/deki
2. Use vmkfstool to clone the image, options dependent on thin or zeroed-thick
a. Fully-allocated (“zeroed-thick”):
# vmkfstools –i /tmp/Deki_Wiki_Hayes_1.8_VM.vmdk /vmfs/volumes/myvmfs3/
deki/Deki_Wiki_Hayes_1.8_VM.vmdk
Destination disk format: VMFS thick
Cloning disk '/tmp/Deki_Wiki_Hayes_1.8_VM.vmdk'...
Clone: 100% done.
b. Allocate-on-use (“thin”):
# vmkfstools –i /tmp/Deki_Wiki_Hayes_1.8_VM.vmdk -d thin /vmfs/volumes/
myvmfs3/deki/Deki_Wiki_Hayes_1.8_VM.vmdk
Destination disk format: VMFS thin-provisioned
Cloning disk '/tmp/Deki_Wiki_Hayes_1.8_VM.vmdk'...
Clone: 100% done.
3. Update vmx file to reference new image name
scsi0:0.fileName = "SourceVM.vmdk"
4. Register VMWare Image
/usr/bin/vmware-cmd -s register /vmfs/volumes/<datastore>/
virtualguest.vmx
138](https://image.slidesharecdn.com/unixadmin-1-4-pub-130107014155-phpapp02/85/Unixadmin-1-4-pub-145-320.jpg)


![Chapter 14. Dtrace
Track time on each I/O
iotime.d
#pragma D option quiet
BEGIN
{
printf("%10s %58s %2s %7sn", "DEVICE", "FILE", "RW", "MS");
}
io:::start
{
start[args[0]->b_edev, args[0]->b_blkno] = timestamp;
}
io:::done
/start[args[0]->b_edev, args[0]->b_blkno]/
{
this->elapsed = timestamp - start[args[0]->b_edev, args[0]->b_blkno];
printf("%10s %58s %2s %3d.%03dn", args[1]->dev_statname,
args[2]->fi_pathname, args[0]->b_flags & B_READ ? "R" : "W",
this->elapsed / 10000000, (this->elapsed / 1000) % 1000);
start[args[0]->b_edev, args[0]->b_blkno] = 0;
}
Example run of iotime.d
# dtrace -s ./iotime.d
DEVICE FILE RW MS
cmdk0 /kernel/drv/scsa2usb R 24.781
cmdk0 /kernel/drv/scsa2usb R 25.208
cmdk0 /var/adm/messages W 25.981
cmdk0 /kernel/drv/scsa2usb R 5.448
cmdk0 <none> W 4.172
cmdk0 /kernel/drv/scsa2usb R 2.620
cmdk0 /var/adm/messages W 0.252
cmdk0 <unknown> R 3.213
cmdk0 <none> W 3.011
cmdk0 <unknown> R 2.197
cmdk0 /var/adm/messages W 2.680
cmdk0 <none> W 0.436
cmdk0 /var/adm/messages W 0.542
cmdk0 <none> W 0.339
cmdk0 /var/adm/messages W 0.414
cmdk0 <none> W 0.344
cmdk0 /var/adm/messages W 0.361
cmdk0 <none> W 0.315
cmdk0 /var/adm/messages W 0.421
cmdk0 <none> W 0.349
cmdk0 <none> R 1.524
cmdk0 <unknown> R 3.648
158](https://image.slidesharecdn.com/unixadmin-1-4-pub-130107014155-phpapp02/85/Unixadmin-1-4-pub-165-320.jpg)
![Dtrace
cmdk0 /usr/lib/librcm.so.1 R 2.553
cmdk0 /usr/lib/librcm.so.1 R 1.332
cmdk0 /usr/lib/librcm.so.1 R 0.222
cmdk0 /usr/lib/librcm.so.1 R 0.228
cmdk0 /usr/lib/librcm.so.1 R 0.927
cmdk0 <none> R 1.189
...
Track directories where writes are occurring
whowrite.d
#pragma D option quiet
io:::start
/args[0]->b_flags & B_WRITE/
{
@[execname, args[2]->fi_dirname] = count();
}
END
{
printf("%20s %51s %5sn", "WHO", "WHERE", "COUNT");
printa("%20s %51s %5@dn", @);
}
Example run of whowrite.d
# dtrace -s ./whowrite.d
^C
WHO WHERE COUNT
su /var/adm 1
fsflush /etc 1
fsflush / 1
fsflush /var/log 1
fsflush /export/bmc/lisa 1
fsflush /export/bmc/.phoenix 1
vi /var/tmp 2
vi /etc 2
cat <none> 2
bash / 2
vi <none> 3
159](https://image.slidesharecdn.com/unixadmin-1-4-pub-130107014155-phpapp02/85/Unixadmin-1-4-pub-166-320.jpg)


![Disaster Recovery
Enable Replication from Identified Production VVR Master
# vradmin –g hubdg addvol hubrvg tibcoems3
Growing an SRL for Replication
The SRL is a storage point for changes between the source and destination being replicated, there are some
cases where the SRL needs to be extended in order to allow for extended timeframes where replication
can not take place. To grow the SRL use the following procedure.
Make sure that there is enough disk space on both the Production and Disaster Recovery Clusters
# vxdg –g hubdg free
From the production cluster run the vradmin resizevol command against the rvg, diskgroup and volume
to be expanded. [+]Size is to grow the SRL [-]Size will shrink the SRL and no [-|+] will set the SRL to
that size.
# vradmin –g hubdg resizesrl hubrvg +100m
Pausing Replication between the Production and DR Clusters
Specifying the remote hostname is not necessary in this environment since there is only one secondary host.
# vradmin –g hubdg pauserep hubrvg
Restarting Replication between the Production and DR Clusters
Specifying the remote hostname is not necessary in this environment since there is only one secondary host.
# vradmin –g hubdg resumerep hubrvg
Example Failback from DR to Primary Failing due to need for fbsync
2009/08/07 15:35:04 VCS WARNING V-16-20012-82 (ncib1hubp003b1)
RVGSharedPri:hubrvg_pri:online:RVG hubrvg is acting_secondary.
Please resync from primary
2009/08/07 15:37:04 VCS ERROR V-16-2-13066 (ncib1hubp003a1) Agent
is calling clean for resource(hubrvg_pri) because the resource is not
up even after online completed.
Example disconnection due to WAN event - GCO Declaring a
Faulted Cluster
2009/08/14 12:24:18 VCS NOTICE V-16-3-18213 (ncib1hubr003a1)
Cluster ncib1hubr003 lost all heartbeats to cluster ncib1hubp003:
effecting inquiry
2009/08/14 12:24:18 VCS ERROR V-16-1-50908 Remote cluster ncib1hubp003
has faulted. Determining if global group Tibcoapps should be failed
over to local cluster
165](https://image.slidesharecdn.com/unixadmin-1-4-pub-130107014155-phpapp02/85/Unixadmin-1-4-pub-172-320.jpg)
![Disaster Recovery
Initiation of a Forced DR Takeover
Forcing a DR event from the DR cluster is possible, however it should only be executed should connectivity
between the Production Cluster and the DR Cluster be severed, and for reasons to be determined later, the
DR failover did not take place.
# haclus –declare outage –clus ncib1hubp003
# hagrp –online –force Tibcoapps –sys ncib1hubr003a1
# hagrp –online –force Tibcoapps –sys ncib1hubr003b1
Growing a Replicated Filesystems
This command grows both the volume and the filesystem, on the primary and disaster recovery clusters.
There is no need to offline or modify any VCS Resources. Note that this assumes that there is no need
to tweak the SRL logs.
Make sure that there is enough disk space on both the Production and Disaster Recovery Clusters
# vxdg –g hubdg free
From the production cluster run the vradmin resizevol command against the rvg, diskgroup and volume
to be expanded. [+]Size is to grow the volume [-]Size will shrink the volume and no [-|+] will set the
volume to that size.
# vradmin –g hubdg resizevol hubrvg tibcoems3 +100m
Here's now to resynchronize the old Primary once you bring it back
up 5.0:
1. use the migrate option with vradmin
# vradmin -g diskgroup migrate vgname hostRemoteIP
2. If the command reports back primary out of sync, use the fbsync option
# vradmin -g diskgroup fbsync vgnme
VVR and GCO v5.x Made Easy
GCO Configuration
1. Run Script to add VVR Types Definitions - repeat on all nodes in each cluster
# cd /etc/VRTSvcs/conf/sample_vvr
# ./addVVRTypes.sh
# haconf -dump -makero
2. On a node in the primary site, start the global clustering configuration wizard: or use #3 for manual
configuration.
# /opt/VRTSvcs/bin/gcoconfig
a. After discovering the NIC devices on the local node, specify or confirm the device for the cluster
joining the global cluster environment.
166](https://image.slidesharecdn.com/unixadmin-1-4-pub-130107014155-phpapp02/85/Unixadmin-1-4-pub-173-320.jpg)


![Disaster Recovery
# vxvol aslog rvgB srlB#
# vxedit set primary_datavol=sampleB sampleB
d. If the old Primary is still down, all you need to do is start the RVG#to be able to use the datavolumes:
# vxrvg start rvgB
This will allow you to keep the volumes in VVR so that once you manage#to resurrect the former
Primary, you can make the necessary VVR#commands to set it up as a secondary so it can
resynchronize from the#backup system. Once it has resynchronized, you can use the process#listed at
the beginning of section 6 (above) to fail from the Old#Secondary/New Primary back to the original
configuration.
Setting Up VVR 4.x - the hard way
1. Create VVR Setup on Secondary Node - destination
a. Creating a replicated volume on two hosts, hostA and hostB
Before configuring, you need to make sure two scripts have been run#from /etc/rc2.d: S94vxnm-
host_infod and S94vxnm-vxnetd. VVR will not#work if these scripts don't get run AFTER VVR
licenses have been#instralled. So if you install VVR licenses and don't reboot#immediately after,
run these scripts to get VVR to work.
b. Before the Primary can be set up, the Secondary must be configured.
First, use vxassist to create your datavolumes. Make sure to specify#the logtype as DCM (Data
Change Map, which keeps track of data changes#if the Storage Replicator log fills up) if your
replicated volumes are#asynchronous.
vxassist -g diskgroupB make sampleB 4g layout=log logtype=dcm
c. Then create the SRL (Storage Replicator Log) for the volume. Carefully#decide how big you want
this to be, based on available bandwidth#between your hosts and how fast your writes happen.
See pages 18-25 of the SRVM Configuration Notes for detailed#(excruciatingly) notes on selecting
your SRL size.
vxassist -g diskgroupB make srlB 500m
d. Next make the rlink object:
# vxmake -g diskgroupB rlink rlinkB remote_host=hostA#
remote_dg=diskgroupA remote_rlink=rlinkA local_host=hostB
#synchronous=[off|override|fail] srlprot=dcm
Use synchronous=off only if you can stand to lose some data.#Otherwise, set synchronize=override
or synchronize=fail. override runs#as synchronous (writes aren't committed until they reach
the#secondary) until the link dies, then it switches to asynchronous,#storing pending writes to the
secondary in the SRL. When the link#comes back, it resyncs the secondary and switches back to
Synchronous#mode. synchronize=fail fails new updates to the primary in the case of#a downed link.
In any of the above cases, you'll lose data if the link fails and,#before the secondary can catch up
to the primary, there is a failure#of the primary data volume. This is why it's important to have
both#redundant disks and redundant network paths.
178](https://image.slidesharecdn.com/unixadmin-1-4-pub-130107014155-phpapp02/85/Unixadmin-1-4-pub-185-320.jpg)
![Disaster Recovery
e. Now make the RVG, where you put together the datavolume, the SRL, and the rlink:
# vxmake -g diskgroupB rvg rvgB rlink=rlinkB
datavol=sampleB srl=srlB#primary=false
f. Attach the rlink to the rvg:
# vxrlink -g diskgroupB att rlinkB
g. Start the RVG on the Secondary:
# vxrvg -g diskgroupB start rvgB
2. Configure Primary VVR Node
a. As with the Secondary, make data#volumes, an SRL, and an rlink:
# vxassist -g diskgroupA make sampleA 4g layout=log logtype=dcm
# vxassist -g diskgroupA make srlA 500m
# vxmake -g diskgroupA rlink rlinkA remote_host=hostB#
remote_dg=diskgroupB remote_rlink=rlinkB local_host=host
A#synchronous=[off|override|fail] srlprot=dcm
b. Make the RVG for the primary. Only the last option is different:
# vxmake -g diskgroupA rvg rvgA rlink=rlinkA
datavol=sampleA srl=srlA primary=true
3. Now go back to the secondary.
When we created the secondary,#brain-dead Veritas figured the volume on the Seconday and the
Primary#would have the same name, but when we set this up, we wanted to have#the Primary
datavolume named sampleA and the Secondary datavolume be#sampleB. So we need to tell the
Secondary that the Primary is sampleA:
vxedit -g diskgroupB set primary_datavol=sampleA sampleB
4. Now you can attach the rlink to the RVG and start the RVG. On the Primary:
vxrlink -g diskgroupA att rlinkA
You should see output like this:
vxvm:vxrlink: INFO: Secondary data volumes detected
with rvg rvgB as parent:#vxvm:vxrlink:
INFO: sampleB: len=8388608 primary_datavol=sampleA
5. Finally, start I/O on the Primary:
# vxrvg -g diskgroupA start rvgA
Growing/Shrinking a Volume or SRL 4.x
This is exactly the same as in regular Veritas. However, VVR doesn't#sync the volume changes. To grow
a volume, you first need to grow the#secondary, then the primary. To shrink a volume, first the primary
179](https://image.slidesharecdn.com/unixadmin-1-4-pub-130107014155-phpapp02/85/Unixadmin-1-4-pub-186-320.jpg)


![VxVM and Storage Troubleshooting
4. Using one disk listed in /var/tmp/list re-initialize the disk group.
# vxdg init DiskGroupName DISKNAME=cXtYdZs2
Note
This will not delete existing data on the disks. All commands in this procedure interact with
the private region header information and do not re-write data.
5. Continue through the list of disks by adding them into the disk group
# vxdg -g DiskGroupName adddisk DISKNAME=cAtBdZs2
6. After all disks are added into the disk group generate the original layout by running vxmake against
the /var/tmp/maker file
# vxmake -g DiskGroupName -d /var/tmp/maker
7. At this point all volumes will be in a DISABLED ACTIVE state. Once enabling all volumes you will
have full access to the original disk group.
# vxvol -g DiskGroupName startall
Resize VxFS Volume and Filesystem
$ vxdg free | egrep ‘(D01|D02|D03|D04|D05)’
GROUP DISK DEVICE TAG OFFSET LENGTH FLAGS
datadg D01 c2t0d0s2 c2t0d0 35547981 35547981 -
datadg D02 c2t1d0s2 c2t1d0 35547981 35547981 -
datadg D03 c2t2d0s2 c2t2d0 35547981 35547981 -
datadg D04 c2t3d0s2 c2t3d0 35547981 35547981 -
datadg D05 c2t4d0s2 c2t4d0 35547981 35547981 -
datadg D06 c2t5d0s2 c2t5d0 35547981 35547981 -
$ /etc/vx/bin/vxresize -g datadg -F vxfs datavol01 +35547981
Incorrect DMP or Disk Identification
Situation: Veritas sees different paths to a LUN as unique disks, even with C-Bit turned on
# vxdisk -o alldgs list
[-cut-]
sdal auto:cdsdisk - (vxfencoorddg) online
sds auto:cdsdisk emc04 knomandg online shared
# vxdisk list sds |grep "state=enabled"
sdan state=enabled
187](https://image.slidesharecdn.com/unixadmin-1-4-pub-130107014155-phpapp02/85/Unixadmin-1-4-pub-194-320.jpg)
![VxVM and Storage Troubleshooting
sdb state=enabled
# vxdisk list sdal |grep "state=enabled"
sdax state=enabled
sds state=enabled
# vxdmpadm getsubpaths dmpnodename=sdal
NAME STATE[A] PATH-TYPE[M] CTLR-NAME ENCLR-TYPE ENCLR-NAME ATTRS
========================================================================
sdax ENABLED(A) - c1 EMC EMC2 -
sds ENABLED(A) - c0 EMC EMC2 -
# vxdmpadm getsubpaths dmpnodename=sds
NAME STATE[A] PATH-TYPE[M] CTLR-NAME ENCLR-TYPE ENCLR-NAME ATTRS
========================================================================
sdan ENABLED(A) - c1 EMC EMC2 -
sdb ENABLED(A) - c0 EMC EMC2 -
Solution
# rm /etc/vx/disk.info ; rm /etc/vx/array.info
# vxconfigd -k
Data Migration out of rootdg
Situation: disks with data are all in rootdg, need to be moved into another disk group with same data prior
to OS upgrade, or to just clean up bad deployment.
Note
In newer versions of vxvm there is a vxsplit command that can be used for this process.
## (for each vol) get the names/disks from vxdisk list
# vxprint -hmQq -g <current disk group> <volname> > /<volname>
## Next
# vxedit -g <dg> -rf rm <volname> (for each vol)
# vxdg -g <dg> rmdisk <name>
# vxdg init <newdg> <diskname>=<disk>
# vxdg -g newdg adddisk <diskname>=<disk> for each disk
# vxmake -g newdg -d /tmp/<volname> for each volume.
# vxvol -g newdg start <volname>
Recover vx Plex
# vxprint|grep DETA
pl vol01-02 vol01 DETACHED 204800 - IOFAIL - -
# vxplex -g ptpd att vol01 vol01-02 &
Shell code to get solaris disk size in GB
# ---- first, get list of disks ----
188](https://image.slidesharecdn.com/unixadmin-1-4-pub-130107014155-phpapp02/85/Unixadmin-1-4-pub-195-320.jpg)
![VxVM and Storage Troubleshooting
disks=( `ls /dev/rdsk/c*s2` )
total=0;
# ---- how many disks? ----
sz=${#disks[*]}
# ---- get disk size for each ----
n=0
echo "Disks:"
while [ $n -lt $sz ]
do
geom=( `prtvtoc ${disks[$n]} 2>/dev/null |
egrep "sector|track|cylinder" | tr -d "*" | awk '{print $1}'` )
# ---- get disk parms and calculate size ----
BperS=${geom[0]}
SperT=${geom[1]}
TperC=${geom[2]}
SperC=${geom[3]}
Cyls=${geom[4]}
AccCyls=${geom[5]}
if [ "$BperS" != "" ]; then
size=`expr $BperS * $SperC * $Cyls`
GB=`expr $size / 1024 / 1024 / 1024`
echo -n " ${disks[$n]}: "
echo $GB "Gbytes"
total=`expr $total + $GB`
fi
n=`expr $n + 1`
done
Split Root Mirror vxvm
Disks: rootdisk is c1t0d0s2 root mirror disk is c1t1d0s2
1. Install the Solaris boot block on the mirror disk:
# /usr/lib/vxvm/bin/vxbootsetup -g rootdg rootmirror
2. If you have separate volumes for opt, export, home on the root disk, it is required to define the partitions
for those volumes using vxmksdpar
# /usr/lib/vxvm/bin/vxmksdpart
Usage: vxmksdpart [-f] [-g diskgroup] subdisk sliceno [tag flags]
e.g. In following example, the opt volume subdisk is on
rootmirror-05, and slice 7 is free on the mirror disk:
# vxmksdpart -g rootdg rootmirror-05 7 0x00 0x00
>>> list of partition types
# prtvtoc -s /dev/rdsk/c2t2d0s2
189](https://image.slidesharecdn.com/unixadmin-1-4-pub-130107014155-phpapp02/85/Unixadmin-1-4-pub-196-320.jpg)
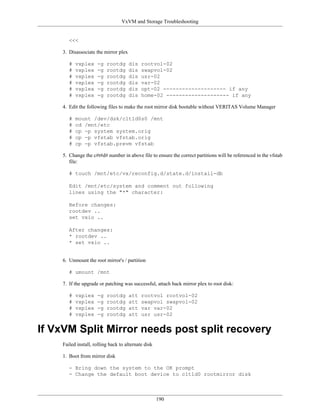


![Advanced VCS for IO Fencing
and Various Commands
vxfsckd is not running:
# mount -F vxfs -o cluster,largefiles,qio
/dev/vx/dsk/orvol_dg/orbvol /shared
UX:vxfs mount: ERROR: Cluster mount is not supported on
a non-CVM volume
on a file system layout version less than 4,
or GAB/GLM modules are not loaded,
or vxfsckd daemon is not running.
# which vxfsckd
/opt/VRTSvxfs/sbin/vxfsckd
# /opt/VRTSvxfs/sbin/vxfsckd
# ps -ef|grep vxfsckd
root 5547 1 0 23:04:43 ? 0:00 /opt/VRTSvxfs/sbin/vxfsckd
largefiles has not yet been set:
# mount -F vxfs -o cluster,largefiles,qio
/dev/vx/dsk/orvol_dg/orbvol /shared
UX:vxfs mount: ERROR: mount option(s) incompatible
with file system /dev/vx/dsk/orvol_dg/orbvol
b. Reboot command issued instead of init 6
This results in the keys from the rebooted node remaining on the disks and prevents vxfen from
starting. Easy way to fix is a reboot with init 6.
5. Adjust CFS Primary node - not master node
node 0# fsclustadm showprimary /orashared
0
node 1# fsclustadm setprimary /orashared
# fsclustadm showprimary /orashared
1
6. Coordinator Disk example with keys - note lack of reservations ; coordinator disks do not set them.
# head -1 /etc/vxfentab > /tmp/coordinator_disk
# vxfenadm -g all -f /tmp/coordinator_disk
Device Name: /dev/rdsk/c2t0d7s2
Total Number Of Keys: 2
key[0]:
Key Value [Numeric Format]: 66,45,45,45,45,45,45,45
Key Value [Character Format]: B-------
key[1]:
Key Value [Numeric Format]: 65,45,45,45,45,45,45,45
Key Value [Character Format]: A-------
# head -1 /etc/vxfentab > /tmp/coordinator_disk
197](https://image.slidesharecdn.com/unixadmin-1-4-pub-130107014155-phpapp02/85/Unixadmin-1-4-pub-204-320.jpg)
![Advanced VCS for IO Fencing
and Various Commands
# vxfenadm -r all -f /tmp/coordinator_disk ## list reservations
Device Name: /dev/rdsk/c2t0d7s2
Total Number Of Keys: 0
No keys...
7. Data Disk example with keys - should have both Reservation and Registration set.
# vxdisk -o alldgs list | awk '/shared$/ {print "/dev/rdsk/" $1 }'
| head -1 > /tmp/data_disk
# vxfenadm -g all -f /tmp/data_disk
Device Name: /dev/rdsk/c2t0d1s2
Total Number Of Keys: 2
key[0]:
Key Value [Numeric Format]: 65,80,71,82,48,48,48,49
Key Value [Character Format]: APGR0001
key[1]:
Key Value [Numeric Format]: 66,80,71,82,48,48,48,49
Key Value [Character Format]: BPGR0001
# vxfenadm -r all -f /tmp/data_disk
Device Name: /dev/rdsk/c2t0d1s2
Total Number Of Keys: 1
Key[0]:
Reservation Type: SCSI3_RESV_WRITEEXCLUSIVEREGISTRANTSONLY
Key Value [Numeric Format]: 65,80,71,82,48,48,48,49
Key Value [Character Format]: APGR0001
8. Determine the appropriate letter representing the local nodeID:
node0=A, node1=B, node2=C, ...
#!/bin/ksh "/usr/bin/echo '0$(expr $(lltstat -N) + 101)'"
B
9. Veritas SAN Serial Number
# vxfenadm -i /dev/rdsk/c2t13d0s2
Vendor id : EMC
Product id : SYMMETRIX
Revision : 5567
Serial Number : 42031000a
10.SCSI3-PGR Register Test Keys for new storage
One system; repeat with key B1 on second system
# vxfenadm -m -kA1 -f /tmp/disklist
Registration completed for disk path: /dev/rdsk/c2t0d1s2
11.SCSI3-PGR Remove Test Keys for new storage
One system; repeat with key B1 on second system
# vxfenadm -x -kA1 -f /tmp/disklist
198](https://image.slidesharecdn.com/unixadmin-1-4-pub-130107014155-phpapp02/85/Unixadmin-1-4-pub-205-320.jpg)
![Advanced VCS for IO Fencing
and Various Commands
Deleted the key : [A1------] from device /dev/rdsk/c2t0d1s2
12.Check SCSI3-PGR Keys on a list of disks
Use disk list to show keys - example only showing one disk
# vxfenadm -g all -f /tmp/disklist
Device Name: /dev/rdsk/c2t0d1s2
Total Number Of Keys: 1
key[0]:
Key Value [Numeric Format]: 65,49,45,45,45,45,45,45
Key Value [Character Format]: A1------
13.Check if IO Fencing License is enabled
vxlicrep -e | grep PGR
PGR#VERITAS Volume Manager = Enabled
PGR_TRAINING#VERITAS Volume Manager = Enabled
PGR = Enabled
PGR_TRAINING = Enabled
14.Disk Detach Policy
In VERITAS Volume Manager 3.2 and later versions, there are two detach policies for a shared disk
group, global and local. The default policy, and the way VERITAS Cluster Volume Manager (CVM) has
always worked, is global. The policy can be selected for each disk group with the vxedit set command.
The global policy will cause the disk to be detached throughout the cluster if a single node experiences
an I/O failure to that disk.
The local policy may be preferred for unmirrored volumes or in cases where availability is preferred
over redundancy of the data. It allows a disk that experiences an I/O failure to remain available if other
nodes in the cluster are still able to access it. After an I/O failure occurs, a message will be passed around
the cluster to determine if the failure is disk related or path related. If the other nodes can still write
to the disk, the mirrors are kept in sync by other nodes. The original node will fail writes. Something
similar is done for reads, but the read will succeed.
The state is not persistent. If a node has a local I/O failure, it does not remember. Any following read
or write that fails will go through the same process of passing messages around the cluster to check for
path or disk failure and repair the mirrored volume.
Disk Detach Policy has no effect on the Master node, as any IO failure will result in the plex detaching
regardless of policy. In any case, slaves that can't see the disk will still be unable to join the cluster.
vxedit man page:
Attribute Values for Disk Group Records
diskdetpolicy
Sets a disk group <detach policy>. These policies determine
the way VxVM detaches unusable disks in a shared disk group.
The diskdetpolicy attribute is ignored for private disk groups.
- global
199](https://image.slidesharecdn.com/unixadmin-1-4-pub-130107014155-phpapp02/85/Unixadmin-1-4-pub-206-320.jpg)

![Advanced VCS for IO Fencing
and Various Commands
Total Number Of Keys: 1
key[0]:
Key Value [Numeric Format]: 65,49,45,45,45,45,45,45
Key Value [Character Format]: A1------
# vxfenadm -r all -f /tmp/data_disk
Device Name: /dev/rdsk/c2t0d1s2
Total Number Of Keys: 0
No keys...
c. Set the reservation mode
Note
Even though the reservation is not a key, you must use the registration key to RESERVE
(see note above).
# vxfenadm -n -f /tmp/data_disk
VXFEN:libvxfen:1118: Reservation FAILED for: /dev/rdsk/c2t0d1s2
VXFEN:libvxfen:1133: Error returned: Error 0
# vxfenadm -n -kA1 -f /tmp/data_disk
Reservation completed for disk path: /dev/rdsk/c2t0d1s2
# vxfenadm -g all -f /tmp/data_disk
Device Name: /dev/rdsk/c2t0d1s2
Total Number Of Keys: 1
key[0]:
Key Value [Numeric Format]: 65,49,45,45,45,45,45,45
Key Value [Character Format]: A1------
# vxfenadm -r all -f /tmp/data_disk
Device Name: /dev/rdsk/c2t0d1s2
Total Number Of Keys: 1
Key[0]:
Reservation Type: SCSI3_RESV_WRITEEXCLUSIVEREGISTRANTSONLY
Key Value [Numeric Format]: 65,49,45,45,45,45,45,45
Key Value [Character Format]: A1------
d. Remove the REGISTRATION
# vxfenadm -x -kA1 -f /tmp/data_disk
Deleted the key : [A1------] from device /dev/rdsk/c2t0d1s2
# vxfenadm -g all -f /tmp/data_disk
Device Name: /dev/rdsk/c2t0d1s2
Total Number Of Keys: 0
No keys...
# vxfenadm -r all -f /tmp/data_disk
201](https://image.slidesharecdn.com/unixadmin-1-4-pub-130107014155-phpapp02/85/Unixadmin-1-4-pub-208-320.jpg)
![Advanced VCS for IO Fencing
and Various Commands
Device Name: /dev/rdsk/c2t0d1s2
Total Number Of Keys: 0
No keys...
e. Unregistering removed the RESERVATION too
# vxfenadm -m -kA1 -f /tmp/data_disk
Registration completed for disk path: /dev/rdsk/c2t0d1s2
# vxfenadm -n -kA1 -f /tmp/data_disk
Reservation completed for disk path: /dev/rdsk/c2t0d1s2
# vxfenadm -m -kB1 -f /tmp/data_disk
Registration completed for disk path: /dev/rdsk/c3t0d1s2
# vxfenadm -g all -f /tmp/data_disk
Device Name: /dev/rdsk/c3t0d1s2
Total Number Of Keys: 2
key[0]:
Key Value [Numeric Format]: 65,49,45,45,45,45,45,45
Key Value [Character Format]: A1------
key[1]:
Key Value [Numeric Format]: 66,49,45,45,45,45,45,45
Key Value [Character Format]: B1------
# vxfenadm -r all -f /tmp/data_disk
Device Name: /dev/rdsk/c3t0d1s2
Total Number Of Keys: 1
Key[0]:
Reservation Type: SCSI3_RESV_WRITEEXCLUSIVEREGISTRANTSONLY
Key Value [Numeric Format]: 65,49,45,45,45,45,45,45
Key Value [Character Format]: A1------
f. A1 Key Removal
# vxfenadm -x -kA1 -f /tmp/data_disk
Deleted the key : [A1------] from device /dev/rdsk/c2t0d1s2
# vxfenadm -g all -f /tmp/data_disk
Device Name: /dev/rdsk/c3t0d1s2
Total Number Of Keys: 1
key[0]:
Key Value [Numeric Format]: 66,49,45,45,45,45,45,45
Key Value [Character Format]: B1------
# vxfenadm -r all -f /tmp/data_disk
Device Name: /dev/rdsk/c3t0d1s2
Total Number Of Keys: 0
202](https://image.slidesharecdn.com/unixadmin-1-4-pub-130107014155-phpapp02/85/Unixadmin-1-4-pub-209-320.jpg)


![Advanced VCS for IO Fencing
and Various Commands
$ zpool import zones
$ zonecfg –z p1 create –a /zones/p1
$ zoneadm –z p1 attach [-u]
$ zooneadm –z p1 boot
REVERSE Migration of Non-Global Zone
Migration back to original host: LDOM#1 commands
$ zoneadm –z p1 halt
$ zoneadm –z p1 detach
$ zpool export zones
Migration back to original host: LDOM#0 commands
Note lack of running zonecfg –z p1 create –a /zones. This is not necessary once the zone.xml and index.xml
are updated with p1 zone information. Should this script be automated, you may want to consider adding
the force configuration into the script – just in case.
$ zpool import zones
$ zoneadm –z p1 attach [-u]
$ zoneadm –z p1 boot
Moving Configuration of Zone and ZFS Pool on iSCSI Storage into Veritas Cluster Server .50MP3.
Note
The Zpool Agent only included with VCS starting in 5.0MP3 for Solaris. There are a number of
configuration variations that could be used here, including legacy mounts with the Mount Agent.
Below is a simple layout that uses ZFS Automounting when the zpool is imported through VCS.
Example VCS 5.0MP3 main.cf configuration for Zpool and Zone Failover
$ haconf -makerw
$ hagrp –add ztest
$ hagrp –modify ztest SystemList dom2 0 dom1 1
$ hagrp –modify ztest AutoStartList dom2 dom1
$ hares -add zpool_zones Zpool ztest
$ hares -modify zpool_zones PoolName zones
$ hares -modify zpool_zones AltRootPath "/"
$ hares -modify zpool_zones ChkZFSMounts 1
$ hares -modify zpool_zones Enabled 1
$ /opt/VRTSvcs/bin/hazonesetup ztest zone_p1 p1
ems dom1 dom2
$ haconf –makerw
$ hares –link zone_p1 zpool_zones
$ haconf –dump -makero
Example main.cf: /etc/VRTSvcs/conf/config/main.cf:
include "types.cf"
205](https://image.slidesharecdn.com/unixadmin-1-4-pub-130107014155-phpapp02/85/Unixadmin-1-4-pub-212-320.jpg)


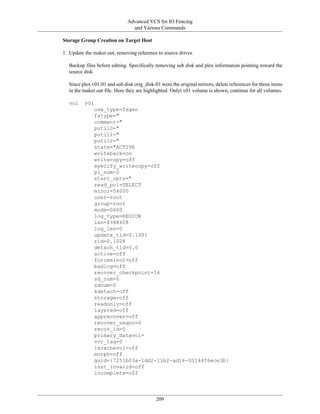


![Chapter 19. Sun Cluster 3.2
Preperation
This section covers a walkthrough configuration for Sun Cluster. General requirments include the
following:
1. Internal Hard Drive Configuration
Warning
ZFS is not supported for the /globaldevice filesystem, therefore unless you are being creative
avoid installing Solaris 10 with the ZFS Root Option. If you do not allocate a UFS filesystem
and partition for /globaldevices then a LOFI device will be used. This will reduce boot
performance.
Partition Layout - set identical between both servers where possible
Part Tag Flag Size Mount Point
0 root wm 8.00GB /
1 swap wu 8.00GB [swap]
2 backup wm 74.50GB [backup]
3 unassigned wm 8.00GB /opt
4 var wm 8.00GB /var
5 unassigned wm 1.00GB /globaldevice
6 unassigned wm 512.19MB [reserved for SVM MDB]
7 unassigned wm 40.99GB /free [remaining]
Table 19.1. Sun Cluster Filesystem Requirements
Filesystem Min Requirement
/var 100MB Free
/opt 50MB Free
/usr 50MB Free
/ 100MB Free
/globaldevices 512MB Free
2. Shared Hard Drive Configuration and Layout
3. Network Configuration
Interface Function Planned Options
----------------------------------------------------
bge0 Public IPMP Link Only Detection
bge1 Private Used for HB
bge2 Private Used for HB
bge3 Public IPMP Link Only Detection
217](https://image.slidesharecdn.com/unixadmin-1-4-pub-130107014155-phpapp02/85/Unixadmin-1-4-pub-224-320.jpg)
![Sun Cluster 3.2
Installation
This section covers a walkthrough configuration for Sun Cluster. General installation include the
following:
1. Product Installaton Location
Warning
Either untar the software on both servers under /tmp or run installer from a shared directory
such as NFS. Sun Cluster must be installed on both systems
2. Run Installer Script
/swdepot/sparc/suncluster/Solaris_sparc
$ ./installer
Unable to access a usable display on the remote system.
Continue in command-line mode?(Y/N) Y
<Press ENTER to Continue>
<Press ENTER to display the Software License Agreement>
<--[40%]--[ENTER To Continue]--[n To Finish]-->n
License Agreement [No] {"<" goes back, "!" exits}? Yes
Installation Type
-----------------
Do you want to install the full set of Sun Java(TM)
Availability Suite Products and Services? (Yes/No) [Yes]
{"<" goes back, "!" exits} Yes
Install multilingual package(s) for all selected components [Yes]
{"<" goes back, "!" exits}: No
Do you want to add multilanguage support now?
1. Yes
2. No
Enter your choice [1] {"<" goes back, "!" exits} 2
Enter 1 to upgrade these shared components and 2 to cancel [1]
{"<" goes back, "!" exits}: 1
Checking System Status
Available disk space... : Checking .... OK
Memory installed... : Checking .... OK
Swap space installed... : Checking .... OK
218](https://image.slidesharecdn.com/unixadmin-1-4-pub-130107014155-phpapp02/85/Unixadmin-1-4-pub-225-320.jpg)
![Sun Cluster 3.2
Operating system patches... : Checking .... OK
Operating system resources... : Checking .... OK
System ready for installation
Enter 1 to continue [1] {"<" goes back, "!" exits} 1
Screen for selecting Type of Configuration
1. Configure Now - Selectively override defaults or express through
2. Configure Later - Manually configure following installation
Select Type of Configuration [1] {"<" goes back, "!" exits} 2
Ready to Install
----------------
The following components will be installed.
Product: Java Availability Suite
Uninstall Location: /var/sadm/prod/SUNWentsyssc32u2
Space Required: 326.34 MB
---------------------------------------------------
Java DB
Java DB Server
Java DB Client
Sun Cluster 3.2 1/09
Sun Cluster Core
Sun Cluster Manager
Sun Cluster Agents 3.2 1/09
Sun Cluster HA for Sun Java(TM) System Application Server
Sun Cluster HA for Sun Java(TM) System Message Queue
Sun Cluster HA for Sun Java(TM) System Messaging Server
Sun Cluster HA for Sun Java(TM) System Calendar Server
Sun Cluster HA for Sun Java(TM) System Directory Server
Sun Cluster HA for Sun Java(TM) System Application Server EE (HADB)
Sun Cluster HA for Instant Messaging
Sun Cluster HA/Scalable for Sun Java(TM) System Web Server
Sun Cluster HA for Apache Tomcat
Sun Cluster HA for Apache
Sun Cluster HA for DHCP
Sun Cluster HA for DNS
Sun Cluster HA for MySQL
Sun Cluster HA for Sun N1 Service Provisioning System
Sun Cluster HA for NFS
Sun Cluster HA for Oracle
Sun Cluster HA for Samba
Sun Cluster HA for Sun N1 Grid Engine
Sun Cluster HA for Solaris Containers
Sun Cluster Support for Oracle RAC
Sun Cluster HA for Oracle E-Business Suite
Sun Cluster HA for SAP liveCache
Sun Cluster HA for WebSphere Message Broker
Sun Cluster HA for WebSphere MQ
219](https://image.slidesharecdn.com/unixadmin-1-4-pub-130107014155-phpapp02/85/Unixadmin-1-4-pub-226-320.jpg)
![Sun Cluster 3.2
Sun Cluster HA for Oracle 9iAS
Sun Cluster HA for SAPDB
Sun Cluster HA for SAP Web Application Server
Sun Cluster HA for SAP
Sun Cluster HA for PostgreSQL
Sun Cluster HA for Sybase ASE
Sun Cluster HA for BEA WebLogic Server
Sun Cluster HA for Siebel
Sun Cluster HA for Kerberos
Sun Cluster HA for Swift Alliance Access
Sun Cluster HA for Swift Alliance Gateway
Sun Cluster HA for Informix
Sun Cluster Geographic Edition 3.2 1/09
Sun Cluster Geographic Edition Core Components
Sun Cluster Geographic Edition Manager
Sun StorEdge Availability Suite Data Replication Support
Hitachi Truecopy Data Replication Support
SRDF Data Replication Support
Oracle Data Guard Data Replication Support
Quorum Server
Sun Java(TM) System High Availability Session Store 4.4.3
All Shared Components
Sun Java(TM) System Monitoring Console 1.0 Update 1
1. Install
2. Start Over
3. Exit Installation
What would you like to do [1] {"<" goes back, "!" exits}? 1
Enter 1 to view installation summary and Enter 2 to view installation logs
[1] {"!" exits} !
In order to notify you of potential updates, we need to confirm an internet
connection. Do you want to proceed [Y/N] : N
Basic Configuration
This section covers a walkthrough configuration for Sun Cluster. General configuration include the
following:
Warning
Interfaces configured for heart beats must be unplumbed and have no /etc/hostname.dev file.
Warning
During the scinstall configuration process the nodes will be rebooted
1. Product Configuration
# /usr/cluster/bin/scinstall
220](https://image.slidesharecdn.com/unixadmin-1-4-pub-130107014155-phpapp02/85/Unixadmin-1-4-pub-227-320.jpg)
![Sun Cluster 3.2
*** Main Menu ***
Please select from one of the following (*) options:
* 1) Create a new cluster or add a cluster node
2) Configure a cluster to be JumpStarted from this install server
3) Manage a dual-partition upgrade
4) Upgrade this cluster node
5) Print release information for this cluster node
* ?) Help with menu options
* q) Quit
Option: 1
*** New Cluster and Cluster Node Menu ***
Please select from any one of the following options:
1) Create a new cluster
2) Create just the first node of a new cluster on this
machine
3) Add this machine as a node in an existing cluster
?) Help with menu options
q) Return to the Main Menu
Option: 1
*** Create a New Cluster ***
This option creates and configures a new cluster.
You must use the Java Enterprise System (JES) installer to install the
Sun Cluster framework software on each machine in the new cluster
before you select this option.
If the "remote configuration" option is unselected from the JES
installer when you install the Sun Cluster framework on any of the new
nodes, then you must configure either the remote shell (see rsh(1)) or
the secure shell (see ssh(1)) before you select this option. If rsh or
ssh is used, you must enable root access to all of the new member
nodes from this node.
Press Control-d at any time to return to the Main Menu.
Do you want to continue (yes/no) [yes]?
>>> Typical or Custom Mode <<<
221](https://image.slidesharecdn.com/unixadmin-1-4-pub-130107014155-phpapp02/85/Unixadmin-1-4-pub-228-320.jpg)
![Sun Cluster 3.2
This tool supports two modes of operation, Typical mode and Custom.
For most clusters, you can use Typical mode. However, you might need
to select the Custom mode option if not all of the Typical defaults
can be applied to your cluster.
For more information about the differences between Typical and Custom
modes, select the Help option from the menu.
Please select from one of the following options:
1) Typical
2) Custom
?) Help
q) Return to the Main Menu
Option [1]: 1
>>> Cluster Name <<<
Each cluster has a name assigned to it. The name can be made up of any
characters other than whitespace. Each cluster name should be unique
within the namespace of your enterprise.
What is the name of the cluster you want to establish? SC001
>>> Cluster Nodes <<<
This Sun Cluster release supports a total of up to 16 nodes.
Please list the names of the other nodes planned for the initial
cluster configuration. List one node name per line. When finished,
type Control-D:
Node name (Control-D to finish): sysdom1
Node name (Control-D to finish): ^D
This is the complete list of nodes:
sysdom0
sysdom1
Is it correct (yes/no) [yes]? yes
>>> Cluster Transport Adapters and Cables <<<
You must identify the cluster transport adapters which attach this
node to the private cluster interconnect.
For node "sysdom0",
What is the name of the first cluster transport adapter? bge1
>>> Cluster Transport Adapters and Cables <<<
222](https://image.slidesharecdn.com/unixadmin-1-4-pub-130107014155-phpapp02/85/Unixadmin-1-4-pub-229-320.jpg)
![Sun Cluster 3.2
You must identify the cluster transport adapters which attach this
node to the private cluster interconnect.
Select the first cluster transport adapter for "sysdom0":
1) bge2
2) bge3
3) Other
Option: 1
Will this be a dedicated cluster transport adapter (yes/no) [yes]? no
What is the cluster transport VLAN ID for this adapter? 1
Searching for any unexpected network traffic on "bge1002" ... done
Verification completed. No traffic was detected over a 10 second
sample period.
Select the second cluster transport adapter for "sysdom0":
1) bge2
2) bge3
3) Other
Option:
>>> Quorum Configuration <<<
Every two-node cluster requires at least one quorum device. By
default, scinstall selects and configures a shared disk quorum device
for you.
This screen allows you to disable the automatic selection and
configuration of a quorum device.
You have chosen to turn on the global fencing. If your shared storage
devices do not support SCSI, such as Serial Advanced Technology
Attachment (SATA) disks, or if your shared disks do not support
SCSI-2, you must disable this feature.
If you disable automatic quorum device selection now, or if you intend
to use a quorum device that is not a shared disk, you must instead use
clsetup(1M) to manually configure quorum once both nodes have joined
the cluster for the first time.
Do you want to disable automatic quorum device selection (yes/no) [no]?
Cluster Creation
Log file - /var/cluster/logs/install/scinstall.log.28876
Testing for "/globaldevices" on "sysdom0" ... done
223](https://image.slidesharecdn.com/unixadmin-1-4-pub-130107014155-phpapp02/85/Unixadmin-1-4-pub-230-320.jpg)
![Sun Cluster 3.2
Testing for "/globaldevices" on "sysdom1" ... done
Starting discovery of the cluster transport configuration.
The following connections were discovered:
sysdom0:bge2 switch1 sysdom1:bge2 [VLAN ID 1]
sysdom0:bge3 switch2 sysdom1:bge3 [VLAN ID 1]
Completed discovery of the cluster transport configuration.
Started cluster check on "sysdom0".
Started cluster check on "sysdom1".
cluster check completed with no errors or warnings for "sysdom0".
cluster check completed with no errors or warnings for "sysdom1".
Configuring "sysdom1" ... done
Rebooting "sysdom1" ... done
Configuring "sysdom0" ... done
Rebooting "sysdom0" ...
Log file - /var/cluster/logs/install/scinstall.log.28876
Rebooting ...
General Commands
This section covers a walkthrough configuration for Sun Cluster. General resource configuration:
• List DID Disks for use with failover storage devices
Note
The DID ID's are under /dev/did/dsk and /dev/did/rdsk on each node in the cluster. These paths
are to be used for creating failover filesystems, zpools and storage access.
cldevice list -v
DID Device Full Device Path
---------- ----------------
d1 sysdom1:/dev/rdsk/c0t0d0
d2 sysdom1:/dev/rdsk/c1t600144F0C312030000004A3B80680017d0
d2 sysdom0:/dev/rdsk/c1t600144F0C312030000004A3B80680017d0
d3 sysdom1:/dev/rdsk/c1t600144F0C312030000004A3B80680018d0
d3 sysdom0:/dev/rdsk/c1t600144F0C312030000004A3B80680018d0
d4 sysdom1:/dev/rdsk/c1t600144F0C312030000004A3B80680019d0
d4 sysdom0:/dev/rdsk/c1t600144F0C312030000004A3B80680019d0
d5 sysdom1:/dev/rdsk/c1t600144F0C312030000004A3B8068001Ad0
d5 sysdom0:/dev/rdsk/c1t600144F0C312030000004A3B8068001Ad0
d6 sysdom1:/dev/rdsk/c1t600144F0C312030000004A3B8068001Bd0
d6 sysdom0:/dev/rdsk/c1t600144F0C312030000004A3B8068001Bd0
224](https://image.slidesharecdn.com/unixadmin-1-4-pub-130107014155-phpapp02/85/Unixadmin-1-4-pub-231-320.jpg)


![Sun Cluster 3.2
vsrv2 Yes
vsrv1 Yes
# metaset -s zora -a /dev/did/dsk/d3
# metainit -s zora d30 1 1 /dev/did/dsk/d3s0
# metainit -s zora d300 -m d30
5. Add QFS Information for Oracle Home on both systems
/etc/opt/SUNWsamfs/mcf:
RAC 5 ms RAC on shared
/dev/md/zora/dsk/d300 50 md RAC on
/etc/opt/SUNWsamfs/samfs.cmd:
fs=RAC
sync_meta=1
/etc/opt/SUNWsamfs/hosts.RAC:
vsrv1 172.16.4.2 1 0 server
vsrv2 172.16.4.1 1 0
6. Create QFS Directory on both nodes and make filesystem just from one node
# mkdir -p /localzone/sczone/root/db_qfe/oracle
# /opt/SUNWsamfs/sbin/sammkfs -S RAC
sammkfs: Configuring file system
sammkfs: Enabling the sam-fsd service.
sammkfs: Adding service tags.
Warning: Creating a new file system prevents use with 4.6 or earlier
releases.
Use the -P option on sammkfs to create a 4.6 compatible file system.
Building 'RAC' will destroy the contents of devices:
/dev/md/zora/dsk/d300
Do you wish to continue? [y/N]y
total data kilobytes = 10228928
total data kilobytes free = 10225216
7. Mount, test, and remove mount point, otherwise clzonecluster install will fail.
# mount RAC
# umount RAC
# rm -rf /localzone/sczone
8. Create the Zones using clzonecluster
230](https://image.slidesharecdn.com/unixadmin-1-4-pub-130107014155-phpapp02/85/Unixadmin-1-4-pub-237-320.jpg)


![Sun Cluster 3.2
# clzonecluster boot sczone
## On both systems finish sysidcfg:
# zlogin -C sczone
Sun Cluster RAC Framework
Setting up the Sun Cluster RAC Framework using CLI
1. Create a scalable resource group.
# clresourcegroup create -Z zcname -n nodelist
-p maximum_primaries=num-in-list
-p desired_primaries=num-in-list
[-p rg_description="description" ]
-p rg_mode=Scalable rac-fmwk-rg
2. Register the SUNW.rac_framework resource type
# clresourcetype register -Z zcname SUNW.rac_framework
3. Add an instance of the SUNW.rac_framework resource type to the resource group that you created in
Step 2.
# clresource create -Z zcname -g rac-fmwk-rg
-t SUNW.rac_framework rac-fmwk-rs
4. Register the SUNW.rac_udlm resource type.
# clresourcetype register -Z zcname SUNW.rac_udlm
5. Add an instance of the SUNW.rac_udlm resource type to the resource group that you created in Step 2.
# clresource create -Z zcname -g resource-group
-t SUNW.rac_udlm
-p resource_dependencies=rac-fmwk-rs rac-udlm-rs
6. Bring online and in a managed state the RAC framework resource group and its resources.
# clresourcegroup online -Z zcname -emM rac-fmwk-rg
233](https://image.slidesharecdn.com/unixadmin-1-4-pub-130107014155-phpapp02/85/Unixadmin-1-4-pub-240-320.jpg)


![Hardware Notes
NetMask = 255.255.255.0
Gateway = 10.13.60.1
DhcpConfigured = disable
5120 iLOM Management
• Power on via the ilom
start /SYS then switch to the console start /SP/console
• Default ilom password
root , changeme
• Changing the ilom default password
set /SP/users/root password Enter new Password: *******
• Enable/ Disable SSH
set /SP/services/ssh state=[enable|disable]
• Display information about commands
show /SP/cli/commands
• Add a local user
create /SP/users/bob password=password role=administrator|operator
• Delete a local user
delete /SP/users/fred
• change the ip address to static
cd /SP/network set pendingipdiscovery=static set pendingipaddress=xxx.xxx.xxx.xxx set
pendingipnetmask=yyy.yyy.yyy.yyy set pendingipgatwat=zzz.zzz.zzz.zzz show to verify setings set
commitpending=true
236](https://image.slidesharecdn.com/unixadmin-1-4-pub-130107014155-phpapp02/85/Unixadmin-1-4-pub-243-320.jpg)


