4. iii
Record of Revisions
Revised reference material, written text and drawings will be furnished as required to
update the information contained within this manual. When revisions to the content of
this manual are submitted, utilize the Record of Revisions form provided to record all
revisions. Specific instructions will be provided in the Revision Packet for recording and
inserting all changes affecting this manual.
Revision
Number
Date
Issued
Description of Changes Initials
Jan 2007 Original Issue
7-16-2010 July 2010 Lubricator Information Updated
Dec 2011 Updated Section 8 to Reflect Change to SPCW REH
1-25-2012 Dec 2011 Updated Section 9 to Reflect Change to SPCW REH
April 2012 Sections 12 (TempView Software Guide) Removed HAH
April 2012
Section 9 (Fault Isolation & Troubleshooting) Removed and
Made into Separate Manual
HAH
April 2012 Updated Sections 1 to 7 plus Introduction HAH
April 2012 Sections 10 and 11 Renumbered to Sections 9 and 10 HAH
5-08-2012 April 2012 Updated Renumbered Sections 9 and 10 HAH
2-03-2014 Feb 2014
Remove Pressure Switch; Add Oiler Information, New Air
Filter, and Safety Pages; General Update to All Sections
HAH
9-02-2014 Sept 2014
Updated SPCW to smaller version, and included Analog
Output Module
HAH
6-25-2015 June 2015 Updated Analog Output Module with Active Loops TWK
2-18-2016 Feb 2016
Incorporated Version 257 Valmet Acoustic Pyrometer
Software User Guide into Section 12 (Appendix B), and
Revised Air Flow Specification throughout Manual
DWB/HHC/
MFA/TWK
2-22-2017 Feb 2017 Reverse orientation of 2-gallon oiler in all diagrams CHC/TWK
5-25-2017 May 2017 Update maintenance schedule CHC/MFA
3-28-2018 March 2018 Mark IV Air Amp
MFA/TWK/
CHC
6. v
SECTION INDEX
Section Title
Section 1.0 Safety
Section 2.0 General System Description
Section 3.0 ASG Recommended Installation
Section 4.0 System Sub-Component Installation
Section 5.0 Pneumatics, Lubricator & Low/High Pressure
Section 6.0 Electrical Connections
Section 7.0 Measurement Verification
Section 8.0 System Power ON/OFF
Section 9.0 Periodic Maintenance and Repair
Section 10.0 Replacement Parts and Repair Kits
Section 11.0 Appendix A: AP106 Troubleshooting Manual
Section 12.0 Appendix B: Valmet Acoustic Pyrometer Software
User Guide
Section 13.0 Appendix C: Installation Drawings
7. vi
List of Figures
Figure 1 Valmet Acoustic Pyrometer System Concept ..................................ix
Figure 2-1 Basic Valmet Acoustic Pyrometer System Block Diagram...............2-2
Figure 2-2 Valmet Acoustic Pyrometer System.................................................2-3
Figure 3-1 ASG Installation Diagram.................................................................3-4
Figure 3-2 ASG Installation Details ...................................................................3-5
Figure 3-3 Completed ASG Installation (prior version)......................................3-7
Figure 4-1 Mark IV Air Amplifier Mounting.........................................................4-2
Figure 4-2 Hose Plate Assembly Mounting .......................................................4-3
Figure 4-3 Photo of Hose Plate .........................................................................4-4
Figure 4-4 Proximity Diagram............................................................................4-4
Figure 4-5 Hose Plate Assembly.......................................................................4-5
Figure 4-6 Membrane Slot Detail.......................................................................4-6
Figure 4-7 Membrane Tube Boiler, Negative Pressure
Installation with Seal Box………………………………………………..4-7
Figure 4-8 Membrane Tube Boiler, Negative Pressure
Installation with Gussets.………………………………………………..4-8
Figure 4-9 Membrane Tube Boiler, Negative Pressure
Installation with Mounting Plate.………………………………………..4-9
Figure 4-10 Mounting Plate Detail……………………………………………………4-9
Figure 4-11 Membrane Tube Boiler, Positive Pressure Installation….…………...4-10
Figure 4-12 ASR Layout……………………………………………………………….4-11
Figure 4-13 AST Layout & Details……………………………………………………4-13
Figure 4-14 SPCW Enclosure………………………………………………………...4-15
Figure 4-15 Analog Output Module Enclosure……………………………………...4-16
Figure 5-1 Basic Pneumatic Block Diagram ......................................................5-2
Figure 5-2 Plant Air to Air Preparation System to Air Amplifier .........................5-3
Figure 5-3 Air Preparation System ....................................................................5-4
Figure 5-4 Installed Air System (prior version) ..................................................5-4
Figure 5-5 Air Amplifier Connection Detail ........................................................5-5
Figure 5-6 Hose Plate Assembly to ASG .........................................................5-6
Figure 5-7 ASG to AST………………………………………………………….……5-7
Figure 5-8 Plant Air to ASR Purge Regulator……………………………………...5-8
Figure 6-1 Inner Panels of SPCW Enclosure……………………………………...6-2
Figure 6-2 Detailed SPCW Panel Diagrams......................................................6-3
8. vii
Figure 6-3 SPCW Panel Connections ...............................................................6-5
Figure 6-4 SPCW Panel, AST and ASR Connection Details.............................6-6
Figure 6-5 SPCW Panel Connection Detail.......................................................6-7
Figure 6-6 ASR Wiring ......................................................................................6-9
Figure 6-7 AST Wiring.......................................................................................6-10
Figure 6-8 AO Module Wiring (Passive Loops)..…………………………………..6-11
Figure 6-9 AO Module Wiring (Active Loops)……………………………………...6-12
Figure 7-1 Measurements .................................................................................7-4
Figure 7-2 Boiler Measurements .......................................................................7-5
Figure 7-3 Boiler Layout……………………………………………………………...7-7
Figure 9-1 Differential Pressure Gauge.............................................................9-2
Figure 9-2 ASR Microphone Replacement........................................................9-3
Figure 9-3 AST Microphone Replacement…………………………………………9-4
Figure 9-4 Remove ASG from Service..............................................................9-6
Figure 9-5 ASG Cutaway ..................................................................................9-8
Figure 9-6 ASG Cutaway ..................................................................................9-9
Figure 9-7 ASG Disassembly (Front) ................................................................9-10
Figure 9-8 Seal Removal...................................................................................9-11
Figure 9-9 Seal Replacement............................................................................9-15
Figure 9-10 Front Component Assembly.............................................................9-19
Figure 9-11 ASG Cutaway ..................................................................................9-20
Figure 9-12 Mark IV Air Amplifier ........................................................................9-28
Figure 9-13 Air Preparation System ....................................................................9-30
Figure 9-14 Solenoid Valve on Hose Plate Assembly .........................................9-31
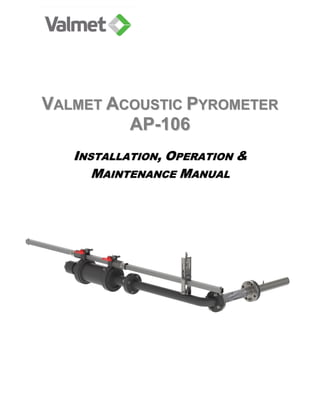
Figure 10-1 Valmet Acoustic Pyrometer System.................................................10-2
Figure 10-2 Acoustic Signal Generator Seal Kit ..................................................10-3
Figure 10-3 Acoustic Signal Trigger Enclosure with Interior Views .....................10-4
Figure 10-4 Acoustic Signal Recceiver with Internal Views.................................10-5
Figure 10-5 ASR External Components ..............................................................10-6
Figure 10-6 Mark IV Air Amplifier ........................................................................10-7
Figure 10-7 Mark III/IV Check Valve Kit...............................................................10-8
Figure 10-8 Mark III/IV Shaft Seal Kit..................................................................10-9
Figure 10-9 Mark III/IV Cylinder Seal Kit .............................................................10-10
Figure 10-10 Air Preparation System Components...............................................10-11
Figure 10-11 Hose Plate Assembly Components..................................................10-12
Figure 10-12 SPCW Enclosure showing Interior Views.........................................10-13
9. viii
Figure 10-13 Analog Output Module showing Interior Views…………………...…..10-14
Figure 10-14 Hoses...............................................................................................10-15
Figure 11-1 Components of SPCW…………………………………………………..11-5
Figure 11-2 Components of AO Module……………………………………………..11-5
Figure 12-1 The Front Panel ...............................................................................12-4
Figure 12-2 Load Signal......................................................................................12-5
Figure 12-3 Edit Setup Files................................................................................12-5
Figure 12-4 Save Signal......................................................................................12-6
Figure 12-5 Manual Fire......................................................................................12-7
Figure 12-6 Process Signal.................................................................................12-8
Figure 12-7 Load Signal......................................................................................12-9
Figure 12-8 Save Signal......................................................................................12-10
Figure 12-9 Trend View.......................................................................................12-11
Figure 12-10 AST Signal with Zoom Views...........................................................12-12
Figure 12-11 ASR Signal.......................................................................................12-13
Figure 12-12 Filtered ASR Signal..........................................................................12-14
Figure 12-13 Spectrogram ....................................................................................12-15
Figure 12-14 Setup Configuration .........................................................................12-16
Figure 12-15 Graphic Leak Channel Display.........................................................12-17
Figure 12-16 Path Table Tab ................................................................................12-18
Figure 12-17 Block Tab.........................................................................................12-18
Figure 12-18 2D Table with Contours....................................................................12-19
Figure 12-19 ISO Tab............................................................................................12-19
Figure 12-20 Path Tab ..........................................................................................12-20
Figure 12-21 Edit Setup Files................................................................................12-21
Figure 12-22 Block Display ...................................................................................12-24
Figure 12-23 LeakLog.csv.....................................................................................12-25
Figure 12-24 ValidLog.csv.....................................................................................12-26
10. ix
List of Tables
Table 2-1 Equipment Specifications.................................................................2-8
Table 2-2 Customer Requirements ..................................................................2-10
Table 7-1 Barrel, Hose & Tube Measurements (offline)...................................7-2
Table 9-1 Routine Care Schedule....................................................................9-2
Table 9-2 Air Amplifier Trouble Shooting .........................................................9-29
Table 10-1 Typical AST Replacement Parts ......................................................10-4
Table 10-2 Typical ASR Internal Replacement Parts.........................................10-5
Table 10-3 Typical ASR External Replacement Parts………………………….....10-6
Table 10-4 Mark III/IV Air Amplifier Repair Kits…………………………………….10-7
Table 10-5 Air Preparation System Typical Replacement Parts…………………10-11
Table 10-6 Hose Plate Assembly Typical Replacement Parts…………………...10-12
Table 10-7 Typical SPCW Replacement Parts…………………………………….10-14
Table 10-8 Typical AO Module Replacement Parts……………………………….10-14
Table 10-9 Hose Assembly Part Numbers…………………………………………10-16
Table 10-10 Recommended Spare Parts…………………………………………….10-17
Table 11-1 Signal Processing Troubleshooting……………………………………11-14
Table 11-2 Diagnostic Programs…………………………………………………….11-15
11. x
Figure 1 – Valmet Acoustic Pyrometer System Concept
2310°F
(1266°C)
Generator Receiver
Boiler Cavity
SPCW
12. xi
Introduction
Purpose
This manual provides detailed instructions for the installation, operation, and servicing
of the Valmet Acoustic Pyrometer™ High Energy Acoustic Pyrometer System. You are
advised to become thoroughly familiar with the equipment and the contents of this
manual. Give careful attention to applicable warnings and cautions. Before performing
any servicing procedure, make sure all necessary safety equipment, test equipment,
repair materials, and special tools are on hand.
If you find an error, omission, or other technical discrepancy, please fill out a copy of the
Comment Form found at the back of this manual and send to Valmet at the address
found in the Exclusive Distributor section of this manual.
User Qualifications
The information contained in this manual is intended for use by persons qualified to
properly install, operate, and repair Valmet Acoustic Pyrometer™ High Energy Acoustic
Pyrometers.
Safety Advisory
This manual describes physical and chemical processes that require the use of
chemicals or other commercially available materials that require precautionary attention.
The user of this manual should obtain material safety data sheets from the
manufacturers or suppliers of the materials to be used. The user must become
completely familiar with and follow all recommendations, warnings, and cautions for the
safe use, handling, and disposal of the materials. The following describes the use of
WARNINGS, CAUTIONS, and NOTES within this manual:
WARNING
WARNINGS CALL ATTENTION TO THE USE OF MATERIALS,
PROCESSES, METHODS, PROCEDURES, OR LIMITS, WHICH MUST
BE FOLLOWED PRECISELY TO AVOID INJURY TO PERSONS.
13. xii
CAUTION
Cautions call attention to methods and procedures that must be
followed to avoid damage to equipment.
NOTE
Notes call attention to methods that make the job easier.
Material List
The material listed in the table below is required for processes within this manual.
WARNINGS and/or CAUTIONS will precede the use of the materials listed.
Material Recommendation Used in…
Teflon®
Tape Commercially Available
Installation, Routine
Maintenance, Repair
Teflon®
Grease Permatex Repair
Degreasing Agent Commercially Available Repair
Cleaning Solvent
(Compatible with steel)
(Compatible with aluminum)
Commercially Available Repair
Anti-seize Compound Permatex Repair
Marine Grease Lubriplate Repair
Thread Sealant Loctite 567 Repair
14. xiii
Abbreviations and Acronyms
The following is a list of abbreviations and acronyms used in this manual.
AAC Amps Alternating Current
A/D Analog to Digital
AC Alternating Current
AO Analog Output Enclosure
AMP Ampere
AP106 Acoustic Pyrometer AP106 System
ASG Acoustic Signal Generator
ASR Acoustic Signal Receiver
AST Acoustic Signal Trigger
AWG American Wire Gauge
bar PSIG multiplied by a factor of .0689
BNC British Naval Connector or Bayonet Nut Connector
°C Centigrade
CFM Cubic Feet per Minute
D/A Digital to Analog
dB Decibel
DCS Distributed Control System
DIN Deutsche Industrinorm - German Standard
gal Gallon
15. xiv
°F Fahrenheit
GND Ground
in. Inch
in-lbs Inch Pounds
JIC Joint Industrial Council
kg Kilograms
L Liter
L/s Liter/second
lbs. Pounds
mA Milliampere
mHz Megahertz
MPC Multiple Processing Control
mm Millimeter
N/A Not Applicable
NPTF National Pipe Thread Female
Nm Newton Meter
NPT National Pipe Thread
O.D. Outside Diameter
psi Pounds Per Square Inch
PSIG Pounds Per Square Inch Gage
qt Quart
REF. Reference
16. xv
RMS Root Mean Squared
SCFM Standard Cubic feet Per Minute
SPCW Signal Processing Computer with Windows software
SST Stainless Steel
TOF Executable File TOF.exe
UNS Unified National Standard
V Volt
VAC Volts Alternating Current
VDC Volts Direct Current
SSR Solid State Relay
17. 1.0 SAFETY
Topic Page
1.1 Safety Definitions ............................................................................................1-2
1.2 General Safety Rules.......................................................................................1-3
1.3 General Plant Safety Rules.............................................................................1-4
1.4 Valmet Equipment Safety ...............................................................................1-5
1.5 Lockout Tagout Procedures for Valmet Equipment.....................................1-6
18.
19. Safety 1-2
1.1 Safety Definitions
Statements in this manual preceded or adjacent to the following words and graphics are
of special significance:
WARNING
WARNING indicates a potentially hazardous situation which if NOT avoided, could
result in death or serious injury.
CAUTION
CAUTION indicates a potential situation which if not avoided, could result in equipment
or property damage.
20. 1-3 Safety
1.2 General Safety Rules
1. Personal Protection Equipment (PPE) must be worn as prescribed for each job, such
as: safety glasses for eye protection (ANSI Z87.1), earplugs or earmuffs for hearing
protection, hard hats at all times within the confines of an industrial area where there
is the potential for falling materials or tools, gloves when handling materials, and steel
toe footwear as necessary for protection against foot injuries.
2. Before servicing, repairing, or adjusting any powered tool or piece of equipment,
disconnect it, lock out the sources of energy (electrical, pneumatic and/or hydraulic),
tag it out, and then try it out to confirm that it is off.
3. Never work without a harness when elevation is more than 4 feet high. Personnel
using a safety harness need to be trained in the proper use of a safety harness.
4. Lift correctly – with legs, not the back, and do not twist. If the load is too heavy
(greater than 70 pounds or 32 Kg) GET HELP.
5. Do not use power tools and equipment until you have been properly instructed in the
safe work methods and become authorized to use them.
6. Be sure that all guards are in place. Do not removed, displace, damage or destroy
any safety device or safeguard furnished or provided for use on the job, nor interfere
with the use thereof.
7. Never oil, lubricate or fuel equipment while it is energized.
8. Use caution when using compressed air. Do not use a compressor or compressed
air to blow dust or dirt from your cloths, hair, face or hands.
9. Use the ‘four and one’ rule when using a ladder. One foot of base for every four feet
of height. Keep ladder base free of debris, hoses, wires, materials etc. No wood or
aluminum ladders can be used.
10. Know where firefighting equipment is located and be trained in how to use it.
11. Use only extension cords of the three-prong type. Use ground fault circuit
interrupters at all times and when using tools in wet atmosphere (e.g. outdoors) or
with any temporary power supply. Check the electrical grounding system daily.
12. Know what emergency procedures have been established for your job site (location
of emergency phone, emergency contact numbers, first aid kit, stretcher location, fire
extinguisher locations, evacuation plan, etc.).
13. Report any work-related incident (near miss), injury or illness, no matter how minor,
to your supervisor or manager.
21. Safety 1-4
1.3 General Plant Safety Rules
• Follow the plant’s safety rules at all times.
• Follow plant Lockout Tagout procedures for conducting any installation or
maintenance on equipment.
• Never operate plant mobile equipment without proper authorization.
• Wear Personal Protective Equipment (PPE):
1. Head protection in the form of a hardhat will be worn on job sites when there
are potentials of falling objects, hair entanglement, burning, or electrical
hazards.
2. Eye protection with side shields (ANSI Z81.1) will be worn when there are
potentials of hazards from compressed air, flying objects, particles, sparks,
chemicals, arcing, glare or dust.
3. Protective steel toe footwear shall be worn to protect from falling objects,
chemicals, or stepping on sharp objects. Athletic or canvas-type shoes shall
not be worn. In many plants, Metatarsal Boots are required.
4. Protective gloves and/or clothing shall be worn when required to protect
against a fire hazard. Fire resistant clothing (FRC) is required.
5. Hearing protection shall be worn in areas with high acoustic levels.
22. 1-5 Safety
1.4 Valmet Equipment Safety
WARNING
BURN HAZARDS:
1. Avoid touching any hot lens tubes. Wear leather gloves to prevent burns.
2. While opening inspection or port doors on a furnace or boiler, always wear PPE
(hard hat, safety glasses, ear plugs, safety shoes and gloves), and use the lens
tube heat shield provided by Valmet. Keep your face off to the side of the
opening or behind the heat shield to avoid high temperatures and/or any
unexpected positive pressure bursts of heat. Wearing a face shield is
recommended.
WARNING
SHOCK HAZARD:
1. Disconnect power to any electrical field boxes, junction boxes and/or electrical
enclosures, or Universal Enclosure prior to conducting any work, repair or
maintenance on them in order to prevent electrical shocks.
WARNING
PINCH POINT HAZARD:
1. The AutoRetract has a pinch point hazard when in motion. Keep the safety
guard in place at all times to prevent pinch injuries.
WARNING
COMPRESSED AIR HAZARDS:
1. Shut compressed air off and bleed pressure in lines before working on any
pneumatics to prevent injuries from unsecured lines and/or pressurized air.
2. Don’t look down the lens tube when the Purge Air is on to prevent injuries from
pressurized air and/or particulate matter. Wear safety glasses to prevent eye
injuries.
WARNING
POTENTIAL INJURY TO MAINTENANCE WORKER:
1. Do not use Acoustic Pyrometer (AP) while workers are inside cold boiler or
furnace that is under maintenance.
2. Do not stand in front of AP barrel while Acoustic Signal Generator (ASG) is
pressurized.
WARNING
EQUIPMENT INSPECTION & LABELS:
1. Equipment needs to be inspected before each use.
2. Equipment labels should be wiped off monthly and replaced if they become
unreadable. Failure to do so could result in equipment damage or injury.
23. Safety 1-6
1.5 Lockout Procedures for Valmet Equipment
These lockout instructions are to be incorporated into each facility’s Lock-Out
Tag-Out Procedures. Lock-out of energy sources should be done prior to any
maintenance or repair on Valmet equipment.
For Electrical Sources of Energy:
1. If there is a Signal Processing Computer (SPCW), first turn off the computer.
2. Inside the control box for each piece of equipment (SPCW, Acoustic Signal
Receiver [ASR], Acoustic Signal Trigger [AST], Combo Box, AutoRetract
Controller, AutoRetract Port Rodder Controller, OptiTrak Controller, and/or
PyroRemote Controller), flip the main circuit breaker (which has LOTO capability)
into the Off position.
LOTO Circuit Breaker
3. Locate the plant circuit breakers powering the Valmet equipment, shut them off,
and lock them out according to the plant’s Lock-Out Tag-Out procedures.
24. 1-7 Safety
For Pneumatic Sources of Energy:
1. Rotate the safety-discharge lock-out ball valve into the Off position (90° to pipe
direction) that is located on the air filter system. This allows the system air
pressure to bleed off safely.
Lock-Out Ball Valve in Off Position
For the Acoustic Pyrometer 106 (AP106), the stored air in the Acoustic Signal
Generator(s) [ASG(s)] must also be bled off by adjusting the metering valve on the
Solenoid Valve/Hose Plate to the open position. (Close this valve before restarting.)
3. Place a lock through the hole in the safety-discharge lock-out ball valve in
accordance with the plant’s Lock-out Tag-Out procedures.
Metering Valve
25. 2.0 GENERAL SYSTEM DESCRIPTION
Topic Page
2.1 Equipment Description ...................................................................................2-3
2.2 System Component Description ....................................................................2-4
2.3 Equipment Specifications...............................................................................2-8
2.4 Customer Requirements............................................................................. 2-10
26.
27. General System Description 2-2
Figure 2-1 – Basic Valmet Acoustic Pyrometer System Block Diagram
REFERENCE ONLY / FINAL CONFIGURATION MAY VARY
Processor
SPCW
1 Total
Receiver
ASR
Trigger
AST
CAT6 Cable
ASG
(1-12 devices) (1-4 Devices)
3 Twisted Pair (Belden 88103)
2 Twisted Pair (Belden 88102)
4-20 mA (1-16
Total) Outputs
to DCS
120/240
VAC
120/240 VAC 120/240 VAC
120/240 VAC
Control Line
In Flexible
Conduit
Air
Prep
85-125 PSIG Min. Air
(Clean, Dry, Oil Free)
1” Pipe (~20 SCFM intermittent
approx. 5 minutes)
35-125 PSIG Min. Air
(Instrument Quality)
½” Pipe (~20 SCFM intermittent
approx. 5 sec/ 30 minutes)
120/240 VAC
4-20mA
Analog
Output
Module
28. 2-3 General System Description
2.1 Equipment Description
The Valmet Acoustic Pyrometer measures the gas temperature using sound
signals. In addition, it can be configured for use as a Leak Detection System.
As illustrated in Figure 2-2, the Valmet Acoustic Pyrometer consists of:
- Air Prep / Mark IV Amplifier - Acoustic Signal Trigger (AST)
- Acoustic Signal Generator (ASG) - Signal Processing Computer (SPCW)
- Acoustic Signal Receiver (ASR) - Connecting Hose Assemblies
- Connecting Data Transmission Cables - Analog Output Module
Figure 2-2 – Valmet Acoustic Pyrometer System
29. General System Description 2-4
2.2 System Component Description
Valmet Acoustic Pyrometer Basic System
The Valmet temperature measurement system provides, continuous,
reliable, and accurate information regarding internal temperatures of
combustion processes. The Valmet Acoustic Pyrometer system
utilizes the fundamental principle that the velocity of sound through a
medium is proportional to the temperature of the medium.
Therefore, by accurately knowing when a sound is generated, when
it is received at a remote location, and the distance between the
source and the receiver, the average temperature between the two
points can be determined.
2.2.1 Acoustic Signal Generator
The Acoustic Signal Generator (ASG) system consists of the primary
signal generator, transmission barrel, charge control valve assembly,
trigger assembly, and an air amplifier with regulator. These
components are assembled and physically mounted according to
unique, site specific, requirements. The final ASG provides a high-
energy burst of sound capable of clear detection and processing
within a range of 100 feet in an open furnace.
At the heart of the Valmet Acoustic Pyrometer system is the Acoustic
Signal Generator. This device, using standard plant service air,
creates a high-energy, sharp leading-edge sound wave with an
intensity of over 170 dB. This sharp leading edge, using traditional
algorithms, is easily distinguishable from ambient boiler noise.
Because of the intensity of the sound wave, multiple receivers up to
100 feet away in an open furnace can detect and process the signal.
Also, because the signal propagation does not rely on interaction
with the combustion particulate, the accuracy of the system is
independent of fuel type or source.
The ASG creates a high energy (>170 dB) acoustic pressure wave
with a very short, well-defined rise time. This clearly defined edge
allows the system components to detect and determine the starting
time of the wave at the AST within 50 microseconds.
The ASG system includes mounting hardware for the ASG. Included
are brackets, recoil constraint springs, and attachment brackets for
the transmission barrel. The material supplied is suitable for
permanent support of the 170-pound ASG hardware.
30. 2-5 General System Description
2.2.2 Transmission Barrel
The transmission barrel directs the high-energy sound impulse from
the generator, through the penetration and into the boiler. It is
constructed of 2 1/2”, mild steel piping with a Stainless Steel end for
boiler penetration.
2.2.3 Mechanical Control Components
The Air Preparation System, Acoustic Signal Trigger (AST), and
Solenoid Control Valve combine to provide local control of the Sound
Generator. The Air Preparation System pre-charges the ASG to
approximately 400 psi. The SPCW sends a logic level signal to the
AST, which in turn sends an AC control signal to the solenoid control
valve, which then discharges (fires) the ASG, producing the sound
pulse.
Following discharge, the charging process repeats and holds the
amplified air charge until the controller re-triggers the system. Sound
impulse interval timing is determined by the user and generally
ranges from one pulse per 5 minutes to one pulse per 15 minutes.
2.2.4 Acoustic Signal Trigger
The Acoustic Signal Trigger (AST) accepts the logic level firing signal
from the SPCW and sends AC control power to the solenoid control
valve to fire the ASG. The AST also includes a microphone assembly
to detect when the sound pulse leaves the ASG. It is housed in a
standard 10” x 12” (NEMA 4) enclosure and mounts near the ASG.
2.2.5 Acoustic Signal Receiver
The Acoustic Signal Receiver (ASR) provides a listening mechanism
for detection of the generated sound wave and a communications
mechanism for verification of signal recognition.
The ASR is housed in a standard 10” x 12” (NEMA 4) enclosure and
mounts, through the boiler skin, to the back side of the waterwall
tubes. Penetration through the wall membrane is accomplished via
0.4” holes providing both mounting support and room for insertion of
a 3/8” stainless steel receiving tube. This tube may be up to 20 feet
in length but shorter, direct penetration installation is desirable.
Typical tube lengths are less than 36 inches.
The Valmet Acoustic Pyrometer system can support up to a
combination of up to 4 ASGs and 12 ASRs. ASRs are capable of
31. General System Description 2-6
receiving and verifying sound from ASGs as far as 100’ distance
(open furnace), provided that there is an unobstructed line of sight
between the ASG and the ASR. Each ASR is capable of detecting a
valid acoustic signal and providing verification of receipt with 50
microseconds of actual sound incidence.
NOTE: The ASRs are connected to the SPCW controller via
shielded, twisted pair connection.
2.2.6 Signal Processing Computer
The Signal Processing Computer (SPCW) controls the system
operation. The SPCW is housed in a standard enclosure and is
capable of operating in typical industrial conditions to temperature up
to 110 F. (NOTE: Higher ambient Temperatures require vortex
cooler)
The SPCW's purpose is to initiate the sound pulse, monitor and
determine the exact moment that the sound pulse is launched into
the boiler, monitor and determine the exact moment that the sound
pulse is received at various remote ASR sites, and then to calculate
the average path temperatures within the boiler using an advanced
signal detection and processing methodology.
NOTE: It is recommended to install the SPCW in an air conditioned
room.
The electronics system resides on an industrial grade processor with
a flat screen display for local configuration, reporting, and
modification of operating parameters. Data displayed on the flat
screen includes temperatures and signals, which can be used to
verify the performance of the system.
The electronics system provides sufficient process inputs/outputs for
simultaneous control of up to 48 ASG/ASR pairs.
2.2.7 Analog Output Module
Up to 32 individually separated 4-20 mA signals are provided for
reporting of temperatures along specific paths, zones or leak
detection channels. Zones are custom defined areas across a plane
of a boiler. Each zone consists of multiple paths for collective
assessment of temperature.
Leak channel alarm outputs provide operation-inhibit function for
high background noise periods.
32. 2-7 General System Description
2.2.8 Temp View
The system may also provide a MODBUS over TCP (Ethernet)
interface to connect to a DCS. The TempView TM boiler display can
be networked in to provide multiple plane displays from a single
location.
2.2.9 Valmet Acoustic Pyrometer System Operation
Prior to firing, the ASG must be pressurized with compressed air to
about 400 psi. This is accomplished by operating the Mark IV Air
Amplifier, for up to 4 minutes to boost the plant air supply to the ~400
psi used by the ASG. When the SPCW determines that it is time to
fire the ASG, it sends a signal to the AST, which operates the
solenoid control valve, which fires the ASG. When the ASG fires, it
releases the air charge very rapidly, which creates a sound wave
with a very sharp rising edge. The actual duration of this sound wave
is unimportant but it is in the order of tenths of milliseconds. This
sharp-edged sound wave travels through the boiler and reaches the
ASR(s) in 10 to 30 milliseconds, depending on boiler dimensions and
boiler temperature. The SPCW has a data acquisition window when
it "listens" for the sound wave at the AST and then at the ASR. After
this window, the SPCW processes the data and then provides a
boiler temperature reading on the LCD screen, 4-20 mA current loop
(or optional MODBUS protocol). This processing takes between 5
and 30 seconds to complete, depending on the number of paths
and/or zones.
The SPCW is configured to fire the ASG at a predefined interval.
This interval is usually set between 5 and 15 minutes. When the
interval expires and it is time to fire the ASG, the SPCW "listens" to
the ASRs in the boiler and waits for the background sound level to
drop below a predefined level before actually firing the ASG. This
prevents the Valmet Acoustic Pyrometer System from getting false
temperature readings during high background noise levels such as
during soot blowing.
The SPCW can detect waterwall tube leaks by monitoring the
background noise level. A 4-20 mA signal can be programmed to
output background noise level (4-18 mA) or alarm (20 mA). Outputs
are physically located in the 4-20 mA Analog Output Module.
33. General System Description 2-8
2.3 Equipment Specifications
Table 2-1 lists the equipment specifications for the Valmet Acoustic Pyrometer.
Component Characteristic Specification
System
(1 boiler with
2 planes)
Power Requirement 120/240 VAC, 15A, 50/60 Hz.
Internal Voltages 12 VDC, 24 VDC
Output
4 - 20 mA (ground isolators may be
used)
Compressed Air
85-125 psi (5.8-8.6 bar), 5 SCFM
(2.4 L/s)
SPCW
(Signal
Processing
Computer
with
Windows
software)
Power Consumption 100/240 VAC, <4A, 50/60 Hz.
Internal Voltages 12 VDC, 24 VDC
Temperature 0 - 43°C (32-110°F)
Relative Humidity 10% - 85%, Non-Condensing
Min-Max Inlet Pressure
(for Cabinet Cooler)
60 – 80 psi (4.1 - 5.5 bar)
Min-Max Usage (for
Cabinet Cooler)
4 – 8 SCFM (1.9 – 3.8 L/s)
ASG
(Acoustic
Signal
Generator)
Compressed Air
250 - 500 PSI (17.2 – 34.5 bar) from
Air Preparation System
Temperature 0 – 80°C (32 – 175°F)
Relative Humidity
Water Wash OK for Enclosure; 0% -
90%, Non-Condensing for
Electronics inside Enclosure
Min-Max Inlet Pressure
(at once per 5 minutes)
To air prep system
85 – 125 psi (5.8 – 8.6 bar)
Average Air
Consumption
2.7 – 4.2 CFM (1.3 – 2.0 L/s) at 90
psi (6.2 bar)
Min-Max Usage per
Firing
50 – 80 SCFM (23.6 – 37.8 L/s)
Depending on Operating Pressure
Analog
Output
Power Consumption 100/240 VAC, <1A
34. 2-9 General System Description
Component Characteristic Specification
Module
Internal Voltage 24 VDC
Outputs 4-20 mA, Isolated, Passive
Temperature 0-43°C (32 - 110°F)
Relative Humidity 10 – 85%, Non-Condensing
AST
(Acoustic
Signal
Trigger)
Power Consumption 110/240 VAC, < 1A, 50/60 Hz.
Temperature -10 – 80°C (14 – 175°F)
Relative Humidity 0% - 90%, Non-Condensing
ASR
(Acoustic
Signal
Receiver)
Power Consumption 120/240 VAC, < 1A, 50/60 Hz.
Temperature -10 – 85°C (14 – 185°F)
Relative Humidity 0% - 90%, Non-Condensing
Min-Max Inlet Pressure
(for each ASR)
35 – 125 psi (2.4 – 8.6 bar)
Min-Max Usage (for
each ASR)
< 1 SCFM (0.5 L/s)
Air
Preparation
System
(Regulator/
Filters/Oiler)
Air Filtration 0.01 Micron Particulate Coalescing
Compressed Air
85-125 psi (5.8-8.6 bar), 5SCFM
(2.6 L/s) @ < 15% Duty Cycle
Microfog Lubricator
2 gal (7.6 L) Lubricator & 5W30
Motor Oil
Oil Consumption
~500 mL (0.5 qt) per Month (for
Lubricator and Mark IV Air Amplifier)
Temperature 0 – 80°C (32 – 175°F)
Relative Humidity Water Wash OK
Min-Max Inlet Pressure 60 – 120 psi (4.1 – 8.3 bar)
Microphones Temperature -10 – 85°C (14 – 185F)
35. General System Description 2-10
Component Characteristic Specification
Relative Humidity 0% - 90%, Non-Condensing
Norgren
Control
Valve (on
Hose Plate
Assembly)
Temperature 0 – 52°C (32 – 125°F)
Table 2-1 – Equipment Specifications
2.4 Customer Requirements
Table 2-2 lists the materials to be supplied by the customer.
Component Characteristic Specification
Electric Power Power Feed, 15 Amp 120/240 VAC Single Phase
Compressed Air
1” Pipe to Header to
Air Filter(s) and each
ASR
85-125 psi (5.8-8.6 bar), 5
SCFM (2.4 L/s) per ASG, 0.8
SCFM (0.4 L/s) per ASR
3 Twisted Pair
Shielded Cable
3 Individually
Shielded/Twisted
Pairs
Belden 88103 (or equivalent)
2 Twisted Pair
Shielded Cable
2 Individually
Shielded/Twisted
Pairs
Belden 88102 (or equivalent)
Table 2-2 – Customer Requirements
39. Acoustic Pyrometer Recommended Installation 3-2
3.1 Planning
The following should be reviewed by personnel prior to installation.
Confirm type of monitoring system to be installed:
■ Zone temperature system
Verify:
■ Clear line of site available between ASGs and ASRs to be installed
■ Line of sight will not exceed 100 feet (30.48 meters) A to B in open
furnace (< 70’ in narrow passages)
■ An atmosphere controlled room to house the SPCW System cabinet
■ Verify there is adequate clearance around obstructions
Personnel understand boiler type to be modified:
■ Tangent tube
■ Membrane tube
For mounting, availability of existing:
■ Access panels
■ Unused soot blower
Plan for:
■ Cutting access holes in boiler casing
■ Making boiler tube bends
■ Delivering plant air to system
■ Separate cable trays or conduit for data transmission lines
■ Individual electrical circuits for each electrical device installed
■ Compensating for boiler expansion of 6 to 8 inches (152 to 203 mm)
Fabrication of:
■ Buckstay bracket
■ Other suitable mounting
Availability of:
■ Cutting/drilling tools
■ Welding equipment
40. 3-3 Acoustic Pyrometer Recommended Installation
3.2 Boiler Preparation (ASG)
This section provides instructions for preparing the boiler for ASG vertical
mounting. After selecting a location for mounting the ASG, an access port
needs to be made.
WARNING
FOLLOW YOUR PLANT SAFETY PRECAUTIONS AND GUIDELINES
FOR WORKING WITH THE BOILER.
3.2.1 With boiler offline, cut a 3.5 in. diameter (90 mm) hole in the lower
boiler casing.
3.2.2 Perform boiler tube bend procedure as necessary to allow the ASG
tube of 3.0 in. diameter (76 mm), to pass through to the centerline of
the water tube walls.
NOTE
The end of the 3.0 in. diameter (76 mm) ASG tube may be crushed
down to an oval to aid in installation. The 3.0 in. diameter (76 mm) may
be crushed to a minimum of 2.0 in. (50.80 mm). Contact Valmet in this
case.
41. Acoustic Pyrometer Recommended Installation 3-4
3.3 ASG Mounting and Installation
This section provides assembly instructions for the ASG. The ASG is shipped
partially disassembled, and when completely assembled it will weigh
170 lbs (77 kg). The following procedure contains numbers in parentheses ( ),
which refer to item numbers in Figures 3-1 and 3-2 below.
Figure 0-1 – ASG Installation Diagram
42. 3-5 Acoustic Pyrometer Recommended Installation
Figure 0-2 – ASG Installation Details
WARNING
FOLLOW YOUR PLANTS SAFETY PRECAUTIONS AND GUIDELINES
FOR WORKING WITH HEAVY COMPONENTS.
WARNING
ANTI-SEIZE COMPOUND IS FLAMMABLE AND TOXIC, DO NOT USE
NEAR OPEN FLAMES OR SPARKS. USE IN A WELL-VENTILATED
AREA.
WARNING
FOLLOW PLANT SAFETY PRECAUTIONS AND GUIDELINES FOR
WELDING PROCEDURES.
43. Acoustic Pyrometer Recommended Installation 3-6
3.3.1 Install seal box (1) as shown in Detail A of Figure 3-2.
3.3.2 Weld stainless steel barrel end (2) to seal box (1). The end of the
stainless steel barrel must end at the water-wall center line of the
boiler.
3.3.3 Weld flange #1 (3) onto the other end of the stainless steel barrel.
3.3.4 Apply anti-seize compound to the threads of 4 flange bolts and
connect one end of the stainless steel flex hose (4), with a gasket, to
flange #1 (3) using the flange bolts, lock washers and nuts (5).
3.3.5 Position barrel assembly (6) and mounting bar (7) such that they
meet up with the other flange end of the stainless steel flex hose (4).
3.3.6 Slide onto the mounting bar a spring stop, spring, second spring and
second spring stop (8, 9) in the orientation as shown in Figure 3-1.
3.3.7 Weld location of mounting bar (7) to available boiler structure via the
end brackets (10).
3.3.8 Hang barrel assembly (6) from mounting bar (7) using the spring
hanger (11).
3.3.9 Apply anti-seize compound to the threads of 4 flange bolts and
attach the barrel assembly (6) with a gasket to the flange end of the
stainless steel flex hose (4) using the flange bolts, lock washers and
nuts (5).
3.3.10 Cut barrel assembly (6) to length.
3.3.11 Hang ASG between the spring and spring stop pairs (8, 9) using 2
pins and 2 rollers (12, 13).
3.3.12 Place flange #2 (14) onto the end of the cut barrel assembly (6), roll
the ASG assembly (15) up to this flange, orient its holes so that they
match the ASG flange holes, and then weld it in place.
3.3.13 As an alternative method for aligning the flange holes (if flange #2
gets welded on prior to matching the ASG flange holes), the front
end of the ASG assembly (15) can be loosened and adjusted. First,
loosen the front barrel jam nuts (16) and front barrel nut retaining
bolts (17). Next, rotate the ASG barrel in order to align the ASG
flange holes to those of flange #2 (14). Lastly, retighten the barrel
nut retaining bolts (17) to a torque specification of 20 ft-lbs, then
retighten the jam nuts (16).
44. 3-7 Acoustic Pyrometer Recommended Installation
3.3.14 Apply anti-seize compound to the threads of 4 flange bolts and
attach the ASG flange with a gasket to flange #2 (14) using the
flange bolts, lock washers and nuts (5).
3.3.15 With the location of the ASG assembly fixed, compress the springs
(8) on either side of the ASG mounting tabs (18) by 1/4 to 1/2" using
the spring stops (9). Drill a hole in the mounting bar through the bolt
hole opening in each spring stop, and then secure each spring stop
with a bolt, lock washer and nut (19).
Figure 0-3 – Completed ASG Installation (prior version)
45. 4.0 SYSTEM SUB-COMPONENT INSTALLATION
Topic Page
4.1 Mark IV Air Amplifier Mounting ......................................................................4-2
4.2 Hose Plate Assembly Mounting .....................................................................4-3
4.3 Boiler Preparation (ASR).................................................................................4-5
4.4 ASR Mounting................................................................................................4-11
4.5 AST Mounting ................................................................................................4-13
4.6 SPCW Enclosure Mounting ..........................................................................4-14
4.7 Analog Output Module Mounting.................................................................4-16
46.
47. System Sub-Component Installation 4-2
4.1 Mark IV Air Amplifier Mounting
The Mark IV Air-Amplifier is designed to be mounted vertically and has two ½”
diameters through holes located in the base plate for fasteners.
WARNING
FOLLOW PLANT SAFETY PRECAUTIONS AND GUIDELINES FOR
WORKING WITH HEAVY COMPONENTS. THE HOIST USED SHOULD
BE CAPABLE OF CARRYING OVER 200 LBS. (91 KG).
Figure 4-1 – Mark IV Air Amplifier Mounting
48. 4-3 System Sub-Component Installation
4.2 Hose Plate Assembly Mounting
This section provides mounting instructions for the hose plate assembly. See
Figures 4-2 to 4-4 below.
Figure 4-2 – Hose Plate Assembly Mounting
50. 4-5 System Sub-Component Installation
4.2.1 Identify an existing structure to which the hose plate assembly can be
mounted to. The assembly needs to be within close proximity of the
ASG per distance requirements shown in Figure 3-4 above. Position
hose plate assembly to the left or right of the existing support structure.
4.2.2 Measure and mark the assembly mounting hole locations onto existing
support structure.
4.2.3 Drill two 9/16” diameter holes through support.
4.2.4 Fasten support block of the assembly to the existing structure with
mounting bolts and lock washers as shown in Figure 4-2.
4.2.5 Set metering valve to the CLOSED position.
Figure 4-5 – Hose Plate Assembly
4.3 Boiler Preparation (ASR)
This section provides instructions for preparing the boiler for ASR mounting. The
following instructions refer to diagrams in Figures 4-6 to 4-11 below. After
selecting a location for mounting the ASR, an access port needs to be made.
51. System Sub-Component Installation 4-6
4.3.1 With boiler offline, cut a 2 inch diameter (51 mm) hole in the
boiler casing.
4.3.2 Drill two 0.5 inch diameter (13 mm) holes vertically on 0.5 inch centers in
the water wall membrane. File edges to create slot. See Membrane
Slot Detail in Figure 4-6 below.
Figure 4-6 – Membrane Slot Detail
NOTE
The following procedure assumes an existing opening in the boiler is not present.
WARNING
FOLLOW PLANT SAFETY PRECAUTIONS AND GUIDELINES FOR WORKING
WITH THE BOILER.
WARNING
FOLLOW PLANT SAFETY PRECAUTIONS AND GUIDELINES
FOR WELDING PROCEDURES.
52. 4-7 System Sub-Component Installation
4.3.3 Attach 1 inch mounting pipe centered over slot in the membrane. Use
either a seal box, gussets, or a mounting plate (see Figures 4-7 to 4-11
below) to support the 1 inch mount pipe. Welds must be sufficient to
support over 100 lbs. (45 kg) of weight at this location.
Figure 4-7 – Membrane Tube Boiler, Negative Pressure Installation with Seal Box
56. 4-11 System Sub-Component Installation
4.4 ASR Mounting
This section provides assembly and mounting instructions for the ASR. The
following procedure refers to Figures 4-7 to 4-11 above and 4-12 below.
Figure 4-12 – ASR Layout
NOTE
The ASR cabinet is completely assembled; no additional assembly is
required inside the cabinet.
WARNING
ANTI-SEIZE COMPOUND IS FLAMMABLE AND TOXIC, DO NOT
USE NEAR OPEN FLAMES OR SPARKS. USE IN A WELL-
VENTILATED AREA.
57. System Sub-Component Installation 4-12
4.4.1 Apply anti-seize to the threads of the pipe set items and then attach
the pipe set and ASR to the 1 inch mount pipe.
4.4.2 Remove microphone from the ASR. With a tape measure, measure
from the slot in the water wall membrane to the end of the
microphone pipe mount. Then subtract approximately 0.5 inch (12
mm) for the distance beyond the compression fitting in the
microphone.
4.4.3 Using a tube cutter, cut the ASR listening tube to the proper length.
Record its final length into the table provided in Section 7.0
Measurement length to 0.25 in. (6 mm) and record Verification.
4.4.4 Install the listening tube into the compression fitting and tighten.
Positioned correctly, it should end within 0.25 inch of the slot in the
membrane wall.
4.4.5 Screw microphone back onto pipe mount in ASR.
CAUTION
ASR listening tube is supplied as a four-foot
(1219 mm) section and must be cut to proper
length. The ASR listening tube must extend from
compression fitting in the microphone to the center
of the water wall membrane within a 1/4 inch.
CAUTION
Be careful not to damage, bend or crimp ASR
listening tube.
58. 4-13 System Sub-Component Installation
4.5 AST Mounting
This section provides mounting instructions for the AST. The following
procedure refers to Figure 4-13 below.
Figure 4-13 – AST Layout & Details
NOTE
The AST cabinet is completely assembled; no additional assembly is required
inside the cabinet.
59. System Sub-Component Installation 4-14
4.5.1 Select a location to mount the AST cabinet. Mount AST cabinet no more
than five feet from ASG connector (refer to Figure 4-4 Proximity
Diagram).
4.5.2 Position AST to railing, column, or other suitable support.
4.5.3 Mark AST mounting position by tracing the four 0.31 inch diameter
(8 mm) holes. Temporarily move AST aside.
4.5.4 Drill four 0.31 inch diameter (8 mm) holes through support.
4.5.5 Reposition AST aligning holes in AST to holes in support.
4.5.6 Bolt AST to support utilizing appropriately sized bolts, washers,
and nuts.
4.6 SPCW Enclosure Mounting
This section provides assembly and mounting instructions for the SPCW
enclosure. The following procedure refers to Figure 4-14.
NOTE
The majority of cabinet hardware was installed at the factory. Detailed
electrical connections are covered in Section 6.0 Electrical Connections.
CAUTION
The cabinet houses a microcomputer, please handle with care.
60. 4-15 System Sub-Component Installation
4.6.1 Install unistruts onto an available wall space in a convenient climate-
controlled room. Using the included hardware, mount the SPCW
enclosure onto the unistruts. It should be installed at a convenient
height for ease of access.
Figure 4-14 – SPCW Enclosure
61. System Sub-Component Installation 4-16
4.7 Analog Output Module Mounting
The preferred location for the AO Module is near the DCS to minimize wiring runs
for the up to 32 twisted pairs. The 4-20 mA Analog Output Module ideally would
be mounted in a cool, dry, dust free environment.
Figure 4-15 – Analog Output Module Enclosure
62.
63. 5.0 PNEUMATICS, LUBRICATOR & LOW/HIGH PRESSURE
Topic Page
5.1 General .............................................................................................................5-2
5.2 Plant Air to Filter/Regulator/Lubricator .........................................................5-3
5.3 Air Preparation System to Air Amplifier ........................................................5-4
5.4 Air Amplifier to Solenoid Valve Block ...........................................................5-5
5.5 Solenoid Valve to ASG....................................................................................5-6
5.6 ASG to AST ......................................................................................................5-6
5.7 Plant Air to ASR Purge Air Regulator ............................................................5-8
64.
65. Pneumatics, Lubricator & Low/High Pressure 5-2
Figure 5-1 – Basic Pneumatic Block Diagram
5.1 General
This section provides instructions for making system pneumatic connections. The
following procedure contains numbers in parentheses ( ), which refer to item
numbers found in figures in this section. You will need to repeat some
procedures based on the number of listening paths installed.
CAUTION
• Do not deliver air to system until after all pneumatic and
electrical connections have been completed.
• Do not operate system without oil in lubricator.
Air Amp
AST
ASR
Temperature
Path
ASG
Solenoid
Block
Boiler
Filter
Plant
Air
Micro-Fog
Lubricator
Exhaust Air
e
Purge
Solenoid Regulator
Plant Air
2 in.
hose
0.5 in.
hose
0.19 in. hose
0.25 in.
hose
ASG
Barrel
0.25 in. hose
66. 5-3 Pneumatics, Lubricator & Low/High Pressure
5.2 Plant Air to Filter/Regulator/Lubricator
5.2.1 Set air regulator (1) to zero psi by adjusting pressure regulator control fully
counterclockwise.
5.2.2 Fill Lubricator with 5W-30 Motor Oil while unpressurized.
5.2.3 With zero air pressure in plant system, wrap fitting threads with Teflon
tape and connect plant air supply to the 0.5 in. (13 mm) NPTF inlet of air
regulator.
5.2.4 Adjust lubricator Allen screw for maximum drip rate.
Figure 5-2 – Plant Air to Air Preparation System to Air Amplifier
67. Pneumatics, Lubricator & Low/High Pressure 5-4
5.3 Air Preparation System to Air Amplifier
Figure 5-3 – Air Preparation System
68. 5-5 Pneumatics, Lubricator & Low/High Pressure
5.4 Air Amplifier to Solenoid Valve Block
5.4.1 Connect ½” Low Pressure Hose PN 030336 (3) from Air Filter to Air
Amplifier ½” JIC fitting.
5.4.2 Connect ¼” High Pressure Hose PN 030334 (4) from JIC fitting (5) outlet
on air amplifier to Hose Plate (6).
Figure 5-5 – Air Amplifier Connection Detail
69. Pneumatics, Lubricator & Low/High Pressure 5-6
5.5 Solenoid Valve to ASG
5.5.1 Remove bolts and flanges from solenoid valve block (1).
5.5.2 Remove bolts and flanges from ASG (2).
5.5.3 Apply anti-seize to threads of bolts.
5.5.4 Attach 90 elbow flange head of hose (3) to solenoid valve block (1) and
fasten with flanges, washers, bolts, and safety bolts with new lock wire.
5.5.5 Attach straight flange head of hose (3) to ASG and fasten with flanges,
washers, bolts, and safety bolts with lock wire.
Figure 5-6 – Hose Plate Assembly to ASG
5.6 ASG to AST
CAUTION
• Do not alter AST trigger hose (1). Length should be 72 in.
(1829 mm).
• Minimum bend radius for AST trigger hose (1) is 0.75 in.
(19 mm).
1
Flanges, Bolts, Washers,
and Lock Wire
Flanges, Bolts, Washers,
and Lock Wire
2
3
70. 5-7 Pneumatics, Lubricator & Low/High Pressure
5.6.1 Attach AST trigger hose (1) to 3/16” JIC fitting at bottom AST cabinet (2),
and to 3/16” JIC fitting on Barrel (3). Attach Air Purge Hose 030335 (7)
from Air Filter to AST.
Figure 5-7 – ASG to AST
71. Pneumatics, Lubricator & Low/High Pressure 5-8
5.7 Plant Air to ASR Purge Air Regulator
5.7.1 Set air regulator (1) to zero PSI. Adjust fully counterclockwise. See Figure
5-8.
5.7.2 With zero air pressure in the plant system, wrap fitting threads with
Teflon tape and connect plant air supply to the 0.5 in. (13 mm) NPTF inlet
of the ASR (2).
Figure 5-8 – Plant Air to ASR Purge Regulator
75. Electrical Connections 6-2
6.1 SPCW Cabinet
This section provides instructions for the general electrical arrangement of the
SPCW Cabinet, ASR Enclosure, AST Enclosure and AO Module. You will need
to also refer to the appropriate engineering drawings for exact cable wiring
diagrams.
The SPCW cabinet/enclosure and its associated internal panels and components
are shown in Figures 6-1 and 6-2 below.
Figure 6-1 – Inner Panels of SPCW Enclosure
WARNING
FOLLOW PLANT SAFETY PRECAUTIONS AND GUIDELINES FOR
WORKING WITH ELECTRICAL POWER.
CAUTION
Do not engage circuit breakers supplying electrical power to
system components until after all electrical connections have
been completed.
77. Electrical Connections 6-4
6.2 SPCW Connections
6.2.1 SPCW Factory Wiring
Figures 6-3 to 6-5 on the following pages illustrate the SPCW Panel
connections and individual wiring details. These connections should
be checked to verify that none have come loose during shipping.
81. Electrical Connections 6-8
6.2.2 Conduit Knockouts
SPCW Cabinets require knockout punches for electrical conduit
runs. Utilize an appropriately sized round knockout punch driver for
the size cable glands you will be installing.
• For SPCW, ASR and AST cabinets, install conduit from the
bottom of the cabinet.
6.2.3 SPCW Power
Connect a 120/240 VAC (15 AMP) rated power line to the SPCW
Cabinet as illustrated in Figures 6-3 and 6-4. Be sure that the SPCW
System is on an individual circuit, and that properly sized conduit is
used to protect the power line.
6.2.4 SPCW System Signals
Locate the proper terminal block locations as illustrated in Figure 6-3.
See Figures 6-4 and 6-5 for typical wiring diagrams. Refer to the
mechanical drawings at the end of this manual for specific details.
NOTES
1. All twisted pair cores include a drain wire, which must be
connected to the appropriate ground shield terminal for each
pair. Failure to do so will lead to system errors. See Figures 6-4
and 6-5 for typical wiring diagrams.
2. Each SPCW system panel provides 4-20 mA output channels
for use in the customers DCS system. These are powered, data
channels. See Figure 6-5 for output wiring terminations.
CAUTION
Before installing output channels to the DCS system, remove
shorting resistor between terminals 1 and 2 of the appropriate
terminal block group. When output channels are not in use,
shortening resistors must be installed. Failure to do so will result in
errors in operation.
3. For channel-to-channel isolation, 4-20 mA isolation modules may
be used.
82. 6-9 Electrical Connections
6.3 ASR Enclosure Connections
6.3.1 ASR Internal Wiring Connections
Figure 6-6 illustrates the ASR receiver enclosure wiring connections.
Figure 6-6 – ASR Wiring
84. 6-11 Electrical Connections
6.5 Analog Output Connections (Active and Passive Loops)
The Passive Analog Output (AO) Module Wiring Connections are shown in
Figure 6-8 below.
Figure 6-8 – Passive Loops AO Module Wiring
85. Electrical Connections 6-12
The Active Analog Output (AO) Module Wiring Connections are shown in Figure
6-9 below.
Figure 6-9 – Active Loops AO Module Wiring
90. 7-3 Measurement Verification
7.1 General
This section provides for critical measurements to be taken and recorded for
later entry into the systems software program.
Previous sections in this manual have referenced entering data into the table
provided in this section (Table 7-1); if measurements were not taken and
entered during those procedural steps, follow the instructions in this section for
taking the measurements and recording them.
NOTE
Copy Table 7-1 as needed to record additional tube measurement.
CAUTION
It is critical that length measurements be accurate. Measurements
deviating by a small amount from the actual lengths will result in
considerable errors during system operation.
Measurements must be accurate within 0.25 in. (6 mm) of actual
lengths for proper system operation.
91. Measurement Verification 7-4
7.2 Measurements
This section refers to Figure 7-1 below.
7.2.1 Measure length of all ASG barrels, from the 3/16” JIC fitting to the
end of SST barrel end, and record data in Table 6-1. This is
Measurement 1 in Figure 7-1.
7.2.2 Measure length of all AST trigger hoses and record the data in Table
7-1. This is Measurement 2 in Figure 7-1.
7.2.3 Measure length of all ASR listening tubes per instructions in Section
3.4, page 3-12 and record data in Table 7-1. This is Measurement 3
in Figure 7-1.
Figure 7-1 – Measurements
92. 7-5 Measurement Verification
7.3 Boiler Dimensions
With the boiler offline, and working from inside the boiler, perform the following.
7.3.1 Establish an X, Y coordinate system inside the boiler. See the
example in Figures 7-2 and 7-3.
NOTE
Figure 7-2 illustrates complex temperature paths in a zone
configuration. Your application may be a single, multiple, or
staggered arrangement.
Figure 7-2 – Boiler Measurements
93. Measurement Verification 7-6
7.3.2 Utilizing Figure 7-2, sketch and record the following.
NOTE
Copy Figure 7-2 as needed for additional boiler installations.
7.3.2.1 Boiler length.
7.3.2.2 Boiler width.
7.3.2.3 Location dimension for ASGs in the X axis.
7.3.2.4 Location dimension for ASGs in the Y axis.
7.3.2.5 Location dimensions for ASGs in the Z axis (elevation).
7.3.2.6 Location dimensions for ASRs in the X axis.
7.3.2.7 Location dimensions for ASRs in the Y axis.
7.3.2.8 Location dimensions for ASRs in the Z axis (elevation).
CAUTION
Accurately determining boiler dimensions,
locations of ASGs, and locations of ASRs is
critical to system operation.
CAUTION
The following procedure is to be
accomplished by Valmet personnel.
7.3.2.9 Enter all dimensional data taken in steps 7.3.2.1 through
7.3.2.4 into the Valmet spreadsheet, which will calculate the
path lengths for the systems setup.ini file.
NOTE
Valmet personnel will enter the data into the Valmet
spreadsheet, make boiler online (full load)
measurements and adjustments, and input data
into the systems setup.ini file.
95. 8.0 SYSTEM POWER ON/OFF
Topic Page
8.1 General .............................................................................................................8-2
8.2 Power ON .........................................................................................................8-2
8.3 Power OFF........................................................................................................8-3
96.
97. System Power ON/OFF 8-2
8.1 General
This section describes powering ON and powering OFF the Valmet Acoustic
Pyrometer System. Review the following checklist before proceeding with
system power up.
■ All mechanical mounts are secure
■ All pneumatic connections are complete and tight
■ Lubricator is filled with 5w-30 motor oil
■ All electrical connections have been properly installed
■ Update of the setup.ini file is complete and accurate
■ Outputs to DCS are connected (may require 4-20 mA isolation
modules).
8.2 Power ON
8.2.1 Air Supply
WARNING
WHEN WORKING WITH COMPRESSED AIR, WEAR EYE
AND FACE PROTECTION. TAKE PRECAUTIONS TO AVOID
INJURY TO OTHER PERSONNEL IN THE AREA.
8.2.1.1 Deliver clean, dry, oil free air to the systems main air
regulator. Minimum 85 psi at 5 scfm (5.86 bar).
8.2.1.2 Adjust metering valve on solenoid valve/hose plate to the
closed position.
8.2.1.3 Adjust main air regulator between 80 and 100 psi (5.51 to
6.89 bar).
8.2.1.4 Adjust air amplifier regulator using pressure gauge on AST
such that the signal to noise ratio is at least 2 to 1 (range
between 250 and 500 psi [17.23 to 34.47 bar]). The seals
last longer using lower pressure.
8.2.1.5 Adjust ASR purge regulators to 35-50 psi (2.4-3.4 bar).
8.2.1.6 Set ASR purge timers for 5 seconds on every 5 minutes.
Final pressure needs to get entered into the
setup file.
NOTE
98. 8-3 System Power ON/OFF
8.2.1.7 Set microphone flow meter to ~5 SCFH.
8.2.2 Electrical Supply
8.2.2.1 Engage circuit breakers delivering 120/240 VAC power to
SPCW Enclosure.
8.2.2.2 Engage circuit breakers delivering 120/240 VAC power to
ASTs and ASRs.
8.2.3 Microcomputers
8.2.3.1 Inside SPCW enclosure, toggle all microcomputer
power switches to ON.
8.2.3.2 Engage circuit breaker for SPCW electronics.
8.2.3.3 The Time of Flight (TOF) program will begin to run. See
Section 8.0 Valmet Acoustic Pyrometer Software User Guide
for detailed software operating instructions.
8.3 Power OFF
The Valmet Acoustic Pyrometer System should be powered off in three steps:
8.3.1 Disengage circuit breaker for SPCW electronics. This will prevent
ASGs from firing electronically.
8.3.2 Adjust the main air regulator to zero psi or shut off air supply valve.
8.3.3 After powering OFF the system, bleed the stored air from ASGs by
adjusting the metering valve on hose plate assembly to the open
position. (Close after pressure is released)
Bleeding the stored air from the ASG keeps the internal piston
closed, keeping unit free of ash, and unable to fire accidentally!
WARNING
WHEN WORKING WITH COMPRESSED AIR, WEAR EYE AND
FACE PROTECTION. TAKE PRECAUTIONS TO AVOID INJURY
TO OTHER PERSONNEL IN THE AREA.
NOTE
99. 9.0 PERIODIC MAINTENANCE AND REPAIR
Topic Page
9.1 General .............................................................................................................9-2
9.2 Routine Care Schedule ...................................................................................9-2
9.3 Microphone Replacement...............................................................................9-3
9.4 Removing ASG from Service..........................................................................9-6
9.5 Disassembly of ASG .......................................................................................9-8
9.6 Seal Removal per Seal Kit ............................................................................9-12
9.7 Cleaning .........................................................................................................9-14
9.8 Seal Replacement..........................................................................................9-16
9.9 ASG Assembly...............................................................................................9-19
9.10 Returning ASG to Service.............................................................................9-21
9.11 Air System Maintenance ...............................................................................9-21
100.
101. Periodic Maintenance and Repair 9-2
9.1 General
This section provides for the care of your Valmet Acoustic Pyrometer system.
Please follow the recommended replacement schedules and repair
instructions for your Valmet Acoustic Pyrometer system.
If a problem persists and cannot be resolved by use of this section, please
contact Valmet; +1 (360) 753-8831) for assistance.
CAUTION: Do not operate system without lubricator oil. Seal life will be
greatly reduced.
9.2 Routine Care Schedule
Pneumatic System Scheduled Task
Lubricator Oil (5W-30 Motor Oil) Check sight glass every 3 month and refill as needed
Air Filter Element (PN 033702)
Replace if Differential Pressure (D.P.) falls in yellow
or red area (see Figure 9-1).
*If you have a manual drain, please check it
periodically and drain as needed. Frequency varies
depending on the air quality.
Air Amplifier
Rebuild Every 12 months
KZA31048, KZA31050, KZA31051
Mark IV Air Amp Rebuild Kits (Quantity: 1 each)
ASG Unit
Rebuild Every 12 months (every 100,000 discharge
cycles)
KZA30754 AP106 Seal Kit (Quantity: 1)
Control Valve Rebuild Every 24 Months
Regulator Inspect every 12 Months
Computer System Scheduled Task
Valmet Acoustic Pyrometer System
Manually fire all paths every 6 months.
(Menu items F6 and F8).
Table 9-1 – Routine Care Schedule
Figure 9-1 – Differential Pressure Gauge
102. 9-3 Periodic Maintenance and Repair
9.3 Microphone Replacement
The following instructions contain item numbers in parentheses ( ), which refer
to item numbers in Figure 9-2.
9.3.1 Removal
9.3.1.1 Turn OFF 12 VDC power to the microphones in the SPCW
cabinet. Pull fuse or breaker.
9.3.1.2 Turn off breaker (1) in ASR/AST enclosure.
9.3.1.3 For ASR/AST cabinets, remove tubing (2) from elbow (3) in
microphone base (4).
9.3.1.4 Remove 12-volt connector (5).
9.3.1.5 Remove BNC connector (6).
9.3.1.6 Unscrew microphone from pipe mount (7).
9.3.1.7 Remove 3 socket head cap screws (8) from side of
microphone.
9.3.1.8 Separate microphone can (9) from microphone base (4) by
pulling straight apart. (Do not twist)
9.3.1.9 Replace microphone can (9) pushing straight on to microphone
base (3) with 12-volt power socket aligned with elbow. (Do not
twist)
9.3.1.10 Replace 3 socket head cap screws (8).
9.3.1.11 Screw microphone to pipe mount (7).
9.3.1.12 Reconnect tubing (2) to elbow (3).
9.3.1.13 Reconnect 12-volt connector (5).
9.3.1.14 Reconnect BNC Connector (6).
9.3.1.15 Turn on breaker (1).
9.3.1.16 Turn on 12 VDC in SPCW.
105. Periodic Maintenance and Repair 9-6
9.4 Removing ASG from Service
9.4.1 Remove ASG from service
The following instructions contain item numbers in parentheses ( ),
which refer to item numbers in Figure 9-4 below.
Figure 9-4 – Remove ASG from Service
106. 9-7 Periodic Maintenance and Repair
WARNING
FOLLOW PLANT SAFETY PRECAUTIONS AND GUIDELINES
FOR WORKING WITH HEAVY COMPONENTS.
9.4.1.1 Turn off power and air supply to system.
9.4.1.2 Open metering valve on solenoid/valve plate to bleed off stored
air.
WARNING
DO NOT PROCEED UNTIL AIR FLOW FROM THE BLEED
VALVE HAS STOPPED. INJURY COULD RESULT FROM
THE RELEASE OF HIGH PRESSURE AIR.
9.4.1.3 Remove safety wire, bolts, flanges, and straight flange head
end of hydraulic hose (21) from back of ASG.
9.4.1.4 Remove bolts, washers and nuts from flange #2 (14).
9.4.1.5 Remove hardware from ASG spring stops (8), (9) and pins
(12).
ASG WEIGHT IS 160 LBS (73 KG). GET HELP TO LIFT.
9.4.1.6 Remove ASG and transport to workshop.
9.4.1.7 Change O-rings & seals (use Seal Kit).
WARNING
107. Periodic Maintenance and Repair 9-8
9.5 Disassembly of ASG
9.5.1 Rear components
The following instructions contain item numbers in parentheses ( ),
which refer to item numbers in Figure 9-5.
9.5.1.1 With the rear hanger (1) still fastened to the ASG via barrel nut
retaining bolts and jam nuts (3), use it as a tool to loosen the
rear outer nut (2) by rotating it counterclockwise. Remove
assembly (4).
Figure 9-5 – ASG Cutaway
108. 9-9 Periodic Maintenance and Repair
9.5.2 Piston removal
This assembly is tack welded. Do not disassemble unless O-
ring (8) is leaking. Use soap bubbles to test for leaks.
The following instructions contain item numbers in parentheses ( ),
which refer to item numbers in Figure 9-6.
9.5.2.1 Remove the front flange (1).
9.5.2.2 Remove the throat (2).
9.5.2.3 Remove the pressure can (3).
9.5.2.4 Then pull out the piston (4).
9.5.2.5 Clean and replace seals (use Seal Kit KZA30754).
Figure 9-6 – ASG Cutaway
NOTE
109. Periodic Maintenance and Repair 9-10
9.5.3 Front Components
The following instructions contain item numbers in parentheses ( ),
which refer to item numbers in Figure 9-7.
9.5.3.1 With the front hanger (6) still fastened to the ASG, use it as a
tool to loosen the front outer nut (7) by rotating it
counterclockwise. Remove assembly.
9.5.3.2 Remove outlet weldment (5).
9.5.3.3 Remove throat (4).
9.5.3.4 Using an O-ring pick, remove O-ring (3) from throat (4),
and discard.
9.5.3.5 Pull center seal can (2) from large barrel (1).
Figure 9-7 – ASG Disassembly (Front)
1 2 3 4 5 6
7
111. Periodic Maintenance and Repair 9-12
9.6 Seal Removal per Seal Kit
9.6.1 Front seals
The following instructions contain item numbers in parentheses ( ),
which refer to item numbers in Figure 9-8.
9.6.1.1 Remove cotter pin (10).
9.6.1.2 Using a box wrench, remove castle nut (9).
9.6.1.3 Remove piston washer (8).
9.6.1.4 Remove delrin piston assembly (5). Delrin piston assembly (5)
consists of:
■ O-ring (6) seated in groove of delrin piston, with Piston ring
(7) over top of O-ring (6). Components can be removed by
using an O-ring pick.
9.6.1.5 Using an O-ring pick, remove shaft O-ring (4).
9.6.2 Center seals
The following instructions contain item numbers in parentheses ( ),
which refer to item numbers in Figure 9-8.
9.6.2.1 Using an O-ring pick, remove step-cut wear ring (11).
CAUTION
Inspect center O-ring (12) carefully. Only replace
center O-ring (12) if damage has occurred.
CAUTION
The following procedure should be accomplished by a
qualified machinist to preserve integrity of components.
112. 9-13 Periodic Maintenance and Repair
9.6.2.2 Draw an alignment mark across components with a making
pen as illustrated in Figure 9-8.
9.6.2.3 Remove Snap Ring (16).
9.6.2.4 Unscrew and remove setscrew (15).
9.6.2.5 Using a spanner wrench unscrew and remove piston locking
ring (14).
9.6.2.6 Using a spanner wrench, remove center piston O-ring retainer
(13).
9.6.2.7 Using an O-ring pick, remove center piston O-ring (12).
9.6.3 Rear seals
The following instructions contain item numbers in parentheses ( ),
which refer to item numbers in Figure 9-8.
9.6.3.1 Using an O-ring pick, remove piston ring (1).
■ Piston ring (1) is seated over top of O-ring (2).
9.6.3.2 Using an O-ring pick, remove O-ring 2.
9.6.3.3 Using an O-ring pick, remove wear ring (3).
113. Periodic Maintenance and Repair 9-14
9.7 Cleaning
WARNING
CLEANING SOLVENTS ARE FLAMMABLE AND TOXIC, DO NOT USE
NEAR OPEN FLAMES OR SPARKS. USE IN A WELL-VENTILATED AREA.
9.7.1 Steel components
Clean all steel components with a solvent that is compatible with
steel. Remove all ash deposits or other contaminants that may have
entered the ASG components.
9.7.1.1 Inspect all sealing surfaces for nicks or burrs. Note that the
cylinder surfaces are chrome plated.
9.7.1.2 Significant scratches or nicks will require component
replacement. Do not attempt to polish or grind.
9.7.2 Aluminum components (Piston)
The following instructions contain item numbers in parentheses ( ),
which refer to item numbers in Figure 9-8.
WARNING
THE ASG PISTON IS MADE OF ALUMINUM. USE ONLY
SOLVENTS COMPATIBLE WITH ALUMINUM.
9.7.2.1 Thoroughly clean piston surface and seal grooves with a
solvent that is compatible with aluminum.
9.7.2.2 Inspect piston for damage.
CAUTION
Minor repair to piston including, polishing down
burrs or nicks is permissible. Damage beyond that
indicated requires replacement of piston.
Do not wash off alignment mark.
NOTE
115. Periodic Maintenance and Repair 9-16
9.8 Seal Replacement
9.8.1 Center seals
The following instructions contain item numbers in parentheses ( ),
which refer to item numbers in Figure 9-9.
9.8.1.1 Apply Teflon grease to new center piston O-ring (12).
9.8.1.2 Install new center piston O-ring (12) over piston shaft and seat
into groove.
9.8.1.3 Install center piston O-ring retainer (13) over piston shaft and
tighten with spanner wrench to previous alignment mark.
9.8.1.4 Install piston locking ring (14) over piston shaft and tighten with
spanner wrench to previous alignment mark.
9.8.1.5 Using the alignment mark made in step 9.6.2.2, align setscrew
hole in piston locking ring with tapped hole in piston.
9.8.1.6 Install new setscrew (15) setting head below surface of piston
locking ring (14).
9.8.1.7 Install snap ring (16) around piston locking ring (14).
9.8.1.8 Install new wear ring (11) into .509 in. (12.9 mm) wide groove.
9.8.2 Rear seals
The following instructions contain item numbers in parentheses ( ),
which refer to item numbers in Figure 9-9.
9.8.2.1 Install new wear ring (3) into .385 in. (9.78 mm) wide groove.
9.8.2.2 Apply Teflon grease to new O-ring (2).
9.8.2.3 Install new O-ring (2) into .130 in. (3.30 mm) groove.
■ O-ring is used as a backup ring.
WARNING
BOILING WATER CAN CAUSE SEVERE BURNS.
WEAR PROTECTIVE GLASSES AND GLOVES WHEN
WORKING WITH HOT WATER.
116. 9-17 Periodic Maintenance and Repair
9.8.2.4 Heat new piston ring (1) in boiling water 212F (100 C) for 5
minutes.
9.8.2.5 Install piston ring (1) over top of O-ring (2).
9.8.2.6 Seat piston ring into .130 in. (3.3 mm) groove.
9.8.2.7 Using oil or grease on Rear Subassembly, carefully press
piston into cylinder (9.5.3) to seat new piston ring. Allow to
cool for several minutes before removing.
9.8.3 Front seals
The following instructions contain item numbers in parentheses ( ),
which refer to item numbers in Figure 9-9.
9.8.3.1 Apply Teflon grease to new O-ring (4).
9.8.3.2 Install new O-ring (4) into 0.19 in. (4.8 mm) wide groove.
WARNING
BOILING WATER CAN CAUSE SEVERE BURNS.
WEAR PROTECTIVE GLASSES AND GLOVES
WHEN WORKING WITH HOT WATER.
9.8.3.3 Heat new piston ring (7) in boiling water 212F (100 C) for 5
minutes.
9.8.3.4 Apply Teflon grease to new O-Ring (6).
9.8.3.5 Install new O-ring (6) onto groove of delrin piston (5).
■ O-ring is used as a backup ring
117. Periodic Maintenance and Repair 9-18
9.8.3.6 Install new piston ring (7) over top of O-ring (6).
9.8.3.7 Using oil or grease, carefully press delrin piston assembly into
throat (9.5.2.2) to seat new piston ring. Allow to cool for
several minutes before removing.
9.8.3.8 Install delrin piston assembly on piston shaft.
9.8.3.9 Install new front piston washer (8).
9.8.3.10 Install castle nut (9).
9.8.3.11 Using a box wrench, tighten castle nut until cotter pin hole is
visible.
9.8.3.12 Install new cotter pin (10) and bend ends back.
118. 9-19 Periodic Maintenance and Repair
9.9 ASG Assembly
9.9.1 Front components
The following instructions contain item numbers in parentheses ( ),
which refer to item numbers in Figure 9-10.
Figure 9-10 – Front Component Assembly
9.9.1.1 Apply marine grease to outer surface of center seal can (2) to
prevent rust.
9.9.1.2 Push center seal can (2) into large barrel (1) until seated.
9.9.1.3 Apply Teflon grease to new O-ring (3) and install in 0.19 in.
(4.8 mm) wide groove in throat (4).
9.9.1.4 Install throat (4) into center seal can (2) until seated.
WARNING
ANTI-SEIZE COMPOUND IS FLAMMABLE AND
TOXIC, DO NOT USE NEAR OPEN FLAMES OR
SPARKS. USE IN A WELL-VENTILATED AREA.
9.9.1.5 Apply anti-seize to threads of large barrel (1), and front outer
nut (7).
9.9.1.6 Install outlet weldment (5) to throat (4).
9.9.1.7 Capture installed components with front outer nut (7).
9.9.1.8 Using front hanger (6) as a tool, tighten front outer nut (7).
1 2 3 4 5 6
7
119. Periodic Maintenance and Repair 9-20
9.9.2 Piston installation
The following instructions contain item numbers in parentheses ( ),
which refer to item numbers in Figure 9-11.
9.9.2.1 Insert piston (6) into large barrel (3).
9.9.2.2 Applying steady pressure, push piston (6) in until delrin piston
(5) is fully seated into throat (4).
9.9.2.3 Applying steady pressure, push subassembly (7) over end of
piston (6) until fully seated against large barrel (3).
WARNING
ANTI-SEIZE COMPOUND IS FLAMMABLE AND
TOXIC, DO NOT USE NEAR OPEN FLAMES OR
SPARKS. USE IN A WELL-VENTILATED AREA.
9.9.2.4 Apply anti-seize to threads of large barrel (3) and threads of
rear outer nut (1).
9.9.2.5 Using rear hanger (2) as a tool, install rear outer nut (1) to
large barrel (3). Tighten rear outer nut (1).
Figure 9-11 – ASG Cutaway
120. 9-21 Periodic Maintenance and Repair
9.10 Returning ASG to Service
To return the ASG to service, please follow the installation instructions in
Section 3.0 ASG Recommended Installation.
9.11 Air System Maintenance
WARNING
WHEN WORKING WITH THE AIR SYSTEM, TURN OFF COMPRESSORS
AND BLEED OFF STORED AIR BEFORE ATTEMPTING ANY SERVICE TO
THE SYSTEM OR COMPONENTS.
9.11.1 Hoses
Even with proper installation, hose life may be significantly reduced
without a continuing maintenance program. Frequency of
maintenance inspections should be determined by the severity of
the application and risk potential.
A maintenance program, at a minimum, must include visual
inspections for the following:
■ Fitting slippage
■ Damaged, cut or abraded covers
■ Hard, stiff, cracked or charred hose
■ Cracked, damaged or corroded fittings
■ Kinked, twisted, crushed or flattened hose
■ Blistered, soft or degraded hose
Any of the above conditions requires immediate shut down of
system and repair or replacement of the hose assembly as required.
121. Periodic Maintenance and Repair 9-22
9.11.2 Routine Maintenance
The following scheduled preventative maintenance checks should be done
monthly to insure continuous trouble free operation.
10.12.1.1 Air Preparation System – Check oil level and quality in
lubricator.
10.12.1.2 Check air lines for water and drain if necessary.
9.11.3 Service Maintenance
The Mark IV air-amplifier is designed to operate continuously at an output
pressure between 250 psig and 500 psig for a period of approximately 12
months before scheduled maintenance is required.
Operating the air amplifier without oil will significantly reduce the
life of the air amplifier and ASG seals.
Operating the air amplifier at pressures above 300psi may reduce the life of
the high pressure seals requiring an increase in scheduled maintenance.
When seal replacement is necessary refer to the photos and instructions
below.
MARK IV Shaft Assembly with High Pressure Piston installed
CAUTION
123. Periodic Maintenance and Repair 9-24
• Remove shaft assembly from MARK IV air amplifier.
• Remove nuts from both ends and slide off pistons, o-rings and spacers.
• HIGH PRESSURE PISTON SEAL REPLACEMENT
Layout High Pressure Piston Parts Install O-ring using Lubrication
Press Piston Ring over O-ring Install Piston seal section and nut
124. 9-25 Periodic Maintenance and Repair
• LOW PRESSURE PISTON SEAL REPLACEMENT
(NOTE: It is not necessary to disassemble bronze/aluminum/magnet assembly)
Install o-ring between piston halves
Install Bronze/Magnet and tighten nut to complete assembly
NOTE: To reinstall piston assembly in MARK IV be sure to use a light coat of oil on
seals. Always use lubrication on o-rings and seals for installation of new parts to
prevent scratching or cutting when inserting into cylinders and over threads.
125. Periodic Maintenance and Repair 9-26
• MARK IV SEAL KITS
Valmet Part
Number
Component
Part
Numbers
Required Quantity Service Manual Description
KZA31048 Shaft Assembly Seal Kit
KZ031046 1
O-ring, Back-up, High Pressure Piston, Viton V-
75/129
KZ031250 1 SL Bearing, Low Pressure, 5"
KZ031202 1
O-ring, Back-up, Low Pressure Piston, Viton, V-
75/157
KZ031267 1 SL Bearing, High Pressure, 2"
KZ031282 1 Low Pressure Piston Ring, 5", PTFE
KZ031290 1 High Pressure Piston Ring, 2”, PTFE
KZ031317 1 Low Pressure Piston to Shaft seal O-ring, Viton 2-016
KZ031318 1 High pressure Piston to Shaft seal O-ring, Viton 2-014
KZ031307 1 Nut, Stover, ½-20 NF
KZ031306 1 Nut, Stover, 5/8-18 NF
KZA31050 Check Valve Assembly
KZ033350 2
Check valve, SS303, 10 PSI cracking pressure, Viton
Seals
KZ031294 4 O-ring V-014, Viton, for Check Valve Retainer
KZ031297 2 Ring, Internal Locking, SST
KZA31051 Cylinder Seal Kit
KZ031302 2
High pressure cylinder to high pressure end cap, O-
Ring, 2-031, Viton
KZ031314 1 High pressure connector O-ring, Viton-906
KZ031291 2
Low pressure cylinder to low pressure end caps, O-
ring, 2-048, Viton
127. Periodic Maintenance and Repair 9-28
Table 9-2 – Air Amplifier Troubleshooting
Pump will not cycle. No
pressure at output.
No air supply to pump.
Check supply air.
Check Lubricator Oil
Pump air regulator set
too low.
Increase air setting.
Pump cycles continuously
when deadheaded.
External leak at pump or
downstream high-
pressure circuit.
Verify and correct.
Check valve is trapped
open or contaminated.
Clean or replace.
Internal leak in pump. Check all dynamic and static seals, check
valves and gaskets.
128. 9-29 Periodic Maintenance and Repair
9.11.4 Air Preparation System
The following instruction refers to Figure 9-13.
The air preparation system consists of an air regulator, air filter,
coalescing filter and lubricator. These should be inspected every
six months. The filters should be replaced during inspection.
CAUTION: DO NOT OPERATE SYSTEM WITHOUT OIL. Adjust
oil drops using see-through dome for one drop per air amp
stroke.
General maintenance should include inspection, cleaning, and
lubricating O-rings with waterproof grease. Plastic elements can be
cleaned in warm water. Internal components can be cleaned by
blowing them out with low-pressure compressed air.
If unit leaks air, or internal components appear worn, the
components should be replaced. The unit can be disassembled for
servicing without removing it from line.
Figure 9-13 – Air Preparation System
129. Periodic Maintenance and Repair 9-30
9.11.5 Solenoid Valve
The following instruction refers to Figure 9-14 below.
The solenoid valve should be cleaned periodically. The time
between cleanings will vary depending on operating conditions.
If voltage to the coil is correct and valve operation is sluggish, or
there is excessive noise or leakage, this will indicate that cleaning
is required.
General maintenance should include inspection, cleaning, and
lubricating O-rings with waterproof grease. The internal
passageways should be cleaned by blowing them out with low-
pressure compressed air.
If unit leaks air, or internal components appear worn, the
components should be replaced. The unit can be disassembled
for servicing without removing it from line. Depressurize before
disassembly.
The following rebuild kit is also available:
■ KZ033353 Norgren Solenoid Rebuild Kit
Figure 9-14 – Solenoid Valve on Hose Plate Assembly
Solenoid Valve
130.
131. 10.0 REPLACEMENT PARTS AND REPAIR KITS
Topic Page
10.1 General……………………………………………………………………………..10-2
10.2 Acoustic Signal Generator……………………………………………………...10-3
10.3 Acoustic Signal Trigger………………………………………………………….10-4
10.4 Acoustic Signal Receiver (Internal Components)…………………………..10-5
10.5 Acoustic Signal Receiver (External Components)………………………….10-6
10.6 Mark IV Air Amplifier……………………………………………………………...10-7
10.7 Air Preparation System…………………………………………………………10-11
10.8 Hose Plate Assembly……………………………………………………………10-12
10.9 SPCW Cabinet…………………………………………………………………... 10-13
10.10 Analog Output Module (Optional) ..………………………………………......10-14
10.11 Hose Assemblies……………………………………………………………......10-15
10.12 Recommended Spare Parts…………………………………………………...10-17
132.
133. Replacement Parts and Repair Kits 10-2
10.1 General
Key replacement parts and/or repair kits are provided for each major
component of the Valmet Acoustic Pyrometer system:
■ Acoustic Signal Generator (ASG)
■ Acoustic Signal Trigger (AST)
■ Acoustic Signal Receiver (ASR)
■ Mark IV Air Amplifier
■ Hose Plate Assembly
■ Signal Processing Computer (SPCW)
■ 4-20 mA Analog Output Module (AO Module) (Optional)
■ Hose Assemblies
Replacement parts for sub-assemblies of these major components appear in
the same section as the major component.
Figure 10-1 – Valmet Acoustic Pyrometer System
134. 10-3 Replacement Parts and Repair Kits
10.2 Acoustic Signal Generator
Figure 10-2 – Acoustic Signal Generator Seal Kit
135. Replacement Parts and Repair Kits 10-4
10.3 Acoustic Signal Trigger
Figure 10-3 – Acoustic Signal Trigger Enclosure with Interior View
Table 10-1 – Typical AST Replacement Parts
Item Part Number Description
1 KZA30108 Microphone Assembly
2 KZ030256 Connector, BNC Cable Assembly
3 KZ030205 DC Power Cable Assembly
4 KZ030666 6 Amp Circuit Breaker
5 KZ030202 Solid State Relay
136. 10-5 Replacement Parts and Repair Kits
10.4 Acoustic Signal Receiver (Internal Components)
Figure 10-4 – Acoustic Signal Receiver Enclosure with Interior Views
Table 10-2 – Typical ASR Internal Replacement Parts
Item Part Number Description
1 KZA30108 Microphone Assembly
2 KZ030256 Connector, BNC Cable Assembly
3 KZ030205 DC Power Cable Assembly
4 KZ030666 2-Pole Circuit Breaker
5 KZ002396 Timer
137. Replacement Parts and Repair Kits 10-6
10.5 Acoustic Signal Receiver (External Components)
Figure 10-5 – ASR External Components
Table 10-3 – Typical ASR External Replacement Part
Item Part Number Description
1 KZ031327 ASR Purge Solenoid Valve (Coil depends on VAC)
1
138. 10-7 Replacement Parts and Repair Kits
10.6 Mark IV Air Amplifier
Figure 10-6 – Mark IV Air Amplifier
[Note] Available all together at KZA31048 Mark III/IV Air Amp Rebuild Kit
Table 10-4 – Mark III/IV Air Amplifier Repair Kits
Item Part Number Description
1 KZA31050 Mark III/IV Rebuild Kit
2 KZA31048 Mark III/IV Shaft Seal Kit
3 KZA31051 Mark III/IV Cylinder Seal Kit
139. Replacement Parts and Repair Kits 10-8
Item Part Number Description
1 KZ031294 O-ring Viton
2 KZ031297 Internal Locking Ring, SST
3 KZ033350 Check Valve, Viton Seals
Figure 10-7 –Mark III/IV Check Valve Kit
KZA31050 Mark III/IV Check Valve Kit
140. 10-9 Replacement Parts and Repair Kits
Item Part Number Description
1 KZ031250 SL Bearing, Low Pressure, 5”
2 KZ031267 SL Bearing, High Pressure, 2”
3 KZ031290 High Pressure Piston Ring, 2”, PTFE
4 KZ031046 O-ring, Back-up, High Pressure Piston, Viton
5 KZ031282 Low Pressure Piston Ring, 5”, PTFE
6 KZ031202 O-ring, Back-up, Low Pressure Piston, Viton
7 KZ031317 Low Pressure Piston to Shaft Seal O-ring, Viton
8 KZ031318 High Pressure Piston to Shaft Seal O-ring, Viton
9 KZ031307 Nut, Stover, 1/2-20 NF
10 KZ031306 Nut, Stover, 5/8-18 NF
Figure 10-8 –Mark III/IV Shaft Seal Kit
KZA31048 Mark III/IV Shaft Seal Kit
141. Replacement Parts and Repair Kits 10-10
Item Part Number Description
1 KZ031291 Low Pressure Cylinder to Low Pressure End Cap, Viton
2 KZ031302 High Pressure Cylinder to High Pressure End Cap, Viton
3 KZ031290 High Pressure Fitting, 2-906, Viton-90D
Figure 10-9 –Mark III/IV Cylinder Seal Kit
KZA31051 Mark III/IV Cylinder Seal Kit
142. 10-11 Replacement Parts and Repair Kits
10.7 Air Preparation System
Figure 10-10 – Air Preparation System Components
Table 10-5 – Air Preparation System Typical Replacement Parts
Item Part Number Description
Not Shown KZ033702 0.01 um Coalescing Combination Element
143. Replacement Parts and Repair Kits 10-12
10.8 Hose Plate Assembly
`
Figure 10-11 – Hose Plate Assembly Components
Table 10-6 – Hose Plate Assembly Typical Replacement Parts
Item Part Number Description
1 Depends on Voltage
and Frequency
Norgren Solenoid Valve
2 KZ033353 Norgren Solenoid Rebuild Kit
3 KZ033478 0-600 psi Pressure Gauge
4 KZ033487 Mini Ball Valve, 1/8” NPT
5 KZ031325 Fine Metering Valve
1, 2
5
3, 4
Muffler
Hose Plate
144. 10-13 Replacement Parts and Repair Kits
10.9 SPCW Cabinet
Figure 10-12 – SPCW Enclosure showing Interior Views
145. Replacement Parts and Repair Kits 10-14
Table 10-7 – Typical SPCW Replacement Parts
10.10 Analog Output Module (Optional)
Figure 10-13 – Analog Output Module showing Interior Panel
Table 10-8 – Typical AO Module Replacement Parts
Item Part Number Description
1 KZ030666 6 Amp Circuit Breaker
2 KZ030911 1 Amp Fuse
Item Part Number Description
1 KZ030666 6 Amp Circuit Breaker
147. Replacement Parts and Repair Kits 10-16
Table 10-9 – Hose Assembly Part Numbers
Item Part Number Description
1 KZ033612 2 ½” x 16 ½” Flanged SST Flex Hose
2 KZ030505 1 ¼” x 45” High Pressure ASG Hose
3 KZ030338 3/16” x 6’ Braided SST AST Trigger Hose
4 KZ030334 ¼” x 6’ Braided SST High Pressure Hose
5 KZ030336 ½” x 6’ Low Pressure Rubber Hose
6 KZA31054 ¼” x 10’ Low Pressure Air Purge Hose
148. 10-17 Replacement Parts and Repair Kits
10.12 Recommended Spare Parts
(See Section 9.2 for Recommended Maintenance Intervals)
Table 10-10– Recommended Spare Parts
Component
Part
Number
Description
Recommended #
Spares
ASG KZA30754 AP 106 Seal Kit 1
ASR
AKZ30108 Microphone Assembly 1
KZ031327 ASR Purge Solenoid Valve 1
Hose Plate
Assembly
Depends on
Voltage &
Frequency
High Pressure Solenoid Valve 0
KZ033353 High Pressure Solenoid Valve
Rebuild Kit
1
KZ030374 Muffler 0
Air Amplifier KZA31051 Air Amplifier Cylinder Seal Kit 1
KZA31048 Air Amplifier Shaft Seal Kit 1
KZA31050 Air Amplifier Check Valve Kit 1
Air Filters KZ033702 Air Filter (0.01 um) Filter Element 1
AST KZ030202 AST Solids State Relay 0
SPCW KZ030911 Fuse, 1A, Slow Blow 1
149. 11.0 APPENDIX A
VALMET ACOUSTIC PYROMETER AP106 SYSTEM FAULT
ISOLATION AND TROUBLESHOOTING MANUAL
11.1 General ...........................................................................................................11-2
11.2 Hardware Troubleshooting...........................................................................11-2
11.3 Troubleshooting Charts................................................................................11-6
11.4 General Signal Processing Troubleshooting............................................11-13
Topic Page
150.
151. Appendix A 11-2
11.1 General
This section provides troubleshooting and fault isolation procedures for the
Valmet Acoustic Pyrometer System. If a problem persists and cannot be
resolved by use of this section, please contact the agent in your region for
assistance.
11.2 Hardware Troubleshooting
Hardware Problem Solution
Generator will not charge fully. Mark
III/IV Air Amplifier pumps
continuously.
Cycle system through several acquisitions. Check
trigger signal (AST) for sharp leading edge AS
SHOWN BELOW. (A weak Trigger Signal can be
caused by firing ASG at low pressures.
Check Supply Air and Filter Regulator for inlet
pressure 85 to 125 psi. The Mark III/IV Air Amplifier
will multiply the inlet air by approximately 6.25. Check
Air Filter for Element Differential Pressure Indicator.
Replace element if indicator is yellow or red. Check
Mark III gauge for proper inlet pressure.