Thumbnails
Begin by puttingdown a “string”, or a line that
breaks up the space of your square, and then fill in a
different zentangle into each space.
Build in details as you go. Look through worksheets
I’ve given you for ideas, but please also come up with
your own! The only rule is that it has to be a
repeated, detailed pattern.
Fill at least 4 of the squares with different
background designs in pencil.
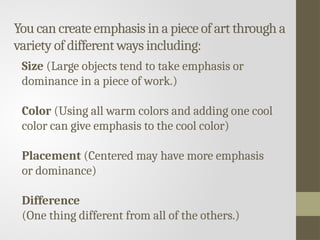
You can createemphasis in a piece of art through a
variety of different ways including:
Size (Large objects tend to take emphasis or
dominance in a piece of work.)
Color (Using all warm colors and adding one cool
color can give emphasis to the cool color)
Placement (Centered may have more emphasis
or dominance)
Difference
(One thing different from all of the others.)
#1 Materials:
Square piece of drawing paper. (I have cut mine anywhere from 9” to 12”.)
Thin and Thick tip markers. (I use Sharpie brand and only black, for more advanced students you could try color.)
Pencils
Thumbnail Worksheets or Extra Paper
Lesson Outline with Student Evaluation (I give to students at beginning so they can follow the steps and know how they will be assessed.)
Zentangle Initials PowerPoint
#2 Art Standards:
GLE:1.1.1 Selects, uses and produces a variety of types and qualities of line for artistic purposes. Demonstrating the use of pattern and detail.
GLE1.1.7: Explores and creates patterns, movement and rhythm by using the repetition of lines.
GLE 1.1.7
Creates, analyzes and evaluates emphasis and dominance in a work of art.
#3 Right click and go to “Open Hyperlink” to play video within YouTube.
http://www.youtube.com/watch?v=0-d2UdXAD7k
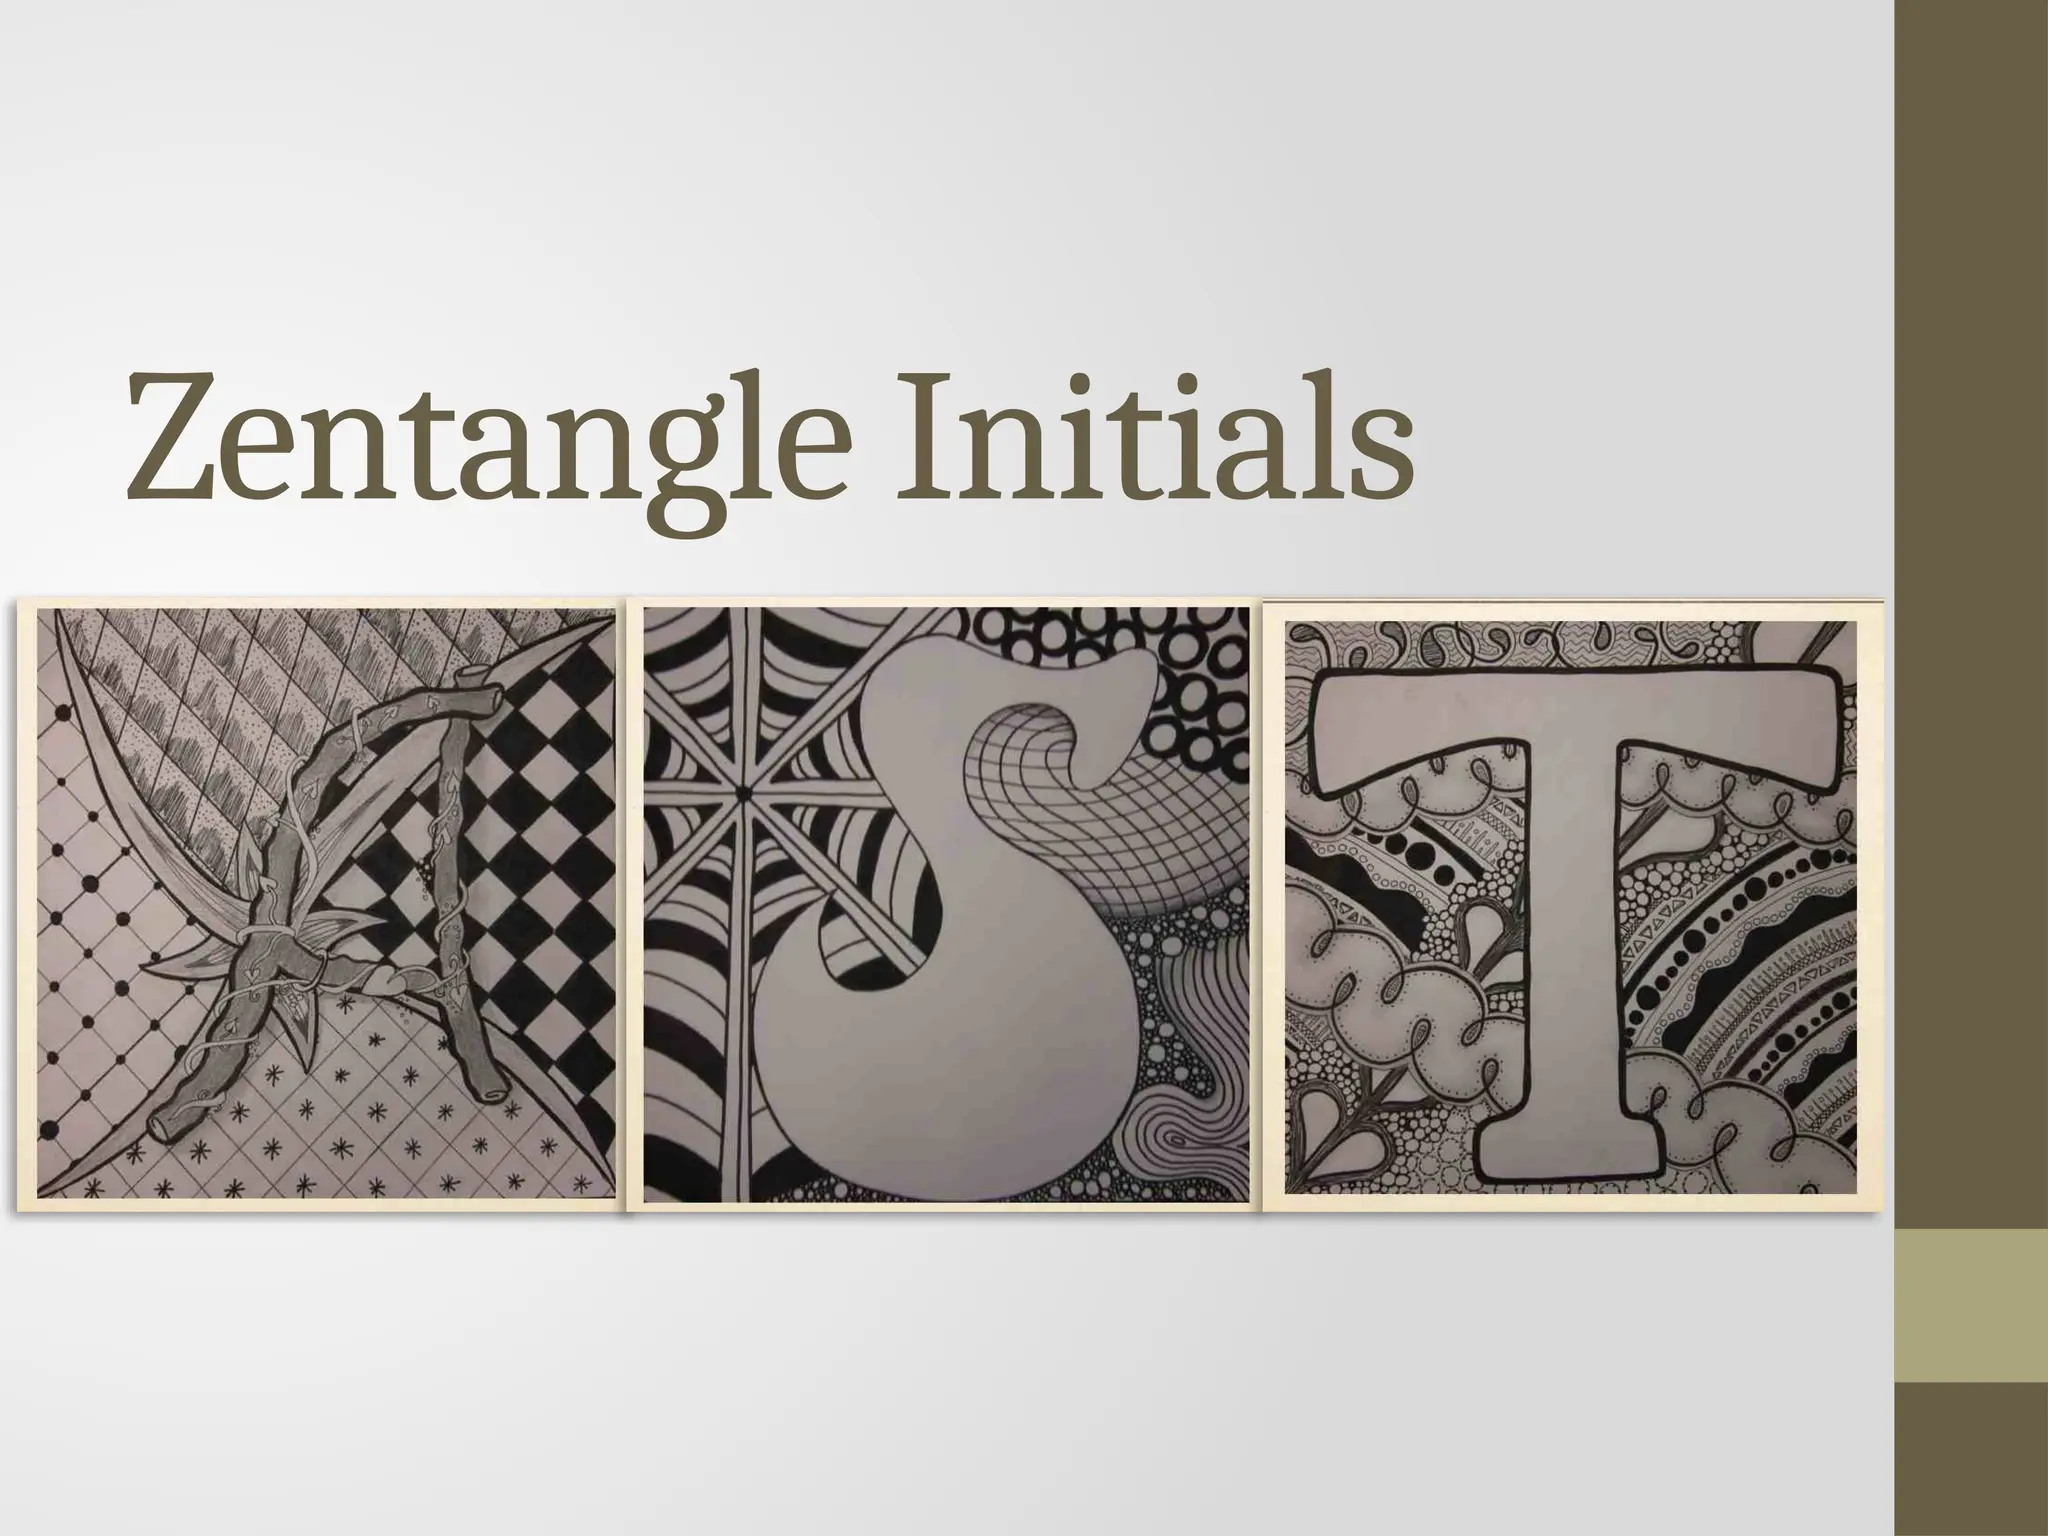
#4 Pattern:
A recurrent thematic element in an artistic or literary work.
Repetition
A principle of organization of visual arts; the repeated use of arts elements to create movement, rhythm, pattern and unity in a piece of art.
Rhythm
A principle of organization of visual arts; the use of arts elements to create movement in an artwork: random, regular, alternation, flowing and progressive.
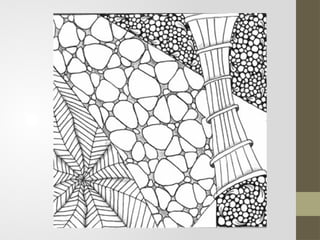
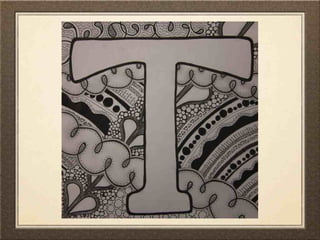
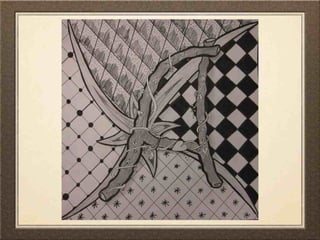
#5 An integral part of of zentangles are “Strings”. Strings are lightly penciled lines that break up the space of your square. Strings provide a foundation that allows us to build the zentangle without thinking or planning. Where is the string in this zentangle?
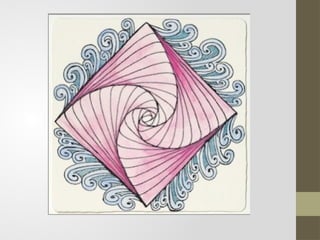
#6 How was emphasis created in this zentangle? What about movement? (Movement is created through the spiral, making it look like it is draining down into itself) Rhythm? (Rhythm is created through the repeated waves and spiral pattern.)
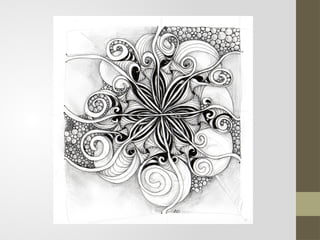
#7 What movement/rhythm do you see in this zentangle? (Bottom left, feel like it goes up and down lending dimension.) Pattern in pebbles creates rhythm.
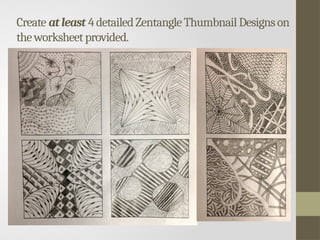
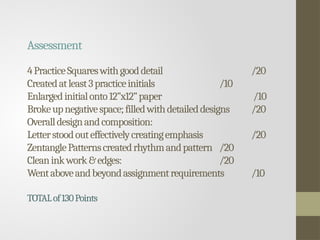
#10 The process is as important as the final outcome. Going through the process will allow you to have a better final product. Take your time and put lots of detail into these thumbnails. You should have at least 6 with good detail before beginning the next step. Doing this will be part of your final grade. In this example the zentangle in the bottom left does not have enough detail to be considered finished.
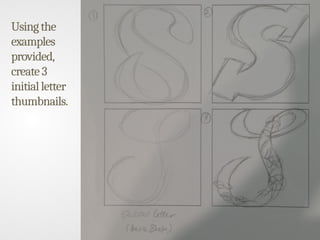
#11 Create at least 3 different thumbnails of your letter designs. You can use the examples given, or find your own examples to use as a guide. At this point, don’t try to create your own, but rather use an example. Start by creating a skeletal letter of the shape of the letter, then go in and add dimension. See boxes in the lower left and right.
#12 Negative space is the space between objects or the parts of an object, for example the area between a cup and its handle. Also the space between an object and the edges of the canvas, i.e. the space around an object. The opposite of negative space is positive space.
#13 Importance given to certain objects or areas in an artwork; color, texture, shape, space and size can be used to create importance.
#14 What is emphasized in the type above? Why? You can use more than one to create emphasis or dominance in a piece of work.
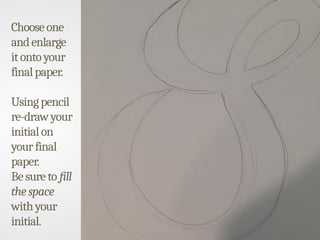
#15 After you draw your initial on your final paper, you will use pencil to break up the space around your letter.Some of the space will be naturally broken by your letter, but you will need to decide how else you want it to be broken up. Outline your initial with Sharpie marker and begin using your thumbnail patterns to fill in the spaces that you created with ink.
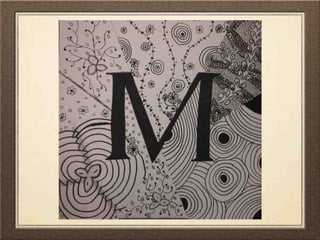
#17 I discuss how each student created emphasis/dominance in the initial on the next 5 slides. I talk about which are the most successful and why. On this letter we talk about shading on the “A”, that the space is broken naturally with the shape of the letter and the checker pattern creating unity in the background that allows the A to maintain dominance or emphasis.
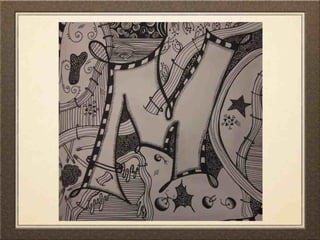
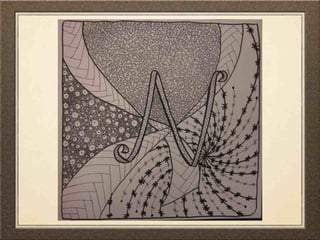
#18 Of all the principles of art we’ve talked about which is best represented in this intial?
(Movement) Talk about how this student created emphasis in her initial even with a lot going on. (Border around M)
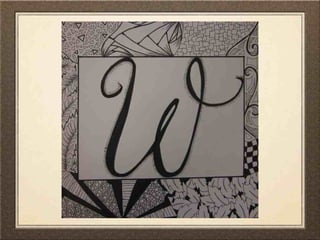
#19 Emphasis in this piece was created a little differently than the others. How was it done?
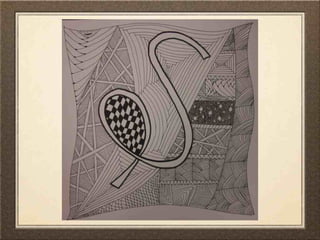
#22 Possible not as successful, why? It still works, but letter is small, patterns not as detailed, not shading, etc.
#23 Vocabulary
Emphasis
Importance given to certain objects or areas in an artwork; color, texture, shape, space and size can be used to create importance.
Negative and Positive Space
Negative space is the space between objects or the parts of an object, for example the area between a cup and its handle. Also the space between an object and the edges of the canvas, i.e. the space around an object. The opposite of negative space is positive space.
Pattern:
A recurrent thematic element in an artistic or literary work.
Repetition
A principle of organization of visual arts; the repeated use of arts elements to create movement, rhythm, pattern and unity in a piece of art.
Rhythm
A principle of organization of visual arts; the use of arts elements to create movement in an artwork: random, regular, alternation, flowing and progressive.
#25 “Betweed” - NOTE TO TEACHER: I usually show a different video of a zentangle for the first 3-4 days (usually for as long as they are working on their thumbnail zentangles) to keep them motivated and interested. This is optional. This video is longer than the others but good because it is done by one of the original creators of Zentangle. I speed through pieces of it, although students are pretty mesmerized by it. Also on some of the videos I just turn down the volume of the video and play music, but for this one and the first one I let them listen to the narration.
#27 This is part four of a sampler, but the students really like the worm or tube-like zentangle that is on this one. You can also play the other versions, they don’t have to be in order.