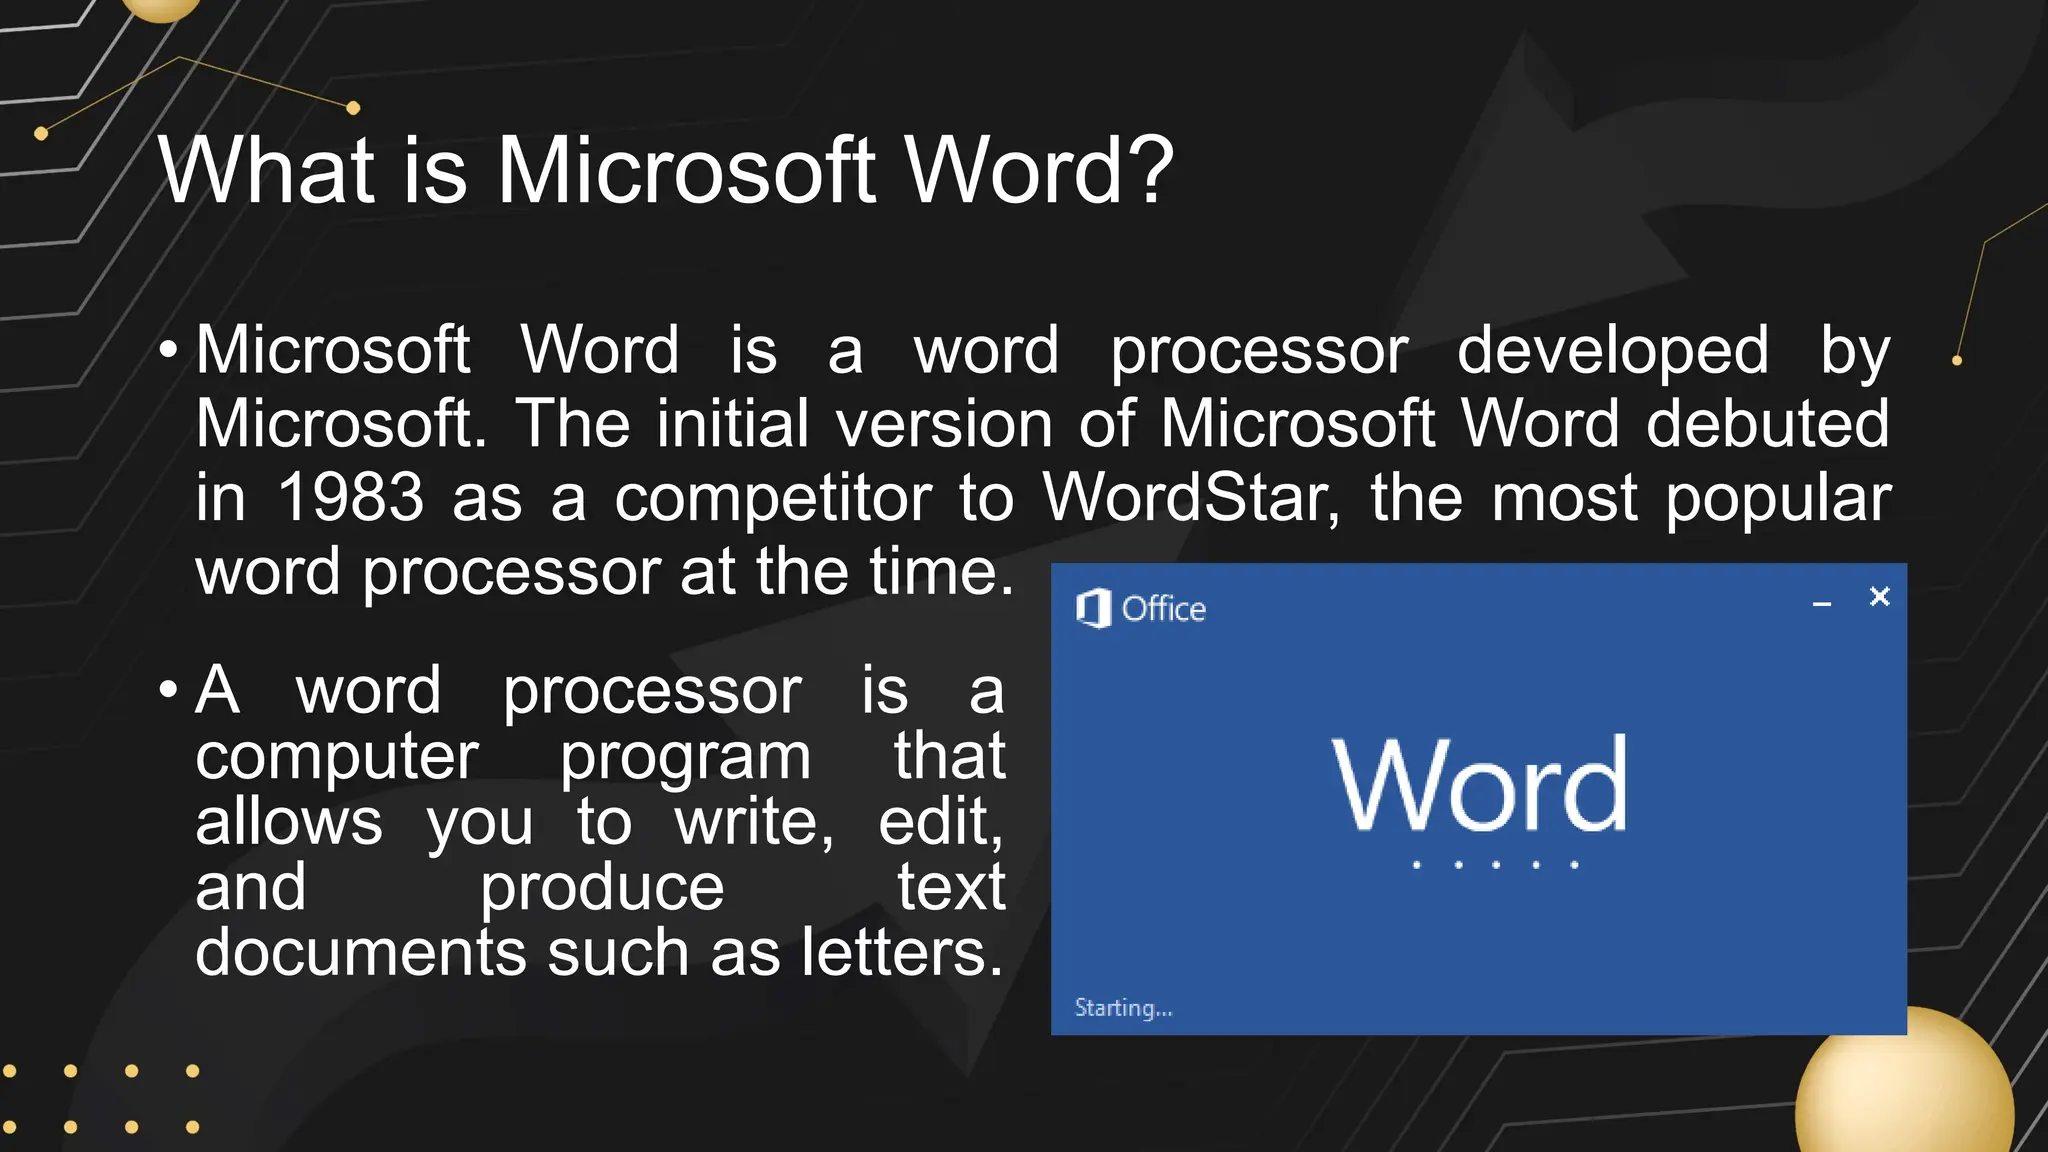
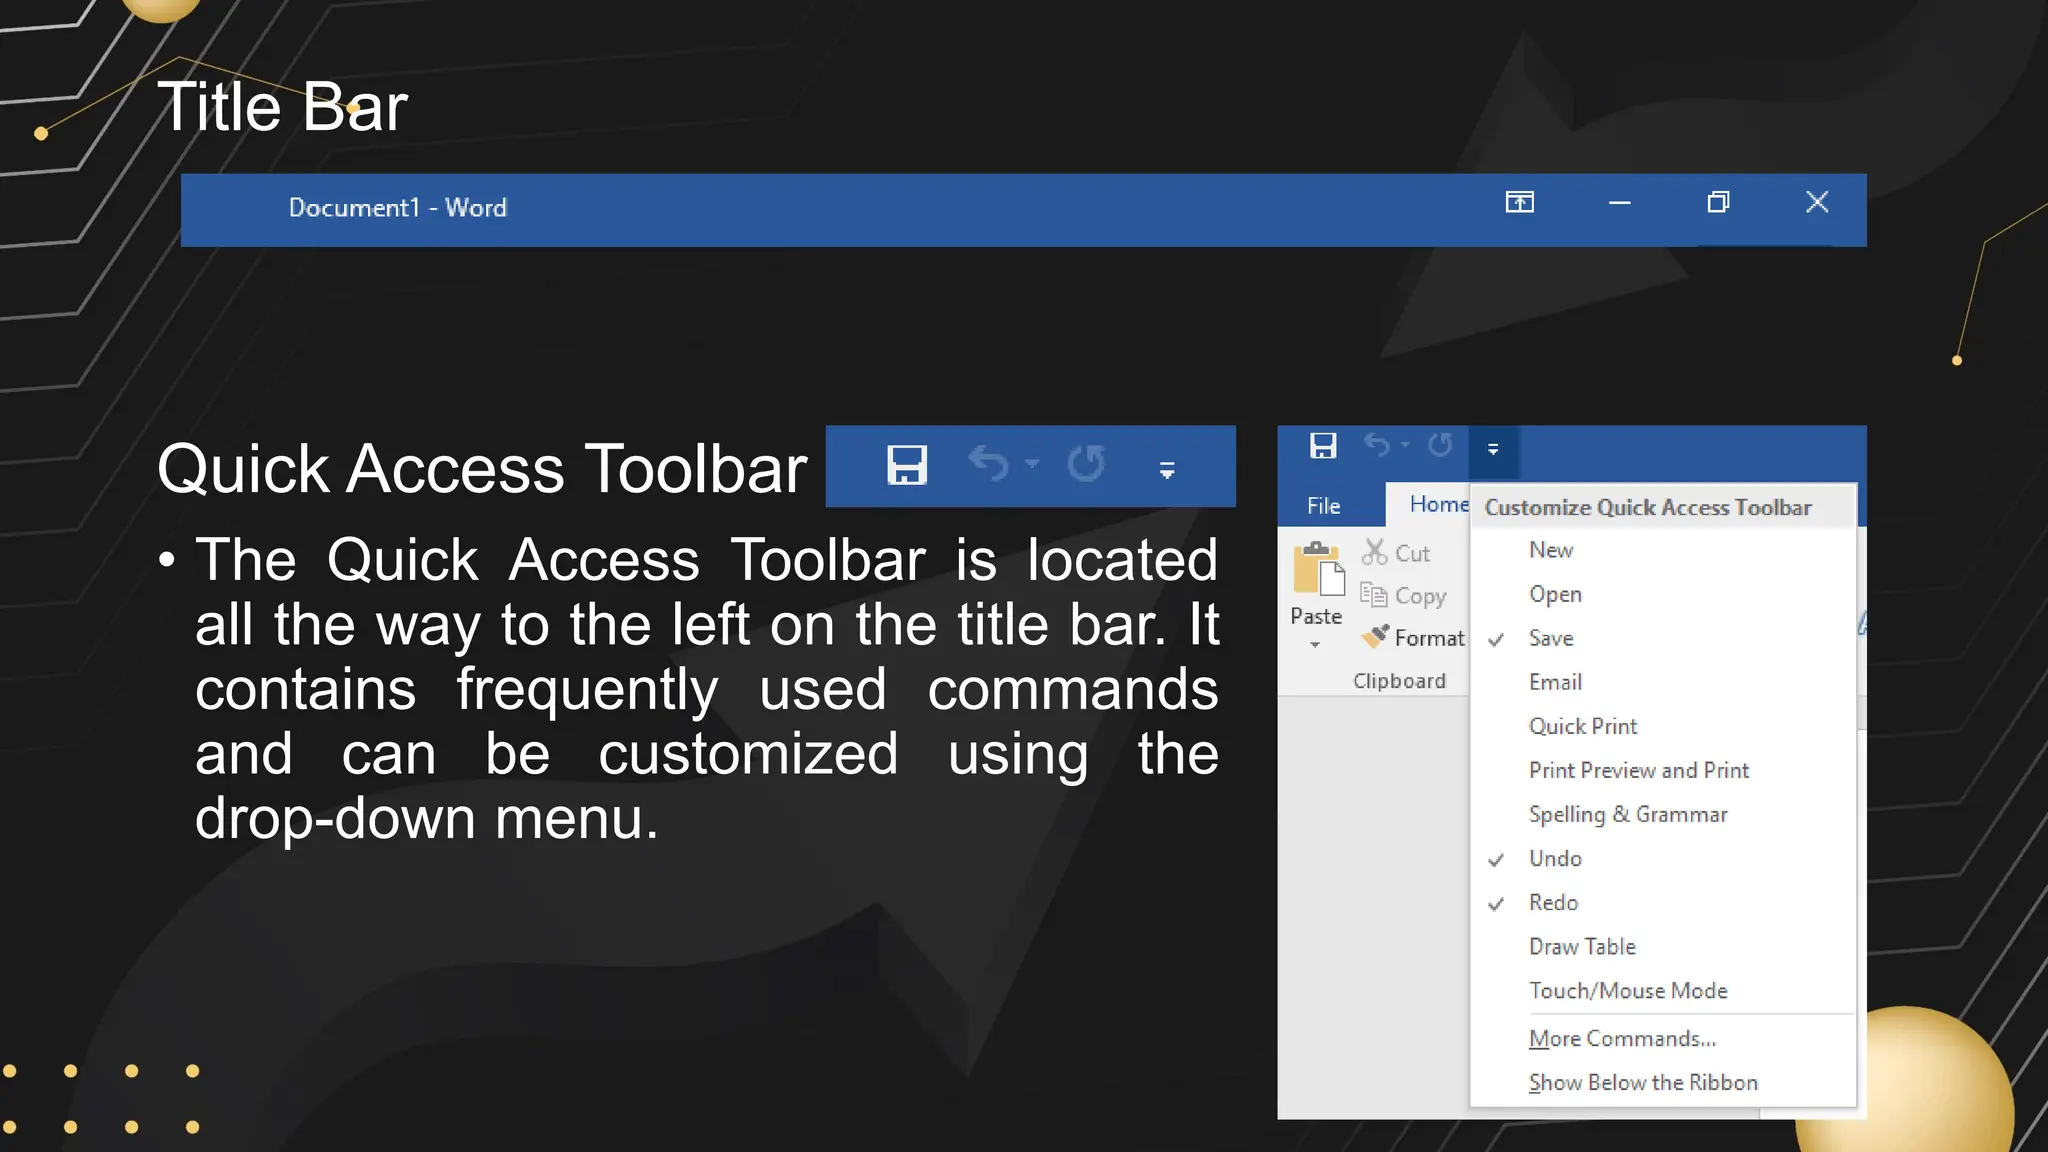
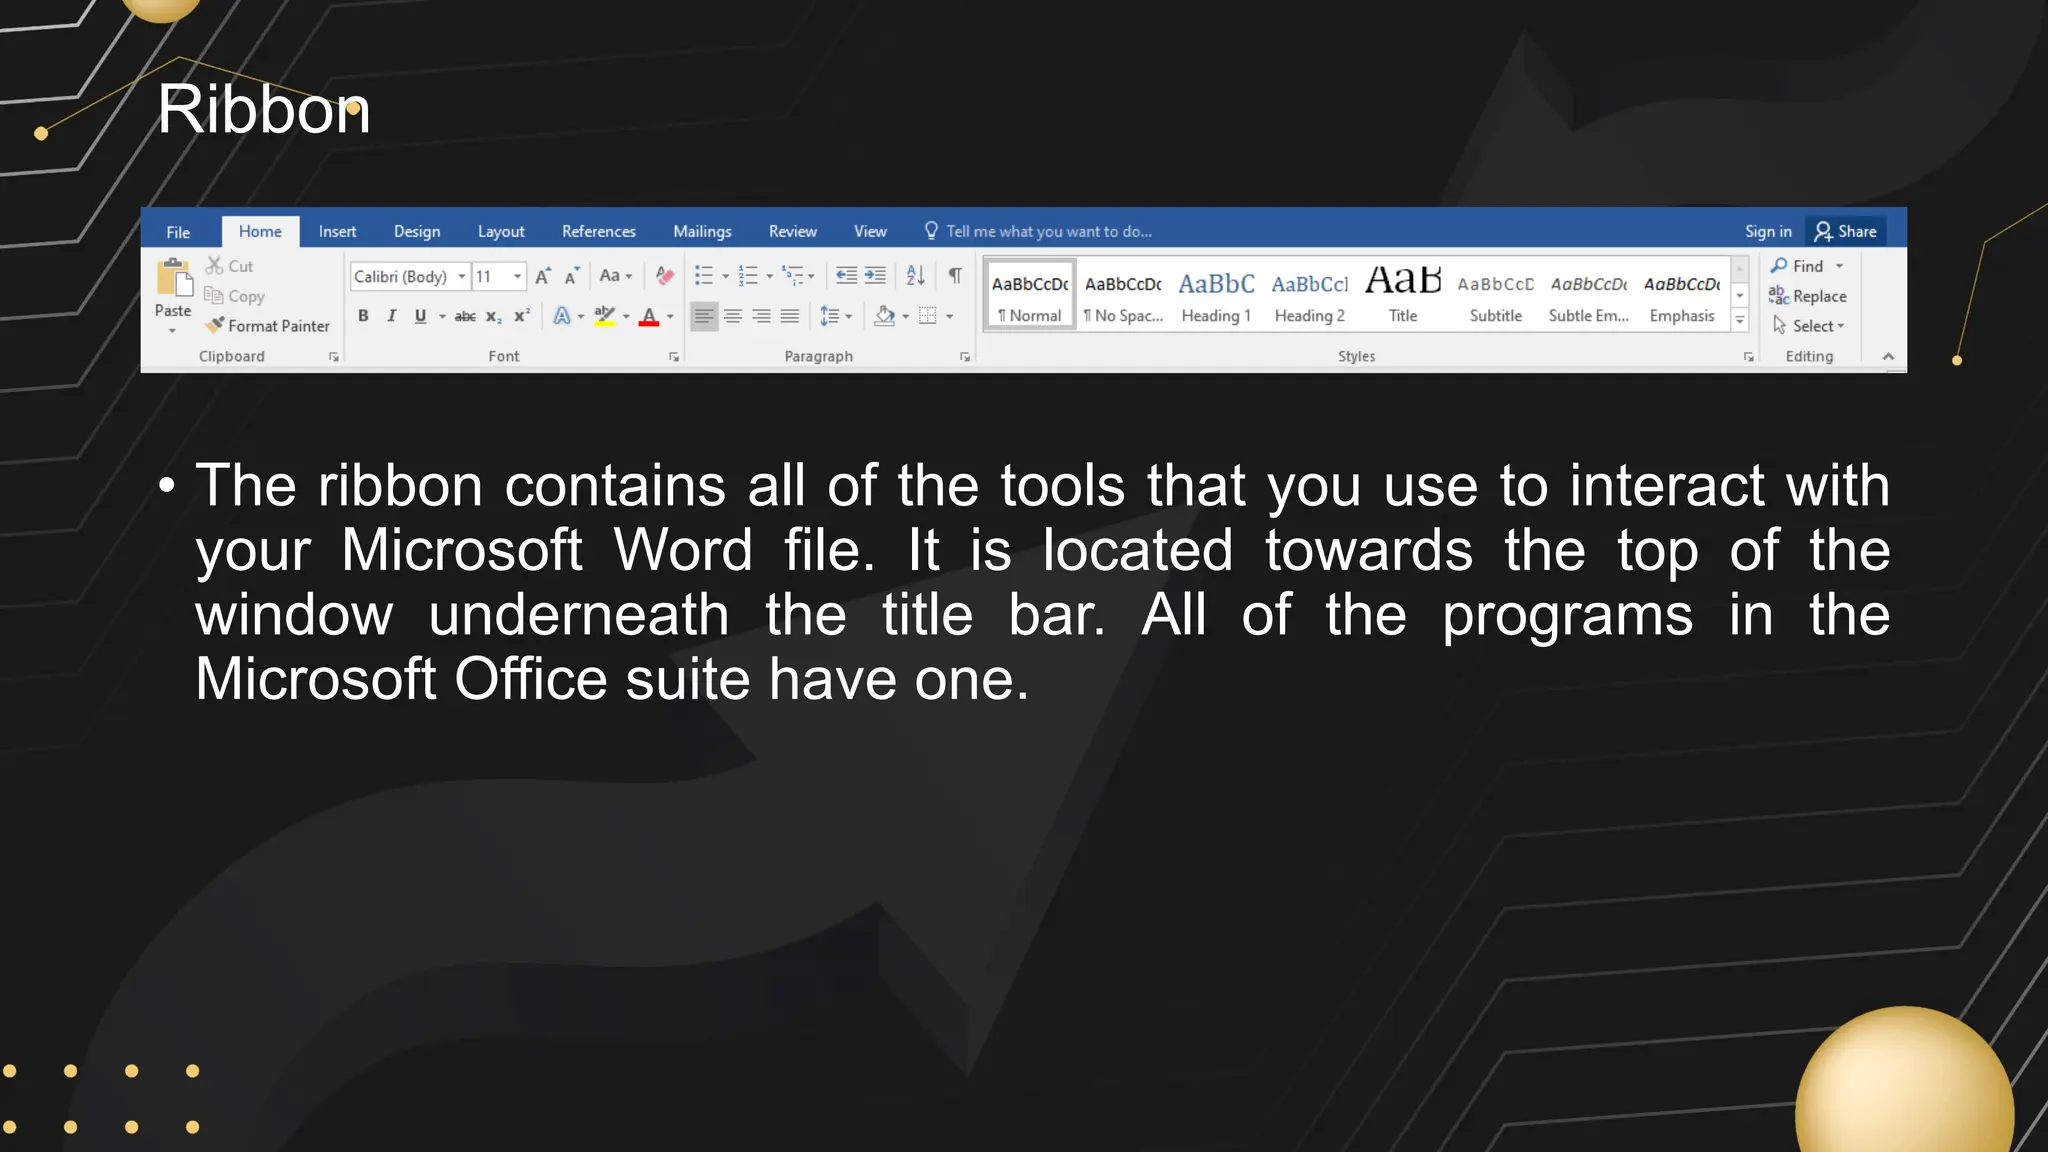
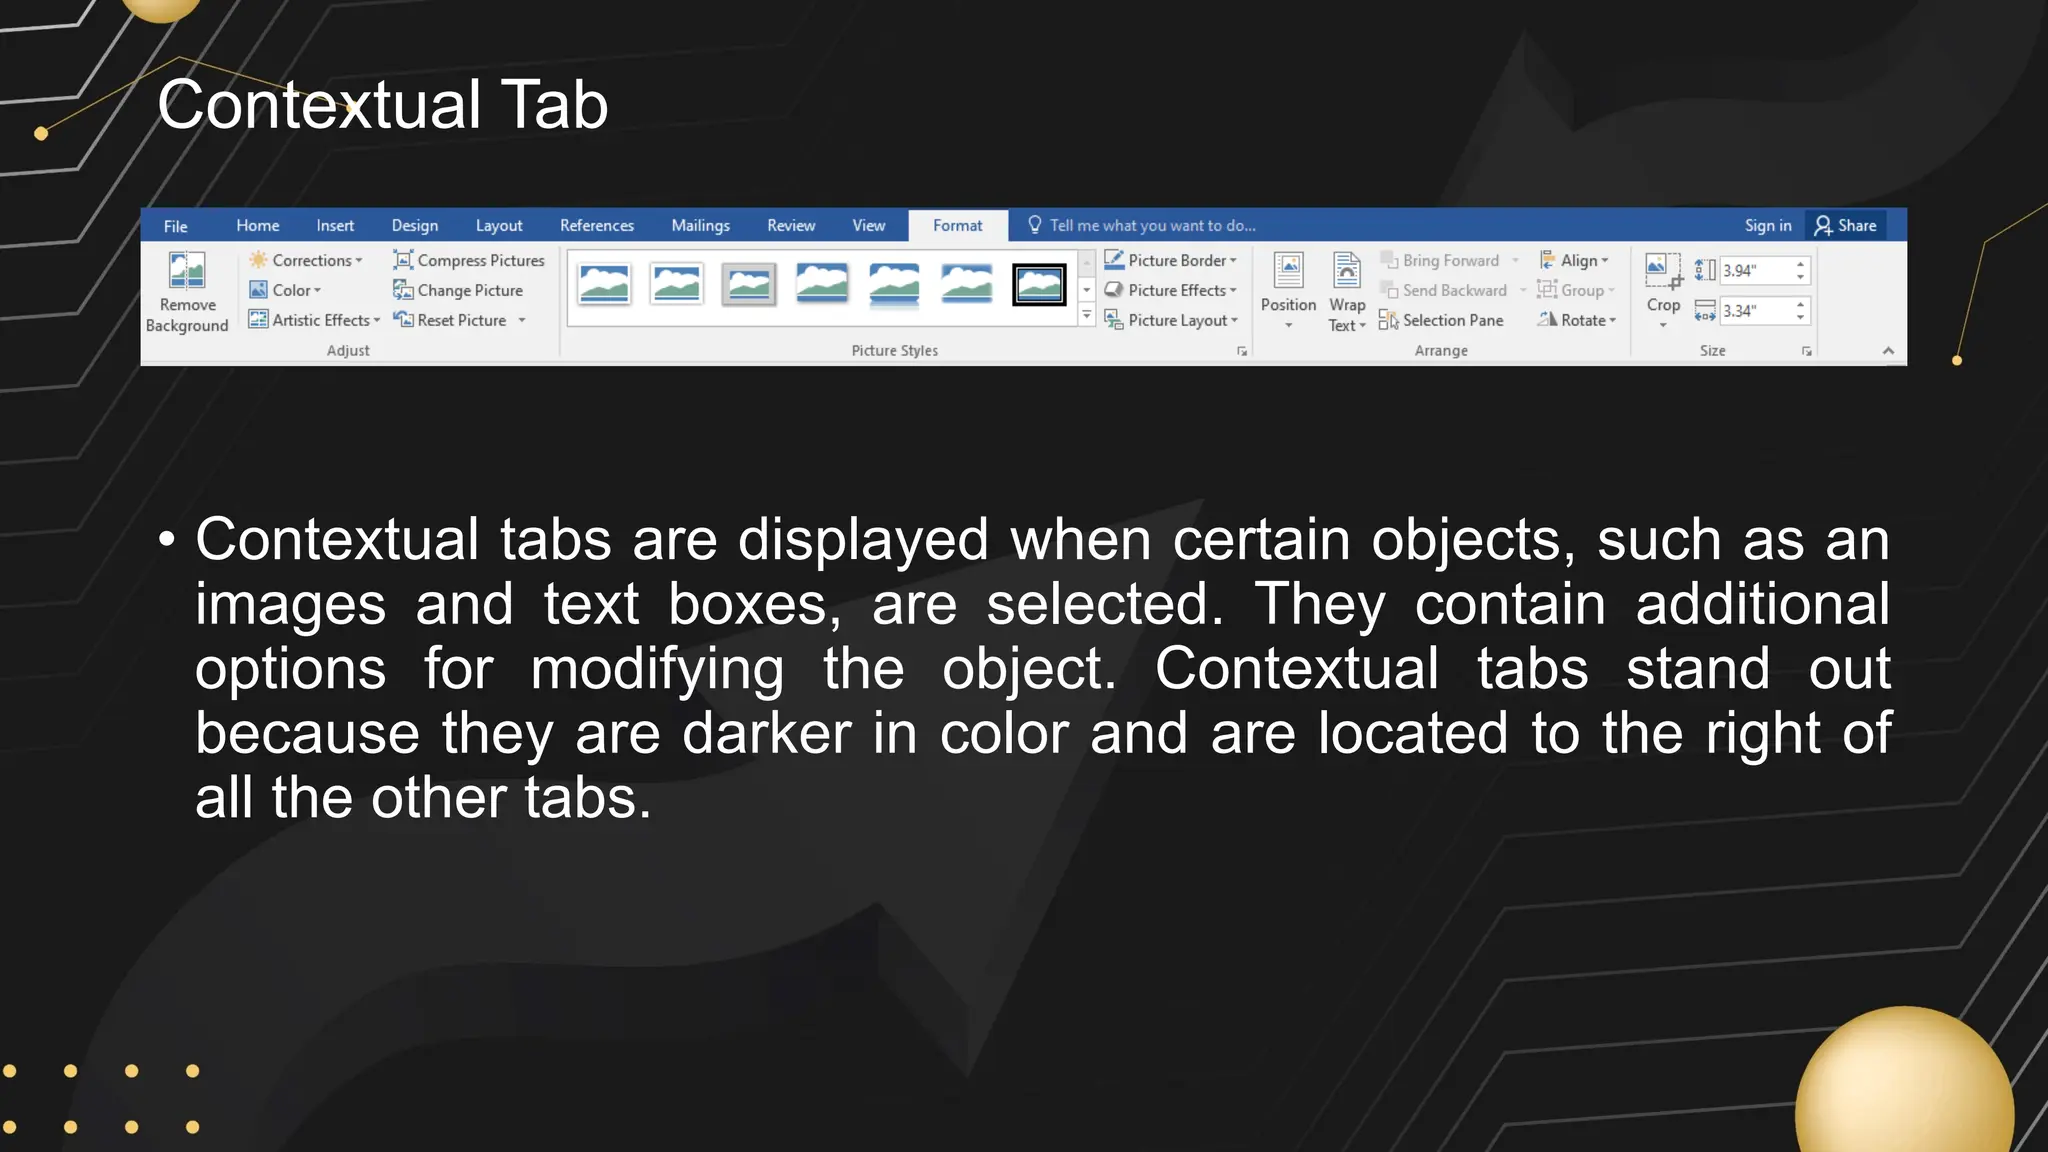
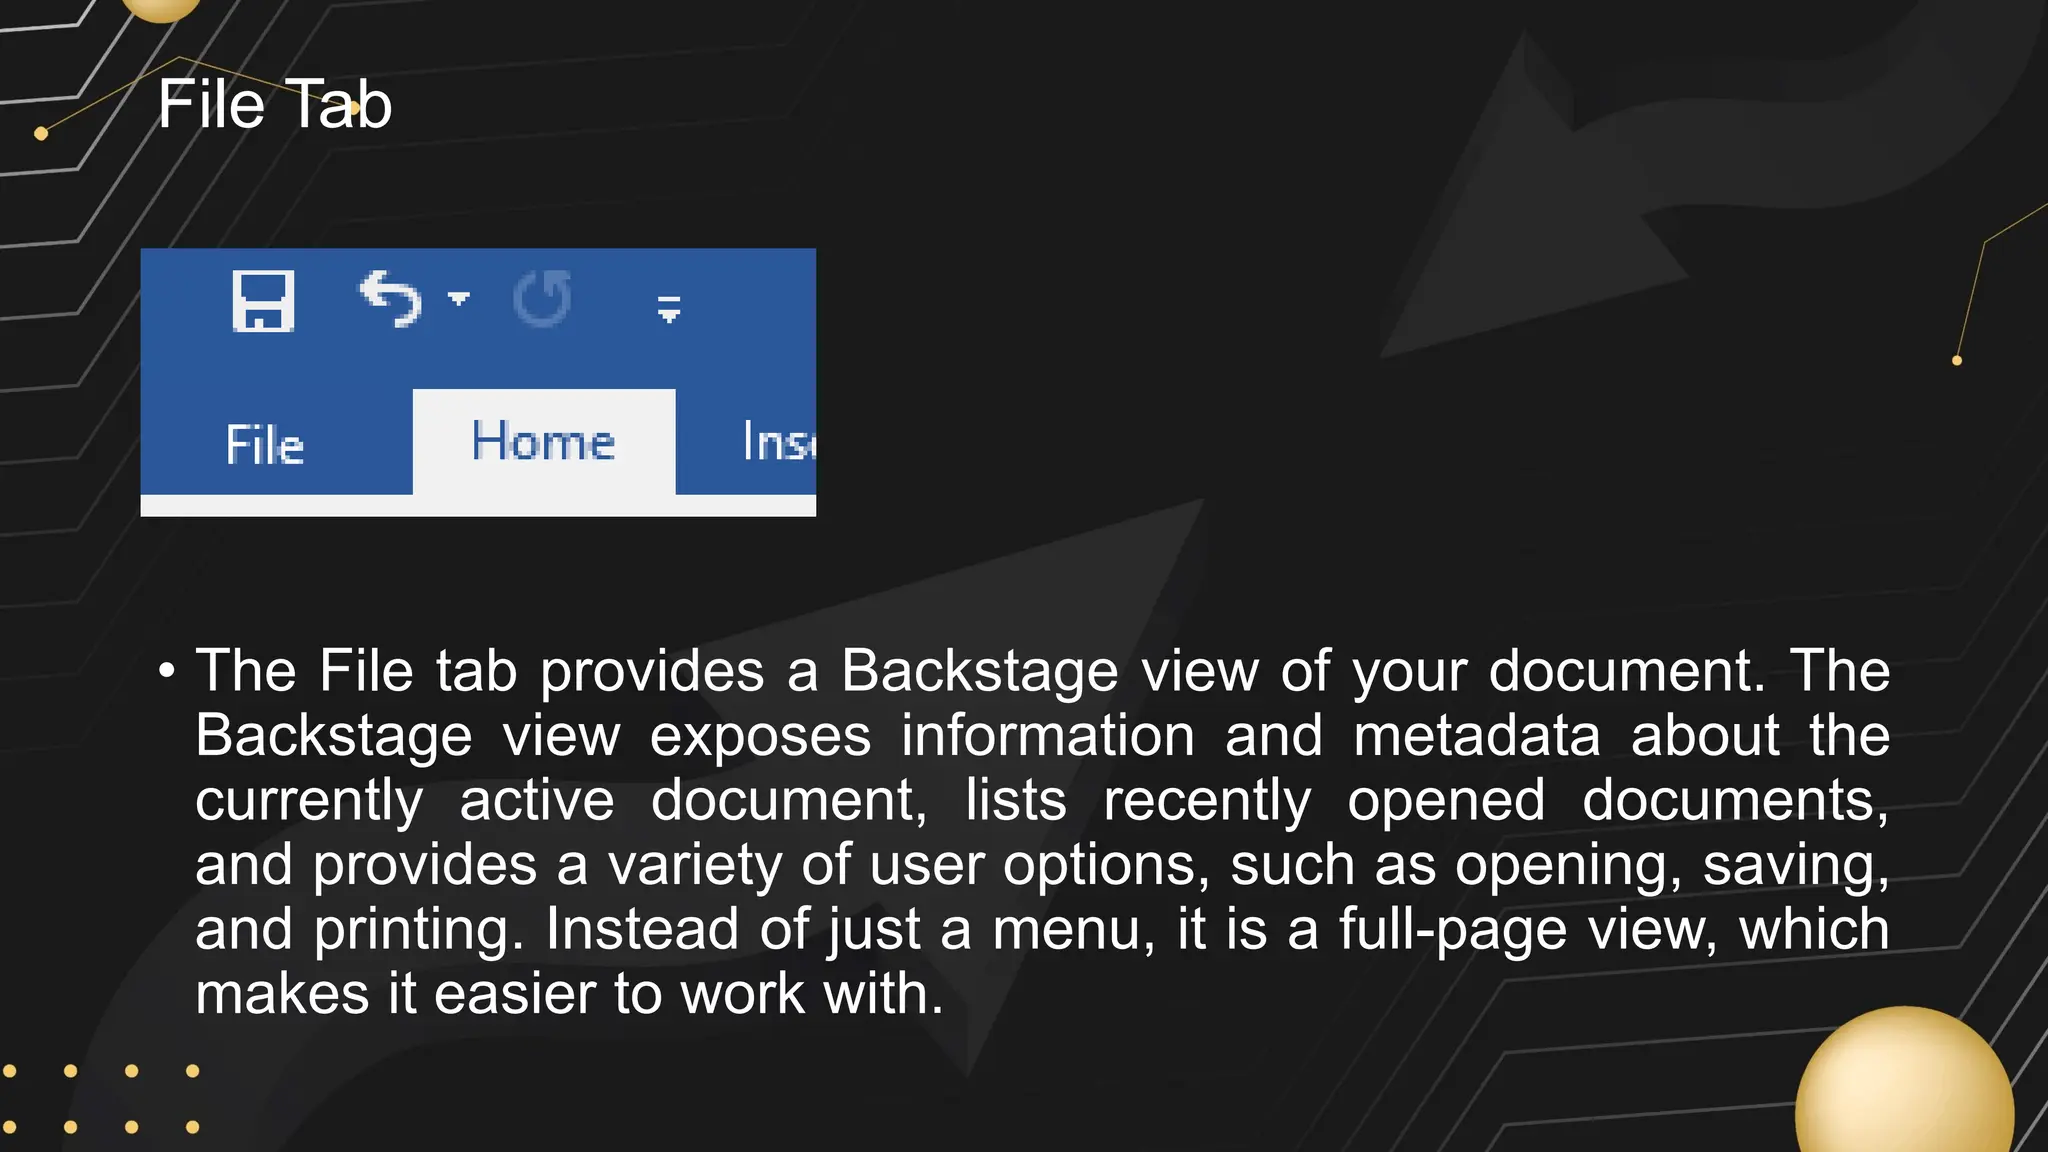
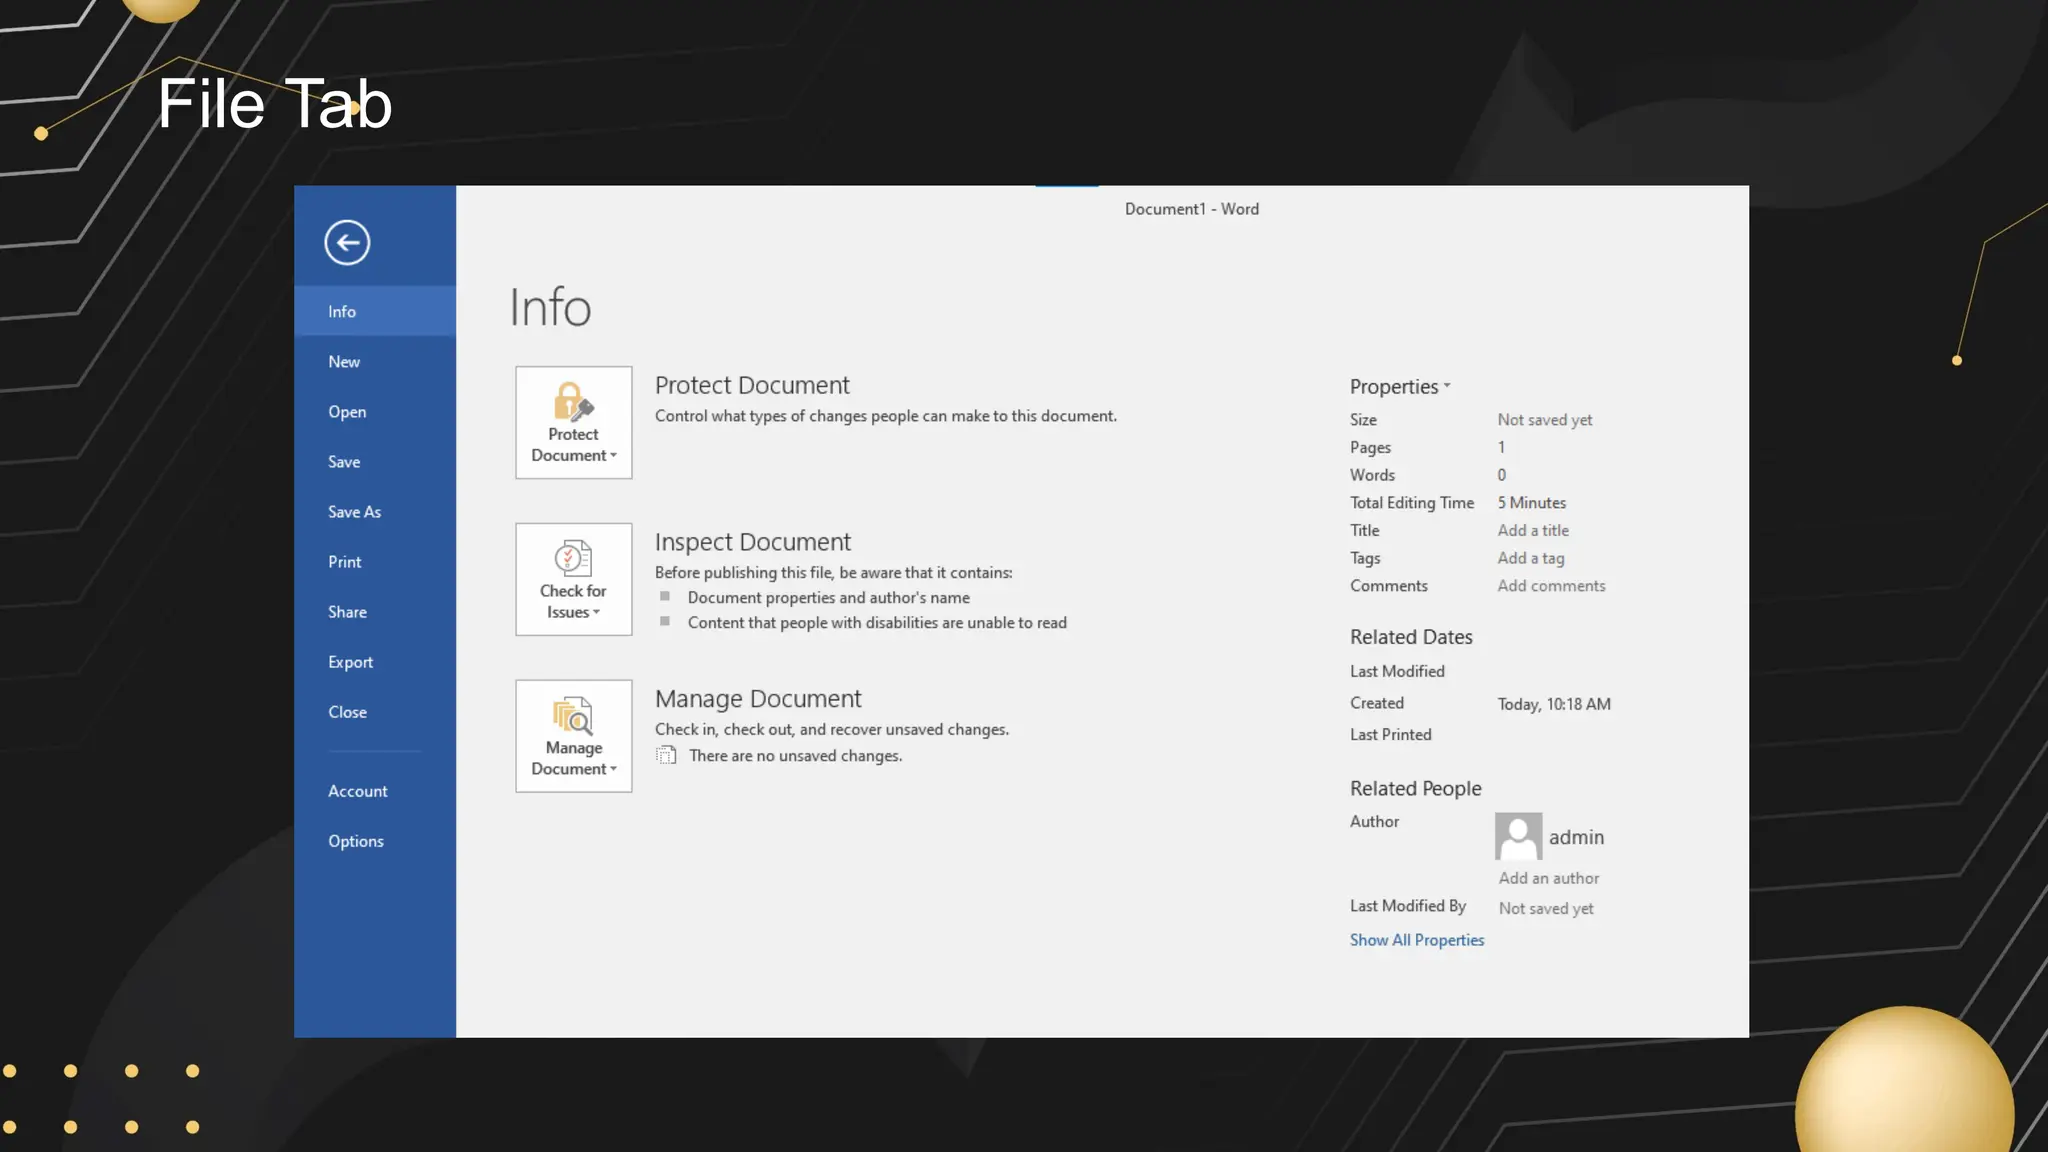
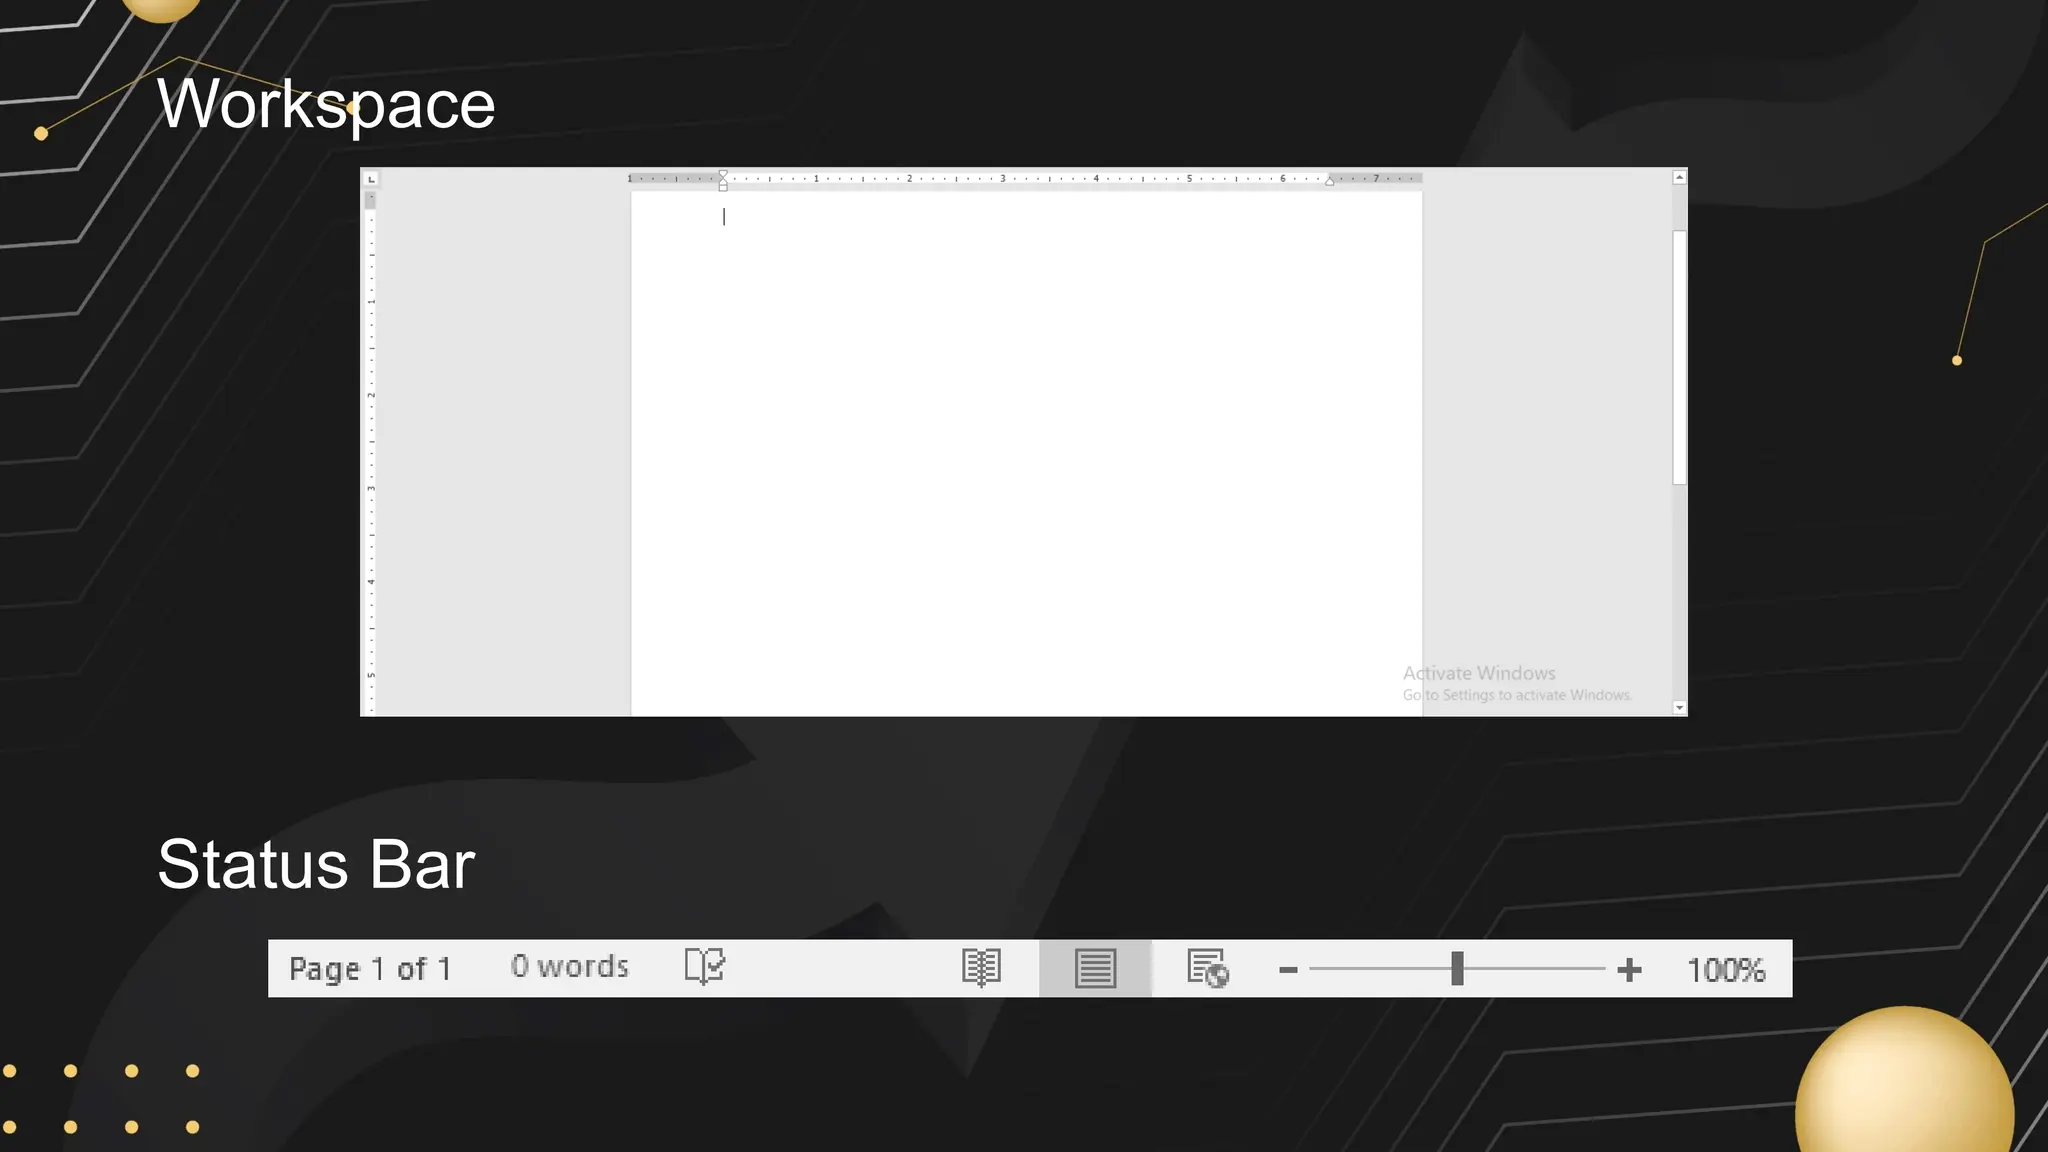
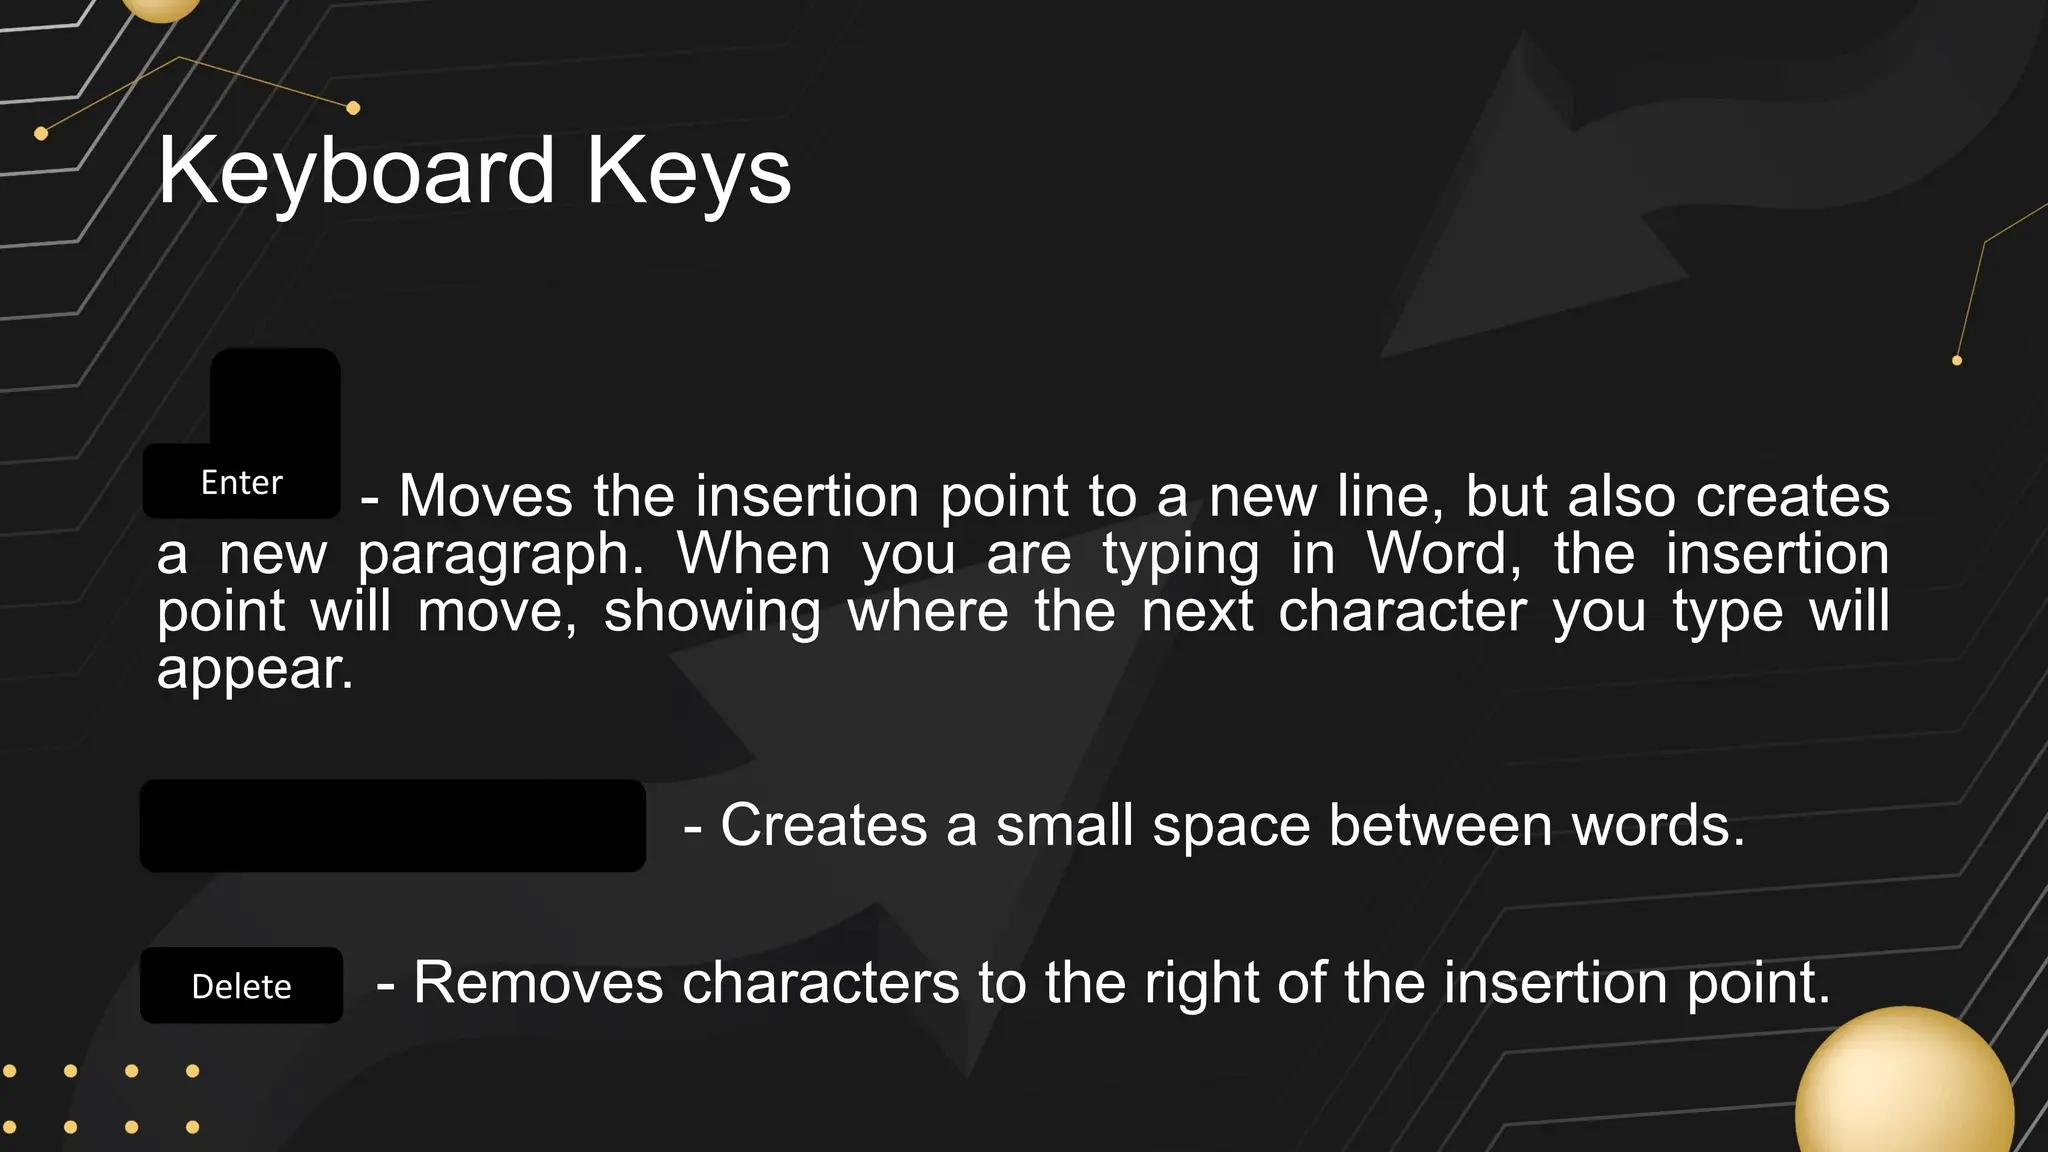
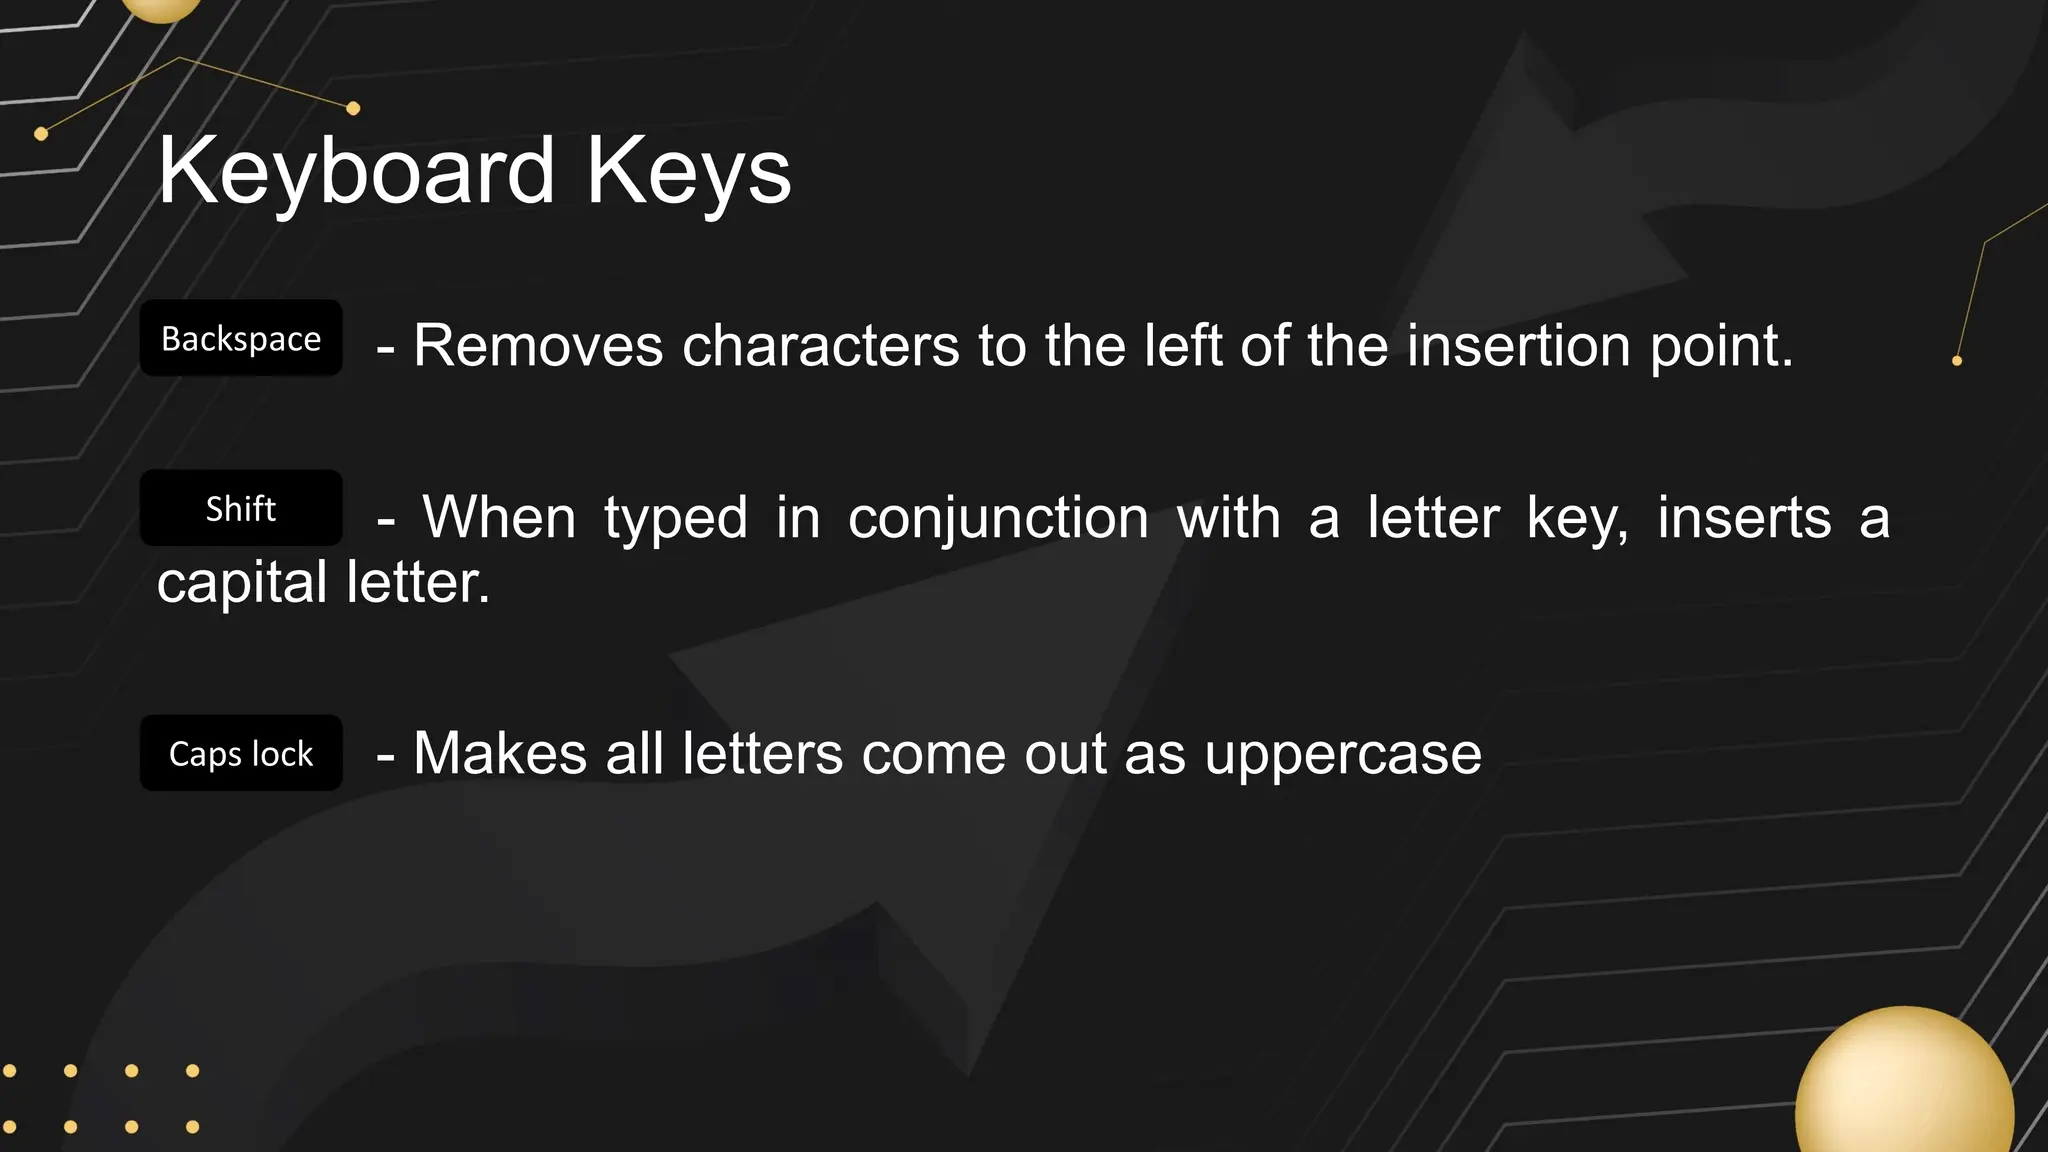
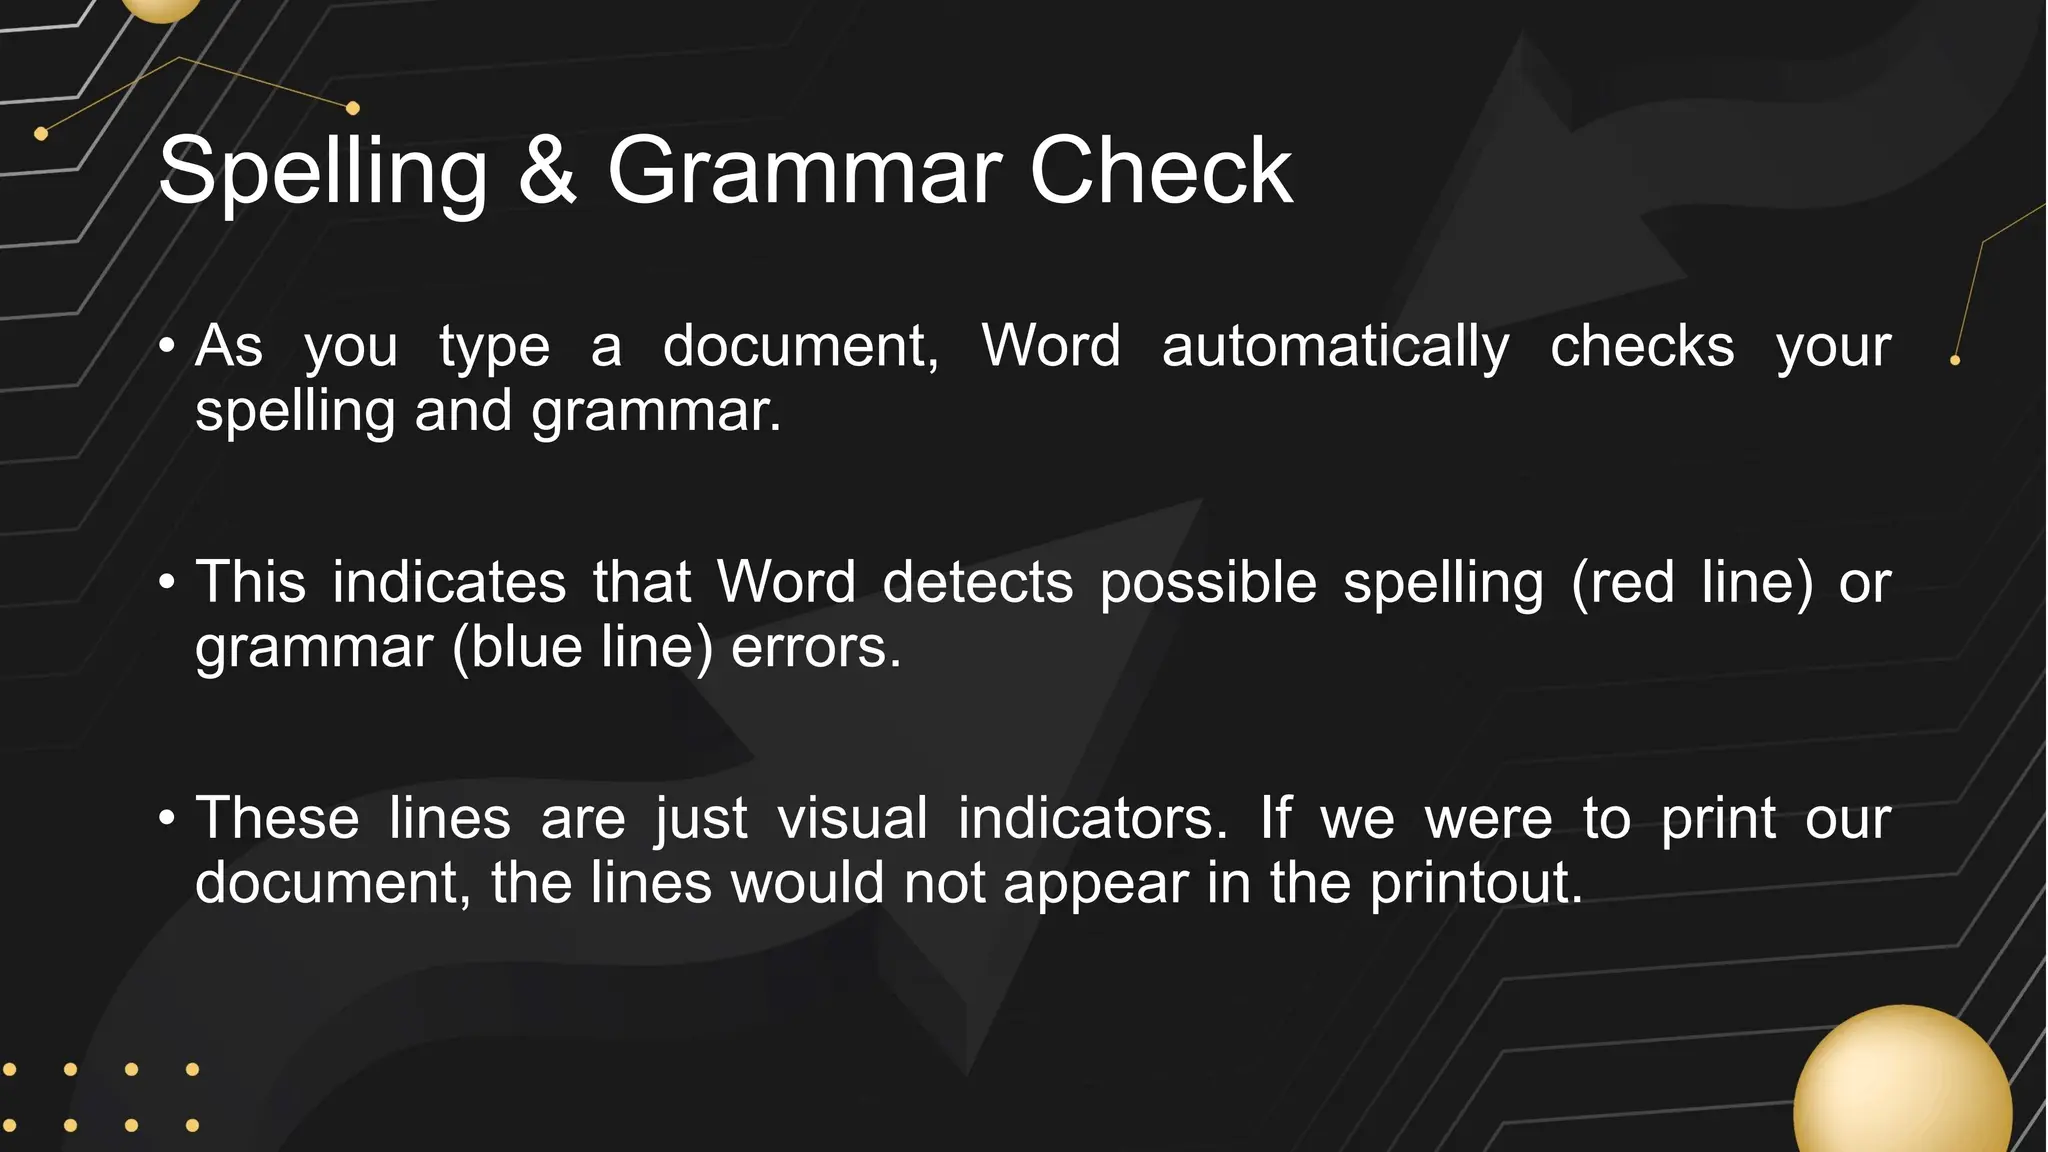
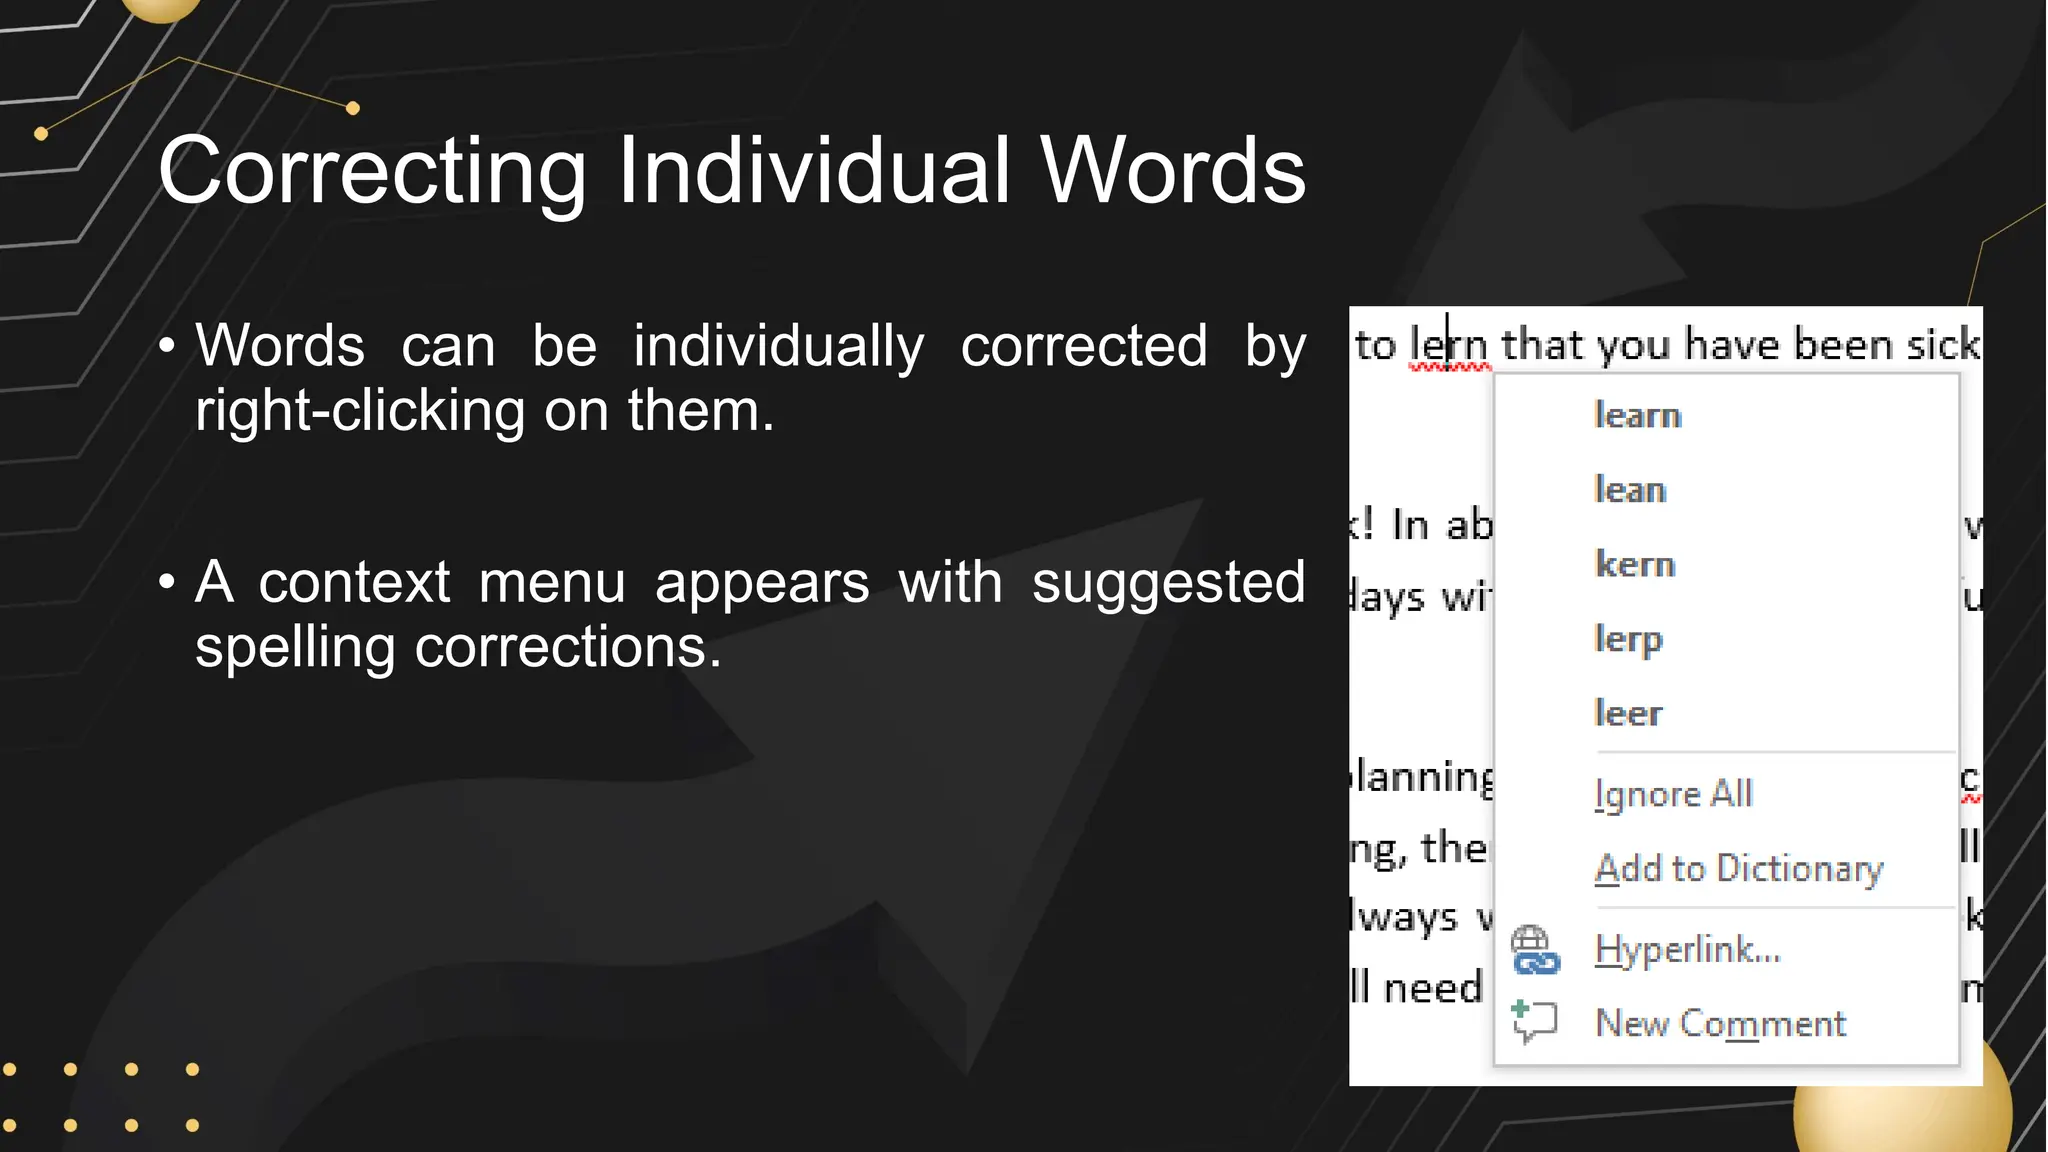
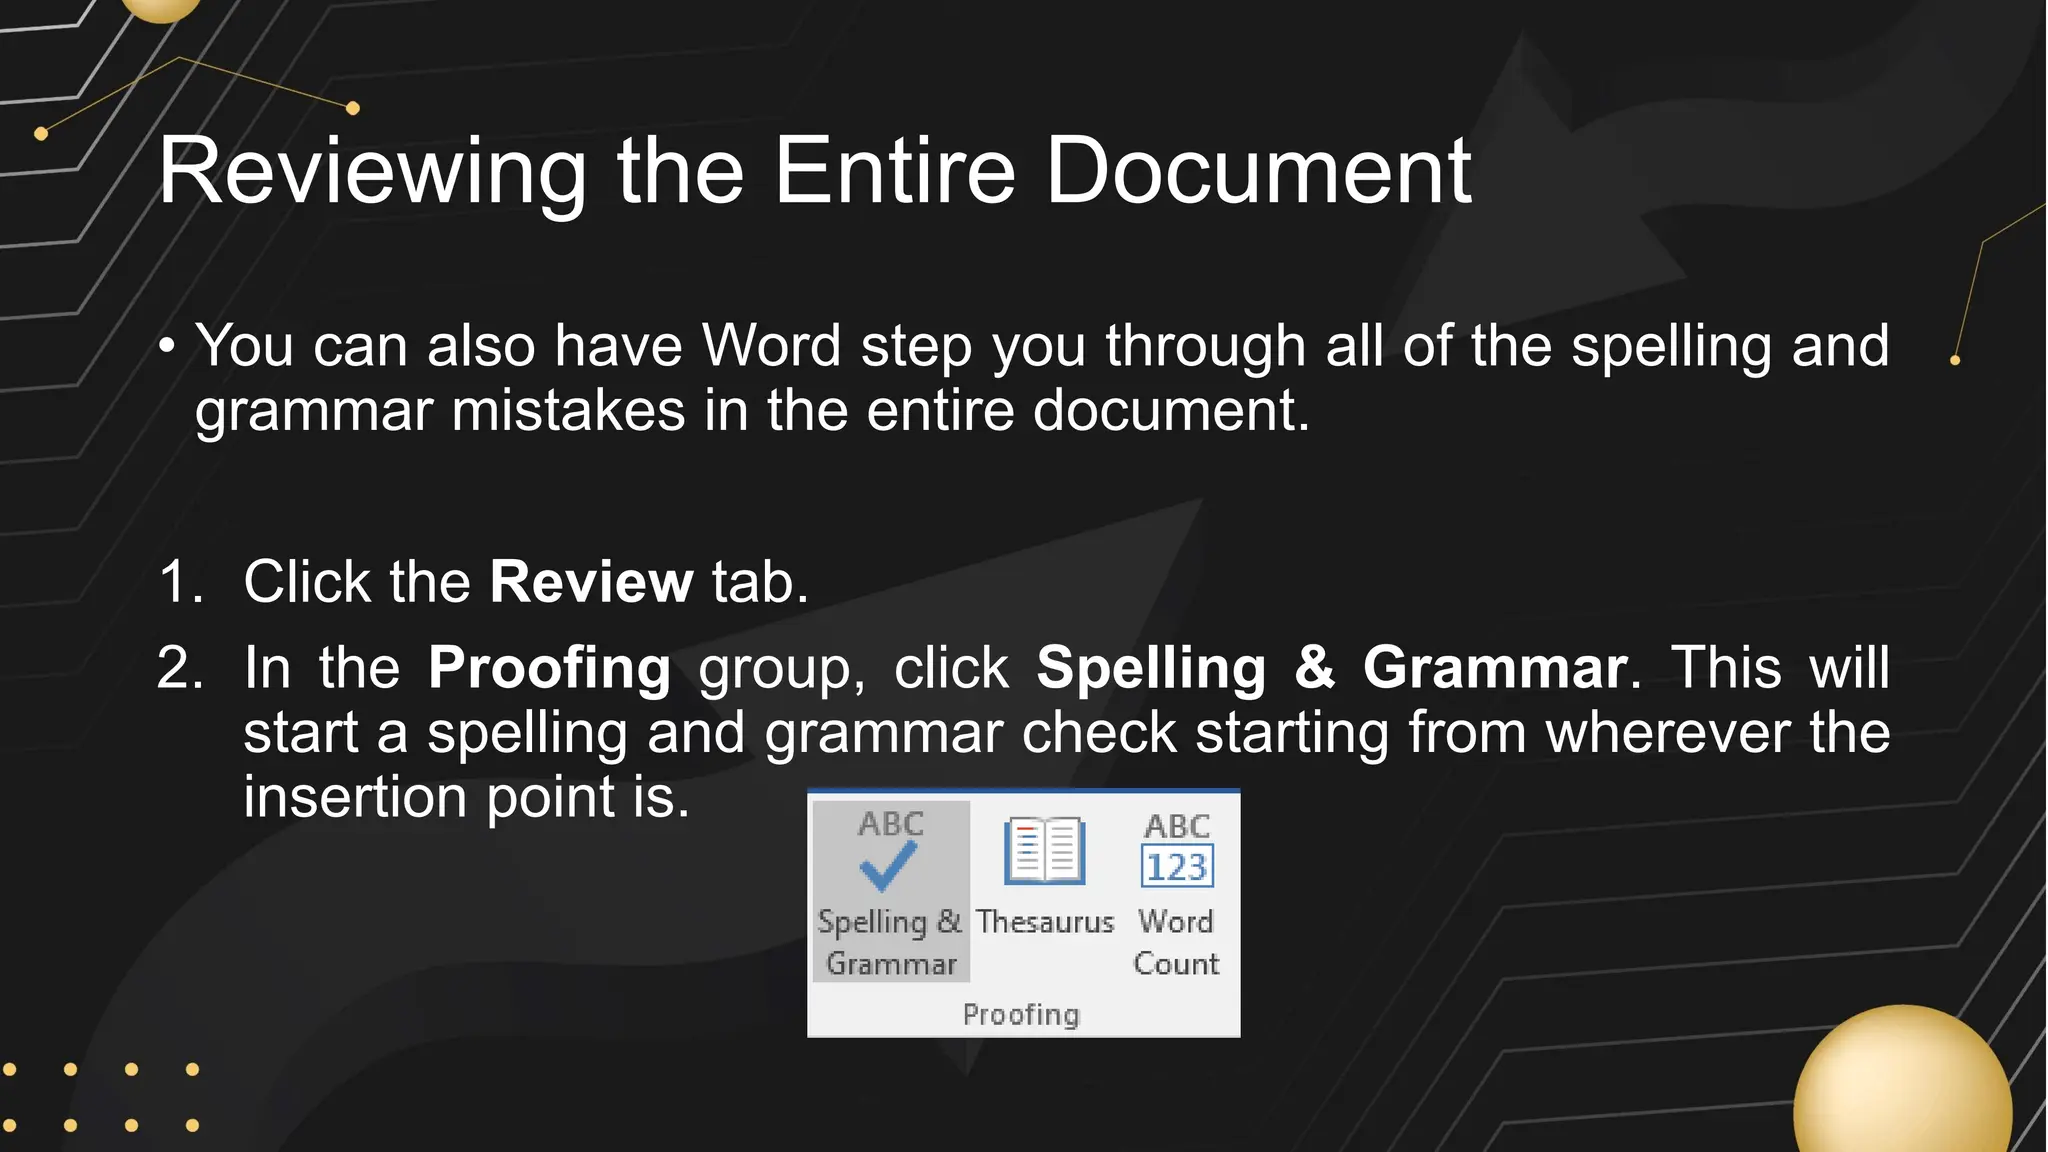
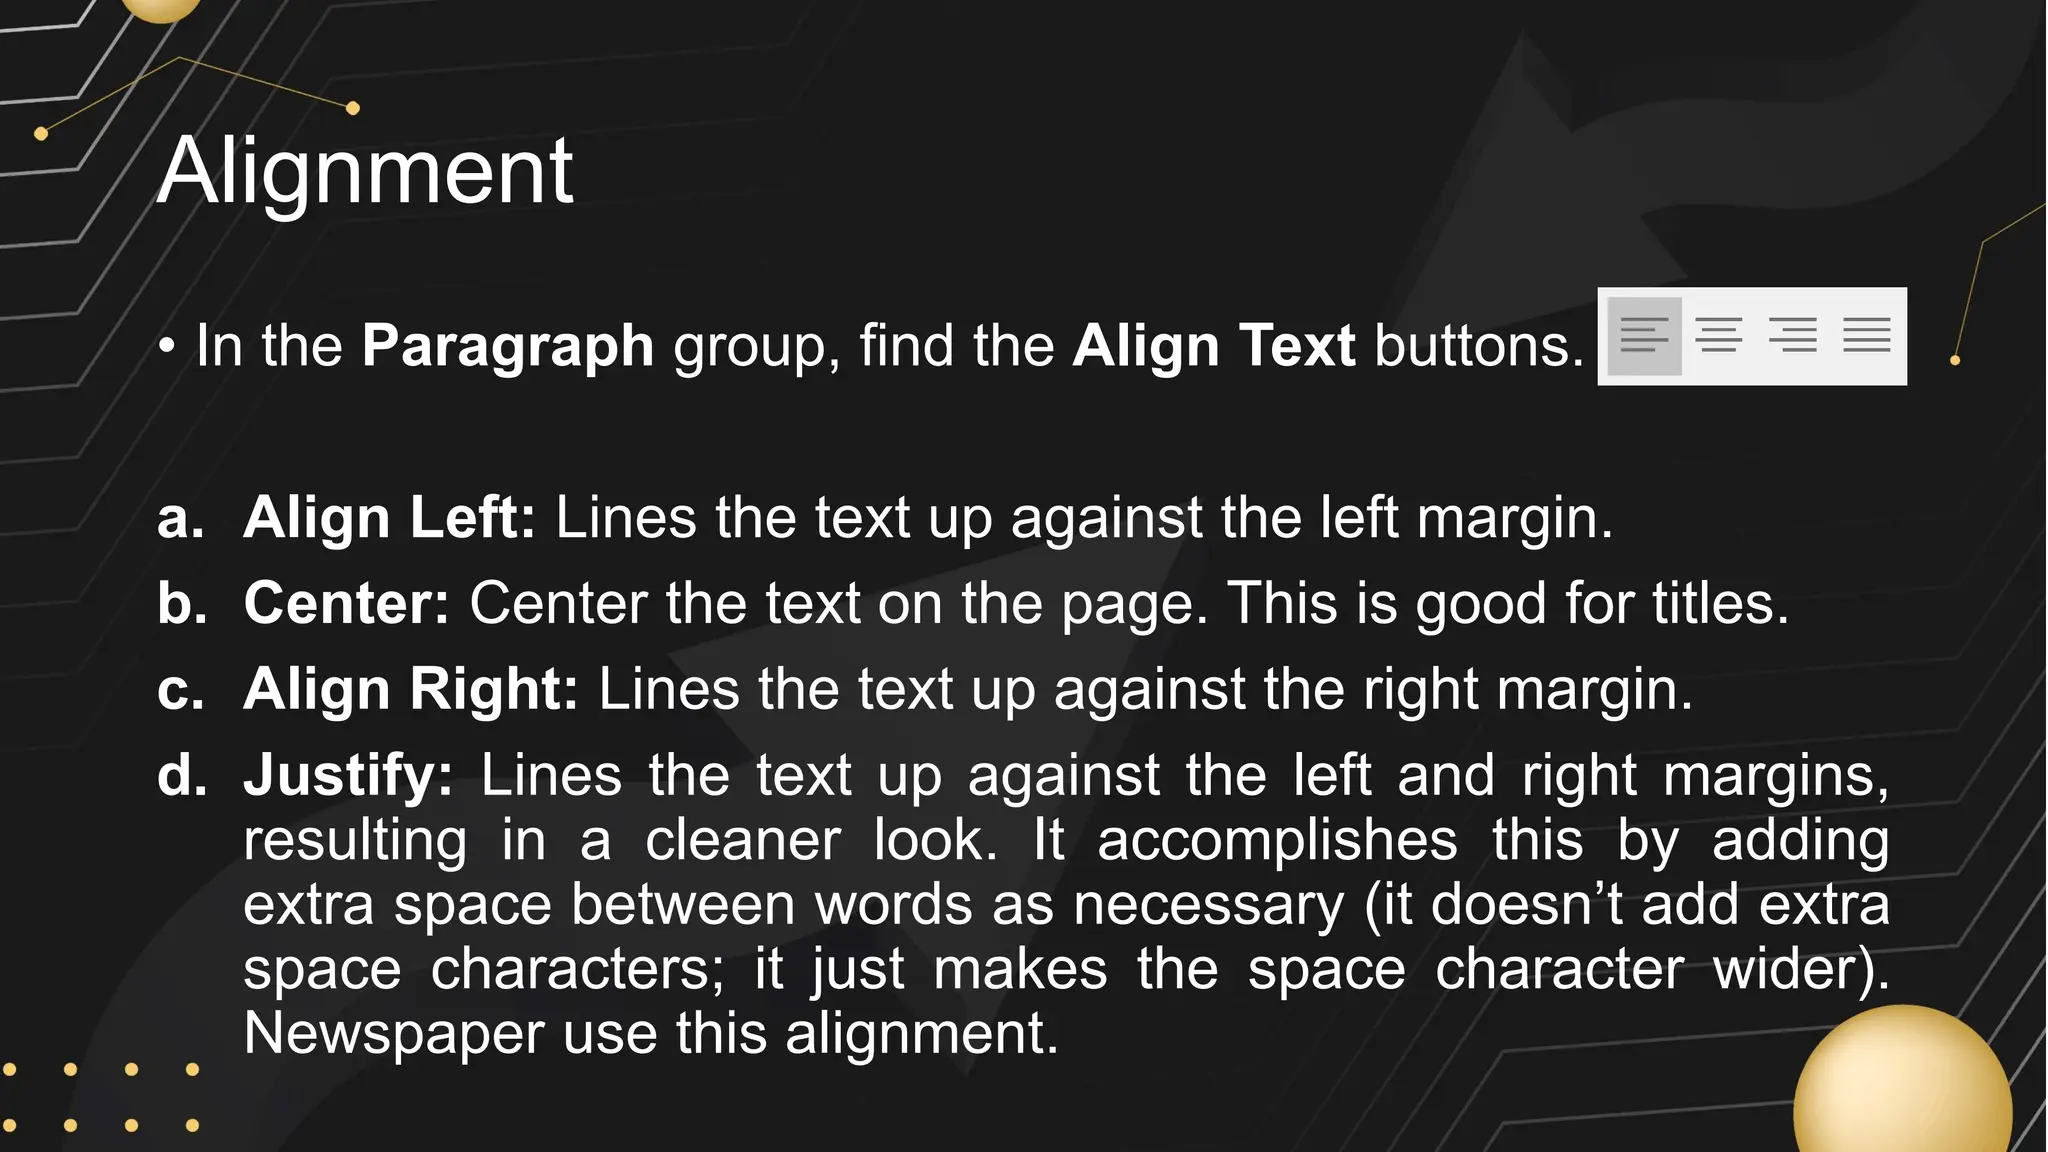
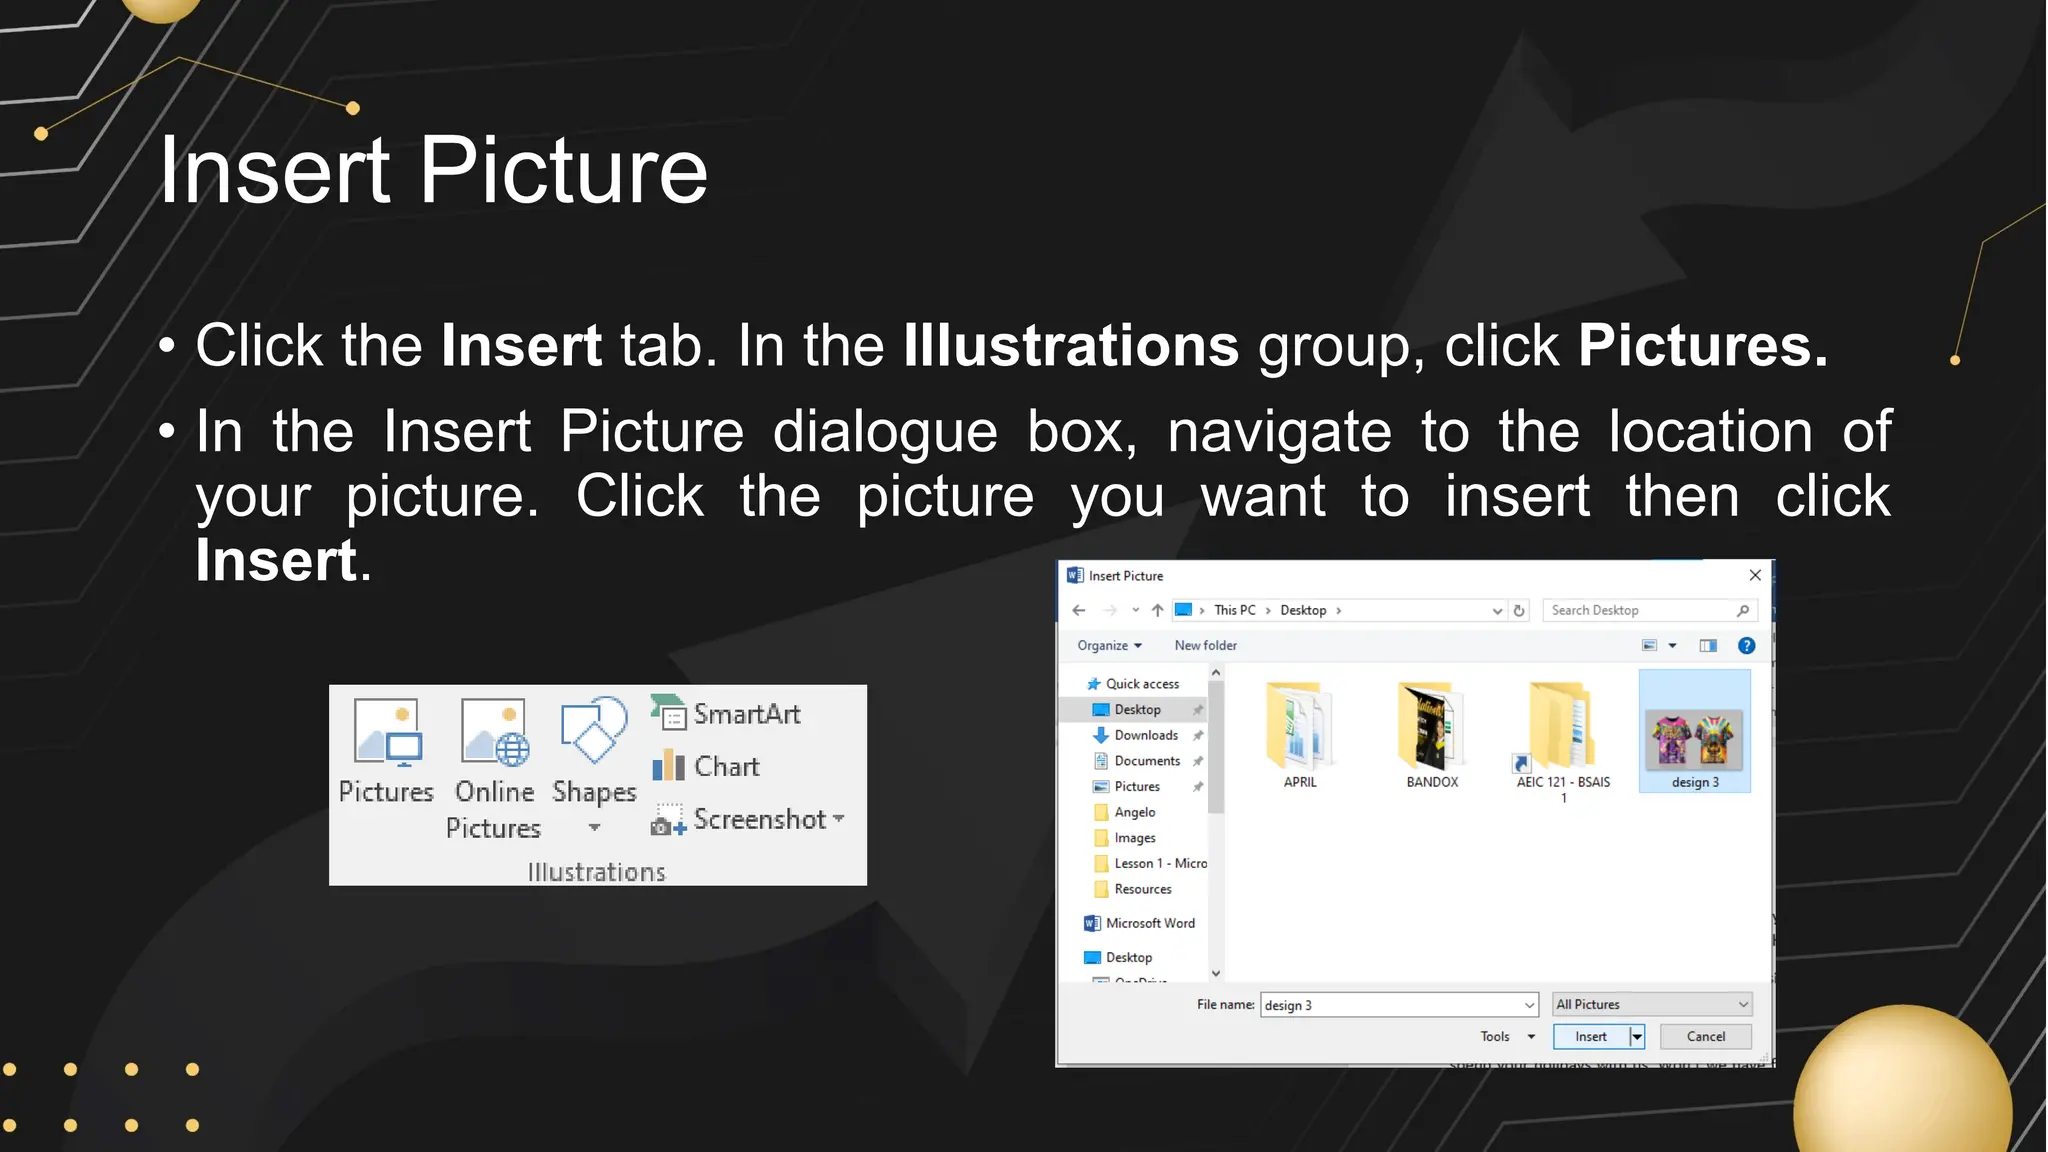
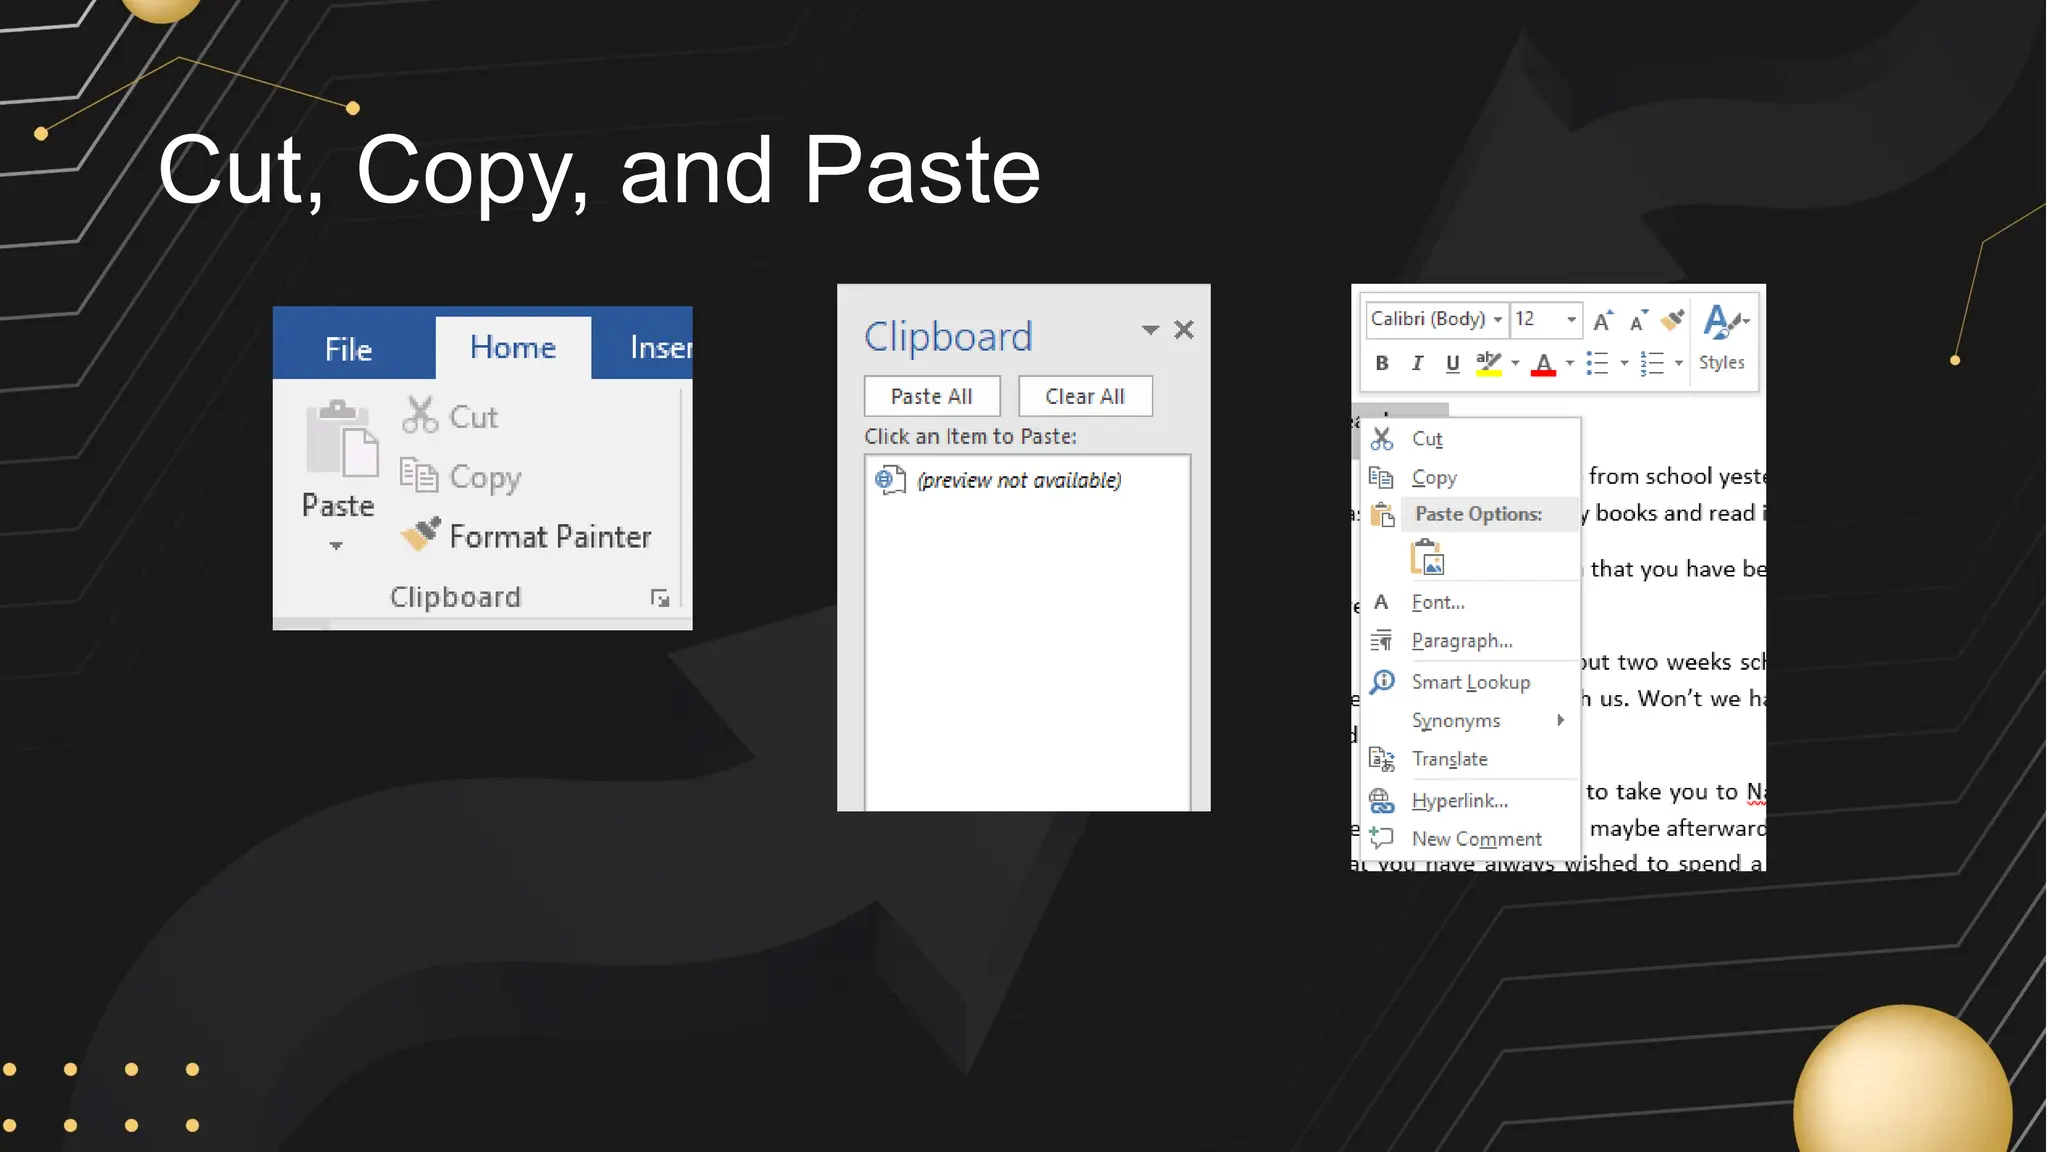
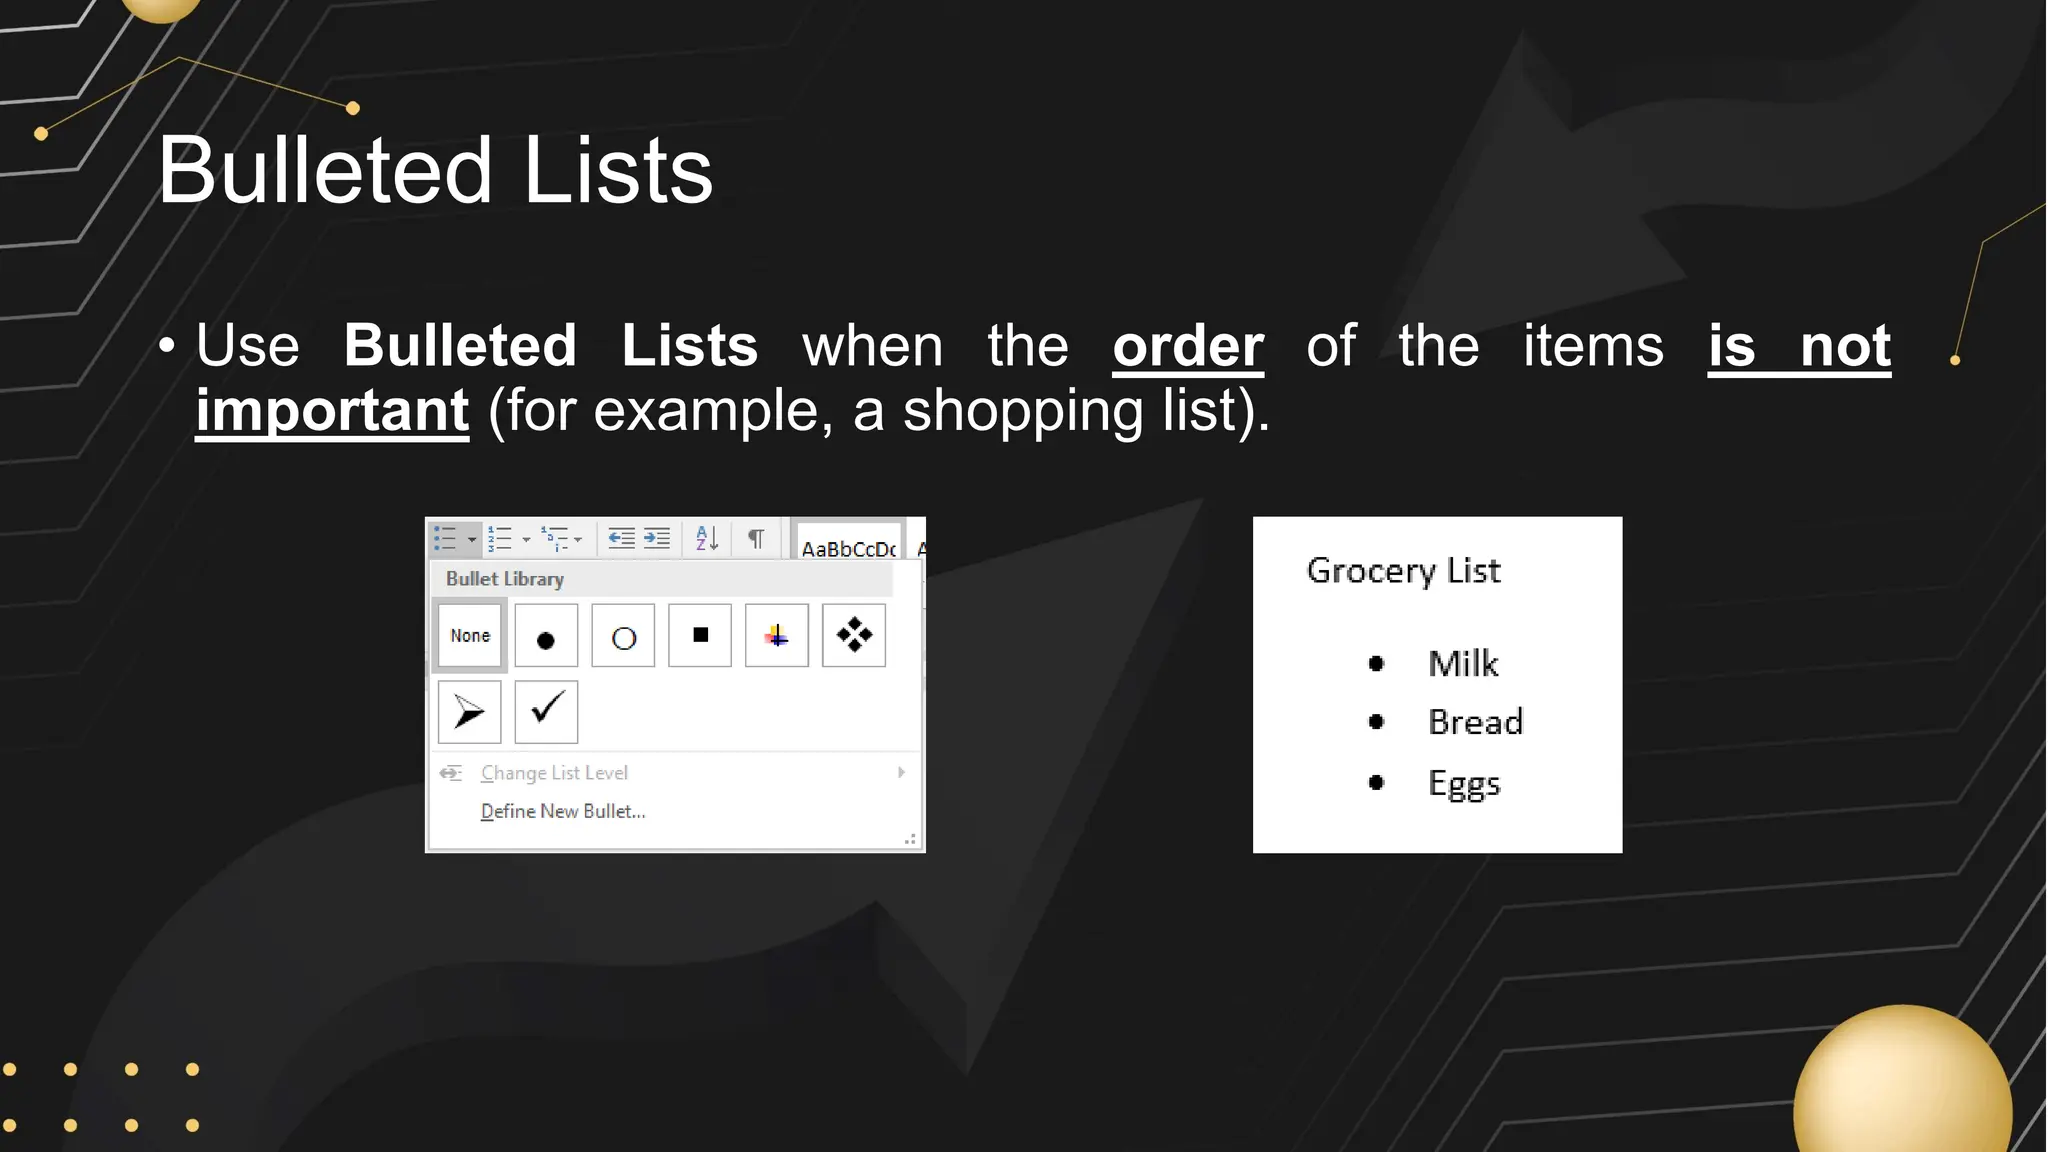
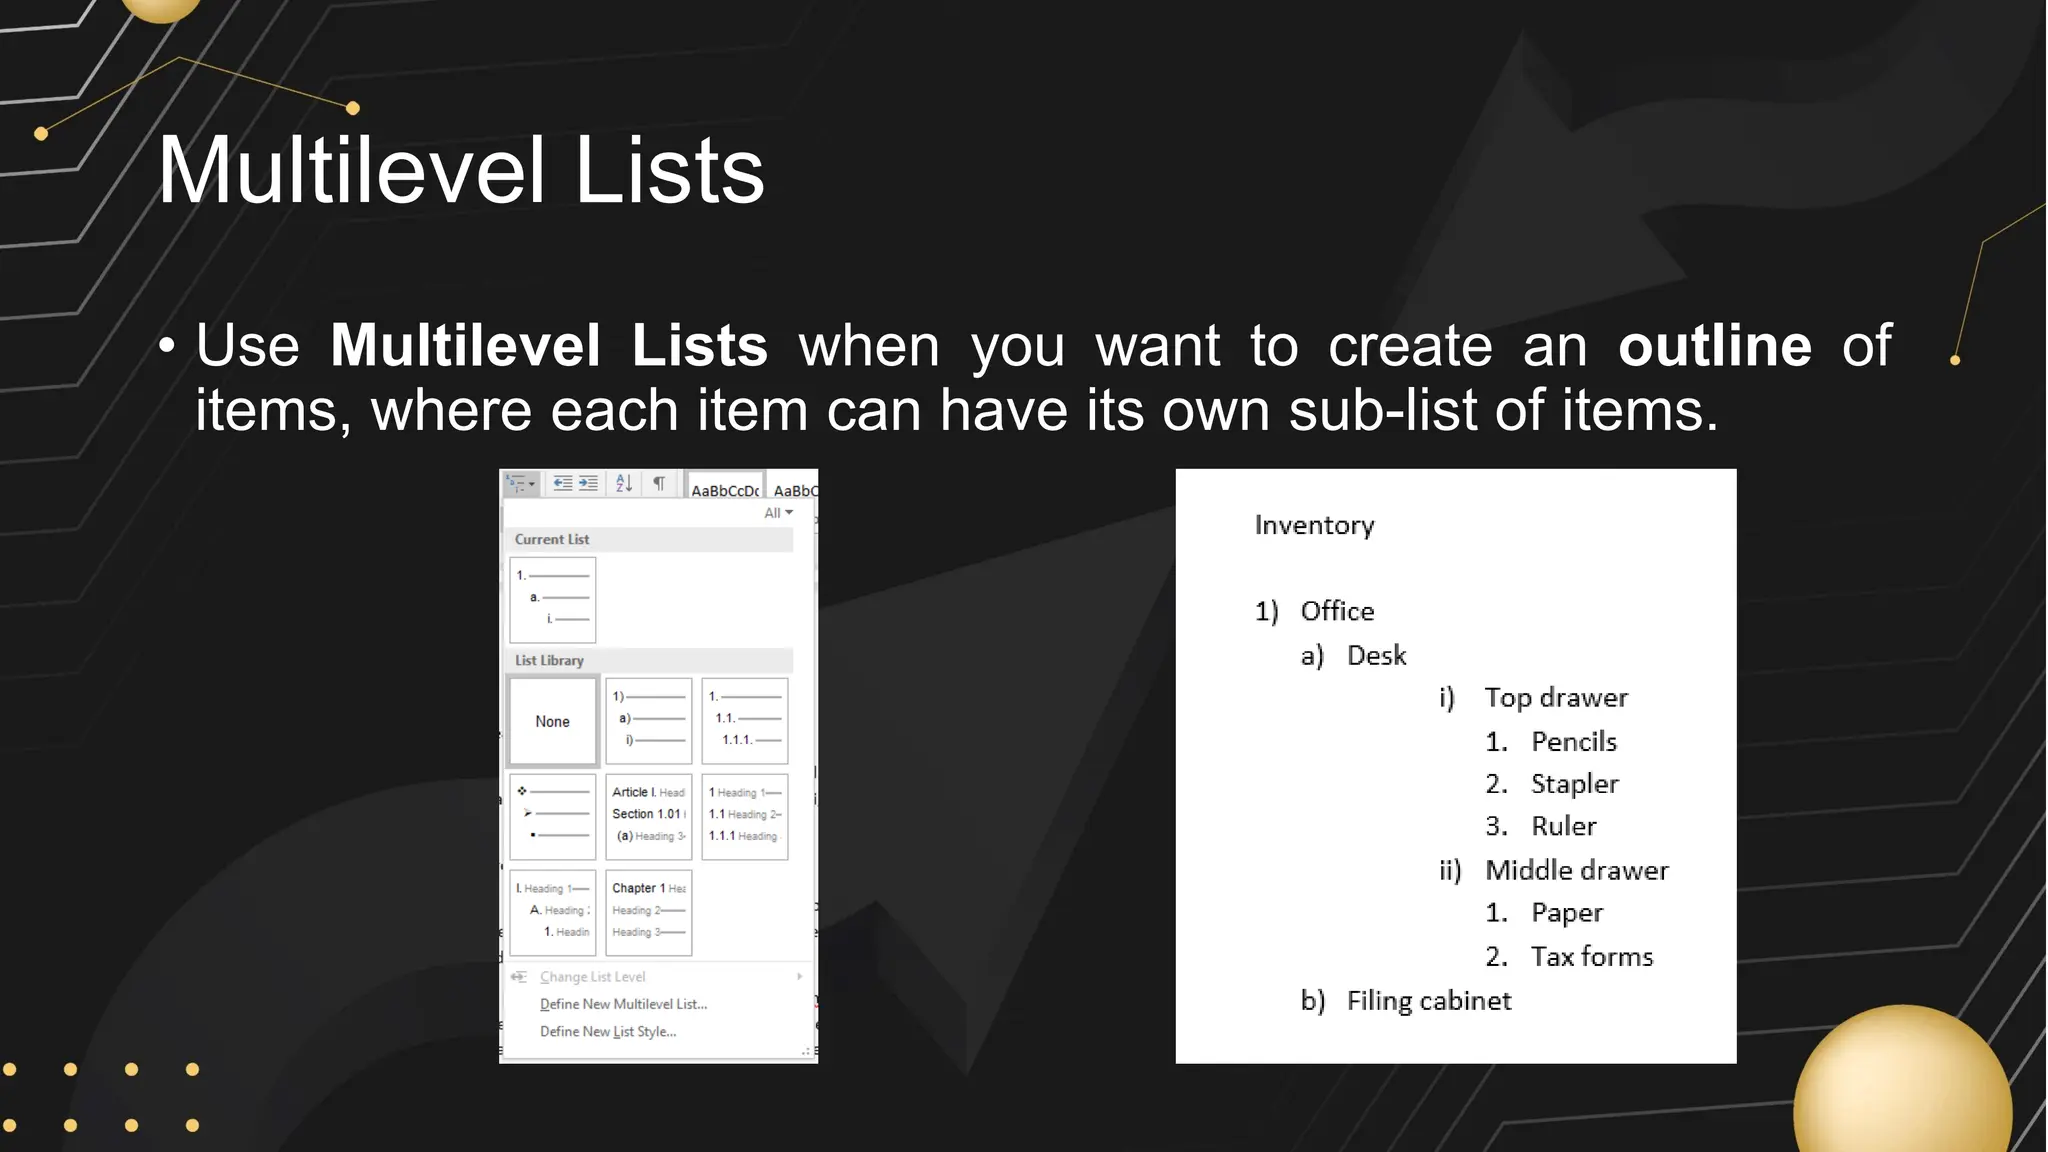
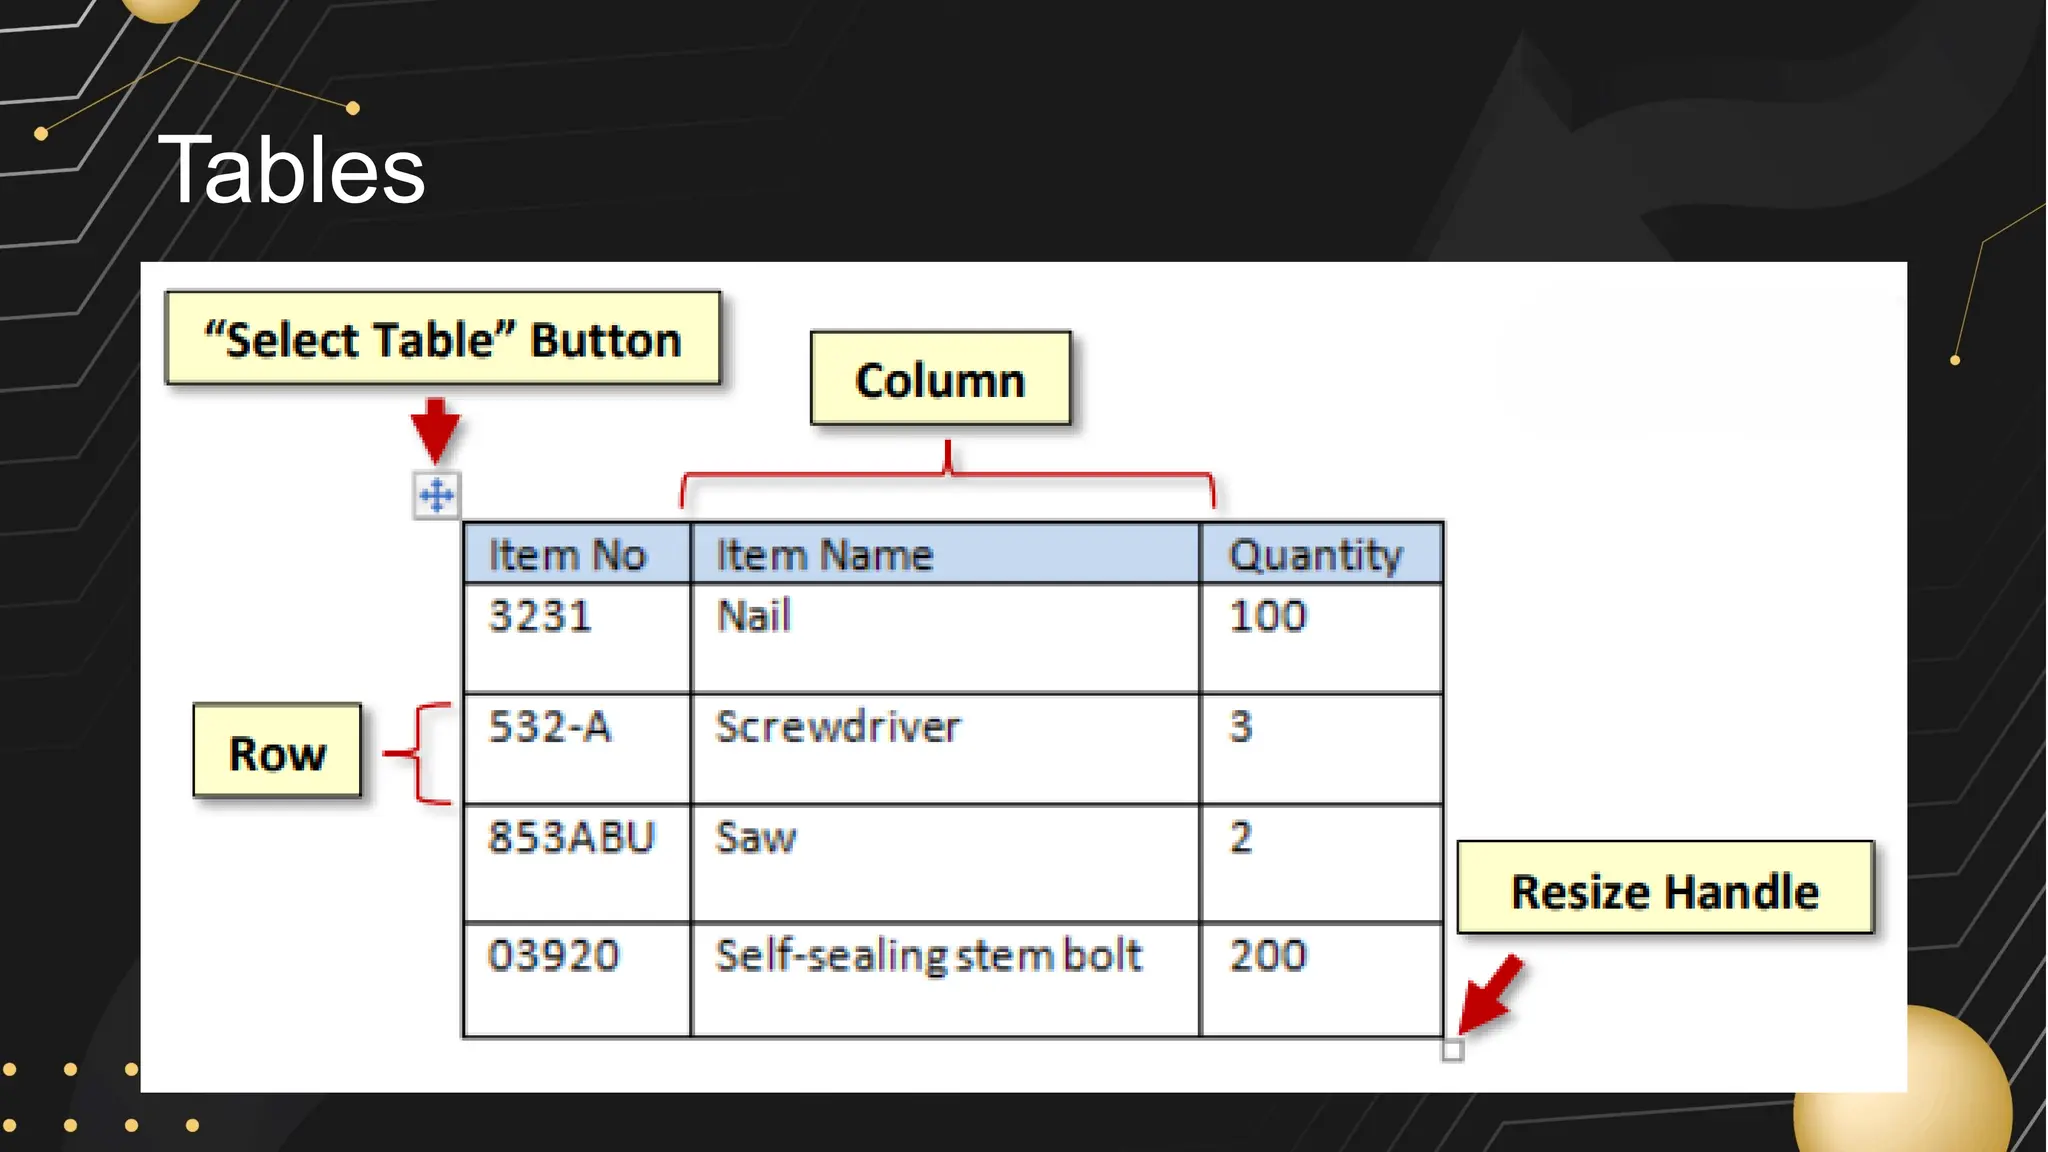
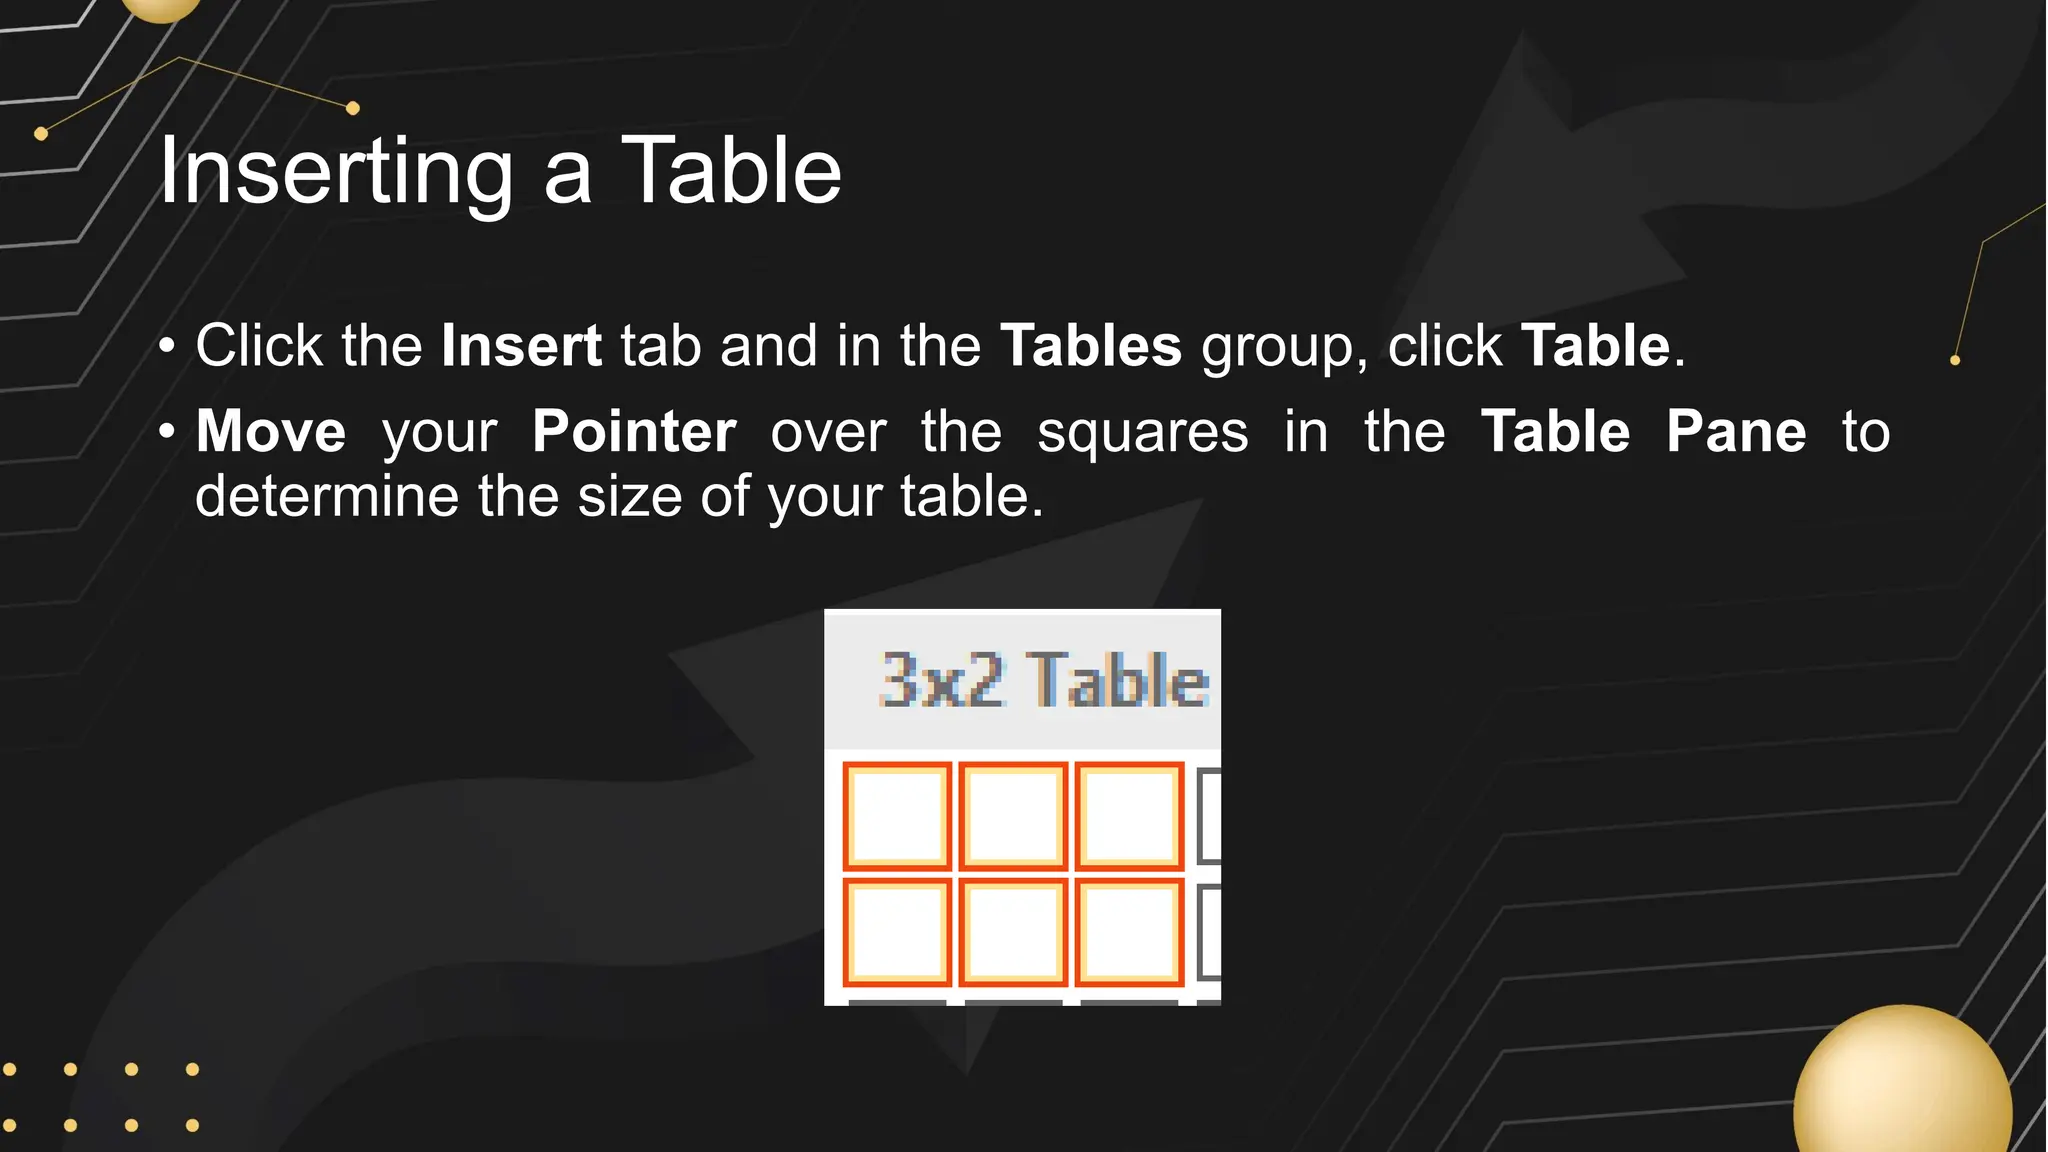
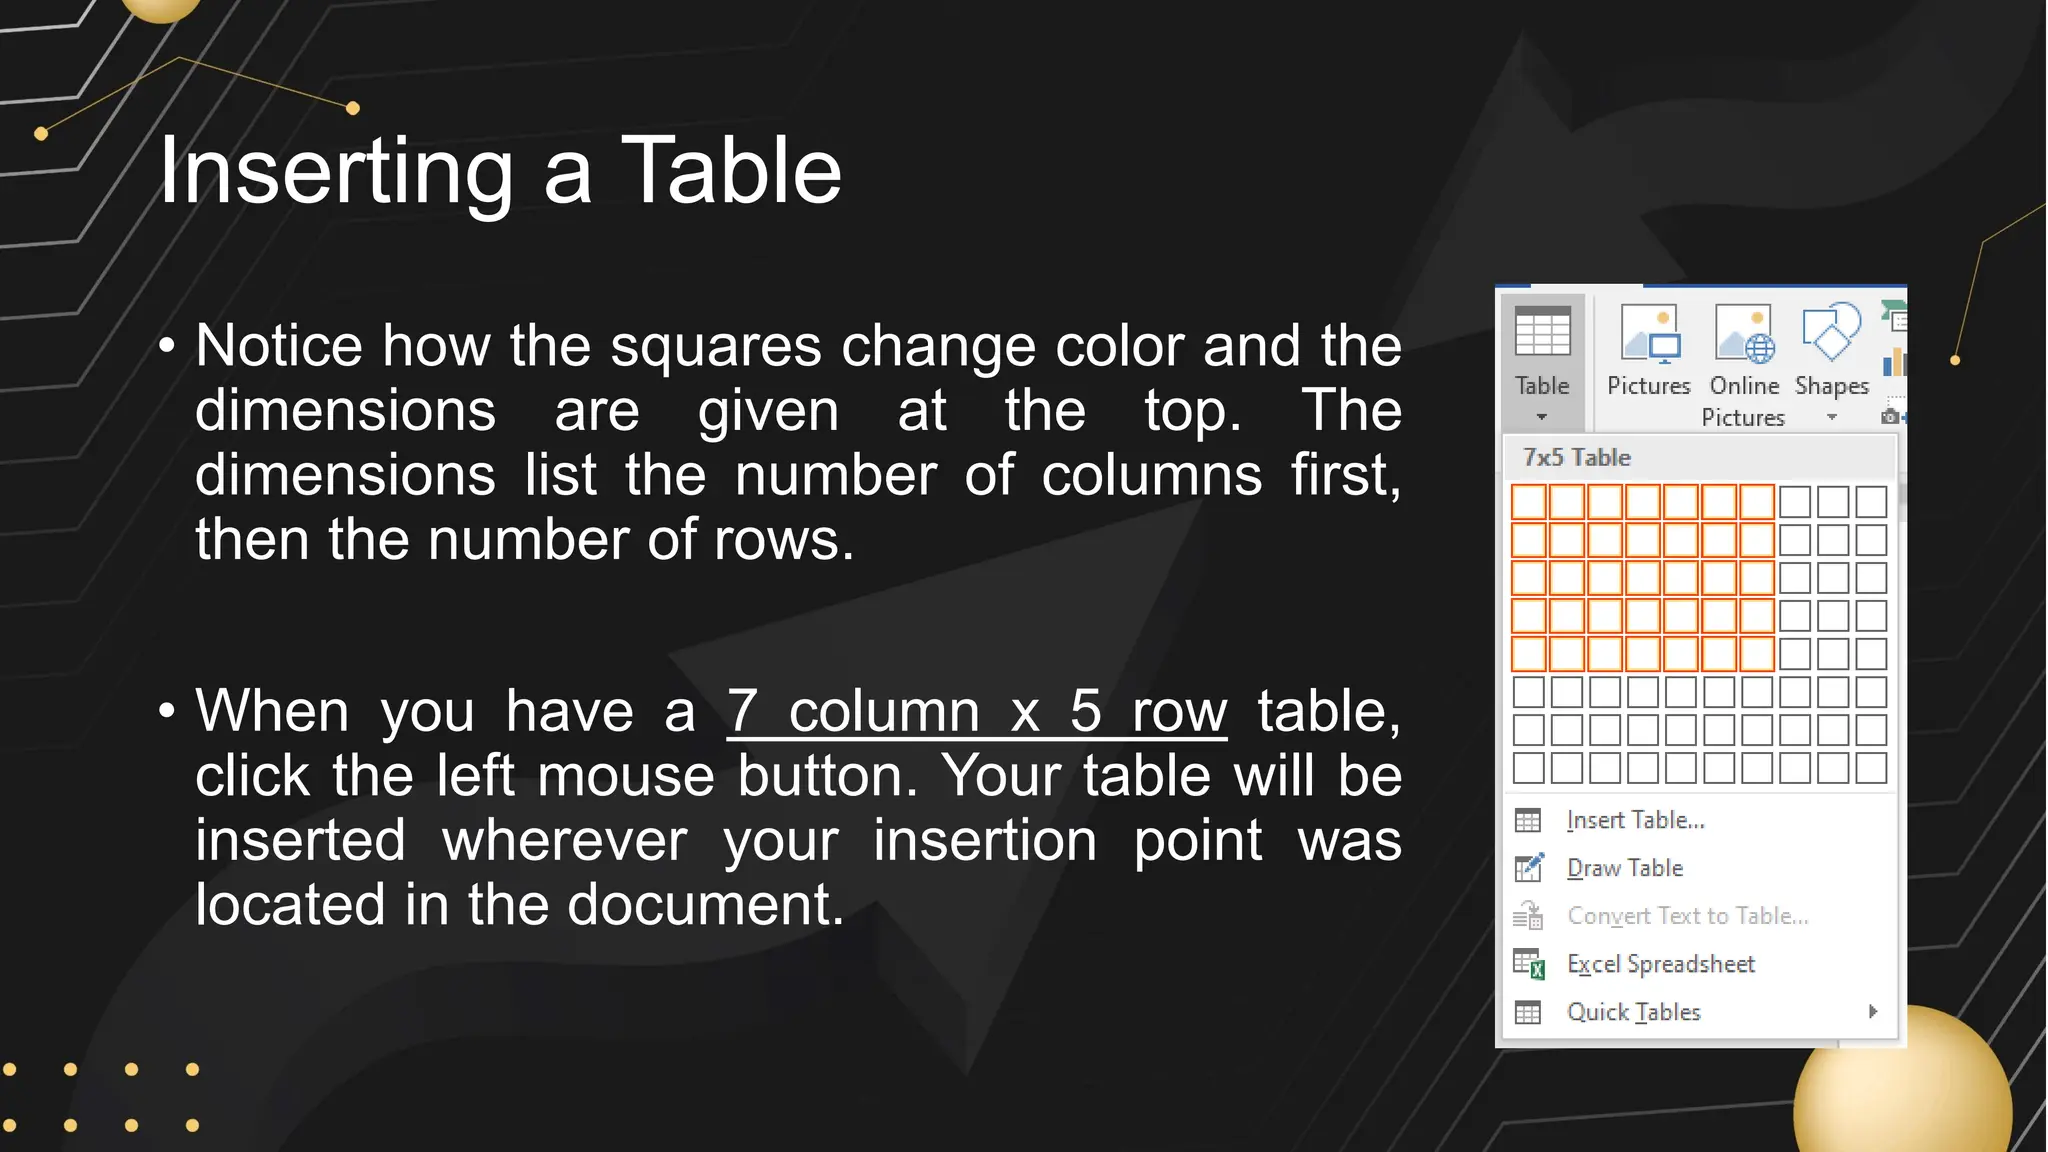
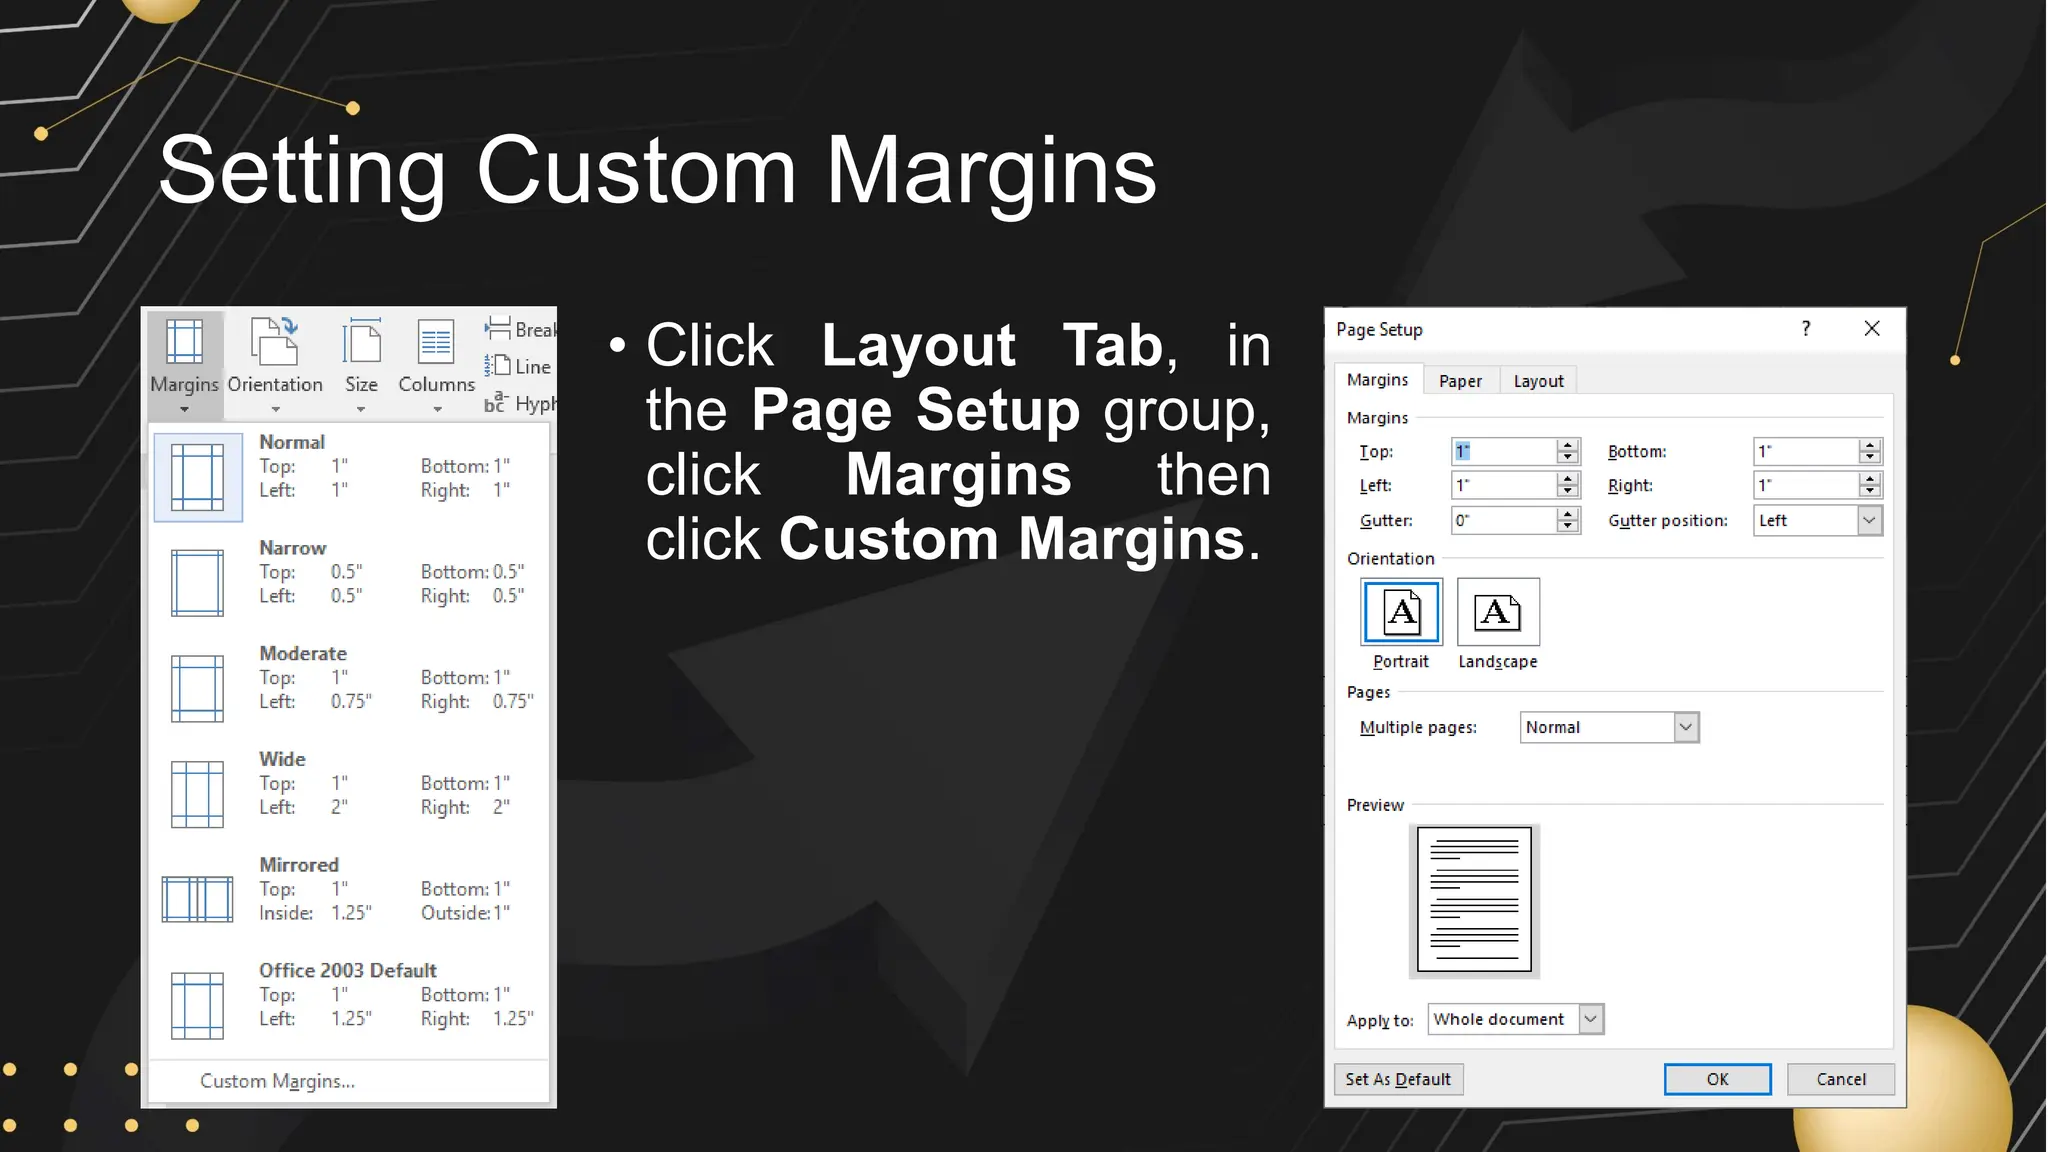
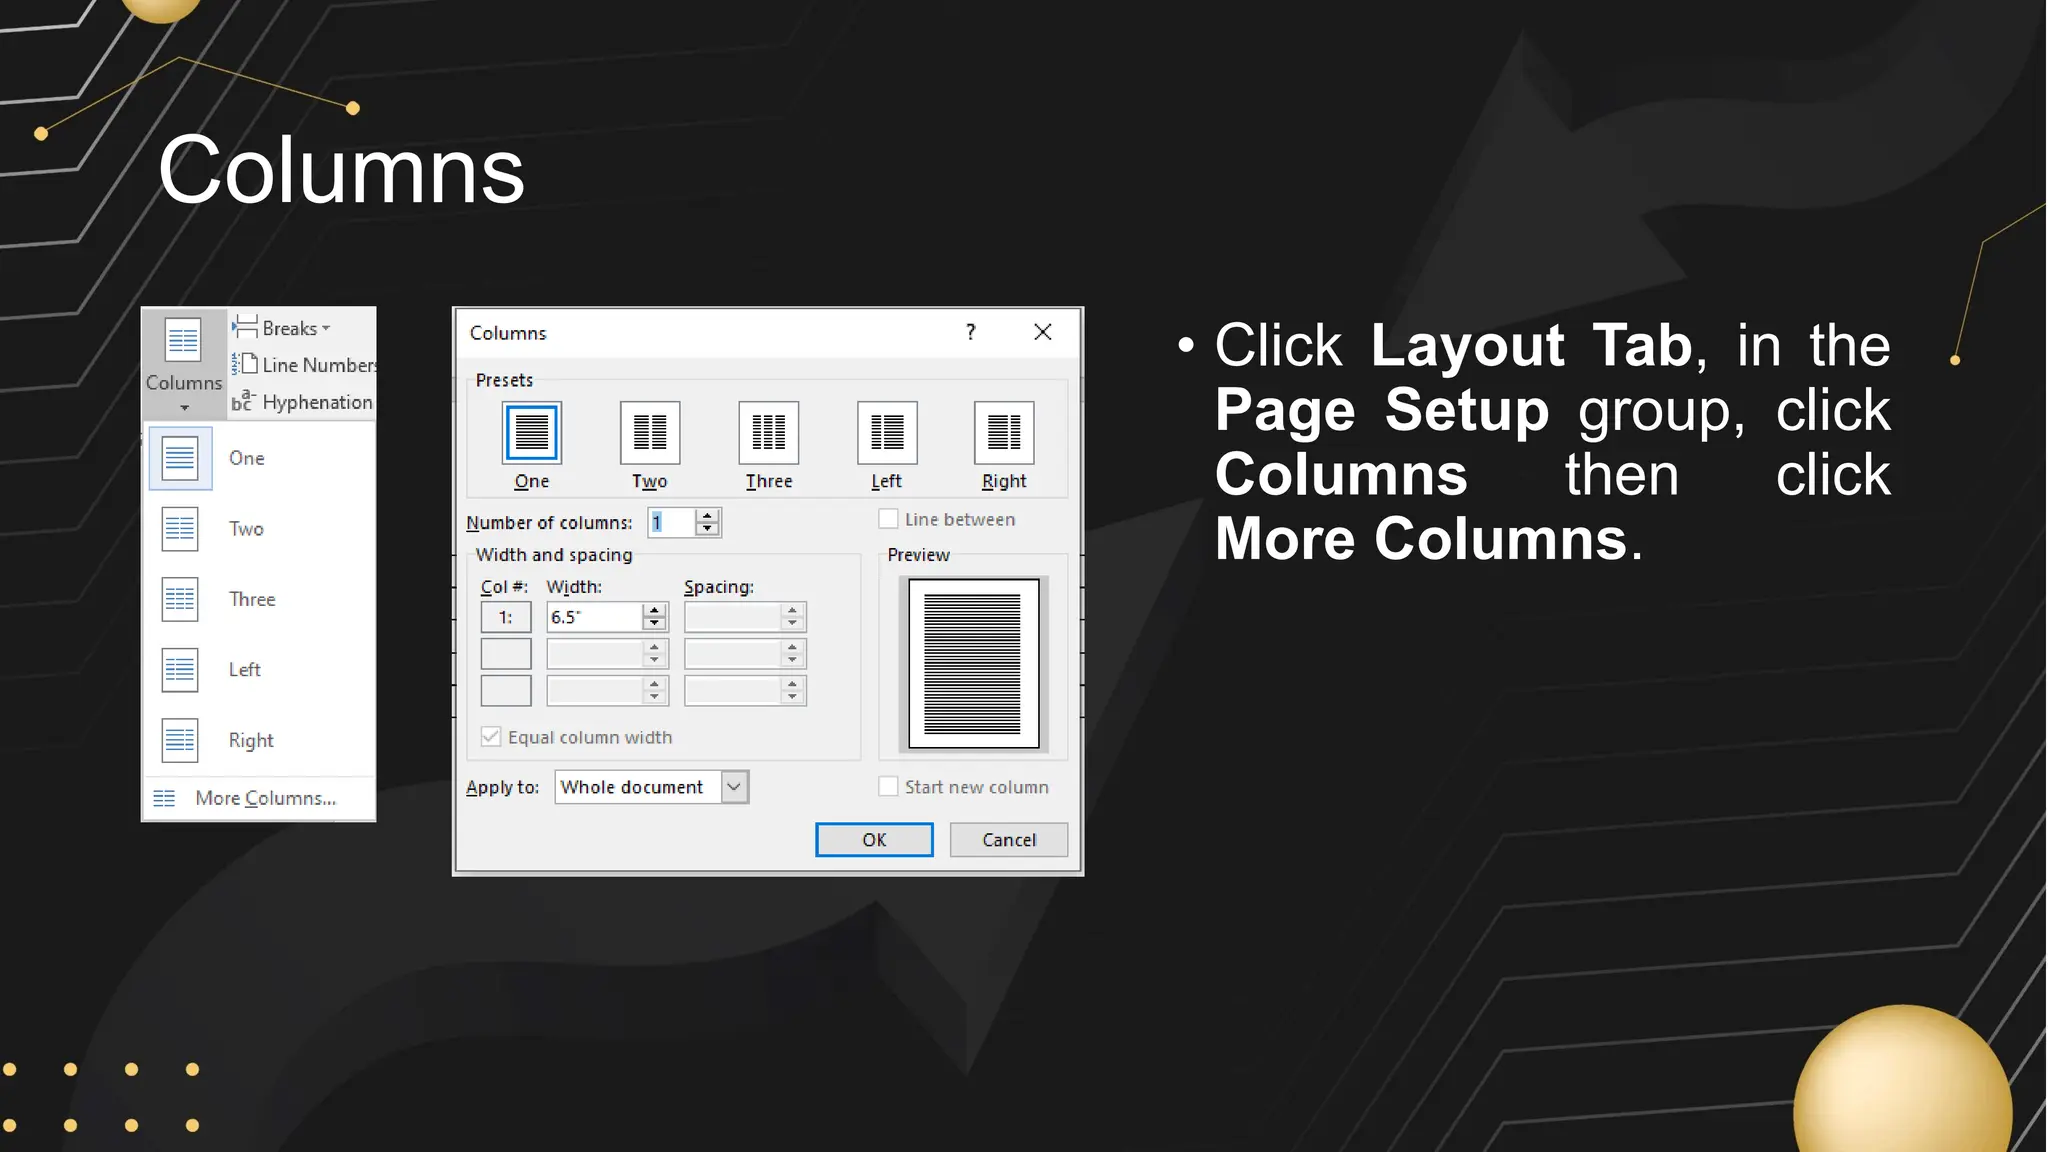
Microsoft Word is a word processor developed by Microsoft, initially released in 1983, designed for writing and editing text documents. It is part of the Microsoft Office suite, and users can subscribe to Office 365 for access to Microsoft Office applications along with free software updates. The document also covers various features of Microsoft Word, such as using the Quick Access Toolbar, the Ribbon, spell-checking, formatting options, and inserting elements like tables and images.


![Vibe Coding vs. Spec-Driven Development [Free Meetup]](https://cdn.slidesharecdn.com/ss_thumbnails/vibecodingvsspecdrivendevelopment-251209105622-43f455e7-thumbnail.jpg?width=640&height=640&fit=bounds)


