This document provides an overview of web technologies including web servers, HTTP, HTML, URLs and the client-server model. It discusses popular web servers like Apache, IIS and XAMPP. It also explains the basic working of the internet using the client-server model, the world wide web, HTML, URLs, HTTP requests and responses. Key concepts around web browsers, servers, HTTP methods and status codes are defined.


![Page 88
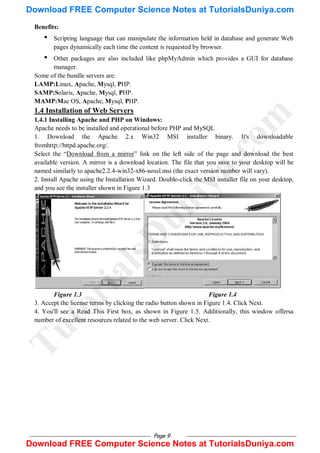
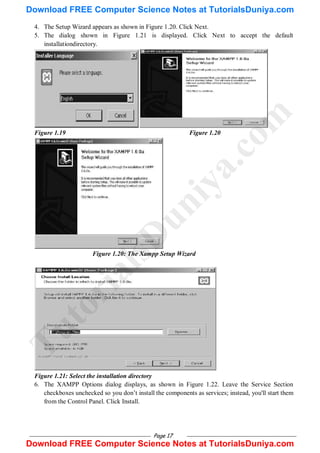
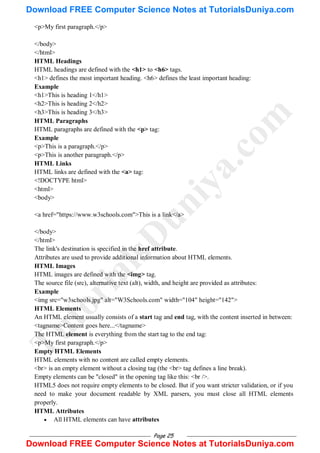
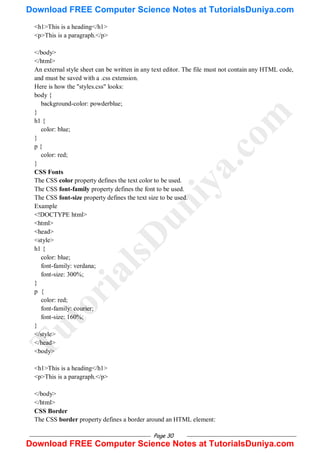
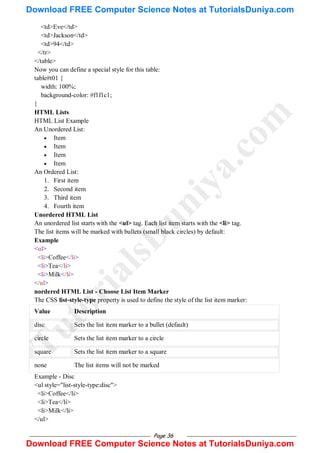
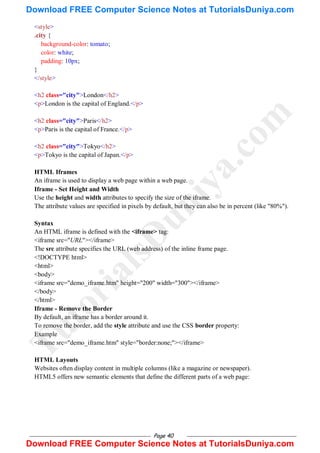
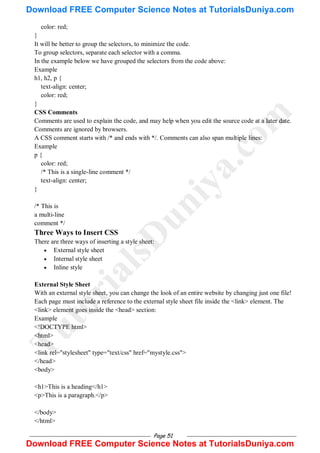
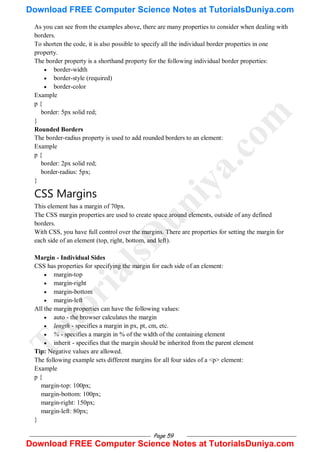
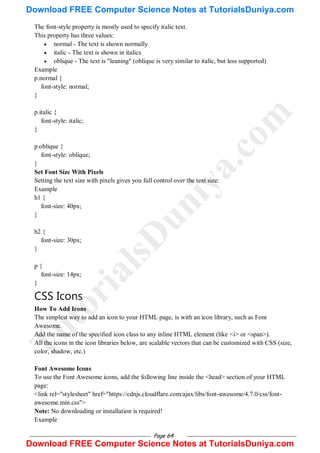
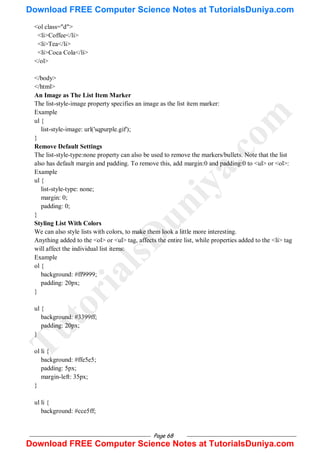
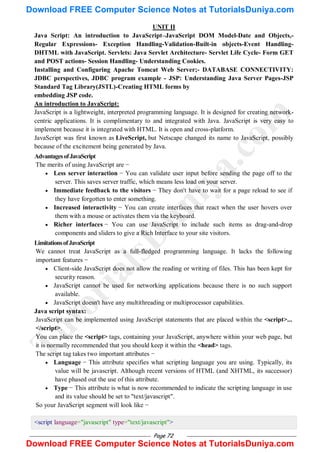
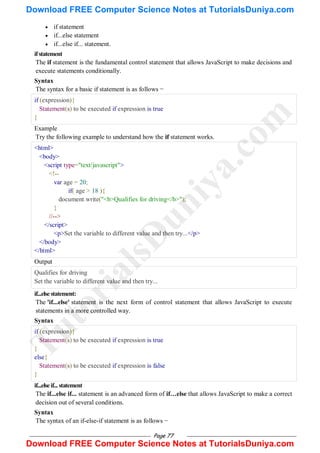
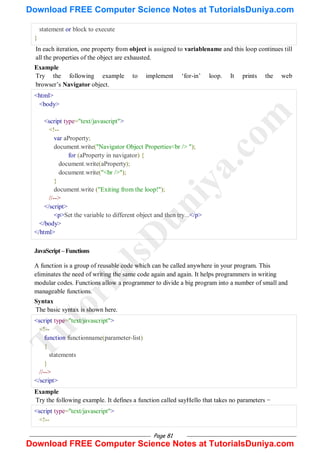
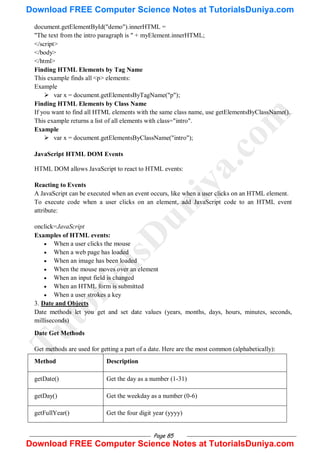
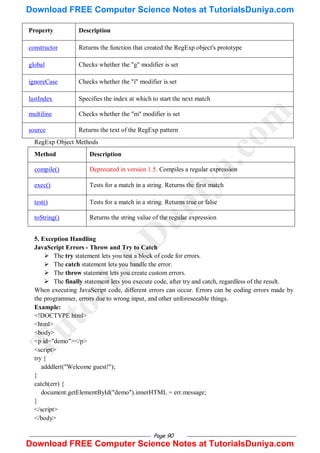
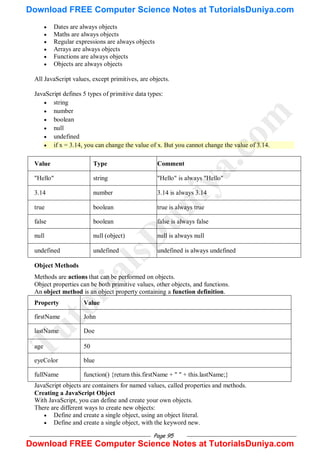
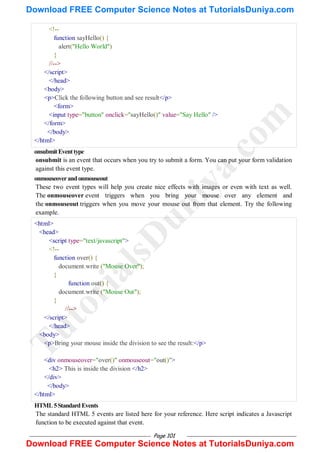
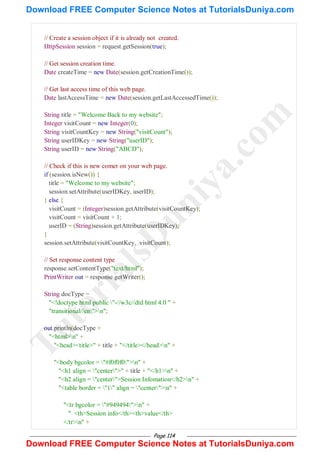
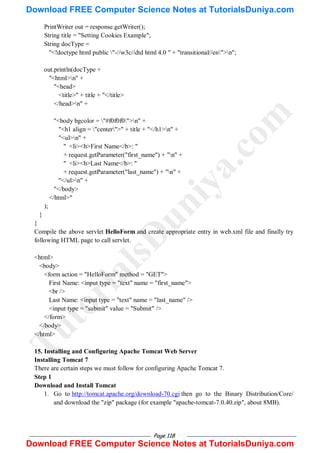
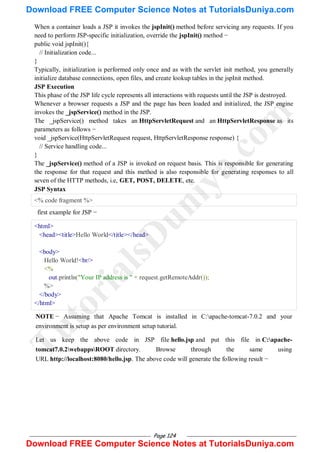
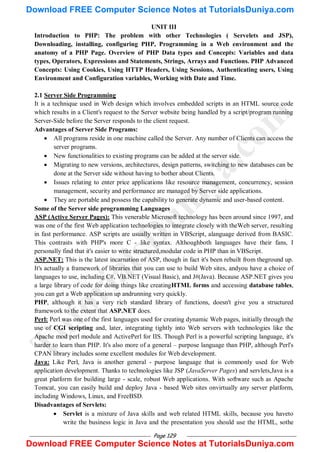
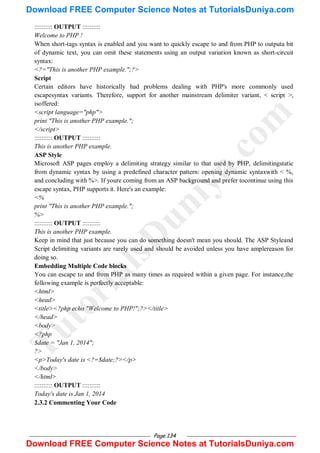
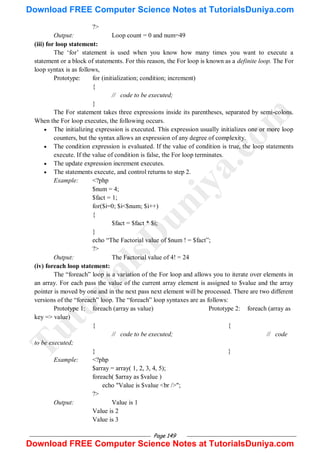
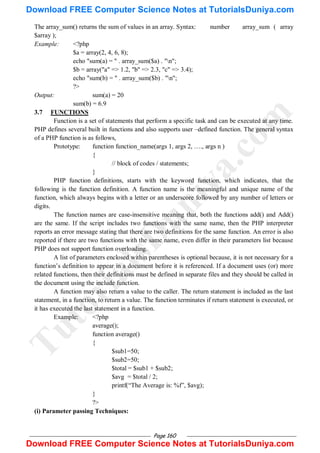
4. Regular Expressions
A regular expression is an object that describes a pattern of characters.
Regular expressions are used to perform pattern-matching and "search-and-replace" functions on
text.
Syntax
/pattern/modifiers;
Modifiers
Modifiers are used to perform case-insensitive and global searches:
Modifier Description
i Perform case-insensitive matching
g Perform a global match (find all matches rather than stopping after the first match)
m Perform multiline matching
Brackets
Brackets are used to find a range of characters:
Expression Description
[abc] Find any character between the brackets
[^abc] Find any character NOT between the brackets
[0-9] Find any character between the brackets (any digit)
[^0-9] Find any character NOT between the brackets (any non-digit)
(x|y) Find any of the alternatives specified
Metacharacters
Metacharacters are characters with a special meaning:
Metacharacter Description
. Find a single character, except newline or line terminator
w Find a word character
W Find a non-word character
d Find a digit
D Find a non-digit character
T
u
t
o
r
i
a
l
s
D
u
n
i
y
a
.
c
o
m
Download FREE Computer Science Notes at TutorialsDuniya.com
Download FREE Computer Science Notes at TutorialsDuniya.com](https://image.slidesharecdn.com/webtechnologiesnotes-tutorialsduniya-240127172050-67829a39/85/Web-Technologies-Notes-TutorialsDuniya-pdf-94-320.jpg)
![Page 93
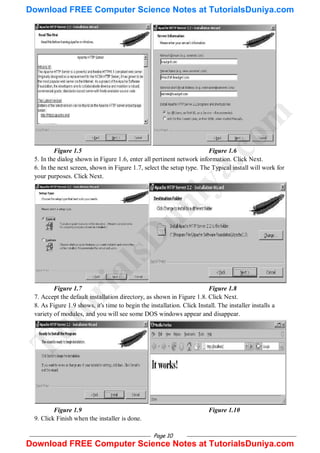
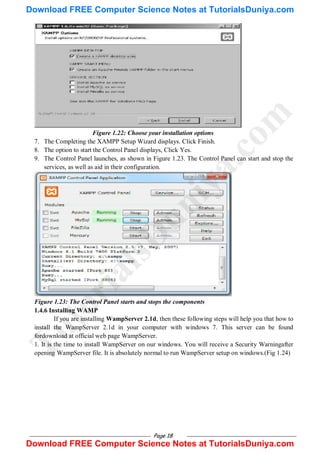
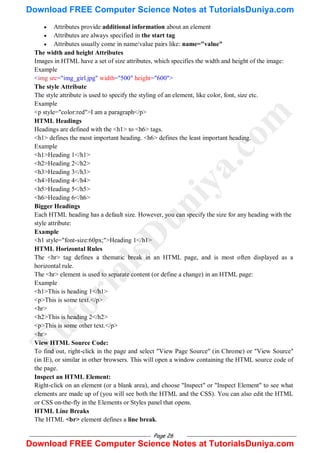
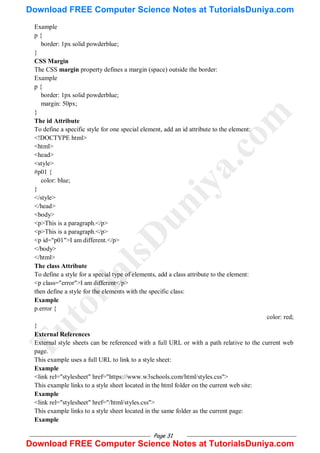
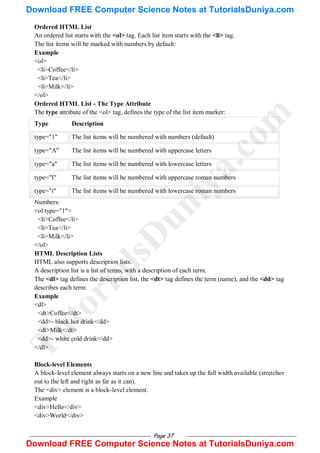
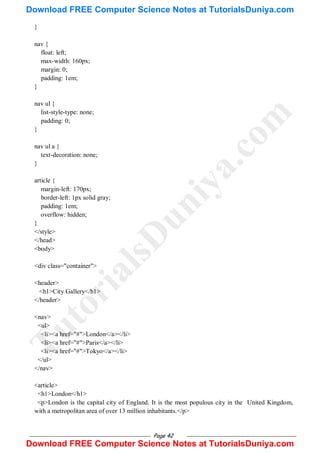
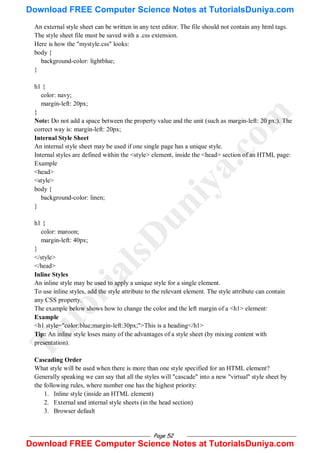
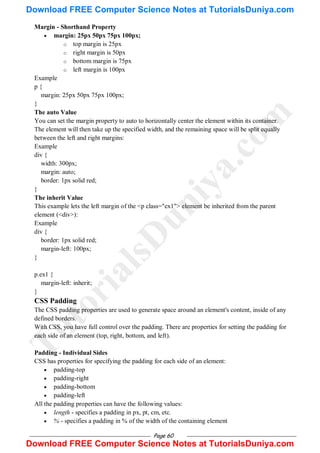
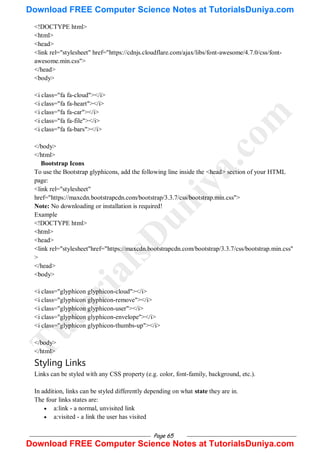
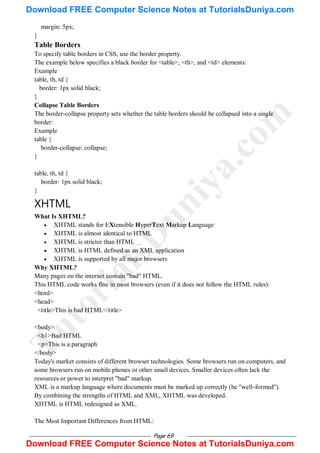
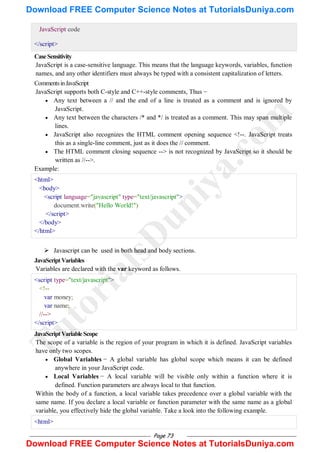
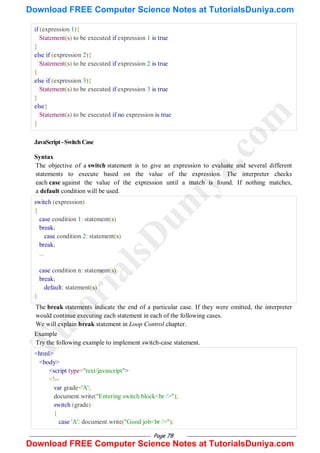
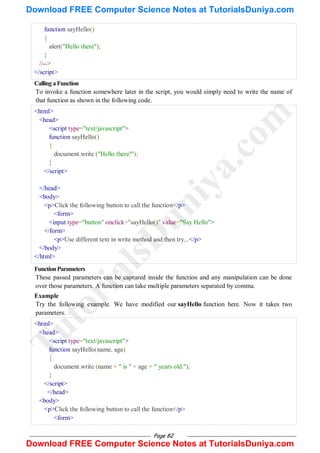
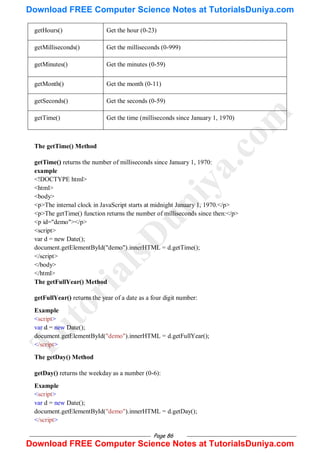
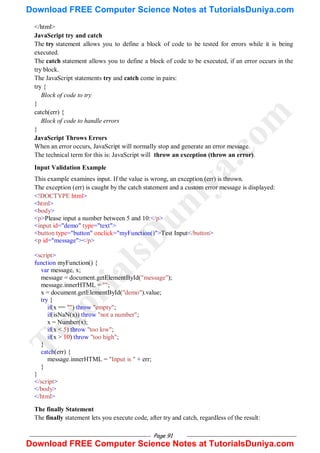
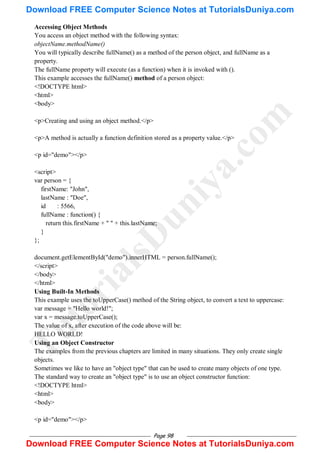
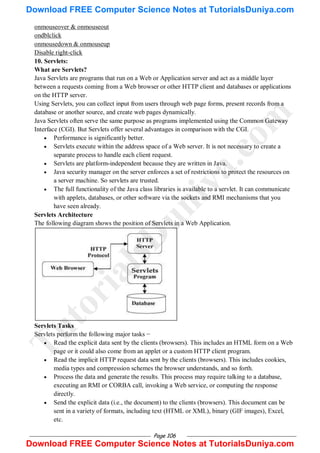
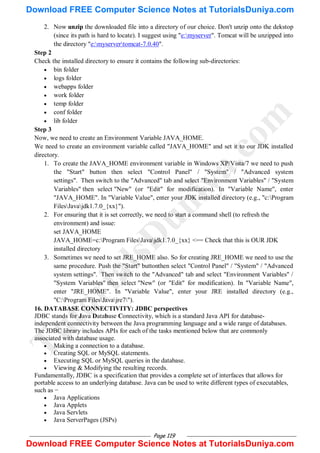
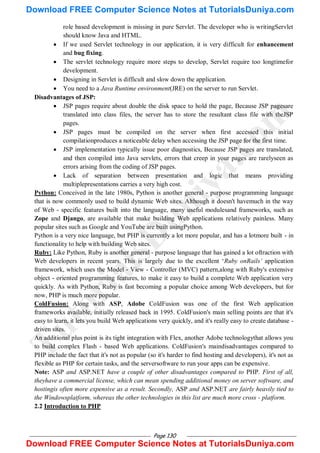
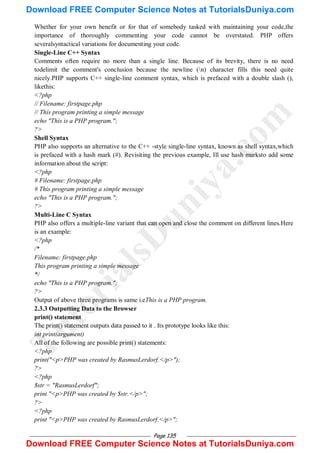
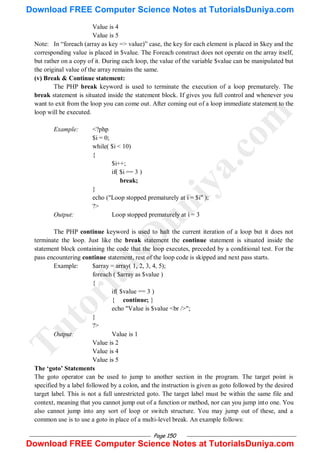
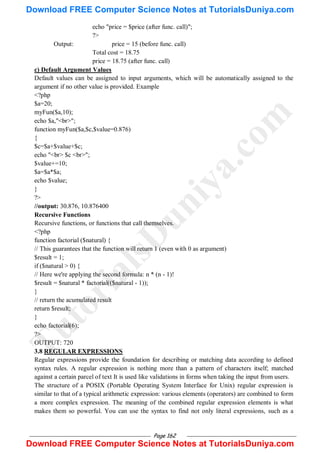
EvalError An error has occurred in the eval() function
RangeError A number "out of range" has occurred
ReferenceError An illegal reference has occurred
SyntaxError A syntax error has occurred
TypeError A type error has occurred
URIError An error in encodeURI() has occurred
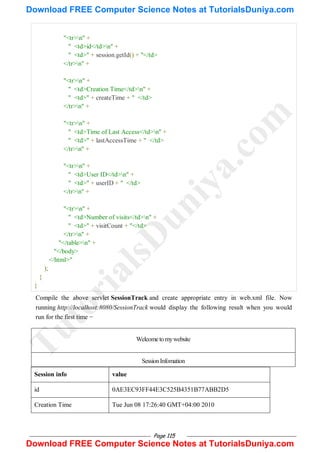
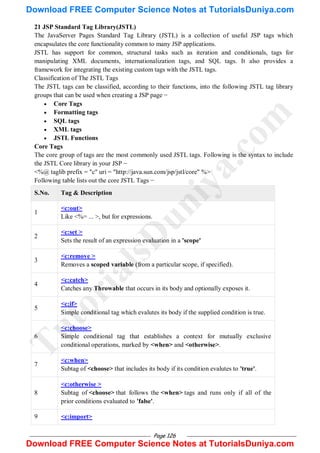
6. Validation
JavaScript Form Validation
HTML form validation can be done by JavaScript.
If a form field (fname) is empty, this function alerts a message, and returns false, to prevent the
form from being submitted:
JavaScript Example
function validateForm() {
var x = document.forms["myForm"]["fname"].value;
if (x == "") {
alert("Name must be filled out");
return false;
}
}
HTML Form Example
<!DOCTYPE html>
<html>
<head>
<script>
function validateForm() {
var x = document.forms["myForm"]["fname"].value;
if (x == "") {
alert("Name must be filled out");
return false;
}
}
</script>
</head>
<body>
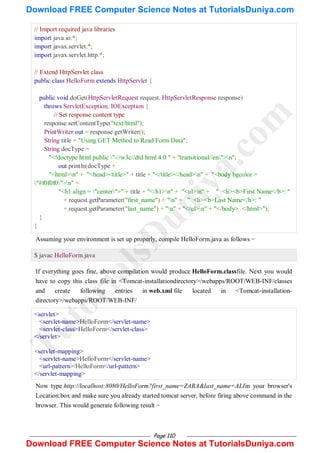
<form name="myForm" action="/action_page.php"
onsubmit="return validateForm()" method="post">
Name: <input type="text" name="fname">
<input type="submit" value="Submit">
</form>
T
u
t
o
r
i
a
l
s
D
u
n
i
y
a
.
c
o
m
Download FREE Computer Science Notes at TutorialsDuniya.com
Download FREE Computer Science Notes at TutorialsDuniya.com](https://image.slidesharecdn.com/webtechnologiesnotes-tutorialsduniya-240127172050-67829a39/85/Web-Technologies-Notes-TutorialsDuniya-pdf-99-320.jpg)
![Page 96
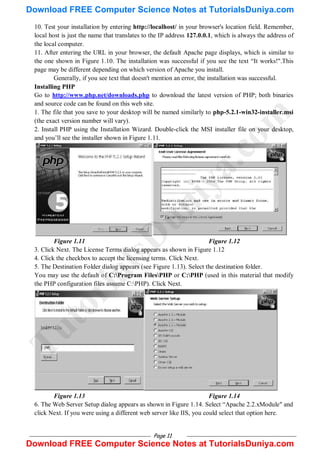
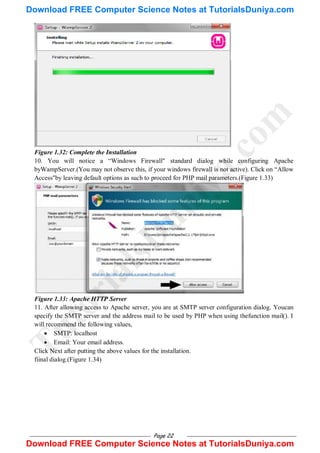
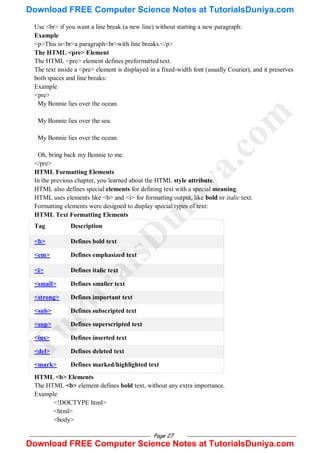
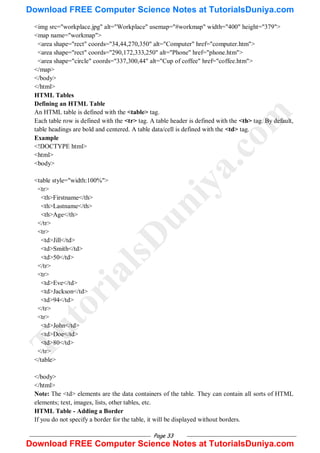
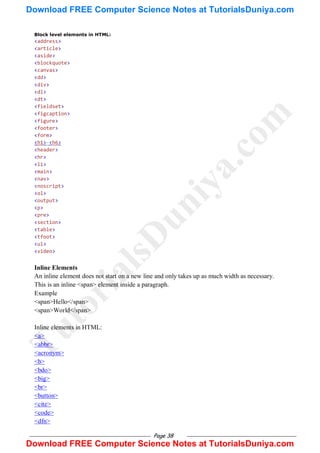
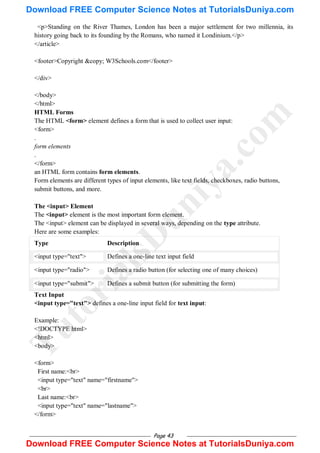
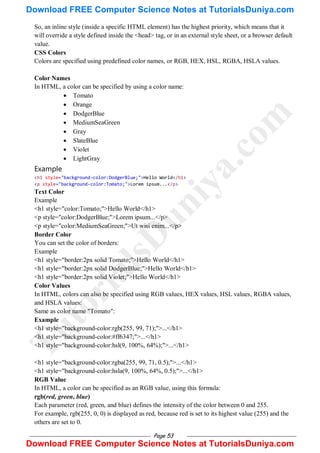
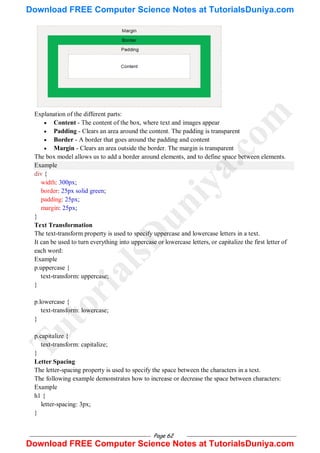
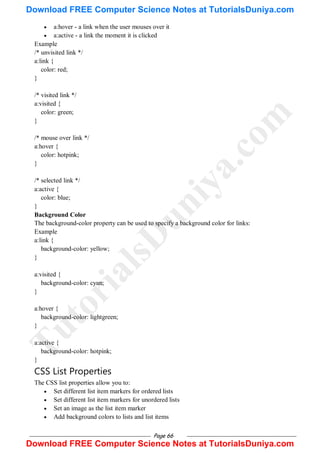
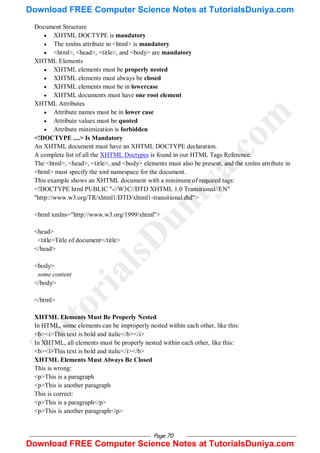
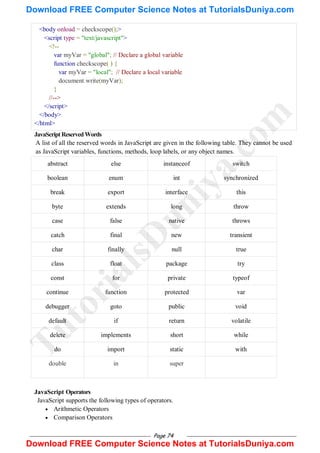
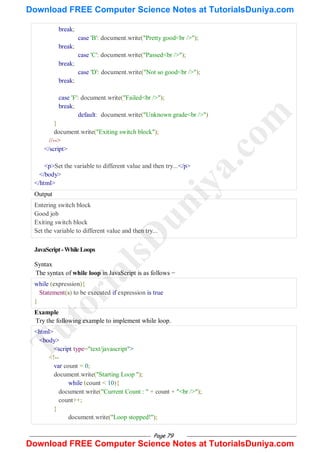
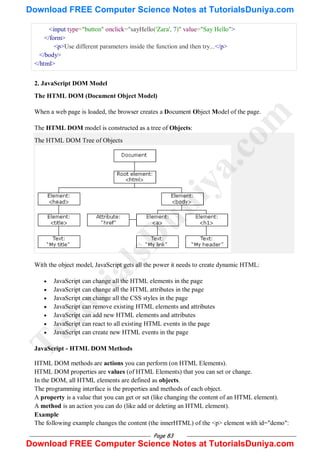
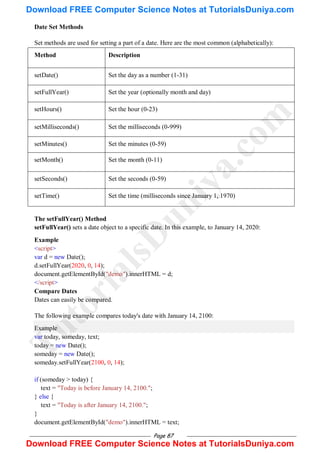
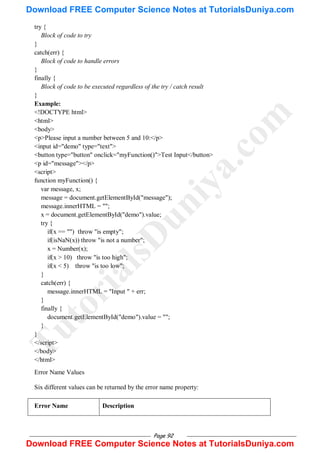
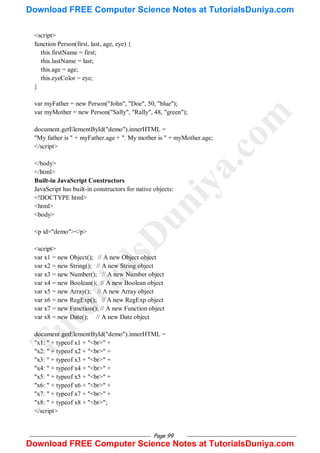
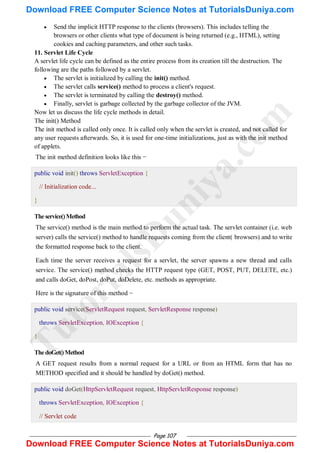
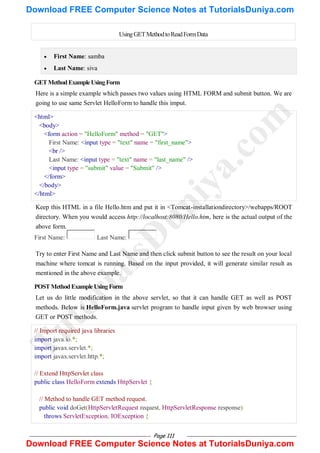
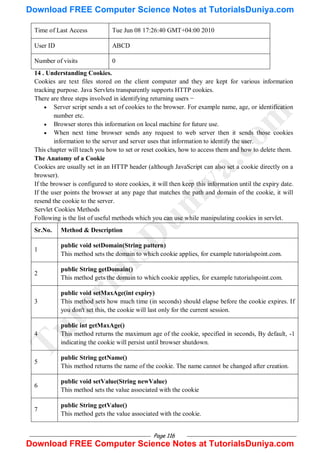
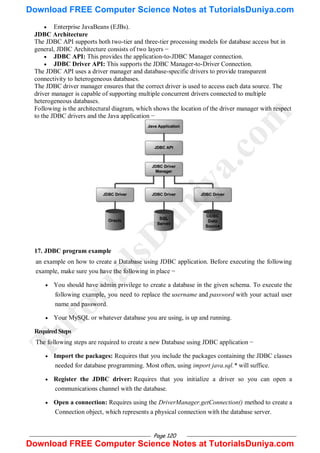
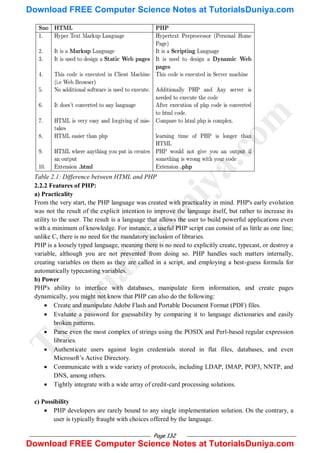
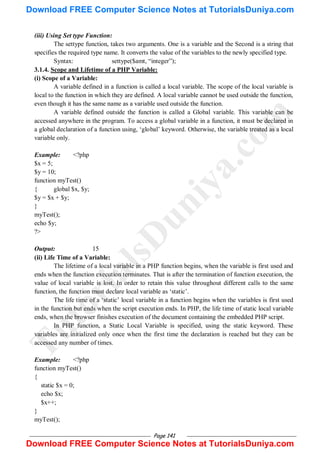
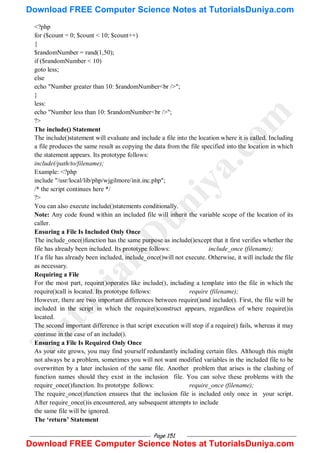
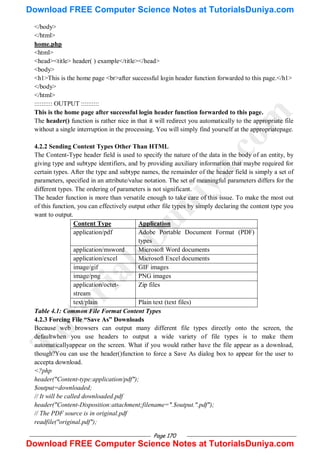
Define an object constructor, and then create objects of the constructed type.
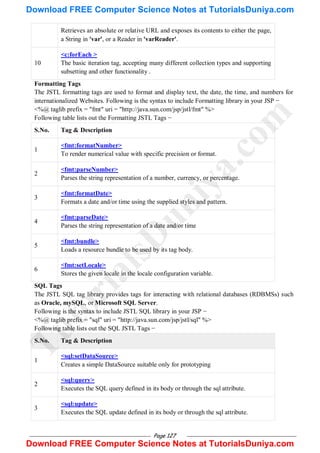
Using an Object Literal
This is the easiest way to create a JavaScript Object.
Using an object literal, you both define and create an object in one statement.
An object literal is a list of name:value pairs (like age:50) inside curly braces {}.
The following example creates a new JavaScript object with four properties
<!DOCTYPE html>
<html>
<body>
<p>Creating a JavaScript Object.</p>
<p id="demo"></p>
<script>
var person = {firstName:"John", lastName:"Doe", age:50, eyeColor:"blue"};
document.getElementById("demo").innerHTML =
person.firstName + " is " + person.age + " years old.";
</script>
</body>
</html>
Using the JavaScript Keyword new
The following example also creates a new JavaScript object with four properties:
Example:
<!DOCTYPE html>
<html>
<body>
<p id="demo"></p>
<script>
var person = new Object();
person.firstName = "John";
person.lastName = "Doe";
person.age = 50;
person.eyeColor = "blue";
document.getElementById("demo").innerHTML =
person.firstName + " is " + person.age + " years old.";
</script>
</body>
</html>
JavaScript Properties
Properties are the values associated with a JavaScript object.
A JavaScript object is a collection of unordered properties.
Properties can usually be changed, added, and deleted, but some are read only.
Accessing JavaScript Properties
The syntax for accessing the property of an object is:
objectName.property // person.age
or
objectName["property"] // person["age"]
or
T
u
t
o
r
i
a
l
s
D
u
n
i
y
a
.
c
o
m
Download FREE Computer Science Notes at TutorialsDuniya.com
Download FREE Computer Science Notes at TutorialsDuniya.com](https://image.slidesharecdn.com/webtechnologiesnotes-tutorialsduniya-240127172050-67829a39/85/Web-Technologies-Notes-TutorialsDuniya-pdf-102-320.jpg)
![Page 97
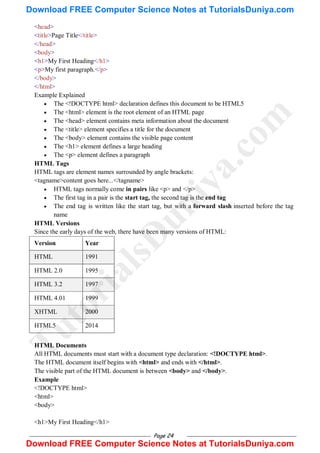
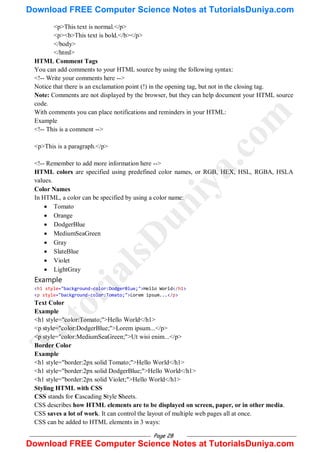
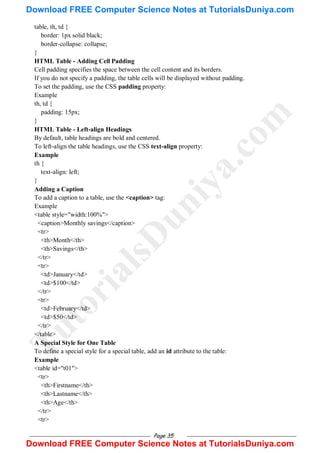
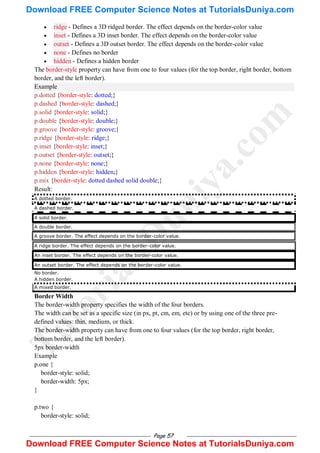
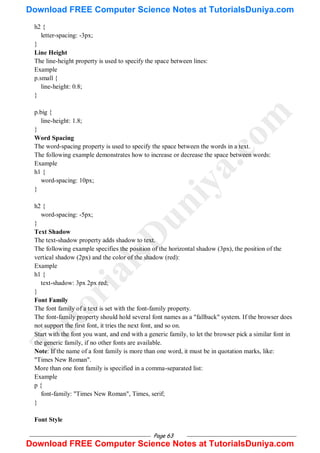
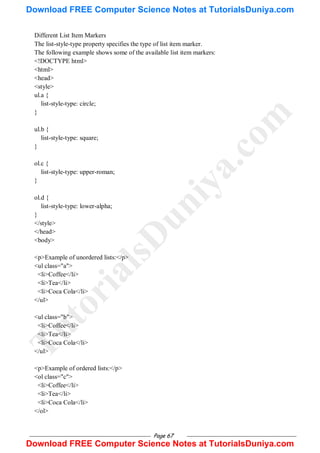
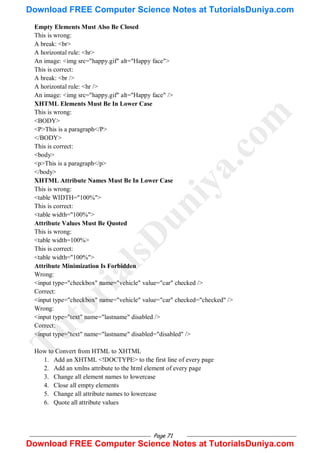
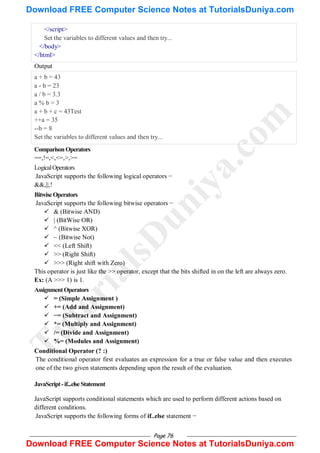
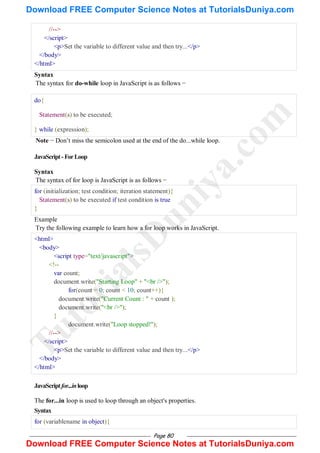
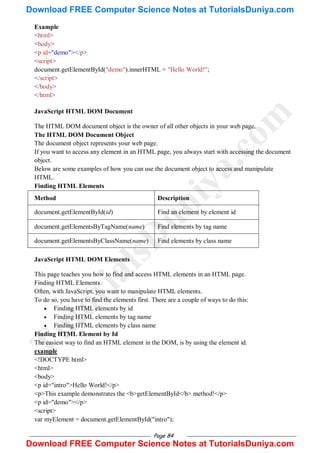
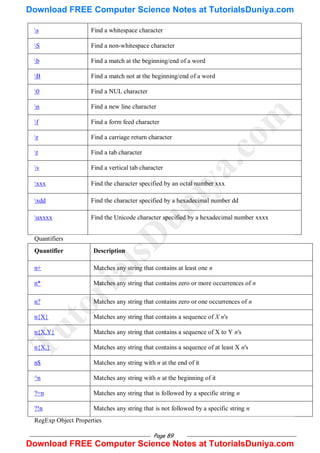
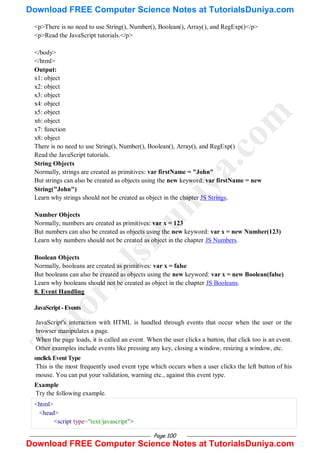
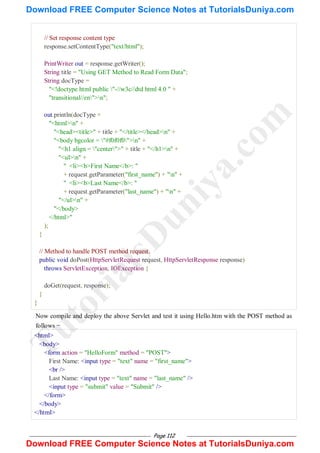
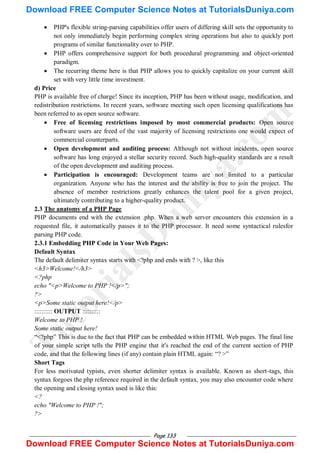
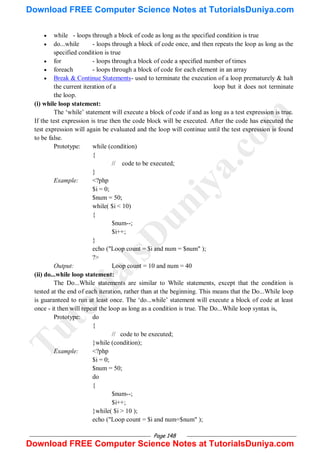
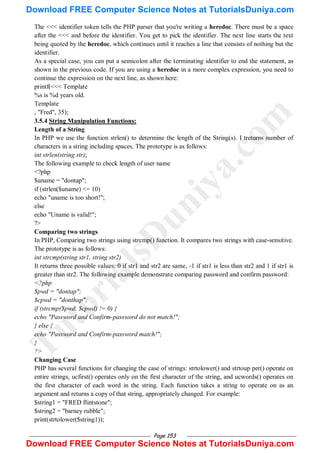
objectName[expression] // x = "age"; person[x]
Example:
<!DOCTYPE html>
<html>
<body>
<p>There are two different ways to access an object property:</p>
<p>You can use .property or ["property"].</p>
<p id="demo"></p>
<script>
var person = {
firstname:"John",
lastname:"Doe",
age:50,
eyecolor:"blue"
};
document.getElementById("demo").innerHTML =
person.firstname + " is " + person.age + " years old.";
</script>
</body>
</html>
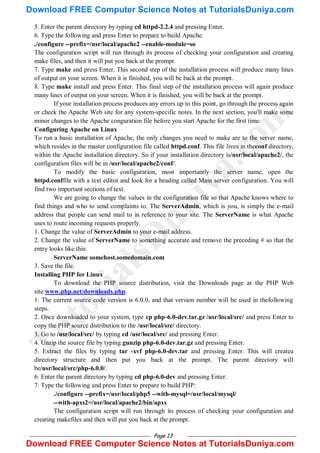
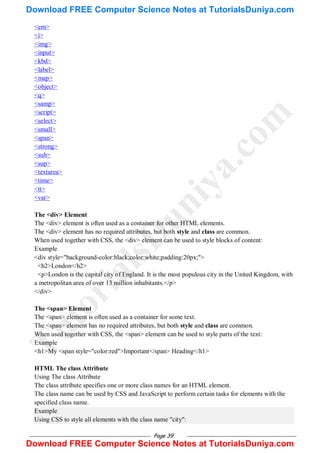
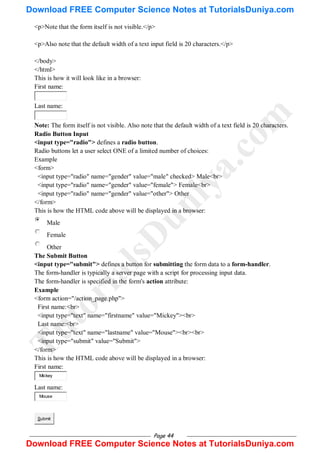
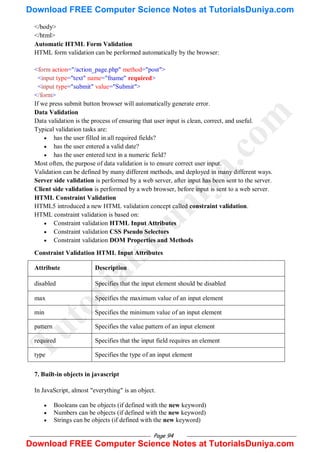
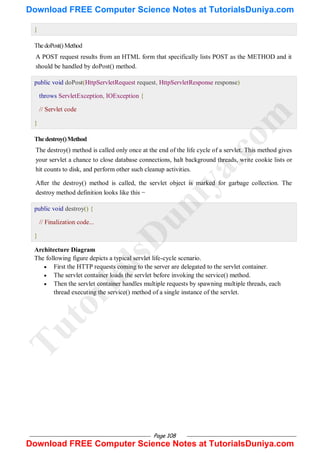
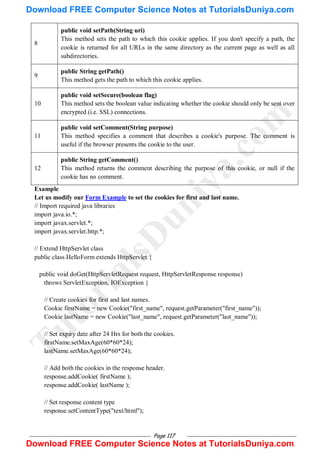
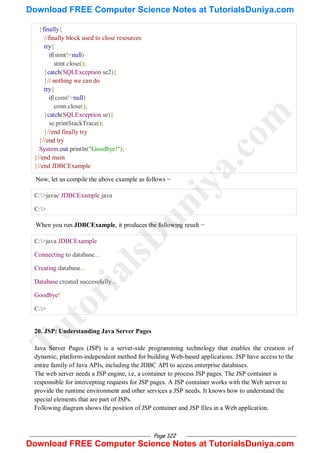
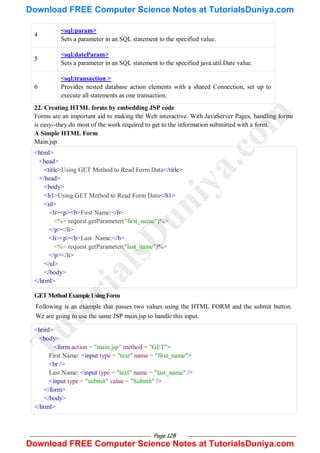
Adding New Properties
You can add new properties to an existing object by simply giving it a value.
Assume that the person object already exists - you can then give it new properties:
Example
person.nationality = "English";
Deleting Properties
The delete keyword deletes a property from an object:
Example
var person = {firstName:"John", lastName:"Doe", age:50, eyeColor:"blue"};
delete person.age; // or delete person["age"];
The delete keyword deletes both the value of the property and the property itself. After deletion, the
property cannot be used before it is added back again.
Property Attributes
All properties have a name. In addition they also have a value.
The value is one of the property's attributes. Other attributes are: enumerable, onfigurable, and
writable. These attributes define how the property can be accessed .
In JavaScript, all attributes can be read, but only the value attribute can be changed (and only if the
property is writable).
The this Keyword
In JavaScript, the thing called this, is the object that "owns" the JavaScript code.
The value of this, when used in a function, is the object that "owns" the function.
Note that this is not a variable. It is a keyword. You cannot change the value of this.
T
u
t
o
r
i
a
l
s
D
u
n
i
y
a
.
c
o
m
Download FREE Computer Science Notes at TutorialsDuniya.com
Download FREE Computer Science Notes at TutorialsDuniya.com](https://image.slidesharecdn.com/webtechnologiesnotes-tutorialsduniya-240127172050-67829a39/85/Web-Technologies-Notes-TutorialsDuniya-pdf-103-320.jpg)


![Page 121
To create a new database, you need not give any database name while preparing database
URL as mentioned in the below example.
Execute a query: Requires using an object of type Statement for building and submitting
an SQL statement to the database.
Clean up the environment . Requires explicitly closing all database resources versus
relying on the JVM's garbage collection.
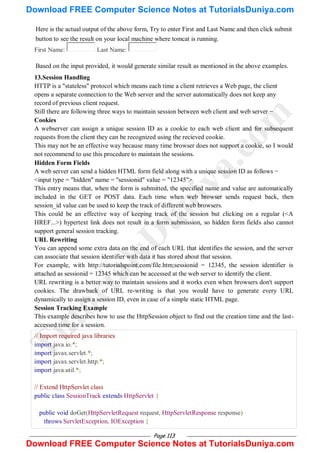
SampleCode
Copy and past the following example in JDBCExample.java, compile and run as follows −
//STEP 1. Import required packages
import java.sql.*;
public class JDBCExample {
// JDBC driver name and database URL
static final String JDBC_DRIVER = "com.mysql.jdbc.Driver";
static final String DB_URL = "jdbc:mysql://localhost/";
// Database credentials
static final String USER = "username";
static final String PASS = "password";
public static void main(String[] args) {
Connection conn = null;
Statement stmt = null;
try{
//STEP 2: Register JDBC driver
Class.forName("com.mysql.jdbc.Driver");
//STEP 3: Open a connection
System.out.println("Connecting to database...");
conn = DriverManager.getConnection(DB_URL, USER, PASS);
//STEP 4: Execute a query
System.out.println("Creating database...");
stmt = conn.createStatement();
String sql = "CREATE DATABASE STUDENTS";
stmt.executeUpdate(sql);
System.out.println("Database created successfully...");
}catch(SQLException se){
//Handle errors for JDBC
se.printStackTrace();
}catch(Exception e){
//Handle errors for Class.forName
e.printStackTrace();
T
u
t
o
r
i
a
l
s
D
u
n
i
y
a
.
c
o
m
Download FREE Computer Science Notes at TutorialsDuniya.com
Download FREE Computer Science Notes at TutorialsDuniya.com](https://image.slidesharecdn.com/webtechnologiesnotes-tutorialsduniya-240127172050-67829a39/85/Web-Technologies-Notes-TutorialsDuniya-pdf-128-320.jpg)


![Page 125
JSP Declarations
A declaration declares one or more variables or methods that you can use in Java code later in the
JSP file. You must declare the variable or method before you use it in the JSP file.
Following is the syntax for JSP Declarations −
<%! declaration; [ declaration; ]+ ... %>
You can write the XML equivalent of the above syntax as follows −
<jsp:declaration>
code fragment
</jsp:declaration>
Following is an example for JSP Declarations −
<%! int i = 0; %>
<%! int a, b, c; %>
<%! Circle a = new Circle(2.0); %>
S.No. Syntax & Purpose
1
<%-- comment --%>
A JSP comment. Ignored by the JSP engine.
2
<!-- comment -->
An HTML comment. Ignored by the browser.
3
<%
Represents static <% literal.
4
%>
Represents static %> literal.
5
'
A single quote in an attribute that uses single quotes.
6
"
A double quote in an attribute that uses double quotes.
T
u
t
o
r
i
a
l
s
D
u
n
i
y
a
.
c
o
m
Download FREE Computer Science Notes at TutorialsDuniya.com
Download FREE Computer Science Notes at TutorialsDuniya.com](https://image.slidesharecdn.com/webtechnologiesnotes-tutorialsduniya-240127172050-67829a39/85/Web-Technologies-Notes-TutorialsDuniya-pdf-133-320.jpg)

![Page 136
?>
All these statements produce identical output:PHP was created by RasmusLerdorf.
The print() statement's return value is misleading because it will always return 1 regardlessof
outcome.
echo() statement
Alternatively, you could use the echo() statement for the same purposes as print(). While thereare
technical differences between echo() and print(), they'll be irrelevant to most readers andtherefore
aren't discussed here. echo()'s prototype looks like this:
void echo(string argument1 [, ...string argumentN])
To use echo(), just provide it with an argument just as was done with print():
echo "PHP was created by RasmusLerdorf.";
As you can see from the prototype, echo() is capable of outputting multiple strings. The utilityof
this particular trait is questionable; using it seems to be a matter of preference more thananything
else. Nonetheless, it's available should you feel the need. Here's an example:
<?php
$heavyweight = "Lennox Lewis";
$lightweight = "Floyd Mayweather";
echo $heavyweight, " and ", $lightweight, " are great fighters.";
?>
This code produces the following: Lennox Lewis and Floyd Mayweather are great fighters.
The key difference between echo() and print() are
1. print() returns integer value echo() returns Boolean (i.e TRUE or FALSE) value.
2. Through print() we pass only one string, in echo() we pass multiple strings.
printf() statement
The printf() statement is ideal when you want to output a blend of static text and
dynamicinformation stored within one or several variables. It's ideal for two reasons. First, it
neatlyseparates the static and dynamic data into two distinct sections, allowing for easy
maintenance.Second, printf() allows you to have considerable control over how the dynamic
information isrendered to the screen in terms of its type, precision, alignment, and position. Its
prototypelooks like this:
integerprintf(string format [, mixed args])
For example, suppose you wanted to insert a single dynamic integer value into an otherwisestatic
string:
printf("one $ equals to %d rupees ", 62);
Executing this command produces the following:one $ equals to 62 rupees
In this example, %d is a placeholder known as a type specifier, andthe d indicates an integer value
will be placed in that position. When the printf() statementexecutes, the lone argument, 100, will be
inserted into the placeholder.
The key difference between print() and printf() are
1. In print() paranthesis are optional where as in printf() compulsary.
2. Through print() we pass only one string, in printf() we pass multiple strings.
3. print() gives unformatted output where as printf() gives formatted output through typespecifiers.
The control strings are as follows
Type Description
%b Argument considered an integer; presented as a binary number
%d Argument considered an integer
%c Argument considered an integer; presented as a signed decimal number
T
u
t
o
r
i
a
l
s
D
u
n
i
y
a
.
c
o
m
Download FREE Computer Science Notes at TutorialsDuniya.com
Download FREE Computer Science Notes at TutorialsDuniya.com](https://image.slidesharecdn.com/webtechnologiesnotes-tutorialsduniya-240127172050-67829a39/85/Web-Technologies-Notes-TutorialsDuniya-pdf-144-320.jpg)
![Page 137
%f Argument considered a floating-point number; presented as a floating-point
number
%o Argument considered an integer; presented as an octal number
%s Argument considered a string; presented as a string
%u Argument considered an integer; presented as an unsigned decimal number
%x Argument considered an integer; presented as a lowercase hexadecimal
number
%X Argument considered an integer; presented as an uppercase hexadecimal
number
sprintf() statement
The sprintf() statement is functionally identical to printf() except that the output is assigned to a
string rather than rendered to the browser. The prototype follows:
stringsprintf(string format [, mixed arguments]);
An example follows:
$cost = sprintf("$%.2f", 43.2); // $cost = $43.20
In this example, %f is a placeholder known as a type specifier, and the f indicates a float value will
be placed in that position.
sprintf() print output to a variable, remaining three functions (i.e print(), echo(), and printf()) print
output on Web browser.
3.1 OVERVIEW OF PHP DATA TYPES AND CONCEPTS
3.1.1. PHP variables [Compare with other language variables]:
The variables in PHP differ from the variables in other programming language such as C,
C++ and Java. In all other languages variables are first assigned with data types and then initialized
with a value.
In PHP, a data type of a variable is automatically assigned with a value making variables
declaration and input of values easier. A variable can have a short name (like x and y) or a more
descriptive name (age, carname, total_volume). PHP variable names are case-sensitive. Rules for
PHP variables:
A variable starts with the $ sign, followed by the name of
the variable
A variable name must start with a letter or the underscore
character
A variable name cannot start with a number
A variable name can only contain alpha-numeric
characters and underscores (A-z, 0-9, and _ )
Variable names are case-sensitive ($age and $AGE are
two different variables)
Example:
<?php
$x = 5;
$y = 4;
echo $x + $y;
T
u
t
o
r
i
a
l
s
D
u
n
i
y
a
.
c
o
m
Download FREE Computer Science Notes at TutorialsDuniya.com
Download FREE Computer Science Notes at TutorialsDuniya.com](https://image.slidesharecdn.com/webtechnologiesnotes-tutorialsduniya-240127172050-67829a39/85/Web-Technologies-Notes-TutorialsDuniya-pdf-145-320.jpg)
![Page 138
$txt = "Learning is Interesting.‖;
echo "Learn WT, $txt!";
?>
Output:
9
Learn WT, Learning is Interesting.
PHP is a Loosely Typed Language:
In the example above, notice that we did not have to tell PHP which data type the variable
is. PHP automatically converts the variable to the correct data type, depending on its value. In other
languages such as C, C++, and Java, the programmer must declare the name and type of the
variable before using it.
Super global variables in PHP 5:
PHP 4.1.0 focus the concepts of Super global variables. Several predefined variables in PHP
are "superglobals", which means that they are always accessible, regardless of scope - and you can
access them from any function, class or file without having to do anything special. The PHP super
global variables are:
$GLOBALS
$_SERVER
$_REQUEST
$_POST
$_GET
$_FILES
$_ENV
$_COOKIE
$_SESSION
Example: <?php
setcookie("user1","123");
setcookie("pass1","123");
$userid = $_POST['uname'];
$passwd = $_POST['upwd'];
if ($_COOKIE['user1']==$userid && $_COOKIE['pass1']==$passwd)
echo "User Authenticated. Success! ";
else
echo "User NOT Authenticated. Try again! ";
?>
3.1.2 PHP‟s Supported Datatypes:
A datatype is the generic name assigned to any data sharing a common set of characteristics.
Common datatypes include Boolean, integer, float, string, and array.
PHP supports eight primitive data types with three classifications.
Scalar Data types: Boolean, integer, float, and string
Compound data types: array and object
Special data types: resource and NULL
3.1.2.1 Scalar Data type:
Scalar data types are used to represent a single value. Several data types fall under
this category, including Boolean, integer, float, and string. PHP supports Four Scalar Data types
such as Boolean, integer, float and string.
T
u
t
o
r
i
a
l
s
D
u
n
i
y
a
.
c
o
m
Download FREE Computer Science Notes at TutorialsDuniya.com
Download FREE Computer Science Notes at TutorialsDuniya.com](https://image.slidesharecdn.com/webtechnologiesnotes-tutorialsduniya-240127172050-67829a39/85/Web-Technologies-Notes-TutorialsDuniya-pdf-146-320.jpg)
![Page 139
(i) Boolean:
The Boolean data type represents truth, supporting only two values: TRUE and FALSE (case
insensitive). Alternatively, you can use zero to represent FALSE, and any nonzero value to
represent TRUE. A few examples follow:
$var = false; // $var is false.
$var = 1; // $var is true.
$var = -1; // $var is true.
$var = 5; // $var is true.
$var = 0; // $var is false.
(ii) Integer:
An integer is representative of any whole number or, in other words, a number that does not contain
fractional parts. PHP supports integer values represented in base 10 (decimal), base 8 (octal), and
base 16 (hexadecimal) numbering systems. Several examples follow:
42 // decimal
-678900 // decimal
0755 // octal
0xC4E // hexadecimal
The maximum supported integer size is platform-dependent, although this is typically positive or
negative 231
for PHP version 5 and earlier. PHP 6 introduced a 64-bit integer value, meaning PHP
will support integer values up to positive or negative 263
in size.
(iii) Float:
Floating-point numbers, also referred to as floats, doubles, or real numbers, allow you to specify
numbers that contain fractional parts. Floats are used to represent monetary values, weights,
distances, and a whole host of other representations in which a simple integer value won‘t suffice.
PHP‘s floats can be specified in a variety of ways, several of which are demonstrated here:
Examples: 4.5678
4.0
8.7e4
1.23E+11
(iv) String:
A string is a sequence of characters treated as a contiguous group. Strings are delimited by single or
double quotes. The following are all examples of valid strings:
Examples: "PHP is a great language"
'*9subwayn'
"123$%^789"
PHP treats strings in the same fashion as arrays.
Example: $color = "maroon";
$parser = $color[2]; // Assigns 'r' to $parser
3.1.2.2 Compound Datatypes:
Compound datatypes allow for multiple items of the same type to be aggregated under a single
representative entity. The array and the object fall into this category
(i) Array
An array is an indexed collection of data values. Each member of the array index (also
known as the key) references a corresponding value.
T
u
t
o
r
i
a
l
s
D
u
n
i
y
a
.
c
o
m
Download FREE Computer Science Notes at TutorialsDuniya.com
Download FREE Computer Science Notes at TutorialsDuniya.com](https://image.slidesharecdn.com/webtechnologiesnotes-tutorialsduniya-240127172050-67829a39/85/Web-Technologies-Notes-TutorialsDuniya-pdf-147-320.jpg)
![Page 140
Example: $state[0] = "Alabama";
$state[1] = "Alaska";
$state[2] = "Arizona";
...
$state[49] = "Wyoming";
(ii) Object
The other compound datatype supported by PHP is the object. The object is a central concept of the
object-oriented programming paradigm. Unlike the other datatypes contained in the PHP language,
an object must be explicitly declared. This declaration of an object‘s characteristics and behavior
takes place within something called a class.
Example: class Appliance {
private $_power;
function setPower($status) {
$this->_power = $status;
}
}
...
$blender = new Appliance;
$blender->setPower("on");
3.1.2.3 Special Datatypes:
Special datatypes include: resource and NULL. The ‗resource‘ is mainly used in database-driven
applications.
3.1.3. PHP Coercions [type conversion]:
Coercion, type coercion or type conversion is the process of altering the data type of a
variable into another data type. PHP uses implicit type conversion (Weak/Loose Typing) so it is not
necessary to declare the type of a variable. One data type can be converted into another implicitly or
explicitly. If type conversion is implicit, then, it is called, Coercion. What coercion type is expected
/required, is usually determined from the context of an expression. Coercions take place between
the integer and double types, Boolean and other scalar types, and numeric and string types.
If a numeric value appears in string context, then that value is converted to string. Similarly,
if a string value appears in numeric context, then that value is converted to a numeric value.
If the string does not begin with a sign or digit, then non-numeric characters that follow the
number in the string are ignored and zero is used.
Explicit Type Conversion:
There are THREE different ways to perform explicit type conversions,
(i) Using ‘C’ language syntax:
An expression can be cast to a different type using the syntax of ‗C‘. Here, the required type
name is written within the parentheses preceding the expression. For example, assume the value of
$amt is 550.50. Then the result of the following will be 550 after casting double type into integer
type.
Syntax: (int)$num;
(ii) Using Conversion Functions:
The conversion functions such as intval, doubleval or strval can be used, to specify explicit
type conversion.
Syntax: intval($num);
T
u
t
o
r
i
a
l
s
D
u
n
i
y
a
.
c
o
m
Download FREE Computer Science Notes at TutorialsDuniya.com
Download FREE Computer Science Notes at TutorialsDuniya.com](https://image.slidesharecdn.com/webtechnologiesnotes-tutorialsduniya-240127172050-67829a39/85/Web-Technologies-Notes-TutorialsDuniya-pdf-148-320.jpg)


![Page 143
Logical (or Relational) Operators
Assignment Operators
Conditional (or ternary) Operators
(i) Arithmatic Operators: There are following arithmetic operators supported by PHP language,
Operator Description Example [ let $a=10 and $b=20 ]
+ Adds two operands $a + $b will give 30
- Subtracts second operand from the first $a - $b will give -10
* Multiply both operands $a * $b will give 200
/ Divide numerator by denominator $b / $a will give 2
% Modulus Operator gives remainder $b % $a will give 0
++ Increment Operator (++i and i++) $i++ which is equal to i=i+1
-- Decrement Operator (--i and i--) $i-- which is equal to i=i-1
(ii) Comparison Operators: There are following comparison operators supported by PHP language,
Operator Description Example [ let a=10 and b=20
]
== Checks, two operands are equal or not ($a == $a) is not true.
!= Checks, two operands are equal or not. ($a != $a) is true.
=== Checks, two operands are equal and have same data type. ($a === $b) is not true.
!== Checks, two operands are not equal and have not same data type. ($a !== $b) is
true.
> Checks, left operand is greater than right operand. ($a > $b) is not true.
< Checks, left operand is less than right operand. ($a < $b) is true.
>= Checks, left operand is greater than or equal to right operand. ($a >=
$b) is not true.
<= Checks, left operand is less than or equal to right operand. ($a <= $b) is
true.
? : Ternary. ($a == $b) ? 5 : 10 $a==$b is true, return 5.
Otherwise 10
(iii) Logical Operators: There are following logical operators supported by PHP language,
Operator Description Example Conclude
AND Called Logical AND operator. $a AND $b true, if both a and b are
equal.
OR Called Logical OR Operator. $a OR $b true, if either a or b is equal.
NOT Called Logical NOT Operator. !($a && $b) false, if both a and b are
equal.
&& Called Logical AND operator. $a && $b true, if both a and b are
equal.
|| Called Logical OR Operator. $a || $b true, if either a or b is equal.
! Called Logical NOT Operator. !($a && $b) false, if both a and b are
equal.
XOR Called Logical XOR Operator. $a XOR $b true, if either a or b is
true.
T
u
t
o
r
i
a
l
s
D
u
n
i
y
a
.
c
o
m
Download FREE Computer Science Notes at TutorialsDuniya.com
Download FREE Computer Science Notes at TutorialsDuniya.com](https://image.slidesharecdn.com/webtechnologiesnotes-tutorialsduniya-240127172050-67829a39/85/Web-Technologies-Notes-TutorialsDuniya-pdf-152-320.jpg)


![Page 154
print(strtoupper($string1));
print(ucfirst($string2));
print(ucwords($string2));
Removing HTML tags from strings
The strip tags() function removes HTML tags from a string.
$input = '<p>Howdy, "Cowboy"</p>';
$output = strip_tags($input);
// $output is 'Howdy, "Cowboy"'
The function may take a second argument that specifies a string of tags to leave in the string. List
only the opening forms of the tags. The closing forms of tags listed in the second parameter are also
preserved:
$input = 'The <b>bold</b> tags will <i>stay</i><p>';
$output = strip_tags($input, '<b>');
// $output is 'The <b>bold</b> tags will stay'
Attributes in preserved tags are not changed by strip tags(). Because attributes such as style and
onmouseover can affect the look and behavior of web pages, preserving some tags with strip tags()
won't necessarily remove the potential for abuse.
3.6 ARRAYS
3.6.1 Array Basics:
An array is a single variable that can hold more than one value at once. You can think of an
array as a list of values. Each value within an array is called an element, and each element is
referenced by its own index , which is unique to that array. To access an element's value whether
you're creating, reading, writing, or deleting the element you use that element's index.
Note: An array index is often referred to as a key. Typically, a numeric index is called an index and
a string index is called a key; however there's no hard - and - fast rule with this.
In PHP, There are three kinds of Arrays:-
Numeric Array: An Array with numeric Key (index).
Associative Array: An array where each key is associated with a value.
Multi-dimensional Array: An array containing one or more arrays.
Arrays in PHP are flexible and built-in data structure. They are entirely different from the arrays
found in any other programming language. PHP‘s array can be defined as, a combination of arrays
found in a typical language such as C and associative arrays or hashes available in other languages
such as, Perl, Ruby and Python.
In PHP, an array element consists of two parts a ‗Key‘ and a ‗Value‘. Another interesting
feature of arrays is that, keys can be only positive integers, only string or a combination of both i.e.,
some of its elements have integer keys and some have string keys
Creating Arrays:
Individual elements of a PHP array are referenced by denoting the element between a pair of
square brackets. Because there is no size limitation on the array, you can create the array simply by
making reference to it, like this:
$branch[0] = "CSE";
Additional values can be added by mapping each new value to an array index, like this:
$branch[1] = "EEE";
$branch[2] = "ECE";
...
$branch[10] = "MECH";
T
u
t
o
r
i
a
l
s
D
u
n
i
y
a
.
c
o
m
Download FREE Computer Science Notes at TutorialsDuniya.com
Download FREE Computer Science Notes at TutorialsDuniya.com](https://image.slidesharecdn.com/webtechnologiesnotes-tutorialsduniya-240127172050-67829a39/85/Web-Technologies-Notes-TutorialsDuniya-pdf-163-320.jpg)
![Page 155
Interestingly, if you intend for the index value to be numerical and ascending, you can omit the
index value at creation time:
$branch[] = "CSE";
$branch[] = "ECE";
...
$branch[] = "EEE";
Creating Arrays with array()
The simplest way to create a new array variable is to use PHP's built - in array() construct. This
takes a list of values and creates an array containing those values, which you can then assign to a
variable:
$branch = array( "CSE", "ECE","EEE","MECH" );
In this line of code, an array of four elements is created, with each element containing a string
value. The array is then assigned to the variable $branch. You can now access any of the array
elements via the single variable name, $branch, as you see in a moment.
If you want to create an associative array, where each element is identified by a string index rather
than a number, you need to use the => operator, as follows:
$student = array( "Name" = > "Suresh", "branch" = > "CSE", "Gender" => "Male");
This creates an array with three elements: ―Suresh‖, which has an index o f‖ Name‖; ―CSE‖, which
has an index of ‖branch‖ ; and ―Male‖, which has an index of ―Gender‖.
Multidimensional arrays
In Multi-dimensional array elements in the array can be an array, and each element in the sub-array
can be an array and so on.
Example: In this example we create multidimensional array, with automatically assigned keys.
<?php
$course=array("UG"=>array("CSE","ECE","EEE","MECH"),
"PG"=>array("M.Tech(CSE)","M.Tech(CS)","M.Tech(VLSI)"),
"Dip"=>array("DCME","DECE","DEEE"));
?>
The above array would look like this it written to the output:
Arry([UG]=>Array( [0]=>CSE
[1]=>ECE
[2]=>EEE
[3]=>MECH)
[PG]=>Array( [0]=>M.Tech(CSE)
[1]=>M.Tech(CS)
[2]=>M.Tech(VLSI))
[Dip]=>Array([0]=>DCME
[1]=>DECE
[2]=>DEEE))
Accessing an Array Element:
Accessing of array elements is the same as in other languages. The brackets with the
subscript of the key are used to access an individual array element. This is irrespective of the integer
key or the string key.
$score[‗sub1‘] = 55;
$day[0] = ―Sunday‖;
T
u
t
o
r
i
a
l
s
D
u
n
i
y
a
.
c
o
m
Download FREE Computer Science Notes at TutorialsDuniya.com
Download FREE Computer Science Notes at TutorialsDuniya.com](https://image.slidesharecdn.com/webtechnologiesnotes-tutorialsduniya-240127172050-67829a39/85/Web-Technologies-Notes-TutorialsDuniya-pdf-164-320.jpg)
![Page 156
Outputting an Array:
The method that is used very often to output the contents of array is to iterate over each key
and echo the corresponding value. This can be done using “foreach” statement.
Example: <?php
$subjects = array(―WT‖, ―ST‖, ―DWDM‖, ―SPM‖, ―MEFA‖);
foreach($subjects as $subject)
{ echo ―{ $subject } <br />‖; }
Printing Arrays for Testing purposes:
The print_r() function accepts a variable and sends its contents to standard output, returning
TRUE on success and FALSE otherwise.
Prototype: Boolean print_r(mixed variables [, Boolean return]);
The print_r function takes the variables, sends the variable contents to standard output and
return TRUE if the operation is successful else it returns FALSE. In addition to this, print_r()
function builds the contents of array into readable format. Consider the example where the contents
of associative array holding few subjects and their subject_ids are to be viewed.
Example: <?php
$subjects = array(―WT‖, ―ST‖, ―DWDM‖, ―SPM‖, ―MEFA‖);
print_r($subjects);
?>
Output: Array([0] => WT, [1] => ST, [2] => DWDM, [3] => SPM, [4[ =>
MEFA)
3.6.2 Adding and Removing Array Elements:
PhP provides a number of functions for both growing and shrinking an array. Some of these
functions are provides as a convenience to programmers to do various queue implementations.
i) Adding a value to the Front of an Array:
The array_unshift() function adds elements to the front of an array. All preexisting
numerical keys are modified to reflect their new position in the array, but associative keys aren‘t
affected.
Prototype: int array_unshift(array array, mixed variables[, mixed variables …..]);
ii) Adding a value at the End of an Array:
The array_push() function adds a value at the end of an array. Returning the total count of
elements in the array after the new value has been added.
Prototype: int array_push(array array, mixed variables[, mixed variables …..]);
iii) Removing a value from the Front of an Array:
The array_shift() function removes and returns the first item found in an array. If numerical
keys are used, all corresponding values will be shifted down, whereas arrays using associative keys
will not be affected.
Prototype: mixed array_shift(array array);
iv) Removing a value at the End of an Array:
The array_pop() function removes and returns the last element in an array. Its prototype as
follows, Its prototype as follows,
Prototype: mixed array_pop(array array);
Example: <?php
$num = array(1,2,3,4,5);
array_unshift($num, -1, 0);
foreach ($num as $nums)
{ echo "{$nums } "; } echo "<br />"; }
T
u
t
o
r
i
a
l
s
D
u
n
i
y
a
.
c
o
m
Download FREE Computer Science Notes at TutorialsDuniya.com
Download FREE Computer Science Notes at TutorialsDuniya.com](https://image.slidesharecdn.com/webtechnologiesnotes-tutorialsduniya-240127172050-67829a39/85/Web-Technologies-Notes-TutorialsDuniya-pdf-165-320.jpg)
![Page 157
array_push($num, 6, 7);
foreach ($num as $nums)
{ echo "{$nums } "; } echo "<br />"; }
array_shift($num);
foreach ($num as $nums)
{ echo "{$nums } "; } echo "<br />"; }
array_pop($num);
foreach ($num as $nums)
{ echo "{$nums } "; } echo "<br />"; }
?>
Output: -1 0 1 2 3 4 5
-1 0 1 2 3 4 5 6 7
0 1 2 3 4 5 6 7
0 1 2 3 4 5 6
3.6.3 Locating / Searching Array Elements:
PHP introduces several functions that enable to search arrays in order to locate array
elements. Some of them are as follows,
i) Searching an Array:
The function in_array() searches an array for a specific value, returning TRUE if the value is
found and FALSE otherwise.
Prototype: Boolean in_array(mixed needle, array haystack[, Boolean strict]);
ii) Searching Associative Array Keys:
The function array_key_exists() returns TRUE if a specified key is found in an array and
FALSE otherwise.
Prototype: Boolean array_key_exists(mixed key, array array);
iii) Searching Associative Array Values:
The function array_search() searches an array for a specified value, returning its key located
and FALSE otherwise.
Prototype: mixed array_search(mixed needle, array haystack [, boolean
strict]);
iv) Retrieving Array Keys:
The function array_keys() returns an array consisting of all keys located in an array. Its
prototype as follows,
Prototype: array array_keys(array array [, mixed search_value [, boolean
preserve_keys]]);
v) Retrieving Array Values:
The function array_values() returns all values located in an array, automatically providing
numeric indexes for the returned array. Its prototype as follows,
Prototype: array array_values(array array);
Example: <?php
$num = array(1,2,3,4,5);
$key = 3;
if(in_array($key, $num))
echo " Search element found!";
else
echo " Search element not found!";
?>
T
u
t
o
r
i
a
l
s
D
u
n
i
y
a
.
c
o
m
Download FREE Computer Science Notes at TutorialsDuniya.com
Download FREE Computer Science Notes at TutorialsDuniya.com](https://image.slidesharecdn.com/webtechnologiesnotes-tutorialsduniya-240127172050-67829a39/85/Web-Technologies-Notes-TutorialsDuniya-pdf-166-320.jpg)

![Page 159
{ echo $cars[$x];
echo "<br>"; }
print_r(rsort($numbers));
?>
Output: Volvo
Toyota
BMW
Array([0] => 22, [1] => 11, [2] => 6, [3] => 4, [4[ => 2)
3.6.6 Some more Array fuctions on array elements:
(i) Shuffle:
This function shuffles (randomizes the order of the elements in) an array. Syntax: boolean
shuffle ( array &$array );
Example: <?php
$numbers = range(1, 10);
shuffle($numbers);
foreach ($numbers as $number)
{ echo "$number "; }
?>
Output: 2 5 7 9 10 1 3 4 6 8
ii) Merger:
The array_merge() array function in PHP will merge multiple arrays. This function takes a
list of arrays separated by commas as its parameters. Syntax: array array_merge ( array
$array1 [, array $... ] );
Example: <?php
$array1 = array("orange", "apple", "grape");
$array2 = array("peach", 88, "plumb");
$array3 = array("lemon", 342);
$newArray = array_merge($array1, $array2, $array3);
foreach ($newArray as $key => $value)
echo "$key - $value <br />";
?>
Output: 0 - orange 1 - apple 2 - grape 3 - peach 4 - 88 5 -
plumb
6 - lemon 7 – 342
iii) Combine:
The array_combine() function creates an array by using the elements from one "keys" array
and one "values" array. Both arrays must have equal number of elements. Syntax:
array_combine(keys,values);
Example: <?php
$fname=array("Peter","Ben","Joe");
$age=array("35","37","43");
$c=array_combine($fname,$age);
print_r($c);
?>
Output: Array ( [Peter] => 35 [Ben] => 37 [Joe] => 43 )
iv) Array Sum:
T
u
t
o
r
i
a
l
s
D
u
n
i
y
a
.
c
o
m
Download FREE Computer Science Notes at TutorialsDuniya.com
Download FREE Computer Science Notes at TutorialsDuniya.com](https://image.slidesharecdn.com/webtechnologiesnotes-tutorialsduniya-240127172050-67829a39/85/Web-Technologies-Notes-TutorialsDuniya-pdf-168-320.jpg)

![Page 163
specific word or number, but also a multitude of semantically different but syntactically similar
strings, such as all HTML tags in a file.
Brackets ([ ]) are used to represent a list, or range, of characters to be matched.
[0 9] matches any decimal digit from 0 through 9.
[a z] matches any character from lowercase a through lowercase z.
[A Z ] matches any character from uppercase A through uppercase Z.
[A Za z] matches any character from uppercase A through lowercase z.
3.8.1 Character Classes:
In PHP, We have several predefined character ranges, also known as character classes. Character
classes specify an entire range of characters for example, the alphabet or an integer set. Standard
classes include the following:
[: alpha :]: Lowercase and uppercase alphabetical characters. This can also be specified
as [A-Za-z].
[: alnum :]: Lowercase and uppercase alphabetical characters and numerical digits. This
can also be written as [A-Za-z0-9].
[: cntrl :]: Control characters such as tab, escape, or backspace.
[: digit :]: Numerical digits 0 through 9. This can also be specified as [0-9].
[: graph :]: Printable characters found in the range of ASCII 33 to 126.
[: lower :]: Lowercase alphabetical characters. This can also be specified as [a-z].
[: punct :]: Punctuation characters, including ! # $ % ^ & ( ) - + = f g [ ] : ; ' <> , . ? and /.
[: upper :]: Uppercase alphabetical characters. This can also be specified as [A-Z].
[: space :]: Whitespace characters, including the space, horizontal tab, vertical tab, new
line, form feed, or carriage return.
[: xdigit :]: Hexadecimal characters. This can also be specified as [a-fA-F0-9].
3.9 PROGRAMMING EXERCISE
1. Write a PHP program to sort list without using sort().
<?php
$array=array('2','4','8','5','1','7','6','9','10','3');
echo "Unsorted array is: ";
echo "<br />";
foreach ($array as $value) {
echo $value . ",";
}
echo "<br />";
echo "<br />";
for($j = 0; $j < count($array); $j ++) {
for($i = 0; $i < count($array)-1; $i ++){
if($array[$i] > $array[$i+1]) {
$temp = $array[$i+1];
$array[$i+1]=$array[$i];
$array[$i]=$temp;
}
}
}
T
u
t
o
r
i
a
l
s
D
u
n
i
y
a
.
c
o
m
Download FREE Computer Science Notes at TutorialsDuniya.com
Download FREE Computer Science Notes at TutorialsDuniya.com](https://image.slidesharecdn.com/webtechnologiesnotes-tutorialsduniya-240127172050-67829a39/85/Web-Technologies-Notes-TutorialsDuniya-pdf-172-320.jpg)
![Page 164
echo "Sorted Array is: ";
echo "<br />";
#print_r($array);
foreach ($array as $value) {
echo $value . ",";
}
?>
2. Write a PHP program to decompose a string into individual elements and store them in an
array.
Use PHPs explode() function to split a string by delimiter and store the separate segments in a
numerically indexed array:
<?php
// define string
$alphabetStr = "a b c d e f g h i j k";
// break string into array
// using whitespace as the separator
// result: ("a","b","c","d","e","f","g","h","i","j","k")
print_r(explode(" ", $alphabetStr));
?>
3. You want to strip an array of all duplicate elements to obtain a unique set.(Removing
Duplicate Elements in an Array)
<?php
// define an array containing duplicates
$numbers = array(10,20,10,40,35,80,35,50,55,10,55,30,40,70,50,10,35,85,40,90,30);
// extracts all unique elements into a new array
// result: "10, 20, 40, 35, 80, 50, 55, 30, 70, 85, 90"
echo join(", ", array_unique($numbers));
?>
4. Write a PHP program to sort a multidimensional array using multiple keys.
<?php
// create a multidimensional array
$data = array();
$data[0] = array("title" => "Net Force", "author" => "Clancy, Tom",
"rating" => 4);
$data[1] = array("title" => "Every Dead Thing", "author" => "Connolly,
John", "rating"=> 5);
$data[2] = array("title" => "Driven To Extremes", "author" => "Allen,
James", "rating" => 4);
$data[3] = array("title" => "Dark Hollow", "author" => "Connolly,
John", "rating" => 4);
$data[4] = array("title" => "Bombay Ice", "author" => "Forbes,
Leslie", "rating" => 5);
// separate all the elements with the same key
// into individual arrays
foreach ($data as $key=>$value) {
$author[$key] = $value['author'];
$title[$key] = $value['title'];
T
u
t
o
r
i
a
l
s
D
u
n
i
y
a
.
c
o
m
Download FREE Computer Science Notes at TutorialsDuniya.com
Download FREE Computer Science Notes at TutorialsDuniya.com](https://image.slidesharecdn.com/webtechnologiesnotes-tutorialsduniya-240127172050-67829a39/85/Web-Technologies-Notes-TutorialsDuniya-pdf-173-320.jpg)
![Page 165
$rating[$key] = $value['rating'];
}
// sort by rating and then author
array_multisort($rating, $author, $data);
print_r($data);
?>
5. Write a PHP script to protect a publicly-displayed e-mail address from being captured by
an e-mail address harvester.
<?php
// function to protect
// publicly-displayed e-mail addresses
// replace @ with "at"
// . with "dot"
// - with "dash"
// _ with "underscore"
function protectEmail($email) {
// define array of search and replacement terms
$search = array(".", "-", "_", "@");
$replace = array(" dot ", " dash ", " underscore ", " at ");
// perform search and replace operation
return str_replace($search, $replace, $email);
}
// result: "dontap at cst dash a dot acm dot org"
print protectEmail("dontap@cst-a.acm.org");
?>
3.10 SUMMARY
Variable is a named memory location that contains data and may be manipulated
throughout the execution of the program.
Variable names begin with a dollar sign ( $ ).
A constant is a value that cannot be modified throughout the execution of a program.
PHP supports eight primitive data types (Boolean, integer, oat, string, array, object,
resource and NULL).
An integer is representative of any whole number or, in other words, a number that does
not contain fractional parts.
A string is series of characters, where a character is the same as a byte.
An array is formally defined as an indexed collection of data values.
An operator is a symbol that specifies a particular action in an expression.
The result of the modulus operator % has the same sign as the dividend that is, the result
of $a % $b will have the same sign as $a.
Bitwise operators allow evaluation and manipulation of specific bits within an integer.
The concatenation operator ('.'), which returns the concatenation of its right and left
arguments.
The concatenating assignment operator ('.='), which appends the argument on the right
side to the argument on the left side.
Looping mechanisms over a simple means for accomplishing a commonplace task in
programming: repeating a sequence of instructions until a specific condition is satisfied.
T
u
t
o
r
i
a
l
s
D
u
n
i
y
a
.
c
o
m
Download FREE Computer Science Notes at TutorialsDuniya.com
Download FREE Computer Science Notes at TutorialsDuniya.com](https://image.slidesharecdn.com/webtechnologiesnotes-tutorialsduniya-240127172050-67829a39/85/Web-Technologies-Notes-TutorialsDuniya-pdf-174-320.jpg)

![Page 166
The foreach construct provides an easy way to iterate over arrays.
The return statement immediately ends execution of the current function, and returns its
argument as the value of the function call.
The strip_tags() function removes HTML tags from a string.
A function is a named block of code that performs a specific task.
3.11 Questions
1. (a) Explain different types of operators in PHP with examples.
(b) Write a PHP program that removes HTML from the given string. [Nov-2012,SupR09(IT)]
2. (a) Explain about PHP data types in detail.
(b) Write a PHP program that uses all the data types. [Nov-2012 Set-1]
3. (a) What is ternary operator? Explain with an example.
(b) Write a PHP program that works on date & time using functions.
(c) Explain about scope of a variable. [Nov-2012 Set-2]
4. (a) What is the use of scope resolution operator? Explain.
(b) Explain about operator precedence & associativity.[Nov-2012 Set-3]
5. (a) Explain different types of operators in PHP.
(b) What is the use of scope resolution operator? Explain.[Nov-2012 Set-4]
6. Explain in detail about statements in PHP.
7. (a) Explain how arrays are used in PHP.
(b) How functions are declare in PHP? Explain recursive functions in PHP with example.
8. (a) List and Explain different array functions in PHP?
(b) Expain different ways to print an array?
9. (a) What is the role of associative arrays in PHP? Explain with examples.
(b) How to declare and access the multidimensional arrays in PHP? Explain.
4.1 Using Cookies
Cookies are a mechanism for storing data in the remote browser .
Then,whenever the browser requests a page on your Web site, all the data in the cookie is
automatically sent to the server within the request.This means that you can send the data once to
thebrowser, and the data is automatically available to your script from that moment onward.
Acookie is sent from the server to the browser as part of the HTTP headers.
4.1.1 Setting Cookies
We can set cookies using the setcookie() function.
setcookie() defines a cookie to be sent along with the rest of the HTTP headers. Like otherheaders,
cookies must be sent before any output from your script (this is a protocol restriction).This requires
that you place calls to this function prior to any output, including < html > and< head > tags as well
as any whitespace.
boolsetcookie( string $name [, string $value [, int $expire = 0 [, string $path [, string $domain [,
bool $secure = false [, bool $httponly = false ]]]]]] )
Here is the detail of all the arguments:
Name: - This sets the name of the cookie and is stored in an environment
variable calledHTTP_COOKIE_VARS. This variable is used while accessing
cookies.
Value:-This sets the value of the named variable and is the content that you
actuallywant to store.
T
u
t
o
r
i
a
l
s
D
u
n
i
y
a
.
c
o
m
Download FREE Computer Science Notes at TutorialsDuniya.com
Download FREE Computer Science Notes at TutorialsDuniya.com](https://image.slidesharecdn.com/webtechnologiesnotes-tutorialsduniya-240127172050-67829a39/85/Web-Technologies-Notes-TutorialsDuniya-pdf-176-320.jpg)
![Page 167
Expiry:- This specify a future time in seconds since 00:00:00 GMT on 1st Jan
1970.After this time cookie will become inaccessible. If this parameter is not set
then cookiewill automatically expire when the Web Browser is closed.
Path:-This specifies the directories for which the cookie is valid. A single
forward slashcharacter permits the cookie to be valid for all directories.
Domain:- This can be used to specify the domain name in very large domains
and mustcontain at least two periods to be valid. All cookies are only valid for
the host and domainwhich created them.
Security:- This can be set to 1 to specify that the cookie should only be sent by
secure transmission using HTTPS otherwise set to 0 which mean cookie can be
sent by regularHTTP.
httponly:- When TRUE the cookie will be made accessible only through the
HTTPprotocol. This means that the cookie won't be accessible by scripting
languages, such asJavaScript. It has been suggested that this setting can
effectively help to reduce identitytheft through XSS attacks (although it is not
supported by all browsers), but that claim is often disputed. Added in PHP 4.2.0.
TRUE or FALSE.
Example
<?php
//File name: setcook.php
//Let's say that the correct login is based on these global user and pass values.
//In the real world, this would be taken from the database most likely.
$username="test_uname";
$password="test_pwd";
setcookie ("cookie_user", $username, time()+60*60*24*30);
setcookie ("cookie_pass", $password, time()+60*60*24*30);
header("read_cook.php");
?>
when we execute above script the cookie values are stored internally in the form of arrays
asfollows:
Array ( [cookie_user] =>test_uname [cookie_pass] =>test_pwd)
4.1.2 Reading Cookies
Cookies can indeed be read and quite easily. By using the $_COOKIE superglobal, you can have
full access to your cookie for reading and writing to it from your script.
The following example demonstrates reading values from cookies. In this example we retrieve
values of previous example cookies.
Example
<?php
//File name: read_cook.php
echo "User name from cookie:".$_COOKIE['cookie_user'];
echo "<br>password from cookie:".$_COOKIE['cookie_pass'];
?>
:::::: OUTPUT::::::
User name from cookie:test_uname
password from cookie:test_pwd
T
u
t
o
r
i
a
l
s
D
u
n
i
y
a
.
c
o
m
Download FREE Computer Science Notes at TutorialsDuniya.com
Download FREE Computer Science Notes at TutorialsDuniya.com](https://image.slidesharecdn.com/webtechnologiesnotes-tutorialsduniya-240127172050-67829a39/85/Web-Technologies-Notes-TutorialsDuniya-pdf-177-320.jpg)
![Page 168
4.1.3 Deleting Cookies
Removing cookies is also a simple task.
You should note that cookies will disappear by themselves if you have set them up to doso.
Example is as follows:
setcookie("cookie_user", $value, time()+3600); /* expire in 1 hour */
Cookies that have not been assigned a time to die will simply be removed when the browser
window closes. Example is as follows:
setcookie("cookie_user", $value);
A user will want to be able to clear the cookies on a site. When deleting a cookie you should
assure that the expiration date is in the past, to trigger the removal mechanism in your
browser. Examples follow how to delete cookies sent in previous example:
<?php
// set the expiration date to one hour ago
setcookie ("cookie_user", "", time() - 3600);
?>
::::: OUTPUT ::::::
After execution of above script it returns null value.
4.2 Using HTTP Headers
HTTP headers are powerful sets of functionality supported by PHP. The most important aspect to
remember about headers is that they can be called only before any output has been written to the
web page. We can use them to control everything, including setting the current page location,
finding out what file format is being displayed, and managing all aspects of the browser cache. In
the following examples, you will learn how to use the header() function in a variety of ways.
Prototype of header() function is as follows:
void header ( string $string [, bool $replace = true [, int $http_response_code ]] )
sring: The header string.
replace: The optional replace parameter indicates whether the header should replace a previous
similar header, or add a second header of the same type. By default it will replace, but if you pass in
FALSE as the second argument you can force multiple headers of the same type.
http response code: Forces the HTTP response code to the specified value. Note that this
parameter only has an effect if the string is not empty.
4.2.1 Redirecting to a Different Location
One of the more common uses for HTTP headers is redirecting a script. By using headers inside
processing scripts, you can force the browser to return to any page we want.
The following program shows the login page. After successful login header() function forwarded to
home.php page.
login.php
<html>
<title>Login</title>
<style>
.error {
font-weight: bold;
color: #FF0000;
}
</style>
</head>
<body>
T
u
t
o
r
i
a
l
s
D
u
n
i
y
a
.
c
o
m
Download FREE Computer Science Notes at TutorialsDuniya.com
Download FREE Computer Science Notes at TutorialsDuniya.com](https://image.slidesharecdn.com/webtechnologiesnotes-tutorialsduniya-240127172050-67829a39/85/Web-Technologies-Notes-TutorialsDuniya-pdf-178-320.jpg)
![Page 169
<div style="width: 500px; text-align: left;">
<?php
$host="localhost"; // Host name
$username="root"; // Mysql username
$password=""; // Mysql password
$db_name="cse"; // Database name
$tbl_name="reg"; // Table name
//Default to showing the form.
$flag = false;
//Handle the incoming data.
if ($_SERVER["REQUEST_METHOD"] == "POST"){
//Let's declare a submission value that tells you if you are fine.
$flag = true;
//Validate the name.
if (trim ($_POST['name']) == "" || trim ($_POST['pwd'])==""){
$flag = false;
echo ("<p class=error>Sorry, you must enter your name & Password.</p><br />");
}
else{
mysql_connect("$host", "$username", "$password")or die("cannot connect");
mysql_select_db("$db_name")or die("cannot select DB");
$sql="SELECT * FROM $tbl_name where name='".$_POST['name']."' and
pwd='".$_POST['pwd']."'";
$result=mysql_query($sql);
if($info = mysql_fetch_array($result)){
$flag = false;
header("Location: home.php"); //this function forward to home.php
}else{
$flag = false;
echo ("<p class=error>Sorry, username or/and password is/are wrong.</p><br />");
}
}
}
if (!$flag){
?>
<form action="<?php $_SERVER["PHP_SELF"];?>" method="post">
<p>Login form:</p>
User Name: <input type="text" name="name" maxlength="150" value="<?php
if ($_SERVER["REQUEST_METHOD"] == "POST"){echo $_POST['name'];}?>"/><br /><br />
Password: <input type="password" name="pwd" maxlength="150" value="<?php
if ($_SERVER["REQUEST_METHOD"] == "POST"){echo $_POST['pwd'];}?>" /><br />
<input type="submit" value="Submit" style="margin-top: 10px;" />
</form>
<?php
}
?>
</div>
T
u
t
o
r
i
a
l
s
D
u
n
i
y
a
.
c
o
m
Download FREE Computer Science Notes at TutorialsDuniya.com
Download FREE Computer Science Notes at TutorialsDuniya.com](https://image.slidesharecdn.com/webtechnologiesnotes-tutorialsduniya-240127172050-67829a39/85/Web-Technologies-Notes-TutorialsDuniya-pdf-179-320.jpg)
![Page 171
?>
The key point in this code is showing content-disposition in the header. By making content-
disposition an attachment value, the browser will force a download rather than display the file
inline. By using this, you can force the download to appear with any particular filenameyou prefer
and also with pretty much any file extension. By using content-type, you force thebrowser to output
a file of the requested type.
4.3 Using Sessions
Because cookies are getting less and less trusted, a means had to be created to allow user
authentication without having to store physical data on a client system. As a solution, sessions came
onto the scene.
session_start() function needs to be called at the beginning of every page where you want session
access. When session_start() is called or when a session auto starts, PHP will call the open and read
session save handlers. This function returns TRUE if a session was successfully started, otherwise
FALSE.
The prototypes for these session-related functions are as follows:
boolsession_start ( void )
boolsession_destroy ( void )
4.3.1 Setting Sessions
Setting the data in sessions is very easy in php. The session support allows to store data between
requests in the $_SESSION superglobal array. The following example creates a session state, sets a
session:
<?php
session_start();
$_SESSION['uname']="test_user";
$_SESSION['pwd']="test_pwd";
?>
When we are executing the above script internally SESSION store the information in an associative
array as follows:
Array ( [uname] =>test_user [pwd] =>test_pwd )
4.3.2 Reading Sessions
Reading the values from SESSIONs is also very easy using $_SESSION superglobal variable. The
following example shows the reading and accessing data from SESSIONs.
<?php
session_start();
echo "Username in SESSION is <b>".$_SESSION['uname']."</b><br>";
echo "Password in SESSION is <b>".$_SESSION['pwd']."</b>";
?>
:::::: OUTPUT ::::::
Username in SESSION is test_user
Password in SESSION is test_pwd
4.3.3 Deleting Sessions
In php we are using three functions to delete or clear SESSION information.
session_unset()
The session_unset() function frees all session variables currently registered. the prototype is as
follows:
T
u
t
o
r
i
a
l
s
D
u
n
i
y
a
.
c
o
m
Download FREE Computer Science Notes at TutorialsDuniya.com
Download FREE Computer Science Notes at TutorialsDuniya.com](https://image.slidesharecdn.com/webtechnologiesnotes-tutorialsduniya-240127172050-67829a39/85/Web-Technologies-Notes-TutorialsDuniya-pdf-181-320.jpg)
![Page 172
voidsession_unset ( void )
session_destroy()
The session_destroy() destroys all of the data associated with the current session. It does not unset
any of the global variables associated with the session, or unset the session cookie. To use the
session variables again, session_start() has to be called. The prototype is as follows:
bool session destroy ( void )
unset()
unset() destroys the specified variables. The behavior of unset() inside of a function canvary
depending on what type of variable you are attempting to destroy.
If a globalized variable is unset() inside of a function, only the local variable is destroyed.The
variable in the calling environment will retain the same value as before unset() wascalled. The
prototype is as follows: void unset ( mixed $var [, mixed $... ] )
Example: unset($_SESSION[`uname']);
After executing the above statement only ‗uname‘ will be cleared from session.
4.3.4 Storing Simple Data Types in Sessions:
Sessions have really been useful only for passing simple data types around. Sessions handlesimple
data types, and they handle them well. Like any PHP variable, however, the data typeof a current
session is based upon what was last assigned to it and can be changed quite easily.
The following example describes this:
<?php
session_start();
(int)$_SESSION['inumber']=1024;
(float)$_SESSION['fnumber']=10.23;
(string)$_SESSION['str']="String";
?>
Internally SESSION stores information as follows:
Array ( [inumber] => 1024 [fnumber] => 10.23 [str] => String )
4.3.5 Storing Complex Data Types in Sessions:
One of the major improvements to PHP is the ability to store complex data types (arrays andobjects)
within a session.
Store & Access Arrays in SESSION
The following example demonstrates how to store arrays in Sessions.
<?php
session_start();
$x=array('uname'=> "suresh",'pwd'=>"1234");
$_SESSION['str']=$x;
?>
Internally session store the data in the form of two-dimensional array as follows:
Array ( [str] => Array ( [uname] => Praveen [pwd] => password ) )
The following example demonstrates accessing the arrays in sessions. When we store arrays in
SESSIONs we are accessing $_SESSION as a two dimensional array.
<?php
session_start();
echo "User name:::::::::::".$_SESSION['str']['uname']."<BR>";
echo "Password:::::::::::".$_SESSION['str']['pwd']."<BR>";
?>
:::::: OUTPUT ::::::
T
u
t
o
r
i
a
l
s
D
u
n
i
y
a
.
c
o
m
Download FREE Computer Science Notes at TutorialsDuniya.com
Download FREE Computer Science Notes at TutorialsDuniya.com](https://image.slidesharecdn.com/webtechnologiesnotes-tutorialsduniya-240127172050-67829a39/85/Web-Technologies-Notes-TutorialsDuniya-pdf-182-320.jpg)
![Page 173
User name:::::::::::suresh
Password:::::::::::1234
Store & Access Objects in SESSION
PHP allows you to store objects within sessions. Using this technique, you can easily storelarge
quantities of data within a single object, use the functionality within the session for thesepurposes,
and then pass the data along to otherpages.
<?php
session_start();
//A class that does not do too much.
classmyclass {
protected $myvalue;
public function setmyvalue ($newvalue){
$this->myvalue = $newvalue;
}
public function getmyvalue (){
return $this->myvalue;
}
}
$_SESSION['myclass_value'] = new myclass ();
//This function exists for the sole purpose of showing how sessions can be called
//from anywhere within the scope of the session state.
functionoutputsessions (){
$_SESSION['myclass_value']->setmyvalue ("Hello World");
echo $_SESSION['myclass_value']->getmyvalue ();
}
//Then you can call the function from here:
outputsessions();
?>
Output:
Hello World
Difference between cookies & sessions
Cookies Sessions
1 Cookies store data on the Client machine Sessions store data on the server
2 Less secure More Secure than cookies
3 Stores less amount of data Here we store more amount of data
4 It store only primitive datatypes It stores both primitive and Compounddatatypes.
5 More amount of time Data stored in
cookies
Less time sessions store the data.
6 No need to require additional space tostore
data
Sessions need extra space, unlike cookiesto store
data
7 No need to call additional functions Here it needssession_start() to create sessions.
8 Setting and deleting use setcookie() For setting session use $_SESSION[]
superglobal array, and delete session information
use unset() or session_destroy().
9 Accessing cookie using $_COOKIE[]
superglobal array.
Accessing sessions using $_SESSION[]
superglobal array
Table 4.1: Difference between cookies & sessions
T
u
t
o
r
i
a
l
s
D
u
n
i
y
a
.
c
o
m
Download FREE Computer Science Notes at TutorialsDuniya.com
Download FREE Computer Science Notes at TutorialsDuniya.com](https://image.slidesharecdn.com/webtechnologiesnotes-tutorialsduniya-240127172050-67829a39/85/Web-Technologies-Notes-TutorialsDuniya-pdf-183-320.jpg)
![Page 174
4.4 Authenticating Your Users
PHP uses two predefined variables to authenticate a user.
1. $_SERVER['PHP_AUTH_USER']
2. $_SERVER['PHP_AUT_PW']
These two superglobal variables store the Username and password values respectively
whileauthenticating is as simple as comparing the expected username and password to these
variables.
The isset() function determines whether a variable has been assigned a value. The prototypeis as
follows:
booleanisset(mixed var[,mixed var[,......]])
It returns TRUE if the variable contains a value and FALSE if it does not.It applied to User
authentication, the isset() function is useful for determining whether the
$_SERVER['PHP_AUTH_USER'] and $_SERVER['PHP_AUTH_PW'] variables are properly set.
Using isset() to verify whether a variable contain a value or not.
<?php
if(!isset($_SERVER['PHP_AUTH_USER']) || !isset($_SERVER['PHP_AUTH_PW'])){
header('www-Authenticate: Basic replays="Authentication"');
header("HTTP/1.1 401 Unauthorized");
}
else{
echo "User Name is ".$_SERVER['PHP_AUTH_USER']."<br/>";
echo "password is ".$_SERVER['PHP_AUTH_PW'];
}
?>
4.5 Using Environment and Configuration Variables
PHP provides a means to use and verify the configuration settings and environment
variablesrelative to the server space the script is occupying. A common use of the environment
variablesin PHP is for dynamic imaging. While Windows systems commonly store their fonts in
onefolder, Linux-based systems keep theirs in another. By using PHPs environment variables
todetermine the current operating system, you can make your code slightly more portable.
Using configuration variables can also come in quite handy, particularly with file uploadscripts. The
base PHP installation leaves only enough processing time to upload files that aregenerally 2MB or
smaller in size. By manipulating the PHP configuration files temporarily, youcan increase the limit
enough to allow a script to process much larger files.
4.5.1 Reading Environment Variables
The $_ENV superglobal is PHPs method for reading a systems environment variables and hasan
argument set that is based upon the current environment that is available to it. We canretrieve them
using the getenv() function also.
<?php
echo $_ENV['Program Files'] . "<br />"; //Outputs C:Program Files.
echogetenv("ProgramFiles") . "<br />"; //Outputs C:Program Files.
echo $_ENV['COMPUTERNAME'] . "<br />"; //Outputs COMPUTER-2339.
echogetenv("COMPUTERNAME") . "<br />"; //Also Outputs COMPUTER-2339.
?>
4.5.2 Reading Configuration Variables
Reading configuration variables, on the other hand, takes place through two functions, ini_get() and
ini_get_all(). The function ini_get() will retrieve the value of a specified configuration variable, and
T
u
t
o
r
i
a
l
s
D
u
n
i
y
a
.
c
o
m
Download FREE Computer Science Notes at TutorialsDuniya.com
Download FREE Computer Science Notes at TutorialsDuniya.com](https://image.slidesharecdn.com/webtechnologiesnotes-tutorialsduniya-240127172050-67829a39/85/Web-Technologies-Notes-TutorialsDuniya-pdf-184-320.jpg)
![Page 175
the function ini_get_all() will retrieve an array filled with the entire selection ofconfiguration
variables that are available.
<?php
echoini_get ("post_max_size") . "<br />"; //Outputs 8MB.
//And you can output the entire listing with this function.
print_r (ini_get_all());
?>
4.5.3 Setting Environment Variables
Setting environment and configuration variables is just as easy as it is to get them. Whileworking
with environment variables, you merely need to assign a new value to the $_ENVsuperglobal to
process a temporary change. The change will be in effect for the scripts duration.
<?php
echo $_ENV['COMPUTERNAME'] . "<br />"; // Echoes COMPUTER-2339.
$_ENV['COMPUTERNAME'] = "dp";
echo $_ENV['COMPUTERNAME'] . "<br />"; //Echoes the new COMPUTERNAME.
?>
4.5.4 Setting Configuration Variables
The same applies for configuration variables but with a different approach. To set a
configurationvariable, you have to use the PHP function ini_set(), which will allow you to set a
configurationvariable for the scripts duration. Once the script finishes executing, the configuration
variablewill return to its original state. The prototype for ini_set() is as follows: string
ini_set ( string varname, string newvalue )
<?php
echoini_get ('post_max_size'); //Echoes 8MB.
//Then you set it to 200M for the duration of the script.
ini_set('post_max_size','200M');
echoini_get ('post_max_size'); //Echoes 200MB.
//Any files that are to be uploaded in this script will be OK up to 200M.
?>
4.6 Working with Date and Time
In the programming world, date and time values formatted in Unix epoch manner.The Unix epoch
(or Unix time or POSIX time or Unix timestamp) is the numberof seconds that have elapsed since
January 1, 1970 (midnight UTC/GMT), not counting leapseconds (in ISO 8601: 1970-01-
01T00:00:00Z). Literally speaking the epoch is Unix time 0(midnight 1/1/1970), but 'epoch' is often
used as a synonym for 'Unix time'. Many Unixsystems store epoch dates as a signed 32-bit integer,
which might cause problems on January19, 2038 (known as the Year 2038 problem or Y2038).
The following are some of the date and time functions.
4.6.1 time()
It returns the current system date and time as a Unix timestamp.
<?php
echo time();
?>
:::::: OUTPUT ::::::
1386331271
4.6.2 date()
T
u
t
o
r
i
a
l
s
D
u
n
i
y
a
.
c
o
m
Download FREE Computer Science Notes at TutorialsDuniya.com
Download FREE Computer Science Notes at TutorialsDuniya.com](https://image.slidesharecdn.com/webtechnologiesnotes-tutorialsduniya-240127172050-67829a39/85/Web-Technologies-Notes-TutorialsDuniya-pdf-185-320.jpg)
![Page 176
Returns a string formatted according to the given format string using the given integer timestamp or
the current time if no timestamp is given. The prototype is a s follows: string date ( string
$format [, int $timestamp = time() ] )
The following example demonstrate date() function.
<?php
echo date("r");
echo "<br>".date("d:M:Y:::H:S:I");
?>
:::::: OUTPUT ::::::
Fri, 06 Dec 2013 13:24:49 +0100
06:Dec:2013:::13:49:0
Character Description
F Full name of the month (January, February, and so on).
M Three-letter abbreviation for the month (Jan, Feb, and so on).
m Numeric representation for the month, with leading zero (two digits).
n Numeric representation for the month (no leading zero).
y Two-digit year.
Y Four-digit year.
d Day of the month, with leading zeros (two digits).
j Day of the month (no leading zeros).
D A textual representation of a day, three letters (Mon, Tue, and so on).
w Numeric representation of the day of the week (0 = Sunday, 6 = Saturday).
h Hour in 12-hour format, with leading zero (two digits).
g Hour in 12-hour format (no leading zero).
H Hour in 24-hour format, with leading zero (two digits).
G Hour in 24-hour format (no leading zero).
a am/pm (lowercase).
A AM/PM (uppercase).
i Minute, with leading zero (two digits).
j Minute (no leading zero)
s Second, with leading zero (two digits).
r RFC-2822 format WWW, DD MMM YYYY HH:MM:SS HHMM
Table 4.2: Formatting Characters for the date() Function
4.6.3 checkdate()
It checks the validity of the date formed by the arguments. A date is considered valid if
eachparameter is properly defined. The prototype is as follows: boolcheckdate ( int $month , int
$day , int $year )
Returns TRUE if the date given is valid; otherwise returns FALSE.
<?php
echo checkdate(12, 31, 2000);// Return 1
echo checkdate(2, 29, 2001); //Return 0
?>
4.6.4 mktime()
Returns the Unix timestamp corresponding to the arguments given. This timestamp is a longinteger
containing the number of seconds between the Unix Epoch (January 1 1970 00:00:00GMT) and the
time specified.
T
u
t
o
r
i
a
l
s
D
u
n
i
y
a
.
c
o
m
Download FREE Computer Science Notes at TutorialsDuniya.com
Download FREE Computer Science Notes at TutorialsDuniya.com](https://image.slidesharecdn.com/webtechnologiesnotes-tutorialsduniya-240127172050-67829a39/85/Web-Technologies-Notes-TutorialsDuniya-pdf-186-320.jpg)
![Page 177
Arguments may be left out in order from right to left; any arguments thus omitted will beset to the
current value according to the local date and time. The prototype is as follows:
intmktime ([ int $hour = date("H") [, int $minute = date("i") [, int $second =date("s") [, int
$month = date("n") [, int $day = date("j") [, int $year = date("Y")[, int $is_dst = -1 ]]]]]]] )
A simple example is:
<?php
echomktime(11,00,6,12,6,2012);//Output: 1354788006
?>
4.6.5 strtotime()
The function expects to be given a string containing an English date format and will try toparse that
format into a Unix timestamp (the number of seconds since January 1 1970 00:00:00UTC), relative
to the timestamp given in now, or the current time if now is not supplied.
Each parameter of this function uses the default time zone unless a time zone is specifiedin that
parameter. Be careful not to use different time zones in each parameter unless that isintended. The
prototype is as follows:
intstrtotime ( string $time [, int $now = time() ] )
Example to demonstrate strtotome()
<?php
echo strtotime("20131206"); // Output: 1386284400
?>
4.6.6 getdate()
It returns an associative array containing the date information of the timestamp, or the currentlocal
time if no timestamp is given.
arraygetdate ([ int $timestamp = time() ] )
Example programs demonstrate getdate()
<?php
print_r(getdate(time()));
?>
:::::: OUTPUT ::::::
Array ( [seconds] => 36 [minutes] => 4 [hours] => 14 [mday] => 6 [wday] => 5[mon] => 12 [year]
=> 2013 [yday] => 339 [weekday] => Friday[month] => December [0] => 1386335076 )
4.6.7 strptime()
strptime() returns an array with the date parsed, or FALSE on error.
array strptime ( string $date , string $format )
Function Description
date_sunrise() Returns time of sunrise for a given day and location (new in PHP 5).
date_sunset() Returns time of sunset for a given day and location (new in PHP 5).
gmdate() Formats a GMT/UTC date/time. Uses the same formatting charactersas the date()
function.
gmmktime() Converts a set of GMT date/time values into a Unix timestamp (analogous to
mktime()).
Table 4.3: More PHP 5 Date/Time Functions
4.7 Programming Exercise
1. Write a PHP program that works on date & time using functions.
<?php
$b = time ();
T
u
t
o
r
i
a
l
s
D
u
n
i
y
a
.
c
o
m
Download FREE Computer Science Notes at TutorialsDuniya.com
Download FREE Computer Science Notes at TutorialsDuniya.com](https://image.slidesharecdn.com/webtechnologiesnotes-tutorialsduniya-240127172050-67829a39/85/Web-Technologies-Notes-TutorialsDuniya-pdf-187-320.jpg)
![Page 178
print date("m/d/y",$b) . "<br>";
print date("D, F jS",$b) . "<br>";
print date("l, F jSY",$b) . "<br>";
print date("g:iA",$b) . "<br>";
print date("r",$b) . "<br>";
print date("g:i:s A D, F jSY",$b) . "<br>";
?>
4.8SUMMARY
• Cookies are a mechanism for storing data in the remote browser.
• A cookie lets you store a small amount of data.
• We can set and delete cookies using the setcookie() function.
• Arguments we pass through setcookie() function are: name, expiry, value, path, domain.
• By using the $_COOKIEsuperglobal, you can havefull access to your cookie for readingand
writing to it from your script.
• By using header() function, we access the HTTP headers in PHP.
• We access HTTP headers in three ways:
1. Redirecting to a Different Location
2. Sending Content Types Other Than HTML
3. Forcing File Save As Downloads
• session_start() function needs to be called at the beginning of every page where you
wantsession.
• The session support allows to store data between requests in the
$_SESSIONsuperglobalarray access.
• Deleting the SESSION information using three functions: session_unset(),
session_destroy()and unset().
• The session_unset() function frees all session variables currently registered.
• The session_destroy() destroys all of the data associated with the current session.
• The unset() destroys the specified variables.
• PHP has the ability to store complex data types (arrays and objects) within a session.
• $_ENVsuperglobal variable or getenv()is used to read Environment variables.
• Reading configuration variables, on the other hand, takes place through two functions,
ini_get() and ini_get_all().
• To set the Configuration variables use the function ini_set().
• In the programming world, date and time values formatted in Unix epoch manner.
• time() function returns the current system date and time as a Unix timestamp.
• checkdate() function is used to validate dates.
4.9Questions
1. (a) How to set a cookie on user computer? Explain with an example.
(b) Explain Briefly how to redirect the HTTP headers to different locations. [Apr/May 2012 Set-
1]
2. (a) What are cookies? What are the advantages of cookies?
(b) Briefly explain different parameters available when setting a cookie. [Apr/May 2012 Set-
2][IT-Nov/Dec2012 Set-(R09)]
3. What are Cookies? Explain the following:
(a) Setting Cookies. (b) Deleting Cookies. [Apr/May 2012 Set-3]
4. (a) Explain briefly how to use the header() function in different ways.
T
u
t
o
r
i
a
l
s
D
u
n
i
y
a
.
c
o
m
Download FREE Computer Science Notes at TutorialsDuniya.com
Download FREE Computer Science Notes at TutorialsDuniya.com](https://image.slidesharecdn.com/webtechnologiesnotes-tutorialsduniya-240127172050-67829a39/85/Web-Technologies-Notes-TutorialsDuniya-pdf-188-320.jpg)
![Page 179
(b) Explain the advantages of the PHP functions available for the time and date. [Apr/May 2012
Set-4]
5. (a) Explain briefly how to redirect the HTTP headers to different locations.
(b) Explain briefly how to use the header ( ) function in different ways. [Nov 2012 Set-1][5(b)
Nov 2012 Set-3]
6. (a) Explain why cookies are becoming less trusted. [5(a) Nov 2012 Set-3]
(b) What is a session? Explain briefly about sessions. [Nov 2012 Set-2]
7. (a) What are the advantages and disadvantages of cookies?
(b) How to set a cookie on user computer? Explain with an example.[Nov 2012 Set-4]
8. (a) What is a session? Explain briefly about sessions.
(b) Explain with an example, how storing of simple data types is done in sessions. [jan-2014
set-1]
9. What are cookies? What are the advantages and disadvantages of cookies? [jan-2014 set-3]
10. Explain the following functions with examples:
(a) getdate() (b) microtime() (c) strptime() (d) idate()
[jan-2014 set-2]
11. Explain the following functions with examples.
(a) date_sunrise() (b) gmmktime() (c) strftime() (d) time() [jan-2014
set-4]
Cookies:
A cookie is a small piece of text file stored on user's computer in the form of name-value pair.
Cookies are used by websites to keep track of visitors e.g. to keep user information like username
etc. If any web application using cookies, Server send cookies and client browser will store it. The
browser then returns the cookie to the server at the next time the page is requested. The most
common example of using a cookie is to store User information, User preferences, Password
Remember Option etc. It is also one of the common and mostly asked interview questions.
Cookies are a mechanism for storing data in the remote browser and thus tracking or identifying
return users. PHP transparently supports HTTP cookies.
A cookie lets you store a small amount of data within the user's browser itself. Then, whenever the
browser requests a page on your Web site, all the data in the cookie is automatically sent to the
server within the request. This means that you can send the data once to the browser, and the data is
automatically available to your script from that moment onward. A cookie is sent from the server to
the browser as part of the HTTP headers.
We can set cookies using the setcookie() function. Cookies can indeed be read and quite easily. By
using the $_COOKIE superglobal, you can have full access to your cookie for reading and writing
to it from your script.
Some facts about Cookie
1. · Cookies are domain specific i.e. a domain cannot read or write to a cookie created by another
domain. This is done by
the browser for security purpose.
2. · Cookies are browser specific. Each browser stores the cookies in a different location. The
cookies are browser specific
and so a cookie created in one browser (e.g in Google Chrome) will not be accessed by another
browser (Internet
Explorer/ Firefox).
T
u
t
o
r
i
a
l
s
D
u
n
i
y
a
.
c
o
m
Download FREE Computer Science Notes at TutorialsDuniya.com
Download FREE Computer Science Notes at TutorialsDuniya.com](https://image.slidesharecdn.com/webtechnologiesnotes-tutorialsduniya-240127172050-67829a39/85/Web-Technologies-Notes-TutorialsDuniya-pdf-189-320.jpg)

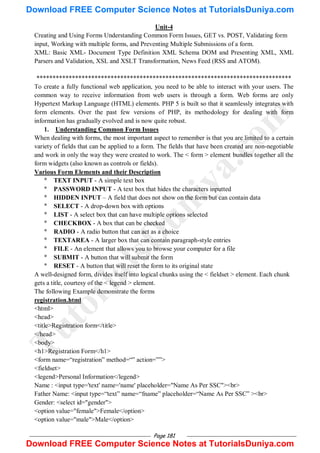
![Page 182
</select><br>
Age: <input id="age" type="number" min="0" max="120"><br> </fieldset>
<fieldset>
<legend>Contact Details</legend>
Telephone: <input id="telephone"><br>
Email: <input type='text' id="email"><br>
</fieldset>
<fieldset>
<legend>Pick Your Favorite Animals</legend>
<input id=―cow" type="checkbox"> Cow
<input id="cat" type="checkbox"> Cat
<input id=―dog" type="checkbox"> Dog
<input id="elephant" type="checkbox"> Elephant
</fieldset>
<p><input type="submit" value="Submit Application"></p>
</form>
</body>
</html>
6.2 GET vs. POST
The two ways available to a web developer that the information entered into the form is transmitted
to its destination by using method. the two methods are GET and POST.
GET
When sending data using the GET method, all fields are appended to the Uniform Resource Locator
(URL) of the browser and sent along with the address as data. Sending data using the GET method
means that fields are generally capped at 150 characters, which is certainly not the most effective
means of passing information. It is also not a secure means of passing data, because many people
know how to send information to a script using an address bar. PHP's current methods for dealing
with GET variable is the $_GET superglobal. Syntax is $_GET['Variable Name'];.
The following Example demonstrate the working of the GET method
File Name: get.php
<html>
<head>
<title>Example for get</title>
</head>
<body>
<form action="get-demo.php" method="GET">
<p>GET Example:</p>
User Name: <input type="text" name="uname" maxlength="150" /><br /><br />
Password: <input type="password" name="pwd" maxlength="150" /><br />
<input type="submit" value="Submit with GET" style="margin-top: 10px;" />
</form>
</body>
</html>
T
u
t
o
r
i
a
l
s
D
u
n
i
y
a
.
c
o
m
Download FREE Computer Science Notes at TutorialsDuniya.com
Download FREE Computer Science Notes at TutorialsDuniya.com](https://image.slidesharecdn.com/webtechnologiesnotes-tutorialsduniya-240127172050-67829a39/85/Web-Technologies-Notes-TutorialsDuniya-pdf-192-320.jpg)
![Page 183
Fig: Output of get.php
File Name: get-demo.php
<html>
<head>
<title>Example for GET</title>
</head>
<body>
<?php
if (trim ($_GET['uname']) != "" && trim ($_GET['pwd']) != ""){
echo "Your User Name (with GET): " . $_GET['uname'];
echo "<br>Your password (with GET) : ". $_GET['pwd'];
} else {
echo "You must submit a value.";
}
?><br /><a href="get.php">Try Again</a>
</body>
</html>
Fig: Output after submit get.php (see the address bar)
When using the GET method, hitting the Refresh button after submitting data the browser will
automatically send the data again.
POST
When sending data using the POST method, values are sent as standard input (the data will be
sended through body not in URL). Sending data using the POST method is quite a bit more secure
(because the method cannot be altered by appending information to the address bar) and can contain
as much information as you choose to send. Therefore, whenever possible, use the POST method
for sending information and then adjust your script to handle it.
PHP s current methods for dealing with POST variable is the $_POST superglobal. Syntax is
$_POST['Variable Name'];.
The following Example demonstrate the working of the POST method
File Name: post.php
<html>
<head>
<title>Example for POST</title>
</head>
<body>
<form action="post-demo.php" method="post">
<p>POST Example:</p>
T
u
t
o
r
i
a
l
s
D
u
n
i
y
a
.
c
o
m
Download FREE Computer Science Notes at TutorialsDuniya.com
Download FREE Computer Science Notes at TutorialsDuniya.com](https://image.slidesharecdn.com/webtechnologiesnotes-tutorialsduniya-240127172050-67829a39/85/Web-Technologies-Notes-TutorialsDuniya-pdf-193-320.jpg)
![Page 184
<input type="hidden" name="submitted" value="yes" />
User Name: <input type="text" name="uname" maxlength="150" /><br /><br />
Password: <input type="password" name="pwd" maxlength="150" /><br />
<input type="submit" value="Submit with POST" style="margin-top: 10px;" />
</form>
</body>
</html>
Fig: Output of post.php
File Name: post-demo.php
<html>
<head>
<title>Example for POST</title>
</head>
<body>
<?php
if (trim ($_POST['uname']) != "" && trim ($_POST['pwd']) != ""){
echo "Your User Name (with POST): " . $_POST['uname'];
echo "<br> Your password(with POST) :". $_POST['pwd'] ;
} else {
echo "You must submit a value.";
}
?><br /><a href=―post.php">Try Again</a>
</body>
</html>
Fig: Output after submit post.php (see the address bar)
Hitting the Refresh button after submitting data using the POST form, the browser will ask you if
you want to resubmit the data that was passed to it previously. If you want to resend the data, you
must select Yes (Resend) to this option.
Fig: Refresh after submitting the form it asks confirmation
GET Vs POST
T
u
t
o
r
i
a
l
s
D
u
n
i
y
a
.
c
o
m
Download FREE Computer Science Notes at TutorialsDuniya.com
Download FREE Computer Science Notes at TutorialsDuniya.com](https://image.slidesharecdn.com/webtechnologiesnotes-tutorialsduniya-240127172050-67829a39/85/Web-Technologies-Notes-TutorialsDuniya-pdf-194-320.jpg)
![Page 185
3 Validating form input
Validation is a way to catch mistakes when they happen (or even better, to prevent them from
happening at all).
Client-side validation: These are the checks that happen in the browser, before a form is
submitted. The goal here is to make life easier for the people filling out the form.
Examples: HTML5, JavaScript etc.
Server-side validation: These are the checks that happen after a form is sent back to the web
server. At this point, it is up to your server-side code to review the details and make sure everything
is proper before continuing. No matter what the browser does, server-side validation is essential.
The following example shows a few examples of form validation using PHP.
Filename: validation.php
<html>
<head>
<title> Validation DEMO </title>
<?php
if($_SERVER["REQUEST_METHOD"]=="POST"){
if($_POST["uname"]==―‖){
echo "<font color=red>Please Enter valid User name</font><br>";
}
else if(strlen($_POST["uname"])<6){
echo "<font color=red>Please Enter valid User name with more than 6 characters<br></font>";
}
if($_POST["pwd"]==―‖){
echo "<font color=red>Please Enter valid Password</font><br>";
}
else if(strlen($_POST["pwd"])<6){
echo "<font color=red>Please Enter valid Password with more than 6 characters<br></font>";
}
}
?>
</head>
<body>
T
u
t
o
r
i
a
l
s
D
u
n
i
y
a
.
c
o
m
Download FREE Computer Science Notes at TutorialsDuniya.com
Download FREE Computer Science Notes at TutorialsDuniya.com](https://image.slidesharecdn.com/webtechnologiesnotes-tutorialsduniya-240127172050-67829a39/85/Web-Technologies-Notes-TutorialsDuniya-pdf-195-320.jpg)
![Page 186
<form method=POST action="<?php $_SERVER['PHP_SELF']?>" >
<table>
<tr> <td>NAME:</td> <td><input type=text name="uname" /></td> </tr>
<tr> <td>PASSWORD:</td> <td><input type=password name="pwd" /></td> </tr>
<tr><td><input type=reset value=CLEAR /></td> <td><input type=submit value=NEXT
/></td></tr>
</table>
</form>
<?php
if($_SERVER["REQUEST_METHOD"]=="POST"){
if($_POST["uname"]!=―‖ && strlen($_POST["uname"])>=6 && $_POST["pwd"]!=―‖
&& strlen($_POST["pwd"])>=6){
echo "Name:<font color=green>".$_POST['uname']."<br></font>";
echo "Password: <font color=green>".$_POST['pwd']."<br></font>";
}
}
?>
</body>
</html>
Fig: Output of validation.php after submitting empty values
In the above script: $_SERVER[“PHP_SELF"] The filename of the currently executing script,
relative to the document root. The above program demonstrates the validation in same page. It is
possible to perform the validations using GET and POST methods into the other pages.
4 Working with multiple forms
Sometimes you will need to collect values from more than one page. Most developers do this for the
sake of clarity. By providing forms on more than one page, you can separate blocks of information
and thus create a flexible experience for the user. The problem, therefore, is how to GET values
from each page onto the next page and finally to the processing script.
Being the great developer that you are, you can solve this problem and use the hidden input form
type. When each page loads, you only load the values from the previous pages into hidden form
elements and submit them.
page1.php
<html>
<head>
<title>Personal information</title>
</head>
<body>
<form method=POST action="page2.php">
<table align=center>
<tr> <td>NAME</td><td><input type="text" name="name"></td> </tr>
<tr> <td>FATHER NAME</td><td><input type="text" name="fname"></td> </tr>
<tr> <td>MOTHER NAME</td><td><input type="text" name="mname"></td> </tr>
<tr> <td>GENDER</td><td> <input type="radio" name="gen" Value="MALE">MALE
T
u
t
o
r
i
a
l
s
D
u
n
i
y
a
.
c
o
m
Download FREE Computer Science Notes at TutorialsDuniya.com
Download FREE Computer Science Notes at TutorialsDuniya.com](https://image.slidesharecdn.com/webtechnologiesnotes-tutorialsduniya-240127172050-67829a39/85/Web-Technologies-Notes-TutorialsDuniya-pdf-196-320.jpg)
![Page 187
<input type="radio" name=gen value=Female>FEMALE</td> </tr>
<tr> <td><input type=reset value=clear></td> <td><input type="submit" value="NEXT>>"></td>
</tr>
</form>
</body>
</html>
Fig: Output of page1.php
page2.php
<html>
<head>
<title>Contact information</title>
</head>
<body>
<form method=POST action="page3.php">
<table align=center>
<tr> <td>E-Mail</td><td><input type="text" name="email"></td> </tr>
<tr> <td>Mobile</td><td><input type="text" name="Mobile"></td> </tr>
<tr> <td>ADDRESS</td><td><textarea name=address></textarea></td> </tr>
<input type=hidden name="name" value="<?php echo $_POST['name'];?>" />
<input type=hidden name="fname" value="<?php echo $_POST['fname'];?>" />
<input type=hidden name="mname" value="<?php echo $_POST['mname'];?>" />
<input type=hidden name="gen" value="<?php echo $_POST['gen'];?>" />
<tr> <td><input type=reset value=clear></td> <td><input type="submit" value="NEXT>>"></td>
</tr>
</table>
</form>
</body>
</html>
Fig: Output of page2.php
page3.php
<html>
<head>
<title>Educational Details</title>
</head>
<body>
<form method=POST action="page4.php">
<table align=center>
<tr> <td>SSC Percentage</td><td><input type="text" name="ssc"></td> </tr>
T
u
t
o
r
i
a
l
s
D
u
n
i
y
a
.
c
o
m
Download FREE Computer Science Notes at TutorialsDuniya.com
Download FREE Computer Science Notes at TutorialsDuniya.com](https://image.slidesharecdn.com/webtechnologiesnotes-tutorialsduniya-240127172050-67829a39/85/Web-Technologies-Notes-TutorialsDuniya-pdf-197-320.jpg)
![Page 188
<tr> <td>Intermediate/10+2</td><td><input type="text" name="inter"></td> </tr>
<tr> <td>UG </td><td><input type=text name=ug></td> </tr>
<input type=hidden name="name" value="<?php echo $_POST['name'];?>" />
<input type=hidden name="fname" value="<?php echo $_POST['fname'];?>" />
<input type=hidden name="mname" value="<?php echo $_POST['mname'];?>" />
<input type=hidden name="gen" value="<?php echo $_POST['gen'];?>" />
<input type=hidden name="email" value="<?php echo $_POST['email'];?>" />
<input type=hidden name="Mobile" value="<?php echo $_POST['Mobile'];?>" />
<input type=hidden name="address" value="<?php echo $_POST['address'];?>" />
<tr> <td><input type=reset value=clear></td> <td><input type="submit" value="NEXT>>"></td>
</tr>
</table>
</form>
</body>
</html>
Fig: Output of page3.php
page4.php
<html>
<head>
<title>Complete Information</title>
</head>
<body>
<table align=center width=40%>
<tr> <td colspan=2><h5>Personal Details</h5></td> </tr>
<tr> <td>NAME</td><td><?php echo $_POST["name"];?></td> </tr>
<tr> <td>FATHER NAME</td><td><?php echo $_POST["fname"];?></td> </tr>
<tr> <td>MOTHER NAME</td><td><?php echo $_POST["mname"];?></td> </tr>
<tr> <td>GENDER</td><td><?php echo $_POST["gen"];?></td> </tr>
<tr> <td colspan=2><h5>Contact details</h5></td> </tr>
<tr> <td>E-Mail</td><td><?php echo $_POST["email"];?></td> </tr>
<tr> <td>Mobile</td><td><?php echo $_POST["Mobile"];?></td> </tr>
<tr> <td>ADDRESS</td><td><?php echo $_POST["address"];?></td> </tr>
<tr> <td colspan=2><h5>Educational details</h5></td> </tr>
<tr> <td>SSC Percentage</td><td><?php echo $_POST["ssc"];?></td> </tr>
<tr> <td>Intermediate/10+2</td><td><?php echo $_POST["inter"];?></td> </tr>
<tr> <td>UG </td><td><?php echo $_POST["ug"];?></td> </tr>
</table>
</body>
</html>
T
u
t
o
r
i
a
l
s
D
u
n
i
y
a
.
c
o
m
Download FREE Computer Science Notes at TutorialsDuniya.com
Download FREE Computer Science Notes at TutorialsDuniya.com](https://image.slidesharecdn.com/webtechnologiesnotes-tutorialsduniya-240127172050-67829a39/85/Web-Technologies-Notes-TutorialsDuniya-pdf-198-320.jpg)
![Page 189
Fig: Output of page4.php
As you can see, by passing the values in the hidden form fields, you can continue to collect
information.
5 . Redisplaying Forms with Preserved Information and Error Messages
When receiving information submitted from a user, the information may not be submitted in
the format you need. To ensure that users do not GET frustrated, it is important to inform them of
what they did wrong and clearly tell them how to fix the problem. It is also bad practice to force
users to completely rewrite all the proper information they may have already submitted on the form.
If users are forced to do redundant work, they may become irritated and potentially disregard your
service altogether. Therefore, to keep users happy, it is important to validate properly and clearly
while keeping matters as simple for them as possible.
Example:
<html>
<head>
<title> Validation DEMO </title>
<?php
if($_SERVER["REQUEST_METHOD"]=="POST"){
if($_POST["uname"]==―‖){
echo "<font color=red>Please Enter valid User name</font><br>";
}
else if(strlen($_POST["uname"])<6){
echo "<font color=red>Please Enter valid User name with more than 6 characters<br></font>";
}
if($_POST["pwd"]==―‖){
echo "<font color=red>Please Enter valid Password</font><br>";
}
else if(strlen($_POST["pwd"])<6){
echo "<font color=red>Please Enter valid Password with more than 6 characters<br></font>";
}
}
?>
</head>
<body>
<form method=POST action="<?php $_SERVER['PHP_SELF']?>" >
T
u
t
o
r
i
a
l
s
D
u
n
i
y
a
.
c
o
m
Download FREE Computer Science Notes at TutorialsDuniya.com
Download FREE Computer Science Notes at TutorialsDuniya.com](https://image.slidesharecdn.com/webtechnologiesnotes-tutorialsduniya-240127172050-67829a39/85/Web-Technologies-Notes-TutorialsDuniya-pdf-199-320.jpg)

![Page 190
<table>
<tr><td>NAME:</td> <td><input type=text name="uname" /></td> </tr>
<tr><td>PASSWORD:</td> <td><input type=password name="pwd" /></td> </tr>
<tr><td><input type=reset value=CLEAR /></td> <td><input type=submit value=NEXT /></td>
</tr>
</table>
</form>
<?php
if($_SERVER["REQUEST_METHOD"]=="POST"){
if($_POST["uname"]!=―‖ && strlen($_POST["uname"])>=6 && $_POST["pwd"]!=―‖
&& strlen($_POST["pwd"])>=6){
echo "Name:<font color=green>".$_POST['uname']."<br></font>";
echo "Password: <font color=green>".$_POST['pwd']."<br></font>";
}
}
?>
</body>
</html>
Fig: Name with less than 6 characters and with out password Fig: With out password
and with name
Fig: With valid inputs ..
6. Global & Super global variables
GLOBAL
$GLOBALS References all variables available in global scope. It is an associative array containing
references to all variables which are currently defined in the global scope of the script. The variable
names are the keys of the array.
Example:
<?php
function test() {
$foo = "local content";
echo '$foo in global scope: ' . $GLOBALS["foo"];
echo '<br>$foo in current scope: ' . $foo . "n";
}
$foo = "Global content";
test();
T
u
t
o
r
i
a
l
s
D
u
n
i
y
a
.
c
o
m
Download FREE Computer Science Notes at TutorialsDuniya.com
Download FREE Computer Science Notes at TutorialsDuniya.com](https://image.slidesharecdn.com/webtechnologiesnotes-tutorialsduniya-240127172050-67829a39/85/Web-Technologies-Notes-TutorialsDuniya-pdf-201-320.jpg)
![Page 191
?>
OUTPUT:
$foo in global scope: Global content
$foo in current scope: local content
Superglobal variables
Superglobals are built-in variables that are always available in all scope. Several predefined
variables in PHP are "superglobals", which means they are available in all scopes throughout a
script. Superglobals were introduced to PHP 4.1. There is no need to do global $variable; to access
them within functions or methods. These superglobal variables are: The $_SERVER superglobal
contains information created by the web serverdetails regarding the server and client configuration
and the current request environment.
Examples:
• $_SERVER['HTTP_REFERER']: The URL of the page that referred the user to the
current location.
• $_SERVER['REMOTE_ADDR']: The clients IP address.
• The $_GET superglobal contains information pertinent to any parameters passed using the
GET method.
• The $_POST superglobal contains information pertinent to any parameters passed using the
POST method.
• The $_COOKIE superglobal stores information passed into the script through HTTP
cookies. Such cookies are typically set by a previously executed PHP script through the PHP
function setcookie().
Example:
<html>
<head>
<title> Validation DEMO </title>
<?php
if($_SERVER["REQUEST_METHOD"]=="POST"){
if($_POST["uname"]==―‖){
echo "<font color=red>Please Enter valid User name</font><br>";
}
else if(strlen($_POST["uname"])<6){
echo "<font color=red>Please Enter valid User name with more than 6 characters<br></font>";
}
if($_POST["pwd"]==―‖){
echo "<font color=red>Please Enter valid Password</font><br>";
}
else if(strlen($_POST["pwd"])<6){
echo "<font color=red>Please Enter valid Password with more than 6 characters<br></font>";
}
}
?>
</head>
<body>
<form method=POST action="<?php $_SERVER['PHP_SELF']?>" >
<table>
<tr> <td>NAME:</td> <td><input type=text name="uname" /></td> </tr>
T
u
t
o
r
i
a
l
s
D
u
n
i
y
a
.
c
o
m
Download FREE Computer Science Notes at TutorialsDuniya.com
Download FREE Computer Science Notes at TutorialsDuniya.com](https://image.slidesharecdn.com/webtechnologiesnotes-tutorialsduniya-240127172050-67829a39/85/Web-Technologies-Notes-TutorialsDuniya-pdf-202-320.jpg)
![Page 192
<tr> <td>PASSWORD:</td> <td><input type=password name="pwd" /></td> </tr>
<tr><td><input type=reset value=CLEAR /></td> <td><input type=submit value=NEXT
/></td></tr>
</table>
</form>
<?php
if($_SERVER["REQUEST_METHOD"]=="POST"){
if($_POST["uname"]!=―‖ && strlen($_POST["uname"])>=6 && $_POST["pwd"]!=―‖
&& strlen($_POST["pwd"])>=6){
echo "Name:<font color=green>".$_POST['uname']."<br></font>";
echo "Password: <font color=green>".$_POST['pwd']."<br></font>";
}
}
?>
</body>
</html>
7. Preventing Multiple Submissions of a Form
One possible occurrence that happens often is that users become impatient when waiting for your
script to do what it is doing, and hence they click the submit button on a form repeatedly. This can
create confusion to your script because, while the user may not see anything happening, your script
is probably going ahead with whatever it has been programmed to do.
Of particular danger are credit card number submittals. If a user continually hits the submit button
on a credit card submittal form, their card may be charged multiple times if the developer has not
taken the time to validate against such an eventuality. You can deal with multiple submittal
validation in essentially two ways.
Server side refers to a script located on the server that is receiving the data.
Client side is mostly browser related.
7.1 Preventing Multiple Submissions on the Server Side
While you can accomplish this goal in a number of ways from a server-side perspective, we prefer
to use a session-based method. Basically, once the submit button has been clicked; the server logs
the request from the individual user. If the user attempts to resubmit a request, the script notes a
request is already in motion from this user and denies the subsequent request. Once the script has
finished processing, the session is unset, and you have no more worries. The following script is an
example for Preventing Multiple Submissions on the Server Side
Filename: p1.php
<html>
<body>
<form name="test" method="post" action="p2.php">
Name::<input type="text" name="uname"><br>
Password::<input type="password" name="pwd"><br>
<input type="submit" value="SUBMIT" id="submitbut"><br>
</form>
</body>
</html>
Filename: p2.php
<?php
$name=$_POST['uname'];
T
u
t
o
r
i
a
l
s
D
u
n
i
y
a
.
c
o
m
Download FREE Computer Science Notes at TutorialsDuniya.com
Download FREE Computer Science Notes at TutorialsDuniya.com](https://image.slidesharecdn.com/webtechnologiesnotes-tutorialsduniya-240127172050-67829a39/85/Web-Technologies-Notes-TutorialsDuniya-pdf-203-320.jpg)
![Page 193
$pwd=$_POST['pwd'];
session_start();
if(!isset($_SESSION['x'])){
$_SESSION['x']=TRUE;
}
if($_SESSION['x']==TRUE){
mysql_connect("localhost","root","");
mysql_select_db("TEST");
mysql_query("INSERT INTO login(uname,pwd) VALUES('$name','$pwd')");
$_SESSION['x']=FALSE;
for($i=0;$i<=2000000;$i++);//do nothing
for($i=0;$i<=2000000;$i++);//do nothing
for($i=0;$i<=2000000;$i++);//do nothing
for($i=0;$i<=2000000;$i++);//do nothing
for($i=0;$i<=2000000;$i++);//do nothing
}
echo "Successfully added to database";
session_unset();
?>
7.2 Preventing Multiple Submissions on the Client Side
Handling multiple submittals from a client-side perspective is actually much simpler than doing it
on the server side. With well-placed JavaScript, you can ensure that the browser will not let the
submittal go through more than once. The problem with this method, of course, is that JavaScript is
not always foolproof because of the user‘s ability to turn it off. The following example uses
JavaScript to cut off multiple submittals from a client-side (browser) level.
Filename: p1.php
<html>
<head>
<script>
function checkandsubmit() {
//Disable the submit button.
document.test.submitbut.disabled = true;
//Then submit the form.
document.test.submit();
}
</script>
</head>
<body>
<form name="test" onsubmit="return checkandsubmit ()" method="post" action="p2.php">
Name::<input type="text" name="uname"><br>
Password::<input type="password" name="pwd"><br>
<input type="submit" value="SUBMIT" id="submitbut"><br>
</form>
</body>
</html>
After submitting, the button will be disabled as follows
T
u
t
o
r
i
a
l
s
D
u
n
i
y
a
.
c
o
m
Download FREE Computer Science Notes at TutorialsDuniya.com
Download FREE Computer Science Notes at TutorialsDuniya.com](https://image.slidesharecdn.com/webtechnologiesnotes-tutorialsduniya-240127172050-67829a39/85/Web-Technologies-Notes-TutorialsDuniya-pdf-204-320.jpg)
![Page 194
8. Handling Special Characters
An added security feature, particularly when dealing with database submittal, is validating against
special characters being inserted into your script. Be it a database insertion script, a contact form, or
even a mailer system, you always want to ensure that no malicious users are attempting to sabotage
your script with bad (or special) characters. PHP allots a number of functions to use in this regard.
string trim ( string str [, string charlist] )
string htmlspecialchars ( string string [, int quote_style [, string charset]] )
string strip_tags ( string str [, string allowable_tags] )
string addslashes ( string str )
The following script demonstrates above functions
<?php
$msg1=" Welcome to PHP ";//for trim
$msg2="<b>Welcome to php</b>";
$msg3="Welcome n to php";
echo "With out using trim(): **".$msg1."**<br>";
echo "Using trim():**".trim($msg1)."**<br><br><br>";
echo "With out using htmlspecialchars(): ".$msg2."<br>";
echo "Using htmlspecialchars(): ".htmlspecialchars($msg2)."<br><br><br>";
echo "Using strip_tags(): ".strip_tags($msg2)."<br><br><br>";
echo "With out Using addslashes(): ".$msg3."<br>";
echo "Using addslashes(): ".addslashes($msg3)."<br><br><br>";
?>
OUTPUT:
With out using trim(): ** Welcome to PHP **
Using trim():**Welcome to PHP**
With out using htmlspecialchars(): Welcome to php
Using htmlspecialchars(): <b>Welcome to php</b>
Using strip_tags(): Welcome to php
With out Using addslashes(): Welcome to php
Using addslashes(): Welcome to php
• The trim() function removes any blank space found at the beginning or end of the submitted
string.
• The htmlspecialchars() function turns attempted HTML into its special character
equivalent.
• The strip_tags() function completely removes any characters it sees as being a tag.
• addslashes(), places a slash in front of any characters that could be harmful to the database
such as apostrophes. The end result is a string that is quite squeaky clean.
9. File Uploads
Handling file uploads in PHP is not exactly difficult from a syntax point of view, but it is important
(extremely important in fact) to ensure that the file being uploaded is within the upload constraints
you lay out for it. The following are the constrains of File:
• size: The size of the uploaded file (in bytes). You could easily find your server under some
heavy loads if you are not careful about what size of files are being uploaded.
• type: The MIME type of the uploaded file. Ex: .jpeg, .pdf, .doc, etc,.
T
u
t
o
r
i
a
l
s
D
u
n
i
y
a
.
c
o
m
Download FREE Computer Science Notes at TutorialsDuniya.com
Download FREE Computer Science Notes at TutorialsDuniya.com](https://image.slidesharecdn.com/webtechnologiesnotes-tutorialsduniya-240127172050-67829a39/85/Web-Technologies-Notes-TutorialsDuniya-pdf-205-320.jpg)
![Page 195
• name: The original file name that was uploaded. It is possible to change file name at the
time of uploading.
• tmp_name: The temporary name of the file that has been uploaded.
• error: The error code that may be generated by the file upload.
The following Example demonstrate file uploading using Form
<form action="" method="post" enctype="multipart/form-data">
<p>Upload Pictures:
<input type="file" name="pictures[]" />
<input type="file" name="pictures[]" />
<input type="file" name="pictures[]" />
<input type="submit" value="Send" name="submitbut"/>
</p>
</form>
<?php
if(isset($_POST['submitbut']))
{
foreach ($_FILES["pictures"]["error"] as $key => $error) {
if ($error == UPLOAD_ERR_OK) {
$tmp_name = $_FILES["pictures"]["tmp_name"][$key];
$name = $_FILES["pictures"]["name"][$key];
move_uploaded_file($tmp_name, "data/$name");
}
}
}
?>
11 . Questions
1. (a) List and describe the different form elements associated with common form issues.
(b) Differentiate GET and POST methods. [Reg-April/May 2012(Set-1) IT, Reg-Nov 2012 (set-4)
CSE]]
2. Explain with example how the validation of forms is done using PHP. [Reg-April/May 2012(Set-
2) IT]
3. (a) What is the advantage of super globals, explain with example?
(b) Write a PHP program to submit values using super globals and globals. [RegApril/May
2012(Set-3) IT]
4. How can we prevent multiple submissions of a form on server side? Explain with example. [Reg-
April/May 2012(Set-4) IT]
[Reg-January 2014 (set-3) CSE]
5. (a) What is the advantage of Superglobals? Explain with example.
(b) Write a program to differentiate GET and POST methods. [Reg-Nov 2012 (set-1)]
6. (a) Explain briefly about the POST method with example.
(b) Differentiate Superglobals versus Globals. [Reg-Nov 2012 (set-2)]
7. (a) Explain briefly about the GET method with example.
(b) Differentiate GET and POST methods. [Reg-Nov 2012 (set-3)]
8. (a) What are the disadvantages of redisplaying forms without previous information and error
messages?
(b) Write a PHP program for redisplaying forms with previous information and error messages.
[sup-Nov2012]
T
u
t
o
r
i
a
l
s
D
u
n
i
y
a
.
c
o
m
Download FREE Computer Science Notes at TutorialsDuniya.com
Download FREE Computer Science Notes at TutorialsDuniya.com](https://image.slidesharecdn.com/webtechnologiesnotes-tutorialsduniya-240127172050-67829a39/85/Web-Technologies-Notes-TutorialsDuniya-pdf-206-320.jpg)
![Page 196
9. (a) What are the disadvantages of redisplaying forms without previous information and error
messages?
(b) Explain briefly the different constrains in uploading a file. [Reg-January 2014 (set-4) CSE]
10. (a) Explain briefly about the GET and POST methods.
(b) Write a program to differentiate GET and POST methods. [Reg-January 2014 (set-2) CSE]
11. Explain the following functions handling special characters:
(a) trim()
(b) htmlspecialchars()
(c) strip_tags()
(d) addslashes() [Reg-January 2014 (set-1) CSE]
1.XML:
What is XML?
Extensible Markup Language (XML) is used to describe data. The XML standard is a flexible way
to create information formats and electronically share structured data via the public Internet, as well
as via corporate networks.
Short for Extensible Markup Language, a specification developed by the W3C. XML is a pared-
down version of SGML, designed especially for Web documents. It allows designers to create their
own customized tags, enabling the definition, transmission, validation, and interpretation of data
between applications and between organizations.
XML was designed to describe data.
XML tags are not predefined in XML. You must define your own tags.
XML is self describing.
XML uses a DTD (Document Type Definition) to formally describe the data.
2. XML BASICS
XML, or eXtensible markup language, is all about creating a universal way for both formatting and
presenting data. Once data is coded or marked up with XML tags, data can then be used in many
different ways.
Main features of XML:
XML files are text files, which can be managed by any text editor.
XML is very simple, because it has less than 10 syntax rules.
Because of these features, XML offers following advantages
XML provides a basic syntax that can be used to share information between different kinds
of computers, different applications, and different organizations. XML data is stored in plain
text format.
With XML, your data can be available to all kinds of "reading machines" (Handheld
computers, voice machines, news feeds, etc), and make it more available for blind people, or
people with other disabilities.
Databases can trade tables, business applications can trade updates, and document systems
can share information.
It supports Unicode, allowing almost any information in any written human language to be
communicated.
Its self-documenting format describes structure and field names as well as specific values.
Content-based XML markup enhances searchability, making it possible for agents and
search engines to categorize data instead of wasting processing power on context-based full-
text searches.
XML is heavily used as a format for document storage and processing, both online and
offline.
T
u
t
o
r
i
a
l
s
D
u
n
i
y
a
.
c
o
m
Download FREE Computer Science Notes at TutorialsDuniya.com
Download FREE Computer Science Notes at TutorialsDuniya.com](https://image.slidesharecdn.com/webtechnologiesnotes-tutorialsduniya-240127172050-67829a39/85/Web-Technologies-Notes-TutorialsDuniya-pdf-207-320.jpg)

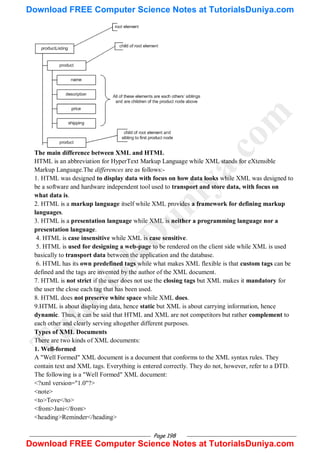
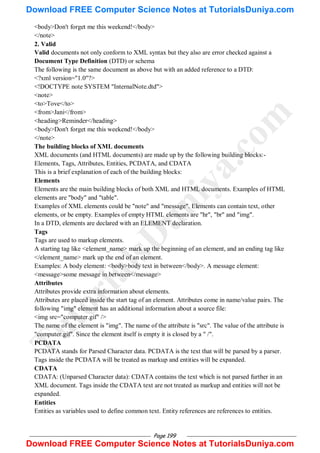
![Page 200
Most of you will known the HTML entity reference: " " that is used to insert an extra space
in an HTML document. Entities are expanded when a document is parsed by an XML parser.
The following entities are predefined in XML:
: Entity
References
Character
< <
> >
& &
" "
' '
<note>
<to>Tove</to>
<from>Jani</from>
<heading>Reminder</heading>
<body>Don't forget me this weekend</body>
</note>
3. Document Type Definition
Introduction to DTD
The purpose of a DTD is to define the legal building blocks of an XML document. It defines the
document structure with a list of legal elements. A DTD can be declared inline in your XML
document, or as an external reference.
Internal DTD
This is an XML document with a Document Type Definition
<?xml version="1.0"?> <!DOCTYPE note [
<!ELEMENT note (to,from,heading,body)>
<!ELEMENT to (#PCDATA)>
<!ELEMENT from (#PCDATA)>
<!ELEMENT heading (#PCDATA)>
<!ELEMENT body (#PCDATA)>
]>
<note>
<to>Tove</to>
<from>Jani</from>
<heading>Reminder</heading>
<body>Don't forget me this weekend!</body>
</note>
The DTD is interpreted like this:
!ELEMENT note (in line 2) defines the element "note" as having four elements:
"to,from,heading,body". !ELEMENT to (in line 3) defines the "to" element to be of the type
"CDATA". !ELEMENT from (in line 4) defines the "from" element to be of the type "CDATA"
and so on.....
External DTD
This is the same XML document with an external DTD:
<?xml version="1.0"?>
<!DOCTYPE note SYSTEM "note.dtd">
<note>
<to>Tove</to>
T
u
t
o
r
i
a
l
s
D
u
n
i
y
a
.
c
o
m
Download FREE Computer Science Notes at TutorialsDuniya.com
Download FREE Computer Science Notes at TutorialsDuniya.com](https://image.slidesharecdn.com/webtechnologiesnotes-tutorialsduniya-240127172050-67829a39/85/Web-Technologies-Notes-TutorialsDuniya-pdf-211-320.jpg)
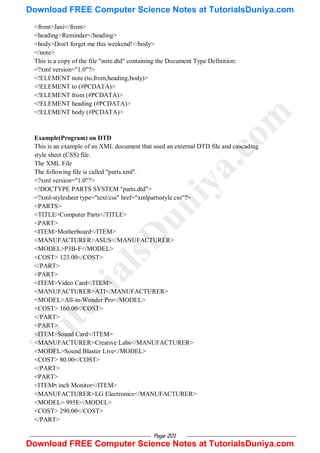


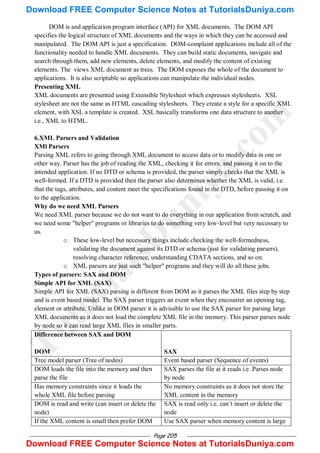
![Page 206
parser
Backward and forward search is possible for
searching the tags and evaluation of the
information inside the tags. So this gives the
ease of navigation
SAX reads the XML file from top to bottom
and backward navigation is not possible
Slower at runtime Faster at runtime
That‘s all on difference between SAX and DOM parsers in Java, now it‘s up to you on which XML
parser you going to choose. DOM parser is recommended over SAX parser if XML file is small
enough and go with SAX parser if you don‘t know size of xml files to be processed or they are
large.
What are the usual application for a DOM parser and for a SAX parser?
In the following cases, using SAX parser is advantageous than using DOM parser.
o The input document is too big for available memory
o You can process the document in small contiguous chunks of input. You do not need
the entire document before you can do useful work
o You just want to use the parser to extract the information of interest, and all
In the following cases, using DOM parser is advantageous than using SAX parser.
o Your application needs to access widely separately parts of the document at the same
time.
o Your application may probably use an internal data structure which is almost as
complicated as the document itself.
o Your application has to modify the document repeatedly.
o Your application has to store the document for a significant amount of time through
many method calls.
Sample document for the example
<?xml version="1.0"?>
<!DOCTYPE shapes [
<!ELEMENT shapes (circle)*>
<!ELEMENT circle (x,y,radius)>
<!ELEMENT x (#PCDATA)>
<!ELEMENT y (#PCDATA)>
<!ELEMENT radius (#PCDATA)>
<!ATTLIST circle color CDATA #IMPLIED>
]>
<shapes>
<circle color="BLUE">
<x>20</x>
<y>20</y>
<radius>20</radius>
</circle>
<circle color="RED" >
<x>40</x>
<y>40</y>
<radius>20</radius>
</circle>
T
u
t
o
r
i
a
l
s
D
u
n
i
y
a
.
c
o
m
Download FREE Computer Science Notes at TutorialsDuniya.com
Download FREE Computer Science Notes at TutorialsDuniya.com](https://image.slidesharecdn.com/webtechnologiesnotes-tutorialsduniya-240127172050-67829a39/85/Web-Technologies-Notes-TutorialsDuniya-pdf-217-320.jpg)
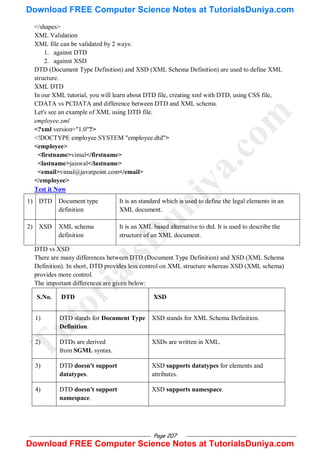
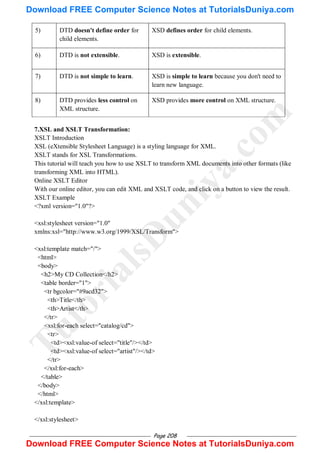


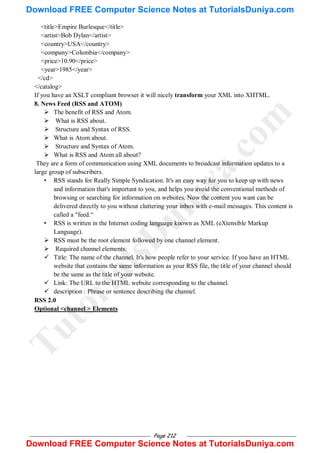
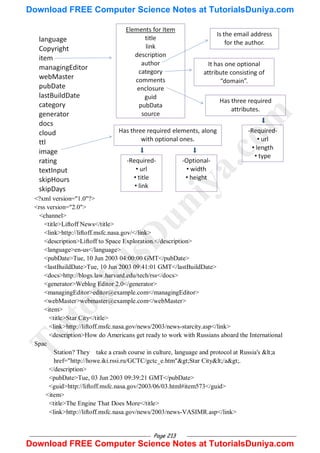
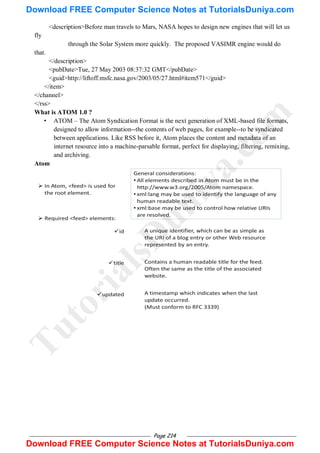
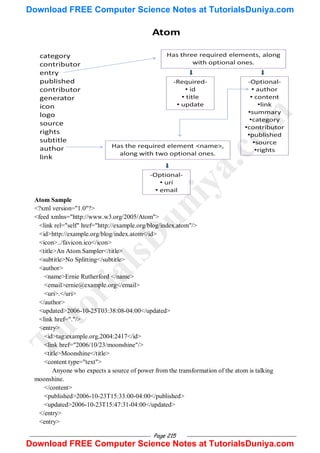


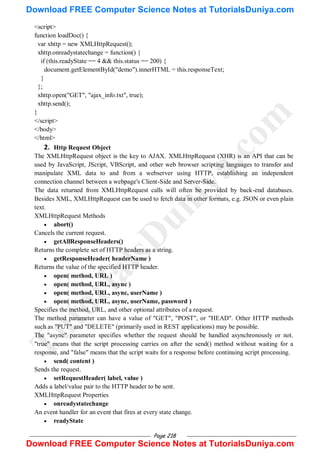
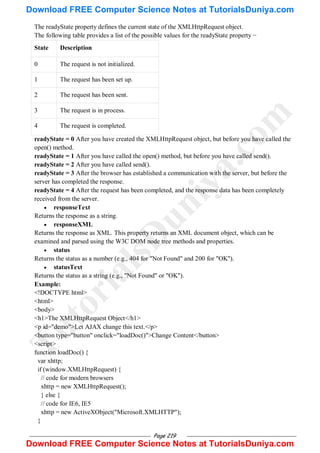
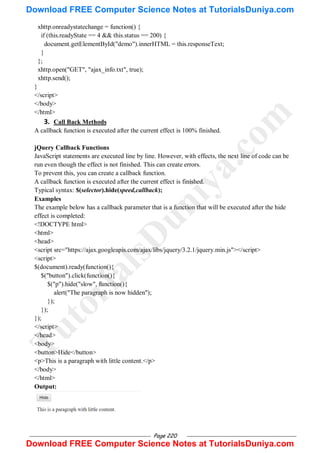
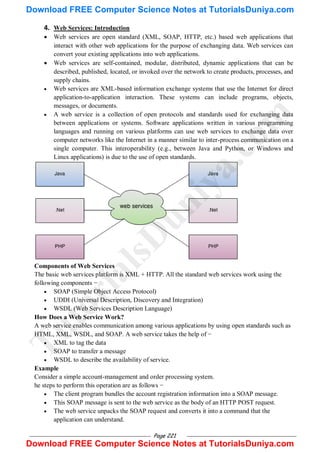
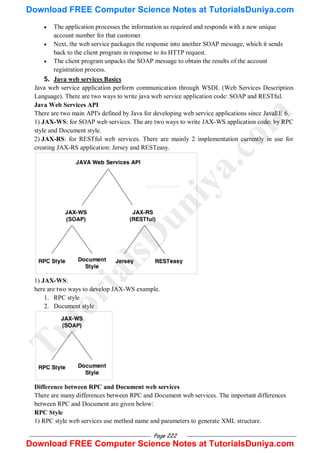
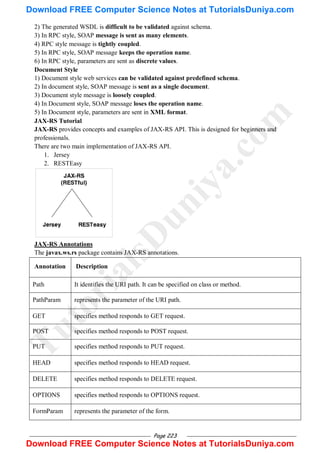
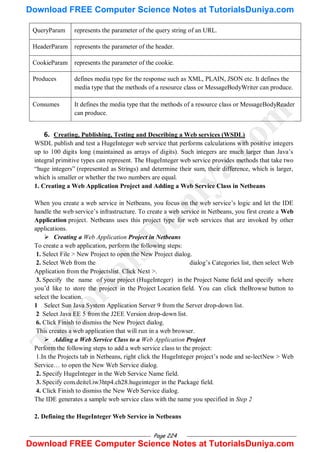
![Page 225
The following example shows the HugeInteger web service‘s code. You can implement this code
yourself in the HugeInteger.java file created in Section 28.3.1, or you can simply replace the code
inHugeInteger.java with a copy of our code from this example‘s folder. You can find this file in the
project‘s srcjavacomdeiteliw3htp4ch28hugeinteger folder.
// HugeInteger.java
// HugeInteger web service that performs operations on large integers.
package com.deitel.iw3htp4.ch28.hugeinteger;
import javax.jws.WebService;
import javax.jws.WebMethod; import javax.jws.WebParam
@WebService( // annotates the class as a web service
name = "HugeInteger", // sets class name
serviceName = "HugeIntegerService" ) // sets the service name
public class HugeInteger
{
private final static int MAXIMUM = 100;
public int[] number = new int[ MAXIMUM ];
public String toString()
{
String value = "";
// convert HugeInteger to a String
for ( int digit : number )
value = digit + value; // places next digit at beginning of value
// locate position of first non-zero digit
int length = value.length();
int position = -1;
for ( int i = 0; i < length; i++ )
{
if ( value.charAt( i ) != '0' )
{
position = i; // first non-zero digit
break;
}
} // end for
return ( position != -1 ? value.substring( position ) : "0" );
} // end method toString
// creates a HugeInteger from a String
public static HugeInteger parseHugeInteger( String s )
{
HugeInteger temp = new HugeInteger();
int size = s.length();
for ( int i = 0; i < size; i++ )
temp.number[ i ] = s.charAt( size - i - 1 ) - '0';
T
u
t
o
r
i
a
l
s
D
u
n
i
y
a
.
c
o
m
Download FREE Computer Science Notes at TutorialsDuniya.com
Download FREE Computer Science Notes at TutorialsDuniya.com](https://image.slidesharecdn.com/webtechnologiesnotes-tutorialsduniya-240127172050-67829a39/85/Web-Technologies-Notes-TutorialsDuniya-pdf-237-320.jpg)
![Page 226
return temp;
} // end method parseHugeInteger
// WbMethod that adds huge integers represented by String arguments
@WebMethod( operationName = "add" )
public String add( @WebParam( name = "first" ) String first,
@WebParam( name = "second" ) String second )
{
int carry = 0; // the value to be carried
HugeInteger operand1 = HugeInteger.parseHugeInteger( first );
HugeInteger operand2 = HugeInteger.parseHugeInteger( second );
HugeInteger result = new HugeInteger(); // stores addition result
// perform addition on each digit
for ( int i = 0; i < MAXIMUM; i++ )
{
// add corresponding digits in each number and the carried value;
// store result in the corresponding column of HugeInteger result
result.number[ i ] = ( operand1.number[ i ] + operand2.number[ i ] + carry ) % 10;
// set carry for next column
carry =
( operand1.number[ i ] + operand2.number[ i ] + carry ) / 10;
} // end for
return result.toString();
} // end WebMethod add
// WebMethod that subtracts integers represented by String arguments
@WebMethod( operationName = "subtract" )
public String subtract( @WebParam( name = "first" ) String first,
@WebParam( name = "second" ) String second )
{
HugeInteger operand1 = HugeInteger.parseHugeInteger( first );
HugeInteger operand2 = HugeInteger.parseHugeInteger( second );
HugeInteger result = new HugeInteger(); // stores difference
// subtract bottom digit from top digit
for ( int i = 0; i < MAXIMUM; i++ )
{
// if the digit in operand1 is smaller than the corresponding
// digit in operand2, borrow from the next digit
if ( operand1.number[ i ] < operand2.number[ i ] )
operand1.borrow( i );
// subtract digits
result.number[ i ] = operand1.number[ i ] - operand2.number[ i ];
} // end for
T
u
t
o
r
i
a
l
s
D
u
n
i
y
a
.
c
o
m
Download FREE Computer Science Notes at TutorialsDuniya.com
Download FREE Computer Science Notes at TutorialsDuniya.com](https://image.slidesharecdn.com/webtechnologiesnotes-tutorialsduniya-240127172050-67829a39/85/Web-Technologies-Notes-TutorialsDuniya-pdf-238-320.jpg)
![Page 227
return result.toString();
} // end WebMethod subtract
// borrow 1 from next digit
private void borrow( int place )
{
if ( place >= MAXIMUM )
throw new IndexOutOfBoundsException();
else if ( number[ place + 1 ] == 0 ) // if next digit is zero
borrow( place + 1 ); // borrow from next digit
number[ place ] += 10; // add 10 to the borrowing digit
--number[ place + 1 ]; // subtract one from the digit to the left
} // end method borrow
// WebMethod that returns true if first integer is greater than second
@WebMethod( operationName = "bigger" )
public boolean bigger( @WebParam( name = "first" ) String first,
@WebParam( name = "second" ) String second )
{
try // try subtracting first from second
{
String difference = subtract( first, second );
return !difference.matches( "^[0]+$" );
} // end try
catch ( IndexOutOfBoundsException e ) // first is less than second
{
return false;
} // end catch
} // end WebMethod bigger
// WebMethod that returns true if the first integer is less than second
@WebMethod( operationName = "smaller" )
public boolean smaller( @WebParam( name = "first" ) String first,
@WebParam( name = "second" ) String second )
{
return bigger( second, first );
} // end WebMethod smaller
// WebMethod that returns true if the first integer equals the second
@WebMethod( operationName = "equals" )
public boolean equals( @WebParam( name = "first" ) String first,
@WebParam( name = "second" ) String second )
{
return !( bigger( first, second ) || smaller( first, second ) );
} // end WebMethod equals
} // end class HugeInteger
T
u
t
o
r
i
a
l
s
D
u
n
i
y
a
.
c
o
m
Download FREE Computer Science Notes at TutorialsDuniya.com
Download FREE Computer Science Notes at TutorialsDuniya.com](https://image.slidesharecdn.com/webtechnologiesnotes-tutorialsduniya-240127172050-67829a39/85/Web-Technologies-Notes-TutorialsDuniya-pdf-239-320.jpg)
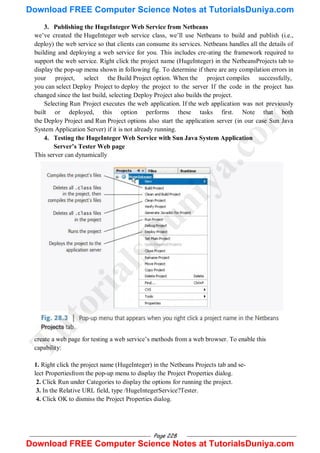
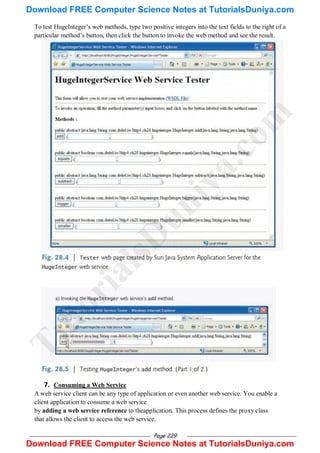
![Page 230
Creating a Client in Netbeans to Consume the HugeInteger Web Service
When you add the web service reference, the IDE creates and compiles the client-side ar-tifacts—
the framework ofJava code that supports the client-side proxy class. The client then calls methods
on an object of the proxy class, which uses the rest of the artifacts to interact with the web service.
Creating a Desktop Application Project in Netbeans
Before performing the steps in this section, ensure that the HugeInteger web service has been
deployed and that the Sun Java System Application Server is running (see Section 28.3.3). Perform
the following steps to create a client Java desktop application in
Netbeans:
1. Select File > New Project… to open the New Project dialog.
2. Select General from the Categories list and Java Application from the Projects list, then click
Next >.
3. Specify the name UsingHugeInteger in the Project Name field and uncheck the Create Main
Class checkbox. In a moment, you‘ll add a subclass of JFrame that contains a mainmethod.
4. Click Finish to create the project.
Adding a Web Service Reference to an Application
Next, you‘ll add a web service reference to your application so that it can interact with
theHugeInteger web service. To add a web service reference, perform the following steps.
1. Right click the project name (UsingHugeInteger) in the Netbeans Projects tab.
2. Select New > Web Service Client… from the pop-up menu to display the New Web Service
Client dialog (Fig. 28.7).
3. In the field, specify the URL WSDL URL http://localhost:8080/HugeInteger/
HugeIntegerService?WSDL (Fig. 28.7). This URL tells the IDE where to find the web service‘s
WSDL description. [Note: If the Sun Java System Application Serv-er is located on a different
computer, replace localhost with the hostname or IP address of that computer.] The IDE uses this
WSDL description to generate the client-side artifacts that compose and support the proxy. Note
that the New Web Service Client dialog enables you to search for web services in several locations.
T
u
t
o
r
i
a
l
s
D
u
n
i
y
a
.
c
o
m
Download FREE Computer Science Notes at TutorialsDuniya.com
Download FREE Computer Science Notes at TutorialsDuniya.com](https://image.slidesharecdn.com/webtechnologiesnotes-tutorialsduniya-240127172050-67829a39/85/Web-Technologies-Notes-TutorialsDuniya-pdf-242-320.jpg)