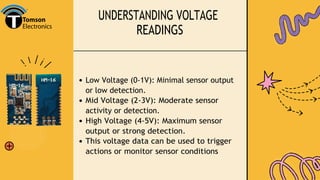
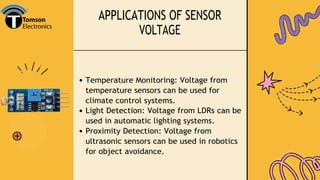
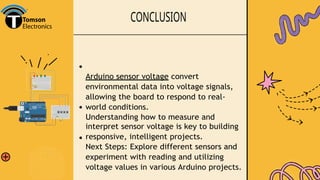
ARDUINO SENSOR VOLTAGE
Understanding Voltage Levels in
Arduino Sensors
INTRODUCTION
Arduino sensor voltage is a versatile
open-source electronics platform
used for building interactive projects.
It consists of hardware (microcontroller)
and software (Arduino IDE).
Sensors play a crucial role in enabling
Arduino to interact with the physical
world, making understanding voltage
essential.
WHAT IS SENSOR VOLTAGE?
Voltage is the difference in
electrical potential between two
points.
In Arduino sensor voltage, voltage
represents the strength of the signal being
sent to the Arduino board.
Most sensors work within a range of 0-5V,
where 0V represents no signal, and 5V
represents maximum signal output.
HOW ARDUINO MEASURES
VOLTAGE
Arduino sensor voltage measure voltage
using their Analog-to-Digital Converter
(ADC).
The ADC converts the analog voltage from
the sensor into a digital value, usually
ranging from 0 to 1023 (for a 10-bit ADC).
Example: A 5V signal will read as 1023,
while a 0V signal will read as 0.
COMMON SENSORS AND THEIR
VOLTAGE OUTPUTS
Light Sensors (LDR): Output voltage varies
based on light intensity (0-5V).
Temperature Sensors (LM35): Outputs a
voltage proportional to temperature
(10mV/°C).
Ultrasonic Sensors (HC-SR04): Outputs
digital signals to measure distance.
Potentiometers: Output voltage can
be manually adjusted between 0-5V.
WIRING THE SENSOR TO ARDUINO
Most sensors have three pins: VCC
(Power), GND (Ground), and Signal.
VCC connects to the 5V or 3.3V pin on
Arduino.
GND connects to the GND pin.
Signal connects to one of Arduino’s analog
pins (A0, A1, etc.).
UNDERSTANDING VOLTAGE
READINGS
Low Voltage (0-1V): Minimal sensor output
or low detection.
Mid Voltage (2-3V): Moderate sensor
activity or detection.
High Voltage (4-5V): Maximum sensor
output or strong detection.
This voltage data can be used to trigger
actions or monitor sensor conditions
APPLICATIONS OF SENSOR
VOLTAGE
Temperature Monitoring: Voltage from
temperature sensors can be used for
climate control systems.
Light Detection: Voltage from LDRs can be
used in automatic lighting systems.
Proximity Detection: Voltage from
ultrasonic sensors can be used in robotics
for object avoidance.
CONCLUSION
Arduino sensor voltage convert
environmental data into voltage signals,
allowing the board to respond to real-
world conditions.
Understanding how to measure and
interpret sensor voltage is key to building
responsive, intelligent projects.
Next Steps: Explore different sensors and
experiment with reading and utilizing
voltage values in various Arduino projects.
VISIT US
8606650999
tomsononline@gmail.com
www.tomsonelectronics.com/

Voltage Detection Sensor Module - Arduino, ARM and other MCU – TOMSON ELECTRONICS.docx

  • 1.
    ARDUINO SENSOR VOLTAGE UnderstandingVoltage Levels in Arduino Sensors
  • 2.
    INTRODUCTION Arduino sensor voltageis a versatile open-source electronics platform used for building interactive projects. It consists of hardware (microcontroller) and software (Arduino IDE). Sensors play a crucial role in enabling Arduino to interact with the physical world, making understanding voltage essential.
  • 3.
    WHAT IS SENSORVOLTAGE? Voltage is the difference in electrical potential between two points. In Arduino sensor voltage, voltage represents the strength of the signal being sent to the Arduino board. Most sensors work within a range of 0-5V, where 0V represents no signal, and 5V represents maximum signal output.
  • 4.
    HOW ARDUINO MEASURES VOLTAGE Arduinosensor voltage measure voltage using their Analog-to-Digital Converter (ADC). The ADC converts the analog voltage from the sensor into a digital value, usually ranging from 0 to 1023 (for a 10-bit ADC). Example: A 5V signal will read as 1023, while a 0V signal will read as 0.
  • 5.
    COMMON SENSORS ANDTHEIR VOLTAGE OUTPUTS Light Sensors (LDR): Output voltage varies based on light intensity (0-5V). Temperature Sensors (LM35): Outputs a voltage proportional to temperature (10mV/°C). Ultrasonic Sensors (HC-SR04): Outputs digital signals to measure distance. Potentiometers: Output voltage can be manually adjusted between 0-5V.
  • 6.
    WIRING THE SENSORTO ARDUINO Most sensors have three pins: VCC (Power), GND (Ground), and Signal. VCC connects to the 5V or 3.3V pin on Arduino. GND connects to the GND pin. Signal connects to one of Arduino’s analog pins (A0, A1, etc.).
  • 7.
    UNDERSTANDING VOLTAGE READINGS Low Voltage(0-1V): Minimal sensor output or low detection. Mid Voltage (2-3V): Moderate sensor activity or detection. High Voltage (4-5V): Maximum sensor output or strong detection. This voltage data can be used to trigger actions or monitor sensor conditions
  • 8.
    APPLICATIONS OF SENSOR VOLTAGE TemperatureMonitoring: Voltage from temperature sensors can be used for climate control systems. Light Detection: Voltage from LDRs can be used in automatic lighting systems. Proximity Detection: Voltage from ultrasonic sensors can be used in robotics for object avoidance.
  • 9.
    CONCLUSION Arduino sensor voltageconvert environmental data into voltage signals, allowing the board to respond to real- world conditions. Understanding how to measure and interpret sensor voltage is key to building responsive, intelligent projects. Next Steps: Explore different sensors and experiment with reading and utilizing voltage values in various Arduino projects.
  • 10.