The document provides instructions for building an Android app that makes an API call to GitHub to retrieve a list of Java developers in Nairobi. It retrieves the data using Volley, parses the JSON response, and displays the developer names, images, and URLs in a RecyclerView with CardViews. It also describes how to set up an adapter to connect the data to the RecyclerView items, create a model class to store the developer data, and add a click handler to launch a profile activity with more details when an item is tapped.

![Set Up
First off, launch android studio and create a new project [File > New > New
Project]. While setting up your project feel free to give your project any name of your
choice, in my case I’ll name it My Volley.
Once your project has finished building, you’ll need to add some dependencies to your
app level Gradle file [app > build.gradle] then locate the dependency block and add
these dependencies.
implementation 'com.google.android.material:material:1.1.0'
implementation 'androidx.cardview:cardview:1.0.0'
implementation 'com.android.volley:volley:1.1.0'
implementation 'com.squareup.picasso:picasso:2.5.2'
Then set internet permissions in the manifest file.
<manifest xmlns:android="http://schemas.android.com/apk/res/android"
package="com.mwongela.myvolley">
<uses-permission android:name="android.permission.INTERNET" />
<application
android:allowBackup="true"
android:icon="@mipmap/ic_launcher"
android:label="@string/app_name"
Layout
By default you already have activity_main.xml [res > layout >
activity_main.xml] this is the layout that will hold the RecyclerView, so set the
layout to RelativeLayout initialize the RecyclerView here.
<?xml version="1.0" encoding="utf-8"?>
<RelativeLayout xmlns:android="http://schemas.android.com/apk/res/android"
xmlns:app="http://schemas.android.com/apk/res-auto"
xmlns:tools="http://schemas.android.com/tools"
android:layout_width="match_parent"
android:layout_height="match_parent"
tools:context=".MainActivity">
<androidx.recyclerview.widget.RecyclerView
android:id="@+id/recycler_view"
android:layout_width="match_parent"
android:layout_height="match_parent"
/>
</RelativeLayout>
Open the MainActivity.java file and initialize the RecyclerView in the on create method
and find it by the id you assigned to it in the activity_main.xml file. In my case I set it’s](https://image.slidesharecdn.com/volleylabbtcbbit-211117121027/75/Volley-lab-btc_bbit-2-2048.jpg)
![id to be “recyler_view” according to the snippet above. So open your MainActivity and
do this:
public class MainActivity extends AppCompatActivity {
//declare the recycler view
private RecyclerView recyclerView;
@Override
protected void onCreate(Bundle savedInstanceState) {
super.onCreate(savedInstanceState);
setContentView(R.layout.activity_main);
//Initialize the recycler view
recyclerView=findViewById(R.id.recycler_view);
recyclerView.setHasFixedSize(true);
recyclerView.setLayoutManager(new LinearLayoutManager(this));
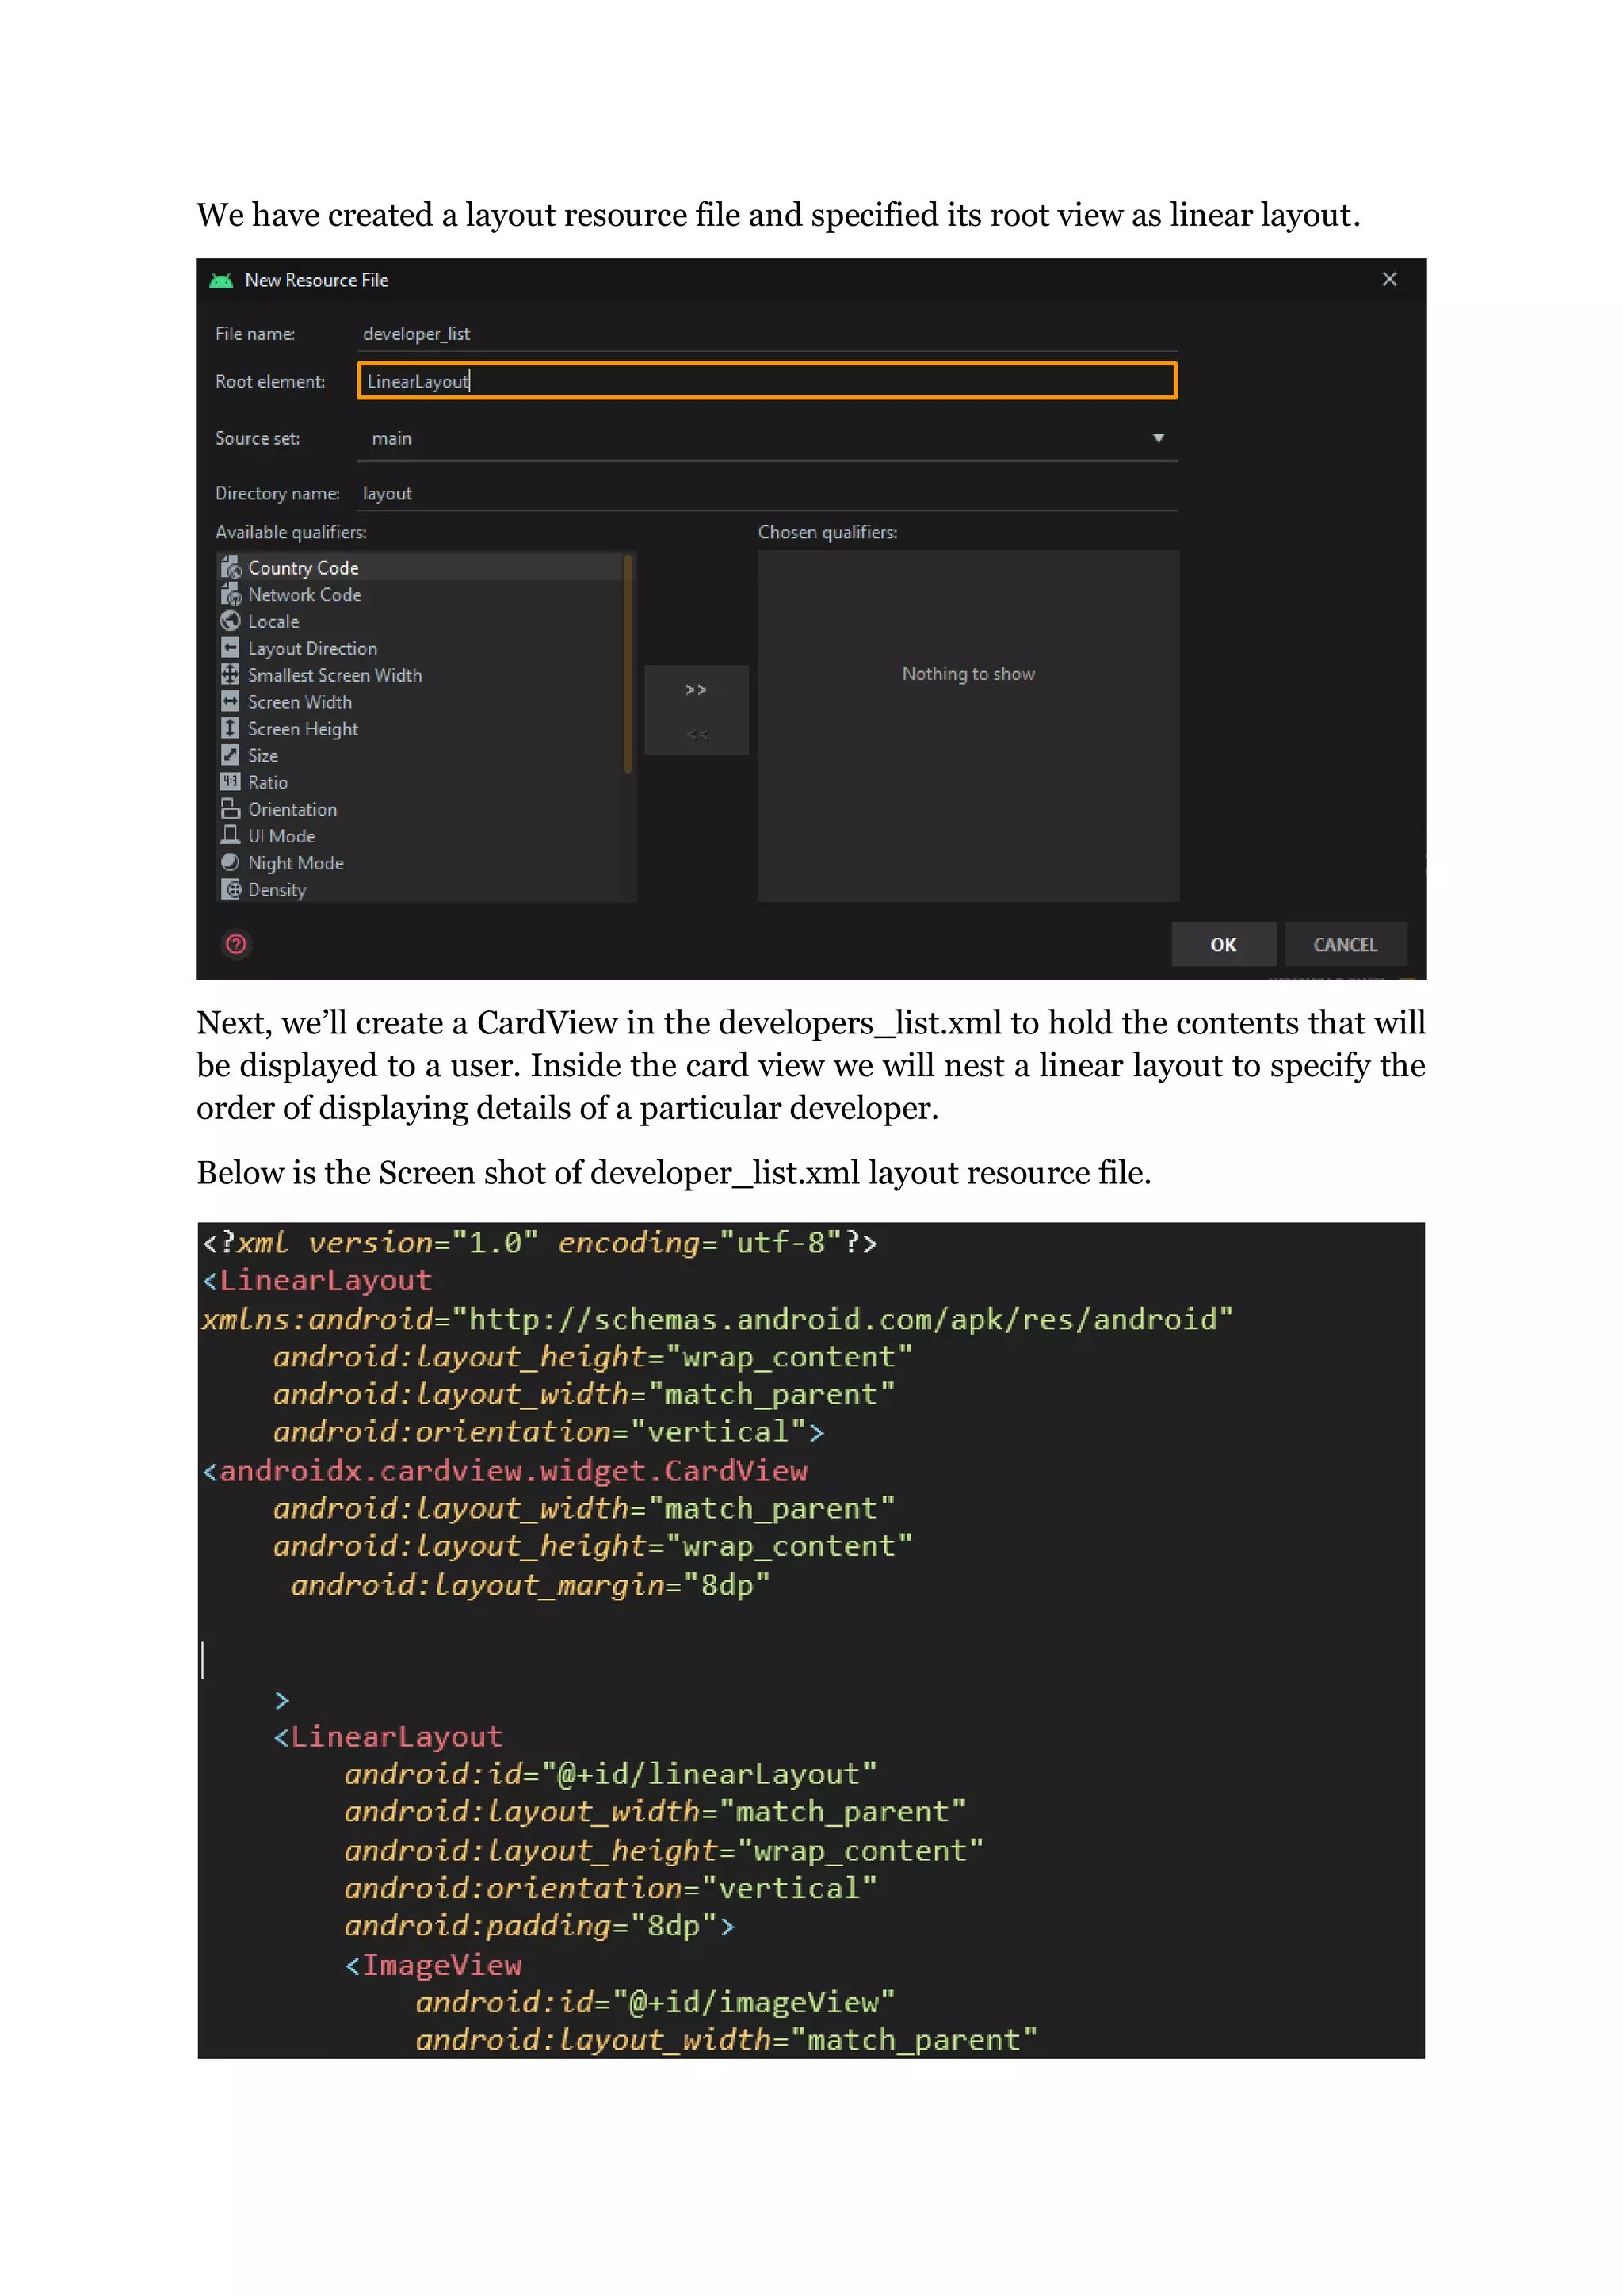
Now we have the RecyclerView set, for the items that will be in the RecyclerView, we’ll
create another layout resource file that will store the data in a CardView and then use
the cards to populate the RecyclerView.
Create a new layout resource file [app > res > layout > New > layout resource
file] and name it developers_list.xml.](https://image.slidesharecdn.com/volleylabbtcbbit-211117121027/75/Volley-lab-btc_bbit-3-2048.jpg)


![resource intensive
Picasso.with(mContext)
.load(currentDeveloper.getAvatar_url())
.into(holder.avatar_url);
The onBindViewHolder () method connects your data to the view holder.
* @param holder Refers to the ViewHolder into which the data should be put.
* @param position Refers to the adapter position.
6. Run your app to make sure that there are no errors.
Fetching the remote json data.
First off this is the structure of the json data we’ll be returning
Check this link
https://api.github.com/search/users?q=language:java+location:nairobi
As seen the data is in JSON format with other {Json Objects} all wrapped in a [Json
Array], so we’ll be returning the data in the same format. However we are not
particularly interested in all the keys of the objects, we only need the login, the html_url
and the avatar_url. These are the variables we defined in the DevelopersList class.
So we’ll be parsing the respective values to their corresponding variables.
Goto MainActivity and define a String variable for the api private static final String
URL_DATA = “api-url here”;
public class MainActivity extends AppCompatActivity {
//api
private static final String URL_DATA =
"https://api.github.com/search/users?q=language:java+location:nairobi";
Additionally create instances of the developer adapter and developer list you defined.
public class MainActivity extends AppCompatActivity {
//api
private static final String URL_DATA =
"https://api.github.com/search/users?q=language:java+location:nairobi";
//declare the recycler view
private RecyclerView recyclerView;
//declare the adapter
private DevelopersAdapter myAdapter;
//declare the Developers List
private List<DeveloperList> developerList;
Initialize the developers list in the on create method...this list will hold the contents of
our remote JSON and pass it to recycler view
protected void onCreate(Bundle savedInstanceState) {
super.onCreate(savedInstanceState);
setContentView(R.layout.activity_main);
//Initialize the recycler view
recyclerView=findViewById(R.id.recycler_view);](https://image.slidesharecdn.com/volleylabbtcbbit-211117121027/75/Volley-lab-btc_bbit-9-2048.jpg)