Downloaded 63 times


![Creating a New Project
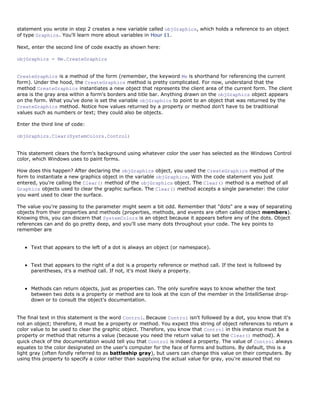
When you first start Visual Studio 2008, you see the Start Page tab within the IDE, as shown in Figure 1.1. You
can open projects created previously or create new projects from this Start page. For this quick tour, you'll
create a new Windows application, so select File, New Project to display the New Project dialog box, shown in
Figure 1.2.
Figure 1.1. You can open existing projects or create new projects from the Visual Studio Start page.
[View full size image]
Figure 1.2. The New Project dialog box enables you to create many types of .NET projects.
[View full size image]](https://image.slidesharecdn.com/visualbasic2008in24hrs-1285035275-phpapp01/85/Visual-Basic-2008-In-24-Hrs-27-320.jpg)

![When Visual Basic creates a new Windows Forms Application project, it adds one form (the empty gray window)
for you to begin building the interface for your application, as shown in Figure 1.3.
Figure 1.3. New Windows Forms Applications start with a blank form; the fun is just beginning!
[View full size image]
By the Way
Within Visual Studio 2008, form is the term given to the design-time view of a window that can be
displayed to a user.
Your Visual Studio 2008 environment might look different from that shown in the figures in this hour due to the
edition of Visual Studio 2008 you're using, whether you've already played with Visual Studio 2008, and other
factors, such as your monitor's resolution. All the elements discussed in this hour exist in all editions of Visual
Studio 2008, however. (If a window shown in a figure doesn't appear in your IDE, use the View menu to display
it.)
By the Way](https://image.slidesharecdn.com/visualbasic2008in24hrs-1285035275-phpapp01/85/Visual-Basic-2008-In-24-Hrs-29-320.jpg)


![Changing the Characteristics of Objects
Almost everything you work with in Visual Basic is an object. Forms, for instance, are objects, as are all the
items you can put on a form to build an interface, such as list boxes and buttons. There are many types of
objects, and objects are classified by type. For example, a form is a Form object, whereas items you can place
on a form are called Control objects, or controls. (Hour 3, "Understanding Objects and Collections," discusses
objects in detail.) Some objects don't have a physical appearance but exist only in code. You'll learn about these
kinds of objects in later hours.
Watch Out!
You'll find that I often mention material coming up in future chapters. In the publishing field, we call
these forward references. For some reason, these tend to unnerve some people. I do this only so that
you realize you don't have to fully grasp a subject when it's first presented; the material will be covered
in more detail later. I try to keep forward references to a minimum, but unfortunately, teaching
programming is not a perfectly linear process. There will be times I'll have to touch on a subject that I
feel you're not ready to dive into fully yet. When this happens, I give you a forward reference to let you
know that the subject will be covered in greater detail later.
Every object has a distinct set of attributes known as properties (regardless of whether the object has a
physical appearance). Properties define the characteristics of an object. Even you have certain properties, such
as your height and hair color. Visual Basic objects have properties as well, such as Height and BackColor.
When you create a new object, the first thing you need to do is set its properties so that the object appears and
behaves the way you want it to. To display an object's properties, click the object in its designer (the main work
area in the IDE).
Click anywhere in the default form now, and check to see that its properties are displayed in the Properties
window. You'll know because the drop-down list box at the top of the Properties window will contain the form's
name: Form1 System.Windows.Forms.Form. Form1 is the name of the object, and System.Windows.Forms.Form
is the type of object.
Naming Objects
The property you should always set first when creating any new object is the Name property. Press F4 to display
the Properties window (if it's not already visible), and scroll toward the top of the properties list until you see
the (Name) property, as shown in Figure 1.4. If the Name property isn't one of the first properties listed, the
Properties window is set to show properties categorically instead of alphabetically. You can show the list
alphabetically by clicking the Alphabetical button that appears just above the properties grid.
Figure 1.4. The Name property is the first property you should change when you add a new object to
your project.
[View full size image]](https://image.slidesharecdn.com/visualbasic2008in24hrs-1285035275-phpapp01/85/Visual-Basic-2008-In-24-Hrs-32-320.jpg)


![which to save the project. Visual Basic creates a subfolder in this location using the value in the Name text box
(in this case, Picture Viewer). You can use the default location or change it to suit your purposes. You can have
Visual Basic create a solution folder in which the project folder gets placed. On large projects, this is a handy
feature. For now, it's an unnecessary step, so uncheck the Create directory for solution box, and then click Save
to save the project.
Figure 1.5. When saving a project, choose a name and location for the project and its files.
[View full size image]
Giving the Form an Icon
Everyone who's used Windows is familiar with icons—the little pictures that represent programs. Icons most
commonly appear on the Start menu next to the name of their respective programs. In Visual Basic, not only do
you have control over the icon of your program file, you also can give every form in your program a unique icon
if you want to.
By the Way
The following instructions assume that you have access to the source files for the examples in this book.
They are available at http://www.samspublishing.com. You can also get these files, as well as discuss
this book, at my website at http://www.jamesfoxall.com/books.aspx. When you unzip the samples, a
folder will be created for each hour, and within each hour's folder will be subfolders for the sample
projects. You'll find the icon for this example in the folder Hour 01Picture Viewer.
You don't have to use the icon I've provided for this example; you can use any icon. If you don't have an
icon available (or you want to be a rebel), you can skip this section without affecting the outcome of the
example.
To give the form an icon, follow these steps:
1. In the Properties window, click the Icon property to select it.
2. When you click the Icon property, a small button with three dots appears to the right of the property. Click
this button.
3. Use the Open dialog box that appears to locate the Picture Viewer.ico file or another icon file of your
choice. When you've found the icon, double-click it, or click it once to select it and then choose Open.](https://image.slidesharecdn.com/visualbasic2008in24hrs-1285035275-phpapp01/85/Visual-Basic-2008-In-24-Hrs-35-320.jpg)

![decrease a property by one pixel, you're making the smallest possible visible change to the property.
Change the Width property to 400 and the Height to 325 by typing in the corresponding box next to a property
name. To commit a property change, press Tab or Enter, or click a different property or window. Your screen
should now look like the one shown in Figure 1.7.
Figure 1.7. Changes made in the Properties window are reflected as soon as they're committed.
[View full size image]
By the Way
You can also size a form by dragging its border, which you'll learn about in Hour 2, or by changing its
properties using code, which you'll learn how to write in Hour 5.
Save the project now by choosing File, Save All from the menu or by clicking the Save All button on the
toolbar—it has a picture of stacked floppy disks.](https://image.slidesharecdn.com/visualbasic2008in24hrs-1285035275-phpapp01/85/Visual-Basic-2008-In-24-Hrs-37-320.jpg)
![Adding Controls to a Form
Now that you've set the initial properties of your form, it's time to create a user interface by adding objects to
the form. Objects that can be placed on a form are called controls. Some controls have a visible interface with
which a user can interact, whereas others are always invisible to the user. You'll use controls of both types in
this example. On the left side of the screen is a vertical tab titled Toolbox. Click the Toolbox tab to display the
Toolbox window, and click the plus sign next to Common Controls to see the most commonly used controls (see
Figure 1.8). The toolbox contains all the controls available in the project, such as labels and text boxes.
Figure 1.8. The toolbox is used to select controls to build a user interface.
[View full size image]
The toolbox closes as soon as you've added a control to a form and when the pointer is no longer over the
toolbox. To make the toolbox stay visible, you would click the little picture of a pushpin located in the toolbox's
title bar.
I don't want you to add them yet, but your Picture Viewer interface will consist of the following controls:
Two Button controls: The standard buttons that you're used to clicking in pretty much every Windows
program you've ever run
A PictureBox control: A control used to display images to a user](https://image.slidesharecdn.com/visualbasic2008in24hrs-1285035275-phpapp01/85/Visual-Basic-2008-In-24-Hrs-38-320.jpg)


![Figure 1.11. Controls that have no interface appear below the form designer.
[View full size image]
Select the OpenFileDialog control, and change its properties as follows:
Property Value
Name ofdSelectPicture
Filename <make empty>
Filter Windows Bitmaps|*.BMP|JPEG Files|*.JPG
Title Select Picture
Watch Out!
Don't actually enter the text <make empty> for the filename; I really mean delete the default value
and make this property value empty.
The Filter property is used to limit the types of files that will be displayed in the Open File dialog box. The
format for a filter is description|filter. The text that appears before the first pipe symbol is the descriptive text of](https://image.slidesharecdn.com/visualbasic2008in24hrs-1285035275-phpapp01/85/Visual-Basic-2008-In-24-Hrs-43-320.jpg)

![Writing the Code Behind an Interface
You have to write code for the program to be capable of performing tasks and responding to user interaction.
Visual Basic is an event-driven language, which means that code is executed in response to events. These
events might come from users, such as a user clicking a button and triggering its Click event, or from Windows
itself (see Hour 4, "Understanding Events," for a complete explanation of events). Currently, your application
looks nice, but it won't do a darn thing. Users can click the Select Picture button until they can file for disability
with carpel tunnel syndrome, but nothing will happen, because you haven't told the program what to do when
the user clicks the button. You can see this for yourself now by pressing F5 to run the project. Feel free to click
the buttons, but they don't do anything. When you're finished, close the window you created to return to Design
mode.
You'll write code to accomplish two tasks. First, you'll write code that lets users browse their hard drives to
locate and select a picture file and then display it in the picture box (this sounds a lot harder than it is). Second,
you'll add code to the Quit button that shuts down the program when the user clicks the button.
Letting a User Browse for a File
The first bit of code you'll write enables users to browse their hard drives, select a picture file, and then see the
selected picture in the PictureBox control. This code executes when the user clicks the Select Picture button;
therefore, it's added to the Click event of that button.
When you double-click a control on a form in Design view, the default event for that control is displayed in a
code window. The default event for a Button control is its Click event, which makes sense, because clicking is
the most common action a user performs with a button. Double-click the Select Picture button now to access its
Click event in the code window (see Figure 1.12).
Figure 1.12. You'll write all your code in a window such as this.
[View full size image]](https://image.slidesharecdn.com/visualbasic2008in24hrs-1285035275-phpapp01/85/Visual-Basic-2008-In-24-Hrs-45-320.jpg)

![By the Way
After you insert the statement that begins with If and press Enter, Visual Basic automatically creates the
End If statement for you. If you type in End If, you'll wind up with two End If statements, and your
code won't run. If this happens, delete one of the statements. Hour 13, "Making Decisions in Visual Basic
Code," has all the details on the If statement.
It's time for another comment. The cursor is currently between the statement that starts with If and the End If
statement. Leave the cursor there and type the following statement, remembering to press Enter at the end of
the line:
' Load the picture into the picture box.
Did You Know?
Don't worry about indenting the code by pressing the Tab key or using spaces. Visual Basic automatically
indents code for you.
This next statement, which appears within the If construct (between the If and End If statements), is the line
of code that actually displays the picture in the picture box.
Enter the following statement:
picshowpicture.Image = Image.FromFile(ofdselectpicture.filename)
In addition to displaying the selected picture, your program also displays the path and filename of the picture in
the title bar. When you first created the form, you changed its Text property using the Properties window. To
create dynamic applications, properties need to be constantly adjusted at runtime, and you do this using code.
Insert the following two statements, pressing Enter at the end of each line:
' Show the name of the file in the form's caption.
Me.Text = "Picture Viewer(" & ofdselectpicture.FileName & ")"
After you've entered all the code, your editor should look like that shown in Figure 1.13.
Figure 1.13. Make sure that your code exactly matches the code shown here.
[View full size image]](https://image.slidesharecdn.com/visualbasic2008in24hrs-1285035275-phpapp01/85/Visual-Basic-2008-In-24-Hrs-47-320.jpg)
![Terminating a Program Using Code
The last bit of code you'll write terminates the application when the user clicks the Quit button. To do this, you'll
need to access the Click event handler of the btnQuit button. At the top of the code window are two tabs. The
current tab says ViewerForm.vb*. This tab contains the code window for the form that has the filename
ViewerForm.vb. Next to this is a tab that says ViewerForm.vb [Design]*. Click this tab to switch from Code view
to the form designer. If you receive an error when you click the tab, the code you entered contains an error,
and you need to edit it to make it the same as shown in Figure 1.13. After the form designer appears, double-
click the Quit button to access its Click event.
Enter the following code in the Quit button's Click event handler; press Enter at the end of each statement:
' Close the window and exit the application
Me.Close()
By the Way
The Me.Close() statement closes the current form. When the last loaded form in a program is closed,
the application shuts itself down—completely. As you build more robust applications, you'll probably
want to execute all kinds of cleanup routines before terminating an application, but for this example,
closing the form is all you need to do.](https://image.slidesharecdn.com/visualbasic2008in24hrs-1285035275-phpapp01/85/Visual-Basic-2008-In-24-Hrs-48-320.jpg)
![Running a Project
Your application is now complete. Click the Save All button on the toolbar (the stack of floppy disks), and then
run your program by pressing F5. You can also run the program by clicking the button on the toolbar that looks
like a right-facing triangle and resembles the Play button on a DVD player. (This button is called Start, and it
can also be found on the Debug menu.) Learning the keyboard shortcuts will make your development process
move along faster, so I recommend that you use them whenever possible.
When you run the program, the Visual Basic interface changes, and the form you've designed appears, floating
over the design environment (see Figure 1.14).
Figure 1.14. When in Run mode, your program executes the same as it would for an end user.
You are now running your program as though it were a stand-alone application running on another user's
machine; what you see is exactly what users would see if they ran the program (without the Visual Studio 2008
design environment in the background, of course). Click the Select Picture button to display the Select Picture
dialog box, shown in Figure 1.15. Use this dialog box to locate a picture file. When you've found a file, double-
click it, or click once to select it and then click Open. The selected picture is then displayed in the picture box, as
shown in Figure 1.16.
Figure 1.15. The OpenFileDialog control handles all the details of browsing for files. Cool, huh?
[View full size image]](https://image.slidesharecdn.com/visualbasic2008in24hrs-1285035275-phpapp01/85/Visual-Basic-2008-In-24-Hrs-49-320.jpg)


![By default, the Visual Basic 2008 Start Page, shown in Figure 2.1, is the first thing you see when you start
Visual Basic (if Visual Basic isn't running, start it now). The Visual Basic 2008 Start Page is a gateway for
performing tasks with Visual Basic. From this page, you can open previously edited projects, create new
projects, and get help.
Figure 2.1. The Start Page is the default entry point for all .NET languages.
[View full size image]
Creating New Projects
The Start Page consists of three category boxes. The Recent Projects category in the upper-left corner is used to
create new projects or open projects already created. To create new projects, click the Create: Project link in
the Recent Projects category. This opens the New Project dialog box, shown in Figure 2.2. The Templates list
varies from machine to machine, depending on which products of the Visual Studio .NET family are installed. Of
course, we're interested in only the Visual Basic Project types in this book.
Figure 2.2. Use the New Project dialog box to create Visual Basic projects from scratch.
[View full size image]](https://image.slidesharecdn.com/visualbasic2008in24hrs-1285035275-phpapp01/85/Visual-Basic-2008-In-24-Hrs-56-320.jpg)


![By default, the Visual Basic 2008 Start Page, shown in Figure 2.1, is the first thing you see when you start
Visual Basic (if Visual Basic isn't running, start it now). The Visual Basic 2008 Start Page is a gateway for
performing tasks with Visual Basic. From this page, you can open previously edited projects, create new
projects, and get help.
Figure 2.1. The Start Page is the default entry point for all .NET languages.
[View full size image]
Creating New Projects
The Start Page consists of three category boxes. The Recent Projects category in the upper-left corner is used to
create new projects or open projects already created. To create new projects, click the Create: Project link in
the Recent Projects category. This opens the New Project dialog box, shown in Figure 2.2. The Templates list
varies from machine to machine, depending on which products of the Visual Studio .NET family are installed. Of
course, we're interested in only the Visual Basic Project types in this book.
Figure 2.2. Use the New Project dialog box to create Visual Basic projects from scratch.
[View full size image]](https://image.slidesharecdn.com/visualbasic2008in24hrs-1285035275-phpapp01/85/Visual-Basic-2008-In-24-Hrs-60-320.jpg)


![Navigating and Customizing the Visual Basic Environment
Visual Basic lets you customize many of its interface elements such as windows and toolbars, enabling you to be
more efficient in the work you do. Create a new Windows application now by opening the File menu and
choosing New Project. This project illustrates manipulating the design environment, so name this project
Environment Tutorial and click OK to create the project. (This exercise won't create anything reusable, but it
will help you learn how to navigate the design environment.) Your screen should look like the one shown in
Figure 2.3.
Figure 2.3. This is pretty much how the integrated development environment (IDE) appears when
you first install Visual Basic.
[View full size image]
By the Way
Your screen might not look exactly like that shown in Figure 2.3, but it'll be close. By the time you've
finished this hour, you'll be able to change the appearance of the design environment to match this
figure—or to any configuration you prefer.
Working with Design Windows](https://image.slidesharecdn.com/visualbasic2008in24hrs-1285035275-phpapp01/85/Visual-Basic-2008-In-24-Hrs-63-320.jpg)

![Docking Design Windows
Visible windows appear docked by default. A docked window appears attached to the side, top, or bottom of
the work area or to some other window. The Properties window shown in Figure 2.3, for example, is docked to
the right side of the design environment (contrast this to where it's floating in Figure 2.4). To make a floating
window become a docked window, drag the title bar of the window toward the edge of the design environment
to which you want to dock the window. As you drag the window, guides appear on the screen, as shown in
Figure 2.5. If you move the mouse over one of the icons that appear as part of the guides, Visual Basic shows a
blue rectangle where the window will appear if you release the mouse button. This is a quick and easy way to
dock a window. You can also drag the window to an edge and get the same blue rectangle. This rectangle will
"stick" in a docked position. If you release the mouse while the rectangle appears this way, the window will be
docked. Although it's difficult to explain, this is very easy to do.
Figure 2.5. The guide icons make it easy to dock a window.
[View full size image]](https://image.slidesharecdn.com/visualbasic2008in24hrs-1285035275-phpapp01/85/Visual-Basic-2008-In-24-Hrs-65-320.jpg)


![Working with Toolbars
Toolbars are the mainstay for performing functions quickly in almost every Windows program. (You'll probably
want to add them to your own programs at some point, and in Hour 9, "Adding Menus and Toolbars to Forms,"
I'll show you how.) Every toolbar has a corresponding menu item, and buttons on toolbars are essentially
shortcuts to their corresponding menu items. To maximize your efficiency when developing with Visual Basic
2008, you should become familiar with the available toolbars. As your skills improve, you can customize existing
toolbars and even create your own toolbars to more closely fit the way you work.
Showing and Hiding Toolbars
Visual Basic includes a number of built-in toolbars you can use when creating projects. One toolbar is visible in
most of the figures shown so far in this hour: the Standard toolbar. You'll probably want this toolbar displayed
all the time.
The toolbars you'll use most often as a new Visual Basic developer are the Standard, Text Editor, and Debug
toolbars; each of these is discussed in this hour. You can also create your own custom toolbars to contain any
functions you think necessary.
To show or hide a toolbar, open the View menu and choose Toolbars to display a list of available toolbars.
Toolbars that are currently visible are checked, as shown in Figure 2.6. Click a toolbar name to toggle its visible
state.
Figure 2.6. Hide or show toolbars to make your workspace more efficient.
[View full size image]](https://image.slidesharecdn.com/visualbasic2008in24hrs-1285035275-phpapp01/85/Visual-Basic-2008-In-24-Hrs-68-320.jpg)


![Adding Controls to a Form Using the Toolbox
The IDE offers some fantastic tools for building a graphical user interface (GUI) for your applications. Most GUIs
consist of one or more forms (Windows) with various elements on the forms, such as text boxes, list boxes, and
buttons. The toolbox is used to place controls on a form. Figure 2.7 shows the default toolbox you see when you
first open or create a Visual Basic project. These controls are discussed in detail in Hour 7, "Working with
Traditional Controls," and Hour 8, "Using Advanced Controls."
Figure 2.7. The standard toolbox contains many useful controls you can use to build robust
interfaces.
[View full size image]
You can add a control to a form in one of four ways:
In the toolbox, click the tool representing the control that you want to place on a form, and then click and
drag on the form where you want the control placed. You're essentially drawing the border of the control.
The location at which you start dragging is used for one corner of the control, and the point at which you
release the mouse button and stop dragging becomes the lower-right corner.
Double-click the desired control type in the toolbox. A new control of the selected type is placed in the
upper-left corner of the form if the form is selected. If a control is selected when you do this, the new
control appears slightly to the right and down from the selected control. The control's height and width are](https://image.slidesharecdn.com/visualbasic2008in24hrs-1285035275-phpapp01/85/Visual-Basic-2008-In-24-Hrs-71-320.jpg)


![By simply clicking a property in the Properties window, you can easily tell the type of input the property
requires.
Working with Color Properties
Properties that deal with colors are unique in how they accept values, yet all color-related properties behave the
same way. In Visual Basic, colors are expressed as a set of three numbers, each having a value from 0 to 255. A
given set of numbers represents the red, green, and blue (RGB) components of a color, respectively. The value
0,255,0, for example, represents pure green, whereas the value 0,0,0 represents black and 255,255,255
represents white. In some cases, colors have also been given specific names that you can use.
A color rectangle is displayed for each color property in the Properties window; this color is the selected color
for the property. Text is displayed next to the colored rectangle. This text is either the name of a color or a set
of RGB values that define the color. Clicking a color property causes a drop-down arrow to appear, but the drop-
down you get by clicking the arrow isn't a typical drop-down list. Figure 2.10 shows what the drop-down list for
a color property looks like.
Figure 2.10. The color drop-down list enables you to select from three sets of colors.
[View full size image]
The color drop-down list is composed of three tabs: Custom, Web, and System. Most color properties use a
system color by default. Hour 5, "Building Forms: The Basics," goes into great detail on system colors. I only
want to mention here that system colors vary from computer to computer. They're determined by the users
when they right-click the desktop and choose to change their colors. Use a system color when you want a color
to be one of the user's selected system colors. When a color property is set to a system color, the name of the
system color appears in the property sheet.](https://image.slidesharecdn.com/visualbasic2008in24hrs-1285035275-phpapp01/85/Visual-Basic-2008-In-24-Hrs-76-320.jpg)


![The properties for a project are presented as a set of vertical tabs, as shown in Figure 2.15.
Figure 2.15. The project properties are used to tailor the project as a whole.
[View full size image]
As you work through the hours in this book, I'll refer to the Project Properties dialog box as necessary,
explaining pages and items in context with other material. Feel free to take a look at your Picture Viewer
properties, but don't change any at this time. You can close the project properties by clicking the small X in the
upper-right corner of the tab section in the IDE. You can also just click a different tab.
Adding and Removing Project Files
When you first start Visual Basic 2008 and create a new Windows Forms Application project, Visual Basic creates
the project with a single form. You're not limited to having one form in a project, however; you can create new
forms or add existing forms to your project at will (feeling powerful yet?). You can also create and add code
modules and classes as well as other types of objects.
You can add a new or existing object to your project in one of three ways:
Choose the appropriate item from the Project menu.
Click the small drop-down arrow that's part of the Add New Item button on the Standard toolbar, and then
choose the object type from the drop-down list that appears, as shown in Figure 2.16.](https://image.slidesharecdn.com/visualbasic2008in24hrs-1285035275-phpapp01/85/Visual-Basic-2008-In-24-Hrs-83-320.jpg)
![Figure 2.16. This toolbutton drop-down is one of three ways to add objects to a project.
[View full size image]
Right-click the project name in the Solution Explorer window, and then choose Add from the shortcut
menu to access a submenu from which you can select object types.
When you select Add ObjectType from any of these menus, a dialog box appears, showing you the objects that
can be added to the project. Your chosen item type is selected by default, as shown in Figure 2.17. Simply
name the object and click Open to create a new object of the selected type. To create an object of a different
type, click the type to select it, name it, and then click Open.
Figure 2.17. Regardless of the menu option you select, you can add any type of object you want
using this dialog box.
[View full size image]](https://image.slidesharecdn.com/visualbasic2008in24hrs-1285035275-phpapp01/85/Visual-Basic-2008-In-24-Hrs-84-320.jpg)


![To complete the project, you need to add the small amount of Visual Basic code necessary to modify the
form's Height and Width properties when the user clicks a button.
3. Access the code for the Enlarge button by double-clicking the ^ button. Type the following statement
exactly as you see it here. Do not press the Enter key or add a space after you've entered this text:
Me.Width
When you type the period, or dot, as it's called, a small drop-down list like the one shown in Figure 3.3
appears. Visual Basic is smart enough to realize that Me represents the current form (more on this in a
moment). To help you write code for the object, it gives you a drop-down list containing all the properties
and methods of the form. This feature is called IntelliSense. When an IntelliSense drop-down box
appears, you can use the up and down arrow keys to navigate the list and press Tab to select the
highlighted list item. This prevents you from misspelling a member name, thereby reducing compile errors.
Because Visual Basic is fully object-oriented, you'll come to rely on IntelliSense drop-down lists in a big
way; I think I'd rather dig ditches than program without them.
Figure 3.3. IntelliSense drop-down lists (also called auto-completion drop-down lists) make
coding dramatically easier.
[View full size image]](https://image.slidesharecdn.com/visualbasic2008in24hrs-1285035275-phpapp01/85/Visual-Basic-2008-In-24-Hrs-99-320.jpg)
![4. Use the Backspace key to erase the code you just entered, and enter the following code in its place (press
Enter at the end of each line):
Me.Width = Me.Width + 20
Me.Height = Me.Height + 20
Remember from before that the word Me doesn't refer to a person, it refers to the object to which the code
belongs (in this case, the form). Me is a reserved word; it's a word that you can't use to name objects or
variables because Visual Basic has a specific meaning for it. When writing code within a form module, as
you're doing here, always use the reserved word Me rather than the name of the form. Me is much shorter
than using the full name of the current form, and it makes the code more portable. (You can copy and
paste the code into another form module and not have to change the form name to make the code work.)
Also, should you change the name of the form at any time in the future, you won't have to change
references to the old name.
By the Way
Me works only in object-based modules such as form modules; you can't use Me in a
standard module, which you'll learn about in Hour 10, "Creating and Calling Code
Procedures."
The code you just entered does nothing more than set the form's Width and Height properties to their
current value plus 20 pixels.
5. Redisplay the form designer by selecting the tab named ViewerForm.vb [Design] at the top of the designer](https://image.slidesharecdn.com/visualbasic2008in24hrs-1285035275-phpapp01/85/Visual-Basic-2008-In-24-Hrs-100-320.jpg)
![window. Then double-click the button with the v to access its Click event, and add the following code:
Me.Width = Me.Width - 20
Me.Height = Me.Height - 20
This code is similar to the code in the btnEnlarge_Click event, except that it reduces the form's Width
and Height properties by 20 pixels. Your screen should now look like Figure 3.4.
Figure 3.4. The code you've entered should look exactly like this.
[View full size image]
Did You Know?
As you create projects, it's a good idea to save frequently. When an asterisk appears to the right of a
tab's title, you know that the file edited within that tab has been changed but not saved. Save your
project now by clicking the Save All button on the toolbar.
Again, display the form designer by clicking the tab ViewerForm.vb [Design]. Your Properties Example project is
now ready to be run! Press F5 to put the project in Run mode. Before continuing, click the Select Picture button,
and choose a picture from your hard drive.](https://image.slidesharecdn.com/visualbasic2008in24hrs-1285035275-phpapp01/85/Visual-Basic-2008-In-24-Hrs-101-320.jpg)
![Next, click the ^ button a few times and notice how the form gets bigger (see Figure 3.5).
Figure 3.5. The form gets bigger, but it still looks just as you designed it.
[View full size image]
Next, click the v button to make the form smaller. When you've clicked enough to satisfy your curiosity (or until
you get bored), end the running program, and return to Design mode by clicking the Stop Debugging button on
the toolbar.
Did you notice how the buttons and the image on the form didn't resize as the form's size changed? In Hour 6,
"Building Forms: Advanced Techniques," you'll learn how to make your forms resize their contents.](https://image.slidesharecdn.com/visualbasic2008in24hrs-1285035275-phpapp01/85/Visual-Basic-2008-In-24-Hrs-102-320.jpg)


![Using the Object Browser
Visual Basic 2008 includes a useful tool that enables you to easily view members (properties, methods, and
events) of all the objects in a project: the Object Browser (see Figure 3.10). This is useful when you're dealing
with objects that aren't well documented, because it enables you to see all the members an object supports. To
view the Object Browser, choose View, Object Browser.
Figure 3.10. The Object Browser enables you to view all properties and methods of an object.
[View full size image]
The Browse drop-down list in the upper-left corner of the Object Browser is used to determine the browsing
scope. You can choose My Solution to view only the objects referenced in the active solution, or you can choose
All Components to view all possible objects. You can customize the object set by clicking the drop-down arrow
next to the Object Browser Settings button to the far right of the Browse drop-down list. I don't recommend
changing the custom object setting until you have some experience using Visual Basic .NET objects, as well as
experience using the Object Browser.
The top-level nodes (each item in the tree is called a node) in the Objects tree are libraries. Libraries are
usually DLL or EXE files on your computer that contain one or more objects. To view the objects in a library,
simply expand the library node. As you select objects within a library, the list to the right of the Objects tree
shows information about the members of the selected object (refer to Figure 3.10). For even more detailed
information, click a member in the list on the right. The Object Browser shows information about the member in
the gray area below the two lists.](https://image.slidesharecdn.com/visualbasic2008in24hrs-1285035275-phpapp01/85/Visual-Basic-2008-In-24-Hrs-113-320.jpg)


![Although it's easy to think that the TextChanged event fires only when you commit your entry, such as by
leaving the text box or pressing Enter, this isn't how it works. Instead, the TextChanged event would be
triggered 16 times—once for each character typed—because each time you enter a new character, the contents
of the text box change. Again, it's important to learn the nuances and the exact behavior of the events you're
using. If you use events without fully understanding how they work, your program might exhibit unusual (which
usually means undesirable) results.
Events Triggered by an Object
Sometimes an object triggers its own events. The most common example of this is the Timer control's Tick
event. The Timer control is a nonvisual control like the common dialog control. It doesn't appear on a form
when the program is running; it appears at design time in the space reserved for nonvisual controls. The Timer
control's sole purpose is to trigger its Tick event at an interval specified in its Interval property.
By setting the Timer control's Interval property, you control the interval (in milliseconds) at which the Timer
event executes. After firing its Timer event, a Timer control resets itself and fires its Timer event again when
the interval has passed. This occurs until the interval is changed, the Timer control is disabled, or the Timer
control's form is unloaded. A common use of timers is to create a clock on a form. You can display the time in a
label and update it at regular intervals by placing the code to display the current time in the Timer event. You'll
create a project with a Timer control in Hour 8, "Using Advanced Controls."
Events Triggered by the Operating System
The third way an event can be triggered is by Windows itself. Often, you might not even realize these events
exist. For example, when a form is fully or partially obstructed by another window, the program needs to know
when the offending window is resized or moved so that it can repaint the area of the window that's hidden.
Windows and Visual Basic work together in this respect. When the obstructing window is moved or resized,
Windows tells Visual Basic to repaint the form, which Visual Basic does. This also causes Visual Basic to raise the
form's Paint event. You can place code into the Paint event to create a custom display for the form, such as
drawing shapes on the form using a Graphics object. When you do so, your custom drawing code executes
every time the form repaints itself.
Avoiding Recursive Events
You must ensure that you never create code where an event can endlessly trigger itself. This is called a
recursive event. To illustrate a situation that causes a recursive event, think of the Textbox control's
TextChanged event, discussed earlier. The TextChanged event fires every time the text in the text box changes.
Placing code in the TextChanged event that alters the text in the text box causes the Change event to be fired
again, which could result in an endless loop. Recursive events terminate when Windows returns a
StackOverflow exception (see Figure 4.1), indicating that Windows no longer has the resources to follow the
recursion.
Figure 4.1. When you receive a StackOverflow exception, you should look for a recursive event as the
culprit.
[View full size image]](https://image.slidesharecdn.com/visualbasic2008in24hrs-1285035275-phpapp01/85/Visual-Basic-2008-In-24-Hrs-120-320.jpg)

![1. Right-click Form1.vb in the Solutions Explorer and choose Rename. Change the filename to
ViewEventsForm.vb. Next, change the Text property of the form to View Events Example.
2. Use the toolbox to add a picture box to the form.
3. Change the name of the picture box to picText, and then double-click the picture box to access its event
procedures.
Your screen should look like the one shown in Figure 4.2. Notice the two drop-down lists at the top of the code
window. One contains the word picText, and the other reads Click. The drop-down list on the left contains a list
of all the objects of the current form (including the form itself and all its controls). The list on the right contains
all the events for the object selected in the first drop-down list.
Figure 4.2. Event procedures are created using the events drop-down list in the code editor.
[View full size image]
Currently, you're viewing the Click event for the picText object. The cursor is placed within the Click event
procedure, ready for you to enter code. The code statement above the cursor is the event declaration—a
statement that defines the structure of an event. Notice that this event declaration contains the name of the
object, an underscore character (_), and then the event name. Following the event name is a set of
parentheses. The items within the parentheses are called parameters, which are the topic of the next section.
This is the standard declaration structure for an event procedure.
Click the events drop-down list (the list on the right), and take a look at all the events that the picture box
supports. Select MouseDown from the list, and notice how your code window changes to look like the one shown](https://image.slidesharecdn.com/visualbasic2008in24hrs-1285035275-phpapp01/85/Visual-Basic-2008-In-24-Hrs-122-320.jpg)
![in Figure 4.3.
Figure 4.3. Visual Basic creates an empty event procedure the first time you select an object's event.
[View full size image]
When you select an event from the list, Visual Basic creates a new event procedure for that event. The full event
declaration is shown here:
Private Sub picText_MouseDown(ByVal sender As Object, _
ByVal e As System.Windows.Forms.MouseEventArgs) _
Handles picText.MouseDown
Notice that the new event declaration is similar to the first one in the window in that it's titled with the object's
name followed by an underscore. However, the remainder of the event procedure declaration is different. It's
the name of the event—in this case, MouseDown.
By the Way
The words Private and Sub are Visual Basic reserved words that indicate the scope and type of the
procedure. Scope and type are discussed in Hour 10, "Creating and Calling Code Procedures."](https://image.slidesharecdn.com/visualbasic2008in24hrs-1285035275-phpapp01/85/Visual-Basic-2008-In-24-Hrs-123-320.jpg)
![Working with Event Parameters
As mentioned previously, the items within the parentheses of an event declaration are called parameters. An
event parameter is a variable that's created and assigned a value by Visual Basic. These parameter variables
are used to get, and sometimes set, relevant information within the event. This data may be text, a number, an
object—almost anything. Multiple parameters within an event procedure are always separated by commas. As
you can see, the MouseDown event has two parameters. When the event procedure is triggered, Visual Basic
automatically creates the parameter variables and assigns them values for use in this single execution of the
event procedure. The next time the event procedure occurs, the values in the parameters are reset. You use the
values in the parameters to make decisions or perform operations in your code.
The MouseDown event of a form has the following parameters:
ByVal sender As Object
and
ByVal e As System.Windows.Forms.MouseEventArgs
For now, ignore the ByVal keywords. These are discussed in Hour 11, "Using Constants, Data Types, Variables,
and Arrays."
The text following ByVal is the name of the parameter, and the string after the word As indicates the type of
data the parameter contains. The first parameter, sender, holds a generic object. Object parameters can be any
type of object supported by Visual Basic. Some contain text, others contain numbers, and still others (many
others) contain objects. In the case of the sender parameter, it always holds a reference to the control causing
the event.
The e parameter of the MouseDown event, on the other hand, is where the real action is. The e parameter also
holds an object, and in this case the object is of type System.Windows.Forms.MouseEventArgs. This object has
properties that relate to the MouseDown event. To see them, type in the following code, but don't press anything
after entering the dot (period):
e.
When you enter the period, you get a drop-down list showing you the members (properties and methods) of the
e object, as shown in Figure 4.4. Using the e object, you can determine a number of things about the
occurrence of the MouseDown event. Table 4.1 lists some of the more interesting items.
Figure 4.4. IntelliSense drop-down lists alleviate the need to memorize the makeup of hundreds of
objects.
[View full size image]](https://image.slidesharecdn.com/visualbasic2008in24hrs-1285035275-phpapp01/85/Visual-Basic-2008-In-24-Hrs-124-320.jpg)


![Although it's easy to think that the TextChanged event fires only when you commit your entry, such as by
leaving the text box or pressing Enter, this isn't how it works. Instead, the TextChanged event would be
triggered 16 times—once for each character typed—because each time you enter a new character, the contents
of the text box change. Again, it's important to learn the nuances and the exact behavior of the events you're
using. If you use events without fully understanding how they work, your program might exhibit unusual (which
usually means undesirable) results.
Events Triggered by an Object
Sometimes an object triggers its own events. The most common example of this is the Timer control's Tick
event. The Timer control is a nonvisual control like the common dialog control. It doesn't appear on a form
when the program is running; it appears at design time in the space reserved for nonvisual controls. The Timer
control's sole purpose is to trigger its Tick event at an interval specified in its Interval property.
By setting the Timer control's Interval property, you control the interval (in milliseconds) at which the Timer
event executes. After firing its Timer event, a Timer control resets itself and fires its Timer event again when
the interval has passed. This occurs until the interval is changed, the Timer control is disabled, or the Timer
control's form is unloaded. A common use of timers is to create a clock on a form. You can display the time in a
label and update it at regular intervals by placing the code to display the current time in the Timer event. You'll
create a project with a Timer control in Hour 8, "Using Advanced Controls."
Events Triggered by the Operating System
The third way an event can be triggered is by Windows itself. Often, you might not even realize these events
exist. For example, when a form is fully or partially obstructed by another window, the program needs to know
when the offending window is resized or moved so that it can repaint the area of the window that's hidden.
Windows and Visual Basic work together in this respect. When the obstructing window is moved or resized,
Windows tells Visual Basic to repaint the form, which Visual Basic does. This also causes Visual Basic to raise the
form's Paint event. You can place code into the Paint event to create a custom display for the form, such as
drawing shapes on the form using a Graphics object. When you do so, your custom drawing code executes
every time the form repaints itself.
Avoiding Recursive Events
You must ensure that you never create code where an event can endlessly trigger itself. This is called a
recursive event. To illustrate a situation that causes a recursive event, think of the Textbox control's
TextChanged event, discussed earlier. The TextChanged event fires every time the text in the text box changes.
Placing code in the TextChanged event that alters the text in the text box causes the Change event to be fired
again, which could result in an endless loop. Recursive events terminate when Windows returns a
StackOverflow exception (see Figure 4.1), indicating that Windows no longer has the resources to follow the
recursion.
Figure 4.1. When you receive a StackOverflow exception, you should look for a recursive event as the
culprit.
[View full size image]](https://image.slidesharecdn.com/visualbasic2008in24hrs-1285035275-phpapp01/85/Visual-Basic-2008-In-24-Hrs-129-320.jpg)

![1. Right-click Form1.vb in the Solutions Explorer and choose Rename. Change the filename to
ViewEventsForm.vb. Next, change the Text property of the form to View Events Example.
2. Use the toolbox to add a picture box to the form.
3. Change the name of the picture box to picText, and then double-click the picture box to access its event
procedures.
Your screen should look like the one shown in Figure 4.2. Notice the two drop-down lists at the top of the code
window. One contains the word picText, and the other reads Click. The drop-down list on the left contains a list
of all the objects of the current form (including the form itself and all its controls). The list on the right contains
all the events for the object selected in the first drop-down list.
Figure 4.2. Event procedures are created using the events drop-down list in the code editor.
[View full size image]
Currently, you're viewing the Click event for the picText object. The cursor is placed within the Click event
procedure, ready for you to enter code. The code statement above the cursor is the event declaration—a
statement that defines the structure of an event. Notice that this event declaration contains the name of the
object, an underscore character (_), and then the event name. Following the event name is a set of
parentheses. The items within the parentheses are called parameters, which are the topic of the next section.
This is the standard declaration structure for an event procedure.
Click the events drop-down list (the list on the right), and take a look at all the events that the picture box
supports. Select MouseDown from the list, and notice how your code window changes to look like the one shown](https://image.slidesharecdn.com/visualbasic2008in24hrs-1285035275-phpapp01/85/Visual-Basic-2008-In-24-Hrs-131-320.jpg)
![in Figure 4.3.
Figure 4.3. Visual Basic creates an empty event procedure the first time you select an object's event.
[View full size image]
When you select an event from the list, Visual Basic creates a new event procedure for that event. The full event
declaration is shown here:
Private Sub picText_MouseDown(ByVal sender As Object, _
ByVal e As System.Windows.Forms.MouseEventArgs) _
Handles picText.MouseDown
Notice that the new event declaration is similar to the first one in the window in that it's titled with the object's
name followed by an underscore. However, the remainder of the event procedure declaration is different. It's
the name of the event—in this case, MouseDown.
By the Way
The words Private and Sub are Visual Basic reserved words that indicate the scope and type of the
procedure. Scope and type are discussed in Hour 10, "Creating and Calling Code Procedures."](https://image.slidesharecdn.com/visualbasic2008in24hrs-1285035275-phpapp01/85/Visual-Basic-2008-In-24-Hrs-132-320.jpg)
![Working with Event Parameters
As mentioned previously, the items within the parentheses of an event declaration are called parameters. An
event parameter is a variable that's created and assigned a value by Visual Basic. These parameter variables
are used to get, and sometimes set, relevant information within the event. This data may be text, a number, an
object—almost anything. Multiple parameters within an event procedure are always separated by commas. As
you can see, the MouseDown event has two parameters. When the event procedure is triggered, Visual Basic
automatically creates the parameter variables and assigns them values for use in this single execution of the
event procedure. The next time the event procedure occurs, the values in the parameters are reset. You use the
values in the parameters to make decisions or perform operations in your code.
The MouseDown event of a form has the following parameters:
ByVal sender As Object
and
ByVal e As System.Windows.Forms.MouseEventArgs
For now, ignore the ByVal keywords. These are discussed in Hour 11, "Using Constants, Data Types, Variables,
and Arrays."
The text following ByVal is the name of the parameter, and the string after the word As indicates the type of
data the parameter contains. The first parameter, sender, holds a generic object. Object parameters can be any
type of object supported by Visual Basic. Some contain text, others contain numbers, and still others (many
others) contain objects. In the case of the sender parameter, it always holds a reference to the control causing
the event.
The e parameter of the MouseDown event, on the other hand, is where the real action is. The e parameter also
holds an object, and in this case the object is of type System.Windows.Forms.MouseEventArgs. This object has
properties that relate to the MouseDown event. To see them, type in the following code, but don't press anything
after entering the dot (period):
e.
When you enter the period, you get a drop-down list showing you the members (properties and methods) of the
e object, as shown in Figure 4.4. Using the e object, you can determine a number of things about the
occurrence of the MouseDown event. Table 4.1 lists some of the more interesting items.
Figure 4.4. IntelliSense drop-down lists alleviate the need to memorize the makeup of hundreds of
objects.
[View full size image]](https://image.slidesharecdn.com/visualbasic2008in24hrs-1285035275-phpapp01/85/Visual-Basic-2008-In-24-Hrs-133-320.jpg)


![Creating Event Handlers
The interface for this example is complete—now on to the fun part. You'll now create the event procedures that
empower the program to do something. The first event that we're interested in is the MouseMove event. Double-
click the picture box on the form to access its event procedures. When you double-click a control, the event
procedure that's created is always for the default event for the type of control. For picture boxes, this is the
Click event. We're not interested in the Click event at this time, however. Open the event list (the drop-down
list in the upper right), and then select MouseMove in the list. Visual Basic creates a new MouseMove procedure
for the text box.
Notice that Visual Basic left the default event procedure it created for you. It's best not to leave dead code
(code that isn't used), so delete the Click event procedure now.
To fully delete the event procedure, you must delete all the following code:
Private Sub picShowPicture_Click(ByVal sender As System.Object, _
ByVal e As System.EventArgs) _
Handles picShowPicture.Click
End Sub
After you've deleted the procedure, your code should look like Figure 4.6.
Figure 4.6. Each time you select a new event, Visual Basic creates an empty event procedure—if one
wasn't created previously for the control.
[View full size image]](https://image.slidesharecdn.com/visualbasic2008in24hrs-1285035275-phpapp01/85/Visual-Basic-2008-In-24-Hrs-137-320.jpg)


![set the Text properties of these labels to empty using the Properties window. However, if you do this, you won't
see the labels on the form in the designer and may place other controls over the top of them. A better solution
is to initialize their values when the form first loads. You'll do just that by following these steps:
1. Open the object drop-down list in the upper left and select (ViewerForm Events). This is the object
reference to your form (see Figure 4.8).
Figure 4.8. The form itself always appears at the top of the object list.
[View full size image]
2. Open the event drop-down list in the upper-right corner and choose Load. The Load event executes
automatically when the form first loads—the perfect place to initialize the Label controls.
3. Enter the following two code statements:
lblX.Text = ""
lblY.Text = ""
That's it—you're finished! Go ahead and press F5 to run the project and give it a test drive. When the form first
loads, the coordinate labels should be empty (this makes them appear invisible). When you mouse over the
picture box, the coordinates are displayed, and when you leave the confines of the picture box, the coordinates
are hidden again. A little bit of code and the right event selection can go a long way.](https://image.slidesharecdn.com/visualbasic2008in24hrs-1285035275-phpapp01/85/Visual-Basic-2008-In-24-Hrs-140-320.jpg)


![Your Picture Viewer currently has some useful functionality, but it's not very flexible. In this hour, you'll start
building an Options dialog box for the program. Add a new form for the dialog box by following these steps:
1. Choose Project, Add Windows Form to display the Add New Item dialog box.
2. In the Name text box, enter OptionsForm.vb. This will be the name of your form as well as the name of
the file that defines the form on the hard drive.
3. Click the Add button (or double-click the Windows Form icon) to close the Add New Item dialog box and
add the form to your project (see Figure 5.1).
Figure 5.1. Each new form starts off as a blank canvas.
[View full size image]
You can change the name of a form using the Properties window at any time. Doing so changes the form's Name
property (but not the name of the file on the hard disk). Whenever possible, give your forms solid names when
creating them.](https://image.slidesharecdn.com/visualbasic2008in24hrs-1285035275-phpapp01/85/Visual-Basic-2008-In-24-Hrs-149-320.jpg)


![Your Picture Viewer currently has some useful functionality, but it's not very flexible. In this hour, you'll start
building an Options dialog box for the program. Add a new form for the dialog box by following these steps:
1. Choose Project, Add Windows Form to display the Add New Item dialog box.
2. In the Name text box, enter OptionsForm.vb. This will be the name of your form as well as the name of
the file that defines the form on the hard drive.
3. Click the Add button (or double-click the Windows Form icon) to close the Add New Item dialog box and
add the form to your project (see Figure 5.1).
Figure 5.1. Each new form starts off as a blank canvas.
[View full size image]
You can change the name of a form using the Properties window at any time. Doing so changes the form's Name
property (but not the name of the file on the hard disk). Whenever possible, give your forms solid names when
creating them.](https://image.slidesharecdn.com/visualbasic2008in24hrs-1285035275-phpapp01/85/Visual-Basic-2008-In-24-Hrs-152-320.jpg)


![Your Picture Viewer currently has some useful functionality, but it's not very flexible. In this hour, you'll start
building an Options dialog box for the program. Add a new form for the dialog box by following these steps:
1. Choose Project, Add Windows Form to display the Add New Item dialog box.
2. In the Name text box, enter OptionsForm.vb. This will be the name of your form as well as the name of
the file that defines the form on the hard drive.
3. Click the Add button (or double-click the Windows Form icon) to close the Add New Item dialog box and
add the form to your project (see Figure 5.1).
Figure 5.1. Each new form starts off as a blank canvas.
[View full size image]
You can change the name of a form using the Properties window at any time. Doing so changes the form's Name
property (but not the name of the file on the hard disk). Whenever possible, give your forms solid names when
creating them.](https://image.slidesharecdn.com/visualbasic2008in24hrs-1285035275-phpapp01/85/Visual-Basic-2008-In-24-Hrs-155-320.jpg)
![Changing the Appearance of a Form
The Properties window can actually show two different sets of properties for a form. Right now, it's probably
showing the form's file properties (the properties that describe the physical file[s] on the hard drive, as shown
in Figure 5.2). If so, click the form in the designer again to view its development properties. Clicking the form
itself shows the form's development properties, whereas clicking the name of the form in the Solution Explorer
shows you the form's physical file properties. This is why I usually tell you to click the form before setting its
properties.
Figure 5.2. File properties can be useful, but they don't allow you to do much with the form.
Take a moment to browse the form's properties in the Properties window. In this hour, I'll show you how to use
the more common properties of the form to tailor its appearance.
Displaying Text on a Form's Title Bar
You should always set the text in a form's title bar to something meaningful. (Not all forms have title bars, as
you'll see later in this hour.) The text displayed in the title bar is the value placed in the form's Text property.
Generally, the text should be one of the following:
The name of the program: This is most appropriate when the form is the program's main or only form.
You used the name of the program for your main form when you defined it in Hour 1.](https://image.slidesharecdn.com/visualbasic2008in24hrs-1285035275-phpapp01/85/Visual-Basic-2008-In-24-Hrs-156-320.jpg)
![The purpose of the form: This is perhaps the most common type of text displayed in a title bar. For
example, if a form is used to select a printer, consider setting the Text property to Select Printer. When
you take this approach, use active voice (for instance, don't use Printer Select).
The name of the form: If you choose to place the name of the form in the form's title bar, use the English
name, not the actual form name. For instance, if you've used a naming convention and you named a form
LoginForm, use the text Login or Login User.
Change the Text property of your form to Picture Viewer Options. Your form should now look like the one
shown in Figure 5.3.
Figure 5.3. Use common sense when setting title bar text.
[View full size image]
By the Way
As with most other form properties, you can change the Text property at any time using Visual Basic
code.](https://image.slidesharecdn.com/visualbasic2008in24hrs-1285035275-phpapp01/85/Visual-Basic-2008-In-24-Hrs-157-320.jpg)
![Changing a Form's Background Color
Although most forms appear with a gray background (this is part of the standard 3D color scheme in Windows),
you can change a form's background to any color you want. To change a form's background color, you change
its BackColor property. The BackColor property is a unique property in that you can specify a named color or
an RGB value in the format red, green, blue.
By default, the BackColor property is set to the color named Control. This color is a system color and might not
be gray. When Windows is installed, it's configured to a default color scheme. In the default scheme for all
Windows versions earlier than XP, the color for forms and other objects is the familiar "battleship gray." For XP
and Vista installations, this color is a light tan (although it still looks gray on most monitors). As a Windows
user, however, you're free to change any system color you want. For instance, some people with color blindness
prefer to change their system colors to colors that have more contrast than the defaults so that objects are
more clearly distinguishable. When you assign a system color to a form or control, the object's appearance
adjusts itself to the current user's system color scheme. This doesn't just occur when a form is first displayed;
changes to the system color scheme are immediately propagated to all objects that use the affected colors.
By the Way
Try to use system colors whenever possible. This will make your application behave as closely as
possible to what the user expects and will avoid problems such as using colors that are indistinguishable
from one another to someone who is color-blind.
Change your form's background color by deleting the word Control in the BackColor property in the Properties
window. In its place enter 0,0,255 and press Enter or Tab to commit your entry. When you commit the entry,
the RGB value changes to the word Blue. If Visual Basic has a named color that matches your RGB values, it
automatically switches to the name for you.
Your form should now be blue, because you entered an RGB value in which you specified no red, no green, and
maximum blue (color values range from 0 to 255). In reality, you'll probably rarely enter RGB values. Instead,
you'll select colors from color palettes. To view color palettes from which you can select a color for the
BackColor property, click the drop-down arrow in the BackColor property in the Properties window, as shown
in Figure 5.4.
Figure 5.4. All color properties have palettes from which you can choose a color.
[View full size image]](https://image.slidesharecdn.com/visualbasic2008in24hrs-1285035275-phpapp01/85/Visual-Basic-2008-In-24-Hrs-158-320.jpg)

![3. Click the BackgroundImage property in the Properties window.
4. Click the Build button that appears next to the property (the small button with three dots).
5. The Select Resource dialog box appears, as shown in Figure 5.5. Click the Local resource option button.
Figure 5.5. Images on your hard drive are considered local resources.
[View full size image]
6. Click Import and locate the file Options.bmp, which you can get from downloading the example files from
my website.
7. You are returned to the Select Resource dialog box. Click OK to load the picture. The selected image is
displayed on the form's background, as shown in Figure 5.6.
Figure 5.6. A form can display a picture, just like a picture box.](https://image.slidesharecdn.com/visualbasic2008in24hrs-1285035275-phpapp01/85/Visual-Basic-2008-In-24-Hrs-160-320.jpg)


![proved difficult to accomplish in large applications containing dozens or even hundreds of forms. Instead, it's
usually just best to set the Icon property of all your forms to the icon that best represents your application.
Because you set the icon of the main form in Hour 1 using the Properties window, you'll use that icon again, but
you'll do it with Visual Basic code. To assign the main icon to your form, follow these steps:
1. Double-click the form in the Form Designer to access its default event: the Load event.
2. Enter the following code statement into the Load event:
Me.Icon = ViewerForm.Icon
Recall from earlier that Me represents the form the code resides in—your Options form. This code sets the
Options form icon to the icon of the Picture Viewer form (your main form). Now, if you change the icon of the
main form in design view, you can be certain that the Options form will always appear with the proper icon. If
you were to set an icon for the Options form using the Properties window, you would lose this flexibility.
Adding Minimize, Maximize, and Control Box Buttons to a Form
Click the OptionsForm.vb [Design]* tab at the top of the work area to switch to the Form Designer. Take a look
at the title bar of the Picture Viewer Options form that you've created, and notice that it has three buttons on it,
as shown in Figure 5.8.
Figure 5.8. You control which, if any, of these buttons are displayed.](https://image.slidesharecdn.com/visualbasic2008in24hrs-1285035275-phpapp01/85/Visual-Basic-2008-In-24-Hrs-163-320.jpg)


![The FormBorderStyle property can be set to one of the following values:
None
FixedSingle
Fixed3D
FixedDialog
Sizable
FixedToolWindow
SizableToolWindow
Run your project now by pressing F5, and move the mouse pointer over one of the borders of your main Picture
Viewer form. This form has a sizable border, which means that you can resize the form by dragging the border.
Move the pointer over an edge of the form. Notice how the pointer changes from a large arrow to a line with
arrows pointing to either side, indicating the direction in which you can stretch the border. When you move the
pointer over a corner, you get a diagonal cursor that indicates that you can stretch both of the sides that meet
at the corner. Clicking and dragging the border changes the size of the form.
Stop the project now by choosing Debug, Stop Debugging (or click the Close button on the form), and change
the OptionsForm form's FormBorderStyle property to None. Notice that the title bar disappears as well, as
shown in Figure 5.10. Of course, when the title bar is gone, there's no visible title bar text, no control box, and
no Minimize or Maximize buttons. In addition, there's no way to move or resize the form. It's rarely appropriate
to specify None for a form's BorderStyle, but if you need to do so (a splash screen comes to mind), Visual Basic
2008 makes it possible.
Figure 5.10. A form with no border also has no title bar.
[View full size image]](https://image.slidesharecdn.com/visualbasic2008in24hrs-1285035275-phpapp01/85/Visual-Basic-2008-In-24-Hrs-166-320.jpg)


![Visual Basic 2008, as well). When the Find and Replace window is visible, the user can still access other
windows.
On the other hand, when a form is displayed as a modal form, all other forms in the same application become
disabled until the modal form is closed; the other forms won't accept any keyboard or mouse input. The user is
forced to deal with only the modal form. After the modal form is closed, the user is free to work with other
visible forms within the program. If the form was displayed by another modal form, that form retains the focus
until closed, and so on. Modal forms are most often used to create dialog boxes in which the user works with a
specific set of data and controls before moving on. The Print dialog box of Microsoft Word, for example, is a
modal dialog box. When the Print dialog box is displayed, you can't work with the document on the main Word
window until the Print dialog box is closed. Most secondary windows in any given program are modal windows.
By the Way
You can display one modal form from another modal form, but you cannot display a nonmodal form from
a modal form.
A form's modality is determined by how you show the form rather than by how you create it (both modal and
nonmodal forms are created the same way). You already learned that to show a form as a nonmodal window,
you use the form's Show() method. To show a form as a modal form, you call the form's ShowDialog() method
instead. Change the code in your button's Click event to read as follows:
OptionsForm.ShowDialog()
When your code looks like this, press F5 to run the project. Click the Options button to display your Options
form. Drag the form away from the main form just a bit, and then try to click the main Picture Viewer form or
some control on it; you can't. Close the modal form now by clicking the Close button in the title bar. Now, the
main Picture Viewer form is enabled again, and you can click the Options button once more (or any other button
of your choosing). When you're finished testing this, stop the running project.
Did You Know?
You can test to see whether a form has been shown modally by testing the form's Modal property in
code.
Displaying a Form in a Normal, Maximized, or Minimized State
Using the Size and Location properties of a form in conjunction with the StartPosition property enables you
to display forms at any location and at any size. You can also force a form to appear minimized or maximized.
Whether a form is maximized, minimized, or shown normally is known as the form's state, and it's determined
by the form's WindowState property.
Click the OptionsForm.vb [Design] tab to view the form designer. Look at your form's WindowState property
now in the Properties window. New forms have their WindowState property set to Normal by default. When you
run the project, as you have several times, the form displays in the same size as it appears in the form designer](https://image.slidesharecdn.com/visualbasic2008in24hrs-1285035275-phpapp01/85/Visual-Basic-2008-In-24-Hrs-170-320.jpg)
![and at the location specified by the form's Location property. Now change the WindowState property to
Minimized. Nothing happens in the Form Design view, but run your project by pressing F5, and then click the
Options button. At first, you might think the form didn't get displayed, but it did. It just appeared minimized to
the taskbar.
Stop the project and change the WindowState property to Maximized. Again, nothing happens in the Form
Design view. Press F5 to run the project, and then click the Options button. This time, the Options form fills the
screen. Notice too how the image is tiled to fill the form (see Figure 5.12), as explained when you added the
image to the form.
Figure 5.12. Images placed on a form are tiled if the form's Background ImageLayout property is set to
Tiled.
[View full size image]
By the Way
When a form is maximized, it fills the entire screen, regardless of the current screen resolution being
used in Windows.
Stop the project, and change the WindowState property back to Normal. You'll rarely set a form's WindowState
property to Minimize at design time (although you might specify Maximize), but you'll probably encounter](https://image.slidesharecdn.com/visualbasic2008in24hrs-1285035275-phpapp01/85/Visual-Basic-2008-In-24-Hrs-171-320.jpg)


![1. Select the OptionsForm.vb [Design] tab to display the form designer for the Options form (if it isn't
displayed already).
2. Add a new button to the form, and set its properties as follows:
Property Value
Name btnOK
Location 305, 12
Text OK
3. Double-click the OK button in the designer to access its Click event, and then enter the following
statement:
Me.Close()
4. Run the project by pressing F5. Click the Options button to display the Options form, and then click OK to
close the Options form. Again, the form isn't just hidden; it is completely unloaded from memory and no
longer exists.
By the Way
If you simply wanted to hide a form, but not unload it from memory, you would call the Hide() method
of the form or set the form's Visible property to False. This would preserve the state of the form for
the time you choose to show it again.](https://image.slidesharecdn.com/visualbasic2008in24hrs-1285035275-phpapp01/85/Visual-Basic-2008-In-24-Hrs-174-320.jpg)


![Did You Know?
If you prefer to draw controls on your forms by clicking and dragging, I strongly suggest that you float
the toolbox or dock it to the right or bottom edge of the design environment. The toolbox interferes with
drawing controls when it's docked to the left edge, because it obscures a good bit of the underlying form.
It's important to note that the first item in each tool category is titled Pointer. Pointer isn't actually a control.
When the pointer item is selected, the design environment is placed in Select mode rather than in a mode to
create a new control. With the pointer chosen, you can select a control and view its properties simply by clicking
it in the designer. This is the default behavior of the development environment.
Manipulating Controls
Getting controls on a form is the easy part. Arranging them so that they create an intuitive and attractive
interface is the challenge. Interface possibilities are nearly endless, so I can't tell you how to design any given
interface here (but I strongly suggest that you create forms that closely match the appearance and behavior of
similar commercial applications). However, I can show you the techniques to move, size, and arrange controls
so that they appear the way you want them to. By mastering these techniques, you'll be much more efficient at
building interfaces, freeing your time for writing the code that makes things happen.
Using the Grid (Size and Snap)
You may have noticed as you've worked with controls in this book that controls seem to "snap" to an invisible
grid. You're not crazy—they actually do. When you draw or move a control on a form in a project with grids
enabled, the coordinates of the control automatically snap to the nearest grid coordinates. This offers some
precision when adjusting the size and location of controls. In practical use, I often find the grid to be only
slightly helpful, because the size or location I want often doesn't fit neatly with the grid locations. However, you
can control the grid's granularity and even visibility, and I suggest you do both.
Grid settings are global to Visual Basic 2008—you don't set them for each individual project or form. To display
the grid settings on your computer, choose Tools, Options to display the Options form. Next, click Windows
Forms Designer in the tree on the left to view the designer settings, as shown in Figure 6.1.
Figure 6.1. Grid settings are global to Visual Basic 2008.
[View full size image]](https://image.slidesharecdn.com/visualbasic2008in24hrs-1285035275-phpapp01/85/Visual-Basic-2008-In-24-Hrs-181-320.jpg)


![Visual Basic includes a number of formatting tools you can use to design attractive interfaces. Most of these are
accessed using the Layout toolbar, shown in Figure 6.7. Display the Layout toolbar now by right-clicking a
toolbar at the top of Visual Basic and choosing Layout from the shortcut menu that appears. The Layout toolbar
includes options for aligning controls horizontally and vertically to the controls' edges or centers.
Figure 6.7. The Layout toolbar makes it quick and easy to align controls.
[View full size image]
Slowly move the mouse pointer from left to right over the buttons on this toolbar to read their ToolTips. Notice
that with this toolbar you can
Align the left edge, middle, or right edge of selected controls.
Align the top edge, middle, or bottom edge of selected controls.
Make the selected controls the same width, height, or both.
Make horizontal or vertical spacing between the selected controls nice and even.
Move layering of the selected controls backward or forward.
Set the tab order of the controls for fluid keyboard navigation.
The first item simply aligns the selected controls to the grid—not much fun there. However, the remainder of
the buttons are very useful. Remember that Visual Basic uses the active control as its baseline when performing
alignment. This is important. Click the Align Tops button, and notice that the selected controls are now aligned
with the active control, as shown in Figure 6.8.
Figure 6.8. The selected control is used as the baseline when you align groups of selected controls.](https://image.slidesharecdn.com/visualbasic2008in24hrs-1285035275-phpapp01/85/Visual-Basic-2008-In-24-Hrs-188-320.jpg)


![3. Drag the lower-right corner of the form to make it bigger. Notice that the controls don't follow the edge of
the form (see Figure 6.10).
Figure 6.10. By default, controls are anchored to the top-left corner of the form.
[View full size image]
4. Stop the running project by choosing Debug, Stop Debugging.
5. Click the Select Picture button to select it and, more importantly, deselect the form.
6. Hold down the Shift key and click the following additional buttons: Quit, Draw Border, Options, ^, and v.
7. Click the Anchor property in the Properties window, and then click the drop-down arrow that appears.
You'll see a drop-down box that's unique to the Anchor property, as shown in Figure 6.11.
Figure 6.11. You use this unique drop-down box to set a control's Anchor property.](https://image.slidesharecdn.com/visualbasic2008in24hrs-1285035275-phpapp01/85/Visual-Basic-2008-In-24-Hrs-191-320.jpg)

![Pretty interesting, huh? What Visual Basic has done is anchored the right edge of the buttons to the right edge
of the form, as shown in Figure 6.13. Really, anchoring means keeping an edge of the control a constant,
relative distance from an edge of the form. It's an unbelievably powerful tool for building interfaces.
Figure 6.13. Anchoring is a powerful feature for creating adaptable forms.
[View full size image]
Notice that the picture box and the coordinate labels still retain their original locations when the form is resized.
No problem—you can address that with the Anchor property as well. Start by changing the anchoring of the X
and Y labels by following these steps (stop the running project if you haven't already):](https://image.slidesharecdn.com/visualbasic2008in24hrs-1285035275-phpapp01/85/Visual-Basic-2008-In-24-Hrs-193-320.jpg)
![1. Click the X label to select it.
2. Hold down the Shift key, and click the Y label to select it.
3. Set the Anchor property the same as you did for the buttons—deselect the left side and select the right
side (refer to Figure 6.12).
4. Click any other property to close the Anchor drop-down box.
Now the picture box is a bit of a different beast from the other controls. You want the top and left anchored the
way they are now, but you want the right and bottom edge to grow and shrink with the form. This is actually
easy to accomplish. Follow these steps:
1. Click the picture box to select it.
2. Open the Anchor property, and select all four anchor points. (All four rectangles should be filled with solid
gray, as shown in Figure 6.14.)
Figure 6.14. This setting anchors the control relative to all four sides of the form.
Now press F5 to run the project, and drag the lower right of the form to make it bigger. Notice that now the
picture box sizes itself to match the form size (see Figure 6.15). You'll find this useful when viewing larger
images.
Figure 6.15. Proper use of the Anchor property allows you to build flexible forms.
[View full size image]](https://image.slidesharecdn.com/visualbasic2008in24hrs-1285035275-phpapp01/85/Visual-Basic-2008-In-24-Hrs-194-320.jpg)


![Did You Know?
If you prefer to draw controls on your forms by clicking and dragging, I strongly suggest that you float
the toolbox or dock it to the right or bottom edge of the design environment. The toolbox interferes with
drawing controls when it's docked to the left edge, because it obscures a good bit of the underlying form.
It's important to note that the first item in each tool category is titled Pointer. Pointer isn't actually a control.
When the pointer item is selected, the design environment is placed in Select mode rather than in a mode to
create a new control. With the pointer chosen, you can select a control and view its properties simply by clicking
it in the designer. This is the default behavior of the development environment.
Manipulating Controls
Getting controls on a form is the easy part. Arranging them so that they create an intuitive and attractive
interface is the challenge. Interface possibilities are nearly endless, so I can't tell you how to design any given
interface here (but I strongly suggest that you create forms that closely match the appearance and behavior of
similar commercial applications). However, I can show you the techniques to move, size, and arrange controls
so that they appear the way you want them to. By mastering these techniques, you'll be much more efficient at
building interfaces, freeing your time for writing the code that makes things happen.
Using the Grid (Size and Snap)
You may have noticed as you've worked with controls in this book that controls seem to "snap" to an invisible
grid. You're not crazy—they actually do. When you draw or move a control on a form in a project with grids
enabled, the coordinates of the control automatically snap to the nearest grid coordinates. This offers some
precision when adjusting the size and location of controls. In practical use, I often find the grid to be only
slightly helpful, because the size or location I want often doesn't fit neatly with the grid locations. However, you
can control the grid's granularity and even visibility, and I suggest you do both.
Grid settings are global to Visual Basic 2008—you don't set them for each individual project or form. To display
the grid settings on your computer, choose Tools, Options to display the Options form. Next, click Windows
Forms Designer in the tree on the left to view the designer settings, as shown in Figure 6.1.
Figure 6.1. Grid settings are global to Visual Basic 2008.
[View full size image]](https://image.slidesharecdn.com/visualbasic2008in24hrs-1285035275-phpapp01/85/Visual-Basic-2008-In-24-Hrs-200-320.jpg)

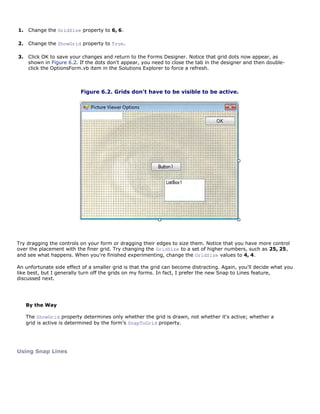


![Visual Basic includes a number of formatting tools you can use to design attractive interfaces. Most of these are
accessed using the Layout toolbar, shown in Figure 6.7. Display the Layout toolbar now by right-clicking a
toolbar at the top of Visual Basic and choosing Layout from the shortcut menu that appears. The Layout toolbar
includes options for aligning controls horizontally and vertically to the controls' edges or centers.
Figure 6.7. The Layout toolbar makes it quick and easy to align controls.
[View full size image]
Slowly move the mouse pointer from left to right over the buttons on this toolbar to read their ToolTips. Notice
that with this toolbar you can
Align the left edge, middle, or right edge of selected controls.
Align the top edge, middle, or bottom edge of selected controls.
Make the selected controls the same width, height, or both.
Make horizontal or vertical spacing between the selected controls nice and even.
Move layering of the selected controls backward or forward.
Set the tab order of the controls for fluid keyboard navigation.
The first item simply aligns the selected controls to the grid—not much fun there. However, the remainder of
the buttons are very useful. Remember that Visual Basic uses the active control as its baseline when performing
alignment. This is important. Click the Align Tops button, and notice that the selected controls are now aligned
with the active control, as shown in Figure 6.8.
Figure 6.8. The selected control is used as the baseline when you align groups of selected controls.](https://image.slidesharecdn.com/visualbasic2008in24hrs-1285035275-phpapp01/85/Visual-Basic-2008-In-24-Hrs-207-320.jpg)


![3. Drag the lower-right corner of the form to make it bigger. Notice that the controls don't follow the edge of
the form (see Figure 6.10).
Figure 6.10. By default, controls are anchored to the top-left corner of the form.
[View full size image]
4. Stop the running project by choosing Debug, Stop Debugging.
5. Click the Select Picture button to select it and, more importantly, deselect the form.
6. Hold down the Shift key and click the following additional buttons: Quit, Draw Border, Options, ^, and v.
7. Click the Anchor property in the Properties window, and then click the drop-down arrow that appears.
You'll see a drop-down box that's unique to the Anchor property, as shown in Figure 6.11.
Figure 6.11. You use this unique drop-down box to set a control's Anchor property.](https://image.slidesharecdn.com/visualbasic2008in24hrs-1285035275-phpapp01/85/Visual-Basic-2008-In-24-Hrs-210-320.jpg)

![Pretty interesting, huh? What Visual Basic has done is anchored the right edge of the buttons to the right edge
of the form, as shown in Figure 6.13. Really, anchoring means keeping an edge of the control a constant,
relative distance from an edge of the form. It's an unbelievably powerful tool for building interfaces.
Figure 6.13. Anchoring is a powerful feature for creating adaptable forms.
[View full size image]
Notice that the picture box and the coordinate labels still retain their original locations when the form is resized.
No problem—you can address that with the Anchor property as well. Start by changing the anchoring of the X
and Y labels by following these steps (stop the running project if you haven't already):](https://image.slidesharecdn.com/visualbasic2008in24hrs-1285035275-phpapp01/85/Visual-Basic-2008-In-24-Hrs-212-320.jpg)
![1. Click the X label to select it.
2. Hold down the Shift key, and click the Y label to select it.
3. Set the Anchor property the same as you did for the buttons—deselect the left side and select the right
side (refer to Figure 6.12).
4. Click any other property to close the Anchor drop-down box.
Now the picture box is a bit of a different beast from the other controls. You want the top and left anchored the
way they are now, but you want the right and bottom edge to grow and shrink with the form. This is actually
easy to accomplish. Follow these steps:
1. Click the picture box to select it.
2. Open the Anchor property, and select all four anchor points. (All four rectangles should be filled with solid
gray, as shown in Figure 6.14.)
Figure 6.14. This setting anchors the control relative to all four sides of the form.
Now press F5 to run the project, and drag the lower right of the form to make it bigger. Notice that now the
picture box sizes itself to match the form size (see Figure 6.15). You'll find this useful when viewing larger
images.
Figure 6.15. Proper use of the Anchor property allows you to build flexible forms.
[View full size image]](https://image.slidesharecdn.com/visualbasic2008in24hrs-1285035275-phpapp01/85/Visual-Basic-2008-In-24-Hrs-213-320.jpg)


![Creating Transparent Forms
A new property of forms that I think is very cool is the Opacity property. This property controls the form's
opaqueness as well as all controls on the form. The default Opacity value of 100% means that the form and its
controls are completely opaque (solid), whereas a value of 0% creates a completely transparent form (no real
point in that). A value of 50%, then, creates a form that's between solid and invisible, as shown in Figure 6.17.
Microsoft Outlook 2003 and newer make good use of opacity in their alerts that pop up to tell you when you've
received an email. The Opacity of these alerts is cycled from 0 to 100, is left at 100 for a short time, and then
cycles back down to 0 as it disappears. You can do this in your program using a simple loop, as discussed in
Hour 14, "Looping for Efficiency."
Figure 6.17. Ghost forms!
[View full size image]](https://image.slidesharecdn.com/visualbasic2008in24hrs-1285035275-phpapp01/85/Visual-Basic-2008-In-24-Hrs-218-320.jpg)


![Creating MDI Forms
All the projects you've created so far have been single-document interface (SDI) projects. In SDI programs,
every form in the application is a peer of all other forms; no intrinsic hierarchy exists between forms. Visual
Basic also lets you create multiple-document interface (MDI) programs. An MDI program contains one parent
window (also called a container) and one or more child windows. A classic example of an MDI program is
Adobe Photoshop. When you run Photoshop, a single parent window appears. Within this parent window, you
can open any number of documents, each appearing in its own child window. In an MDI program, all child
windows share the same toolbar and menu bar, which appear on the parent window. One restriction of child
windows is that they can exist only within the confines of the parent window. Figure 6.19 shows an example of
Photoshop running with a number of child document windows open.
Figure 6.19. Le Collage! MDI applications consist of a single parent window and one or more child
windows.
[View full size image]
By the Way
MDI applications can have any number of normal windows (dialog boxes, for example) in addition to
child windows.](https://image.slidesharecdn.com/visualbasic2008in24hrs-1285035275-phpapp01/85/Visual-Basic-2008-In-24-Hrs-221-320.jpg)


![Setting the Startup Form
The Startup object in a Windows Application project is, by default, the first form added to the project. This also
happens to be the form that Visual Basic creates automatically when you create a new Windows Application
project.
Every Windows Forms project must have a Startup form as the entry point to the program. You change the
Startup form by right-clicking the project name in the Solution Explorer and choosing Properties. The Startup
form property appears on the first property page that appears, as shown in Figure 6.22.
Figure 6.22. The entry point of the application is determined by the Startup form property.
[View full size image]
If the Startup object property is set to show a child window, you might not get the behavior you expect when
the project starts. The designated form would appear, but it wouldn't be a child, because no code would execute
to set the form's MdiParent property to a valid MDI parent form.
If MDI forms still confuse you, don't worry. Most of the applications you'll write as a new Visual Basic
programmer will be SDI programs. As you become more familiar with creating Visual Basic projects in general,
start experimenting with MDI projects. Remember, you don't have to make a program an MDI program simply
because you can; make an MDI program if the requirements of the project dictate that you do so.](https://image.slidesharecdn.com/visualbasic2008in24hrs-1285035275-phpapp01/85/Visual-Basic-2008-In-24-Hrs-226-320.jpg)


![Follow these steps to see how the TextAlign property works:
1. Change the TextAlign property of the text box to Right, and see how the text becomes right-aligned
within the text box.
2. Change TextAlign to Center to see what center alignment looks like. As you can see, this property is
pretty straightforward.
3. Change the TextAlign property back to Left before continuing.
Creating a Multiline Text Box
In Hour 6, I talked about the sizing handles of a selected control. I mentioned how handles that can be sized are
filled with white, and handles that are locked appear with a gray center. Notice how only the left and right edges
of the text box have white sizing handles. This means that you can adjust only the left and right edges of the
control (you can alter only the width, not the height). This is because the text box is defined as a single-line text
box, meaning that it displays only one line of text. What would be the point of a really tall text box that showed
only a single line of text?
To allow a text box to display multiple lines of text, set its Multiline property to True. Set the Multiline
property of your text box to True now, and notice how all the sizing handles become white. Although you could
set this using the Properties window, there is a nifty shortcut for setting the MultiLine property of a text box.
Select the text box, and then click the little square with the arrow that appears above the text box (refer to
Figure 7.2). This displays a simple shortcut menu showing the MultiLine property value. Click the check box
next to the value, and then click off the menu to close it. Most controls have such a shortcut menu, but the
contents depend on the type of control selected. Get used to opening these shortcut menus when you see the
little box with the arrow so that you can become familiar with the properties each control makes available in its
shortcuts.
Change the Text property of the text box to This is sample text. A multiline text box will wrap its
contents as necessary. Press Enter or Tab to commit the property change. Figure 7.3 shows how the text box
displays only part of what you entered, because the control simply isn't big enough to show all the text. Change
the Size property to 139, 52, and you'll then see the entire contents of the text box, as shown in Figure 7.4.
Figure 7.3. A text box might contain more text than it can display.
[View full size image]](https://image.slidesharecdn.com/visualbasic2008in24hrs-1285035275-phpapp01/85/Visual-Basic-2008-In-24-Hrs-236-320.jpg)
![Figure 7.4. A multiline text box can be sized as large as necessary.
[View full size image]](https://image.slidesharecdn.com/visualbasic2008in24hrs-1285035275-phpapp01/85/Visual-Basic-2008-In-24-Hrs-237-320.jpg)

![Stop the project now by choosing Debug, Stop Debugging, and then change the control's Enabled property back
to True.
Adding Scrollbars
Even though you can size a multiline text box, there will still be times when the contents of the control are more
than can be displayed. If you believe this is a possibility for a text box you're adding to a form, give the text box
scrollbars by changing the ScrollBars property from None to Vertical, Horizontal, or Both.
By the Way
For a text box to display scrollbars, its Multiline property must be set to True. Also, if you set the
ScrollBars property to Both, the horizontal scrollbar won't appear unless you also set the WordWrap
property to False. If you set WordWrap equal to True, text will always wrap to fit the control, so there
will never be any text off to the right of the text box, and there will be no need for a horizontal scrollbar.
Change the ScrollBars property of your text box to Vertical, and notice how a scrollbar appears in the text
box (see Figure 7.6).
Figure 7.6. If a text box might contain a lot of text, give it a scrollbar.
[View full size image]](https://image.slidesharecdn.com/visualbasic2008in24hrs-1285035275-phpapp01/85/Visual-Basic-2008-In-24-Hrs-239-320.jpg)


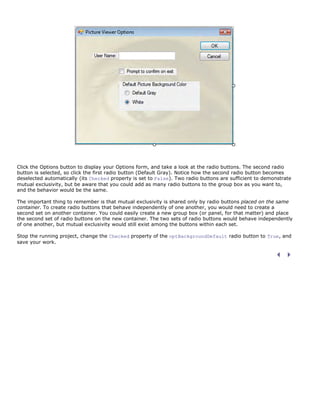

![Atom Heart Mother
Wish You Were Here
Animals
Echoes
Meddle
Dark Side of the Moon
When you're finished, your screen should look like that shown in Figure 7.13. Click OK to commit your entries
and close the window. Notice that the list box contains the items you entered.
Figure 7.13. Use this dialog box to manipulate an Items collection at design time.
[View full size image]
Manipulating Items at Runtime
In Hour 3, "Understanding Objects and Collections," you learned about objects, properties, methods, and
collections. All this knowledge comes into play when you manipulate lists at runtime. The Items property of a
list box (and a combo box, for that matter) is an object property that returns a collection. Collections in many](https://image.slidesharecdn.com/visualbasic2008in24hrs-1285035275-phpapp01/85/Visual-Basic-2008-In-24-Hrs-253-320.jpg)


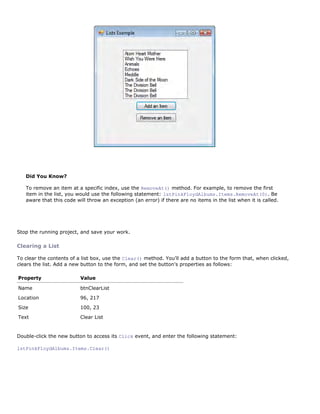

![your work.
Figure 7.15. The SelectedItem and SelectedIndex properties make it easy to determine which item in
a list is selected.
[View full size image]
By the Way
You can set up a list box to allow multiple items to be selected at once. To do this, you change the
SelectionMode property of the list box to MultiSimple (clicking an item toggles its selected state) or
MultiExtended (you have to hold down Ctrl or Shift to select multiple items). To determine which items
are selected in a multiselection list box, use the list box's SelectedItems collection.
Sorting a List
List boxes and combo boxes have a Sorted property. This property is set to False when a control is first
created. Changing this property value to True causes Visual Basic to sort the contents of the list alphabetically.
When the contents of a list are sorted, the index of each item in the Items collection is changed; therefore, you
can't use an index value obtained prior to setting Sorted to True.
Sorted is a property, not a method. Realize that you don't have to call Sorted to sort the contents of a list;
Visual Basic enforces a sort order as long as the Sorted property is set to True. This means that all items added](https://image.slidesharecdn.com/visualbasic2008in24hrs-1285035275-phpapp01/85/Visual-Basic-2008-In-24-Hrs-258-320.jpg)


![1. Create a new Windows Application titled Timer Example.
2. Right-click Form1.vb in the Solution Explorer, choose Rename, and change the name of the form to
TimerExampleForm.vb.
3. Set the form's Text property to Timer Example. (Remember to click the form itself to view its properties.)
4. Add a new Timer control to your form by double-clicking the Timer item in the toolbox (it's located in the
Components toolbox category).
The Timer control is invisible at runtime, so it's added to the gray area at the bottom of the screen rather than
placed on the form, as shown in Figure 8.1.
Figure 8.1. Invisible-at-runtime controls are shown at the bottom of the designer, not on a form.
[View full size image]
Set the properties of the Timer control as follows:
Property Value
Name tmrClock
Enabled True
You probably noticed that the Timer control has very few properties compared to the other controls you've
worked with; it doesn't need many. The most important property of the Timer control is the Interval property.
It determines how often the Timer control fires its Tick event (where you'll place code to do something when
the designated time elapses). The Interval property is specified in milliseconds, so a setting of 1,000 is equal
to 1 second, which is exactly what you set the Interval to for this example. As with many controls, the best
way to understand how the Timer control works is to use it. Now you will create a simple clock using the Timer](https://image.slidesharecdn.com/visualbasic2008in24hrs-1285035275-phpapp01/85/Visual-Basic-2008-In-24-Hrs-267-320.jpg)


![1. Create a new Windows Application titled Timer Example.
2. Right-click Form1.vb in the Solution Explorer, choose Rename, and change the name of the form to
TimerExampleForm.vb.
3. Set the form's Text property to Timer Example. (Remember to click the form itself to view its properties.)
4. Add a new Timer control to your form by double-clicking the Timer item in the toolbox (it's located in the
Components toolbox category).
The Timer control is invisible at runtime, so it's added to the gray area at the bottom of the screen rather than
placed on the form, as shown in Figure 8.1.
Figure 8.1. Invisible-at-runtime controls are shown at the bottom of the designer, not on a form.
[View full size image]
Set the properties of the Timer control as follows:
Property Value
Name tmrClock
Enabled True
You probably noticed that the Timer control has very few properties compared to the other controls you've
worked with; it doesn't need many. The most important property of the Timer control is the Interval property.
It determines how often the Timer control fires its Tick event (where you'll place code to do something when
the designated time elapses). The Interval property is specified in milliseconds, so a setting of 1,000 is equal
to 1 second, which is exactly what you set the Interval to for this example. As with many controls, the best
way to understand how the Timer control works is to use it. Now you will create a simple clock using the Timer](https://image.slidesharecdn.com/visualbasic2008in24hrs-1285035275-phpapp01/85/Visual-Basic-2008-In-24-Hrs-271-320.jpg)


![Creating Tabbed Dialog Boxes
Windows 95 was the first version of Windows to introduce a tabbed interface. Since then, tabs have been widely
adopted as a primary interface element. Tabs provide two major benefits: a logical grouping of controls and a
reduction of required screen space. Although tabs might look complicated, they are actually easy to build and
use.
You'll add a set of tabs to your Options dialog box in your Picture Viewer program. In this case, the tabs will be
overkill, because you won't have much on them, but the point is to learn how they work, so follow these steps:
1. Start by opening the Picture Viewer project you completed in Hour 7.
2. Double-click OptionsForm.vb in the Solution Explorer to display it in the designer.
3. Add a new Tab control to your form by double-clicking the TabControl item in the toolbox (it's located in
the Containers toolbox category). The Tab control defaults to having two tabs, which happens to be what
you need for this example. Set the Tab control's properties as follows:
Property Value
Name tabOptions
Location 2, 2
Size 202, 94
4. The tabs that appear on a Tab control are determined by the control's TabPages collection. Click the
TabPages property of the Tab control in the Properties window, and then click the small button that
appears. Visual Basic shows the TabPage Collection Editor. Your Tab control has two tabs by default, as
shown in Figure 8.3.
Figure 8.3. Use the TabPage Collection Editor to define tabs.
[View full size image]](https://image.slidesharecdn.com/visualbasic2008in24hrs-1285035275-phpapp01/85/Visual-Basic-2008-In-24-Hrs-274-320.jpg)


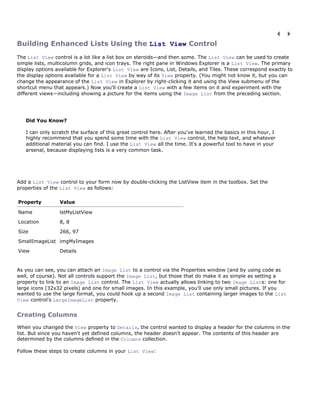

![Figure 8.7. Pictures from a linked Image List are readily available to the control.
[View full size image]
An item's Text property determines the text displayed for the item in the List View. If the View property
is set to Details and multiple columns have been defined, the value of the Text property appears in the
first column. Subsequent column values are determined by the SubItems collection.
4. Click the SubItems property (located in the Data category of the ListViewItem's properties). Then click the
small button that appears, which displays the ListViewSubItem Collection Editor.
5. Click Add to create a new subitem, and change its text to Nebraska.
6. Click OK to return to the ListViewItem Collection Editor.
7. Click the Add button to create another item. This time, change the Text property to your name, and use
the techniques you just learned to add a subitem. For the Text property of the subitem, enter your state of
residence. Go ahead and give it an image, just as you did for my name.
8. When you're finished, click OK to close the ListViewItem Collection Editor. Your List View should now
contain two list items, as shown in Figure 8.8.
Figure 8.8. List Views offer much more functionality than a standard list box.](https://image.slidesharecdn.com/visualbasic2008in24hrs-1285035275-phpapp01/85/Visual-Basic-2008-In-24-Hrs-283-320.jpg)


![6. Add a new Menu Strip control to your form by double-clicking the MenuStrip item in the toolbox (located
in the Menus & Toolbars category), and change its name to mnuMainMenu. As shown in Figure 9.2, the
control is added to the pane at the bottom of the Form Designer. Take a look at the top of the form—you
see the text Type Here.
Figure 9.2. A menu has no items when first added to a form.
[View full size image]](https://image.slidesharecdn.com/visualbasic2008in24hrs-1285035275-phpapp01/85/Visual-Basic-2008-In-24-Hrs-297-320.jpg)


![Follow these steps to create the code for the menus:
1. Click the File menu to open it.
2. Double-click the Open Picture menu item. Just as when you double-click a control, Visual Basic displays the
code editor with the default event for the menu item you've clicked. For menu items, this is the Click
event.
3. Enter the following code:
' Show the open file dialog box.
If ofdSelectPicture.ShowDialog = DialogResult.OK Then
' Load the picture into the picture box.
picShowPicture.Image = Image.FromFile(ofdSelectPicture.FileName)
' Show the name of the file in the form's caption.
Me.Text = "Picture Viewer (" & ofdSelectPicture.FileName & ")"
End If
This is the exact code you entered for the Select Picture button you created in Hour 1, "Jumping in with
Both Feet: A Visual Basic 2008 Programming Tour," so I won't discuss it here.
4. Double-click ViewerForm.vb in the Solution Explorer window to switch back to the Form Designer for the
Picture Viewer form.
5. Double-click the Confirm on Exit menu item to access its Click event. Enter the following code statement:
mnuConfirmOnExit.Checked = Not(mnuConfirmOnExit.Checked)
When Confirm on Exit is clicked, this code sets the item's checked state to the opposite of the item's
current checked state. The function Not() is used to negate a Boolean (true or false) value. Don't worry; I
discuss this in detail in Hour 12, "Performing Arithmetic, String Manipulation, and Date/Time Adjustments."
For now, realize that if the current value of the Checked property is True, Not() returns False. If Checked
currently is False, Not() returns True. Therefore, the checked value toggles between True and False
each time the menu item is clicked.
6. Double-click ViewerForm.vb in the Solution Explorer window (or click the ViewerForm.vb [Design] tab) to
switch back to the Form Designer for the Picture Viewer form again.
7. Double-click the Quit menu item to access its Click event, and enter the following code:
Me.Close()
Again, recall from Hour 1 that this statement simply closes the form. This has the effect of closing the
application, because it's the only form that's loaded.
8. Return to the form viewer yet again, click Tools to display the Tools menu, and then double-click the Draw
Border menu item to access its Click event. Enter the following code:
Dim objGraphics As Graphics
objGraphics = Me.CreateGraphics
objGraphics.Clear(System.Drawing.SystemColors.Control)
objGraphics.DrawRectangle(System.Drawing.Pens.Blue, _
picShowPicture.Left - 1, _](https://image.slidesharecdn.com/visualbasic2008in24hrs-1285035275-phpapp01/85/Visual-Basic-2008-In-24-Hrs-304-320.jpg)
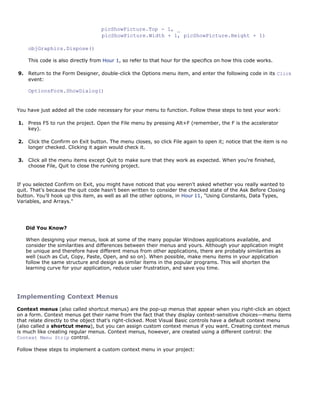
![1. Display the ViewerForm.vb form in the Form Designer.
2. Add a new context menu strip to the form by double-clicking the Context Menu Strip item in the toolbox.
Like the Main Menu control, the Context Menu Strip control is placed in the pane below the Form
Designer. Change its name to mnuPictureContext.
3. When the Context Menu Strip control is selected, a context menu appears toward the top for editing.
Click the Type Here box, enter the text Draw Border (see Figure 9.8), and press Enter to create the menu
item. You've just created a context menu with a single menu item.
Figure 9.8. Context menus are edited much like regular menus.
[View full size image]
4. Double-click the new menu item to access its Click event, and enter the following code:
Dim objGraphics As Graphics
objGraphics = Me.CreateGraphics
objGraphics.Clear(System.Drawing.SystemColors.Control)
objGraphics.DrawRectangle(System.Drawing.Pens.Blue, _
picShowPicture.Left - 1, _
picShowPicture.Top - 1, _
picShowPicture.Width + 1, picShowPicture.Height + 1)
objGraphics.Dispose()](https://image.slidesharecdn.com/visualbasic2008in24hrs-1285035275-phpapp01/85/Visual-Basic-2008-In-24-Hrs-306-320.jpg)

![1. Click the File menu at the top of the form to open it, and then click Open Picture.
2. In the Properties window, click the ShortcutKeys property, and then click the down arrow that appears.
This drop-down, shown in Figure 9.10, allows you to define a shortcut key for the selected menu item.
Figure 9.10. A shortcut key is assigned using the ShortcutKeys property of a menu item.
[View full size image]
3. Check Ctrl and then select O (for Open) from the Key drop-down menu; then click another property to
close the drop-down.
4. Press F5 to run the project once more. Next, press Ctrl+O. The application behaves as though you opened
the File menu and clicked the Open Picture item.
Did You Know?
Although it isn't always possible, try to assign logical shortcut key combinations. The meaning of F6 is
hardly intuitive, for example. But, when assigning modifiers such as Ctrl with another character, you
have some flexibility. For instance, the key combination of Ctrl+Q might be a more intuitive shortcut key
for Quit than Ctrl+T. Again, if the menu item is the same as or similar to a menu item in a commercial
application, use the same shortcut key as the commercial application.](https://image.slidesharecdn.com/visualbasic2008in24hrs-1285035275-phpapp01/85/Visual-Basic-2008-In-24-Hrs-308-320.jpg)


![6. Add a new Menu Strip control to your form by double-clicking the MenuStrip item in the toolbox (located
in the Menus & Toolbars category), and change its name to mnuMainMenu. As shown in Figure 9.2, the
control is added to the pane at the bottom of the Form Designer. Take a look at the top of the form—you
see the text Type Here.
Figure 9.2. A menu has no items when first added to a form.
[View full size image]](https://image.slidesharecdn.com/visualbasic2008in24hrs-1285035275-phpapp01/85/Visual-Basic-2008-In-24-Hrs-312-320.jpg)


![Follow these steps to create the code for the menus:
1. Click the File menu to open it.
2. Double-click the Open Picture menu item. Just as when you double-click a control, Visual Basic displays the
code editor with the default event for the menu item you've clicked. For menu items, this is the Click
event.
3. Enter the following code:
' Show the open file dialog box.
If ofdSelectPicture.ShowDialog = DialogResult.OK Then
' Load the picture into the picture box.
picShowPicture.Image = Image.FromFile(ofdSelectPicture.FileName)
' Show the name of the file in the form's caption.
Me.Text = "Picture Viewer (" & ofdSelectPicture.FileName & ")"
End If
This is the exact code you entered for the Select Picture button you created in Hour 1, "Jumping in with
Both Feet: A Visual Basic 2008 Programming Tour," so I won't discuss it here.
4. Double-click ViewerForm.vb in the Solution Explorer window to switch back to the Form Designer for the
Picture Viewer form.
5. Double-click the Confirm on Exit menu item to access its Click event. Enter the following code statement:
mnuConfirmOnExit.Checked = Not(mnuConfirmOnExit.Checked)
When Confirm on Exit is clicked, this code sets the item's checked state to the opposite of the item's
current checked state. The function Not() is used to negate a Boolean (true or false) value. Don't worry; I
discuss this in detail in Hour 12, "Performing Arithmetic, String Manipulation, and Date/Time Adjustments."
For now, realize that if the current value of the Checked property is True, Not() returns False. If Checked
currently is False, Not() returns True. Therefore, the checked value toggles between True and False
each time the menu item is clicked.
6. Double-click ViewerForm.vb in the Solution Explorer window (or click the ViewerForm.vb [Design] tab) to
switch back to the Form Designer for the Picture Viewer form again.
7. Double-click the Quit menu item to access its Click event, and enter the following code:
Me.Close()
Again, recall from Hour 1 that this statement simply closes the form. This has the effect of closing the
application, because it's the only form that's loaded.
8. Return to the form viewer yet again, click Tools to display the Tools menu, and then double-click the Draw
Border menu item to access its Click event. Enter the following code:
Dim objGraphics As Graphics
objGraphics = Me.CreateGraphics
objGraphics.Clear(System.Drawing.SystemColors.Control)
objGraphics.DrawRectangle(System.Drawing.Pens.Blue, _
picShowPicture.Left - 1, _](https://image.slidesharecdn.com/visualbasic2008in24hrs-1285035275-phpapp01/85/Visual-Basic-2008-In-24-Hrs-319-320.jpg)

![1. Display the ViewerForm.vb form in the Form Designer.
2. Add a new context menu strip to the form by double-clicking the Context Menu Strip item in the toolbox.
Like the Main Menu control, the Context Menu Strip control is placed in the pane below the Form
Designer. Change its name to mnuPictureContext.
3. When the Context Menu Strip control is selected, a context menu appears toward the top for editing.
Click the Type Here box, enter the text Draw Border (see Figure 9.8), and press Enter to create the menu
item. You've just created a context menu with a single menu item.
Figure 9.8. Context menus are edited much like regular menus.
[View full size image]
4. Double-click the new menu item to access its Click event, and enter the following code:
Dim objGraphics As Graphics
objGraphics = Me.CreateGraphics
objGraphics.Clear(System.Drawing.SystemColors.Control)
objGraphics.DrawRectangle(System.Drawing.Pens.Blue, _
picShowPicture.Left - 1, _
picShowPicture.Top - 1, _
picShowPicture.Width + 1, picShowPicture.Height + 1)
objGraphics.Dispose()](https://image.slidesharecdn.com/visualbasic2008in24hrs-1285035275-phpapp01/85/Visual-Basic-2008-In-24-Hrs-321-320.jpg)

![1. Click the File menu at the top of the form to open it, and then click Open Picture.
2. In the Properties window, click the ShortcutKeys property, and then click the down arrow that appears.
This drop-down, shown in Figure 9.10, allows you to define a shortcut key for the selected menu item.
Figure 9.10. A shortcut key is assigned using the ShortcutKeys property of a menu item.
[View full size image]
3. Check Ctrl and then select O (for Open) from the Key drop-down menu; then click another property to
close the drop-down.
4. Press F5 to run the project once more. Next, press Ctrl+O. The application behaves as though you opened
the File menu and clicked the Open Picture item.
Did You Know?
Although it isn't always possible, try to assign logical shortcut key combinations. The meaning of F6 is
hardly intuitive, for example. But, when assigning modifiers such as Ctrl with another character, you
have some flexibility. For instance, the key combination of Ctrl+Q might be a more intuitive shortcut key
for Quit than Ctrl+T. Again, if the menu item is the same as or similar to a menu item in a commercial
application, use the same shortcut key as the commercial application.](https://image.slidesharecdn.com/visualbasic2008in24hrs-1285035275-phpapp01/85/Visual-Basic-2008-In-24-Hrs-323-320.jpg)

![Using the Toolbar Control
Generally, when a program has a menu (as most programs should), it should also have a toolbar. Toolbars
(called toolstrips in Visual Basic 2008 for some reason) are one of the easiest ways for a user to access
program functions. Unlike menu items, toolbar items are always visible and therefore are immediately available.
In addition, toolbar items have ToolTips, which enable a user to discover a tool button's purpose simply by
hovering the mouse pointer over the button.
Toolbar items are really shortcuts for menu items; every item on a toolbar should have a corresponding menu
item. Remember, some users prefer to use the keyboard, in which case they need to have keyboard access to
functions via menus.
The actual items you place on a toolbar depend on the features the application supports. However, the
mechanics of creating toolbars and toolbar items are the same regardless of the buttons you choose to use.
Toolbars are created using the ToolStrip control.
Follow these steps to add a toolbar to the main form in your Picture Viewer project:
1. Display the ViewerForm.vb form in the Form Designer (if it's not already displayed).
2. Add a new ToolStrip control to your form by double-clicking the ToolStrip item in the toolbox. A new
toolbar is added to the top of your form. Change the name of the toolbar to tbrMainToolbar.
3. Notice that the toolbar appears above the menu. Anyone who has used a Windows application knows that a
toolbar belongs below the menu bar. Right-click the toolbar and choose Bring To Front from its shortcut
menu. That causes the toolbar to move below the menu. Your form should now look like Figure 9.11.
Figure 9.11. New toolbars have no buttons.
[View full size image]](https://image.slidesharecdn.com/visualbasic2008in24hrs-1285035275-phpapp01/85/Visual-Basic-2008-In-24-Hrs-325-320.jpg)
![Adding Toolbar Buttons Using the Buttons Collection
Like many other controls you've already learned about, the ToolStrip control supports a special collection:
Items. The Items collection contains the buttons that appear on the toolbar. Click the Items property in the
Properties window, and then click the small button that appears; the Items Collection Editor appears. The list of
members shows the toolbar itself, but no buttons, because new toolbars have no buttons.
By the Way
You'll add three images to your toolbar: one for Open, one for Draw Border, and one for Options. You
can download these images from my website, http://www.jamesfoxall.com/books.aspx.
Take a moment to open the drop-down list in the upper-left corner, as shown in Figure 9.12. This list contains
the types of items that can be added to a toolbar.
Figure 9.12. Toolbars may contain a number of different types of items.
[View full size image]](https://image.slidesharecdn.com/visualbasic2008in24hrs-1285035275-phpapp01/85/Visual-Basic-2008-In-24-Hrs-326-320.jpg)


![1. Click the tbrMainToolbar control below the form to select it.
2. Double-click the Open button on the toolbar to access its Click event. Be sure to click the button and not
the toolbar. Double-clicking the toolbar accesses a different event altogether. Enter the following code:
' Show the open file dialog box.
If ofdSelectPicture.ShowDialog = DialogResult.OK Then
' Load the picture into the picture box.
picShowPicture.Image = Image.FromFile(ofdSelectPicture.FileName)
' Show the name of the file in the form's caption.
Me.Text = "Picture Viewer(" & ofdSelectPicture.FileName & ")"
End If
3. Click the ViewerForm.vb [Design] tab to return to Form Design view.
4. Double-click the Draw Border button, and add the following code to its Click event:
Dim objGraphics As Graphics
objGraphics = Me.CreateGraphics
objGraphics.Clear(System.Drawing.SystemColors.Control)
objGraphics.DrawRectangle(System.Drawing.Pens.Blue, _
picShowPicture.Left - 1, _
picShowPicture.Top - 1, _
picShowPicture.Width + 1, picShowPicture.Height + 1)
objGraphics.Dispose()
5. Click the ViewerForm.vb [Design] tab to return to Form Design view.
6. Double-click the Options button, and add the following code to its Click event:
OptionsForm.ShowDialog()
Go ahead and save your work, and then press F5 to run the project. Clicking the toolbar buttons should now
perform the same actions as clicking the menu items. In Hour 10, I'll show you how the two controls can share
code.
Creating Drop-Down Menus for Toolbar Buttons
Although you won't use one in this project, be aware that you can create drop-down menus on toolbars, as
shown in Figure 9.14. Visual Basic 2008 uses these in a number of places. To create a menu like this, instead of
adding a regular button to the toolbar, you add a DropDownButton. Doing so creates a submenu just like when
you defined regular menus earlier in this hour.
Figure 9.14. You can create drop-down menus like these.
[View full size image]](https://image.slidesharecdn.com/visualbasic2008in24hrs-1285035275-phpapp01/85/Visual-Basic-2008-In-24-Hrs-330-320.jpg)

![Creating a Status Bar
The last control I'll show you is the Status Bar control. The Status Bar isn't nearly as fancy, or even as useful,
as other controls such as the ToolStrip or MenuStrip (but it's also not as difficult to work with, either). A
status bar adds value to an application in that it makes information available in a standard location, and users
have come to expect it. In its simplest form, a status bar displays a caption and sizing grip—the dots to the
right of the control that the user can drag to change the form's size.
Add a new status bar to the form now by double-clicking the StatusStrip item in the toolbox (located in the
Menus & Toolbars category). You need to use the vertical scrollbar to the right in the designer to scroll down
and see the status bar at the bottom of your form. Change the name of the StatusStrip to sbrMyStatusStrip.
Because of how you have anchored your other controls, the status strip overlays a few controls at the bottom of
the form. Fix this now by following these steps:
1. Click the PictureBox on the form, and change its Size property to 265, 256.
2. Change the Location.Y property of the Shrink and Enlarge buttons to 285. Your form should now look like
Figure 9.15.
Figure 9.15. Status bars always appear at the bottom of a form.
[View full size image]
Click the StatusStrip to select it, and take a look at its left edge. Does it look familiar? It's similar to the](https://image.slidesharecdn.com/visualbasic2008in24hrs-1285035275-phpapp01/85/Visual-Basic-2008-In-24-Hrs-332-320.jpg)


![form, it's often best to place that code in the form's module. You'll be placing code within a form module, as
well as within a new module that you'll create in this hour.
By the Way
The current development trend centers on object-oriented programming (OOP), which revolves around
class modules. I'll give you a primer on OOP in Hour 16, but it's an advanced topic, so I don't cover it in
detail. I highly recommend that you read a dedicated object-oriented programming book, such as Sams
Teach Yourself Object-Oriented Programming with Visual Basic .NET in 21 Days, Second Edition (Sams
Publishing, 2002), after you're comfortable with the material in this book.
The primary general rule for using standard modules is that you should create modules to group related sets of
code. This isn't to say that you should create dozens of modules. Rather, group related functions into a
reasonably sized set of modules. For example, you might want to create one module that contains all your
printing routines and another that holds your data-access routines. In addition, I like to create a general-
purpose module in which to place all the various routines that don't necessarily fit in more specialized modules.
By the Way
It's often preferable to create classes and instantiate objects rather than use standard modules, but no
rules are set in stone. Some OOP purists suggest (strongly) that you never use a standard module.
Remember that a standard module is simply a tool, and all tools have a purpose.
You'll build on the Picture Viewer application from Hour 9, "Adding Menus and Toolbars to Forms," so open that
now.
Next, create a new standard module by choosing Project, Add Module. Visual Basic displays the Add New Item
dialog box, as shown in Figure 10.1.
Figure 10.1. All new project items are added using this dialog box.
[View full size image]](https://image.slidesharecdn.com/visualbasic2008in24hrs-1285035275-phpapp01/85/Visual-Basic-2008-In-24-Hrs-339-320.jpg)
![Note that this is the same dialog box used to add new forms. Visual Basic knows that you want to add a module
(based on the menu option you used to get here), so the Module icon is selected for you. Change the name of
the module to DrawingModule.vb, and click Add to create the new module. Visual Basic creates the new
module and positions you in the code window, ready to enter code, as shown in Figure 10.2.
Figure 10.2. Modules have no graphical interface, so you always work with them in the code editor.
[View full size image]](https://image.slidesharecdn.com/visualbasic2008in24hrs-1285035275-phpapp01/85/Visual-Basic-2008-In-24-Hrs-340-320.jpg)


![form, it's often best to place that code in the form's module. You'll be placing code within a form module, as
well as within a new module that you'll create in this hour.
By the Way
The current development trend centers on object-oriented programming (OOP), which revolves around
class modules. I'll give you a primer on OOP in Hour 16, but it's an advanced topic, so I don't cover it in
detail. I highly recommend that you read a dedicated object-oriented programming book, such as Sams
Teach Yourself Object-Oriented Programming with Visual Basic .NET in 21 Days, Second Edition (Sams
Publishing, 2002), after you're comfortable with the material in this book.
The primary general rule for using standard modules is that you should create modules to group related sets of
code. This isn't to say that you should create dozens of modules. Rather, group related functions into a
reasonably sized set of modules. For example, you might want to create one module that contains all your
printing routines and another that holds your data-access routines. In addition, I like to create a general-
purpose module in which to place all the various routines that don't necessarily fit in more specialized modules.
By the Way
It's often preferable to create classes and instantiate objects rather than use standard modules, but no
rules are set in stone. Some OOP purists suggest (strongly) that you never use a standard module.
Remember that a standard module is simply a tool, and all tools have a purpose.
You'll build on the Picture Viewer application from Hour 9, "Adding Menus and Toolbars to Forms," so open that
now.
Next, create a new standard module by choosing Project, Add Module. Visual Basic displays the Add New Item
dialog box, as shown in Figure 10.1.
Figure 10.1. All new project items are added using this dialog box.
[View full size image]](https://image.slidesharecdn.com/visualbasic2008in24hrs-1285035275-phpapp01/85/Visual-Basic-2008-In-24-Hrs-344-320.jpg)
![Note that this is the same dialog box used to add new forms. Visual Basic knows that you want to add a module
(based on the menu option you used to get here), so the Module icon is selected for you. Change the name of
the module to DrawingModule.vb, and click Add to create the new module. Visual Basic creates the new
module and positions you in the code window, ready to enter code, as shown in Figure 10.2.
Figure 10.2. Modules have no graphical interface, so you always work with them in the code editor.
[View full size image]](https://image.slidesharecdn.com/visualbasic2008in24hrs-1285035275-phpapp01/85/Visual-Basic-2008-In-24-Hrs-345-320.jpg)


![form, it's often best to place that code in the form's module. You'll be placing code within a form module, as
well as within a new module that you'll create in this hour.
By the Way
The current development trend centers on object-oriented programming (OOP), which revolves around
class modules. I'll give you a primer on OOP in Hour 16, but it's an advanced topic, so I don't cover it in
detail. I highly recommend that you read a dedicated object-oriented programming book, such as Sams
Teach Yourself Object-Oriented Programming with Visual Basic .NET in 21 Days, Second Edition (Sams
Publishing, 2002), after you're comfortable with the material in this book.
The primary general rule for using standard modules is that you should create modules to group related sets of
code. This isn't to say that you should create dozens of modules. Rather, group related functions into a
reasonably sized set of modules. For example, you might want to create one module that contains all your
printing routines and another that holds your data-access routines. In addition, I like to create a general-
purpose module in which to place all the various routines that don't necessarily fit in more specialized modules.
By the Way
It's often preferable to create classes and instantiate objects rather than use standard modules, but no
rules are set in stone. Some OOP purists suggest (strongly) that you never use a standard module.
Remember that a standard module is simply a tool, and all tools have a purpose.
You'll build on the Picture Viewer application from Hour 9, "Adding Menus and Toolbars to Forms," so open that
now.
Next, create a new standard module by choosing Project, Add Module. Visual Basic displays the Add New Item
dialog box, as shown in Figure 10.1.
Figure 10.1. All new project items are added using this dialog box.
[View full size image]](https://image.slidesharecdn.com/visualbasic2008in24hrs-1285035275-phpapp01/85/Visual-Basic-2008-In-24-Hrs-349-320.jpg)
![Note that this is the same dialog box used to add new forms. Visual Basic knows that you want to add a module
(based on the menu option you used to get here), so the Module icon is selected for you. Change the name of
the module to DrawingModule.vb, and click Add to create the new module. Visual Basic creates the new
module and positions you in the code window, ready to enter code, as shown in Figure 10.2.
Figure 10.2. Modules have no graphical interface, so you always work with them in the code editor.
[View full size image]](https://image.slidesharecdn.com/visualbasic2008in24hrs-1285035275-phpapp01/85/Visual-Basic-2008-In-24-Hrs-350-320.jpg)

![Writing Code Procedures
After you've created the module(s) in which to store your code, you can begin to write Visual Basic code
procedures. A procedure is a discrete set of code that can be called from other code. Procedures are much like
events, but rather than being executed by a user interacting with a form or control, procedures are executed
when called by a code statement.
Visual Basic has two types of procedures:
Procedures that return a value (called functions)
Procedures that do not return a value (called subroutines)
There are many reasons to create a procedure that returns a value. For example, a function can return True or
False, depending on whether it was successful in completing its task. You could also write a procedure that
accepts certain parameters (data passed to the procedure, in contrast to data returned by the procedure) and
returns a value based on those parameters. For instance, you could write a procedure that enables you to pass
it a sentence, and in return it passes back the number of spaces in the sentence. The possibilities are limited
only by your imagination. Just keep in mind that a procedure doesn't have to return a value.
Declaring Procedures That Don't Return Values
To create a procedure, whether it be a Sub (a procedure that doesn't return a value) or a Function (a
procedure that returns a value), you first declare it within a module. In your new module, type the following and
press the Enter key:
Public Sub OpenPicture()
When you press Enter, Visual Basic automatically inserts a blank line and creates the text End Sub, as shown in
Figure 10.3. You've just created a new procedure.
Figure 10.3. The Public Sub and End Sub statements create the basic structure of a Sub procedure.
[View full size image]](https://image.slidesharecdn.com/visualbasic2008in24hrs-1285035275-phpapp01/85/Visual-Basic-2008-In-24-Hrs-352-320.jpg)


![Consistency and maintainability: When you duplicate code, you often forget all the places where that code
is used. You might fix a bug in one location but not in another, or add a feature to one copy of the code
but not another. By using a single procedure, you only have to worry about maintaining one instance of
the code.
Now you'll create a procedure to draw a border around the picture box. Position the cursor after the words End
Sub, press Enter, and type the following code where shown in Figure 10.4:
Code View:
Public Sub DrawBorder(ByRef objPicturebox As PictureBox)
Dim objGraphics As Graphics
objGraphics = objPicturebox.Parent.CreateGraphics
objGraphics.Clear(System.Drawing.SystemColors.Control)
objGraphics.DrawRectangle(System.Drawing.Pens.Blue, objPicturebox.Left - 1, _
objPicturebox.Top - 1, _
objPicturebox.Width + 1, objPicturebox.Height + 1)
objGraphics.Dispose()
End Sub
Figure 10.4. Start your new procedure where the arrow is pointing.
[View full size image]](https://image.slidesharecdn.com/visualbasic2008in24hrs-1285035275-phpapp01/85/Visual-Basic-2008-In-24-Hrs-355-320.jpg)
![A few items introduced in this procedure may look new to you. The first is that there is text within the
parentheses of the procedure declaration. I mentioned earlier that this is where you can define parameters.
Parameters are data passed into the procedure, as opposed to a value returned by the procedure. You've just
created a parameter of type picture box. I'll cover the specifics in Hour 11, but for now I just want you to
understand the following concept: Code that calls this procedure passes into it a reference to a picture box
object. The procedure then can work with the reference just as though it were manipulating the object directly.
The first procedure you created should have been done this way, but I wanted you to see both approaches. In
the first procedure (OpenPicture), you hard-coded a reference to ViewerForm. This means that the code works
for only that form. Because this second procedure accepts a reference to a picture box by way of a parameter,
the procedure can work with a picture box on any form in your project. This is an important concept to
remember. You should strive to use parameters in your procedures while at the same time avoiding hard-coding
references to objects that belong to other forms.
The objPicturebox parameter is used throughout the procedure in place of a hard-coded reference to the
picture box object on your form. That's pretty easy to understand, but the second statement in the procedure
needs a bit more clarification. Notice the reference to objPicturebox.Parent. All controls have a parent, which
is the container on which the control is placed. The Parent property is an object property that returns a
reference to the parent. In the case of the picture box on your form, Parent refers to the form itself. So,
objPicturebox.Parent.CreateGraphics is the same as calling picShowPicture.CreateGraphics or
Me.CreateGraphics from within the form.
Your module should now look like Figure 10.5.
Figure 10.5. Code must exist within procedures, and procedures must be placed between the Module
declaration and End Module.
[View full size image]](https://image.slidesharecdn.com/visualbasic2008in24hrs-1285035275-phpapp01/85/Visual-Basic-2008-In-24-Hrs-356-320.jpg)

![Calling Code Procedures
Calling a procedure is simple—much simpler than creating one! So far, I've had you create two procedures. Each
of these procedures contains code like that used in no less than three places! Now you'll remove all that
duplicate code, replacing it with calls to the common procedures you've just written. Follow these steps to make
this happen:
1. Double-click ViewerForm.vb in the Solution Explorer to view the form in the Form Designer.
2. The first code you'll replace is the Open Picture code you entered for the Open Picture button on the
toolbar. Double-click the Open Picture button to access its Click event. Delete all the code between the
event declaration and End Sub, as shown in Figure 10.6.
Figure 10.6. Delete this code and replace it with the procedure call.
[View full size image]
3. With the old code deleted, enter the following statement:
OpenPicture()
That's it! To call a Sub procedure (a procedure that doesn't return a value), you simply use the procedure
name followed by a pair of parentheses. If the procedure expects one or more parameters, you would
enter them between the parentheses.](https://image.slidesharecdn.com/visualbasic2008in24hrs-1285035275-phpapp01/85/Visual-Basic-2008-In-24-Hrs-358-320.jpg)

![returned by the function. This often means placing a function call on the right side of an equals sign or
embedding it in an expression.
You've now created a procedure and called it from two locations—your application is really taking shape! Now
that you have a toolbar and a menu, you no longer need the buttons that you created in Hour 1, "Jumping in
with Both Feet: A Visual Basic 2008 Programming Tour."
Follow these steps to get rid of the buttons:
1. Double-click the Select Picture button on the right side of the form. Remove the entire event, including the
procedure declaration that begins with Private, and the End Sub statement, as shown in Figure 10.7.
Figure 10.7. When deleting a procedure, you must delete the declaration and the End
statement as well.
[View full size image]
2. Go back to the Form Designer by clicking the ViewerForm.vb[Design]* tab at the top of the work area.
3. The Select Picture button should be selected, because you just double-clicked it. If it is not, click it to
select it. Press Delete to delete the button.
4. Repeat steps 1 through 3 for the Quit button, the Draw Border button, and the Options button. Be sure to
delete the procedures for each of them! Your screen should now look like Figure 10.8.](https://image.slidesharecdn.com/visualbasic2008in24hrs-1285035275-phpapp01/85/Visual-Basic-2008-In-24-Hrs-360-320.jpg)
![Figure 10.8. The buttons are no longer necessary now that you have menus and
toolbars.
[View full size image]
5. Go ahead and clean up the form further. Set the Location property of the X label to 336,256, and set the
Location property of the Y label to 336,269. Finally, set the Size of the Picture box to 322,257. Now
your form should look like Figure 10.9.
Figure 10.9. Much better!](https://image.slidesharecdn.com/visualbasic2008in24hrs-1285035275-phpapp01/85/Visual-Basic-2008-In-24-Hrs-361-320.jpg)


![Using the constant is much easier and less prone to error than typing this:
Debug.WriteLine(3.14159265358979 * 2)
Constants can be referenced only in the scope in which they are defined. I discuss scope in the section
"Determining Scope" later in this hour.
You'll use what you learn in this hour to enable the options controls that you added in Hour 7, "Working with
Traditional Controls." The first thing you'll do is use constants to create default values for the options. Recall
from Hour 7 that you created an option form that allowed the user to manipulate the following three options:
The user's name: This is displayed in the Picture Viewer's main form title bar.
Prompt to confirm on exit: This is used to determine whether the user is asked if he or she really wants to
shut down the Picture Viewer application.
The default background color of the picture box: This can be set to gray (the default) or white.
In the following steps, you'll create a constant for the default value of the Prompt on Exit option. Start by
opening the Picture Viewer project from Hour 10, and then follow these steps:
1. Click ViewerForm.vb in the Solution Explorer to select it.
2. Click the View Code button at the top of the Solution Explorer to view the code behind ViewerForm.vb.
3. The constants you are about to create will be module-level constants. That is, they can be used anywhere
within the module in which they are declared. This means that they won't be placed in a specific procedure.
The place to put module constants is right after the declaration of the module toward the top (Public
Class classname). Position the cursor on the line following the declaration (see Figure 11.1), press Enter
to create a new line, and then enter the following constant declaration:
Const c_defPromptOnExit = False
Figure 11.1. Module constants go here.
[View full size image]](https://image.slidesharecdn.com/visualbasic2008in24hrs-1285035275-phpapp01/85/Visual-Basic-2008-In-24-Hrs-382-320.jpg)


![Strict Typing
Strict typing is the process by which Visual Basic enforces data typing; you can put a value in a variable only if
the value is of the correct data type. If you want to cast a value of one type into a variable of another type that
holds a smaller number or has less precision, you must use a type-conversion function. With this feature turned
off (which it is for new projects by default), Visual Basic lets you move any type of data into any variable,
regardless of the data types involved. To do this, it has to make a best guess about how the data should be
cast, which can cause inaccuracies such as truncating a large number when moving it from a Double to a
Single.
There are rare circumstances in which you might need to turn off strict typing, but these only come up with
advanced programming. Leaving strict typing on forces you to write better code, so I suggest that you turn it on
in your projects. To turn on Option Strict in your Picture Viewer project, follow these steps:
1. Right-click the project name in the Solution Explorer, and choose Properties from the context menu.
2. On the Project Properties page, click the Compile tab on the left.
3. Open the Option strict drop-down list, and choose On, as shown in Figure 11.2.
Figure 11.2. Using Option Strict forces you to write better code.
[View full size image]
Press F5 to run your project. Visual Basic tells you that there was a build error, as shown in Figure 11.3.](https://image.slidesharecdn.com/visualbasic2008in24hrs-1285035275-phpapp01/85/Visual-Basic-2008-In-24-Hrs-387-320.jpg)
![Figure 11.3. Simply enabling Option Strict broke the code.
Follow these steps to correct it:
1. Click No to stop running the project and view the error.
2. Visual Basic returns to the code window, but a new window, the Error List, has opened at the bottom (see
Figure 11.4). Also notice that the constant you declared now appears with a wavy blue underline.
Figure 11.4. The Error List window helps you pinpoint problems in your code.
[View full size image]](https://image.slidesharecdn.com/visualbasic2008in24hrs-1285035275-phpapp01/85/Visual-Basic-2008-In-24-Hrs-388-320.jpg)


![For all modules other than those used to generate forms, it's easy to add code to the Declarations section;
simply add the Public/Private statements just after the module declaration line and before any procedure
definitions, as shown in Figure 11.6.
Figure 11.6. The Declarations section exists above all declared procedures.
[View full size image]
Did You Know?
A quick way to get to the Declarations section of any module is to choose (Declarations) from the
procedure drop-down list in the upper-right corner of a module window.
Using Global (Namespace) Scope
A constant or variable is said to have global scope (or namespace scope) when it can be seen and referenced
from any procedure, regardless of the module in which the procedure exists. One common use of a global
variable is storing a reference to a database connection so that all code that needs access to the database can
do so via the variable. Creating global constants and variables is similar to declaring module-level constants and
variables. Global constants and variables must be declared in a module's Declarations section, just like module-](https://image.slidesharecdn.com/visualbasic2008in24hrs-1285035275-phpapp01/85/Visual-Basic-2008-In-24-Hrs-396-320.jpg)


![Using Variables in Your Picture Viewer Project
You added a module-level constant to your Picture Viewer project earlier in this hour. In this section, you'll
create variables to hold the values for the controls on your Options form. In Hour 16, you will finish hooking up
the options for your project.
Creating the Variables for the Options
In past hours, you defined three options for your Picture Viewer project. Let's consider each one now:
User Name: This is where the user can enter her name, which appears in the form's title bar. Think for a
moment about the type of data that will be stored for this option. If you said String (which is text),
you're correct.
Prompt to confirm on exit: This option has two possible values, true and false, so you need to use a
Boolean value to store this option.
Default picture background color: This is actually a special case. I told you about the common data types,
but in addition to those there are dozens of other different data types, one of which is Color. You'll use a
variable of the data type Color to store the user's background color preference.
Follow these steps to create the variables:
1. Display the code for the ViewerForm.vb form (not the OptionsForm.vb form).
2. Locate the Declarations section of the form's module—it's where you created the constant
c_defPromptOnExit.
3. Enter the following three variable declarations beginning on the line following the constant definition:
Private m_strUserName As String
Private m_blnPromptOnExit As Boolean
Private m_objPictureBackColor As Color
Your code should look like Figure 11.7.
Figure 11.7. Public variables go in the Declarations section.
[View full size image]](https://image.slidesharecdn.com/visualbasic2008in24hrs-1285035275-phpapp01/85/Visual-Basic-2008-In-24-Hrs-403-320.jpg)
![Initializing and Using the Options Variables
Now that the variables have been created, you need to initialize them. Follow these steps:
1. The best place to set up a form is usually the form's Load event. Getting to a form's events can be tricky. If
you just select the form name in the object drop-down box (the drop-down in the upper-left corner of the
code window), you see only a small subset of the form's events. You need to open the object drop-down
and choose (ViewerForm Events), as shown in Figure 11.8. After you've chosen ViewerForm Events, open
the event drop-down list and choose Load to display the Load event.
Figure 11.8. You need to choose this option to see all the form's events.
[View full size image]](https://image.slidesharecdn.com/visualbasic2008in24hrs-1285035275-phpapp01/85/Visual-Basic-2008-In-24-Hrs-404-320.jpg)


![Debug.WriteLine(Mid("The rooster crows at midnight.", 9))
Determining Whether One String Contains Another Using Instr()
At times you'll need to determine whether one string exists within another. For example, suppose that you let
users enter their full name into a text box, and that you want to separate the first and last names before saving
them into individual fields in a database. The easiest way to do this is to look for the space in the string that
separates the first name from the last. You could use a loop to examine each character in the string until you find
the space, but Visual Basic includes a native function that does this for you, faster and easier than you could do it
yourself: the InStr() function. The basic InStr() function has the following syntax:
Instr([start, ] stringtosearch, stringbeingsought) ' Returns an Integer
By the Way
The InStr() function has always been an enigma to me. For one thing, it's the only function I've ever seen
in which the first parameter is optional, but the subsequent parameters are required. Second, it's
documented with the second parameter, called string1, and the third parameter, called string2. This
makes it difficult to remember which parameter is used for what and will probably force you to reference
the Help when you use this function.
The InStr() function searches one string for the occurrence of another. If the string is found, the character
location of the start of the matching search string is returned. If the search string is not found within the other
string, 0 is returned. The following code searches a variable containing the text "James Foxall", locates the space,
and uses Left() and Mid() to place the first and last names in separate variables:
Dim strFullName As String = "James Foxall"
Dim strFirstName As String
Dim strLastName As String
Dim intLocation As Integer
intLocation = Instr(strFullName, " ")
strFirstName = Microsoft.VisualBasic.Left(strFullName, intLocation - 1)
strLastName = Mid(strFullName, intLocation + 1)
Did You Know?
This code assumes that a space will be found and that it won't be the first or last character in the string.
Such code might need to be more robust in a real application, such as checking to see whether InStr()
returned 0, indicating that no match was found.
When this code runs, InStr() returns 6, the location in which the first space is found. Notice how I subtracted 1
from intLocation when using Microsoft.VisualBasic.Left(). If I didn't do this, the space would be part of the](https://image.slidesharecdn.com/visualbasic2008in24hrs-1285035275-phpapp01/85/Visual-Basic-2008-In-24-Hrs-429-320.jpg)


![1. Right-click Form1.vb in the Solution Explorer, choose Rename, and then change the form's name to
SelectCaseExampleForm.vb. Next, set the form's Text property to Select Case Example (you have to
click the form to view its design properties).
2. Add a new combo box to the form by double-clicking the ComboBox item on the toolbox. Set the combo
box's properties as follows:
Property Value
Name cboAnimals
Location 80, 100
3. Add some items to the list. Click the Items property of the combo box, and then click the Build button that
appears in the property to access the String Collection Editor for the combo box. Enter the text as shown in
Figure 13.3; be sure to press Enter at the end of each list item to make the next item appear on its own
line.
Figure 13.3. Each line you enter here becomes an item in the combo box at runtime.
[View full size image]
4. Add a Button control. When the button is clicked, a Select Case construct is used to determine which
animal the user selected and to tell the user how many legs the selected animal has. Add a new button to
the form by double-clicking the Button tool in the toolbox. Set the button's properties as follows:
Property Value
Name btnShowLegs](https://image.slidesharecdn.com/visualbasic2008in24hrs-1285035275-phpapp01/85/Visual-Basic-2008-In-24-Hrs-457-320.jpg)
![Property Value
Location 102, 130
Text Show Legs
Your form should now look like the one shown in Figure 13.4. Click Save All on the toolbar to save your work
before continuing.
Figure 13.4. This example uses only a combo box and a Button control.
[View full size image]
All that's left to do is add the code. Double-click the Button control to access its Click event, and then enter
the following code:
Select Case cboAnimals.Text
Case "Bird"
MessageBox.Show("This animal has 2 legs.")
Case "Horse", "Dog", "Cat"
MessageBox.Show ("This animal has 4 legs.")
Case "Snake"
MessageBox.Show ("This animal has no legs.")
Case "Centipede"
MessageBox.Show ("This animal has 100 legs.")
Case Else](https://image.slidesharecdn.com/visualbasic2008in24hrs-1285035275-phpapp01/85/Visual-Basic-2008-In-24-Hrs-458-320.jpg)


![Hour 14. Looping for Efficiency
What You'll Learn in This Hour:
Looping a specific number of times using For...Next
Looping based on a condition using Do...Loop
You will often encounter situations in which you need to execute the same code statement or group of
statements repeatedly. You will need to execute some of these statements a specific number of times, whereas
others might need to be executed as long as a certain condition persists (an expression is True) or until a
condition occurs (an expression becomes True). Visual Basic includes constructs that enable you to easily define
and execute these repetitive code routines: loops. This hour shows you how to use the two major looping
constructs to make your code smaller, faster, and more efficient.
Looping a Specific Number of Times Using For...Next
The simplest type of loop you can create is the For...Next loop, which has been around since the earliest
forms of the BASIC language. With a For...Next loop, you instruct Visual Basic to begin a loop by starting a
counter at a specific value. Visual Basic then executes the code within the loop, increments the counter by a
defined incremental value, and repeats the loop until the counter reaches an upper limit you've set. The
following is the general syntax for the basic For...Next loop:
For countervariable = start To end [Step step]
... [statements to execute in loop]
[Exit For]
... [statements to execute in loop]
Next [countervariable]
Initiating the Loop Using For
The For statement both sets up and starts the loop. The For statement has the components described in Table
14.1.
Table 14.1. Components of the For Statement
Part Description
countervariable A previously declared variable of a numeric data type (Integer,
Long, and so on). This variable is incremented each time the loop
occurs.
start The number you want to start counting from.](https://image.slidesharecdn.com/visualbasic2008in24hrs-1285035275-phpapp01/85/Visual-Basic-2008-In-24-Hrs-467-320.jpg)


![as a comment and doesn't execute it.)
The next statement (the Sleep() statement) tells Visual Basic to pause. The number in parentheses is the
number of milliseconds to wait—in this case, 200. This is a nifty function! We could have used another
For...Next loop to create a pause, but then the duration of the pause would depend on the speed of the
user's computer. By using Sleep(), we've guaranteed that the pause will be the same on every machine
that executes this code.
The Next statement sends execution back to the For statement, where the variable is decremented and
tested to make sure that we haven't reached the stop value.
When the loop is finished, the form will be invisible. The last statement simply sets Opacity back to 1,
showing the form.
Click Save All on the toolbar and press F5 to run the project. When the form first appears, it looks normal. Click
the button, though, and watch the form fade out (see Figure 14.2)!
Figure 14.2. This would take a lot of code without a loop!
[View full size image]
If you were to forgo a loop and write each line of code necessary to change the opacity, you would have to
duplicate the statements 20 times each! Using a simple For...Next loop, you performed the same task in just a
few lines of code.
Use a For...Next loop when you know how many times you want the loop to execute. This doesn't mean that
you have to know how many times you want the loop to execute at design time. It simply means that you must](https://image.slidesharecdn.com/visualbasic2008in24hrs-1285035275-phpapp01/85/Visual-Basic-2008-In-24-Hrs-472-320.jpg)

![Hour 14. Looping for Efficiency
What You'll Learn in This Hour:
Looping a specific number of times using For...Next
Looping based on a condition using Do...Loop
You will often encounter situations in which you need to execute the same code statement or group of
statements repeatedly. You will need to execute some of these statements a specific number of times, whereas
others might need to be executed as long as a certain condition persists (an expression is True) or until a
condition occurs (an expression becomes True). Visual Basic includes constructs that enable you to easily define
and execute these repetitive code routines: loops. This hour shows you how to use the two major looping
constructs to make your code smaller, faster, and more efficient.
Looping a Specific Number of Times Using For...Next
The simplest type of loop you can create is the For...Next loop, which has been around since the earliest
forms of the BASIC language. With a For...Next loop, you instruct Visual Basic to begin a loop by starting a
counter at a specific value. Visual Basic then executes the code within the loop, increments the counter by a
defined incremental value, and repeats the loop until the counter reaches an upper limit you've set. The
following is the general syntax for the basic For...Next loop:
For countervariable = start To end [Step step]
... [statements to execute in loop]
[Exit For]
... [statements to execute in loop]
Next [countervariable]
Initiating the Loop Using For
The For statement both sets up and starts the loop. The For statement has the components described in Table
14.1.
Table 14.1. Components of the For Statement
Part Description
countervariable A previously declared variable of a numeric data type (Integer,
Long, and so on). This variable is incremented each time the loop
occurs.
start The number you want to start counting from.](https://image.slidesharecdn.com/visualbasic2008in24hrs-1285035275-phpapp01/85/Visual-Basic-2008-In-24-Hrs-474-320.jpg)


![as a comment and doesn't execute it.)
The next statement (the Sleep() statement) tells Visual Basic to pause. The number in parentheses is the
number of milliseconds to wait—in this case, 200. This is a nifty function! We could have used another
For...Next loop to create a pause, but then the duration of the pause would depend on the speed of the
user's computer. By using Sleep(), we've guaranteed that the pause will be the same on every machine
that executes this code.
The Next statement sends execution back to the For statement, where the variable is decremented and
tested to make sure that we haven't reached the stop value.
When the loop is finished, the form will be invisible. The last statement simply sets Opacity back to 1,
showing the form.
Click Save All on the toolbar and press F5 to run the project. When the form first appears, it looks normal. Click
the button, though, and watch the form fade out (see Figure 14.2)!
Figure 14.2. This would take a lot of code without a loop!
[View full size image]
If you were to forgo a loop and write each line of code necessary to change the opacity, you would have to
duplicate the statements 20 times each! Using a simple For...Next loop, you performed the same task in just a
few lines of code.
Use a For...Next loop when you know how many times you want the loop to execute. This doesn't mean that
you have to know how many times you want the loop to execute at design time. It simply means that you must](https://image.slidesharecdn.com/visualbasic2008in24hrs-1285035275-phpapp01/85/Visual-Basic-2008-In-24-Hrs-479-320.jpg)

![Using Do...Loop to Loop an Indeterminate Number of Times
In some situations, you won't know the exact number of times a loop must be performed—not even when the
loop begins. You could start a For...Next loop specifying an upper limit that you know is larger than the
number of loops needed, check for a terminating condition within the loop, and exit the loop using an Exit For
statement when the condition is met. However, this approach is inefficient and usually impractical. When you
need to create such a loop, using Do...Loop is the answer.
Creating a Do...Loop
Do...Loop comes in a number of flavors. Its most basic form has the following syntax:
Do
[Statements]
Loop
Ending a Do...Loop
A Do...Loop without some sort of exit mechanism or defined condition is an endless loop. In its most basic form
(shown previously), nothing is present to tell the loop when to stop looping. At times you might need an endless
loop (game programming is an example), but most often, you'll need to exit the loop when a certain condition is
met. Like the For...Next loop, the Do...Loop has a statement you can use to exit the loop at any time: the
Exit Do statement. For example, you could expand the Do...Loop we're discussing to include an Exit Do
statement such as the following:
Do
[Statements]
If expression Then Exit Do
Loop
In this code, the loop would execute until expression evaluates to True. Generally, the expression is based on
a variable that's modified somewhere within the loop. Obviously, if the expression never changes, the loop
never ends.
You can build an expression into the Do...Loop structure itself using one of two keywords: While or Until. The
following is a simple Do...Loop using the While keyword:
Do While expression
[Statements]
Loop
As long as expression evaluates to True, this loop continues to occur. If expression evaluates to False when
the loop first starts, the code between the Do While and Loop statements doesn't execute—not even once.
Here's a similar Do...Loop that uses the Until keyword:
Do Until expression
[Statements]
Loop](https://image.slidesharecdn.com/visualbasic2008in24hrs-1285035275-phpapp01/85/Visual-Basic-2008-In-24-Hrs-481-320.jpg)
![This loop behaves differently from the loop that uses While. When you define a loop using the keyword Until,
the loop executes repeatedly until expression evaluates to True. As long as expression is False, the loop
occurs. This is essentially the opposite behavior of While. If expression is True when the loop begins, the code
between the Do Until and Loop statements doesn't execute—not even once.
Notice how both While and Until can prevent the loop from executing. This occurs because expression is
placed on the Do statement, which means that it's evaluated before the loop is entered and again each time the
loop iterates. You can put a While or Until on the Loop statement rather than on the Do statement, which
means that the loop executes once before expression is evaluated for the first time. Such loops always occur
at least once. You need to be aware of how this changes the loop's behavior. Here's the previous example with
the While keyword placed on the Loop statement:
Do
[Statements]
Loop While expression
Again, this loop executes as long as expression evaluates to True. The difference between the Do...While and
Do...Loop While loops is that code between the Do and the Loop While statements always executes at least
once; expression isn't evaluated until the loop has completed its first cycle. Again, such a loop always executes
at least once, regardless of the value of expression. Here's the same code shown previously, this time with the
Until keyword placed on the Loop statement rather than on the Do statement:
Do
[Statements]
Loop Until expression
This loop executes until expression evaluates to True. However, the code within this loop always executes at
least once; expression isn't evaluated until the loop completes its first cycle.
By the Way
You can use Continue Do within a Do...Loop to send execution back to the Do statement, just as
though the Loop statement were reached.
Creating a Do...Loop Example
Now you'll create an example using a Do...Loop. In this project, you'll find the first 10 numbers that are evenly
divisible by 3. Although you know you want to find 10 numbers, you don't know how many numbers you will
have to evaluate. Therefore, the Do...Loop is the best choice.
Create a new Windows Application named No Remainders, and then follow these steps:](https://image.slidesharecdn.com/visualbasic2008in24hrs-1285035275-phpapp01/85/Visual-Basic-2008-In-24-Hrs-482-320.jpg)


![Identifying the Two Basic Types of Errors
Two types of errors can occur in code: build errors and runtime errors. A build error is a coding error that
prevents Visual Basic's compiler from being able to process the code; Visual Basic won't compile a project that
has a build error in it. A statement that calls a procedure with incorrect parameters, for example, generates a
build error. Runtime errors are those that don't occur at compile time but are encountered when the project is
being run. Runtime errors are usually a result of trying to perform an invalid operation on a variable.
To illustrate, consider this next statement, which wouldn't generate a compile error:
intResult = 10 / intDenominator
Under most circumstances, this code wouldn't even generate a runtime error. However, what happens if the
value of intDenominator is 0? Ten divided by 0 is undefined, which won't fit into intResult (intResult is an
Integer variable). Attempting to run the code with the intDenominator variable having a value of 0 causes
Visual Basic to return a runtime error. A runtime error is called an exception, and when an exception occurs,
it's said to be thrown (that is, Visual Basic throws an exception when a runtime error occurs). When an
exception is thrown, code execution stops at the offending statement, and Visual Basic displays an error
message. You can prevent Visual Basic from stopping execution when an exception is thrown by writing special
code to handle the exception, which you'll learn about later in this hour.
Add the following statements to the Click event, right below the two comment lines:
Dim lngAnswer As Long
lngAnswer = 100 / CLng(txtInput.Text)
MessageRox.Show("100/" & txtInput.Text & " is " & lngAnswer)
The misspelling of the function name MessageBox is intentional; type in the preceding line of code exactly as it
appears. Although you've misspelled the function name, Visual Basic doesn't return an immediate error. Notice,
however, that Visual Basic displays a wavy blue line under the function name. Move the mouse pointer over the
underlined text, and leave it there for a second; Visual Basic displays a tip explaining the nature of the error, as
shown in Figure 15.2.
Figure 15.2. Visual Basic highlights build errors in the code window by using wavy lines.
[View full size image]](https://image.slidesharecdn.com/visualbasic2008in24hrs-1285035275-phpapp01/85/Visual-Basic-2008-In-24-Hrs-498-320.jpg)
![Press F5 to run the project. When you do, Visual Basic displays a message that a build error was found, and it
asks whether you want to continue by running the last successful build. Because the code won't run as is,
there's no point in continuing, so click No to return to the code editor. Take a look at the Error List (if it's not
displayed, use the View menu to show it). All build errors in the current project appear in the Error List, as
shown in Figure 15.3. To view a particular offending line of code, double-click an item in the Error List.
Figure 15.3. Build errors are easy to find using the Error List.
[View full size image]](https://image.slidesharecdn.com/visualbasic2008in24hrs-1285035275-phpapp01/85/Visual-Basic-2008-In-24-Hrs-499-320.jpg)
![Build errors are very serious because they prevent code from being compiled and therefore prevent execution.
Build errors must be corrected before you can run the project. Double-click the build error in the Error List to go
directly to the error.
Correct the problem by changing the R to a B so that the function name is MessageBox. After you've made this
change, press F5 to run the project. Visual Basic no longer returns a build error; you've just successfully
debugged a problem!
Click the Perform Division button now, and you'll receive another error (see Figure 15.4).
Figure 15.4. A runtime exception halts code execution at the offending line.
[View full size image]](https://image.slidesharecdn.com/visualbasic2008in24hrs-1285035275-phpapp01/85/Visual-Basic-2008-In-24-Hrs-500-320.jpg)

![Using Visual Basic's Debugging Tools
Visual Basic includes a number of debugging tools to help you track down and eliminate bugs. In this section,
you'll learn how to use break points and the Immediate window—two tools that form the foundation of any
debugging arsenal.
Working with Break Points
Just as an exception halts the execution of a procedure, you can deliberately stop execution at any statement of
code by creating a break point. When Visual Basic encounters a break point while executing code, execution is
halted at the break statement before the statement is executed. Break points enable you to query or change the
value of variables at a specific instance in time, and they let you step through code execution one line at a time.
You'll create a break point to help troubleshoot the exception in your lngAnswer = statement.
Adding a break point is simple. Just click in the gray area to the left of the statement at which you want to
break code execution. When you do so, Visual Basic displays a red circle, denoting a break point at that
statement (see Figure 15.5). To clear the break point, you would click the red circle (but don't do this now).
Figure 15.5. Break points give you control over code execution.
[View full size image]](https://image.slidesharecdn.com/visualbasic2008in24hrs-1285035275-phpapp01/85/Visual-Basic-2008-In-24-Hrs-502-320.jpg)
![By the Way
Break points are saved with the project. You don't have to reset all your break points each time you
open the project.
Click the gray area to the left of the lngAnswer = statement to create a break point, as shown in Figure 15.5.
After you've set the break point, press F5 to run the program. Click the Perform Division button again. When
Visual Basic encounters the break point, code execution is halted—right before the statement with the break
point executes—and the procedure with the break point is shown. In addition, the cursor is conveniently placed
at the statement with the current break point. Notice the yellow arrow overlaying the red circle of the break
point (see Figure 15.6). This yellow arrow marks the next statement to be executed. It just so happens that the
statement has a break point, so the yellow arrow appears over the red circle. (The yellow arrow won't always be
over a red circle, but it will always appear in the gray area aligned with the next statement that will execute.)
Figure 15.6. A yellow arrow denotes the next statement to be executed.
[View full size image]
When code execution is halted at a break point, you can do a number of things. Table 15.1 lists the most
common actions. For now, press F5 to continue program execution. Again, you get an overflow exception.
Table 15.1. Actions That Can Be Taken at a Break Point](https://image.slidesharecdn.com/visualbasic2008in24hrs-1285035275-phpapp01/85/Visual-Basic-2008-In-24-Hrs-503-320.jpg)

![You can do a number of things to prevent this error. The most obvious is to ensure that the text box contains a
value before attempting to use CLng(). You'll do this now.
Visual Basic now supports on-the-fly code editing—something that was sorely lacking in earlier versions of .NET.
This means that you can now modify code while debugging it. You no longer have to stop the project to make
changes and then run it once more to test your changes.
Put the cursor at the end of the Dim statement and press Enter. Next, enter the following code statements:
If txtInput.Text = "" Then
Exit Sub
End If
Remember the yellow arrow used to show the next statement that will execute? It indicates that if you continue
code execution now, the statement that throws the exception will run once more. We want our new statements
to execute. Follow these steps to designate the new code as the next code to be executed:
1. Click the yellow arrow, and hold down the mouse button.
2. Drag the yellow arrow to the statement that begins with If txtInput.Text.
3. Release the mouse button.
Now, the yellow arrow should indicate that the next statement to execute will be the If statement, as shown in
Figure 15.7.
Figure 15.7. You can manually control the flow of code when debugging.
[View full size image]](https://image.slidesharecdn.com/visualbasic2008in24hrs-1285035275-phpapp01/85/Visual-Basic-2008-In-24-Hrs-505-320.jpg)

![Figure 15.8. The View Detail window gives you important information for fixing exception problems.
[View full size image]
The text in the View Detail window says "Conversion from string "your name" to type 'Long' is not
valid." It apparently still doesn't like what's being passed to the CLng() function.
By now, it might have occurred to you that there's no logical way to convert alphanumeric text to a number;
CLng() needs a number to work with. You can easily test this by following these steps:
1. Choose Debug, Stop Debugging.
2. Press F5 to run the project.
3. Enter a number into the text box, and click the button. Code execution again stops at the break point.
4. Press F8 to execute the statement. No errors this time! Press F5 to continue execution; Visual Basic
displays the message box (finally). Click OK to dismiss the message box, and then close the form to stop
the project.
Did You Know?
You can use the Immediate window to change the value of a variable.](https://image.slidesharecdn.com/visualbasic2008in24hrs-1285035275-phpapp01/85/Visual-Basic-2008-In-24-Hrs-507-320.jpg)
![Because the CLng() function expects a number, but the text box contains no intrinsic way to force numeric
input, you have to accommodate this situation in your code. Visual Basic includes a handy function called
IsNumeric(), which returns True if the supplied argument is a number and False if not. You can use this
function to ensure that only a number is passed to the CLng() function. Add the following statement
immediately below the last If...Then construct you entered (after the End...If statement):
If Not (IsNumeric(txtInput.Text)) Then Exit Sub
This statement simply passes the contents of the text box to the IsNumeric() function. If the function returns
False (the text is not a number), the procedure is exited. Your procedure should now look similar to the one
shown in Figure 15.9. Realize that the first If...End If statement is redundant; the new statement will catch
when a user hasn't entered anything into the text box.
Figure 15.9. The final code, complete with data verification.
[View full size image]
Go ahead and press F5 to run the project. Enter some nonnumeric text into the text box, and click the button. If
you entered the code correctly, no exception will occur; the data validation tests you've created prevent
inappropriate data from being passed to the CLng() function. You just debugged the procedure!
The Immediate window is a powerful debugging tool. You can use it to get and set variables as well as view the
value in a property. You can even use the Immediate window to call functions. For example, while in Break
mode, you could enter the following into the Immediate window, and Visual Basic would print the result of the
function call:](https://image.slidesharecdn.com/visualbasic2008in24hrs-1285035275-phpapp01/85/Visual-Basic-2008-In-24-Hrs-508-320.jpg)


![Catch objException As System.InvalidCastException
MessageBox.Show("You must enter something in the text box.")
Catch objException As Exception
MessageBox.Show("Caught an exception that wasn't an invalid cast.")
End Try
Notice that this structure has two Catch statements. The first Catch statement is designed to catch only an
overflow exception; it won't catch exceptions of any other type. The second Catch statement doesn't care what
type of exception is thrown; it catches all of them. The second Catch statement acts as a catchall for any
exceptions that aren't overflow exceptions because Catch sections are evaluated from top to bottom, much like
Case statements in the Select...Case structure. You could add more Catch sections to catch other specific
exceptions if the situation calls for it.
In this next example, you'll build on the Picture Viewer project last edited in Hour 11, "Using Constants, Data
Types, Variables, and Arrays," so go ahead and open that project now. First, I want you to see the exception
that you'll catch. Follow these steps to cause an exception to occur:
1. Press F5 to run the project.
2. Click the Open Picture button on the toolbar to display the Select Picture dialog box.
3. In the File Name: box, enter *.* and press Enter. This changes your filter so that you can now select files
that aren't images. Locate a file on your hard drive that you know is not an image. Files with the extension
.txt, .ini, or .pdf are perfect.
4. After you've located a file that isn't an image file, click it to select it, and then click Open.
You have caused an out of memory exception, as shown in Figure 15.11. This is the exception thrown by the
picture box when you attempt to load a file that isn't a picture. Your first reaction might be something along the
lines of "Why do I have to worry about that? No one would do that." Well, welcome to programming, my friend!
A lot of your time will be spent writing code to protect users from themselves. It's not fair and usually not fun,
but it is a reality.
Figure 15.11. You never want an unhandled exception to occur—ever.
[View full size image]](https://image.slidesharecdn.com/visualbasic2008in24hrs-1285035275-phpapp01/85/Visual-Basic-2008-In-24-Hrs-514-320.jpg)


![duration of an object's lifetime. Objects can be created and destroyed as needed, and when an object is
destroyed, all its data is destroyed as well.
Classes differ from standard modules in more ways than just how their data behaves. When you define a
standard module, its public functions and procedures are instantly available to other modules within your
application. However, public functions and procedures of classes aren't immediately available to your program.
Classes are templates for objects. At runtime, your code doesn't interact with the code in the class module per
se, but it instantiates objects derived from the class. Each object acts as its own class "module" and thus has its
own set of module data. When classes are exposed externally to other applications, the application containing
the class's code is called the server. An application that creates and uses instances of an object is called a
client. When you use instances of classes in the application that contains those classes, the application itself
acts as both a client and a server. In this hour, I'll refer to the code instantiating an object derived from a class
as client code.
Begin by creating a new Windows Application called Class Programming Example, and then follow these steps to
create your project:
1. Rename the default form ClassExampleForm.vb, and set its Text property to Class Programming
Example.
2. Add a new class to the project by choosing Project, Add Class. Save the class with the name
clsMyClass.vb, as shown in Figure 16.1.
Figure 16.1. Classes are added to a project just as other object files are added.
[View full size image]
Creating an Object Interface
For an object to be created from a class, the class must expose an interface. As I mentioned earlier, an interface
is a set of exposed functionality (properties, methods, and events). An interface is the means by which client
code communicates with the object derived from the class. Some classes expose a limited interface, and others
expose complex interfaces. The content and quantity of your class's interface are entirely up to you.](https://image.slidesharecdn.com/visualbasic2008in24hrs-1285035275-phpapp01/85/Visual-Basic-2008-In-24-Hrs-522-320.jpg)


![Perhaps the biggest problem is this: How do you control data validation? For instance, how could you
ensure that Quantity is never set to a negative value?
It's simply not possible to work around these issues using a public variable. Instead of exposing public variables,
you should create class properties using property procedures.
Property procedures enable you to execute code when a property is changed, to validate property values, and to
dictate whether a property is read-only, write-only, or both readable and writable. Declaring a property
procedure is similar to declaring a standard Function or Sub procedure, but with some important differences.
The basic structure of a property procedure looks like this:
Public Property propertyname() As datatype
Get
' Code to return the property's value goes here.
End Get
Set(ByVal Value As datatype)
' Code that accepts a new value goes here.
End Set
End Property
The first word in the property declaration simply designates the scope of the property (usually Public, Private,
or Friend). Properties declared with Public are available to code outside the class (they can be accessed by
client code). If the application exposes its objects to other applications, Public procedures are visible outside
the application. Procedures declared as Friend, on the other hand, behave like Public procedures, with the
exception that they are not available outside the application. Properties declared as Private are available only
to code within the class. Immediately following the scope identifier is the word Property. This word tells Visual
Basic that you're creating a property procedure rather than a Sub or Function procedure. Next come the
property name and data type.
Type the following two statements into your class:
Private m_intHeight As Integer
Public Property Height() As Integer
After entering the statements, press Enter to commit them. Visual Basic fills in the rest of the procedure
template for you, as shown in Figure 16.3.
Figure 16.3. Visual Basic creates property procedure templates.
[View full size image]](https://image.slidesharecdn.com/visualbasic2008in24hrs-1285035275-phpapp01/85/Visual-Basic-2008-In-24-Hrs-525-320.jpg)

![Add the following statement between the Set and End Set statements:
m_intHeight = Value
If you look closely at the Set statement, you'll see that it's similar to a Sub declaration and that Value is a
parameter. Value contains the value being passed to the property by the client code. The statement you just
entered assigns the new value to the module-level variable.
As you can see, the property procedure is a wrapper around the module-level variable. When the client code
sets the property, the Set construct stores the new value in the variable. When the client retrieves the value of
the property, the Get construct returns the value in the module-level variable.
So far, the property procedure, with its Get and Set constructs, doesn't do anything different from what it
would do if you were to simply declare a public variable (only the property procedure requires more code).
However, look at this variation of the same Set construct:
Set(ByVal value As Integer)
If m_intHeight < 10 Then Exit Property
m_intHeight = value
End Set
This Set construct restricts the client to setting the Height property to a value greater than or equal to 10. If a
value less than 10 is passed to the property, the property procedure terminates without setting m_intHeight.
You're not limited to performing only data validation; you can pretty much add whatever code you want and
even call other procedures. Go ahead and add the verification statement to your procedure so that the Set
construct looks like this one. Your code should now look like the procedure shown in Figure 16.4.
Figure 16.4. This is a property procedure, complete with data validation.
[View full size image]](https://image.slidesharecdn.com/visualbasic2008in24hrs-1285035275-phpapp01/85/Visual-Basic-2008-In-24-Hrs-527-320.jpg)


![duration of an object's lifetime. Objects can be created and destroyed as needed, and when an object is
destroyed, all its data is destroyed as well.
Classes differ from standard modules in more ways than just how their data behaves. When you define a
standard module, its public functions and procedures are instantly available to other modules within your
application. However, public functions and procedures of classes aren't immediately available to your program.
Classes are templates for objects. At runtime, your code doesn't interact with the code in the class module per
se, but it instantiates objects derived from the class. Each object acts as its own class "module" and thus has its
own set of module data. When classes are exposed externally to other applications, the application containing
the class's code is called the server. An application that creates and uses instances of an object is called a
client. When you use instances of classes in the application that contains those classes, the application itself
acts as both a client and a server. In this hour, I'll refer to the code instantiating an object derived from a class
as client code.
Begin by creating a new Windows Application called Class Programming Example, and then follow these steps to
create your project:
1. Rename the default form ClassExampleForm.vb, and set its Text property to Class Programming
Example.
2. Add a new class to the project by choosing Project, Add Class. Save the class with the name
clsMyClass.vb, as shown in Figure 16.1.
Figure 16.1. Classes are added to a project just as other object files are added.
[View full size image]
Creating an Object Interface
For an object to be created from a class, the class must expose an interface. As I mentioned earlier, an interface
is a set of exposed functionality (properties, methods, and events). An interface is the means by which client
code communicates with the object derived from the class. Some classes expose a limited interface, and others
expose complex interfaces. The content and quantity of your class's interface are entirely up to you.](https://image.slidesharecdn.com/visualbasic2008in24hrs-1285035275-phpapp01/85/Visual-Basic-2008-In-24-Hrs-532-320.jpg)


![Perhaps the biggest problem is this: How do you control data validation? For instance, how could you
ensure that Quantity is never set to a negative value?
It's simply not possible to work around these issues using a public variable. Instead of exposing public variables,
you should create class properties using property procedures.
Property procedures enable you to execute code when a property is changed, to validate property values, and to
dictate whether a property is read-only, write-only, or both readable and writable. Declaring a property
procedure is similar to declaring a standard Function or Sub procedure, but with some important differences.
The basic structure of a property procedure looks like this:
Public Property propertyname() As datatype
Get
' Code to return the property's value goes here.
End Get
Set(ByVal Value As datatype)
' Code that accepts a new value goes here.
End Set
End Property
The first word in the property declaration simply designates the scope of the property (usually Public, Private,
or Friend). Properties declared with Public are available to code outside the class (they can be accessed by
client code). If the application exposes its objects to other applications, Public procedures are visible outside
the application. Procedures declared as Friend, on the other hand, behave like Public procedures, with the
exception that they are not available outside the application. Properties declared as Private are available only
to code within the class. Immediately following the scope identifier is the word Property. This word tells Visual
Basic that you're creating a property procedure rather than a Sub or Function procedure. Next come the
property name and data type.
Type the following two statements into your class:
Private m_intHeight As Integer
Public Property Height() As Integer
After entering the statements, press Enter to commit them. Visual Basic fills in the rest of the procedure
template for you, as shown in Figure 16.3.
Figure 16.3. Visual Basic creates property procedure templates.
[View full size image]](https://image.slidesharecdn.com/visualbasic2008in24hrs-1285035275-phpapp01/85/Visual-Basic-2008-In-24-Hrs-535-320.jpg)

![Add the following statement between the Set and End Set statements:
m_intHeight = Value
If you look closely at the Set statement, you'll see that it's similar to a Sub declaration and that Value is a
parameter. Value contains the value being passed to the property by the client code. The statement you just
entered assigns the new value to the module-level variable.
As you can see, the property procedure is a wrapper around the module-level variable. When the client code
sets the property, the Set construct stores the new value in the variable. When the client retrieves the value of
the property, the Get construct returns the value in the module-level variable.
So far, the property procedure, with its Get and Set constructs, doesn't do anything different from what it
would do if you were to simply declare a public variable (only the property procedure requires more code).
However, look at this variation of the same Set construct:
Set(ByVal value As Integer)
If m_intHeight < 10 Then Exit Property
m_intHeight = value
End Set
This Set construct restricts the client to setting the Height property to a value greater than or equal to 10. If a
value less than 10 is passed to the property, the property procedure terminates without setting m_intHeight.
You're not limited to performing only data validation; you can pretty much add whatever code you want and
even call other procedures. Go ahead and add the verification statement to your procedure so that the Set
construct looks like this one. Your code should now look like the procedure shown in Figure 16.4.
Figure 16.4. This is a property procedure, complete with data validation.
[View full size image]](https://image.slidesharecdn.com/visualbasic2008in24hrs-1285035275-phpapp01/85/Visual-Basic-2008-In-24-Hrs-537-320.jpg)


![correct. Click the button to create the object and call the method. When you do, you get the exception shown in
Figure 16.5.
Figure 16.5. Exceptions such as this are a risk of late binding.
[View full size image]
As explained in Hour 15, "Debugging Your Code," runtime exceptions are more problematic than build errors
because they're usually encountered by end users and under varying circumstances. When you late-bind
objects, it's easy to introduce these types of problems; therefore, late binding has a real risk of throwing
exceptions. As you'll see in the next section, early binding reduces many of these risks.
Go ahead and choose Debug, Stop Debugging before continuing.
Early-Binding an Object Variable
If Visual Basic can determine a Dispatch ID for a member at compile time, there's no need to look up the ID
when the member is referenced at runtime. This results in considerably faster calls to object members. Not only
that, but Visual Basic can also validate the member call at compile time, reducing the chance of errors in your
code.
Early binding occurs when you dimension a variable as a specific type of object, rather than just As Object.
When a variable is early-bound, Visual Basic looks up the Dispatch IDs of the object's members at compile time,
rather than at runtime.
The following are important reasons to use early binding:](https://image.slidesharecdn.com/visualbasic2008in24hrs-1285035275-phpapp01/85/Visual-Basic-2008-In-24-Hrs-542-320.jpg)
![Speed
More speed
Objects, their properties, and their methods appear in IntelliSense drop-down lists.
The compiler can check for syntax and reference errors in your code so that many problems are found at
compile time, rather than at runtime.
For early binding to take place, an object variable must be declared as a specific object type (that is, not As
Object). Change the Dim statement in the code you've entered to read as follows:
Dim objMyObject As clsMyClass
As soon as you commit this statement, Visual Basic displays a wavy blue line under the bad method call, as
shown in Figure 16.6. This occurs because Visual Basic now knows the exact type of object the variable will
contain; therefore, it can and does perform syntax checking on all member references. Because it can't find a
member with the name AddtoNumbers, it flags this as a build error. Try running the project by pressing F5, and
you'll see that Visual Basic does indeed recognize this as a build problem.
Figure 16.6. With early-bound objects, Visual Basic performs syntax checking for you.
[View full size image]](https://image.slidesharecdn.com/visualbasic2008in24hrs-1285035275-phpapp01/85/Visual-Basic-2008-In-24-Hrs-543-320.jpg)
![Place the cursor at the period between the words objMyObject and AddtoNumbers. Delete the period and then
type a period once more. This time, Visual Basic displays an IntelliSense drop-down list with all the members of
the class, as shown in Figure 16.7. Go ahead and select the AddTwoNumbers member to fix your code.
Figure 16.7. Visual Basic displays IntelliSense drop-down lists of members for early-bound objects.
[View full size image]
Creating a New Object When Dimensioning a Variable
You can instantiate a new object on the declaration statement by including the keyword New, like this:
Dim objMyObject As New clsMyClass()
This approach alleviates the need for a second statement to create a new instance of the object. However, if you
do this, the variable will always contain a reference to an object. If there's a chance that you might not need the
object, you should probably avoid using the New keyword on the Dim statement. Consider the following:
Dim objMyObject As clsMyClass
If condition Then
objMyObject = New clsMyObject
' Code to use the custom object would go here.
End If](https://image.slidesharecdn.com/visualbasic2008in24hrs-1285035275-phpapp01/85/Visual-Basic-2008-In-24-Hrs-544-320.jpg)


![Using InputBox() to Get Information from a User
The MessageBox.Show() method enables you to ask the user simple Yes/No, OK/Cancel-type questions, but it
doesn't let you get specific input from a user, such as text or a number. When you need input from a user, you
have two choices:
Create a form with one or more controls to capture the data.
Use the InputBox() function to gather data from the user.
The InputBox() function can capture only one piece of data, so it's not appropriate for most data-entry
situations. However, in some circumstances, you might find that you need only one piece of data, and creating a
custom form in such a situation would be overkill. For example, suppose that you have a simple application and
you want the user to enter a name when he or she first starts the application. You could use the InputBox()
function to have the user enter his or her name, rather than designing a special form.
The basic syntax of the InputBox() function looks like this:
InputBox(prompt, [title], [defaultresponse])
The first two parameters are similar to the corresponding parameters in MessageBox.Show(). The first
parameter is the prompt to display to the user. This is where you specify the instructions or question that you
want posed to the user. The title parameter determines the text that appears in the title bar. Again, if you
omit title, the name of the project is shown. The following statement creates the input box shown in Figure
17.8:
strResult = InputBox("What is your favorite color?", "Enter Color")
Figure 17.8. The input box enables a user to enter a single piece of information.
The last parameter, defaultresponse, enables you to specify text that appears by default in the text box
portion of the input box. For example, the following statement produces the input box shown in Figure 17.9:
Code View:](https://image.slidesharecdn.com/visualbasic2008in24hrs-1285035275-phpapp01/85/Visual-Basic-2008-In-24-Hrs-569-320.jpg)


![3. You'll add code to the KeyPress event of the text box to "eat" keystrokes that aren't numbers. Double-click
the text box now to access its default event.
4. We're not interested in the TextChanged event, so choose KeyPress from the event list in the upper right
of the code window.
5. Go ahead and delete the TextChanged event, because you won't be using it. Your code editor should now
look like Figure 17.10.
Figure 17.10. The KeyPress event is a good place to handle keyboard entry.
[View full size image]
As you learned in Hour 4, "Understanding Events," the e parameter contains information specific to the
occurrence of this event. In keyboard-related events, the e parameter contains information about the key being
pressed; it's what you'll use to work with the user's keystrokes.
The key being pressed is available as the KeyChar property of the e parameter. You'll write code that handles
the keystroke when the pressed key is anything other than a number.
Add the following code to the KeyPress event:
If Not (IsNumeric(e.KeyChar)) Then
e.Handled = True
End If](https://image.slidesharecdn.com/visualbasic2008in24hrs-1285035275-phpapp01/85/Visual-Basic-2008-In-24-Hrs-573-320.jpg)
![You're probably curious about the Handled property of the e object. When you set this property to True, you're
telling Visual Basic that you handled the keystroke and that Visual Basic should ignore it (that is, not add it to
the text box). To see the effect this has, press F5 to run the project, and enter text into the text box. Try
entering both numbers and letters; you'll find that only the numbers appear in the text box (see Figure 17.11).
Figure 17.11. The keyboard events enable you to handle keystrokes as you see fit.
[View full size image]
When you paste data from the Clipboard, the KeyPress event isn't fired for each keystroke. Therefore, it's
possible that a nonnumeric character could appear in the text box. If you absolutely needed to keep nonnumeric
characters out of the text box, you'd need to use the TextChanged event as well.
By the Way
It's not often that I need to catch a keypress, but every now and then I do. The three keystroke events
listed in Table 17.4 have always made it easy to do what I need to do, but if there's one caveat I've
discovered, it's that you need to give careful consideration to which event you choose (such as KeyPress
or KeyUp, for example). Different events work best in different situations, and the best thing to do is to
start with what seems like the most logical event, test the code, and change the event if necessary.](https://image.slidesharecdn.com/visualbasic2008in24hrs-1285035275-phpapp01/85/Visual-Basic-2008-In-24-Hrs-574-320.jpg)

![the procedure drop-down list (the drop-down list in the upper right), and select FormClosed. Enter the
following statement in the FormClosed event:
m_objGraphics.Dispose()
Your procedure should now look like the one shown in Figure 17.12.
Figure 17.12. Code in many places often works together to achieve one goal.
[View full size image]
The last bit of code you need to add is the code that will draw on the form. You'll place code in the form's
MouseMove event to do this. First, the code will make sure that the left mouse button is held down. If it
isn't, no drawing will take place; the user must hold down the mouse button to draw. Next, a rectangle will
be created. The coordinates of the mouse pointer will be used to create a small rectangle that will be
passed to the DrawEllipse method of the graphics object. This has the effect of drawing a tiny circle
where the mouse pointer is positioned.
5. Again, select (MainForm Events) from the object drop-down list, and this time select MouseMove from the
list of event procedures. Add the following code to the MouseMove event:
Dim rectEllipse As Rectangle
If e.Button <> Windows.Forms.MouseButtons.Left Then Exit Sub
With rectEllipse
.X = e.X - 1](https://image.slidesharecdn.com/visualbasic2008in24hrs-1285035275-phpapp01/85/Visual-Basic-2008-In-24-Hrs-576-320.jpg)


![Property Value
Name btnDrawText
Location 162, 182
Text Draw Text
Time for the code to fly!
As mentioned earlier, all drawing will be performed using a memory bitmap, which then will be copied to
the form. You'll reference this bitmap in multiple places, so you'll make it a module-level variable.
4. Double-click the form to access its Load event. Then add the following statement above the Form_Load
procedure declaration; do not place this in the form's Load event!
Private m_objDrawingSurface As Bitmap
5. For the bitmap variable to be used, it must reference a Bitmap object. A good place to initialize things is in
the form's Load event, so put your cursor back in the Load event now, and enter the following code:
Randomize()
' Create a drawing surface with the same dimensions as the client
' area of the form.
m_objDrawingSurface = New Bitmap(Me.ClientRectangle.Width, _
Me.ClientRectangle.Height, _
Drawing.Imaging.PixelFormat.Format24bppRgb)
InitializeSurface()
Your procedure should now look like the one shown in Figure 18.5.
Figure 18.5. Make sure that your code appears exactly as it does here.
[View full size image]](https://image.slidesharecdn.com/visualbasic2008in24hrs-1285035275-phpapp01/85/Visual-Basic-2008-In-24-Hrs-606-320.jpg)

![Your procedure should now look like the one shown in Figure 18.6.
Figure 18.6. Verify that your code is entered correctly.
[View full size image]
If you run your project now, you'll find that nothing is drawn to the form. This is because the drawing is
being done to a bitmap in memory, and you haven't yet added the code to copy the bitmap to the form.
The place to do this is in the form's Paint event so that the contents of the bitmap are sent to the form
every time the form paints itself. This ensures that the items you draw always appear on the form.
7. Create an event handler for the form's Paint event. First, choose (MainForm Events) from the object drop-
down list in the upper-left corner of the code editor. Then select Paint from the event drop-down list in the
upper-right corner. Add the following code to the Paint event:
Dim objGraphics As Graphics
' You can't modify e.Graphics directly.
objGraphics = e.Graphics
' Draw the contents of the bitmap on the form.
objGraphics.DrawImage(m_objDrawingSurface, 0, 0, _
m_objDrawingSurface.Width, _
m_objDrawingSurface.Height)
The e parameter of the Paint event has a property that references the form's Graphics object. You can't
modify the Graphics object using the e parameter, however, because it's read-only. This is why you've
created a new Graphics object to work with and then set the object to reference the form's Graphics
object. The method DrawImage() draws the image in a bitmap to the surface of a Graphics object, so the
last statement simply sends the contents of the bitmap that exists in memory to the form.](https://image.slidesharecdn.com/visualbasic2008in24hrs-1285035275-phpapp01/85/Visual-Basic-2008-In-24-Hrs-608-320.jpg)


![shown in Figure 19.1. It's important to note that usually the OpenFileDialog doesn't actually open a file, but it
allows a user to select a file so that it can be opened by code within the application.
Figure 19.1. The OpenFileDialog control is used to browse for a file.
[View full size image]
Add a new OpenFileDialog control to your project now by double-clicking the OpenFileDialog item in the
toolbox. The OpenFileDialog doesn't have an interface per se, so it appears in the area below the form rather
than on it, as shown in Figure 19.2. For the user to browse for files, you have to manipulate the
OpenFileDialog using its properties and methods.
Figure 19.2. The Open File dialog box is hosted below the form, not on it.
[View full size image]](https://image.slidesharecdn.com/visualbasic2008in24hrs-1285035275-phpapp01/85/Visual-Basic-2008-In-24-Hrs-616-320.jpg)


![shown in Figure 19.1. It's important to note that usually the OpenFileDialog doesn't actually open a file, but it
allows a user to select a file so that it can be opened by code within the application.
Figure 19.1. The OpenFileDialog control is used to browse for a file.
[View full size image]
Add a new OpenFileDialog control to your project now by double-clicking the OpenFileDialog item in the
toolbox. The OpenFileDialog doesn't have an interface per se, so it appears in the area below the form rather
than on it, as shown in Figure 19.2. For the user to browse for files, you have to manipulate the
OpenFileDialog using its properties and methods.
Figure 19.2. The Open File dialog box is hosted below the form, not on it.
[View full size image]](https://image.slidesharecdn.com/visualbasic2008in24hrs-1285035275-phpapp01/85/Visual-Basic-2008-In-24-Hrs-623-320.jpg)


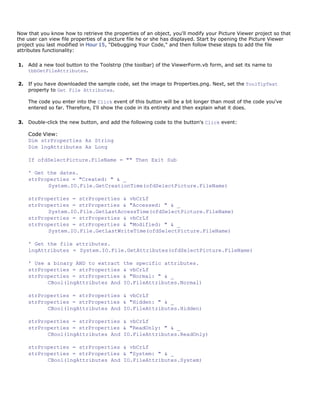


![Table 20.1. Top Nodes of the Windows Registry
Node Description
HKEY_CLASSES_ROOT Contains information that associates file types with
programs and configuration data for COM components.
HKEY_CURRENT_USER Contains configuration information for the user currently
logged on to Windows.
HKEY_LOCAL_MACHINE Contains configuration information specific to the
computer, regardless of the user logged in.
HKEY_USERS Contains all user profiles on the computer. When a user
logs in, HKEY_CURRENT_USER is set as an alias to a specific
user in HKEY_USERS.
HKEY_CURRENT_CONFIG Contains information about the hardware profile used by
the local computer during startup.
Under each hive listed in Table 20.1 are a number of keys. Figure 20.1 shows what the Registry looks like on
my computer. Notice how Clock is a subkey that belongs to the Microsoft key, which in turn is a subkey of the
Software key, which belongs to the HKEY_CURRENT_USER hive.
Figure 20.1. The Registry is a hierarchical structure of hives, keys, and values.
[View full size image]](https://image.slidesharecdn.com/visualbasic2008in24hrs-1285035275-phpapp01/85/Visual-Basic-2008-In-24-Hrs-643-320.jpg)

![Property What It's Used to Access
CurrentUser HKEY_CURRENT_USER
LocalMachine HKEY_LOCAL_MACHINE
Users HKEY_USERS
Creating Registry keys using My.Computer.Registry is a snap. First, you have to identify the hive under which
you want to create the key. When you know the hive, you just call the CreateSubKey() method of the
corresponding hive object property, passing it the name of the key to create. For example, consider this
statement:
My.Computer.Registry.CurrentUser.CreateSubKey("UserSettings")
This statement would create the key UserSettings under HKEY_CURRENT_USER. Realize that an application
rarely creates a key directly under a hive. You can use many subkeys for each hive, but perhaps the most
common is the Software key. Most applications create a corporate-named key under Software and then
create product keys below the corporate subkey. For example, suppose that your company name is
CleverSoftware, you're planning to ship the Picture Viewer program, and you want to store some application
settings in the Registry. (In fact, you will modify your Picture Viewer to do this later in this hour.) You want to
end up with a key structure that looks like this:
HKEY_CURRENT_USERSoftwareCleverSoftwarePictureViewer
Fortunately, the CreateSubKey() method allows you to specify multiple levels of keys in one method call. To
create this structure, you would use the following statement:
My.Computer.Registry.CurrentUser.CreateSubKey _
("SoftwareCleverSoftwarePictureViewer")
Visual Basic would parse this statement by first locating the hive HKEY_CURRENT_USER and then looking for a
Software key. It would find one, because all Windows machines have this key, but it would not overwrite this
key. It would then look for CleverSoftware. Assuming that it does not find this key, it would create it and the
subkey that you specified. Note that if Visual Basic finds an existing subkey that you defined in your statement
(all subkeys are separated by a backslash []), it does not overwrite it.
By the Way
Why HKEY_CURRENT_USER instead of HKEY_LOCAL_MACHINE? In general, it's best to save application
settings in HKEY_CURRENT_USER so that each user who uses your application can have his or her own
settings. If you store your settings in HKEY_LOCAL_MACHINE, the settings will be global to all users who
run the application from the computer in question. Also, some administrators restrict access to
HKEY_LOCAL_MACHINE, and your application will fail if it attempts to access restricted keys.
Deleting Registry Keys
You can use two methods to delete a Registry key: DeleteSubKey() and DeleteSubKeyTree().](https://image.slidesharecdn.com/visualbasic2008in24hrs-1285035275-phpapp01/85/Visual-Basic-2008-In-24-Hrs-645-320.jpg)
![DeleteSubKey() deletes a key and all its values as long as the key contains no subkeys. DeleteSubKeyTree()
deletes a key, its values, and all subkeys and values found below it. Use this one with care!
Here's a statement that could be used to delete the key created with the previous sample code:
My.Computer.Registry.CurrentUser.DeleteSubKey _
("SoftwareCleverSoftwarePictureViewer")
Did You Know?
DeleteSubKey() throws an exception if the key you specify does not exist. Whenever you write code to
work with the Registry, try to account for the unexpected.
Getting and Setting Key Values
Creating and deleting keys is useful, but only in the sense that keys provide the structure for the important
data: the value items. You've already learned that keys can have one or more value items and that value items
are defined as a specific data type. All that's left is to learn the code used to manipulate Registry values.
Unfortunately, getting and setting key values isn't as easy as defining keys. When you define keys, the
My.Computer.Registry object makes it easy to work with hives by giving you an object property for each hive.
There are properties for getting and setting values for each of these hive properties, but they don't work as
expected. To create a new value item, or to set the value of an existing value item, you use
My.Computer.Registry.SetValue(). The SetValue() method has the following syntax:
SetValue(keypath, itemname, value)
Unfortunately, you have to specify the hive name in keypath, as you will see. Notice that you do not specify the
data type; Visual Basic sets the data type according to the value that is passed to the method. For example, to
create a RegistrationName value item for the Registry key discussed in the preceding section, you would use a
statement like this:
My.Computer.Registry.SetValue _
("HKEY_CURRENT_USERSoftwareCleverSoftwarePictureViewer", _
"RegistrationName", "James Foxall")
This statement would produce a value item, as shown in Figure 20.2.
Figure 20.2. Values appear attached to keys.
[View full size image]](https://image.slidesharecdn.com/visualbasic2008in24hrs-1285035275-phpapp01/85/Visual-Basic-2008-In-24-Hrs-646-320.jpg)


![1. Double-click ViewerForm.vb in the Solution Explorer window to show the form in the designer.
2. Double-click the form to show its Load event.
3. Highlight all the code except the first two statements, as shown in Figure 20.3, and press Ctrl+X to cut the
code.
Figure 20.3. Cut the highlighted code.
[View full size image]
4. Enter the following statement:
LoadDefaults()
5. Position the cursor at the end of the End Sub statement that completes the definition of the
frmViewer_Load event, and press Enter to create a new line.
6. Type the following statement, and press Enter:
Public Sub LoadDefaults()
7. Press Ctrl+V to paste the code you deleted from the Form_Load event. Your code window should look like
Figure 20.4.](https://image.slidesharecdn.com/visualbasic2008in24hrs-1285035275-phpapp01/85/Visual-Basic-2008-In-24-Hrs-651-320.jpg)
![Figure 20.4. Procedures are all about grouping related sets of code.
[View full size image]
You now have a procedure that you can call when the user saves new settings to the Registry.
8. Double-click OptionsForm.vb in the Solution Explorer to display it in the designer.
9. Double-click OK to access its Click event.
10. Enter the following statement right before the Me.Close() statement (after all the code that saves the
user's values to the Registry):
ViewerForm.LoadDefaults()
11. Press F5 to run the project.
12. Click the Options button on the toolbar to display the Options form, and change the default background
color to Gray on the Appearance tab. When you click OK to save the settings and close the Options form,
the background of the picture box changes to white immediately.
The Registry is a powerful tool to have at your disposal—if used properly! In this section, you learned all the
necessary techniques to implement Registry functionality in your applications.](https://image.slidesharecdn.com/visualbasic2008in24hrs-1285035275-phpapp01/85/Visual-Basic-2008-In-24-Hrs-652-320.jpg)


![Table 20.1. Top Nodes of the Windows Registry
Node Description
HKEY_CLASSES_ROOT Contains information that associates file types with
programs and configuration data for COM components.
HKEY_CURRENT_USER Contains configuration information for the user currently
logged on to Windows.
HKEY_LOCAL_MACHINE Contains configuration information specific to the
computer, regardless of the user logged in.
HKEY_USERS Contains all user profiles on the computer. When a user
logs in, HKEY_CURRENT_USER is set as an alias to a specific
user in HKEY_USERS.
HKEY_CURRENT_CONFIG Contains information about the hardware profile used by
the local computer during startup.
Under each hive listed in Table 20.1 are a number of keys. Figure 20.1 shows what the Registry looks like on
my computer. Notice how Clock is a subkey that belongs to the Microsoft key, which in turn is a subkey of the
Software key, which belongs to the HKEY_CURRENT_USER hive.
Figure 20.1. The Registry is a hierarchical structure of hives, keys, and values.
[View full size image]](https://image.slidesharecdn.com/visualbasic2008in24hrs-1285035275-phpapp01/85/Visual-Basic-2008-In-24-Hrs-655-320.jpg)

![Property What It's Used to Access
CurrentUser HKEY_CURRENT_USER
LocalMachine HKEY_LOCAL_MACHINE
Users HKEY_USERS
Creating Registry keys using My.Computer.Registry is a snap. First, you have to identify the hive under which
you want to create the key. When you know the hive, you just call the CreateSubKey() method of the
corresponding hive object property, passing it the name of the key to create. For example, consider this
statement:
My.Computer.Registry.CurrentUser.CreateSubKey("UserSettings")
This statement would create the key UserSettings under HKEY_CURRENT_USER. Realize that an application
rarely creates a key directly under a hive. You can use many subkeys for each hive, but perhaps the most
common is the Software key. Most applications create a corporate-named key under Software and then
create product keys below the corporate subkey. For example, suppose that your company name is
CleverSoftware, you're planning to ship the Picture Viewer program, and you want to store some application
settings in the Registry. (In fact, you will modify your Picture Viewer to do this later in this hour.) You want to
end up with a key structure that looks like this:
HKEY_CURRENT_USERSoftwareCleverSoftwarePictureViewer
Fortunately, the CreateSubKey() method allows you to specify multiple levels of keys in one method call. To
create this structure, you would use the following statement:
My.Computer.Registry.CurrentUser.CreateSubKey _
("SoftwareCleverSoftwarePictureViewer")
Visual Basic would parse this statement by first locating the hive HKEY_CURRENT_USER and then looking for a
Software key. It would find one, because all Windows machines have this key, but it would not overwrite this
key. It would then look for CleverSoftware. Assuming that it does not find this key, it would create it and the
subkey that you specified. Note that if Visual Basic finds an existing subkey that you defined in your statement
(all subkeys are separated by a backslash []), it does not overwrite it.
By the Way
Why HKEY_CURRENT_USER instead of HKEY_LOCAL_MACHINE? In general, it's best to save application
settings in HKEY_CURRENT_USER so that each user who uses your application can have his or her own
settings. If you store your settings in HKEY_LOCAL_MACHINE, the settings will be global to all users who
run the application from the computer in question. Also, some administrators restrict access to
HKEY_LOCAL_MACHINE, and your application will fail if it attempts to access restricted keys.
Deleting Registry Keys
You can use two methods to delete a Registry key: DeleteSubKey() and DeleteSubKeyTree().](https://image.slidesharecdn.com/visualbasic2008in24hrs-1285035275-phpapp01/85/Visual-Basic-2008-In-24-Hrs-657-320.jpg)
![DeleteSubKey() deletes a key and all its values as long as the key contains no subkeys. DeleteSubKeyTree()
deletes a key, its values, and all subkeys and values found below it. Use this one with care!
Here's a statement that could be used to delete the key created with the previous sample code:
My.Computer.Registry.CurrentUser.DeleteSubKey _
("SoftwareCleverSoftwarePictureViewer")
Did You Know?
DeleteSubKey() throws an exception if the key you specify does not exist. Whenever you write code to
work with the Registry, try to account for the unexpected.
Getting and Setting Key Values
Creating and deleting keys is useful, but only in the sense that keys provide the structure for the important
data: the value items. You've already learned that keys can have one or more value items and that value items
are defined as a specific data type. All that's left is to learn the code used to manipulate Registry values.
Unfortunately, getting and setting key values isn't as easy as defining keys. When you define keys, the
My.Computer.Registry object makes it easy to work with hives by giving you an object property for each hive.
There are properties for getting and setting values for each of these hive properties, but they don't work as
expected. To create a new value item, or to set the value of an existing value item, you use
My.Computer.Registry.SetValue(). The SetValue() method has the following syntax:
SetValue(keypath, itemname, value)
Unfortunately, you have to specify the hive name in keypath, as you will see. Notice that you do not specify the
data type; Visual Basic sets the data type according to the value that is passed to the method. For example, to
create a RegistrationName value item for the Registry key discussed in the preceding section, you would use a
statement like this:
My.Computer.Registry.SetValue _
("HKEY_CURRENT_USERSoftwareCleverSoftwarePictureViewer", _
"RegistrationName", "James Foxall")
This statement would produce a value item, as shown in Figure 20.2.
Figure 20.2. Values appear attached to keys.
[View full size image]](https://image.slidesharecdn.com/visualbasic2008in24hrs-1285035275-phpapp01/85/Visual-Basic-2008-In-24-Hrs-658-320.jpg)


![1. Double-click ViewerForm.vb in the Solution Explorer window to show the form in the designer.
2. Double-click the form to show its Load event.
3. Highlight all the code except the first two statements, as shown in Figure 20.3, and press Ctrl+X to cut the
code.
Figure 20.3. Cut the highlighted code.
[View full size image]
4. Enter the following statement:
LoadDefaults()
5. Position the cursor at the end of the End Sub statement that completes the definition of the
frmViewer_Load event, and press Enter to create a new line.
6. Type the following statement, and press Enter:
Public Sub LoadDefaults()
7. Press Ctrl+V to paste the code you deleted from the Form_Load event. Your code window should look like
Figure 20.4.](https://image.slidesharecdn.com/visualbasic2008in24hrs-1285035275-phpapp01/85/Visual-Basic-2008-In-24-Hrs-663-320.jpg)
![Figure 20.4. Procedures are all about grouping related sets of code.
[View full size image]
You now have a procedure that you can call when the user saves new settings to the Registry.
8. Double-click OptionsForm.vb in the Solution Explorer to display it in the designer.
9. Double-click OK to access its Click event.
10. Enter the following statement right before the Me.Close() statement (after all the code that saves the
user's values to the Registry):
ViewerForm.LoadDefaults()
11. Press F5 to run the project.
12. Click the Options button on the toolbar to display the Options form, and change the default background
color to Gray on the Appearance tab. When you click OK to save the settings and close the Options form,
the background of the picture box changes to white immediately.
The Registry is a powerful tool to have at your disposal—if used properly! In this section, you learned all the
necessary techniques to implement Registry functionality in your applications.](https://image.slidesharecdn.com/visualbasic2008in24hrs-1285035275-phpapp01/85/Visual-Basic-2008-In-24-Hrs-664-320.jpg)


![Do statement, which again tests to see whether we're at the end of the file. One thing this code doesn't test for
is a zero-length string (""). If the text file has a blank line, the string variable will hold a zero-length string. You
might want to test for a situation like this when working with text files in your code.
That's it! Text files are not database files; you'll never get the power and flexibility from a text file that you
would from a real database. With that said, text files are easy to work with and provide amazing and quick
results within the context of their design.
Modifying Your Picture Viewer Project to Use a Text File
In this section, you'll modify your Picture Viewer project to use a text file. You'll have your Picture Viewer
update a log (a text file) every time the user views a picture. You'll then create a simple dialog box that the
user can open to view the log file. If you no longer have the Picture Viewer project open from earlier, open it
now.
Creating the Picture Viewer Log File
In this section, you'll modify the Picture Viewer project to create the log file. Follow these steps to implement
the log functionality:
1. Double-click ViewerForm.vb in the Solution Explorer window to display the form in the designer.
2. Recall that you created a single procedure that is called from both the menu and the toolbar to open a
picture. This makes it easier, because you have to add the log code in only one place. Double-click the
Open Picture button on the toolbar to access its Click event.
3. You now need to go to the OpenPicture() function. Here's an easy way to do this: Right-click the code
OpenPicture(), and choose Go To Definition from the shortcut menu, as shown in Figure 20.5. Whenever
you do this to a procedure call, Visual Basic displays the code of the procedure being referenced.
Figure 20.5. Go To Definition is a quick way to view a procedure being called in code.
[View full size image]](https://image.slidesharecdn.com/visualbasic2008in24hrs-1285035275-phpapp01/85/Visual-Basic-2008-In-24-Hrs-669-320.jpg)
![4. Take a look at the OpenPicture() procedure. Where would you place the code to create a log file? Would
you enter all the log file code right into this procedure? First, the log file should be updated only when a
picture is successfully loaded, which would be in the Try block, right after the statement that updates the
sbrMyStatusStrip control. Second, the log code should be isolated from this procedure, so you'll add just
a single function call. Add this statement between the code to update the status bar and the End If:
UpdateLog(ViewerForm.ofdSelectPicture.FileName)
Your code should look like Figure 20.6. Note that it currently has an error (the procedure UpdateLog
doesn't exist), but you're about to correct that.
Figure 20.6. It's always a good idea to isolate code into cohesive procedures.
[View full size image]](https://image.slidesharecdn.com/visualbasic2008in24hrs-1285035275-phpapp01/85/Visual-Basic-2008-In-24-Hrs-670-320.jpg)


![1. Click the View Picture Log button on the toolbar to display the Picture Viewer History Log. Notice that the
text box displays The log file could not be found. This means the Try block worked!
2. Click OK to close the form.
3. Click the Open Picture button on the toolbar, browse to a picture file, and display it.
4. Click the View Picture Log button again. Notice that the log now displays a log entry, as shown in Figure
20.7.
Figure 20.7. Text files make creating logs easy.
[View full size image]](https://image.slidesharecdn.com/visualbasic2008in24hrs-1285035275-phpapp01/85/Visual-Basic-2008-In-24-Hrs-674-320.jpg)


![1. Choose Project, Database Example Properties to display the Project Properties.
2. Click the References tab to display the active references for the project, as shown in Figure 21.1.
Figure 21.1. You use Project Properties to import namespaces.
[View full size image]
3. In the lower part of this page is a check box list of imported namespaces. Use the scrollbar for this list box
(not the main scrollbar for the page) to locate and check System.Data and System.Xml. System.Data is
probably already checked and will appear toward the top of the list. If not, locate it and check it.
System.Xml will most likely not be checked, and it will be toward the bottom of the list.
4. Click MainForm.vb [Design] to return to the Form Designer.
Connecting to a Database
To access data in a database, you must first establish a connection using an ADO.NET connection object.
Multiple connection objects are included in the .NET Framework, such as the OleDbConnection object (for
working with the same OLE DB data providers you would access through traditional ADO) and the
SqlConnection object (for optimized access to Microsoft SQL Server). Because these examples connect to the
Microsoft Jet Database, you'll be using the OleDbConnection object. To create an object variable of type
OleDbConnection and initialize the variable to a new connection, you could use a statement like this:
Dim cnADONetConnection As New OleDb.OleDbConnection()](https://image.slidesharecdn.com/visualbasic2008in24hrs-1285035275-phpapp01/85/Visual-Basic-2008-In-24-Hrs-681-320.jpg)


![1. Choose Project, Database Example Properties to display the Project Properties.
2. Click the References tab to display the active references for the project, as shown in Figure 21.1.
Figure 21.1. You use Project Properties to import namespaces.
[View full size image]
3. In the lower part of this page is a check box list of imported namespaces. Use the scrollbar for this list box
(not the main scrollbar for the page) to locate and check System.Data and System.Xml. System.Data is
probably already checked and will appear toward the top of the list. If not, locate it and check it.
System.Xml will most likely not be checked, and it will be toward the bottom of the list.
4. Click MainForm.vb [Design] to return to the Form Designer.
Connecting to a Database
To access data in a database, you must first establish a connection using an ADO.NET connection object.
Multiple connection objects are included in the .NET Framework, such as the OleDbConnection object (for
working with the same OLE DB data providers you would access through traditional ADO) and the
SqlConnection object (for optimized access to Microsoft SQL Server). Because these examples connect to the
Microsoft Jet Database, you'll be using the OleDbConnection object. To create an object variable of type
OleDbConnection and initialize the variable to a new connection, you could use a statement like this:
Dim cnADONetConnection As New OleDb.OleDbConnection()](https://image.slidesharecdn.com/visualbasic2008in24hrs-1285035275-phpapp01/85/Visual-Basic-2008-In-24-Hrs-686-320.jpg)


![Manipulating Data
The easiest way to manipulate data using ADO.NET is to create a DataTable object containing the result set of a table,
query, or stored procedure. Using a DataTable object, you can add, edit, delete, find, and navigate records. The
following sections explain how to use DataTable s.
Understanding DataTable s
DataTable s contain a snapshot of data in the data source. You generally start by filling a DataTable , manipulating
its results, and finally sending the changes back to the data source. The DataTable is populated using the Fill()
method of a DataAdapter object, and changes are sent back to the database using the Update() method of a
DataAdapter . Any changes made to the DataTable appear only in the local copy of the data until you call the Update
method. Having a local copy of the data reduces contention by preventing users from blocking others from reading the
data while it's being viewed. If you're familiar with ADO, you'll note that this is similar to the Optimistic Batch Client
Cursor in ADO.
Creating a DataAdapter
To populate a DataTable , you must create a DataAdapter . The DataAdapter you'll create will use the connection
you've already defined to connect to the data source and then execute a query you'll provide. The results of that query
are pushed into a DataTable .
As mentioned earlier, the .NET Framework has multiple connection objects. It has multiple ADO.NET DataAdapter
objects as well. You'll use the OleDbDataAdapter because you will be connecting to Microsoft SQL Server.
The constructor for a DataAdapter optionally takes the command to execute when filling a DataTable or DataSet , as
well as a connection specifying the data source (you could have multiple connections open in a single project). This
constructor has the following syntax:
Code View:
Dim cnADONetAdapter As New OleDb.OleDbDataAdapter([CommandText],[Connection]);
To add a DataAdapter to your project, follow these steps:
1.
Add the following statement immediately below the statement you entered to declare the m_cnADONewConnection
object (in the class header, not in the Load event) to create a module-level variable:
Private m_daDataAdapter As OleDb.OleDbDataAdapter
2.
Add the following statement at the bottom of the Load event of the form (immediately following the statement that
opens the connection):
Code View:
m_daDataAdapter = New OleDb.OleDbDataAdapter("Select * From Contacts",m_cnADONetConnection)
Because you'll use the DataAdapter to update the original data source, you must specify the insert, update, and
delete statements to use to submit changes from the DataTable to the data source. ADO.NET lets you customize how](https://image.slidesharecdn.com/visualbasic2008in24hrs-1285035275-phpapp01/85/Visual-Basic-2008-In-24-Hrs-689-320.jpg)
![updates are submitted by enabling you to manually specify these statements as database commands or stored
procedures. In this case, you'll have ADO.NET generate these statements automatically by creating a CommandBuilder
object.
3.
Enter this statement in the class header to create the CommandBuilder module-level variable:
Private m_cbCommandBuilder As OleDb.OleDbCommandBuilder
The CommandBuilder is an interesting object in that after you initialize it, you no longer work with it directly. It works
behind the scenes to handle the updating, inserting, and deleting of data. To make this work, you have to attach the
CommandBuilder to a DataAdapter . You do so by passing a DataAdapter to the CommandBuilder . The
CommandBuilder then registers for update events on the DataAdapter and provides the insert, update, and delete
commands as needed.
4.
Add the following statement to the end of the Form_Load event to initialize the CommandBuilder object:
m_cbCommandBuilder = New OleDb.OleDbCommandBuilder(m_daDataAdapter)
By the Way
When using a Jet database, the CommandBuilder object can create the dynamic SQL code only if the table in
question has a primary key defined.
Your code should now look like Figure 21.2 .
Figure 21.2. You will be jumping around a lot in this example. Be sure to follow the steps exactly!
[View full size image]](https://image.slidesharecdn.com/visualbasic2008in24hrs-1285035275-phpapp01/85/Visual-Basic-2008-In-24-Hrs-690-320.jpg)
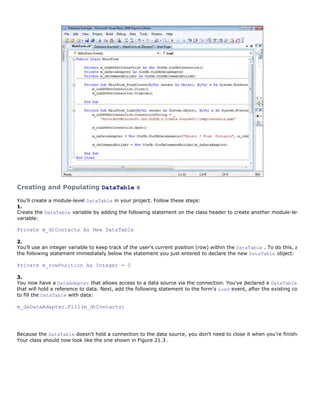
![Figure 21.3. This code accesses a database and creates a DataTable that can be used anywhere in the
class.
[View full size image]
Referencing Fields in a DataRow
DataTable s contain a collection of DataRow s. To access a row within the DataTable , you specify the ordinal (index)
of that DataRow . For example, you could access the first row of your DataTable like this:
Dim m_rwContact As DataRow = m_dtContacts.Rows(0)
Data elements in a DataRow are called columns . For example, the Contacts table I've created has two columns:
ContactName and State . To reference the value of a column, you can pass the column name to the DataRow like this:
' Change the value of the column.
m_rwContact("ContactName") = "Bob Brown"
or
' Get the value of the column.
strContactName = m_rwContact("ContactName")
By the Way](https://image.slidesharecdn.com/visualbasic2008in24hrs-1285035275-phpapp01/85/Visual-Basic-2008-In-24-Hrs-692-320.jpg)


![Explorer, choose Rename, and then change the name of the default form to MainForm.vb. Next, set the form's
Text property to Automate Excel.
Add a button to the form by double-clicking the Button item in the toolbox, and set the button's properties as
follows:
Property Value
Name btnAutomateExcel
Location 90, 128
Size 104, 23
Text Automate Excel
Creating a Reference to an Automation Library
To use the objects of a program that supports automation (a server), you have to reference the program's type
library. A program's type library (also called its object library) is a file containing a description of the
program's object model. After you've referenced the type library of an automation server (also called a
component), you can access the server's objects as though they were internal Visual Basic objects.
You create the reference to Excel's automation library much like you created a reference to the System.Data
namespace in Hour 21, "Working with a Database." To create a reference to the Excel library, follow these
steps:
1. Choose Project, Automate Excel Properties to display the Project Properties.
2. Click the References tab to display the active references for the project, as shown in Figure 22.1.
Figure 22.1. You use Project Properties to add references to COM servers.
[View full size image]](https://image.slidesharecdn.com/visualbasic2008in24hrs-1285035275-phpapp01/85/Visual-Basic-2008-In-24-Hrs-705-320.jpg)

![By the Way
If you don't see Microsoft Excel 12.0 Object Library in your list of available COM references,
you probably don't have Excel 2007 installed, and this example will not work. If you find
Microsoft Excel 11.0 Object Library in the list, that refers to Excel 2003. You can use the
code in this chapter with Excel 2003, but not with versions earlier than that.
5. In the lower part of the References page is a check box list of imported namespaces. Use the scrollbar for
this list box (not the main scrollbar for the page) to locate and check Microsoft.Office.Interop. This most
likely is one of the last items in the list.
6. Click MainForm.vb [Design] to return to the Form Designer.
By the Way
Visual Basic doesn't work directly with COM components (as did previous versions of Visual Basic).
Instead, it interacts through a wrapper, a set of code and objects that works as an intermediary
between Visual Basic and a COM component. When you add the reference to a COM component, .NET
automatically creates this wrapper for you.](https://image.slidesharecdn.com/visualbasic2008in24hrs-1285035275-phpapp01/85/Visual-Basic-2008-In-24-Hrs-707-320.jpg)


![Explorer, choose Rename, and then change the name of the default form to MainForm.vb. Next, set the form's
Text property to Automate Excel.
Add a button to the form by double-clicking the Button item in the toolbox, and set the button's properties as
follows:
Property Value
Name btnAutomateExcel
Location 90, 128
Size 104, 23
Text Automate Excel
Creating a Reference to an Automation Library
To use the objects of a program that supports automation (a server), you have to reference the program's type
library. A program's type library (also called its object library) is a file containing a description of the
program's object model. After you've referenced the type library of an automation server (also called a
component), you can access the server's objects as though they were internal Visual Basic objects.
You create the reference to Excel's automation library much like you created a reference to the System.Data
namespace in Hour 21, "Working with a Database." To create a reference to the Excel library, follow these
steps:
1. Choose Project, Automate Excel Properties to display the Project Properties.
2. Click the References tab to display the active references for the project, as shown in Figure 22.1.
Figure 22.1. You use Project Properties to add references to COM servers.
[View full size image]](https://image.slidesharecdn.com/visualbasic2008in24hrs-1285035275-phpapp01/85/Visual-Basic-2008-In-24-Hrs-710-320.jpg)

![By the Way
If you don't see Microsoft Excel 12.0 Object Library in your list of available COM references,
you probably don't have Excel 2007 installed, and this example will not work. If you find
Microsoft Excel 11.0 Object Library in the list, that refers to Excel 2003. You can use the
code in this chapter with Excel 2003, but not with versions earlier than that.
5. In the lower part of the References page is a check box list of imported namespaces. Use the scrollbar for
this list box (not the main scrollbar for the page) to locate and check Microsoft.Office.Interop. This most
likely is one of the last items in the list.
6. Click MainForm.vb [Design] to return to the Form Designer.
By the Way
Visual Basic doesn't work directly with COM components (as did previous versions of Visual Basic).
Instead, it interacts through a wrapper, a set of code and objects that works as an intermediary
between Visual Basic and a COM component. When you add the reference to a COM component, .NET
automatically creates this wrapper for you.](https://image.slidesharecdn.com/visualbasic2008in24hrs-1285035275-phpapp01/85/Visual-Basic-2008-In-24-Hrs-712-320.jpg)


![Did You Know?
If the program you want to automate has a macro builder (as most Microsoft products do), you can save
yourself a lot of time and headaches by creating macros of the tasks you want to automate. Macros are
actually code, and in the case of Microsoft products, they're VBA code, which is similar to Visual Basic 6
code. Although this code won't port directly to Visual Basic 2008, it's rather easy to migrate in most
cases, and the macro builder does all or most of the work of determining objects and members for you.
The following section of code uses the techniques just described to add data to four cells. Follow these steps
now to automate sending the data to Excel:
1. Enter this code into your procedure:
objExcel.Range("A1").Select()
objExcel.ActiveCell.FormulaR1C1 = "75"
objExcel.Range("B1").Select()
objExcel.ActiveCell.FormulaR1C1 = "125"
objExcel.Range("C1").Select()
objExcel.ActiveCell.FormulaR1C1 = "255"
objExcel.Range("D1").Select()
objExcel.ActiveCell.FormulaR1C1 = "295"
The next step is to have Excel total the four cells. You do this by using the Range object to select the cells,
activating a new cell in which to place the total, and then using FormulaR1C1 again to create the total by
passing it a formula rather than a literal value.
2. Enter this code into your procedure:
objExcel.Range("A1:D1").Select()
objExcel.Range("E1").Activate()
objExcel.ActiveCell.FormulaR1C1 = "=SUM(RC[-4]:RC[-1])"
3. Select all five cells and bold them. Enter the following statements to accomplish this:
objExcel.Range("A1:E1").Select()
objExcel.Selection.Font.Bold = True
The last thing you need to do is destroy the object reference by setting the object variable to Nothing.
Excel remains open even though you've destroyed the automation instance (not all servers do this).
4. Add this last statement to your procedure:
objExcel = Nothing
To help ensure that you entered everything correctly, Listing 22.1 shows the procedure in its entirety.
Listing 22.1. Code to Automate Excel](https://image.slidesharecdn.com/visualbasic2008in24hrs-1285035275-phpapp01/85/Visual-Basic-2008-In-24-Hrs-716-320.jpg)
![Private Sub btnAutomateExcel_Click(ByVal sender As System.Object, _
ByVal e As System.EventArgs) _
Handles btnAutomateExcel.Click
Dim objExcel As New Excel.Application
objExcel.Visible = True
objExcel.Workbooks.Add()
objExcel.Range("A1").Select()
objExcel.ActiveCell.FormulaR1C1 = "75"
objExcel.Range("B1").Select()
objExcel.ActiveCell.FormulaR1C1 = "125"
objExcel.Range("C1").Select()
objExcel.ActiveCell.FormulaR1C1 = "255"
objExcel.Range("D1").Select()
objExcel.ActiveCell.FormulaR1C1 = "295"
objExcel.Range("A1:D1").Select()
objExcel.Range("E1").Activate()
objExcel.ActiveCell.FormulaR1C1 = "=SUM(RC[-4]:RC[-1])"
objExcel.Range("A1:E1").Select()
objExcel.Selection.Font.Bold = True
objExcel = Nothing
End Sub
Testing Your Client Application
Now that your project is complete, press F5 to run it, and click the button to automate Excel. If you entered the
code correctly, Excel will start, data will be placed in four cells, the total of the four cells will be placed in a fifth
cell, and all cells will be made bold, as shown in Figure 22.3.
Figure 22.3. You can control almost every aspect of Excel using its object model.
[View full size image]](https://image.slidesharecdn.com/visualbasic2008in24hrs-1285035275-phpapp01/85/Visual-Basic-2008-In-24-Hrs-717-320.jpg)

![Automating Microsoft Word
Now you'll build another simple application that automates Microsoft Word 2007. Begin by creating a new
project titled Automate Word. Right-click Form1.vb in the Solution Explorer, choose Rename, and then change
the default form's name to MainForm.vb. Next, change the form's Text property to Automate Word.
Creating a Reference to an Automation Library
To automate Microsoft Word, you have to reference Word's object library, just like you did for Excel. Follow
these steps to reference the library:
1. Choose Project, Automate Word Properties to display the Project Properties.
2. Click the References tab to display the active references for the project.
3. Below the list of existing references (and above the list of imported namespaces), click the Add button to
display the list of available references.
4. On the COM tab, locate Microsoft Word 12.0 Object Library, and double-click it. This selects the library and
closes the Add Reference dialog box. The COM reference appears in the References list in the Project
Properties window.
By the Way
If you don't see Microsoft Word 12.0 Object Library in your list of available COM references,
you probably don't have Word 2007 installed. As with the Excel example, you can use the
11.0 Object Library of Word if you have Word 2003 installed.
5. In the lower part of the References page is a check box list of Imported Namespaces. Use the scrollbar for
this list box (not the main scrollbar for the page) to locate and check Microsoft.Office.Interop. This most
likely is one of the last items in the list.
6. Click MainForm.vb [Design] to return to the Forms Designer.
Creating an Instance of an Automation Server
As with the previous example, all the code for automating Word is placed in a button's Click event. Follow
these steps to create the button and instantiate a Word object:
1. Add a button to the form by double-clicking the Button item in the toolbox, and set the button's properties
as follows:
Property Value
Name btnAutomateWord](https://image.slidesharecdn.com/visualbasic2008in24hrs-1285035275-phpapp01/85/Visual-Basic-2008-In-24-Hrs-719-320.jpg)
![Property Value
Location 90, 128
Size 104, 23
Text Automate Word
2. Double-click the button to access its Click event.
3. To work with Word's object model, you need an instance of Word's Application object. Enter the following
statement to create a variable that contains an instance of Word's Application object:
Dim objWord As New Word.Application
4. As with Excel, Word starts hidden, so the user doesn't know it's running. Because you'll want to see the
fruits of your labor, add this statement to force Word to show itself:
objWord.Visible = True
5. Next, have Word create a new document by adding this statement to your procedure:
objWord.Documents.Add()
6. There are many ways to send text to Word. Perhaps the easiest is the TypeText() method of the
Selection object. The Selection object refers to currently selected text in the Word document. When a
new document is created, it has no text, and the selection object simply refers to the edit cursor at the
start of the document. Sending text to Word using Select.TypeText() inserts the text at the top of the
document. Enter this statement to send text to Word:
objWord.Selection.TypeText("This is text from a VB 2008 application.")
7. The last statement you need to enter sets the Word object to Nothing:
objWord = Nothing
8. Press F5 to run the program. You should see Word start, and then a new document is created using the
text you specified with TypeText(), as shown in Figure 22.4.
Figure 22.4. A simple but effective demonstration of automating Word.
[View full size image]](https://image.slidesharecdn.com/visualbasic2008in24hrs-1285035275-phpapp01/85/Visual-Basic-2008-In-24-Hrs-720-320.jpg)


![Using the Publish Wizard to Create a ClickOnce Application
Now you'll create a ClickOnce program that installs the Picture Viewer program you've been building throughout
this book. Begin by opening the Picture Viewer project from Hour 20, "Working with Text Files and the Registry,"
and then follow these steps:
1. Choose Build, Publish Picture Viewer. This displays the Publish Wizard, shown in Figure 23.1. This page is
used to specify where you want the ClickOnce file created.
Figure 23.1. The Publish Wizard is used to create ClickOnce programs.
[View full size image]
2. Specify the location for the ClickOnce install files. Be aware that you must enter a path that already exists;
Visual Basic does not create a path for you. If you specify an invalid path, you get a Build error at the end
of the wizard. Notice the examples listed on this page; you can specify a file path, a file share, an FTP
server, or a website. After you've supplied a valid path, click Next.
3. On the next page of the Publish Wizard, shown in Figure 23.2, specify the method users will employ to
install your program. Although you can specify a website or UNC share, choose From a CD-ROM or DVD-
ROM for this example and click Next.](https://image.slidesharecdn.com/visualbasic2008in24hrs-1285035275-phpapp01/85/Visual-Basic-2008-In-24-Hrs-731-320.jpg)
![Figure 23.2. Users can install your application in one of three ways.
[View full size image]
4. The next page of the Publish Wizard, shown in Figure 23.3, asks you whether the application will check for
updates. If your application supports this feature, select the appropriate option button, and specify a
location where the update files will be placed. The Picture Viewer is a simple application and does not need
this level of functionality, so leave the option The application will not check for updates selected, and click
Next.
Figure 23.3. ClickOnce applications can update themselves if you design them to do so.
[View full size image]](https://image.slidesharecdn.com/visualbasic2008in24hrs-1285035275-phpapp01/85/Visual-Basic-2008-In-24-Hrs-732-320.jpg)
![5. The final page of the Publish Wizard, shown in Figure 23.4, is simply a confirmation page. Verify that the
information displayed is how you want it. Don't be concerned about the formatting applied to your path.
Visual Basic will modify it to create a valid UNC path. Click Finish to create the install.
Figure 23.4. Make sure that everything is correct before you finish the wizard.
[View full size image]](https://image.slidesharecdn.com/visualbasic2008in24hrs-1285035275-phpapp01/85/Visual-Basic-2008-In-24-Hrs-733-320.jpg)
![When you click Finish, the Publish Wizard creates the ClickOnce application and opens the folder containing the
install files, as shown in Figure 23.5. To distribute this application, you would simply burn the contents of this
folder, including the subfolder and its contents, to a CD-ROM or DVD-ROM and send it to a user.
Figure 23.5. These files (and the subfolder) make up the ClickOnce program.
[View full size image]](https://image.slidesharecdn.com/visualbasic2008in24hrs-1285035275-phpapp01/85/Visual-Basic-2008-In-24-Hrs-734-320.jpg)

![Testing Your Picture Viewer ClickOnce Install Program
Run the Setup.exe file in your designated ClickOnce folder to start the install. You might notice a quick window
that shows an animated dialog indicating that the computer is being checked for a valid Internet connection.
The first dialog you can interact with is a security warning, as shown in Figure 23.6. The publisher of the
component is listed as unknown because the file isn't digitally signed.
Figure 23.6. All ClickOnce programs launch with a security warning.
[View full size image]
Did You Know?
Digitally signing a file is beyond the scope of this book, but if this is important to you, you can learn
more at http://www.verisign.com/ (search for "code signing").
Click Install to install the Picture Viewer.
That's it! There are no additional dialog boxes to deal with. In fact, the Picture Viewer launches automatically
when the install completes.
Now, open your Start menu, and you will see a new folder. It most likely will be the company name you used to
register Visual Basic 2008. In that folder is the Picture Viewer application shortcut the user can click to run the
program.](https://image.slidesharecdn.com/visualbasic2008in24hrs-1285035275-phpapp01/85/Visual-Basic-2008-In-24-Hrs-736-320.jpg)
![Uninstalling an Application You've Distributed
All Windows applications should provide a facility to easily be removed from the user's computer. Most
applications provide this functionality in the Add/Remove Programs dialog box, and yours is no exception. In
fact, all ClickOnce programs automatically create an entry in the Uninstall or change a program dialog box.
Follow these steps to uninstall the Picture Viewer program:
1. Choose Start, Control Panel.
2. Locate the Uninstall a program link, and click it.
3. Scroll down in the dialog box until you find the Picture Viewer program, as shown in Figure 23.7.
Figure 23.7. Your program can be uninstalled using the Uninstall or change a program
dialog box.
[View full size image]
4. To uninstall the program, click to select it, and then click Uninstall/Change.](https://image.slidesharecdn.com/visualbasic2008in24hrs-1285035275-phpapp01/85/Visual-Basic-2008-In-24-Hrs-737-320.jpg)
![Setting Advanced Options for Creating ClickOnce Programs
The Publish Wizard is the easiest way to create a ClickOnce program, but it doesn't give you access to all the
features of ClickOnce. To view all the available settings, right-click the project name in the Solution Explorer
and choose Properties. Next, click the Publish tab, and you see a page of publishing options, as shown in Figure
23.8. Using this page, you can specify prerequisites, such as whether to install the .NET Framework, which is
required to run any .NET application. (By default, the Publish Wizard creates your ClickOnce application such
that it installs the .NET Framework from the Web if the user performing the install doesn't have the Framework
installed.) The Publish Wizard walks you through many of these options, but the most control is gained by
setting your options here and clicking the Publish Now button, which appears at the bottom right of the Publish
page.
Figure 23.8. Advanced ClickOnce settings can be set on the Publish tab of the Project Properties.
[View full size image]](https://image.slidesharecdn.com/visualbasic2008in24hrs-1285035275-phpapp01/85/Visual-Basic-2008-In-24-Hrs-738-320.jpg)


![Index
[SYMBOL] [A] [B] [C] [D] [E] [F] [G] [H] [I] [J] [K] [L] [M] [N] [O] [P] [Q] [R] [S] [T] [U] [V] [W] [X] [Y] [Z]](https://image.slidesharecdn.com/visualbasic2008in24hrs-1285035275-phpapp01/85/Visual-Basic-2008-In-24-Hrs-753-320.jpg)
![Index
[SYMBOL] [A] [B] [C] [D] [E] [F] [G] [H] [I] [J] [K] [L] [M] [N] [O] [P] [Q] [R] [S] [T] [U] [V] [W] [X] [Y] [Z]
* (asterisk) 2nd
' (apostrophe)
(backslash)
, (comma)
& (concatentation) operator
/ (division) operator
= (equals sign)
^ (exponentiation) operator
- (negation) operator
() (parentheses)
. (period) 2nd
+ (plus sign) 2nd
# (pound sign)
- (subtraction) operator
_ (underscore) 2nd 3rd](https://image.slidesharecdn.com/visualbasic2008in24hrs-1285035275-phpapp01/85/Visual-Basic-2008-In-24-Hrs-754-320.jpg)
![Index
[SYMBOL] [A] [B] [C] [D] [E] [F] [G] [H] [I] [J] [K] [L] [M] [N] [O] [P] [Q] [R] [S] [T] [U] [V] [W] [X] [Y] [Z]
Abort enumerator (DialogResult)
AbortRetryIgnore enumerator (MessageBoxButtons)
accelerator keys
Accept buttons
AcceptsReturn property (Text Box control)
AcceptsTabs property (Text Box control)
accessing
events
Registry
actions
ActiveCaption system color
ActiveCaptionText system color
ActiveCell object
ActiveMdiChild property (forms)
Add Class command (Project menu)
Add Module command (Project menu)
Add New Item dialog box 2nd
Add() method 2nd
Items collection 2nd
Nodes collection
addition
addition (+) operator
AddTwoNumbers() function
ADO.NET
connecting to databases
DataAdapter object
creating
definition
Fill() method
Update() method 2nd
DataRow object
DataSet object
DataTable object
creating records
definition
deleting records
editing records
navigating records
overview
populating
disconnecting from databases
OleDBConnection object
Close() method
connecting to databases
ConnectionString property
definition
disconnecting from databases
Open() method
overview
SqlConnection object
Advanced Appearance dialog box
alignment
controls
text boxes
ampersand (&)](https://image.slidesharecdn.com/visualbasic2008in24hrs-1285035275-phpapp01/85/Visual-Basic-2008-In-24-Hrs-755-320.jpg)
![Anchor property
anchoring controls
And operator
apostrophe (')
Appearance Settings dialog box
Application object
applications [See programs.]
Archive flag (files)
arithmetic
addition
division
exponentiation
modulus arithmetic
multiplication
negation
operator precedence
overview
subtraction
arrays
declaring
definition 2nd
elements
multidimensional arrays
referencing
As keyword
assigning shortcut keys to menus
asterisk (*)
auto-hiding design windows
Automate Excel Properties command (Project menu)
Automate Word Properties command (Project menu)
automation
definition
Excel
creating workbooks
instantiating automation server
making Excel visible
modifying workbooks
referencing type libraries
testing
overview
Word
instantiating automation server
referencing type libraries
automation servers, creating instances of
Excel
Word
AutoScroll property (forms)
AutoScrollMargin property (forms)
AutoScrollMinSize property (forms)](https://image.slidesharecdn.com/visualbasic2008in24hrs-1285035275-phpapp01/85/Visual-Basic-2008-In-24-Hrs-756-320.jpg)
![Index
[SYMBOL] [A] [B] [C] [D] [E] [F] [G] [H] [I] [J] [K] [L] [M] [N] [O] [P] [Q] [R] [S] [T] [U] [V] [W] [X] [Y] [Z]
BackColor property (forms)
BackgroundImage property (forms)
backgrounds (forms)
color
images 2nd
backslash ()
BaseDirectory() method
bin prefix
binding object references to variables
early binding
late binding
Bitmap() method
bitmaps
block scope
Boolean data type
Boolean logic
And operator
definition
Not operator
Or operator
overview
Xor operator
borders
break points
actions
creating
definition
BringToFront() method
browsing files
browsing scope
bugs [See also debugging.]
build errors
building confidence
Button control [See buttons.]
Button property (MouseEventArgs)
buttons
Accept buttons
adding to forms
adding to message boxes
Cancel buttons
close buttons
determining which button is clicked
drawing buttons
button properties
Clear() method
CreateGraphics method
Dispose() method
DrawRectangle() method
overview
testing
variables
maximize buttons
minimize buttons
overview
properties](https://image.slidesharecdn.com/visualbasic2008in24hrs-1285035275-phpapp01/85/Visual-Basic-2008-In-24-Hrs-757-320.jpg)

![Index
[SYMBOL] [A] [B] [C] [D] [E] [F] [G] [H] [I] [J] [K] [L] [M] [N] [O] [P] [Q] [R] [S] [T] [U] [V] [W] [X] [Y] [Z]
calling
methods
procedures
Cancel buttons
Cancel enumerator (DialogResult)
caret (^)
casting data types
Catch statement 2nd
catching exceptions
CBool() function
CByte() function
CChar() function
CDate() function
CDbl() function
CDec() function
CenterParent value (StartPosition property)
CenterScreen value (StartPosition property)
changing
Excel workbooks
forms
background color
background images
borders
close buttons
icons
maximize buttons
minimize buttons
minimum/maximum size
names
title bar text
properties 2nd
records
Char data type
check boxes
CheckBox control
checked menu items, creating
CheckState property (CheckBox)
chr prefix
CInt() function
circles
classes
compared to standard modules
definition
encapsulation
form classes
interfaces
creating
definition
methods
creating
definition
object instantiation
early-binding object variables
in variable declarations
late-binding object variables](https://image.slidesharecdn.com/visualbasic2008in24hrs-1285035275-phpapp01/85/Visual-Basic-2008-In-24-Hrs-759-320.jpg)
![object lifetimes
overview
releasing object references
overview
properties
declaring
definition
read-only properties
readable properties
writable properties
write-only properties
StreamReader
StreamWriter
cleanup code
Clear() method
Graphics object
Items collection 2nd
Nodes collection
clearing
drawing surfaces
lists 2nd
Tree View nodes
Click event 2nd
menus
text boxes
ClickOnce applications
advanced settings
creating with Publish Wizard
overview
testing
uninstalling
Clicks property (MouseEventArgs)
client code
clients
CLng() function 2nd 3rd
close buttons
Close() method 2nd 3rd
CObj() function
code labels
code modules [See modules.]
code windows, hiding
collections
Collections Example form
definition
Items 2nd
iterative processing
Nodes
Add() method
Clear() method
Remove() method
structure of
TabPages
Collections Example form
color
dithering
forms
background color
background images
icons
properties
system colors
columns 2nd
Columns property (List View control)
combo boxes](https://image.slidesharecdn.com/visualbasic2008in24hrs-1285035275-phpapp01/85/Visual-Basic-2008-In-24-Hrs-760-320.jpg)
![ComboBox control
comma (,)
CommandBuilder object
commands
File menu, New Project
Project menu
Add Class
Add Module
Automate Excel Properties
Automate Word Properties
regedit
View menu, Properties Window
comments
adding to code
definition
common language runtime
common type system
comparison operators
compilers
components 2nd [See also programs.]
concatenation 2nd 3rd
concatenation (&) operator
confidence, building
connecting to databases
ConnectionString property (OleDBConnection object)
constants
advantages of
defining
definition
naming conventions
scope
block scope
global scope
module-level scope
name conflicts
overview
procedure-level scope
containers
definition 2nd
frames
Context Menu Strip control 2nd
context menus
assigning shortcut keys to
creating
context-sensitive help
continuing For...Next loops
control objects [See controls.]
Control system color
ControlDark system color
ControlLight system color
controls
adding to forms 2nd
by double-clicking from toolbox
by dragging from toolbox
by drawing
arranging on forms
alignment
anchoring
evenly spacing controls
making controls same size
snapping to grid
snapping to lines
Button [See buttons.]
CheckBox](https://image.slidesharecdn.com/visualbasic2008in24hrs-1285035275-phpapp01/85/Visual-Basic-2008-In-24-Hrs-761-320.jpg)


![Index
[SYMBOL] [A] [B] [C] [D] [E] [F] [G] [H] [I] [J] [K] [L] [M] [N] [O] [P] [Q] [R] [S] [T] [U] [V] [W] [X] [Y] [Z]
Dash value (DashStyle property)
DashDot value (DashStyle property)
DashDotDot value (DashStyle property)
DashStyle property (pens)
data types
Boolean
Byte
casting
Char
common type system
Date 2nd
Decimal
definition
determining
Double
guidelines for use
Integer
Long
naming conventions
Object
overview
REG_BINARY
REG_EXPAND_SSZ
REG_MULTI_SSZ
REG_SZ
Sbyte
Short
Single
strict typing
definition
enabling
String
type conversion functions
UInteger
ULong
UShort
DataAdapters
creating
Fill() method
Update() method 2nd
databases [See also ADO.NET.]
connecting to
DataAdapters
creating
Fill() method
Update() method 2nd
DataRows
DataSets
DataTables
creating records
definition
deleting records
editing records
navigating records
overview](https://image.slidesharecdn.com/visualbasic2008in24hrs-1285035275-phpapp01/85/Visual-Basic-2008-In-24-Hrs-764-320.jpg)

![If...Then...Else
nesting
simple example
overview
Select Case statement
example
multiple comparisons
overview
radio buttons, evaluating
Try...Catch...Finally blocks
declaring
arrays
constants
functions
procedures
properties
subroutines
variables
explicit variable declaration
simple example
static variables
Define Color dialog box
defining [See declaring.]
Delete() method
Directory object
File object
DeleteSubKey() method
DeleteSubKeyTree() method
deleting
directories
files
list items 2nd
menu items
project files
records
Registry keys
Tree View nodes
Delta property (MouseEventArgs)
deployment
ClickOnce applications
advanced settings
creating with Publish Wizard
overview
testing
uninstalling
overview
design windows
auto-hiding
docking
floating
showing/hiding
states
Desktop system color
device independence
dialog boxes
Add New Item 2nd
Advanced Appearance
Appearance Settings
custom dialog boxes
Define Color
New Project 2nd
Open File
Save Project
tabbed dialog boxes](https://image.slidesharecdn.com/visualbasic2008in24hrs-1285035275-phpapp01/85/Visual-Basic-2008-In-24-Hrs-766-320.jpg)
![DialogResult enumerations
digital signatures
Dim statement
dimensioning
arrays
variables
explicit variable declaration
simple example
directories
Directory flag (files)
Directory object
disconnecting from databases
display settings
displaying
design windows
forms
initial display position
maximized state
minimized state
normal state
message boxes
object properties
Open File dialog box
Picture Viewer log files
properties
Registry options
text
labels
text boxes
toolbars
Dispose() method 2nd 3rd
distributable components [See programs.]
dithering
division
division (/) operator
Do...Loop
example
exiting
overview
syntax
docking
design windows
toolbars
DoSomething() subroutine
dot (.) 2nd
Dot value (DashStyle property)
Double data type
double-clicking mouse
downward casting
DrawBorder() function
DrawEllipse() method
drawing
circles
clearing drawing surfaces
controls on forms
Drawing project
button properties
Clear() method
CreateGraphics method
Dispose() method
DrawRectangle() method
overview
testing
variables](https://image.slidesharecdn.com/visualbasic2008in24hrs-1285035275-phpapp01/85/Visual-Basic-2008-In-24-Hrs-767-320.jpg)

![Index
[SYMBOL] [A] [B] [C] [D] [E] [F] [G] [H] [I] [J] [K] [L] [M] [N] [O] [P] [Q] [R] [S] [T] [U] [V] [W] [X] [Y] [Z]
e parameter (MouseDown event)
early-binding object variables
editing
Excel workbooks
forms
background color
background images
borders
close buttons
icons
maximize buttons
minimize buttons
minimum/maximum size
names
title bar text
properties 2nd
records
elements of arrays
ellipses
Else statement
ElseIf statement
empty strings
Enabled property (Text Box control)
enabling strict typing
encapsulation 2nd
End Function statement
End If statement
End Sub statement
endless loops
enumerations
DialogResult
MessageBoxButtons
MessageBoxIcon
Environment Tutorial
design windows
auto-hiding
docking
floating
showing/hiding
states
overview
Properties window
color properties
overview
property descriptions
selecting objects
viewing and changing properties
Solution Explorer
adding/removing files
overview
project components
project properties
solutions
toolbars
docking](https://image.slidesharecdn.com/visualbasic2008in24hrs-1285035275-phpapp01/85/Visual-Basic-2008-In-24-Hrs-769-320.jpg)
![overview
resizing
showing/hiding
toolbox
equals sign (=)
errors [See also debugging; exceptions.]
build errors
runtime errors
structured error handling
unstructured error handling
evenly spacing controls
event driven languages
event-driven programming model [See also events.]
event handling
definition
event procedures
events
accessing
Click 2nd
menus
text boxes
compared to methods
definition
event-driven programming model
event handlers
event procedures
keyboard events
KeyDown
KeyPress
KeyUp
mouse events
MouseDown 2nd 3rd
MouseEnter
MouseHover
MouseLeave
MouseMove 2nd 3rd
MouseUp 2nd
MultilineChanged
names
overview
parameters
recursive events
sample project
event handlers
user interface
SelectedIndexChanged
TextChanged 2nd
Tick 2nd
triggering
by objects
by operating systems
overview
through user interaction
Excel automation
creating workbooks
instantiating automation server
making Excel visible
modifying workbooks
referencing type libraries
testing
Exception object
exceptions [See also errors.]
catching
Exception object](https://image.slidesharecdn.com/visualbasic2008in24hrs-1285035275-phpapp01/85/Visual-Basic-2008-In-24-Hrs-770-320.jpg)

![Index
[SYMBOL] [A] [B] [C] [D] [E] [F] [G] [H] [I] [J] [K] [L] [M] [N] [O] [P] [Q] [R] [S] [T] [U] [V] [W] [X] [Y] [Z]
File menu commands, New Project
File object [See also files.]
Copy() method
Delete() method
Exists() method
GetAttributes() method
GetCreationTime() method
GetLastAccessTime() method
GetLastWriteTime() method
Move() method
FileLen() function
files
attributes
determining
viewing in Picture Viewer program
browsing
copying
deleting
determining whether file exists
File object
Copy() method
Delete() method
Exists() method
GetAttributes() method
GetCreationTime() method
GetLastAccessTime() method
GetLastWriteTime() method
Move() method
log files
creating
displaying
testing
moving
OpenFileDialog control
creating file filters
overview
showing Open File dialog box
project files
renaming
returning date/time information about
SaveFileDialog control
text files
Picture Viewer log files
reading
writing to
Fill() method
filters
Finally statement
floating design windows
Font object
For statement
For...Next loops
continuing before Next is reached
example
exiting](https://image.slidesharecdn.com/visualbasic2008in24hrs-1285035275-phpapp01/85/Visual-Basic-2008-In-24-Hrs-772-320.jpg)
![For statement
Next statement
Step keyword
syntax
form modules
Format() function
Format16bppGrayScale value (pixelformat argument)
Format16bppRgb555 value (pixelformat argument)
Format24bppRgb value (pixelformat argument)
formatting dates/times
FormBorderStyle property (forms)
forms
background color
background images
borders
close buttons
Collections Example
context menus
assigning shortcut keys to
creating
controlling size of
controls
adding 2nd
alignment
anchoring
Button [See buttons.]
CheckBox
ComboBox
Context Menu Strip
definition 2nd
evenly spacing
Group Box
Image List
invisible controls
Label
layering
List View
ListBox
making controls same size
Menu Strip
OpenFileDialog controls
Panel
PictureBox controls 2nd
properties
Radio Button
selecting groups of
snapping to grid
snapping to lines
Status Bar
Tab
Text Box
Timer
ToolStrip
Tree View
visible controls
definition
displaying
initial display position
maximized state
minimized state
normal state
form classes
Graphic objects
hiding](https://image.slidesharecdn.com/visualbasic2008in24hrs-1285035275-phpapp01/85/Visual-Basic-2008-In-24-Hrs-773-320.jpg)
![icons 2nd
lists [See lists.]
maximize buttons
MDI (multiple-document interface) forms
minimize buttons
modal versus nonmodal
names 2nd
overview
properties
ActiveMdiChild
AutoScroll
AutoScrollMargin
AutoScrollMinSize
BackColor
BackgroundImage
FormBorderStyle
Height
Icon 2nd
IsMdiContainer
MaximumSize
MdiParent
MinimumSize
Name 2nd
Opacity
ShowInTaskbar
StartPosition
Text 2nd
TopMost
Visible
Width
WindowState
resizing
scrollable forms
showing
Startup forms
status bars
tab order
templates
title bars
toolbars
buttons
creating
drop-down menus for
programming
top-level menus
assigning shortcut keys to
checked menu items
creating
creating menu items
deleting menu items
moving menu items
programming
topmost nonmodal windows
transparent forms
unloading
forward references
frames
Friend keyword 2nd
FromImage() method
FullRowSelect property (List View control)
Function keyword 2nd
functions [See also specific functions.]
calling
declaring](https://image.slidesharecdn.com/visualbasic2008in24hrs-1285035275-phpapp01/85/Visual-Basic-2008-In-24-Hrs-774-320.jpg)

![Index
[SYMBOL] [A] [B] [C] [D] [E] [F] [G] [H] [I] [J] [K] [L] [M] [N] [O] [P] [Q] [R] [S] [T] [U] [V] [W] [X] [Y] [Z]
g_ prefix
garbage collection
GDI (Graphical Device Interface)
Get statement
GetAttributes() method
GetCreationTime() method
GetLastAccessTime() method
GetLastWriteTime() method
GetSetting() function
GetValue() method
global scope
GoTo statement
GotoExample() subroutine
Graphical Device Interface (GDI)
graphics
adding to form backgrounds
circles
ellipses
GDI (Graphical Device Interface)
Graphics object
creating for bitmaps
creating for forms/controls
overview
icons
adding to forms
adding to message boxes
assigning to forms
lines
overview
pens
creating
DashStyle property
definition
Persisting Graphics project example
persisting on forms
rectangles
storing in image lists
system colors
text, drawing
Graphics object [See also graphics.]
creating for bitmaps
creating for forms/controls
overview
GrayText system color
grid, snapping controls to
GridSize setting (grid)
Group Box control
group boxes
groups of controls
properties
selecting
spacing](https://image.slidesharecdn.com/visualbasic2008in24hrs-1285035275-phpapp01/85/Visual-Basic-2008-In-24-Hrs-776-320.jpg)
![Index
[SYMBOL] [A] [B] [C] [D] [E] [F] [G] [H] [I] [J] [K] [L] [M] [N] [O] [P] [Q] [R] [S] [T] [U] [V] [W] [X] [Y] [Z]
Handles keyword
handling exceptions
Height property (forms)
Help
Hidden flag (files)
Hide() method
hiding
code windows
design windows
forms
toolbars
Highlight system color
HighlightText system color
HKEY_CLASSES_ROOT node (Registry)
HKEY_CURRENT_CONFIG node (Registry)
HKEY_CURRENT_USER node (Registry) 2nd
HKEY_LOCAL_MACHINE node (Registry)
HKEY_USERS node (Registry)
hyphen (-)](https://image.slidesharecdn.com/visualbasic2008in24hrs-1285035275-phpapp01/85/Visual-Basic-2008-In-24-Hrs-777-320.jpg)
![Index
[SYMBOL] [A] [B] [C] [D] [E] [F] [G] [H] [I] [J] [K] [L] [M] [N] [O] [P] [Q] [R] [S] [T] [U] [V] [W] [X] [Y] [Z]
Icon property (forms) 2nd
icons
adding to forms
adding to message boxes
assigning to forms
IDE (integrated development environment)
If...Then statement
ElseIf statement
If...Then...Else
nesting
simple example
If...Then...Else statement
Ignore enumerator (DialogResult)
IL (Intermediate Language)
Image List control
ImageIndex property (List View control)
images
adding to form backgrounds
circles
ellipses
GDI (Graphical Device Interface)
Graphics object
creating for bitmaps
creating for forms/controls
overview
icons
adding to forms
adding to message boxes
assigning to forms
lines
overview
pens
creating
DashStyle property
definition
Persisting Graphics project example
persisting on forms
rectangles
storing in image lists
system colors
text, drawing
ImageSize property (Image control)
Immediate window
importing namespaces
InactiveBorder system color
InactiveCaption system color
InactiveCaptionText system color
Inflate() method
Information enumerator (MessageBoxIcon)
inheritance
initializing variables
InputBox() function
Insert() method
instantiation
automation servers](https://image.slidesharecdn.com/visualbasic2008in24hrs-1285035275-phpapp01/85/Visual-Basic-2008-In-24-Hrs-778-320.jpg)

![Index
[SYMBOL] [A] [B] [C] [D] [E] [F] [G] [H] [I] [J] [K] [L] [M] [N] [O] [P] [Q] [R] [S] [T] [U] [V] [W] [X] [Y] [Z]
JITter (just-in-time compiler)](https://image.slidesharecdn.com/visualbasic2008in24hrs-1285035275-phpapp01/85/Visual-Basic-2008-In-24-Hrs-780-320.jpg)
![Index
[SYMBOL] [A] [B] [C] [D] [E] [F] [G] [H] [I] [J] [K] [L] [M] [N] [O] [P] [Q] [R] [S] [T] [U] [V] [W] [X] [Y] [Z]
keyboard events, handling
KeyDown event
KeyPress event
keys
Registry keys
creating
deleting
getting/setting key values
shortcut keys, assigning to menus
KeyUp event
keywords [See also statements.]
As
ByRef
ByVal
definition
Friend 2nd
Function 2nd
Handles
Let
Me
Mod
New 2nd
Private 2nd 3rd 4th
prohibited in names
Public 2nd 3rd
ReadOnly
Return
Step
Sub 2nd 3rd
To
WriteOnly](https://image.slidesharecdn.com/visualbasic2008in24hrs-1285035275-phpapp01/85/Visual-Basic-2008-In-24-Hrs-781-320.jpg)
![Index
[SYMBOL] [A] [B] [C] [D] [E] [F] [G] [H] [I] [J] [K] [L] [M] [N] [O] [P] [Q] [R] [S] [T] [U] [V] [W] [X] [Y] [Z]
Label control
labels
code labels
creating
languages
common language runtime
IL (Intermediate Language)
machine language
LargeImageList property (List View control)
late-binding object variables
layering controls
LayoutMode setting (grid)
Left() function
Len() function
Let keyword
libraries
definition
type libraries
lifetimes of objects
line continuation character (_)
lines
snapping controls to
list boxes
adding items to lists
clearing lists
Items collection
overview
removing items from lists
retrieving item information
sorting lists
List View control
adding list items
columns
overview
removing all list items
removing list items
ListBox control
adding items to lists
clearing lists
Items collection
overview
removing items from lists
retrieving item information
sorting lists
lists
adding items to 2nd
clearing 2nd
columns
drop-down lists
image lists
list boxes
adding items to lists
clearing lists
Items collection
overview](https://image.slidesharecdn.com/visualbasic2008in24hrs-1285035275-phpapp01/85/Visual-Basic-2008-In-24-Hrs-782-320.jpg)

![Index
[SYMBOL] [A] [B] [C] [D] [E] [F] [G] [H] [I] [J] [K] [L] [M] [N] [O] [P] [Q] [R] [S] [T] [U] [V] [W] [X] [Y] [Z]
m_ prefix
machine language
macros
magic numbers
managed code
Manual value (StartPosition property)
math
addition
division
exponentiation
modulus arithmetic
multiplication
negation
operator precedence
overview
subtraction
maximize buttons
maximized state (forms)
maximum length of text boxes
MaximumSize property (forms)
MaxLength property (Text Box control)
MDI (multiple-document interface) forms
MdiParent property (forms)
Me keyword
Me.Close() statement
menu commands
File menu, New Project
Project menu
Add Class
Add Module
Automate Excel Properties
Automate Word Properties
View menu, Properties Window
Menu Strip control
Menu system color
menus
context menus
assigning shortcut keys to
creating
overview
top-level menus
assigning shortcut keys to
checked menu items
creating
creating menu items
deleting menu items
moving menu items
programming
MenuText system color
message boxes
buttons/icons
determining which button is clicked
displaying 2nd
message-writing guidelines
MessageBox.Show() method 2nd](https://image.slidesharecdn.com/visualbasic2008in24hrs-1285035275-phpapp01/85/Visual-Basic-2008-In-24-Hrs-784-320.jpg)
![MessageBoxButtons
MessageBoxIcon
metadata
methods [See also specific methods.]
definition
dynamic nature of
invoking
Microsoft.VisualBasic namespace
Mid() function
minimize buttons
minimized state (forms)
MinimumSize property (forms)
Mod keyword
modal forms
modifying
Excel workbooks
forms
background color
background images
borders
close buttons
icons
maximize buttons
minimize buttons
minimum/maximum size
names
title bar text
properties 2nd
records
module-level scope
modules
compared to classes
definition
form modules
standard (class) modules
modulus arithmetic
mouse
double-clicking
event handling
MouseDown event 2nd 3rd
MouseEnter event
MouseHover event
MouseLeave event
MouseMove event 2nd 3rd
MouseUp event 2nd
MouseDown event 2nd 3rd
MouseEnter event
MouseHover event
MouseLeave event
MouseMove event 2nd 3rd
MouseUp event 2nd
Move() method
Directory object
File object
moving
directories
files
menu items
multidimensional arrays
Multiline property (Text Box control)
multiline text boxes
MultilineChanged event
multiple-document interface (MDI) forms
multiplication (*) operator](https://image.slidesharecdn.com/visualbasic2008in24hrs-1285035275-phpapp01/85/Visual-Basic-2008-In-24-Hrs-785-320.jpg)

![Index
[SYMBOL] [A] [B] [C] [D] [E] [F] [G] [H] [I] [J] [K] [L] [M] [N] [O] [P] [Q] [R] [S] [T] [U] [V] [W] [X] [Y] [Z]
Name property 2nd
namespace (global) scope
namespaces
importing
overview
System.Data
table of
naming conventions
constants
controls
data types
events
forms
name conflicts (scope)
objects
reserved words
variables
navigating records
negation (-) operator
nesting If...Then statements
.NET Framework
common language runtime
common type system
definition 2nd
garbage collection
IL (Intermediate Language)
namespaces
importing
overview
System.Data
table of
overview
recommended reading
New keyword 2nd
New Project command (File menu)
New Project dialog box 2nd
NewRow() method
Next statement
No enumerator (DialogResult)
nodes (Tree View)
adding
clearing
definition
removing
Nodes collection
Add() method
Clear() method
Remove() method
None enumerator
DialogResult
MessageBoxIcon
nonmodal forms
nonvisual controls
Normal flag (files)
normal state (forms)](https://image.slidesharecdn.com/visualbasic2008in24hrs-1285035275-phpapp01/85/Visual-Basic-2008-In-24-Hrs-787-320.jpg)

![Index
[SYMBOL] [A] [B] [C] [D] [E] [F] [G] [H] [I] [J] [K] [L] [M] [N] [O] [P] [Q] [R] [S] [T] [U] [V] [W] [X] [Y] [Z]
obj prefix
Object Browser
Object data type
object libraries. creating references to
Excel
Word
object models
object-oriented programming (OOP)
object-oriented programmming
objects
ActiveCell
ADO.NET objects [See ADO.NET.]
Application
collections
Collections Example form
definition
iterative processing
structure of
CommandBuilder
containers
control objects [See controls.]
definition
Directory
Exception
File [See also files.]
Copy() method
Delete() method
Exists() method
GetAttributes() method
GetCreationTime() method
GetLastAccessTime() method
GetLastWriteTime() method
Move() method
Font
form objects [See forms.]
Graphics [See also graphics.]
creating for bitmaps
creating for forms/controls
overview
instantiation
early-binding object variables
in variable declarations
late-binding object variables
object lifetimes
overview
releasing object references
methods
definition
dynamic nature of
invoking
naming
Object Browser
object-oriented programmming
overview
properties](https://image.slidesharecdn.com/visualbasic2008in24hrs-1285035275-phpapp01/85/Visual-Basic-2008-In-24-Hrs-789-320.jpg)

![Index
[SYMBOL] [A] [B] [C] [D] [E] [F] [G] [H] [I] [J] [K] [L] [M] [N] [O] [P] [Q] [R] [S] [T] [U] [V] [W] [X] [Y] [Z]
Panel control
parameters
defined
definition 2nd
overview
passing
parentheses ()
passing
literal values to variables
parameters
PasswordChar
PasswordChar property (Text Box control)
passwords
Pen() method
pens
creating
DashStyle property
definition
period (.) 2nd
persistence of graphics
Persisting Graphics project
picShowPicture_MouseMove procedure
Picture Viewer program
browsing files
ClickOnce file
creating
testing
uninstalling
controls
Button controls
definition
invisible controls
OpenFileDialog controls
PictureBox controls 2nd
visible controls
drawing button
Clear() method
CreateGraphics method
Dispose() method
DrawRectangle() method
overview
properties
variables
file properties
log files
creating
displaying
testing
MouseMove event
event handlers
user interface
project, creating
quitting
Registry
displaying options from](https://image.slidesharecdn.com/visualbasic2008in24hrs-1285035275-phpapp01/85/Visual-Basic-2008-In-24-Hrs-791-320.jpg)
![loading options from
saving options to
running
saving
testing 2nd
variables
creating
initializing
ViewerForm
icon
naming
resizing
Text property
PictureBox controls 2nd
pictures [See graphics.]
pixelformat argument (Bitmap() method)
pixels
plus sign (+) 2nd
polymorphism
populating DataTables
pound sign (#)
Practical Standards for Microsoft Visual Basic .NET, Second Edition 2nd
precedence of operators
prefixes
for controls
for data types
for variables
Private keyword 2nd 3rd 4th
procedural languages
procedure-level scope
procedures 2nd [See also specific procedures.]
calling
declaring
definition 2nd 3rd
event procedures
exiting
parameters
picShowPicture_MouseMove
recursive loops
subroutines
processor independent code
programming
menus
toolbars
programs
automation
definition
Excel
overview
Word
ClickOnce applications
advanced settings
creating with Publish Wizard
overview
testing
uninstalling
creating
definition 2nd
executables
interfaces
Picture Viewer [See Picture Viewer program.]
quitting
self-contained applications
Project menu commands](https://image.slidesharecdn.com/visualbasic2008in24hrs-1285035275-phpapp01/85/Visual-Basic-2008-In-24-Hrs-792-320.jpg)
![Add Class
Add Module
Automate Excel Properties
Automate Word Properties
projects [See also specific projects.]
components
creating 2nd
definition
managing with Solution Explorer
adding/removing files
overview
project components
project properties
solutions
opening
properties
running
saving
properties [See also specific properties.]
button properties
color properties
control properties
declaring
definition 2nd
displaying
getting
modifying
object properties
project properties
property descriptions
read-only properties 2nd
readable properties
referencing
setting
viewing and changing
writable properties
write-only properties
Properties window
color properties
overview
property descriptions
selecting objects
viewing and changing properties
Properties Window command (View menu)
Public Function statement
Public keyword 2nd 3rd
Public Sub statement
Publish Wizard](https://image.slidesharecdn.com/visualbasic2008in24hrs-1285035275-phpapp01/85/Visual-Basic-2008-In-24-Hrs-793-320.jpg)
![Index
[SYMBOL] [A] [B] [C] [D] [E] [F] [G] [H] [I] [J] [K] [L] [M] [N] [O] [P] [Q] [R] [S] [T] [U] [V] [W] [X] [Y] [Z]
Question enumerator (MessageBoxIcon)](https://image.slidesharecdn.com/visualbasic2008in24hrs-1285035275-phpapp01/85/Visual-Basic-2008-In-24-Hrs-794-320.jpg)
![Index
[SYMBOL] [A] [B] [C] [D] [E] [F] [G] [H] [I] [J] [K] [L] [M] [N] [O] [P] [Q] [R] [S] [T] [U] [V] [W] [X] [Y] [Z]
Radio Button control
radio buttons 2nd
Range object
read-only properties 2nd
readable properties
reading text files
ReadLine() method
ReadOnly keyword
ReadToEnd() method
ReadyOnly flag (files)
records
creating
deleting
editing
navigating
rectangles
recursive events
recursive loops
reference, passing by
reference-tracing garbage collection
referencing
arrays
DataRows
object properties
type libraries
Excel
Word
REG_BINARY data type
REG_EXPAND_SSZ data type
REG_MULTI_SSZ data type
REG_SZ data type
regedit command
Registry
accessing
displaying options from
keys
creating
deleting
getting/setting key values
loading options from
overview
regedit command
saving options to
structure
releasing object references
Remove() method
Items collection 2nd
Nodes collection
RemoveAt() method
removing
directories
files
list items 2nd
menu items
project files](https://image.slidesharecdn.com/visualbasic2008in24hrs-1285035275-phpapp01/85/Visual-Basic-2008-In-24-Hrs-795-320.jpg)
![records
Registry keys
Tree View nodes
renaming files
Replace() function
replacing text within strings
reserved words
As
ByRef
ByVal
definition
Friend 2nd
Function 2nd
Handles
Let
Me
Mod
New 2nd
Private 2nd 3rd 4th
prohibited in names
Public 2nd 3rd
ReadOnly
Return
Step
Sub 2nd 3rd
To
WriteOnly
resizing
forms
toolbars
resolution (screen)
Retry enumerator (DialogResult)
RetryCancel enumerator (MessageBoxButtons)
Return keyword
Right() function
routines [See procedures.]
rows
RTrim() function
running
database example
projects
runtime errors](https://image.slidesharecdn.com/visualbasic2008in24hrs-1285035275-phpapp01/85/Visual-Basic-2008-In-24-Hrs-796-320.jpg)
![Index
[SYMBOL] [A] [B] [C] [D] [E] [F] [G] [H] [I] [J] [K] [L] [M] [N] [O] [P] [Q] [R] [S] [T] [U] [V] [W] [X] [Y] [Z]
s_ prefix
Sams Teach Yourself Object-Oriented Programming with Visual Basic .NET in 21 Days, Second Edition
Save Project dialog box
SaveFileDialog control
SaveSetting() function
saving
projects
Registry options
Sbyte data type
scope
block scope
browsing scope
definition
global scope
module-level scope
name conflicts
naming conventions
overview
procedure-level scope
screen resolution
scrollable forms
scrollbars
Scrollbars property (Text Box control)
SDI (single-document interface) forms [See forms.]
security, digital signatures
Select Case statement
example
multiple comparisons
overview
radio buttons, evaluating
Select() method
SelectedIndexChanged event
selecting
controls
objects
Selection object
self-contained applications
SendToBack() method
servers
automation servers 2nd
definition
Set statement
SetValue() method
shapes
circles
ellipses
lines
rectangles
sho prefix
Short data type
shortcut keys, assigning to menus
shortcut menus
assigning shortcut keys to
creating
Show() method 2nd 3rd 4th](https://image.slidesharecdn.com/visualbasic2008in24hrs-1285035275-phpapp01/85/Visual-Basic-2008-In-24-Hrs-797-320.jpg)
![ShowCurrentRecord() method
ShowDialog() method 2nd
ShowGrid setting (grid)
showing
design windows
forms
initial display position
maximized state
minimized state
normal state
message boxes
object properties
Open File dialog box
Picture Viewer log files
properties
Registry options
text
labels
text boxes
toolbars
ShowInTaskbar property (forms)
ShowInVisible Taskbar property (forms)
signatures, digital
Single data type
single-document interface (SDI) forms [See forms.]
sizing
controls
forms 2nd
grips
toolbars
slash (/)
Sleep() function
Snap to Lines layout feature
SnapToGrid setting (grid)
sng prefix
Solidvalue (DashStyle property)
Solution Explorer
adding/removing project files
overview
project components
project properties
solutions 2nd
Sorted property (ListBox control)
sorting lists
spacing controls
spaghetti code
SqlConnection object
StackOverflow exception
stacks
standard (class) modules
compared to classes
creating
definition
Start Page
creating new projects
opening existing projects
overview
starting Visual Basic 2008
StartPosition property (forms)
Startup forms
statements [See also keywords; loops.]
Catch
definition
Dim](https://image.slidesharecdn.com/visualbasic2008in24hrs-1285035275-phpapp01/85/Visual-Basic-2008-In-24-Hrs-798-320.jpg)
![Else
ElseIf
End Function
End If
End Sub
Exit Do
Exit For
Exit Function
Exit Sub
Exit Try
Finally
For
Get
GoTo
If...Then
ElseIf statement
If...Then...Else
nesting
simple example
Next
On Error
Public Function
Public Sub
Select Case
example
multiple comparisons
overview
radio buttons, evaluating
Set
Try
Try...Catch...Finally 2nd
states
static text, displaying with Label control
static variables
Status Bar control
status bars
Step keyword
stepping into code
stepping out of code
stepping over code
Stop enumerator (MessageBoxIcon)
str prefix
StreamReader class
StreamWriter class
strict typing
definition
enabling
String data type
strings
concatenation 2nd 3rd
determining number of characters in
determining whether one string contains another
replacing text within
retrieving text from left side of
retrieving text from right side of
retrieving text within
trimming
zero-length strings 2nd
structure (block) scope
structured error handling
structures, DateTime 2nd
Sub keyword 2nd 3rd
SubItems property (List View control)
subroutines [See also specific subroutines.]](https://image.slidesharecdn.com/visualbasic2008in24hrs-1285035275-phpapp01/85/Visual-Basic-2008-In-24-Hrs-799-320.jpg)

![Index
[SYMBOL] [A] [B] [C] [D] [E] [F] [G] [H] [I] [J] [K] [L] [M] [N] [O] [P] [Q] [R] [S] [T] [U] [V] [W] [X] [Y] [Z]
Tab control
tab order (forms)
tabbed dialog boxes
TabIndex property (controls)
tables
creating records
definition
deleting records
editing records
navigating records
overview
populating
TabPages collection
taskbar, hiding forms in
templates
Temporary flag (files)
terminating programs
testing
ClickOnce applications
drawing project
Excel automation
Picture Viewer program 2nd
text
displaying on form title bars
drawing
Font object
labels
strings
concatenation 2nd 3rd
determining number of characters in
determining whether one string contains another
replacing text within
retrieving text from left side of
retrieving text from right side of
retrieving text within
trimming
zero-length strings 2nd
text boxes
events
maximum length
multiline text boxes
overview
password fields
scrollbars
text alignment
text files
Picture Viewer log files
reading
writing to
Text Box control
events 2nd
maximum length
multiline text boxes
overview
password fields](https://image.slidesharecdn.com/visualbasic2008in24hrs-1285035275-phpapp01/85/Visual-Basic-2008-In-24-Hrs-801-320.jpg)
![scrollbars
text alignment
Text property
forms 2nd
Label control
TextAlign property (Text Box control)
TextChanged event 2nd
Tick event 2nd
TimeOfDay() function
Timer control 2nd
times
adding to/subtracting from
determining intervals between
file date/time information, returning
formatting
retrieving current
title bars (forms)
To keyword
toolbars
adding toolbar buttons
creating
docking
drop-down menus for
overview
programming
resizing
showing/hiding
Toolbox window 2nd
ToolStrip control [See also toolbars.]
top-level menus
assigning shortcut keys to
checked menu items
creating
creating menu items
deleting menu items
moving menu items
programming
topmost nonmodal windows
TopMost property (forms)
traditional controls [See controls.]
transparent forms
TransparentColor property (Image List control)
Tree View control
adding nodes
clearing all nodes
overview
removing nodes
triggering
events
by objects
by operating systems
overview
through user interaction
methods
Trim() function
trimming strings
Try statement
Try...Catch...Finally structure 2nd
turning on strict typing
type libraries, creating references to
Excel
Word
types
Boolean](https://image.slidesharecdn.com/visualbasic2008in24hrs-1285035275-phpapp01/85/Visual-Basic-2008-In-24-Hrs-802-320.jpg)

![Index
[SYMBOL] [A] [B] [C] [D] [E] [F] [G] [H] [I] [J] [K] [L] [M] [N] [O] [P] [Q] [R] [S] [T] [U] [V] [W] [X] [Y] [Z]
UInteger data type
ULong data type
underscore (_) 2nd 3rd
uninstalling ClickOnce applications
unloading forms
unmanaged code
unstructured error handling
Update() method 2nd
upward casting
user interaction
custom dialog boxes
InputBox() function
keyboard events
message boxes
determining which button is clicked
displaying buttons/icons
displaying with MessageBox.Show() function
message-writing guidelines
mouse events
overview
triggering events
UShort data type](https://image.slidesharecdn.com/visualbasic2008in24hrs-1285035275-phpapp01/85/Visual-Basic-2008-In-24-Hrs-804-320.jpg)
![Index
[SYMBOL] [A] [B] [C] [D] [E] [F] [G] [H] [I] [J] [K] [L] [M] [N] [O] [P] [Q] [R] [S] [T] [U] [V] [W] [X] [Y] [Z]
value, passing by
values, storing in variables
variables [See also data types.]
arrays [See arrays.]
Date
declaring 2nd
explicit variable declaration
simple example
static variables
definition 2nd
Drawing project
in expressions
naming conventions
passing literal values to
Picture Viewer program variables
creating
initializing
scope
block scope
global scope
module-level scope
name conflicts
overview
procedure-level scope
static variables
View menu commands, Properties Window
ViewerForm
icon
naming
properties
Height
Icon
Name
Text
Width
resizing
viewing
design windows
forms
initial display position
maximized state
minimized state
normal state
message boxes
object properties
Open File dialog box
Picture Viewer log files
properties
Registry options
text
labels
text boxes
toolbars
views
List View control](https://image.slidesharecdn.com/visualbasic2008in24hrs-1285035275-phpapp01/85/Visual-Basic-2008-In-24-Hrs-805-320.jpg)

![Index
[SYMBOL] [A] [B] [C] [D] [E] [F] [G] [H] [I] [J] [K] [L] [M] [N] [O] [P] [Q] [R] [S] [T] [U] [V] [W] [X] [Y] [Z]
Warning enumerator (MessageBoxIcon)
While...End While loops
Width property (forms)
Window system color
windows
code windows, hiding
design windows
auto-hiding
docking
floating
showing/hiding
states
Immediate
Properties
color properties
overview
property descriptions
selecting objects
viewing and changing properties
Toolbox
topmost nonmodal windows
Windows Registry [See Registry.]
WindowsDefaultBounds value (StartPosition property)
WindowsDefaultLocation value (StartPosition property)
WindowState property (forms)
wizards, Publish Wizard
Word automation
instantiating automation server
referencing type libraries
WordWrap property (Text Box control)
workbooks (Excel)
creating
modifying
wrappers
writable properties
Write() method
write-only properties
WriteLine() method 2nd 3rd
WriteOnly keyword
writing to text files](https://image.slidesharecdn.com/visualbasic2008in24hrs-1285035275-phpapp01/85/Visual-Basic-2008-In-24-Hrs-807-320.jpg)
![Index
[SYMBOL] [A] [B] [C] [D] [E] [F] [G] [H] [I] [J] [K] [L] [M] [N] [O] [P] [Q] [R] [S] [T] [U] [V] [W] [X] [Y] [Z]
X property (MouseEventArgs)
Xor operator](https://image.slidesharecdn.com/visualbasic2008in24hrs-1285035275-phpapp01/85/Visual-Basic-2008-In-24-Hrs-808-320.jpg)
![Index
[SYMBOL] [A] [B] [C] [D] [E] [F] [G] [H] [I] [J] [K] [L] [M] [N] [O] [P] [Q] [R] [S] [T] [U] [V] [W] [X] [Y] [Z]
Y property (MouseEventArgs)
Yes enumerator (DialogResult)
YesNo enumerator (MessageBoxButtons)
YesNoCancel enumerator (MessageBoxButtons)](https://image.slidesharecdn.com/visualbasic2008in24hrs-1285035275-phpapp01/85/Visual-Basic-2008-In-24-Hrs-809-320.jpg)
![Index
[SYMBOL] [A] [B] [C] [D] [E] [F] [G] [H] [I] [J] [K] [L] [M] [N] [O] [P] [Q] [R] [S] [T] [U] [V] [W] [X] [Y] [Z]
zero-length strings 2nd](https://image.slidesharecdn.com/visualbasic2008in24hrs-1285035275-phpapp01/85/Visual-Basic-2008-In-24-Hrs-810-320.jpg)

This document provides an overview and table of contents for the book "Sams Teach Yourself Visual Basic 2008 in 24 Hours: Complete Starter Kit" by James Foxall. The book aims to teach readers Visual Basic 2008 through 24 one-hour lessons. It covers topics such as the Visual Basic environment, building user interfaces, programming fundamentals, working with data, and deploying applications. The book is intended for readers with little to no programming experience and provides exercises and examples to build skills in Visual Basic 2008.