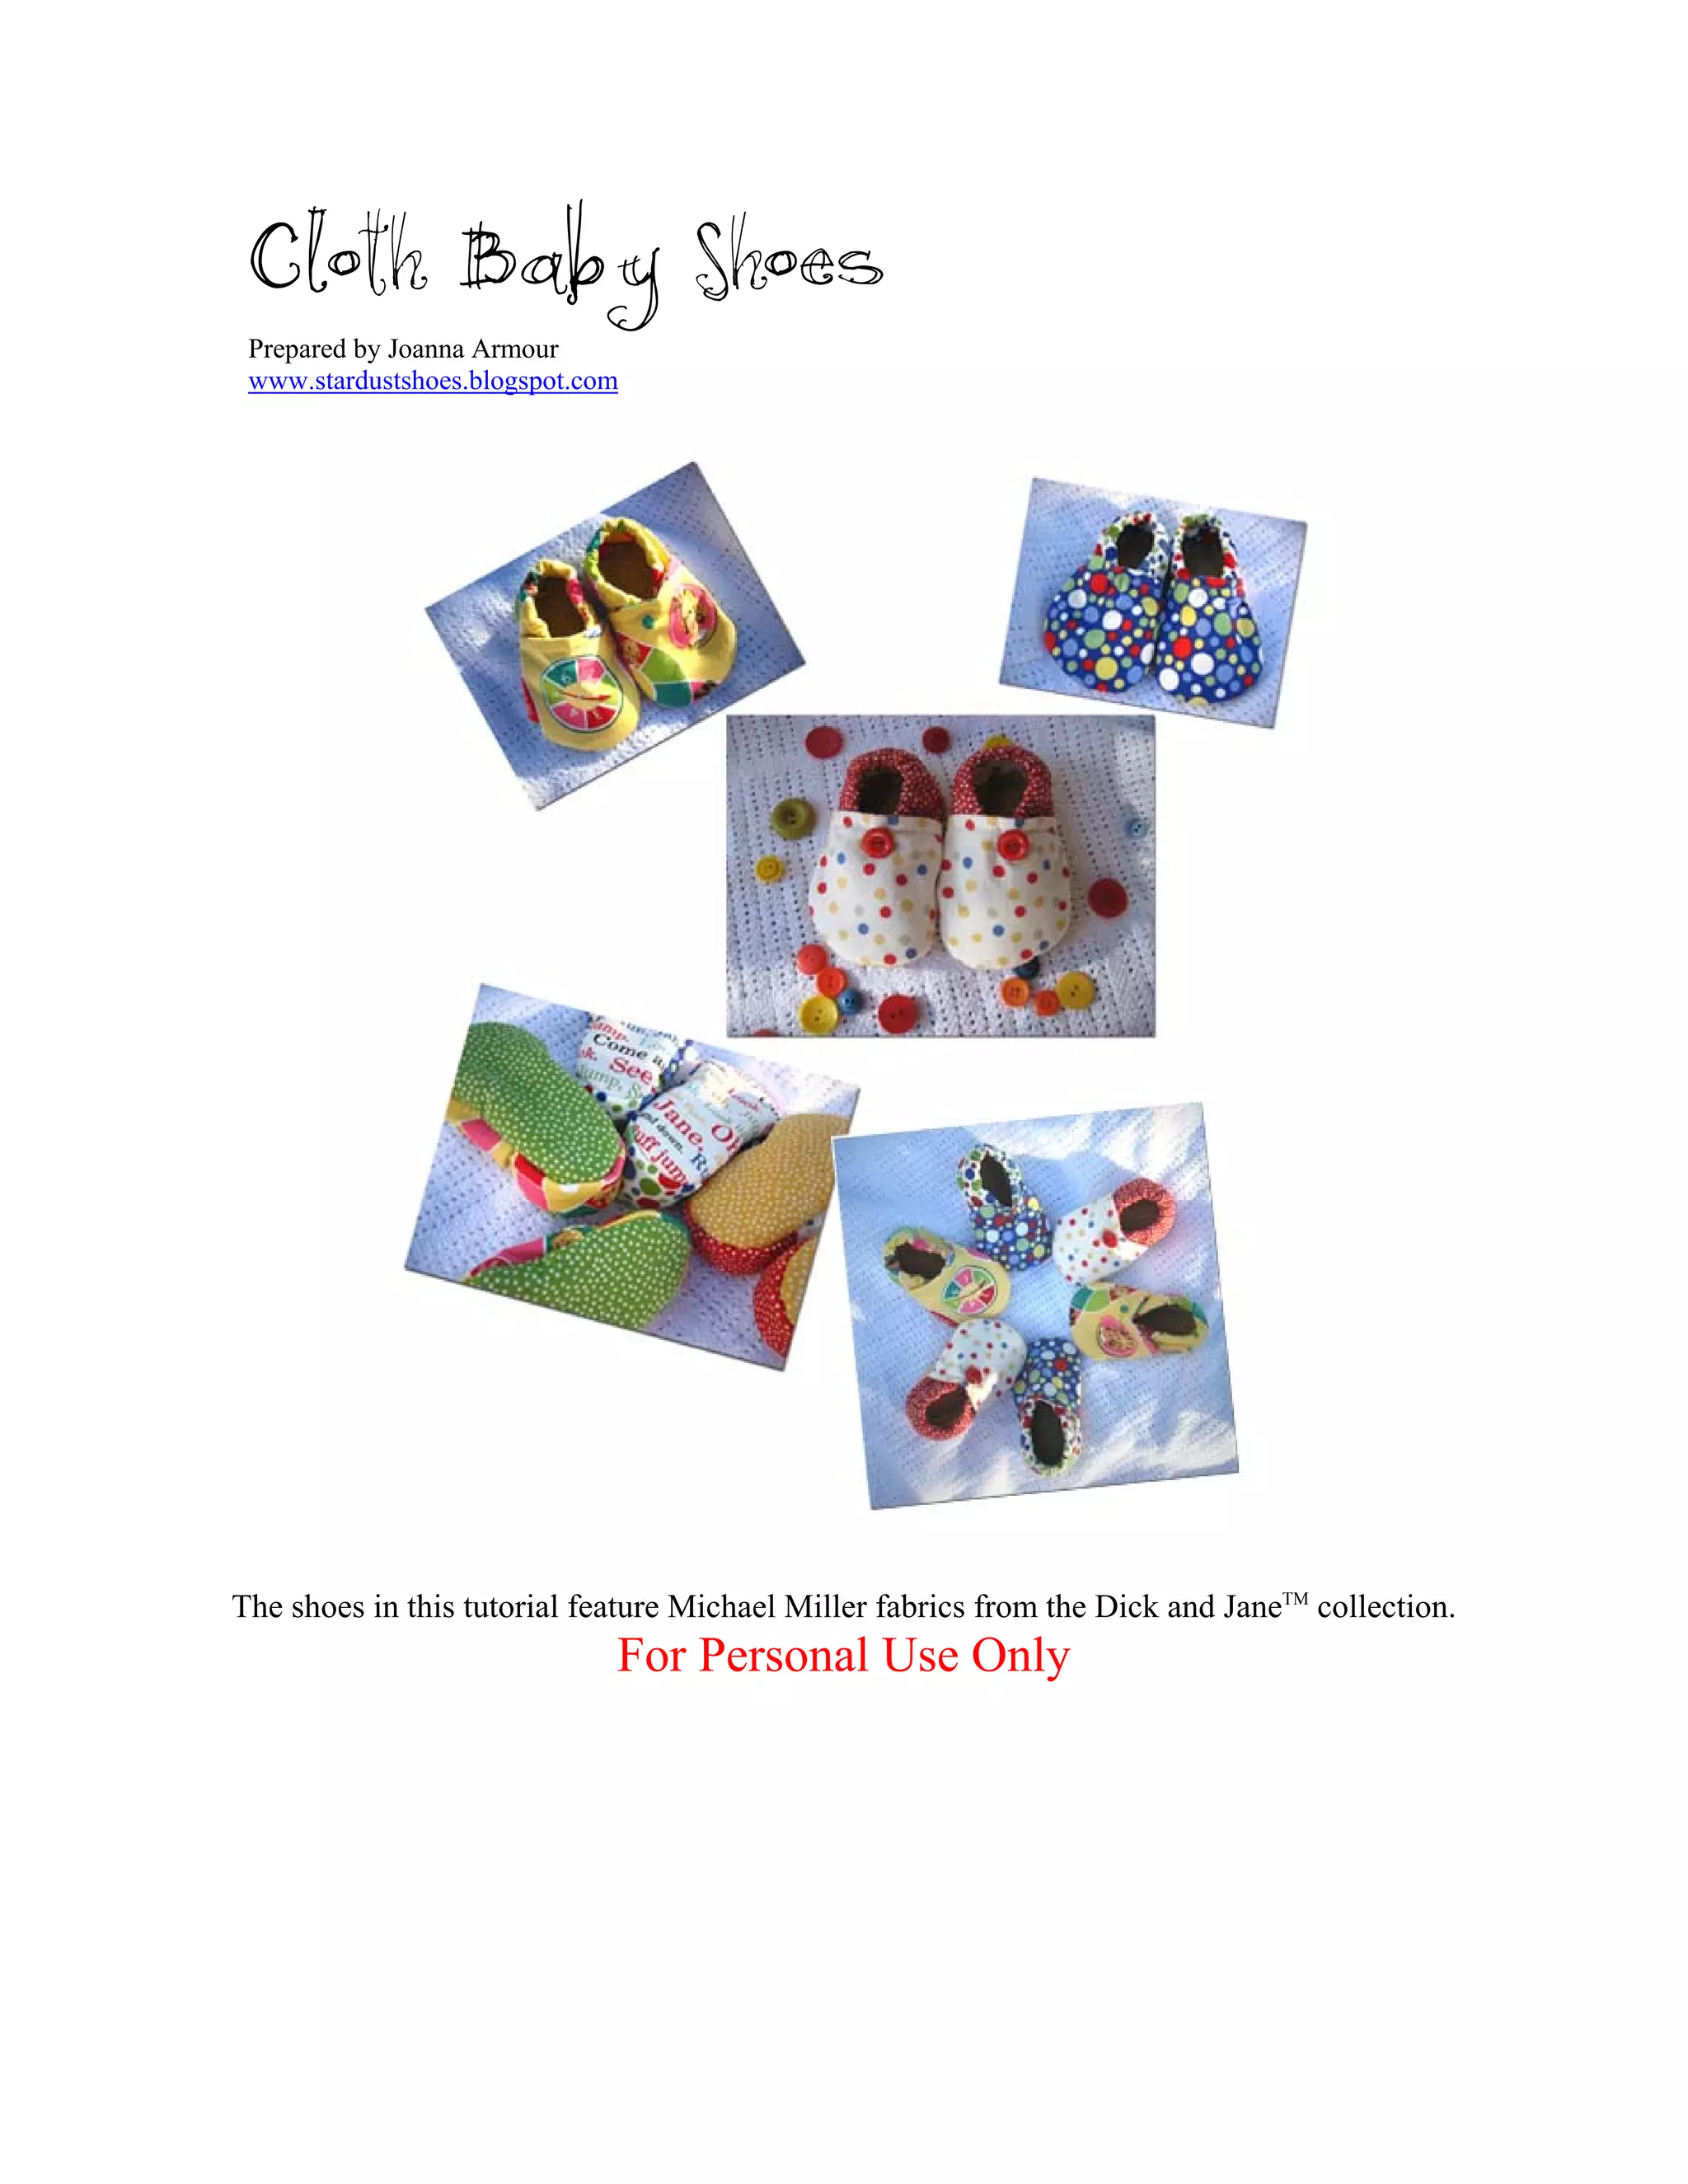
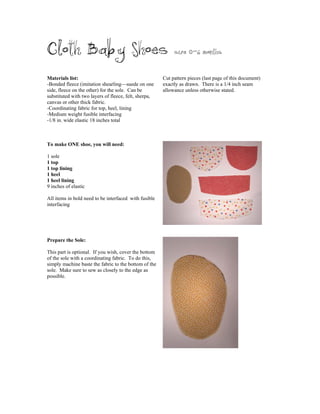
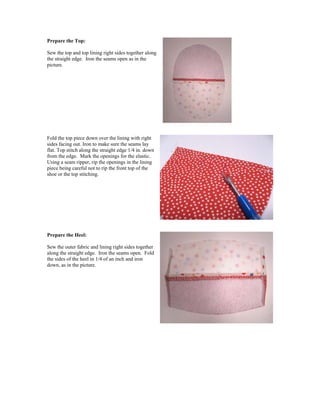
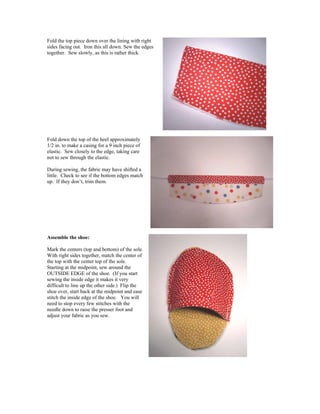
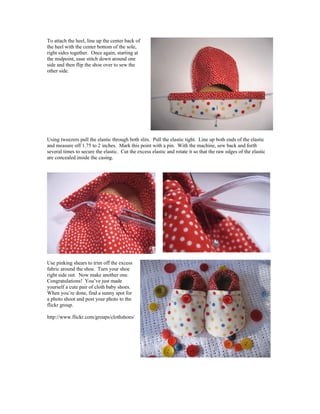
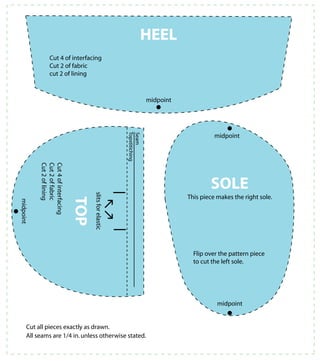
Cloth Baby Shoes
Prepared by Joanna Armour
www.stardustshoes.blogspot.com
The shoes in this tutorial feature Michael Miller fabrics from the Dick and JaneTM
collection.
For Personal Use Only
Cloth Baby Shoes size 0-6 months
Materials list:
-Bonded fleece (imitation shearling—suede on one
side, fleece on the other) for the sole. Can be
substituted with two layers of fleece, felt, sherpa,
canvas or other thick fabric.
-Coordinating fabric for top, heel, lining
-Medium weight fusible interfacing
-1/8 in. wide elastic 18 inches total
Cut pattern pieces (last page of this document)
exactly as drawn. There is a 1/4 inch seam
allowance unless otherwise stated.
To make ONE shoe, you will need:
1 sole
1 top
1 top lining
1 heel
1 heel lining
9 inches of elastic
All items in bold need to be interfaced with fusible
interfacing
Prepare the Sole:
This part is optional. If you wish, cover the bottom
of the sole with a coordinating fabric. To do this,
simply machine baste the fabric to the bottom of the
sole. Make sure to sew as closely to the edge as
possible.
Prepare the Top:
Sew the top and top lining right sides together along
the straight edge. Iron the seams open as in the
picture.
Fold the top piece down over the lining with right
sides facing out. Iron to make sure the seams lay
flat. Top stitch along the straight edge 1/4 in. down
from the edge. Mark the openings for the elastic.
Using a seam ripper, rip the openings in the lining
piece being careful not to rip the front top of the
shoe or the top stitching.
Prepare the Heel:
Sew the outer fabric and lining right sides together
along the straight edge. Iron the seams open. Fold
the sides of the heel in 1/4 of an inch and iron
down, as in the picture.
Fold the top piece down over the lining with right
sides facing out. Iron this all down. Sew the edges
together. Sew slowly, as this is rather thick.
Fold down the top of the heel approximately
1/2 in. to make a casing for a 9 inch piece of
elastic. Sew closely to the edge, taking care
not to sew through the elastic.
During sewing, the fabric may have shifted a
little. Check to see if the bottom edges match
up. If they don’t, trim them.
Assemble the shoe:
Mark the centers (top and bottom) of the sole.
With right sides together, match the center of
the top with the center top of the sole.
Starting at the midpoint, sew around the
OUTSIDE EDGE of the shoe. (If you start
sewing the inside edge it makes it very
difficult to line up the other side.) Flip the
shoe over, start back at the midpoint and ease
stitch the inside edge of the shoe. You will
need to stop every few stitches with the
needle down to raise the presser foot and
adjust your fabric as you sew.
To attach the heel, line up the center back of
the heel with the center bottom of the sole,
right sides together. Once again, starting at
the midpoint, ease stitch down around one
side and then flip the shoe over to sew the
other side.
Using tweezers pull the elastic through both slits. Pull the elastic tight. Line up both ends of the elastic
and measure off 1.75 to 2 inches. Mark this point with a pin. With the machine, sew back and forth
several times to secure the elastic. Cut the excess elastic and rotate it so that the raw edges of the elastic
are concealed inside the casing.
Use pinking shears to trim off the excess
fabric around the shoe. Turn your shoe
right side out. Now make another one.
Congratulations! You’ve just made
yourself a cute pair of cloth baby shoes.
When you’re done, find a sunny spot for
a photo shoot and post your photo to the
flickr group.
http://www.flickr.com/groups/clothshoes/
HEEL
Cut 4 of interfacing
Cut 2 of fabric
cut 2 of lining
midpoint
TOP
midpoint
Seam
slitsforelastic
Cut4ofinterfacing
Cut2offabric
Cut2oflining
jk
Topstitiching
SOLE
midpoint
midpoint
This piece makes the right sole.
Flip over the pattern piece
to cut the left sole.
Cut all pieces exactly as drawn.
All seams are 1/4 in.unless otherwise stated.

Vianneth

  • 1.
    Cloth Baby Shoes Preparedby Joanna Armour www.stardustshoes.blogspot.com The shoes in this tutorial feature Michael Miller fabrics from the Dick and JaneTM collection. For Personal Use Only
  • 2.
    Cloth Baby Shoessize 0-6 months Materials list: -Bonded fleece (imitation shearling—suede on one side, fleece on the other) for the sole. Can be substituted with two layers of fleece, felt, sherpa, canvas or other thick fabric. -Coordinating fabric for top, heel, lining -Medium weight fusible interfacing -1/8 in. wide elastic 18 inches total Cut pattern pieces (last page of this document) exactly as drawn. There is a 1/4 inch seam allowance unless otherwise stated. To make ONE shoe, you will need: 1 sole 1 top 1 top lining 1 heel 1 heel lining 9 inches of elastic All items in bold need to be interfaced with fusible interfacing Prepare the Sole: This part is optional. If you wish, cover the bottom of the sole with a coordinating fabric. To do this, simply machine baste the fabric to the bottom of the sole. Make sure to sew as closely to the edge as possible.
  • 3.
    Prepare the Top: Sewthe top and top lining right sides together along the straight edge. Iron the seams open as in the picture. Fold the top piece down over the lining with right sides facing out. Iron to make sure the seams lay flat. Top stitch along the straight edge 1/4 in. down from the edge. Mark the openings for the elastic. Using a seam ripper, rip the openings in the lining piece being careful not to rip the front top of the shoe or the top stitching. Prepare the Heel: Sew the outer fabric and lining right sides together along the straight edge. Iron the seams open. Fold the sides of the heel in 1/4 of an inch and iron down, as in the picture.
  • 4.
    Fold the toppiece down over the lining with right sides facing out. Iron this all down. Sew the edges together. Sew slowly, as this is rather thick. Fold down the top of the heel approximately 1/2 in. to make a casing for a 9 inch piece of elastic. Sew closely to the edge, taking care not to sew through the elastic. During sewing, the fabric may have shifted a little. Check to see if the bottom edges match up. If they don’t, trim them. Assemble the shoe: Mark the centers (top and bottom) of the sole. With right sides together, match the center of the top with the center top of the sole. Starting at the midpoint, sew around the OUTSIDE EDGE of the shoe. (If you start sewing the inside edge it makes it very difficult to line up the other side.) Flip the shoe over, start back at the midpoint and ease stitch the inside edge of the shoe. You will need to stop every few stitches with the needle down to raise the presser foot and adjust your fabric as you sew.
  • 5.
    To attach theheel, line up the center back of the heel with the center bottom of the sole, right sides together. Once again, starting at the midpoint, ease stitch down around one side and then flip the shoe over to sew the other side. Using tweezers pull the elastic through both slits. Pull the elastic tight. Line up both ends of the elastic and measure off 1.75 to 2 inches. Mark this point with a pin. With the machine, sew back and forth several times to secure the elastic. Cut the excess elastic and rotate it so that the raw edges of the elastic are concealed inside the casing. Use pinking shears to trim off the excess fabric around the shoe. Turn your shoe right side out. Now make another one. Congratulations! You’ve just made yourself a cute pair of cloth baby shoes. When you’re done, find a sunny spot for a photo shoot and post your photo to the flickr group. http://www.flickr.com/groups/clothshoes/
  • 6.
    HEEL Cut 4 ofinterfacing Cut 2 of fabric cut 2 of lining midpoint TOP midpoint Seam slitsforelastic Cut4ofinterfacing Cut2offabric Cut2oflining jk Topstitiching SOLE midpoint midpoint This piece makes the right sole. Flip over the pattern piece to cut the left sole. Cut all pieces exactly as drawn. All seams are 1/4 in.unless otherwise stated.