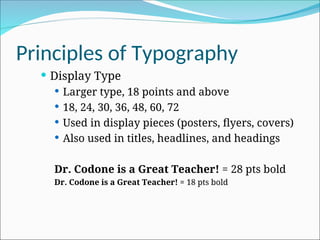
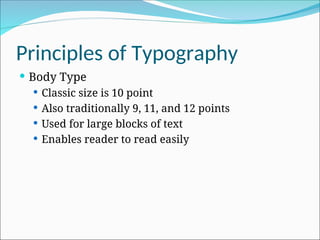
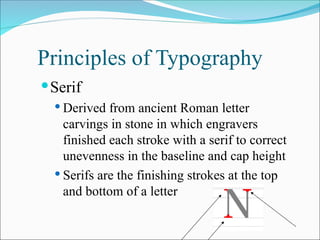
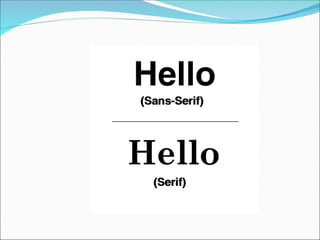
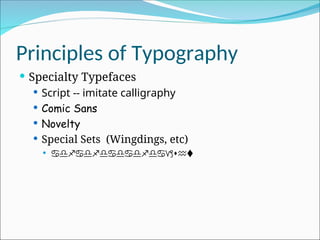
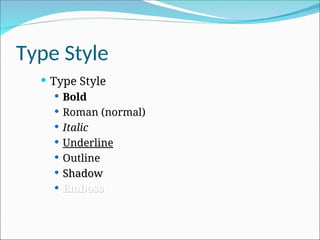
TCO 285
Dr. Codone
Principles of Typography
 “Types of Type”
 Display type
 Body Type
 Serif Typefaces
 Sans Serif Typefaces
 Specialty Type
Principles of Typography
 Display Type
 Larger type, 18 points and above
 18, 24, 30, 36, 48, 60, 72
 Used in display pieces (posters, flyers, covers)
 Also used in titles, headlines, and headings
Dr. Codone is a Great Teacher! = 28 pts bold
Dr. Codone is a Great Teacher! = 18 pts bold
Principles of Typography
 Body Type
 Classic size is 10 point
 Also traditionally 9, 11, and 12 points
 Used for large blocks of text
 Enables reader to read easily
Principles of Typography
Serif
 Derived from ancient Roman letter
carvings in stone in which engravers
finished each stroke with a serif to correct
unevenness in the baseline and cap height
 Serifs are the finishing strokes at the top
and bottom of a letter
Principles of Typography
 Sans Serif
 Sans means
“without” serifs
 Plain, unadorned
letters
 Arial
 Think “Sans-A-Belt”
pants
Principles of Typography
 Specialty Typefaces
 Script -- imitate calligraphy
 Comic Sans
 Novelty
 Special Sets (Wingdings, etc)
  
 
Principles of Typography
 Type Families
 Those fonts with variations -- all in the same
family
 Helvetica
 Helvetica Bold
 Helvetica Narrow
 Arial
 Arial Bold
Principles of Typography
 Anatomy of Type
Typography
Cap
Height
Point Size
Serif Ascender
Descender
X-height
Type Size
 Points vs. Picas
 Type size is measured in points
 72 points per inch
 72 points is not quite 1 inch high, but close
 12 points in a pica; 6 picas to an inch, 72 points
per inch
 pts (points), pi (pica)
 InDesign uses picas or inches
http://www.sallygentieuwelch.com/pixelart/picas.gif
Type Style
 Type Style
 Bold
 Roman (normal)
 Italic
 Underline
 Outline
 Shadow
Shadow
 Emboss
Emboss
Text Alignment
 Text Alignment
 Flush left (ragged right)
 Justified
 Centered
 Flush right (ragged left)
Text Alignment
This is flush left; notice the ragged right edge. Flush
left is the most common alignment. This is easier to
read and maintains the word spacing and letterspacing
intended by the designer of the typeface.
Text Alignment
This is justified text; notice the text is even at the
right
and left. White space is evenly distributed
between
words and sometimes between characters.
Sometimes
words are unevenly spaced and there are “rivers
and
lakes” of white space.
Text Alignment
This is flush right; notice the ragged left edge.
Flush right should be used only in small blocks
and in a contoured shape.
Text Alignment
This is centered text. Extra white space is
distributed evenly at the left and right sides of
the copy. This should be used only in small
blocks, since it is not easy to read. The shape
should be contoured; if not, it may just look like
improper indentation.
Text Alignment
 Text Indentation
 First line
 Hanging indent
What is a hanging indent? Well, I’m happy to tell you.
A hanging indent is where the top line is
flush left, but the lines below are indented, just like this
.
 Full indent
Principles of Typography
 Other Important Items
 Widows -- single, incomplete line at top of a
page or column
 Orphans -- same thing at the bottom of page
 Leading -- vertical space b/w lines of type
 Kerning --reduction of horizontal space
between characters for a better fit
 Tracking -- uniform reduction of space
between all characters in a line
Leading
Tracking
Kerning
Principles of Typography
 Always Safe -- use only one typeface, with
variations in style and size
 Usually Safe -- use sans serif display with serif
body type
 Take Your Chances -- using both sans serif and
serif display and body type
 Rarely Effective -- using two very similar or
very dissimilar typefaces
Principles of Typography
 Selecting Type to Match the Job
 Typeface must be compatible with the message
 Type can be feminine, masculine, friendly,
harsh, elegant, delicate, etc
 Start by choosing Times Roman for formal serif
applications and Helvetica (Arial) for informal
content.
Step-by-Step Design Planning
 Rule of Three
 Three colors
 Three typefaces (2 in the same family)
 Three type sizes:
 One size and color for 2/3 of the layout
 One size and color for 2/3 of the remaining 1/3
 Accent color and size for the remaining 1/9
www.dafont.com
Step-by-Step Design Planning
 Pre-design planning
 Determine objectives of the design project
 Consider the audience(s)
 Consider elements to be included
 Think about how to project the most appropriate
image by your design
Step-by-Step Design Planning
 Creating Thumbnails
 Draw thumbnail sketches by hand
 Use post-it notes!
 Or, use Powerpoint or PageMaker to draft
thumbnails
Step-by-Step Design Planning
 Create your Design using software
 Margins
 Hierarchy -- determine relative importance of
each element; focus on top two priority items to
help create contrast
Step-by-Step Design Planning
 Proportion -- size of the width to the size of the
height
 Uneven proportions are more aesthetically
pleasing than even
 8 1/2 x 11 is of uneven proportion
 Keep unequal proportion in mind when
positioning page elements; for example, never
divide a layout in half by vertically centering a
title
Step-by-Step Design Planning
 Golden Mean
Not the Golden Mean!
The Golden Mean!
The Golden Mean!
Step-by-Step Design Planning
 Unity -- ensure no elements appear isolated or look
as though they are floating in space; use borders,
lines, etc to unify the layout.
Step-by-Step Design Planning
 Use Grids to help design your page
 Grids bring order & consistency
 Grids form a graphic backbone
 Grids establish a logical page layout
Three Column
Grid
Two Column Grid
Typographic Designs Form & Communication

Typographic Designs Form & Communication

  • 1.
  • 2.
    Principles of Typography “Types of Type”  Display type  Body Type  Serif Typefaces  Sans Serif Typefaces  Specialty Type
  • 3.
    Principles of Typography Display Type  Larger type, 18 points and above  18, 24, 30, 36, 48, 60, 72  Used in display pieces (posters, flyers, covers)  Also used in titles, headlines, and headings Dr. Codone is a Great Teacher! = 28 pts bold Dr. Codone is a Great Teacher! = 18 pts bold
  • 4.
    Principles of Typography Body Type  Classic size is 10 point  Also traditionally 9, 11, and 12 points  Used for large blocks of text  Enables reader to read easily
  • 5.
    Principles of Typography Serif Derived from ancient Roman letter carvings in stone in which engravers finished each stroke with a serif to correct unevenness in the baseline and cap height  Serifs are the finishing strokes at the top and bottom of a letter
  • 6.
    Principles of Typography Sans Serif  Sans means “without” serifs  Plain, unadorned letters  Arial  Think “Sans-A-Belt” pants
  • 8.
    Principles of Typography Specialty Typefaces  Script -- imitate calligraphy  Comic Sans  Novelty  Special Sets (Wingdings, etc)     
  • 9.
    Principles of Typography Type Families  Those fonts with variations -- all in the same family  Helvetica  Helvetica Bold  Helvetica Narrow  Arial  Arial Bold
  • 10.
    Principles of Typography Anatomy of Type Typography Cap Height Point Size Serif Ascender Descender X-height
  • 11.
    Type Size  Pointsvs. Picas  Type size is measured in points  72 points per inch  72 points is not quite 1 inch high, but close  12 points in a pica; 6 picas to an inch, 72 points per inch  pts (points), pi (pica)  InDesign uses picas or inches
  • 12.
  • 13.
    Type Style  TypeStyle  Bold  Roman (normal)  Italic  Underline  Outline  Shadow Shadow  Emboss Emboss
  • 14.
    Text Alignment  TextAlignment  Flush left (ragged right)  Justified  Centered  Flush right (ragged left)
  • 15.
    Text Alignment This isflush left; notice the ragged right edge. Flush left is the most common alignment. This is easier to read and maintains the word spacing and letterspacing intended by the designer of the typeface.
  • 16.
    Text Alignment This isjustified text; notice the text is even at the right and left. White space is evenly distributed between words and sometimes between characters. Sometimes words are unevenly spaced and there are “rivers and lakes” of white space.
  • 17.
    Text Alignment This isflush right; notice the ragged left edge. Flush right should be used only in small blocks and in a contoured shape.
  • 18.
    Text Alignment This iscentered text. Extra white space is distributed evenly at the left and right sides of the copy. This should be used only in small blocks, since it is not easy to read. The shape should be contoured; if not, it may just look like improper indentation.
  • 19.
    Text Alignment  TextIndentation  First line  Hanging indent What is a hanging indent? Well, I’m happy to tell you. A hanging indent is where the top line is flush left, but the lines below are indented, just like this .  Full indent
  • 20.
    Principles of Typography Other Important Items  Widows -- single, incomplete line at top of a page or column  Orphans -- same thing at the bottom of page  Leading -- vertical space b/w lines of type  Kerning --reduction of horizontal space between characters for a better fit  Tracking -- uniform reduction of space between all characters in a line
  • 21.
  • 22.
    Principles of Typography Always Safe -- use only one typeface, with variations in style and size  Usually Safe -- use sans serif display with serif body type  Take Your Chances -- using both sans serif and serif display and body type  Rarely Effective -- using two very similar or very dissimilar typefaces
  • 23.
    Principles of Typography Selecting Type to Match the Job  Typeface must be compatible with the message  Type can be feminine, masculine, friendly, harsh, elegant, delicate, etc  Start by choosing Times Roman for formal serif applications and Helvetica (Arial) for informal content.
  • 24.
    Step-by-Step Design Planning Rule of Three  Three colors  Three typefaces (2 in the same family)  Three type sizes:  One size and color for 2/3 of the layout  One size and color for 2/3 of the remaining 1/3  Accent color and size for the remaining 1/9
  • 25.
  • 26.
    Step-by-Step Design Planning Pre-design planning  Determine objectives of the design project  Consider the audience(s)  Consider elements to be included  Think about how to project the most appropriate image by your design
  • 27.
    Step-by-Step Design Planning Creating Thumbnails  Draw thumbnail sketches by hand  Use post-it notes!  Or, use Powerpoint or PageMaker to draft thumbnails
  • 28.
    Step-by-Step Design Planning Create your Design using software  Margins  Hierarchy -- determine relative importance of each element; focus on top two priority items to help create contrast
  • 29.
    Step-by-Step Design Planning Proportion -- size of the width to the size of the height  Uneven proportions are more aesthetically pleasing than even  8 1/2 x 11 is of uneven proportion  Keep unequal proportion in mind when positioning page elements; for example, never divide a layout in half by vertically centering a title
  • 30.
  • 31.
  • 32.
  • 33.
  • 34.
    Step-by-Step Design Planning Unity -- ensure no elements appear isolated or look as though they are floating in space; use borders, lines, etc to unify the layout.
  • 35.
    Step-by-Step Design Planning Use Grids to help design your page  Grids bring order & consistency  Grids form a graphic backbone  Grids establish a logical page layout
  • 36.
  • 37.