Download as PDF, PPTX


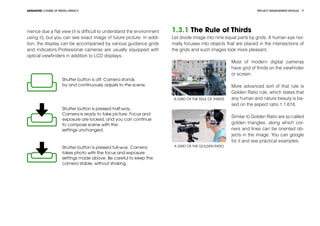


The document outlines an advanced course on media literacy focusing on the fundamentals of photography, including image composition, camera usage, and visual communication techniques. It emphasizes the importance of photography in communication and artistic expression, discussing the historical context and significance of images in society. Additionally, the document provides practical tips for enhancing photographic skills, as well as insights into the evolution of image creation and manipulation.


![Photography%20book%20pro%20forma[1]](https://cdn.slidesharecdn.com/ss_thumbnails/photography20book20pro20forma1-140113042536-phpapp02-thumbnail.jpg?width=640&height=640&fit=bounds)

![Photography%20book%20pro%20forma[1]](https://cdn.slidesharecdn.com/ss_thumbnails/photography20book20pro20forma1-140113034800-phpapp02-thumbnail.jpg?width=640&height=640&fit=bounds)
![Photography%20book%20pro%20forma[1]](https://cdn.slidesharecdn.com/ss_thumbnails/photography20book20pro20forma1-140113034202-phpapp02-thumbnail.jpg?width=640&height=640&fit=bounds)


