This document provides an overview of the basic tools and materials used in embroidery. It discusses various tools like embroidery hoops, scissors, thimbles, tape measures, gauges, needle threaders, pounce powder, and embroidery needles. For each tool, a brief description and intended use is given. Maintaining tools like keeping scissors sharpened and protected in a sheath is also mentioned. The development of embroidery in the Philippines is briefly introduced, noting it was introduced by the Dutch and further developed under Spanish influence.
This document is a learning module for a Grade 7/8 Technology and Livelihood Education course on handicraft production. It covers three lessons: 1) producing an embroidered article, 2) producing a recycled project, and 3) producing wrapped gift items. Lesson 1 focuses on using basic embroidery tools and creating an embroidered article. It provides information sheets describing various embroidery tools, materials, and stitches. It includes activities for students to practice using tools and creating embroidered works.
Here are the key points about tools and its classification:
- Tools are durable articles or implements used in nail care services.
- Tools are classified according to the task it will perform such as for manicure,
pedicure or both.
- Proper use and maintenance of tools ensures safety, hygiene and best service.
EQUIPMENT are the apparatus or devices used in nail care services which are not
hand-held. Equipment are also classified according to task requirements.
The common equipment used in manicure and pedicure are:
EQUIPMENT PICTURES
1. Manicure Table is where manicure
services are performed. It has storage
comp
Here are the key points covered in the information sheet:
- Embroidery is the ornamentation of textiles and other materials with needlework.
- Embroidery was introduced to the Philippines by the Spanish in the 15th century. Filipino embroidery now rivals work from other countries like Switzerland.
- Embroidery tools include gauges, tape measures, thimbles, embroidery hoops/stilettos, embroidery scissors, needle threaders, pounce, and different types of needles.
- Correct use and storage of tools is important to prevent damage and allow for neat, quality work.
- Knowledge of different tools and materials is essential for successful embroidery.
K-12 Module in T.L.E. Grade 8 Second Grading (Handicrafts)Daniel Manaog
==========================================
K-12 Module in A.P. Grade 8 Second Grading!
Want to Download?
Click Here => http://www.slideshare.net/danielmanaog14/savedfiles?s_title=1-27-pages&user_login=danielmanaog14
==========================================
This document provides information about hand tools and equipment used in illustration. It identifies two main categories: manual/hand tools and digital tools. Manual tools discussed include pencils, erasers, rulers, paper, compass, masking tape, drawing boards, coloring materials, sharpeners, triangular scales, dividers, and protractors. Digital tools mentioned are drawing tablets and scanners. The purpose and use of each tool is described. The document aims to teach learners about the various tools needed to complete illustration works.
Here are the answers to Activity 1.1:
1. Spade - Used for breaking hard topsoil and digging canals or ditches.
2. Rake - Used for cleaning the ground and leveling the topsoil.
3. Hand Trowel - Used in loosening soil around the growing plants.
4. Bolo - Used for chopping branches of tree and cutting tall grasses and weeds.
5. Sprinkler - Used for watering seedlings and young plants.
7_8. TLE Agricultural Crop Production Quarter 1 Module 1_ Farm Tools, Equipme...JENNYROSEMOJICA
Here are the answers to Activity 1.1:
1. Spade - Used for breaking hard topsoil and digging canals or ditches.
2. Rake - Used for cleaning the ground and leveling the topsoil.
3. Hand Trowel - Used in loosening soil around the growing plants.
4. Bolo - Used for chopping branches of tree and cutting tall grasses and weeds.
5. Sprinkler - Used for watering seedlings and young plants.
This document describes various carpentry tools and materials. It identifies 18 common tools used in carpentry such as rules, try squares, marking knives, hammers, saws, planes, chisels, and drills. It also describes different types of saws, chisels, and planes. Finally, it provides brief explanations of the uses of each tool in woodworking.
This document provides information about an English module for 10th grade students on the language of research, campaign, and advocacy. It includes an introductory message for teachers and learners, outlines what students are expected to learn, and provides guidance on how to use the module. The development team and management team responsible for creating the module are also listed.
Sdo navotas creative_writing_q2_m7_creating an online portfolio of the output...DepEd Navotas
The document provides instructions for creating an online portfolio using Microsoft PowerPoint to showcase creative writing outputs such as poems, stories, and scripts from Senior High School. It discusses setting up the PowerPoint presentation with the proper orientation and slide size and adding text, images, animations, audio files and videos to the digital portfolio. The final step mentioned is finalizing the digital portfolio.
The document provides an introduction to the Technology and Livelihood Education Module 2 on Industrial Arts (Automotive). It discusses Republic Act 8293 which states that no copyright exists for Philippine government works, and that prior approval is needed to use government materials for profit. The module was created by a development team from the Department of Education Caraga Region and covers competencies on carrying out measurement and calculation needed in automotive.
This document provides information on sewing tools and preparing fabric for sewing projects. It begins by stating the objectives of classifying sewing tools and their uses. It then lists and describes the 5 basic categories of sewing tools - measuring, cutting, marking, hand/machine sewing, and pressing tools. Examples are provided for each type of tool. The document also discusses the steps for preparing fabric, including soaking, drying, checking for wrinkles and selvages. Proper preparation of tools and fabric is emphasized as important for successful sewing projects.
Here are the steps to estimate the cost of farm activities for 1 hectare of land preparation for rice for the first cropping of 2019-2020:
1. Identify the farm activities needed such as plowing, harrowing, construction and repair of dikes, etc.
2. Determine the number of workers and equipment needed for each activity.
3. Quantify the labor input such as number of days, hours, etc.
4. Determine the labor cost per day/hour.
5. Multiply the labor cost by the labor input to get the total cost.
6. Tabulate all the information to come up with the estimated total cost of production.
The table provided
This learning resource hopes to engage the learners into guided and independent learning activities at their own pace and time. Furthermore, this also aims to help learners acquire the needed 21st-century skills while taking into consideration their needs and circumstances.
1. Traditional art techniques are being applied to contemporary arts by modifying the techniques to create new artworks. For example, puni folding is applied to straw folding and origami.
2. Common techniques used in contemporary art include minimalism, found objects, and large-scale art. Minimalism removes unnecessary elements while found objects use discarded items. Large-scale art is created for public viewing.
3. The medium refers to the material or substance used to create the artwork. Artists often use locally available materials. The medium varies depending on the artist and art form, and can include musical instruments, traditional materials, body movements, and practical materials like cement,
This module introduces the learner to different types of computer memory and storage devices. It discusses primary memory which includes RAM and ROM that can be accessed directly by the CPU. RAM is volatile and comes in different types like DRAM and SRAM. ROM is non-volatile and includes PROM, EPROM, and EEPROM. Secondary storage devices discussed include the hard drive, optical drive, and external flash drive which use various storage media and connect to the computer. The learner is taught to identify appropriate measuring instruments for different computer components.
This document discusses Technology Livelihood Education (TLE) - Information and
Communication Technology (Computer Systems Servicing) Exploratory Course for Grades 7
and 8. Specifically, it covers Module 3 on Performing Mensuration and Calculation.
The module aims to teach students how to identify objects or components to be measured,
convert decimal to binary, compute the actual storage capacity and speed of various devices,
and apply techniques to check conversions and computations. It also discusses maintaining
measuring instruments.
The document provides definitions for terms like mensuration, measurement, and calculation.
It also describes common measuring instruments used in computer system servicing like
The document discusses principal roots and whether they are rational or irrational. It defines principal root, radical, and radicand. It explains that principal roots of perfect squares are rational numbers, while principal roots that are non-terminating or non-repeating decimals are irrational numbers. The document provides examples of determining whether specific principal roots are rational or irrational.
Math3 q1 mod1_visualizing-numbers-up-to-10-000_v308092020angela quinto
The document discusses a mathematics module that teaches students to visualize numbers from 1,001 to 10,000. It uses examples like the number of rice sacks distributed after a typhoon to explain how to represent numbers with discs and blocks in their place values of thousands, hundreds, tens and ones. The module provides activities to help students understand and practice visualizing four-digit numbers.
Here are some key points about kitchen utensils, tools, and equipment:
- They are used for preparing, cooking, and serving food.
- Common categories include those for measuring, cutting, mixing, cooking, cleaning, and grinding ingredients.
- Examples are knives, cutting boards, spoons, spatulas, pans, colanders, blenders, can openers, peelers, etc.
- Proper use and storage helps ensure safety and extends their lifespan.
- Learning their names and functions develops important life skills for cooking.
The document provides guidance on interpreting plans and drawings for agricultural crop production, noting the importance of acquainting oneself with relevant government plans to reduce risks and enhance farming business. It also stresses that making a planting layout will help maximize land area and that a whole-farm plan considers physical, financial, and human resources for the present and future. Sample farm labor requirements are also provided for different stages of production.
Livelihood.bread and pastry production.module 1.porrasRenatoLimBaylasJr
The document discusses different tools and equipment used in baking, including preparatory tools like graters and rolling pins, measuring tools like measuring cups and spoons, mixing tools like mixing bowls and electric mixers, cutting tools like pastry blenders and kitchen shears, baking pans like cake pans and muffin pans, ovens like deck ovens and convection ovens, and other equipment like bread toasters and double broilers. It provides pictures and descriptions of each tool or piece of equipment and their uses. It also classifies the various baking tools and equipment into categories such as ovens, measuring tools, mixing tools, and others.
The passage discusses the seductive and destructive power of methamphetamine (meth). It notes that while meth initially increases sex drive and performance, government officials and doctors are reluctant to discuss this effect. The summary also mentions a doctor who interviewed meth addicts, finding that both men and women reported meth's impact on their sex lives.
Here are the key terms to fill in the blanks:
1. Inspection
2. ocular inspection
3. property
4. number of years
5. Inspect
6. obsolete
7. irreparable
8. sheltered
9. facilities
10. degree of maintenance, repair, restoration or upgrading
1. The document discusses local materials that can be used for creating art in the Philippines, including materials sourced from the sea shore, rice fields, tropical forests, and mangrove forests.
2. It provides examples of local materials like shells, driftwood, leaves, vines, and fibers that can be acquired from these environments.
3. Choosing appropriate local materials suited for the artwork is important for realizing the artist's concept and bringing out their creativity.
This document provides information about a mathematics module for 7th grade students on absolute value and operations with integers. It includes 5 lessons: 1) representing absolute value of numbers on a number line, 2) addition of integers, 3) subtraction of integers, 4) multiplication of integers, and 5) division of integers. The module aims to help students represent absolute value, perform operations with integers, and solve related problems. It was developed by a team of educators and is intended to assist both students and teachers.
The general assembly agenda covers school rules for students regarding uniforms, grooming, footwear, reporting procedures, and student handbook requirements. It also details policies around leaving school premises during class hours, bringing lunches from home, child protection, optional off-campus activities, and COVID safety measures. The overall message is that MV Montessori aims to nurture, protect and provide inclusive education for students.
This document provides information on preparing vegetable dishes, including objectives, health benefits of vegetables, important nutrients found in vegetables, principles of preparing vegetables, classifications of vegetables, flavor and color components, characteristics of quality vegetables, thawing and preparing fresh vegetables, and basic knife cuts. The key points are that vegetables provide many nutrients and health benefits, should be prepared to retain nutrients and texture, and there are various ways to classify, thaw, and cut vegetables.
7_8. TLE Agricultural Crop Production Quarter 1 Module 1_ Farm Tools, Equipme...JENNYROSEMOJICA
Here are the answers to Activity 1.1:
1. Spade - Used for breaking hard topsoil and digging canals or ditches.
2. Rake - Used for cleaning the ground and leveling the topsoil.
3. Hand Trowel - Used in loosening soil around the growing plants.
4. Bolo - Used for chopping branches of tree and cutting tall grasses and weeds.
5. Sprinkler - Used for watering seedlings and young plants.
This document describes various carpentry tools and materials. It identifies 18 common tools used in carpentry such as rules, try squares, marking knives, hammers, saws, planes, chisels, and drills. It also describes different types of saws, chisels, and planes. Finally, it provides brief explanations of the uses of each tool in woodworking.
This document provides information about an English module for 10th grade students on the language of research, campaign, and advocacy. It includes an introductory message for teachers and learners, outlines what students are expected to learn, and provides guidance on how to use the module. The development team and management team responsible for creating the module are also listed.
Sdo navotas creative_writing_q2_m7_creating an online portfolio of the output...DepEd Navotas
The document provides instructions for creating an online portfolio using Microsoft PowerPoint to showcase creative writing outputs such as poems, stories, and scripts from Senior High School. It discusses setting up the PowerPoint presentation with the proper orientation and slide size and adding text, images, animations, audio files and videos to the digital portfolio. The final step mentioned is finalizing the digital portfolio.
The document provides an introduction to the Technology and Livelihood Education Module 2 on Industrial Arts (Automotive). It discusses Republic Act 8293 which states that no copyright exists for Philippine government works, and that prior approval is needed to use government materials for profit. The module was created by a development team from the Department of Education Caraga Region and covers competencies on carrying out measurement and calculation needed in automotive.
This document provides information on sewing tools and preparing fabric for sewing projects. It begins by stating the objectives of classifying sewing tools and their uses. It then lists and describes the 5 basic categories of sewing tools - measuring, cutting, marking, hand/machine sewing, and pressing tools. Examples are provided for each type of tool. The document also discusses the steps for preparing fabric, including soaking, drying, checking for wrinkles and selvages. Proper preparation of tools and fabric is emphasized as important for successful sewing projects.
Here are the steps to estimate the cost of farm activities for 1 hectare of land preparation for rice for the first cropping of 2019-2020:
1. Identify the farm activities needed such as plowing, harrowing, construction and repair of dikes, etc.
2. Determine the number of workers and equipment needed for each activity.
3. Quantify the labor input such as number of days, hours, etc.
4. Determine the labor cost per day/hour.
5. Multiply the labor cost by the labor input to get the total cost.
6. Tabulate all the information to come up with the estimated total cost of production.
The table provided
This learning resource hopes to engage the learners into guided and independent learning activities at their own pace and time. Furthermore, this also aims to help learners acquire the needed 21st-century skills while taking into consideration their needs and circumstances.
1. Traditional art techniques are being applied to contemporary arts by modifying the techniques to create new artworks. For example, puni folding is applied to straw folding and origami.
2. Common techniques used in contemporary art include minimalism, found objects, and large-scale art. Minimalism removes unnecessary elements while found objects use discarded items. Large-scale art is created for public viewing.
3. The medium refers to the material or substance used to create the artwork. Artists often use locally available materials. The medium varies depending on the artist and art form, and can include musical instruments, traditional materials, body movements, and practical materials like cement,
This module introduces the learner to different types of computer memory and storage devices. It discusses primary memory which includes RAM and ROM that can be accessed directly by the CPU. RAM is volatile and comes in different types like DRAM and SRAM. ROM is non-volatile and includes PROM, EPROM, and EEPROM. Secondary storage devices discussed include the hard drive, optical drive, and external flash drive which use various storage media and connect to the computer. The learner is taught to identify appropriate measuring instruments for different computer components.
This document discusses Technology Livelihood Education (TLE) - Information and
Communication Technology (Computer Systems Servicing) Exploratory Course for Grades 7
and 8. Specifically, it covers Module 3 on Performing Mensuration and Calculation.
The module aims to teach students how to identify objects or components to be measured,
convert decimal to binary, compute the actual storage capacity and speed of various devices,
and apply techniques to check conversions and computations. It also discusses maintaining
measuring instruments.
The document provides definitions for terms like mensuration, measurement, and calculation.
It also describes common measuring instruments used in computer system servicing like
The document discusses principal roots and whether they are rational or irrational. It defines principal root, radical, and radicand. It explains that principal roots of perfect squares are rational numbers, while principal roots that are non-terminating or non-repeating decimals are irrational numbers. The document provides examples of determining whether specific principal roots are rational or irrational.
Math3 q1 mod1_visualizing-numbers-up-to-10-000_v308092020angela quinto
The document discusses a mathematics module that teaches students to visualize numbers from 1,001 to 10,000. It uses examples like the number of rice sacks distributed after a typhoon to explain how to represent numbers with discs and blocks in their place values of thousands, hundreds, tens and ones. The module provides activities to help students understand and practice visualizing four-digit numbers.
Here are some key points about kitchen utensils, tools, and equipment:
- They are used for preparing, cooking, and serving food.
- Common categories include those for measuring, cutting, mixing, cooking, cleaning, and grinding ingredients.
- Examples are knives, cutting boards, spoons, spatulas, pans, colanders, blenders, can openers, peelers, etc.
- Proper use and storage helps ensure safety and extends their lifespan.
- Learning their names and functions develops important life skills for cooking.
The document provides guidance on interpreting plans and drawings for agricultural crop production, noting the importance of acquainting oneself with relevant government plans to reduce risks and enhance farming business. It also stresses that making a planting layout will help maximize land area and that a whole-farm plan considers physical, financial, and human resources for the present and future. Sample farm labor requirements are also provided for different stages of production.
Livelihood.bread and pastry production.module 1.porrasRenatoLimBaylasJr
The document discusses different tools and equipment used in baking, including preparatory tools like graters and rolling pins, measuring tools like measuring cups and spoons, mixing tools like mixing bowls and electric mixers, cutting tools like pastry blenders and kitchen shears, baking pans like cake pans and muffin pans, ovens like deck ovens and convection ovens, and other equipment like bread toasters and double broilers. It provides pictures and descriptions of each tool or piece of equipment and their uses. It also classifies the various baking tools and equipment into categories such as ovens, measuring tools, mixing tools, and others.
The passage discusses the seductive and destructive power of methamphetamine (meth). It notes that while meth initially increases sex drive and performance, government officials and doctors are reluctant to discuss this effect. The summary also mentions a doctor who interviewed meth addicts, finding that both men and women reported meth's impact on their sex lives.
Here are the key terms to fill in the blanks:
1. Inspection
2. ocular inspection
3. property
4. number of years
5. Inspect
6. obsolete
7. irreparable
8. sheltered
9. facilities
10. degree of maintenance, repair, restoration or upgrading
1. The document discusses local materials that can be used for creating art in the Philippines, including materials sourced from the sea shore, rice fields, tropical forests, and mangrove forests.
2. It provides examples of local materials like shells, driftwood, leaves, vines, and fibers that can be acquired from these environments.
3. Choosing appropriate local materials suited for the artwork is important for realizing the artist's concept and bringing out their creativity.
This document provides information about a mathematics module for 7th grade students on absolute value and operations with integers. It includes 5 lessons: 1) representing absolute value of numbers on a number line, 2) addition of integers, 3) subtraction of integers, 4) multiplication of integers, and 5) division of integers. The module aims to help students represent absolute value, perform operations with integers, and solve related problems. It was developed by a team of educators and is intended to assist both students and teachers.
Similar to TLE_Exploratory8_Q1M1Weeks1&2_OK.pdf (20)
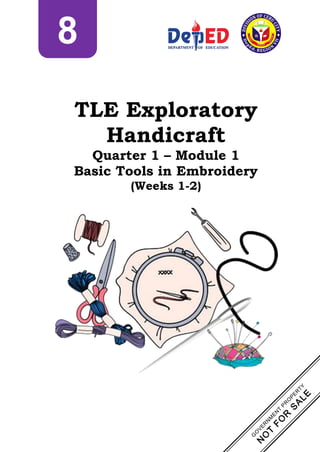
The general assembly agenda covers school rules for students regarding uniforms, grooming, footwear, reporting procedures, and student handbook requirements. It also details policies around leaving school premises during class hours, bringing lunches from home, child protection, optional off-campus activities, and COVID safety measures. The overall message is that MV Montessori aims to nurture, protect and provide inclusive education for students.
This document provides information on preparing vegetable dishes, including objectives, health benefits of vegetables, important nutrients found in vegetables, principles of preparing vegetables, classifications of vegetables, flavor and color components, characteristics of quality vegetables, thawing and preparing fresh vegetables, and basic knife cuts. The key points are that vegetables provide many nutrients and health benefits, should be prepared to retain nutrients and texture, and there are various ways to classify, thaw, and cut vegetables.
TLE 7 lesson3 interpretplansanddrawings-190718154111.pdfallenclarkdechavez
This document discusses various methods of arranging and planting crops, including:
- Row planting, where crops are planted in straight lines to maximize yields and facilitate farm operations. Crops can be arranged in single or multiple rows.
- Intercropping, where a secondary crop is planted within or between the rows of the main crop.
- Methods of planting include direct seeding, using broadcasting, hill planting, or drilling techniques, and transplanting seedlings.
- Factors like soil type, slope, and irrigation influence spatial arrangements in the farm. Precise spacing and rates are important for optimal growth and yields.
This document discusses starches and cereals. It begins by defining starch as a complex carbohydrate found in plants that functions as a chief storage form of carbohydrates. The three main sources of starches are listed as cereal grains, roots and tubers, and legumes. Common starchy foods from these sources like rice, corn, potatoes and cassava are identified. The document then covers native and modified starches and provides nutritional information about common cereals and types of noodles.
This document provides information and examples related to farm inputs and labor requirements. It includes a sample estimation problem that calculates various costs. The key points are:
- Farm inputs discussed include seeds, seedlings, fertilizer, insecticides, irrigation, and planting. Labor is required for land preparation, planting, and plant care.
- A sample estimation problem calculates costs such as salary for planting and fertilizing, fertilizer used, based on information like land area, fertilizer amount, number of workers and days.
- The total costs calculated for the example are: salary for planting ($3,000), fertilizer from planting to survey ($4,000), salary for fertilizing to survey ($1,200
This document defines various terms related to agriculture including farm equipment, farm implements, farm tools, preventive maintenance, repair, and tools used in agricultural crop production. It provides descriptions and examples of common farm equipment like plows, harrows, rotavators, hand tractors, and water pumps. It also lists and describes various farm implements, farm inputs, and types of farm labor involved in crop production. The document includes sections on proper use of tools like shovels and provides examples for performing estimations and basic calculations in agriculture.
The document provides information on tools and materials needed for electrical work. It discusses common electrical tools like screwdrivers, hammers, pliers, wire strippers, knives, drills, hacksaws and their various types. It also describes electrical materials like convenience outlets, switches, fuses, circuit breakers, junction boxes, utility boxes, wires, conduits/pipes and their purposes. The document gives details on making electrical wire splices and joints and provides instructions on creating an extension cord using necessary tools and materials.
This document discusses various principles of plating food, including:
- Balance is important when selecting foods and garnishes to offer variety in color, shape, texture and flavor.
- Using at least two colors on a plate makes it more interesting than one color. Garnishes also contribute to color.
- Plates should contain a variety of shapes and forms created by cutting vegetables differently.
- Portion sizes and plates must be properly matched so portions don't look skimpy or overcrowded.
- Food should be arranged attractively and logically balanced on the plate.
The document discusses personal entrepreneurial competencies that are common among successful entrepreneurs. It identifies 10 behavioral patterns organized into three clusters: achievement, planning, and power. The achievement cluster includes opportunity seeking, persistence, and commitment to work contracts. Opportunity seeking means having a good eye for business opportunities. Persistence means not giving up easily when facing obstacles. Commitment to work contracts involves satisfying customers and fulfilling promises.
This presentation was provided by Steph Pollock of The American Psychological Association’s Journals Program, and Damita Snow, of The American Society of Civil Engineers (ASCE), for the initial session of NISO's 2024 Training Series "DEIA in the Scholarly Landscape." Session One: 'Setting Expectations: a DEIA Primer,' was held June 6, 2024.
How to Add Chatter in the odoo 17 ERP ModuleCeline George
In Odoo, the chatter is like a chat tool that helps you work together on records. You can leave notes and track things, making it easier to talk with your team and partners. Inside chatter, all communication history, activity, and changes will be displayed.
Introduction to AI for Nonprofits with Tapp NetworkTechSoup
Dive into the world of AI! Experts Jon Hill and Tareq Monaur will guide you through AI's role in enhancing nonprofit websites and basic marketing strategies, making it easy to understand and apply.
Main Java[All of the Base Concepts}.docxadhitya5119
This is part 1 of my Java Learning Journey. This Contains Custom methods, classes, constructors, packages, multithreading , try- catch block, finally block and more.
How to Fix the Import Error in the Odoo 17Celine George
An import error occurs when a program fails to import a module or library, disrupting its execution. In languages like Python, this issue arises when the specified module cannot be found or accessed, hindering the program's functionality. Resolving import errors is crucial for maintaining smooth software operation and uninterrupted development processes.
Assessment and Planning in Educational technology.pptxKavitha Krishnan
In an education system, it is understood that assessment is only for the students, but on the other hand, the Assessment of teachers is also an important aspect of the education system that ensures teachers are providing high-quality instruction to students. The assessment process can be used to provide feedback and support for professional development, to inform decisions about teacher retention or promotion, or to evaluate teacher effectiveness for accountability purposes.
The simplified electron and muon model, Oscillating Spacetime: The Foundation...RitikBhardwaj56
Discover the Simplified Electron and Muon Model: A New Wave-Based Approach to Understanding Particles delves into a groundbreaking theory that presents electrons and muons as rotating soliton waves within oscillating spacetime. Geared towards students, researchers, and science buffs, this book breaks down complex ideas into simple explanations. It covers topics such as electron waves, temporal dynamics, and the implications of this model on particle physics. With clear illustrations and easy-to-follow explanations, readers will gain a new outlook on the universe's fundamental nature.
Executive Directors Chat Leveraging AI for Diversity, Equity, and InclusionTechSoup
Let’s explore the intersection of technology and equity in the final session of our DEI series. Discover how AI tools, like ChatGPT, can be used to support and enhance your nonprofit's DEI initiatives. Participants will gain insights into practical AI applications and get tips for leveraging technology to advance their DEI goals.
How to Manage Your Lost Opportunities in Odoo 17 CRMCeline George
Odoo 17 CRM allows us to track why we lose sales opportunities with "Lost Reasons." This helps analyze our sales process and identify areas for improvement. Here's how to configure lost reasons in Odoo 17 CRM
2. ii
Technology and Livelihood Education - 8
Quarter 1 – Modules
First Edition, 2020
Republic Act 8293, section 176 states that: No copyright shall subsist in
any work of the Government of the Philippines. However, prior approval of the
government agency or office wherein the work is created shall be necessary for
exploitation of such work for profit. Such agency or office may, among other things,
impose as a condition the payment of royalties.
Borrowed materials (i.e., songs, stories, poems, pictures, photos, brand
names, trademarks, etc.) included in this module are owned by their respective
copyright holders. Every effort has been exerted to locate and seek permission to use
these materials from their respective copyright owners. The publisher and authors
do not represent nor claim ownership over them.
Printed in the Philippines by DepEd Cebu City Division, ROVII
Office Address: Imus Avenue, Cebu City
Telefax: (032) 255-1516 / (032) 253-9095
E-mail Address: cebu.city@deped.gov.ph
Development Team of the Module
Compilers: Erika Nadera & Marlene G. Padigos
Editors: Delia T. Canono & Violly Chyril S. Bugtong
Reviewer: Marlene G. Padigos
Illustrator / Layout Artists:
Management Team:
Rhea Mar A. Angtud, Schools Division Superintendent
Danilo G. Gudelosao, Asst. Schools Division Superintendent
Grecia F. Bataluna, CID Chief
Marlene G. Padigos, EPS-EPP/TLE/TVL
Vanessa L. Harayo, EPS-LRMS
3. iii
Introductory Message
Welcome to the Technology and Livelihood Education – 8 on Embroidery!
This module was collaboratively designed, developed and reviewed by educators both
from public and private institutions to assist you, the teacher, in helping the learners
meet the standards set by the K to 12 Curriculum while overcoming their personal,
social, and economic constraints in schooling.
This learning resource hopes to engage the learners in guided and independent
learning activities at their own pace and time. Furthermore, this also aims to help
learners acquire the needed 21st century skills while taking into consideration their
needs and circumstances.
This module was designed to provide you with fun and meaningful opportunities for
guided and independent learning at your own pace and time. You will be enabled to
process the contents of the learning resource while being an active learner.
This module has the following parts and corresponding icons:
What I Need to Know
This will give you an idea of the skills or
competencies you are expected to learn in the
module.
What I Know
This part includes an activity that aims to
check what you already know about the
lesson to take. If you get all the answers
correct (100%), you may decide to skip this
module.
What’s In
This is a brief drill or review to help you link
the current lesson with the previous one.
What’s New
In this portion, the new lesson will be
introduced to you in various ways such as a
story, a song, a poem, a problem opener, an
activity, or a situation.
What is It
This section provides a brief discussion of the
lesson. This aims to help you discover and
understand new concepts and skills.
What’s More
This comprises activities for independent
practice to solidify your understanding and
skills of the topic. You may check the
answers to the exercises using the Answer
Key at the end of the module.
What I Have Learned
This includes questions or blank
sentence/paragraph to be filled in, to process
what you learned from the lesson.
4. iv
What I Can Do
This section provides an activity which will
help you transfer your new knowledge or skill
into real life situations or concerns.
Assessment
This is a task which aims to evaluate your
level of mastery in achieving the learning
competency.
Additional Activities
In this portion, another activity will be given
to you to enrich your knowledge or skill of the
lesson learned. This also tends retention of
learned concepts.
Answer Key
This contains answers to all activities in the
module.
At the end of this module you will also find:
The following are some reminders in using this module:
1. Use the module with care. Do not put unnecessary mark/s on any part of the
module. Use a separate sheet of paper in answering the exercises.
2. Do not forget to answer What I Know before moving on to the other activities
included in the module.
3. Read the instruction carefully before doing each task.
4. Observe honesty and integrity in doing the tasks and checking your answers.
5. Finish the task at hand before proceeding to the next.
6. Submit the accomplished module at the end of every week.
7. Upon submission claim the module for the following week.
If you encounter any difficulty in answering the tasks in this module, do not
hesitate to consult your teacher or facilitator through text, phone call, chat, or
the online classroom during the virtual orientation with students.
Always bear in mind that you are not alone.
We hope that through this material, you will experience meaningful learning and
gain deep understanding of the relevant competencies. You can do it!
References This is a list of all sources used in
developing this module.
5. 1
What I Need to Know
This module was designed and written with you in mind. It is here to help you
understand Handicraft. The scope of this module permits it to be used in many
different learning situations. The language used recognizes the diverse vocabulary
level of students. The lessons are arranged to follow the standard sequence of the
course.
This module discusses the Basic Tools and Materials in Embroidery.
After going through this module, you are expected to:
1. identify the basic tools and materials in embroidery;
2. familiarize the symbols used in caring textile;
3. identify and be familiarized with the different kinds of stitches;
4. perform different kinds of stitches; and
5. observe precautionary measures proper use of tools in embroidery.
This module covers the Introduction/ Learning Objectives, Pre-Assessment, Lesson
Proper, Generalization, Application, Post Assessment, Additional Activity (optional).
What I Know
Use a separate sheet in doing this activity. Please do not forget to write the
following in your answer sheet:
Name: ______________________________ Yr. & Section: _________
Yr. Level & Subject (Specialization): ________________ Module No: ___________
Name of the Activity: What I know Date: _________________
Directions: Write the letter of your answer.
1. It is a small, sharp, and pointed item for fine work in trimming scallops, clipping
threads and cutting large eyelets.
A. Embroidery hoop C. Gauge
B. Embroidery Scissors D. Pounce
2. It is a fine powder used in transferring design by pricking method.
A. Embroidery hoop C. Gauge
B. Embroidery Scissors D. Pounce
3. A type of fabric that is intended for Hardanger embroidery since the number of
threads per square inch is the same for both warp and woof.
A. Basketweave C. Common weave
B. Break-even weave D. Even-weave
6. 2
4. It was used as an outlining stitch or as a filling stitch. It is done using quite thick
threads, such as wool.
A. Seed Stitch B. Split Stitch C. Stem Stitch D. Satin Stitch
5. It is considered being the easiest stitch for outlining.
A. Running Stitch B. Looped Stitch C. Stem Stitch D. Satin Stitch
6. It is made of wood, bone, metal, or plastic, and used to make eyelets in the
fabric to be embroidered.
A. Embroidery hoop C. Gauge
B. Embroidery Scissors D. Pounce
7. It is used to protect the middle finger and push the needle while doing your
embroidery work
A. Embroidery hoop B. thimble C. scissors D. tape measure
8. It is used for easier threading especially by those sewers with poor eyesight.
A. Embroidery bag B. thimble C. scissors D. threader
9. It is basically an outline stitch, this stitch is usually used for flower stems and
outlines.
A. Seed Stitch B. Split Stitch C. Stem Stitch D. Satin Stitch
10. A place for pins and needles.
A. Embroidery bag B. Emery bag C. Pin cushion D. sewing box
What’s In
Development of Philippine Embroidery
Embroidery is the ornamentation of textiles and other materials with needlework for
personal use and decoration not only at home but for offices as well. The term
embroidery is an English word derived from the old French embroiders meaning edge
and border.
Embroidery was introduced in the Orient by the Netherlands in the 15th century. It
was brought by the Spaniards to the Philippines where it made a wonderful growth
which some of the best works could compete for the ones in Switzerland, a country
noted for its exquisite embroidery.
7. 3
What’s New
Below are the tools and materials used in Embroidery its uses and maintenance.
Tools
Gauge – is used to measure short distances.
Tape measure- is used for measuring more than one-
foot distance or materials.
Thimbles – is made from metal or plastic, used to protect
the middle finger, and push the needle while doing your
embroidery work. This comes in sizes from 6 (small) to
12 (large).
Embroidery hoop/stiletto – is made of wood, bone,
metal, or plastic, and used to make eyelets in the fabric
to be embroidered. It is also used to keep the fabric
stretched while embroidery stitches are applied to the
design.
It is advisable to place tissue paper over the inner hoop or
twist or wrap the inner hoop with a thin material to prevent
markings on the fabric.
Embroidery scissors - a small, sharp, and pointed item
for fine work in trimming scallops, clipping threads, and
cutting large eyelets.
Note: Protect the blades by keeping them in a sheath or
cover and get them to sharpen occasionally.
8. 4
Needle threader- is used for easier threading especially
by those sewers with poor eyesight.
Pounce- is a fine powder used in transferring design by
pricking method.
Embroidery needles- are short pieces of steel with fine points at one end
and little openings or eyes at the other. The type of embroidery and the kind
of thread to use are two things to consider in choosing your needle.
Needles should always have a fine tip so that they can easily move in and out
of the fabric. Do not use a bent needle, without a point, or rusty. This will affect
the regularity and neatness of work. Protect your needles by storing them in a
needle case. Sharpen your needles and make pins last longer by rubbing them
with an abrasive material such as sandpaper or heavy wool.
Crewel - are sharp-pointed, medium
length with large eyes for easy
threading, used for most standard
embroidery stitchery. They come in
different sizes, ranges from 1 to 10.
9. 5
Chenille
Tapestry needle - is similar in size to chenille but is blunt rather than sharp.
Tapestry needles are large enough to accommodate crochet thread or embroidery
floss, and many are large enough to accommodate yarn as well, sizes range from
13 to 26.
Watercolor brush
10. 6
Pincushion- is typically filled tightly with
stuffing to hold pins rigidly in place.
Tracing paper- is used for tracing designs.
Sewing box – is used to keep together the
embroidery tools and materials.
Bag - is made of washable material to hold your work
when not busy on it. It keeps work clean and fresh.
For further reference: Watch this video on how to use some of these tools mentioned
above.
https://www.youtube.com/embed/MeGPaPvwvvA?feature=oembed
https://www.flickr.com/photos/
160866001@N07/39648771723
11. 7
Materials
1. Fabric- sometimes referred to as cloth, are of great variety and they differ in
material, weight, weave, design, color, and finish.
Three Types of Fabric
1. Common weave- includes most tightly woven fabrics with a relatively smooth
surface like linen, wool, and cotton. They are best used for articles with
decorative stitches.
2. Even-weave- are intended for Hardanger embroidery since the number of
threads per square inch is the same for both warp and woof.
3. Basketweave- is commonly used by beginners, while ramie linen is mostly
used by those who are accustomed to this type of embroidery. There is usually
a guide for cross-stitch, or smocking with an evenly spaced pattern like
gingham cloth, or polka dots in the market.
All fabrics should be prewashed before using them for quilting or embroidery. The
filler that is used in the fabric can cause havoc if it is not removed by washing prior
to working with the fabric.
12. 8
Thread - is available in various types. They differ in terms of texture, fiber content,
number of strands, and colors. Threads are usually coded in numbers and color
names. They can be bought in skeins, balls, or spools. The color of the thread should
suit the color and texture of the design and the fabric to be embroidered,
Proper Care of Embroidery Thread
As one of the most essential elements of the stitching process, it is important to
ensure proper and careful care of embroidery thread. Store it properly under
controlled conditions to avoid the following issues:
1. Thread dents—when a cone falls onto the floor, the point of impact can “dent”
the thread, resulting in a weak spot (or spots) that can ultimately lead to problems
as the thread travels toward the needle. This is a common problem for those who
store unused cones on top of their machine. Those cones will “walk” across the
machine table due to the vibration of sewing and ultimately end up on the floor.
2. Discoloring and fading - Threads, especially rayon, will fade when exposed to
sunlight for extended periods of time. If your threads are stored on a windowsill
or anywhere that sunlight can strike them full force, you risk fading and
discoloring.
3. Lint buildup—Threads that sit out are exposed to the elements of your shop’s
environment. They are prone to get dust and lint. Over time, the buildup of dirt
can sink down into the threads. When the thread travels through the upper
thread path, it takes the crud with it, dispensing it through the critical surfaces
(such as tensioners) that should remain clean and smooth. The end result will be
inconsistent upper thread tension and possible thread breaks.
4. Brittleness—In addition to discoloring and fading, excessive exposure to sunlight
can dry out the thread and lead to brittleness in the fibers. Obviously, this will
weaken the thread and lead to excessive thread breaks.
Embroidery Stitches
There are various embroidery stitches that you can choose from when you do
embroidery work. For you to gain more skill on this line, below are the illustration of
some of the embroidery stitches which will help and guide you as you enjoy working
on this lovely craft.
1. Backstitch- the most often used to outline a
design. This stitch also forms the baseline for
other embroidery stitches
13. 9
2. Bullion stitch- a single detached stitch that is
used for filling in a design area. Rows of bullion
stitches may also be used to outline a design. It
is recommended that one uses a needle with a
small eye for ease in pulling
3. Chain stitch- one of the more popular stitches
used for outlining. When worked in close rows,
chain stitches make good stitches for filling the
design area.
4. Cross-stitch- stitched formed by two crossing
arms and may be used for outlining, as borders,
or to fill in an entire area.
5. Feather stitch- a stitch with a loop and
stitches evenly worked on both left and right
sides of a design area.
6. Herringbone stitch- a basic overlapping stitch
popular for its use in borders.
7. Fish Bone- a kind of filling stitch which is ideal
for making leaves or feathers. It requires us to
divide the pattern into two and each side is
filled alternately giving it a plaited effect in the
center, thus ideal to make leaves or feathers.
8. French knot- a single detached stitch used
primarily to fill in a design area. It is a popular
stitch among embroiderers in that it can be used
to create the eyes on an embroidered face or the
center of a flower.
9. Lazy daisy chain stitch- also called detached
chain stitch, this stitch is worked in a circle to
resemble the petals of a flower.
10. Looped stitch- a very decorative stitch and can
be experimented with threads for various colors
over borders. Close layers of this stitch can
create wonderful effects on a pattern.
11. Running stitch- considered being the easiest
stitch for outlining.
14. 10
12. Satin stitch- a solid filling stitch that is used to
cover a design area with long, straight stitches
worked very close together
13. Split stitch- done using quite thick threads,
such as wool. It was used as an outlining stitch
or as a filling stitch.
14. Seed stitch- also known as rice grain stitch.
Stitch uses simple straight stitches in a single
direction to fill in patterns. It has shorter
stitches above the fabric and longer stitches on
the reverse side. They remind of strawberry
seeds, probably, which inspired its name.
15. Stem Stitch- basically an outline stitch, this
stitch is usually used for flower stems, and
outlines. It can only be used as a filling, rows of
Stem stitch worked closely together within a
shape until it is filled completely.
Embroidery Stitches
Instructions: Do the following stitches at home. Pass them the following week. Follow
the steps carefully. Take a picture/video of yourself while doing the activity. Post it
in your e-classroom or you may send your output to any preferred platform.
Materials:
Needle
Thread (any color)
Recycled cloth
1. Backstitch
a. Bring the thread through A and take it
in through B. This creates one stitch.
15. 11
b. Bring the thread through C and take it in
through B. This way, we are creating a
stitch by taking the thread backward
c. Bring the thread through D and take it
in through C. Continue this pattern to
finish the design.
d. A finished line of backstitch will look like this.
2. Bullion stitch
a. Bring the needle out through A and put
the needle through B at the desired
length.
b. Now, bring the needle out through A
again. Then, wind the thread around the
needle as shown. The distance of the
wound thread should measure the same
as the distance between A and B. Too
many or too few wraps will spoil the
stitch.
c. Then, hold the wrapped thread with your
fingers and pull the needle out with the
other finger. Keep pulling the needle
completely in an upward direction till
the wraps lay on the fabric as shown
above. Adjust and straighten the wraps
if required and put the needle back
through B.
16. 12
3. Chain stitch
a. Bring the needle through at the top of the
traced line
b. Hold the working thread down towards
the left with the thumb.
c. Insert the needle at the point where the
thread has just come through and bring
it up on the traced line about one-
sixteenth of an inch / 1.5mm further
along.
4. Cross-stitch
a. Bring the needle out through A and take it
diagonally across to B. Bring it back again
through C, which lies vertically below A.
b. Now put the needle in through D, which
lies vertically above B. You have made a
single cross.
5. Feather stitch
a. We begin by doing a long-tailed daisy with
the start point on A. The loop is angled at
about 45 degrees since we are making a
zig-zag pattern. While making the ‘tail’,
before going in through the fabric, we
wrap the thread around the needle as
shown in the illustration.
b. Then, the needle is put in through C and
brought out through D, again at an angle
of about 45 degrees. Next, loop the thread
around the needle as shown. This is to
make the next long-tailed daisy.
17. 13
c. Continue this procedure of making long-tailed
daisies at 45-degree angles.
d. This illustration shows a portion of the
feathered chain stitch.
6. Fishbone
a. To begin with, bring the needle out
through point A, which is the top tip of
line Y. Put it in through B, to make a
single straight stitch.
b. Now, bring the needle out from a point
very close to A on line X. Put it in
through a point very close to B on line Y.
Again pull out the needle through a point
very close to A on line Z.
c. This procedure of putting in the needle
through X and Z alternatively will
follow. Each time we will be connecting
X-Y and Y-Z.
d. Make sure all the stitch points lie close
to each other to avoid any visible
spaces.
e. Halfway through, our leaf would look
like this. You can see the rib being
formed.
f. Once finished, the filled leaf would look
like this.
18. 14
7. French knot
a. Bring the needle out through A.
b. Now, place the needle close to the fabric. Wrap the
thread around it twice, as shown.
c. Keep the longer end of the thread pulled with
your fingers while putting the needle back at a
point just close to A or even through A.
8. Herringbone stitch
a. Bring the needle out through the first stitch
line at A. Now, take the needle in through B,
which lies diagonally across A on the second
stitch line. Then, take the needle back out
through C, which lies near B.
b. Now, the same procedure will be worked on
the first stitch line. Take the needle
diagonally across to D and bring the needle
back out through E.
c. Continue to make such crosses on both
stitch lines alternately. Make sure the
diagonal stitches are parallel to each other
to bring out the best look.
9. Lazy daisy chain stitch
a. Bring the thread out through A. Put in the
needle near A and bring it out through
point B, but do not pull the needle out
completely. Now, loop the thread around
the needle, like we would in chain stitch.
b. Pull out the needle to tighten the loop.
Put in the needle just outside the chain
created and that will finish the lazy daisy
stitch.
19. 15
c. This stand-alone stitch can be used freely
to be a part of any design. Since I have
decided to make a flower, I will proceed
with making multiple lazy daisies around
the marked stitch line.
d. The completed flower is made of multiple
lazy daisies
10.Looped stitch
a. Lay the foundation by doing a running
stitch. Take a contrasting colored thread
and bring it out from near the first running
stitch
b. Start following the Pekinese stitch
technique. Take the needle in through the
second stitch and come out through the
first, making a loop.
c. Continue this action of ‘looping’ using the
running stitch fruition, as illustrated.
d. Finish up the pattern for it to look like
this.
11.Running stitch
a. Bring the needle out at 1.
b. Insert the needle down at 2
c. Continue steps a and b, working right to
left, to make several running stitches.
Check that the stitches on both and wrong
sides of the fabric are of equal length.
20. 16
12.Satin stitch
a. Bring the needle out through A and put it in
through B. So, that makes a stitch that
covers a small area between the stitch lines.
b. Now, bring the needle back through C, a
point very close to A. Continue this action
over the two stitch lines.
c. Once finished, the area is filled as shown.
You will be spending as much thread on the
reverse side as you do on the actual side of
the fabric.
13.Split
a. Bring out the thread through A and put it in
through B
b. Take the needle backward to bring it out
through C. Note that C lies halfway between
A and B.
b. While bringing out the thread through C,
take it in between the thread, splitting it
into two
c. Again, put the needle in through D to bring
it out through B, splitting the thread
d. Continue this procedure to finish the stitch.
The only thing to keep in mind is to split the
thread when bringing the needle out. In
some way, it will give you a visual feel of
chain stitch
21. 17
14.Seed Stitch
a. Make rows of short running stitches as
illustrated. You need not do row after row,
as long as the strawberry seed pattern is
more or less maintained.
b. Try not to bend with the curves of the
pattern. The rows of running stitch should
essentially be done in straight lines.
15.Stem Stitch
a. Bring out the thread through A and take it in
through B. Take the needle backward and
bring the thread out through C. Make sure
the point C lies over the stitch A-B.
b. You need to note that point C lies about
halfway through A and B. Also, note that C lies
on top of the stitch A-B. So, all the subsequent
stitch points will lie on top of their previous
stitch.
c. Take the needle in through D. Try to mark D in
such a way that the point B will lie halfway
through C-D. Bring the needle out through B.
d. So, the pattern of two stitches of the stem
stitch will be as shown above.
22. 18
What’s More
Use a separate sheet in answering the test. Be sure to write the following:
Name: ______________________________ Yr. & Section: ___________
Yr. Level & Subject (Specialization): ________________ Module No: _____________
Name of the Activity: What’s More Date: ___________________
Instructions: Identify and name the symbols used to care for your textile.
1. 6.
2. 7.
3. 8.
4. 9.
5. 10.
23. 19
What I Have Learned
Use a separate sheet in answering the test. Be sure to write the following:
Name: ______________________________ Yr. & Section: ____________
Yr. Level & Subject ( Specialization): ________________ Module No: ______________
Name of the Activity: What I Have Learned Date: ____________________
Directions: Answer the following questions.
1. How do you properly care for your embroidery thread?
___________________________________________________________________
___________________________________________________________________
2. What are the three types of fabric used in embroidery?
___________________________________________________________________
___________________________________________________________________
What I Can Do
Use a separate sheet in answering the test. Be sure to write the following:
Name: ______________________________ Yr. & Section: _____________
Yr. Level & Subject ( Specialization): _______________ Module No: _______________
Name of the Activity: What I Can Do Date: _____________________
Test I. Instructions. Based on the picture below. List down the textile caring
symbols for this shirt and write the meaning of each symbol.
24. 20
Test II. Instructions: Do at least five stitches. Follow the steps carefully. Take a
picture/video of yourself while doing the activity. Post it in your e-classroom
or send it to your preferred online platform. Put all the finished stitches in a
scrapbook made of recycled notebooks.
Materials:
• Needle
• Thread (any color)
• Recycled cloth
• Recycled Notebook
Stitches to perform
1. Back Stitch 2. Stem Stitch 3. Seed Stitch
4. Split Stitch 5. Looped stitch 6. Running Stitch
7. Chain Stitch 8. Lazy daisy chain
stitch
9. French Knot
Criteria for Grading:
Accuracy of Stitches 30%
Neatness 30%
Speed 20%
Presentation 20%
Total 100%
Assessment
Use a separate sheet in answering the test. Be sure to write the following:
Name: ______________________________ Yr. & Section: ___________
Yr. Level & Subject (Specialization): ________________ Module No: _____________
Name of the Activity: Assessment Date: ___________________
Directions: Write the letter of the correct answer.
1. It is basically an outline stitch, this stitch is usually used for flower stems and
outlines.
A. Seed Stitch B. Split Stitch C. Stem Stitch D. Satin Stitch
2. It was used as an outlining stitch or as a filling stitch. It is done using quite
thick threads, such as wool.
A. Seed Stitch B. Split Stitch C. Stem Stitch D. Satin Stitch
3. It is considered being the easiest stitch for outlining.
A. Running Stitch B. Looped Stitch C. Stem Stitch D. Satin Stitch
4. Stitched formed by two crossing arms and may be used for outlining, as
borders, or to fill in an entire area.
A. Bullion stitch B. Cross-stitch C. Feather stitch D. Fish Bone
25. 21
5. A stitch with a loop and stitches evenly worked on both left and right sides of
a design area.
A. Bullion stitch B. Cross-stitch C. Feather stitch D. Fish Bone
6. It is used to keep the fabric stretched while embroidery stitches are applied to
the design.
A. Embroidery hoop B. thimble C. scissors D. tape measure
7. It is used to protect the middle finger and push the needle while doing your
embroidery work
A. Embroidery hoop B. thimble C. scissors D. tape measure
8. It is used for easier threading especially by those sewers with poor eyesight.
A. Embroidery bag B. thimble C. scissors D. threader
9. It is used to keep together the embroidery tools and materials.
A. Embroidery bag B. thimble C. scissors D. sewing box
10.A place for pins and needles.
A. Embroidery bag B. Emery bag C. Pin cushion D. sewing box
Answer Key
References
K to 12 Handicraft Learning Module
Online Sources:
https://www.youtube.com/embed/MeGPaPvwvvA?feature=oembed
https://www.homestratosphere.com/types-of-embroidery-tools/
https://www.youtube.com/watch?v=MeGPaPvwvvA
https://www.youtube.com/watch?v=MeGPaPvwvvA&list=PLw9UtrbSNwZXfOGeSILzxTkTNlv
gfdhMa&index=2
https://www.youtube.com/watch?v=XJtfDtI06NE
https://www.youtube.com/watch?v=kKnBUa4l2k4
https://www.youtube.com/watch?v=wY7hWEwe_mI
What’s
More
1.
Bleach
2.
Dry
Clean
normal
3.
Do
not
dry
clean
4.
Do
not
dry
5.
Dry
in
Shade
6.
Dry
clean
7.
Iron
on
High
8.
Dip
dry
9.
Iron
on
Medium
10.
Handwash