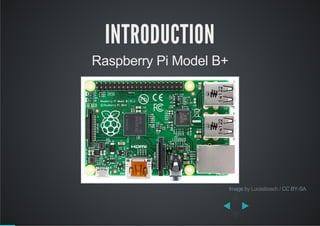
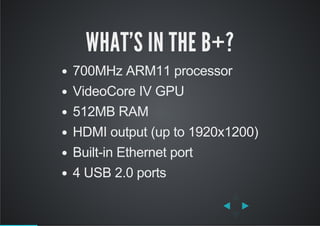
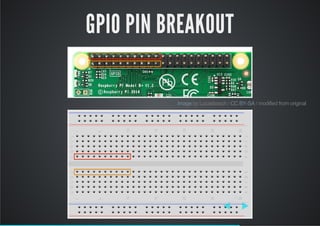
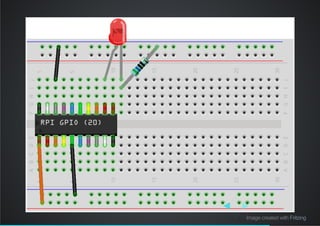
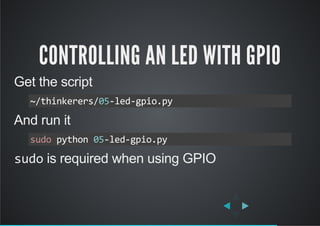
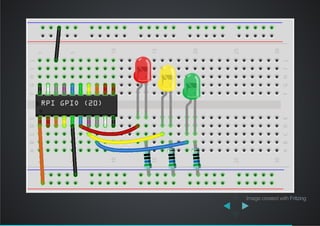
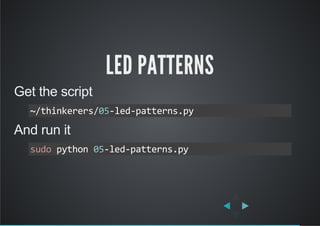
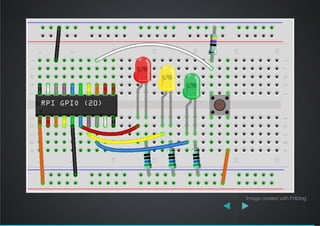
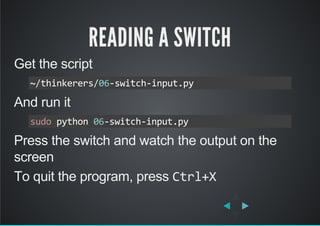
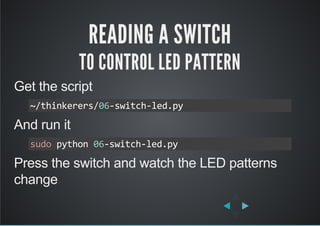
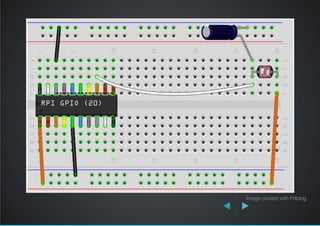
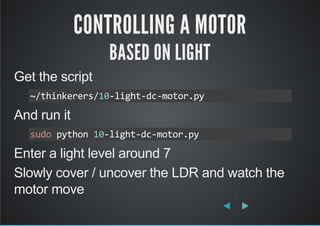
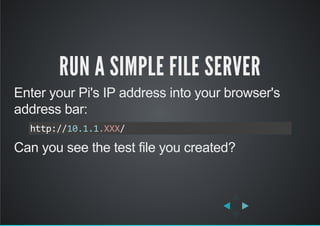
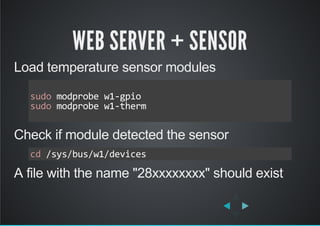
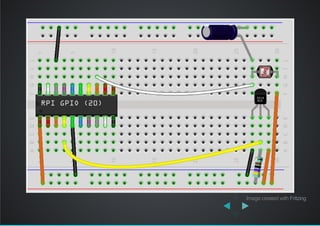
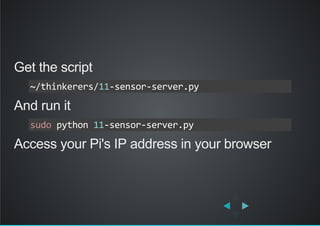
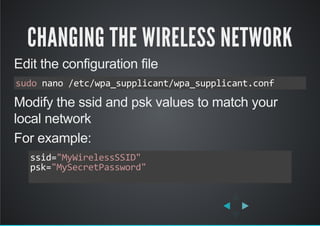
WWW.THINKERERS.ORG
PRESENTS
RASPBERRY PI
HI THERE
I'm Adrian
Social entrepreneur and maker enthusiast
Based in KL
Previously enterprise software specialist
INTRODUCTION
Raspberry Pi Model B+
 by Lucasbosch / Image CC BY­SA
PI? RASPBERRY?
low­cost single­board computer
developed by the Raspberry Pi Foundation, UK
mainly runs Linux operating systems
Pi => Python
WHY RASPBERRY PI?
originally for teaching computer science in
schools
functions just like a regular PC:
browse internet, plays videos and games, word
processing
allows easy and painless way to control
electrical components/sensors using software
affordably priced at USD35 (≈ RM125)
WHAT'S IN THE B+?
700MHz ARM11 processor
VideoCore IV GPU
512MB RAM
HDMI output (up to 1920x1200)
Built­in Ethernet port
4 USB 2.0 ports
OTHER MODELS
Model A (April 2012)
Model B (Oct 2012)
Compute Model (April 2014)
Model B+ (July 2014)
Model A+ (Nov 2014)
Version 2 Model B (Feb 2015)
WHAT'S NOT IN THE BOX?
Display monitor (duh!)
Keyboard & mouse (obviously...)
Power supply (via Micro USB port)
Storage (microSD card)
CONNECTING TO THE PI
STANDALONE
Raspberry Pi + Monitor + Keyboard + Mouse
HEADLESS
Raspberry Pi + Network + Your Laptop
NETWORKING WITH THE PI
Built­in Ethernet for wired connections
Wireless also supported when attached to a
compatible WiFi dongle
We will connect to the Pi through a network
using SSH
SSH
also called Secure Shell
allows remote login to a networked computer
uses encryption to secure data communications
involves an SSH server (the Raspberry Pi)
and an SSH client (your laptop)
SSH CLIENTS
Linux and Mac OS X have a built­in command:
ssh
Windows users can install
PuTTY
   tip: PuTTY GUI client is also available for Linux
CONNECTING VIA SSH
Each Pi has been assigned a fixed IP address
For Linux and Mac OS X, type:
ssh pi@10.1.1.10
For Windows, run PuTTY
Hostname = 10.1.1.10, Port = 22
Click 'Open'
BASIC CLI & PYTHON
CLI COMMANDS
ls ­ list directory contents
pwd ­ show current directory
cd ­ change directory
mkdir ­ make directory
mv ­ move/rename files
rm ­ remove files/directories
mv ­ move/rename files
sudo ­ super user privileges
PYTHON
is a programming language
you create a file (called a Python script) that
contains a set of instructions
these instructions tell the computer what to do,
like read input from the keyboard or print some
text to the screen
you then pass the script to the Python
interpreter which will execute those instructions
HELLO PYTHON
Lets write a simple Python script to read input
from the keyboard and then print it to the screen
HELLO PYTHON
1. Create a new directory
2. Change to that new directory
3. Create a Python script
mkdir ~/python‐intro
cd ~/python‐intro
nano hello.py
SIMPLE PYTHON PROGRAM
4. Type in the following
name = raw_input("Hi, what is your name? ")
print("Hello %s, have fun hacking today!" % name)
          
SIMPLE PYTHON PROGRAM
5. Save the file by pressing Ctrl+X
6. When asked to confirm, press Y, then hit
ENTER
7. Run the Python script by typing:
python hello.py
MODIFYING A PYTHON PROGRAM
To edit your Python script, run the following again
Try adding another question and response
nano hello.py
GPIO AND CIRCUITS
WHAT IS GPIO
General­purpose input/output
generic pins on an integrated circuit
each pin can be configured as input or output
input/output values can be high (1) or low (0)
exposed as a 20x2 row of pins on the Model B+
GPIO ON THE PI
The GPIO pins are exposed on the 20x2 pin
header of the Model B+
 by Lucasbosch /   / cropped from originalImage CC BY­SA
GPIO PINOUT
Pinout on the Model B+
Note how some of the pins have a specific
function
 by Image www.raspberrypi­spy.co.uk
VOLTAGE SUPPLY RAILS
The Pi supplies 2 voltage levels: 5V and 3.3V
What voltage level to use depends on the
component
VOLTAGE SUPPLY RAILS
2 x 5­volt pins (red)
2 x 3.3­volt pins (orange)
8 x ground pins (grey)
 by Image www.raspberrypi­spy.co.uk
WARNING
The GPIO pins on the Pi are NOT 5V tolerant
Never connect a 5V pin directly to any other pin
as this can permanently damage the Pi
REMEMBER
Always ensure the Pi is turned off before making
any changes to your circuit
TURNING THE PI OFF
1. Run this command
2. Wait for the lights to stop flashing
3. Disconnect the USB power cable from the Pi
or
    switch off the power socket
sudo halt
GPIO PIN BREAKOUT
 by Lucasbosch /   / modified from originalImage CC BY­SA
DOWNLOAD
all the code we will be using from
We will transfer the code to the Pi using a
network share
http://bit.ly/1A3lWd4
NETWORK SHARE
log on to your Pi
from your laptop, open:
copy all the files across
move the files to thinkerers directory:
//10.1.1.10/pishare
mv ~/share/* ~/thinkerers
CONTROLLING AN LED WITH GPIO
Image created with Fritzing
CONTROLLING AN LED WITH GPIO
Get the script
And run it
sudo is required when using GPIO
~/thinkerers/05‐led‐gpio.py
sudo python 05‐led‐gpio.py
LED PATTERNS
Image created with Fritzing
LED PATTERNS
Get the script
And run it
~/thinkerers/05‐led‐patterns.py
sudo python 05‐led‐patterns.py
READING INPUT
Image created with Fritzing
READING A SWITCH
Get the script
And run it
Press the switch and watch the output on the
screen
To quit the program, press Ctrl+X
~/thinkerers/06‐switch‐input.py
sudo python 06‐switch‐input.py
READING A SWITCH
TO CONTROL LED PATTERN
Get the script
And run it
Press the switch and watch the LED patterns
change
~/thinkerers/06‐switch‐led.py
sudo python 06‐switch‐led.py
SENSORY MADNESS
(INPUTS)
READING LIGHT
Image created with Fritzing
READING LIGHT
Get the script
And run it
Move your hand over the LDR and watch the
reading change
To quit the program, press Ctrl+X
~/thinkerers/07‐reading‐light.py
sudo python 07‐reading‐light.py
READING TEMPERATURE
Image created with Fritzing
SOME MODULES NEED TO BE ENABLED
Run this
Note: this isn't permanent
sudo modprobe w1‐gpio
sudo modprobe w1‐therm     
     
READING TEMPERATURE
Get the script
And run it
Touch the temperature sensor and watch the
reading change
To quit the program, press Ctrl+X
~/thinkerers/08‐reading‐temp.py
sudo python 08‐reading‐temp.py
? MAGIC RULER ?
SONAR SENSOR
Get the script
Hold the sensor steady and point it at a nearby
flat surface
Then execute the script
~/thinkerers/08‐sonar‐sensor.py
sudo python 08‐sonar‐sensor.py
MOTOR-ING
(OUTPUTS)
Image created with Fritzing
CONTROLLING A DC MOTOR
Script to use:
And run it
~/thinkerers/09‐dc‐motor.py
sudo python 09‐dc‐motor.py
CAUTION
Take care removing the L293D
Slowly wedge it out by gripping the sides
Try not to bend the sharp pins
CONTROLLING A SERVO MOTOR
The Pi isn't actually good for servo control
Only one PWM pin ­ GPIO18
Linux OS interrupts the pulse generated
Both software and hardware solutions available
Image created with Fritzing
CONTROLLING A SERVO MOTOR
Script to use:
Execute the script
Enter angle between 0 and 180 degrees
~/thinkerers/09‐servo‐motor.py
sudo python 09‐servo‐motor.py
AUTOMATION
Input + Output = AUTOMATION
Try to combine what you just learnt
Can you control the DC motor based on light?
Example: bright = move forwards
    dim = move backwards
CONTROLLING A MOTOR
BASED ON LIGHT
Get the script
And run it
Enter a light level around 7
Slowly cover / uncover the LDR and watch the
motor move
~/thinkerers/10‐light‐dc‐motor.py
sudo python 10‐light‐dc‐motor.py
REMOTE MONITORING AND CONTROL
RUN A SIMPLE FILE SERVER
Create a directory
Change to that directory
Create a test file, enter some text, and save it
Run this
mkdir ~/website
cd ~/website
nano test.txt
sudo python ‐m SimpleHTTPServer 80
RUN A SIMPLE FILE SERVER
Enter your Pi's IP address into your browser's
address bar:
Can you see the test file you created?
http://10.1.1.XXX/
BASIC WEB SERVER
Get the script
And run it
In your browser, go to
~/thinkerers/11‐basic‐server.py
sudo python 11‐basic‐server.py
http://10.1.1.XXX/any‐text‐you‐like
WEB SERVER + SENSOR
Load temperature sensor modules
Check if module detected the sensor
A file with the name "28xxxxxxxx" should exist
sudo modprobe w1‐gpio
sudo modprobe w1‐therm     
     
cd /sys/bus/w1/devices
Image created with Fritzing
Get the script
And run it
Access your Pi's IP address in your browser
~/thinkerers/11‐sensor‐server.py
sudo python 11‐sensor‐server.py
AFTER THE WORKSHOP
CHANGING THE PI'S IP ADDRESS
Edit the configuration file
Modify these lines to match your local network
For example:
sudo nano /etc/network/interfaces
address 10.1.1.XXX
gateway 10.1.1.1
          
address 192.168.0.XXX
gateway 192.168.0.1
          
CHANGING THE WIRELESS NETWORK
Edit the configuration file
Modify the ssid and psk values to match your
local network
For example:
sudo nano /etc/wpa_supplicant/wpa_supplicant.conf
ssid="MyWirelessSSID"
psk="MySecretPassword"
          
RECOMMENDED RESOURCES
TOO MANY TO CHOOSE!
THE END
THANKS FOR COMING!
MIND DOING A SHORT SURVEY?
This work by Adrian Lai is licensed under a
Python code samples provided are free of known copyright restrictions
The Raspberry Pi and the Raspberry Pi Logo
are trademarks of the Raspberry Pi Foundation
All other registered trademarks are property of their respective owners
Creative Commons Attribution­ShareAlike 4.0 International License

ThinkerersA01