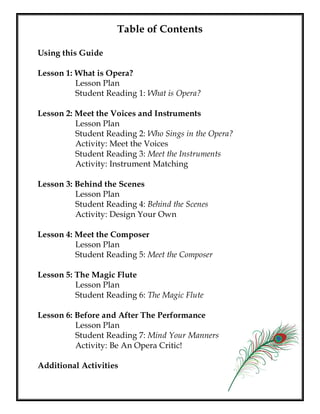
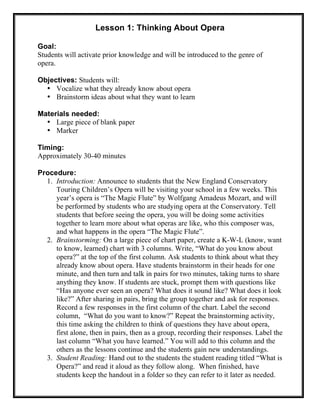
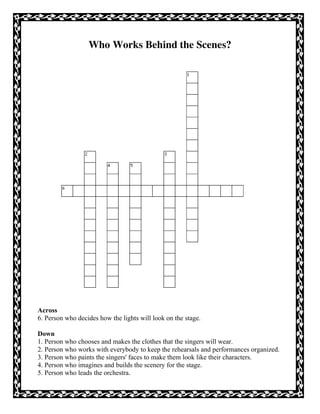
Teacher Resource Guide
for
The Magic Flute
by Wolfgang Amadeus Mozart
NEW ENGLAND CONSERVATORY
Touring Children’s Opera 2010
Written and Compiled by Mary-Alexandra Onstad,
Touring Children’s Opera Intern
With contributions from Afton Cotton, Jessica Reed, and Tanya Maggi
Table of Contents
Using this Guide
Lesson 1: What is Opera?
Lesson Plan
Student Reading 1: What is Opera?
Lesson 2: Meet the Voices and Instruments
Lesson Plan
Student Reading 2: Who Sings in the Opera?
Activity: Meet the Voices
Student Reading 3: Meet the Instruments
Activity: Instrument Matching
Lesson 3: Behind the Scenes
Lesson Plan
Student Reading 4: Behind the Scenes
Activity: Design Your Own
Lesson 4: Meet the Composer
Lesson Plan
Student Reading 5: Meet the Composer
Lesson 5: The Magic Flute
Lesson Plan
Student Reading 6: The Magic Flute
Lesson 6: Before and After The Performance
Lesson Plan
Student Reading 7: Mind Your Manners
Activity: Be An Opera Critic!
Additional Activities
Using This Guide
Dear Teachers,
Welcome to NEC’s Touring Children’s Opera Teacher Resource
Guide! This guide is intended to assist you and your students in
learning some basic information about opera and to help you
learn more about the opera you and your students will be seeing
this year, The Magic Flute by Wolfgang Amadeus Mozart.
This guide contains six lessons that can be used prior to your
student’s viewing of the opera. The lessons are designed for
students in grades 3-6, and can be used in the general or music
classroom. The lessons can and should be modified and
supplemented in any way that is appropriate for your students at
any grade level—feel free to be creative and to pick and choose
what will work well for your class! We hope that you will find
this guide to be a useful resource as you prepare your students to
view a live performance.
The Magic Flute is originally a very large-scale German opera that
is performed in 2 acts. The version that you and your students
will see has been adapted to run in one act in just 40 minutes, and
will be sung in English. The singers are all graduate voice
students at New England Conservatory, and will use costumes,
props, and some small set pieces when performing.
We look forward to sharing this opera with you and your
students, and hope that you find it an enriching and enjoyable
experience!
Sincerely,
The Community Performances and Partnerships Program
and Opera Department at New England Conservatory
Lesson 1: Thinking About Opera
Goal:
Students will activate prior knowledge and will be introduced to the genre of
opera.
Objectives: Students will:
• Vocalize what they already know about opera
• Brainstorm ideas about what they want to learn
Materials needed:
• Large piece of blank paper
• Marker
Timing:
Approximately 30-40 minutes
Procedure:
1. Introduction: Announce to students that the New England Conservatory
Touring Children’s Opera will be visiting your school in a few weeks. This
year’s opera is “The Magic Flute” by Wolfgang Amadeus Mozart, and will
be performed by students who are studying opera at the Conservatory. Tell
students that before seeing the opera, you will be doing some activities
together to learn more about what operas are like, who this composer was,
and what happens in the opera “The Magic Flute”.
2. Brainstorming: On a large piece of chart paper, create a K-W-L (know, want
to know, learned) chart with 3 columns. Write, “What do you know about
opera?” at the top of the first column. Ask students to think about what they
already know about opera. Have students brainstorm in their heads for one
minute, and then turn and talk in pairs for two minutes, taking turns to share
anything they know. If students are stuck, prompt them with questions like
“Has anyone ever seen an opera? What does it sound like? What does it look
like?” After sharing in pairs, bring the group together and ask for responses.
Record a few responses in the first column of the chart. Label the second
column, “What do you want to know?” Repeat the brainstorming activity,
this time asking the children to think of questions they have about opera,
first alone, then in pairs, then as a group, recording their responses. Label the
last column “What you have learned.” You will add to this column and the
others as the lessons continue and the students gain new understandings.
3. Student Reading: Hand out to the students the student reading titled “What is
Opera?” and read it aloud as they follow along. When finished, have
students keep the handout in a folder so they can refer to it later as needed.
Student Reading 1
What Is Opera?
You might think that only fat people sing opera, or that only people wearing big horns
and weird clothes sing opera. But if you go and see an opera you won’t see that. Going
to an opera is like going to another planet where nothing is familiar to you. But if you
take a little time to learn what opera is all about and how it works, you might find that
there is something to enjoy about opera for everyone—even you!
In opera many different things are used to tell the story. There are dancers, singers,
actors, an orchestra, costumes and sets to tell the story. Also in opera there are
characters, a setting, a problem, events and a solution—just like in the books you are
reading right now. But opera is more than just a story. In opera, the characters sing
beautiful music that expresses their emotions. The music and the acting make the story
even more fun to watch for the audience.
Something else you might not know is that in opera, the composers often wrote the
story in the language that they spoke. The most common operas are sung in Italian,
French and German, but a lot of opera is also translated or written in English as well.
Many of the characters in the opera sing arias (AH-ree-ahs), which are solos songs
that show how they are feeling. Arias can express many different emotions such as
sorrow, happiness, anger, or silliness. It is very important for the singers to be good
actors and express what they are feeling so the audience can understand what they are
singing about. When they aren’t singing arias, the characters in the opera sing
recitative (reh-sit-ta-TEEVE), which is a kind of singing that sounds like speaking, and
moves the story along more quickly. Singers sometimes sing cadenzas (ca-DEN-zahs)
during their arias, when they improvise and show off their vocal talents. If the audience
likes something they heard during the performance, they might shout Bravo (for the
male performer) or Brava (or the female performer).
The words of the opera are called the Libretto (lib-RET-oh), which is an Italian word
that means “little book.” The person who writes the words of the opera is called the
librettist. The librettist is usually different from the composer, who writes the music for
the opera but sometimes the composer writes both the music and the words. The story
for an opera can be taken from folktales or fairy tales, but sometimes librettists write
their own stories, too.
There are many different kinds of people that take part in an opera. There are the solo
singers who sing the leading roles in the production. There is also the chorus, which
can play different roles in the opera like villagers, soldiers and different people for the
crowd scenes. There are also musicians who play in the orchestra, producers, set
designers, costume designers, lighting designers, directors, and a conductor to read the
score (a book where all the music for the singers and instruments is located) and
lead the orchestra and singers. An opera takes a lot of people to put on, but the end
result is fabulous, exciting and a wonderful thing to watch.
Lesson 2: Meet the Voices and Instruments
Goal:
Students will become familiar with the different voice parts that are used in opera
as well as the important instruments that help make up an orchestra.
Objectives: Students will
• Read to gain new understanding
• Learn 6 voice types and the differences in each voice type
• Learn about different instruments that are used during an opera
• Listen and imagine what they think the voice types sound like.
• Listen and choose what instrument belongs to what picture.
Materials Needed:
• KWL from Lesson 1
• Student Reading 2: “Who Sings in the Opera?”
• Activity Sheet 1 (1 copy per student)
• Listening CD #1-Demonstration of 6 different voice types
• Student Reading 3: “Meet the Instruments”
• Activity Sheet 2 : “Meet the Instruments” (1 copy per student)
• Listening CD #2- Demonstration of 9 different Instruments
• Markers
• Pencil and erasers
• Counters or beans for instrument guessing game
Timing:
Two 30-45 min lessons or one 60-90 minute lesson. This lesson can be broken into
2 separate lessons if needed for time. Or, if needed, you can choose to omit
learning about the instruments.
Procedure:
1. Introduction: Review with the students the KWL chart created in Lesson 1.
Add any new information to the “What do you want to know?” and “What
you have learned” categories.
2. Student Reading: After discussing the last lesson, tell them that today they
will be learning all about the different voice types that are heard in opera.
Hand out copies of the Student Reading 2: “Who Sings in the Opera?”. You
can either do a shared reading with the students or a read out loud with your
students as they follow along.
3. Activity 1: Meet the Voices: After the students have read about the 6
different voice types, hand out a copy of Activity Sheet 1 to each student.
Have the students listen to the 30 second clip of each voice type from CD #1
and in the each box have them jot down words that describe what they are
hearing such as high, low, bird-like, deep, fluttering, etc. You can play each
selection for them twice if needed. After all 6 voice types have been played,
have the students share what words they thought described each voice type.
4. Note: Parts 4 and 5 can be done as their own separate lesson. Student
Reading 2: Pass out copies of Student Reading 3: “Meet the Instruments” to
each student. Read through this information aloud or have the students read
in small groups, pairs, or individually.
5. Activity 2: Meet the Instruments: Pass out a copy of Activity Sheet 2 to each
student. Also pass out the counters or beans that the students will use to put
over the right answer during this activity. Play students a 30 second clip of
an instrument from CD #2. Let them take some time to guess which
instrument is being played, and place their counter on the picture of their
choice. Play the clip one more time for them. Have students raise their hands
when they think they know the correct answer. Choose a student to answer,
and confirm the correct instrument, having student move their counters as
necessary. Repeat until all 9 instruments have been played.
Student Reading 2
Who Sings in the Opera?
There are four main voice types in operatic singing: soprano,
mezzo-soprano, tenor and bass. In opera, these voice types are
broken out into categories that show the singer’s vocal range as
well as the kinds of roles they usually take on.
Sopranos: Sopranos are the highest of the female voice types. In
opera, the soprano is almost always the ‘heroine’ or leading lady
of the opera. Some special sopranos are called coloratura
sopranos and lyric sopranos. Coloratura soprano voices move
very fast and usually sing very high. Lyric sopranos sing older
roles, and though they sing high, they don’t usually sing very fast.
Mezzo-Soprano: The mezzo soprano is the lower-ranged female
voice type. Throughout opera history, the mezzo has been used
to play many different types of characters: everything from boys
or young men to mothers, witches, gypsies and old women.
Tenor: The tenor is the highest of the male voices. The tenor
often plays the hero in an opera.
Bass: There are two low voice types for men. One is called the
Baritone and this is the most common voice type for men. It has
a lower range than the tenor and usually plays the villain in the
opera. There is also the Bass voice, which is the lowest of all the
male voices, and is very deep and husky.
Activity Sheet 1
Meet The Voices:
Write down words that you think describe the voice type that you are hearing. You will
hear 6 different voices. There will be one voice per box.
1. Soprano 2. Coloratura Soprano
3. Mezzo-Soprano 4. Tenor
5. Baritone 6. Bass
Student Reading 3
Meet the Instruments
In the opera you will see in a few weeks, you will only hear a piano
accompanying the singers. The piano will be imitating a full orchestra, which
is what you would hear in a full-length opera production. There are 4
different sections to the orchestra: strings, woodwinds, brass and
percussion. Let’s learn more about some of the instruments in each section:
Strings
All have strings and are played with a bow.
Violin
• Highest sounding and smallest of all the string
instruments
Viola
• Lower and larger than the violin
Cello
• Even lower than the viola and large enough that it has to
be played upright while sitting down
Bass
• The lowest and largest string instrument,
between 6-7 feet tall!
Woodwinds
Were once all made of wood, and are played by blowing air through them.
Today, many are made of silver and gold.
Flute and piccolo
• Highest sounding of all woodwind instruments
• Piccolo is much smaller and its pitch is higher than the
flute
Oboe and English Horn
• Medium high in pitch, and played with a double reed.
Clarinet
• Has a wide range from high to low, sounding hollow and
mellow, and is played with a single reed
Bassoon
• Lowest range of the woodwinds, played with a double
reed.
Student Reading 3
Brass
All made of metal and played by blowing air through them.
Trumpet
• Highest of all the brass instruments and sounds
brilliant and strong
French Horn
• Medium low range and player’s right hand is placed in
the bell to control pitches and tones
Trombone
• Medium low range, has a slide that is pushed in and out
Tuba
• Lowest sounding and largest brass instrument
Percussion
All struck by the hand or mallets to create rhythms.
Timpani
• Also called the kettle drum; large, pitched drums
played in groups of 3-5
• Produces deep thunder like tones
Snare Drum
• Played with drumsticks for high sharp tones
Cymbals
• 2 circular brass discs that crash together
Marimba
• A large xylophone with wooden bars and metal
resonator tubes underneath
Piano/Keyboard
• Considered a percussion instrument since it plays a
rhythmic role in music
• Sound is produced by small hammers striking strings.
These hammers strike when the player’s hands press
the piano keys.
Activity Sheet 2
There are many instruments in the orchestra that accompanies the singers in an opera.
Can you pick out which instrument is being played on the CD? Put your marker on the
instrument you think it is. Raise your hand when you think you know the answer.
Lesson 3: Behind the Scenes
Goal:
Students will understand that many people need to come together to make an opera
happen, including directors, stage managers, designers, makeup artists and a crew.
Objectives: Students will:
• Read to gain new understanding of terms
• Discover the roles performed behind the scenes during an opera production
• Imagine designing a set, costumes, and makeup
Materials needed:
• Student Reading 4: “Behind the Scenes”
• Activity Sheet 3: “Design you Own!” (1 copy per student)
• Markers, Crayons, Colored Pencils
Timing:
Approximately 45 minutes.
Procedure:
1. Introduction: Review what the students learned about opera during Lesson 2
and add to the KWL chart from Lesson 1.
2. Student Reading: Tell the students that today they will learning all about
what goes on backstage in an opera production. Hand out a copy of Student
Reading 4: “Behind the Scenes” to each student. Have students read in small
groups or read out loud to your students as they follow along.
3. Activity 3: Design Your Own - Hand out a copy of Activity Sheet 3 to each
student. Students will begin by designing their own story and characters for
an opera, and then choose to design the set, costumes, makeup, or all three.
Students can do this activity in partners, in groups, or independently. After
they are done, they can share their story and what they designed with the rest
of the class.
Student Reading 4
Behind The Scenes
The people who work behind the scenes on an
opera have a wide variety of jobs. The set
designer imagines the scenery that will be on
stage with the actors, and makes models and
blueprints of the set to make sure it will fit on
the stage. The lighting designer works with the set designer to decide
how the lights will look on the stage—which colors, how bright, and so
on—to help tell the story of the opera, and to help make the emotions of
the actors come to life. The construction crew then puts together the set
and helps to set up the lights. The crew is made up of carpenters, painters,
electricians, sound technicians, and prop-makers (a prop is an object that
an actor holds or uses on stage). In charge of all of these people is the
technical director, who makes sure everyone in the crew is doing his or
her job, and makes sure the set and the lights come together perfectly.
Another important person behind the scenes is the costume designer.
He or she works with the director of the opera to draw sketches and
imagine what the actors will be wearing. Then, the costume designer finds
costume pieces (like hats, shoes, and accessories), and sews clothes for the
actors to wear. The costume designer sometimes also works with a
makeup artist, who uses makeup and paint to help the actors transform
into their characters.
Lastly, two of the most important people behind the scenes are the stage
manager and the director. The stage manager works with all of the
singers, the conductor, the crew, the designers, and the director to make
sure everything is running smoothly. During the performance, he or she
tells the crew when to raise and lower the curtain, when to change the
lighting and scenery, and where the actors should enter and exit the stage
from. The stage manager is usually also in charge of everyone’s rehearsal
schedule, and makes sure that everyone is in the right place at the right
time, so it is important that they are organized and good at communicating
information. The director is in charge of the entire opera production, and
needs to have a clear idea of what he or she wants the opera to look like
and sound like in the end. The director decides where the singers will
stand and move on the stage, how they will interact with each other, and
how the entire story should unfold in front of the audience.
Activity Sheet 3
Name: _________________________ Date: _____________
Design Your Own!
Now that you know how important the people are who work
“behind the scenes” on an opera, take some time to try out their jobs
yourself! First, think of a story (that you already know from a book
or movie, or from your own imagination), and then imagine what the
scenery, costumes, and makeup would look like. Lastly, make
sketches, just like a real designer would use to bring to the director!
Story Title:
______________________________________________________
Characters:
______________________________________________________
______________________________________________________
______________________________________________________
The setting of this story is ________________________________.
What happens in your story? _______________________________
______________________________________________________
_____________________________________________________________
_____________________________________________________________
_____________________________________________________________
Activity Sheet 3
Sketch Your Designs!
Choose 1, 2, or all 3 of the following activities to complete.
1. In the space below, draw a picture of what the set and scenery would look
like on the stage of your opera.
2. In the space below, draw a picture of what the characters would wear as
costumes in your opera. Label the characters with their names.
Set:
Costumes:
Activity Sheet 3
3. Choose two characters from your opera, and draw a picture of their makeup
on the blank faces below. Label the characters with their names.
Lesson 4: Meet the Composer
Goal:
Students will learn about the life of Wolfgang Amadeus Mozart, the composer of
The Magic Flute and will gain an understanding of his musical career and
accomplishments.
Objectives: Students will:
• Read to gain new understanding
• Create sequential timelines
Materials Needed:
• KWL from Lesson 1
• Student Reading 5: “Meet the Composer” (1 copy per student)
• Highlighters (optional)
• Activity Sheet 4: “Create a Timeline” (1 copy per student)
• Event Sheets- Before the lesson begins, label 15 pieces of blank paper with a
date from the Event Reference Sheet included in this lesson, one date per
sheet. These sheets will be handed out to students during the “Create a
Timeline” activity.
• Pencils and Erasers
• Markers
• Tape
Procedure:
1. Introduction: Review with the students what they learned during Lesson 3,
and add any new understandings or questions to the KWL chart from Lesson
1.
2. Student Reading: Hand out copies of Student Reading 5: “Meet the
Composer” to each student. Tell students that they will be learning about
important events that happened to Mozart during his lifetime, and ask them
to highlight (or circle/underline) any dates that they come across in the text
as they read. Do a shared reading (or read aloud) of the text as the students
follow along, or have the students read the selection in small groups, in
pairs, or independently. Students will find a total of 15 dates in the text as
they read. (Note: You can use the Event Reference Sheet to make sure
students have found all of the events mentioned in the reading.)
3. Activity – Create a Timeline: Pass out the Event Sheets that you made before
the lesson to pairs or trios depending on how many students you have. In
their small groups, have the students look back in their reading to find out
what happened in Mozart’s life on that date, add a caption to their date
describing the event, and draw a picture of that event. When they are done,
have each group come up and put their event up on the white board with tape
in the correct sequence, creating a class timeline.
Event Reference Sheet (for Teacher Use)
from Student Reading 5: Meet the Composer
1. Birth- January 27th
, 1756
2. 1760 – Began playing piano
3. 1761 – Started composing
4. 1763 – First piece published
5. 1769 – First opera published
6. 1763-1766 – Made his trip through Europe with family to play for royalty
7. 1767-1768 – Moved to Vienna
8. 1769-70 – Took a tour of Italy with his father
9. 1778 – Composed the Paris Symphony
10. 1779 – Returned to Salzburg, Austria
11.1786 – Wrote the Marriage of Figaro
12. 1787 – Wrote Don Givovanni
13. 1790 – Wrote Cosi Fan Tutte
14. 1791 – Wrote The Magic Flute
15.Death – December 5th
, 1791 at the age of 35
Activity Directions: On 15 pieces of blank paper, write one date per sheet (date
only). Hand out the sheets to small groups of students and have them use their
reading to find out what happened during Mozart’s life on that date, and write a 1-
sentence caption. Then, the group can create an illustration for that event. Once
all the groups are finished, students can put all of the event sheets in order to make
a class timeline of Mozart’s life.
Student Reading 5
Meet the Composer:
Wolfgang Amadeus Mozart
Wolfgang Amadeus Mozart was born into a musical
family on January 27th
, 1756 in Salzburg, Austria.
His father Leopold was a violist and composer.
When Mozart’s sister Maria Anna was seven, she
began keyboard lessons with her father, and the
three-year-old Wolfgang watched with fascination.
In 1760 Mozart was 4 years old, and began piano
lessons playing with great musical knowledge.
Mozart was a considered a child prodigy. A child prodigy is a child who is very
good at a something at a very young age. By the age of 5 in 1761, he was already
very good at the piano and violin, and started composing his own pieces. He had
his first piece published when he was seven years old in 1763, and then had his
first opera published when he was twelve years old in 1769. Mozart loved
composing so much that he could do it even while eating- his favorite food was
liver dumplings and sauerkraut!
From 1763-1766, Mozart’s family made many trips throughout Europe so he could
perform for royalty on a concert tour. He met a lot of famous musicians during his
travels, and he moved to Vienna from 1767-1768 to work with them. His father
then decided to go on a tour of Italy with Wolfgang in 1769-70. Because of this
trip, he wrote his first Italian opera, which was called Mitridate. He and his mother
then decided to travel to France where he composed the Paris Symphony in 1778.
His mother died there in Paris.
He returned to Salzburg, Austria in 1779 where he was able to write for a lot of
very important people who would hear his music. In 1786 he wrote his most
important opera called “The Marriage of Figaro.” He wrote many famous operas
after this, such as Don Giovanni (1787), Cosi Fan Tutte (1790) and The Magic
Flute (1791).
At the end of his life, Mozart was asked to write a requiem (a piece written to
honor the dead). He was very ill at the time and never finished the piece. He died at
the age of 35 on Dec 5, 1791. Even though he only lived a short life he was able to
compose beautiful operas, symphonies, concertos, masses and chamber music
pieces that are still heard around the world today. He will always considered a
genius.
Lesson 5: The Story of “The Magic Flute”
Goal:
Students will learn about the story of the Magic Flute and the characters they will
meet during the opera.
Objectives:
• Learn the plot of “The Magic Flute”
• Create and perform their own 5-minute “Magic Flute Skits”
Materials Needed:
• KWL Chart and Marker
• Student Reading 6: “The Magic Flute” (1 copy per student)
• Sheet of paper and pencils for skit planning (1 per group)
• Arts and crafts supplies and/or dramatic play props and costumes
Timing:
30-45 minutes, depending on grade level
Procedure:
1. Introduction: Review the KWL chart created in Lesson 1, and add any new
understandings of questions to the columns.
2. Student Reading: Hand out a copy of Student Reading 6: “The Magic Flute”
to each student. Do a shared reading or read-aloud of the text as students
follow along, or have students read the selection in small groups, in pairs, or
independently. (Note: The synopsis in this handout reflects the shortened
version of the opera that the students will see. The full opera is much longer
and includes other plot elements and characters.)
3. Activity: Act It Out: Explain to the students that now that they know the
basic story of “The Magic Flute,” they will be creating their own 5-minute
“Magic Flute Skits” to show what they learned. Divide the class into small
groups (4-5 students per group) and challenge them to come up with an
original skit that will tell the story of “The Magic Flute” in their own way.
Encourage students to be creative and funny with the story if they like, and
challenge them to keep the whole performance at 5 minutes or less in length.
Students can take on multiple roles, and one student can act as a narrator if
that is helpful. Encourage students to create costume pieces, props, or name
tags using arts and crafts materials to define their characters. Allow students
time to create and rehearse, writing down their ideas and outlines, and
circulate among the groups to facilitate their decision-making. Remind
students to include the important details from the story. When all groups are
finished, have the students share their skits with the class.
Student Reading 6
The Magic Flute
Composer: Wolfgang Amadeus Mozart
Setting:
A Mysterious Place
Characters:
Queen of the Night
The Three Ladies – Assistants to the Queen
Papageno – A Bird Catcher
Papagena – A Bird Lady who is Papageno’s True Love
Pamina – Daughter of the Queen of the Night
Tamino – A Prince Prince
Sarastro – A High Priest
Monostatos – A servant of Sarastro
Synopsis of What You Will See:
The opera begins as the colorful bird catcher and our hero of the story, Papageno, sings his
favorite song about his favorite subject: himself! Prince Tamino introduces himself to
Papageno, who boasts that he is the smartest and strongest person in the kingdom. The Three
Ladies, who work for the devious Queen of the Night, punish Papageno for lying by
padlocking his mouth shut tight! He begs them to take it off and they finally agree. The Ladies
present Tamino with a magic flute and Papageno with magic bells. The Queen arrives and
gives Tamino a portrait of her daughter, Princess Pamina. She tells Tamino that Pamina has
been kidnapped by the evil Sarastro and that only Tamino can save her. Tamino falls in love
with the portrait of Pamina and decides to go to her rescue. Papageno agrees to come along and
assist him.
Tamino and Papageno find out that Sarastro is not a villain at all and has taken Pamina away
from her evil mother in order to keep Pamina safe. Meanwhile, poor Pamina is being annoyed
by a rude servant, Monostatos, but Papageno arrives to help her. Tamino joins them and with
their magic flute and bells, Tamino and Papageno defeat the servant and begin their escape.
However, in order to prove that he is worthy and brave, Sarastro has instructed Tamino to
remain SILENT no matter what! When he won't speak to Pamina, she thinks that Tamino no
longer loves her and is heartbroken. Tamino leaves and, to Pamina's horror, her evil mother
appears and commands her to harm Sarastro. Pamina resists her mother even though the Queen
claims that she will abandon Pamina forever. Pamina remains strong and the Queen leaves,
furious. Papageno and Tamino, still trying to remain silent, are approached by the Three Ladies
who try to lure them to their evil kingdom, but they resist. Pamina chases them away and she
and Tamino are reunited, but poor Papageno cannot find his true love, Papagena! He is about
to give up all hope, but to his great happiness, Papagena appears and they happily plan their
future. In the final scene, the evil Queen, Ladies and Monostatos try to attack one more time,
but are driven away. As Tamino, Pamina, Papageno and Papagena rejoice, the evil ones return,
begging to be forgiven and promising to lead good and noble lives. They are forgiven and
everyone sings the joyful finale.
Lesson 6: Before and After the Performance
Goals:
Students will understand that attending a live performance requires a new set of
audience behaviors or “opera manners”, and behaving appropriately will help them
to enjoy the opera more fully. Students will reflect on what they have learned
about opera during this unit.
Objectives: Students will:
• Learn and apply the behaviors that are expected for audience members
during a live performance
• Reflect on their new understandings after the performance is complete
Materials Needed:
• Student Reading 7: Mind Your Manners (1 copy per student)
• KWL Chart and Marker
• Activity Sheet 4: Be An Opera Critic! (1 copy per student)
• Materials for making Thank You Cards/Letters (optional)
Timing:
Part 1: Just before viewing the opera (day before or class period before)
Part 2: Just after viewing the opera (class period or day after)
Procedure:
1. Part 1: Introduction: Tell students that the time has come for the NEC
Touring Children’s Opera performance. Remind them of all that they have
learned, and ask what they will be watching for during the opera (take a few
responses from students, or have them share with each other). Tell students
that attending a live opera requires some particular behaviors from the
audience, and that you are going to share with them some “Opera Manners”
to make sure the performance can be fully enjoyed by everyone (including
the musicians).
2. Student Reading: Hand out copies of the Student Reading 7: “Mind Your
Manners” to each student. As a whole class, read through the behavior
guide, and clarify any additional expectations that you have for their
behavior. Make sure students know what is expected of them during the
performance and why.
3. Wrap up: When students are finished, make sure they put their papers away
(no papers or other objects brought to the performance please ) and get
them excited to see the show!
4. Part 2: Following the performance, refer back to the KWL chart and add
any last understandings to it. Have all of the questions been answered?
What new things have the students learned since they have now seen a live
opera production? Remind students of how far they have come with their
learning about opera since the beginning of this unit.
5. Hand out copies of Activity Sheet 4: “Be An Opera Critic!” to each student.
Read through the directions with the students, and have them respond to the
worksheet with their reflections on the opera performance. Tell students to
use their own opinions, just like real opera critics do. Post these reflections
on a bulletin board for other students in the school to enjoy, or have students
take them home to share with their families. As an optional extension
activity, you can ask students to use the completed worksheets to write full
articles of their own, and publish them in a class newspaper arts section.
6. As an optional closing activity, have students write letters or thank you cards
to the cast of the opera. Any letters or cards can be sent to:
Afton Cotton
Community Performances and Partnerships Program
New England Conservatory
Boston, MA 02115.
Thank the students for their hard work during this unit, and encourage them
to see as many live performances as they can in the future!
Student Reading 6
Mind Your Manners!
How to be a Good Audience Member
Attending an opera is a special event! This might be a new experience for
you. Reading these “opera manners” will help you understand what is
expected of you when you go and see the performance. They will help you
and the performers enjoy the opera to its fullest.
Opera Manners:
Opera Manners begin the moment you enter the performance
space. It is not polite to shout or run. Please use a medium speaking
voice when you enter the space and walk in an orderly manner.
When the lights go down or someone begins making an
announcement, you’ll know that the opera is about to start.
Clapping is only used at specific times during in the opera. It is
okay to clap during scene changes when the actors are offstage, and
when the opera is over (you can clap as loud as you want then!) but
other than that, use your good listening ears and enjoy the
performance.
Sometimes a singer or musician might ask the audience a
question during the performance. That is a great time to raise your
hand and answer them. Other than that, you should not call out
during the performance, and should save any questions you have
until after the performance is over.
If someone near to you is talking or distracting you, try to
ignore them, or quietly get the attention of your teacher.
At the end of the performance, you can call out “ Bravo! “ or
Brava!” to a singer as they take a bow to show them that they did a
good job.
After the performance, talk to your friends about what you saw
and heard. Talk about your favorite moments, your favorite
performer, and what you liked most about the opera overall.
Activity Sheet 4
Be an Opera Critic!
Opera critics write articles for newspapers and magazines telling
their readers all about the opera production they have just seen. Now
it’s your turn! Use this worksheet to put together a review of “The
Magic Flute,” and tell your readers what you thought of it.
Name of the Opera: _______________________________________________
When and Where You Saw It: _____________________________________
Quick Description of the Opera: ___________________________________
__________________________________________________________________
__________________________________________________________________
Most Exciting Moment in the Opera: _____________________________
__________________________________________________________________
Funniest Moment in the Opera: __________________________________
__________________________________________________________________
Saddest Moment in the Opera: ____________________________________
__________________________________________________________________
Your Favorite Character and Why: _______________________________
__________________________________________________________________
Singer You Think Did the Best Job and Why: _____________________
__________________________________________________________________
Overall Review (would you recommend that other people see it,
and why or why not): ____________________________________________
__________________________________________________________________
Additional Activities
& Contact Information
Word Search: Opera Words
E V I T A T I C E R S A K B F C A F
Y F P R S D C Q O K O M R C V D R C
F W B A R I T O N E P C J E G G T O
A R I A G D T Q S O R A H W P C S D
U B I Q Y A R T R V A J U Q A O E P
D R K F A I V O E A N B D D E C H E
R O N E T R T H N R O O E L I U C T
D V Z V L C O Z H B B N Y Q I W R N
D C R Y U T D O Q W Z I K V T V O V
C Q M D E J G U G A E M L A D J V A
F C N C F Y C M C R A W M C F O D O
X O I L Z Z L H O O Y P G H C A Q D
C O U A J C W C C I M Y L H I L O E
D Q H J S A S C H B V P J S N K D E
D U J Q N P E Q Q I I M O A L I V J
I C K C Z S A K H R T H G S Y S I T
X O A M S O Z X X A A U D O E S X L
B A R K R F O S X C I E I O T R P I
ARIA
BARITONE
BRAVO
CADENZA
COMPOSER
CONDUCTOR
LIBRETTIST
OPERA
ORCHESTRA
RECITATIVE
SCORE
SOPRANO
TENOR
Word Search:
Characters of “The Magic Flute”
C H B T Z P A S T F K V H X O S A X
M O N O S T A T O S J I E M P B B Z
Z D F Q Y R C P J K B M C Q J X C I
M A L G A D G K A S Y H D F L C B T
I E Y S V Y Y X L G O N I M A T E N
X K T G O I A F N Y E T J S E W M Y
G R H S I J P D C F Y N P E Q E Q A
O Y U H U Q W A T K D S O I P E F K
T J X R J P G T N Z H U R D Y O Y Q
Y G Y R A K O V R I N P T A A D C U
V G N I X P D O F E M F L L J Y Y S
J Z F A I A Q Q E W W A C G H V P W
J E B I T P C U T K M I P P I N D L
C Q T W F A Q K Q A P X G C Z F G P
C C C V L G F R O C I N W W X W O V
D H M T Q E L G A D A G Z X E S B N
W H Q B R N T T K X W J S R S S K P
Z X E O U A X G M P O B Z N B C M N
LADIES
MONOSTATOS
PAMINA
PAPAGENA
PAPAGENO
QUEEN
SARASTRO
TAMINO
Who Works Behind the Scenes?
Across
6. Person who decides how the lights will look on the stage.
Down
1. Person who chooses and makes the clothes that the singers will wear.
2. Person who works with everybody to keep the rehearsals and performances organized.
3. Person who paints the singers' faces to make them look like their characters.
4. Person who imagines and builds the scenery for the stage.
5. Person who leads the orchestra.
For more information regarding New England Conservatory’s
Touring Children’s Opera, or the Community Performances
and Partnerships Program, please contact:
Mary-Alexandra Onstad
Touring Children’s Opera Intern, 2009-2010
mary-alexandra.onstad@necmusic.edu
(410) 963-6574
Afton Cotton
Community Performances and Partnerships Program Manager
New England Conservatory
290 Huntington Avenue
Boston, MA 02115
afton.cotton@necmusic.edu
(617) 585-1743
http://necmusic.edu/partnerships/community-performances
partnerships-program

Teacher Resource Guide - The Magic Flute

  • 1.
    Teacher Resource Guide for TheMagic Flute by Wolfgang Amadeus Mozart NEW ENGLAND CONSERVATORY Touring Children’s Opera 2010 Written and Compiled by Mary-Alexandra Onstad, Touring Children’s Opera Intern With contributions from Afton Cotton, Jessica Reed, and Tanya Maggi
  • 2.
    Table of Contents Usingthis Guide Lesson 1: What is Opera? Lesson Plan Student Reading 1: What is Opera? Lesson 2: Meet the Voices and Instruments Lesson Plan Student Reading 2: Who Sings in the Opera? Activity: Meet the Voices Student Reading 3: Meet the Instruments Activity: Instrument Matching Lesson 3: Behind the Scenes Lesson Plan Student Reading 4: Behind the Scenes Activity: Design Your Own Lesson 4: Meet the Composer Lesson Plan Student Reading 5: Meet the Composer Lesson 5: The Magic Flute Lesson Plan Student Reading 6: The Magic Flute Lesson 6: Before and After The Performance Lesson Plan Student Reading 7: Mind Your Manners Activity: Be An Opera Critic! Additional Activities
  • 3.
    Using This Guide DearTeachers, Welcome to NEC’s Touring Children’s Opera Teacher Resource Guide! This guide is intended to assist you and your students in learning some basic information about opera and to help you learn more about the opera you and your students will be seeing this year, The Magic Flute by Wolfgang Amadeus Mozart. This guide contains six lessons that can be used prior to your student’s viewing of the opera. The lessons are designed for students in grades 3-6, and can be used in the general or music classroom. The lessons can and should be modified and supplemented in any way that is appropriate for your students at any grade level—feel free to be creative and to pick and choose what will work well for your class! We hope that you will find this guide to be a useful resource as you prepare your students to view a live performance. The Magic Flute is originally a very large-scale German opera that is performed in 2 acts. The version that you and your students will see has been adapted to run in one act in just 40 minutes, and will be sung in English. The singers are all graduate voice students at New England Conservatory, and will use costumes, props, and some small set pieces when performing. We look forward to sharing this opera with you and your students, and hope that you find it an enriching and enjoyable experience! Sincerely, The Community Performances and Partnerships Program and Opera Department at New England Conservatory
  • 4.
    Lesson 1: ThinkingAbout Opera Goal: Students will activate prior knowledge and will be introduced to the genre of opera. Objectives: Students will: • Vocalize what they already know about opera • Brainstorm ideas about what they want to learn Materials needed: • Large piece of blank paper • Marker Timing: Approximately 30-40 minutes Procedure: 1. Introduction: Announce to students that the New England Conservatory Touring Children’s Opera will be visiting your school in a few weeks. This year’s opera is “The Magic Flute” by Wolfgang Amadeus Mozart, and will be performed by students who are studying opera at the Conservatory. Tell students that before seeing the opera, you will be doing some activities together to learn more about what operas are like, who this composer was, and what happens in the opera “The Magic Flute”. 2. Brainstorming: On a large piece of chart paper, create a K-W-L (know, want to know, learned) chart with 3 columns. Write, “What do you know about opera?” at the top of the first column. Ask students to think about what they already know about opera. Have students brainstorm in their heads for one minute, and then turn and talk in pairs for two minutes, taking turns to share anything they know. If students are stuck, prompt them with questions like “Has anyone ever seen an opera? What does it sound like? What does it look like?” After sharing in pairs, bring the group together and ask for responses. Record a few responses in the first column of the chart. Label the second column, “What do you want to know?” Repeat the brainstorming activity, this time asking the children to think of questions they have about opera, first alone, then in pairs, then as a group, recording their responses. Label the last column “What you have learned.” You will add to this column and the others as the lessons continue and the students gain new understandings. 3. Student Reading: Hand out to the students the student reading titled “What is Opera?” and read it aloud as they follow along. When finished, have students keep the handout in a folder so they can refer to it later as needed.
  • 5.
    Student Reading 1 WhatIs Opera? You might think that only fat people sing opera, or that only people wearing big horns and weird clothes sing opera. But if you go and see an opera you won’t see that. Going to an opera is like going to another planet where nothing is familiar to you. But if you take a little time to learn what opera is all about and how it works, you might find that there is something to enjoy about opera for everyone—even you! In opera many different things are used to tell the story. There are dancers, singers, actors, an orchestra, costumes and sets to tell the story. Also in opera there are characters, a setting, a problem, events and a solution—just like in the books you are reading right now. But opera is more than just a story. In opera, the characters sing beautiful music that expresses their emotions. The music and the acting make the story even more fun to watch for the audience. Something else you might not know is that in opera, the composers often wrote the story in the language that they spoke. The most common operas are sung in Italian, French and German, but a lot of opera is also translated or written in English as well. Many of the characters in the opera sing arias (AH-ree-ahs), which are solos songs that show how they are feeling. Arias can express many different emotions such as sorrow, happiness, anger, or silliness. It is very important for the singers to be good actors and express what they are feeling so the audience can understand what they are singing about. When they aren’t singing arias, the characters in the opera sing recitative (reh-sit-ta-TEEVE), which is a kind of singing that sounds like speaking, and moves the story along more quickly. Singers sometimes sing cadenzas (ca-DEN-zahs) during their arias, when they improvise and show off their vocal talents. If the audience likes something they heard during the performance, they might shout Bravo (for the male performer) or Brava (or the female performer). The words of the opera are called the Libretto (lib-RET-oh), which is an Italian word that means “little book.” The person who writes the words of the opera is called the librettist. The librettist is usually different from the composer, who writes the music for the opera but sometimes the composer writes both the music and the words. The story for an opera can be taken from folktales or fairy tales, but sometimes librettists write their own stories, too. There are many different kinds of people that take part in an opera. There are the solo singers who sing the leading roles in the production. There is also the chorus, which can play different roles in the opera like villagers, soldiers and different people for the crowd scenes. There are also musicians who play in the orchestra, producers, set designers, costume designers, lighting designers, directors, and a conductor to read the score (a book where all the music for the singers and instruments is located) and lead the orchestra and singers. An opera takes a lot of people to put on, but the end result is fabulous, exciting and a wonderful thing to watch.
  • 6.
    Lesson 2: Meetthe Voices and Instruments Goal: Students will become familiar with the different voice parts that are used in opera as well as the important instruments that help make up an orchestra. Objectives: Students will • Read to gain new understanding • Learn 6 voice types and the differences in each voice type • Learn about different instruments that are used during an opera • Listen and imagine what they think the voice types sound like. • Listen and choose what instrument belongs to what picture. Materials Needed: • KWL from Lesson 1 • Student Reading 2: “Who Sings in the Opera?” • Activity Sheet 1 (1 copy per student) • Listening CD #1-Demonstration of 6 different voice types • Student Reading 3: “Meet the Instruments” • Activity Sheet 2 : “Meet the Instruments” (1 copy per student) • Listening CD #2- Demonstration of 9 different Instruments • Markers • Pencil and erasers • Counters or beans for instrument guessing game Timing: Two 30-45 min lessons or one 60-90 minute lesson. This lesson can be broken into 2 separate lessons if needed for time. Or, if needed, you can choose to omit learning about the instruments. Procedure: 1. Introduction: Review with the students the KWL chart created in Lesson 1. Add any new information to the “What do you want to know?” and “What you have learned” categories. 2. Student Reading: After discussing the last lesson, tell them that today they will be learning all about the different voice types that are heard in opera. Hand out copies of the Student Reading 2: “Who Sings in the Opera?”. You can either do a shared reading with the students or a read out loud with your students as they follow along. 3. Activity 1: Meet the Voices: After the students have read about the 6 different voice types, hand out a copy of Activity Sheet 1 to each student. Have the students listen to the 30 second clip of each voice type from CD #1 and in the each box have them jot down words that describe what they are hearing such as high, low, bird-like, deep, fluttering, etc. You can play each
  • 7.
    selection for themtwice if needed. After all 6 voice types have been played, have the students share what words they thought described each voice type. 4. Note: Parts 4 and 5 can be done as their own separate lesson. Student Reading 2: Pass out copies of Student Reading 3: “Meet the Instruments” to each student. Read through this information aloud or have the students read in small groups, pairs, or individually. 5. Activity 2: Meet the Instruments: Pass out a copy of Activity Sheet 2 to each student. Also pass out the counters or beans that the students will use to put over the right answer during this activity. Play students a 30 second clip of an instrument from CD #2. Let them take some time to guess which instrument is being played, and place their counter on the picture of their choice. Play the clip one more time for them. Have students raise their hands when they think they know the correct answer. Choose a student to answer, and confirm the correct instrument, having student move their counters as necessary. Repeat until all 9 instruments have been played.
  • 8.
    Student Reading 2 WhoSings in the Opera? There are four main voice types in operatic singing: soprano, mezzo-soprano, tenor and bass. In opera, these voice types are broken out into categories that show the singer’s vocal range as well as the kinds of roles they usually take on. Sopranos: Sopranos are the highest of the female voice types. In opera, the soprano is almost always the ‘heroine’ or leading lady of the opera. Some special sopranos are called coloratura sopranos and lyric sopranos. Coloratura soprano voices move very fast and usually sing very high. Lyric sopranos sing older roles, and though they sing high, they don’t usually sing very fast. Mezzo-Soprano: The mezzo soprano is the lower-ranged female voice type. Throughout opera history, the mezzo has been used to play many different types of characters: everything from boys or young men to mothers, witches, gypsies and old women. Tenor: The tenor is the highest of the male voices. The tenor often plays the hero in an opera. Bass: There are two low voice types for men. One is called the Baritone and this is the most common voice type for men. It has a lower range than the tenor and usually plays the villain in the opera. There is also the Bass voice, which is the lowest of all the male voices, and is very deep and husky.
  • 9.
    Activity Sheet 1 MeetThe Voices: Write down words that you think describe the voice type that you are hearing. You will hear 6 different voices. There will be one voice per box. 1. Soprano 2. Coloratura Soprano 3. Mezzo-Soprano 4. Tenor 5. Baritone 6. Bass
  • 10.
    Student Reading 3 Meetthe Instruments In the opera you will see in a few weeks, you will only hear a piano accompanying the singers. The piano will be imitating a full orchestra, which is what you would hear in a full-length opera production. There are 4 different sections to the orchestra: strings, woodwinds, brass and percussion. Let’s learn more about some of the instruments in each section: Strings All have strings and are played with a bow. Violin • Highest sounding and smallest of all the string instruments Viola • Lower and larger than the violin Cello • Even lower than the viola and large enough that it has to be played upright while sitting down Bass • The lowest and largest string instrument, between 6-7 feet tall! Woodwinds Were once all made of wood, and are played by blowing air through them. Today, many are made of silver and gold. Flute and piccolo • Highest sounding of all woodwind instruments • Piccolo is much smaller and its pitch is higher than the flute Oboe and English Horn • Medium high in pitch, and played with a double reed. Clarinet • Has a wide range from high to low, sounding hollow and mellow, and is played with a single reed Bassoon • Lowest range of the woodwinds, played with a double reed.
  • 11.
    Student Reading 3 Brass Allmade of metal and played by blowing air through them. Trumpet • Highest of all the brass instruments and sounds brilliant and strong French Horn • Medium low range and player’s right hand is placed in the bell to control pitches and tones Trombone • Medium low range, has a slide that is pushed in and out Tuba • Lowest sounding and largest brass instrument Percussion All struck by the hand or mallets to create rhythms. Timpani • Also called the kettle drum; large, pitched drums played in groups of 3-5 • Produces deep thunder like tones Snare Drum • Played with drumsticks for high sharp tones Cymbals • 2 circular brass discs that crash together Marimba • A large xylophone with wooden bars and metal resonator tubes underneath Piano/Keyboard • Considered a percussion instrument since it plays a rhythmic role in music • Sound is produced by small hammers striking strings. These hammers strike when the player’s hands press the piano keys.
  • 12.
    Activity Sheet 2 Thereare many instruments in the orchestra that accompanies the singers in an opera. Can you pick out which instrument is being played on the CD? Put your marker on the instrument you think it is. Raise your hand when you think you know the answer.
  • 13.
    Lesson 3: Behindthe Scenes Goal: Students will understand that many people need to come together to make an opera happen, including directors, stage managers, designers, makeup artists and a crew. Objectives: Students will: • Read to gain new understanding of terms • Discover the roles performed behind the scenes during an opera production • Imagine designing a set, costumes, and makeup Materials needed: • Student Reading 4: “Behind the Scenes” • Activity Sheet 3: “Design you Own!” (1 copy per student) • Markers, Crayons, Colored Pencils Timing: Approximately 45 minutes. Procedure: 1. Introduction: Review what the students learned about opera during Lesson 2 and add to the KWL chart from Lesson 1. 2. Student Reading: Tell the students that today they will learning all about what goes on backstage in an opera production. Hand out a copy of Student Reading 4: “Behind the Scenes” to each student. Have students read in small groups or read out loud to your students as they follow along. 3. Activity 3: Design Your Own - Hand out a copy of Activity Sheet 3 to each student. Students will begin by designing their own story and characters for an opera, and then choose to design the set, costumes, makeup, or all three. Students can do this activity in partners, in groups, or independently. After they are done, they can share their story and what they designed with the rest of the class.
  • 14.
    Student Reading 4 BehindThe Scenes The people who work behind the scenes on an opera have a wide variety of jobs. The set designer imagines the scenery that will be on stage with the actors, and makes models and blueprints of the set to make sure it will fit on the stage. The lighting designer works with the set designer to decide how the lights will look on the stage—which colors, how bright, and so on—to help tell the story of the opera, and to help make the emotions of the actors come to life. The construction crew then puts together the set and helps to set up the lights. The crew is made up of carpenters, painters, electricians, sound technicians, and prop-makers (a prop is an object that an actor holds or uses on stage). In charge of all of these people is the technical director, who makes sure everyone in the crew is doing his or her job, and makes sure the set and the lights come together perfectly. Another important person behind the scenes is the costume designer. He or she works with the director of the opera to draw sketches and imagine what the actors will be wearing. Then, the costume designer finds costume pieces (like hats, shoes, and accessories), and sews clothes for the actors to wear. The costume designer sometimes also works with a makeup artist, who uses makeup and paint to help the actors transform into their characters. Lastly, two of the most important people behind the scenes are the stage manager and the director. The stage manager works with all of the singers, the conductor, the crew, the designers, and the director to make sure everything is running smoothly. During the performance, he or she tells the crew when to raise and lower the curtain, when to change the lighting and scenery, and where the actors should enter and exit the stage from. The stage manager is usually also in charge of everyone’s rehearsal schedule, and makes sure that everyone is in the right place at the right time, so it is important that they are organized and good at communicating information. The director is in charge of the entire opera production, and needs to have a clear idea of what he or she wants the opera to look like and sound like in the end. The director decides where the singers will stand and move on the stage, how they will interact with each other, and how the entire story should unfold in front of the audience.
  • 15.
    Activity Sheet 3 Name:_________________________ Date: _____________ Design Your Own! Now that you know how important the people are who work “behind the scenes” on an opera, take some time to try out their jobs yourself! First, think of a story (that you already know from a book or movie, or from your own imagination), and then imagine what the scenery, costumes, and makeup would look like. Lastly, make sketches, just like a real designer would use to bring to the director! Story Title: ______________________________________________________ Characters: ______________________________________________________ ______________________________________________________ ______________________________________________________ The setting of this story is ________________________________. What happens in your story? _______________________________ ______________________________________________________ _____________________________________________________________ _____________________________________________________________ _____________________________________________________________
  • 16.
    Activity Sheet 3 SketchYour Designs! Choose 1, 2, or all 3 of the following activities to complete. 1. In the space below, draw a picture of what the set and scenery would look like on the stage of your opera. 2. In the space below, draw a picture of what the characters would wear as costumes in your opera. Label the characters with their names. Set: Costumes:
  • 17.
    Activity Sheet 3 3.Choose two characters from your opera, and draw a picture of their makeup on the blank faces below. Label the characters with their names.
  • 18.
    Lesson 4: Meetthe Composer Goal: Students will learn about the life of Wolfgang Amadeus Mozart, the composer of The Magic Flute and will gain an understanding of his musical career and accomplishments. Objectives: Students will: • Read to gain new understanding • Create sequential timelines Materials Needed: • KWL from Lesson 1 • Student Reading 5: “Meet the Composer” (1 copy per student) • Highlighters (optional) • Activity Sheet 4: “Create a Timeline” (1 copy per student) • Event Sheets- Before the lesson begins, label 15 pieces of blank paper with a date from the Event Reference Sheet included in this lesson, one date per sheet. These sheets will be handed out to students during the “Create a Timeline” activity. • Pencils and Erasers • Markers • Tape Procedure: 1. Introduction: Review with the students what they learned during Lesson 3, and add any new understandings or questions to the KWL chart from Lesson 1. 2. Student Reading: Hand out copies of Student Reading 5: “Meet the Composer” to each student. Tell students that they will be learning about important events that happened to Mozart during his lifetime, and ask them to highlight (or circle/underline) any dates that they come across in the text as they read. Do a shared reading (or read aloud) of the text as the students follow along, or have the students read the selection in small groups, in pairs, or independently. Students will find a total of 15 dates in the text as they read. (Note: You can use the Event Reference Sheet to make sure students have found all of the events mentioned in the reading.) 3. Activity – Create a Timeline: Pass out the Event Sheets that you made before the lesson to pairs or trios depending on how many students you have. In their small groups, have the students look back in their reading to find out what happened in Mozart’s life on that date, add a caption to their date describing the event, and draw a picture of that event. When they are done, have each group come up and put their event up on the white board with tape in the correct sequence, creating a class timeline.
  • 19.
    Event Reference Sheet(for Teacher Use) from Student Reading 5: Meet the Composer 1. Birth- January 27th , 1756 2. 1760 – Began playing piano 3. 1761 – Started composing 4. 1763 – First piece published 5. 1769 – First opera published 6. 1763-1766 – Made his trip through Europe with family to play for royalty 7. 1767-1768 – Moved to Vienna 8. 1769-70 – Took a tour of Italy with his father 9. 1778 – Composed the Paris Symphony 10. 1779 – Returned to Salzburg, Austria 11.1786 – Wrote the Marriage of Figaro 12. 1787 – Wrote Don Givovanni 13. 1790 – Wrote Cosi Fan Tutte 14. 1791 – Wrote The Magic Flute 15.Death – December 5th , 1791 at the age of 35 Activity Directions: On 15 pieces of blank paper, write one date per sheet (date only). Hand out the sheets to small groups of students and have them use their reading to find out what happened during Mozart’s life on that date, and write a 1- sentence caption. Then, the group can create an illustration for that event. Once all the groups are finished, students can put all of the event sheets in order to make a class timeline of Mozart’s life.
  • 20.
    Student Reading 5 Meetthe Composer: Wolfgang Amadeus Mozart Wolfgang Amadeus Mozart was born into a musical family on January 27th , 1756 in Salzburg, Austria. His father Leopold was a violist and composer. When Mozart’s sister Maria Anna was seven, she began keyboard lessons with her father, and the three-year-old Wolfgang watched with fascination. In 1760 Mozart was 4 years old, and began piano lessons playing with great musical knowledge. Mozart was a considered a child prodigy. A child prodigy is a child who is very good at a something at a very young age. By the age of 5 in 1761, he was already very good at the piano and violin, and started composing his own pieces. He had his first piece published when he was seven years old in 1763, and then had his first opera published when he was twelve years old in 1769. Mozart loved composing so much that he could do it even while eating- his favorite food was liver dumplings and sauerkraut! From 1763-1766, Mozart’s family made many trips throughout Europe so he could perform for royalty on a concert tour. He met a lot of famous musicians during his travels, and he moved to Vienna from 1767-1768 to work with them. His father then decided to go on a tour of Italy with Wolfgang in 1769-70. Because of this trip, he wrote his first Italian opera, which was called Mitridate. He and his mother then decided to travel to France where he composed the Paris Symphony in 1778. His mother died there in Paris. He returned to Salzburg, Austria in 1779 where he was able to write for a lot of very important people who would hear his music. In 1786 he wrote his most important opera called “The Marriage of Figaro.” He wrote many famous operas after this, such as Don Giovanni (1787), Cosi Fan Tutte (1790) and The Magic Flute (1791). At the end of his life, Mozart was asked to write a requiem (a piece written to honor the dead). He was very ill at the time and never finished the piece. He died at the age of 35 on Dec 5, 1791. Even though he only lived a short life he was able to compose beautiful operas, symphonies, concertos, masses and chamber music pieces that are still heard around the world today. He will always considered a genius.
  • 21.
    Lesson 5: TheStory of “The Magic Flute” Goal: Students will learn about the story of the Magic Flute and the characters they will meet during the opera. Objectives: • Learn the plot of “The Magic Flute” • Create and perform their own 5-minute “Magic Flute Skits” Materials Needed: • KWL Chart and Marker • Student Reading 6: “The Magic Flute” (1 copy per student) • Sheet of paper and pencils for skit planning (1 per group) • Arts and crafts supplies and/or dramatic play props and costumes Timing: 30-45 minutes, depending on grade level Procedure: 1. Introduction: Review the KWL chart created in Lesson 1, and add any new understandings of questions to the columns. 2. Student Reading: Hand out a copy of Student Reading 6: “The Magic Flute” to each student. Do a shared reading or read-aloud of the text as students follow along, or have students read the selection in small groups, in pairs, or independently. (Note: The synopsis in this handout reflects the shortened version of the opera that the students will see. The full opera is much longer and includes other plot elements and characters.) 3. Activity: Act It Out: Explain to the students that now that they know the basic story of “The Magic Flute,” they will be creating their own 5-minute “Magic Flute Skits” to show what they learned. Divide the class into small groups (4-5 students per group) and challenge them to come up with an original skit that will tell the story of “The Magic Flute” in their own way. Encourage students to be creative and funny with the story if they like, and challenge them to keep the whole performance at 5 minutes or less in length. Students can take on multiple roles, and one student can act as a narrator if that is helpful. Encourage students to create costume pieces, props, or name tags using arts and crafts materials to define their characters. Allow students time to create and rehearse, writing down their ideas and outlines, and circulate among the groups to facilitate their decision-making. Remind students to include the important details from the story. When all groups are finished, have the students share their skits with the class.
  • 22.
    Student Reading 6 TheMagic Flute Composer: Wolfgang Amadeus Mozart Setting: A Mysterious Place Characters: Queen of the Night The Three Ladies – Assistants to the Queen Papageno – A Bird Catcher Papagena – A Bird Lady who is Papageno’s True Love Pamina – Daughter of the Queen of the Night Tamino – A Prince Prince Sarastro – A High Priest Monostatos – A servant of Sarastro Synopsis of What You Will See: The opera begins as the colorful bird catcher and our hero of the story, Papageno, sings his favorite song about his favorite subject: himself! Prince Tamino introduces himself to Papageno, who boasts that he is the smartest and strongest person in the kingdom. The Three Ladies, who work for the devious Queen of the Night, punish Papageno for lying by padlocking his mouth shut tight! He begs them to take it off and they finally agree. The Ladies present Tamino with a magic flute and Papageno with magic bells. The Queen arrives and gives Tamino a portrait of her daughter, Princess Pamina. She tells Tamino that Pamina has been kidnapped by the evil Sarastro and that only Tamino can save her. Tamino falls in love with the portrait of Pamina and decides to go to her rescue. Papageno agrees to come along and assist him. Tamino and Papageno find out that Sarastro is not a villain at all and has taken Pamina away from her evil mother in order to keep Pamina safe. Meanwhile, poor Pamina is being annoyed by a rude servant, Monostatos, but Papageno arrives to help her. Tamino joins them and with their magic flute and bells, Tamino and Papageno defeat the servant and begin their escape. However, in order to prove that he is worthy and brave, Sarastro has instructed Tamino to remain SILENT no matter what! When he won't speak to Pamina, she thinks that Tamino no longer loves her and is heartbroken. Tamino leaves and, to Pamina's horror, her evil mother appears and commands her to harm Sarastro. Pamina resists her mother even though the Queen claims that she will abandon Pamina forever. Pamina remains strong and the Queen leaves, furious. Papageno and Tamino, still trying to remain silent, are approached by the Three Ladies who try to lure them to their evil kingdom, but they resist. Pamina chases them away and she and Tamino are reunited, but poor Papageno cannot find his true love, Papagena! He is about to give up all hope, but to his great happiness, Papagena appears and they happily plan their future. In the final scene, the evil Queen, Ladies and Monostatos try to attack one more time, but are driven away. As Tamino, Pamina, Papageno and Papagena rejoice, the evil ones return, begging to be forgiven and promising to lead good and noble lives. They are forgiven and everyone sings the joyful finale.
  • 23.
    Lesson 6: Beforeand After the Performance Goals: Students will understand that attending a live performance requires a new set of audience behaviors or “opera manners”, and behaving appropriately will help them to enjoy the opera more fully. Students will reflect on what they have learned about opera during this unit. Objectives: Students will: • Learn and apply the behaviors that are expected for audience members during a live performance • Reflect on their new understandings after the performance is complete Materials Needed: • Student Reading 7: Mind Your Manners (1 copy per student) • KWL Chart and Marker • Activity Sheet 4: Be An Opera Critic! (1 copy per student) • Materials for making Thank You Cards/Letters (optional) Timing: Part 1: Just before viewing the opera (day before or class period before) Part 2: Just after viewing the opera (class period or day after) Procedure: 1. Part 1: Introduction: Tell students that the time has come for the NEC Touring Children’s Opera performance. Remind them of all that they have learned, and ask what they will be watching for during the opera (take a few responses from students, or have them share with each other). Tell students that attending a live opera requires some particular behaviors from the audience, and that you are going to share with them some “Opera Manners” to make sure the performance can be fully enjoyed by everyone (including the musicians). 2. Student Reading: Hand out copies of the Student Reading 7: “Mind Your Manners” to each student. As a whole class, read through the behavior guide, and clarify any additional expectations that you have for their behavior. Make sure students know what is expected of them during the performance and why. 3. Wrap up: When students are finished, make sure they put their papers away (no papers or other objects brought to the performance please ) and get them excited to see the show! 4. Part 2: Following the performance, refer back to the KWL chart and add any last understandings to it. Have all of the questions been answered? What new things have the students learned since they have now seen a live
  • 24.
    opera production? Remindstudents of how far they have come with their learning about opera since the beginning of this unit. 5. Hand out copies of Activity Sheet 4: “Be An Opera Critic!” to each student. Read through the directions with the students, and have them respond to the worksheet with their reflections on the opera performance. Tell students to use their own opinions, just like real opera critics do. Post these reflections on a bulletin board for other students in the school to enjoy, or have students take them home to share with their families. As an optional extension activity, you can ask students to use the completed worksheets to write full articles of their own, and publish them in a class newspaper arts section. 6. As an optional closing activity, have students write letters or thank you cards to the cast of the opera. Any letters or cards can be sent to: Afton Cotton Community Performances and Partnerships Program New England Conservatory Boston, MA 02115. Thank the students for their hard work during this unit, and encourage them to see as many live performances as they can in the future!
  • 25.
    Student Reading 6 MindYour Manners! How to be a Good Audience Member Attending an opera is a special event! This might be a new experience for you. Reading these “opera manners” will help you understand what is expected of you when you go and see the performance. They will help you and the performers enjoy the opera to its fullest. Opera Manners: Opera Manners begin the moment you enter the performance space. It is not polite to shout or run. Please use a medium speaking voice when you enter the space and walk in an orderly manner. When the lights go down or someone begins making an announcement, you’ll know that the opera is about to start. Clapping is only used at specific times during in the opera. It is okay to clap during scene changes when the actors are offstage, and when the opera is over (you can clap as loud as you want then!) but other than that, use your good listening ears and enjoy the performance. Sometimes a singer or musician might ask the audience a question during the performance. That is a great time to raise your hand and answer them. Other than that, you should not call out during the performance, and should save any questions you have until after the performance is over. If someone near to you is talking or distracting you, try to ignore them, or quietly get the attention of your teacher. At the end of the performance, you can call out “ Bravo! “ or Brava!” to a singer as they take a bow to show them that they did a good job. After the performance, talk to your friends about what you saw and heard. Talk about your favorite moments, your favorite performer, and what you liked most about the opera overall.
  • 26.
    Activity Sheet 4 Bean Opera Critic! Opera critics write articles for newspapers and magazines telling their readers all about the opera production they have just seen. Now it’s your turn! Use this worksheet to put together a review of “The Magic Flute,” and tell your readers what you thought of it. Name of the Opera: _______________________________________________ When and Where You Saw It: _____________________________________ Quick Description of the Opera: ___________________________________ __________________________________________________________________ __________________________________________________________________ Most Exciting Moment in the Opera: _____________________________ __________________________________________________________________ Funniest Moment in the Opera: __________________________________ __________________________________________________________________ Saddest Moment in the Opera: ____________________________________ __________________________________________________________________ Your Favorite Character and Why: _______________________________ __________________________________________________________________ Singer You Think Did the Best Job and Why: _____________________ __________________________________________________________________ Overall Review (would you recommend that other people see it, and why or why not): ____________________________________________ __________________________________________________________________
  • 27.
  • 28.
    Word Search: OperaWords E V I T A T I C E R S A K B F C A F Y F P R S D C Q O K O M R C V D R C F W B A R I T O N E P C J E G G T O A R I A G D T Q S O R A H W P C S D U B I Q Y A R T R V A J U Q A O E P D R K F A I V O E A N B D D E C H E R O N E T R T H N R O O E L I U C T D V Z V L C O Z H B B N Y Q I W R N D C R Y U T D O Q W Z I K V T V O V C Q M D E J G U G A E M L A D J V A F C N C F Y C M C R A W M C F O D O X O I L Z Z L H O O Y P G H C A Q D C O U A J C W C C I M Y L H I L O E D Q H J S A S C H B V P J S N K D E D U J Q N P E Q Q I I M O A L I V J I C K C Z S A K H R T H G S Y S I T X O A M S O Z X X A A U D O E S X L B A R K R F O S X C I E I O T R P I ARIA BARITONE BRAVO CADENZA COMPOSER CONDUCTOR LIBRETTIST OPERA ORCHESTRA RECITATIVE SCORE SOPRANO TENOR
  • 29.
    Word Search: Characters of“The Magic Flute” C H B T Z P A S T F K V H X O S A X M O N O S T A T O S J I E M P B B Z Z D F Q Y R C P J K B M C Q J X C I M A L G A D G K A S Y H D F L C B T I E Y S V Y Y X L G O N I M A T E N X K T G O I A F N Y E T J S E W M Y G R H S I J P D C F Y N P E Q E Q A O Y U H U Q W A T K D S O I P E F K T J X R J P G T N Z H U R D Y O Y Q Y G Y R A K O V R I N P T A A D C U V G N I X P D O F E M F L L J Y Y S J Z F A I A Q Q E W W A C G H V P W J E B I T P C U T K M I P P I N D L C Q T W F A Q K Q A P X G C Z F G P C C C V L G F R O C I N W W X W O V D H M T Q E L G A D A G Z X E S B N W H Q B R N T T K X W J S R S S K P Z X E O U A X G M P O B Z N B C M N LADIES MONOSTATOS PAMINA PAPAGENA PAPAGENO QUEEN SARASTRO TAMINO
  • 30.
    Who Works Behindthe Scenes? Across 6. Person who decides how the lights will look on the stage. Down 1. Person who chooses and makes the clothes that the singers will wear. 2. Person who works with everybody to keep the rehearsals and performances organized. 3. Person who paints the singers' faces to make them look like their characters. 4. Person who imagines and builds the scenery for the stage. 5. Person who leads the orchestra.
  • 31.
    For more informationregarding New England Conservatory’s Touring Children’s Opera, or the Community Performances and Partnerships Program, please contact: Mary-Alexandra Onstad Touring Children’s Opera Intern, 2009-2010 mary-alexandra.onstad@necmusic.edu (410) 963-6574 Afton Cotton Community Performances and Partnerships Program Manager New England Conservatory 290 Huntington Avenue Boston, MA 02115 afton.cotton@necmusic.edu (617) 585-1743 http://necmusic.edu/partnerships/community-performances partnerships-program