
Recommended
More Related Content
Similar to Tank and Filter Cleaing Procedure.pptx
Similar to Tank and Filter Cleaing Procedure.pptx (20)
Recently uploaded
Recently uploaded (20)
Tank and Filter Cleaing Procedure.pptx
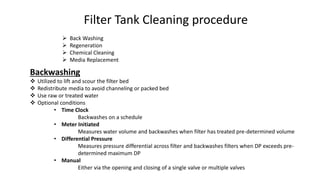
- 1. Filter Tank Cleaning procedure Back Washing Regeneration Chemical Cleaning Media Replacement Backwashing Utilized to lift and scour the filter bed Redistribute media to avoid channeling or packed bed Use raw or treated water Optional conditions • Time Clock Backwashes on a schedule • Meter Initiated Measures water volume and backwashes when filter has treated pre-determined volume • Differential Pressure Measures pressure differential across filter and backwashes filters when DP exceeds pre- determined maximum DP • Manual Either via the opening and closing of a single valve or multiple valves
- 3. Regeneration ‒ Some medias require regeneration ‒ Purpose is to recharge the bed with elements that either exchange or act as a catalyst for removal action ‒ Common Solutions . Brine - Salt . Potassium Permanganate . Hydrochloric Acid (HCI) . Others - depending on media and application ‒ Continuous or Intermittent (during backwash cycle) ‒ Can add cleaning agents on periodic basis CHEMICAL CLEANING OPTIONS Ironeater/Res-up - Removes iron and rust build up on resin beds that foul the softener or other medias Citric Acid - Removes iron and other contaminants from fouled water softeners Mineral Reactivator Clean a fouled resin bed and restore exchange capacity Potassium Permanganate / Fer-Sul - Strong oxidizing agent - Oxides dissolved iron and manganese to insoluble oxides - Injected continuously prior to filter or during regeneration/backwashing only Soda Ash, Caustic Soda or Sodium Bicarbonate • Highly alkaline Neutralizes acid found in some waters Helps to eliminate corrosion
- 4. Injector Cleaning Injector on valve will clog due to sediment, salt and silt Treated water for backwashing will prevent this AKA-Separate Source Backwashing Procedure • Shut off water supply • Open faucet downstream to relieve pressure or put valve into backwash mode • Carefully remove injector assembly and disassemble per manufacturers instructions • Flush all parts with water • Use one of the mentioned cleaning agents or vinegar to clean the small holes in the orifice and throat • Reassemble in reverse order Media Replacement Depressurization Place the unit into the backwash position for several minutes to loosen the bed - unplug valve if necessary Shut off the main water supply to the filter or place the filter in by-pass to depressurize the filter Disconnect the plumbing on the inlet, outlet and drain Valve Removal Unscrew the control valve from the filter tank Separate the valve from the distributor tube. Place valve to one side
- 5. Media Replacement Removal of Old Media • If tank is small and light enough, the filter can be simply picked up and turned upside down into a large drum or bin to remove the media. Be careful to not break the distribution tube/riser or hub assembly . • For heavier tank, insert a piece of 1½" flexible hose into the distributor and siphon the water into the drain • Remove distributor tube from the tank • Flush out all the contents into a large pail or garbage can by elevating the tank as required • Lay tank on its side and insert a garden hose into the tank • Make sure tank is completely empty before proceeding - Loading the New Media - • Inspect distribution tube and laterals/hub - • Place distributor tube into tank - • Plug end of distributor tube to prevent media from entering it - • Fill filter ¼ to 1/3 full of water - • Place media into the tank in the order indicated by the manufacturer Media Replacement Loading the New Media • Ensure distributor tube stays on the bottom of the tank, reasonably centered • Whenever possible, fill the tank outdoors to avoid problems with dust. If inside, wear dust mask. • Wear appropriate safety gear, goggles, mask, gloves, etc.
- 6. Media Replacement - Placing the Unit in Service . • Once media is loaded, remove the cover from the distributor and clean the top of the tank . • Place control valve on the tank, ensuring the distributor fits into the valve properly • Tighten the valve onto the tank using moderate force • Apply household liquid soap to the main seal O-ring • Connect inlet, outlet and drain connections • Change valve to backwash position • Slowly open inlet valve to allow air to escape and fines to be removed • Once filled, some resins require a soak in period. Consult manufacturer • Allow to backwash until drain runs clear - disconnect power • Allow valve to continue through cycle to service mode. • Open inlet valve fully. . Check for leaks
- 7. A. Precautions before commencing the operation:- Tank Cleaning 1. As far as possible mechanized cleaning should be undertaken at the workplace. In case it is not feasible to do so, no single person should be allowed to undertake the work of cleaning/maintenance. 2. Minimum of two persons should be present all the time and one of them shall be trained and experienced. The supervisor shall remain present at all times. 3. It is recommended that in the peak summer season, entry of the person into the sewerage/ETP/STP should not be allowed between 11 AM to 4 PM when concentration of gases is expected to be high. 4. First aid box to meet the emergency should be available at the work place before commencing the work. Keep the emergency contact numbers of ambulance police, Fire Brigade ready for use to provide immediate relief in case of any accident. 5. It is the responsibility of the person who has engaged the labour to cleaning of the Sewerage/ETP/STP that to apprise them about the “Do’s & Don’ts” in advance to ensure safety. 6. Before undertaking the work, the manholes of the chamber/septic tank/sewers should be kept open for minimum 4 hr. duration to ensure sufficient cross ventilation. If necessary, use forced ventilation such as ducting, exhaust fan etc. 7. Before under taking the work it will be the duty of the employer to note down name of the person, his address, family whereabouts and emergency contact numbers of his near dear ones so that they can be contacted in case of emergency.
- 8. B. Precautions during operations: 1. The person engaged for cleaning the Sewerage/ETP/STP should not be allowed to consume alcohol or take any drugs. Also the persons, who are not physically fit should not be allowed to undertake the work. 2. The persons engaged for the job will be essentially required to wear the protective gear as per requirement of the work place. 3. The protective gear and safety equipment shall comprise of the equipment’s (i) Safety body harness/safety belt (ii) face mask (iii) Safety torch (iv) Hand gloves (v) Safety googles (vi) Safety Helmet (vii) Emergency medical oxygen resuscitator Kit (viii) Gas Monitor (ix) Head Lamp (x) Reflecting Jacket (xi) Guide Pipe set ( xii) Safety Tripod set (xiii) Full body Wader suit (xiv) Chlorine Mask (ix) Air compressor for blower (xvii) Modular Airlines Supply Trolley System (xviii) Full face mask (xix) Safety Gumboots (xx) Raincoat. 4. If there is appearance of white foam and no live cockroach then there is strong possibility of presence of poisonous gases in that chamber. Use litmus paper/gas detector to confirm the same. Give sufficient time by opening the chamber to open sky and if possible use air blowers to allow the gases to escape before taking up the work. 5. Do no depend on the presence of the foot rests fixed in the chamber wall since there is a possibility that with passages of time grip/ hold of the footrest has given way and it may not be strong enough to take the load. Always use rope ladder after testing its carrying strength. 6. No person should be allowed to continue to work or stay in the chamber for more than 15 minutes at a stretch. The persons outside the chamber should remain in conversation with the person/ persons inside the chamber to ensure their well -being. In case of uneasiness to the person working inside the chamber, a signal shall be given by shaking the rope attached his safety harness so that he can be pulled cut of the chamber. 7. Smoking or carrying open fire flame in the near vicinity of the work place should not be allowed. Any electric installation should also be not switched on or switched off near the place of work. If electric wires happen to be nearly, they should be properly insulated. 8. No tools or equipment should be placed near the edge of the manhole to avoid any injury to the worker due to sudden fall of the equipment inside the manhole.