The document provides instructions on how to properly set a table, including:
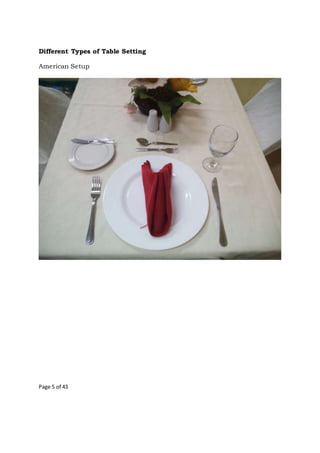
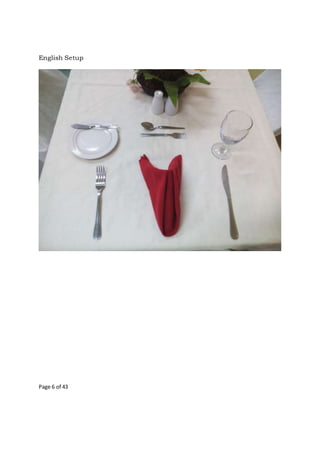
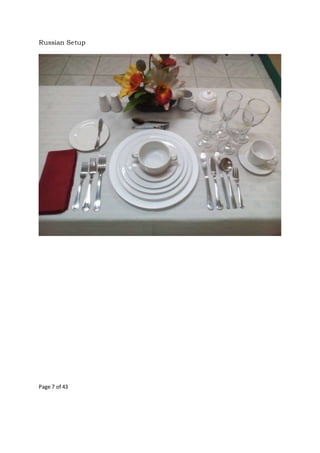
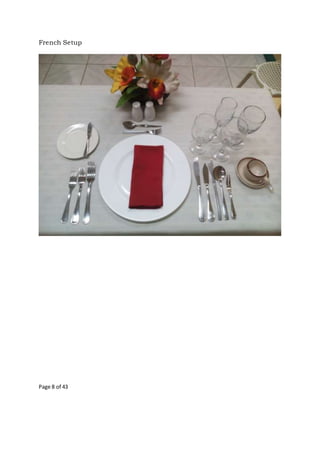
1. It discusses the importance of table setting and demonstrates different types of settings like American, English, Russian, and French.
2. It details how to lay out flatware, dinnerware, and glassware in a standardized way and provides rules for handling each item properly.
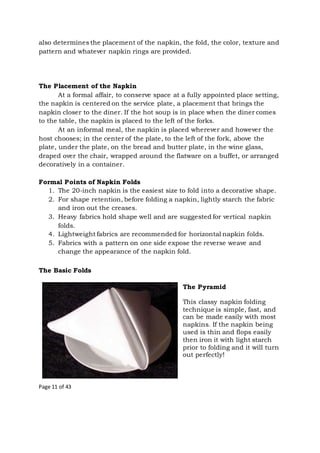
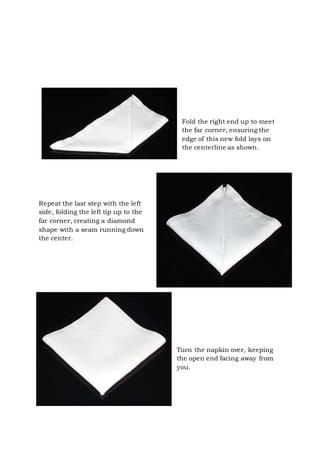
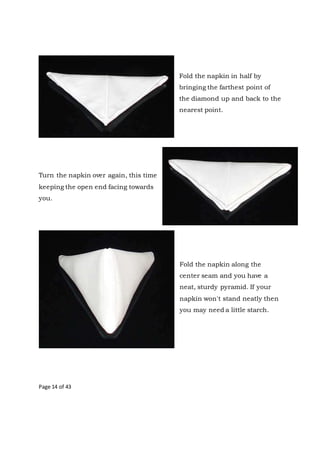
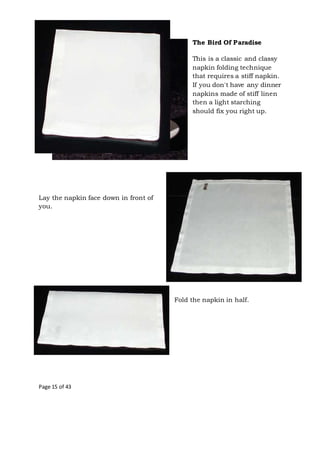
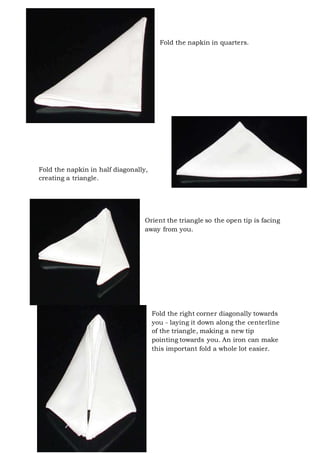
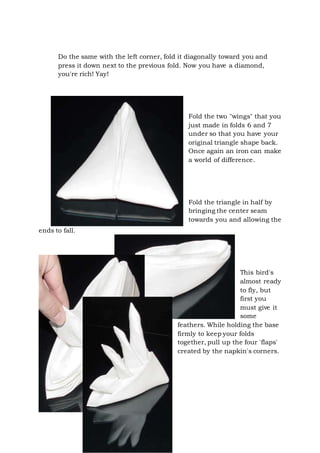
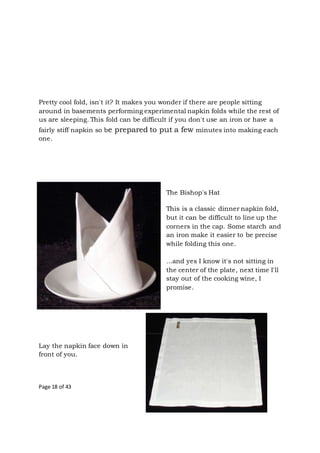
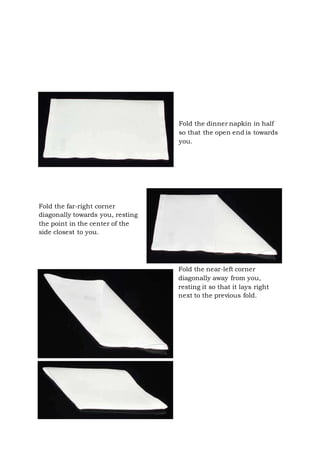
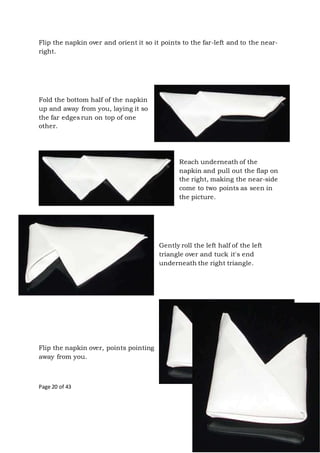
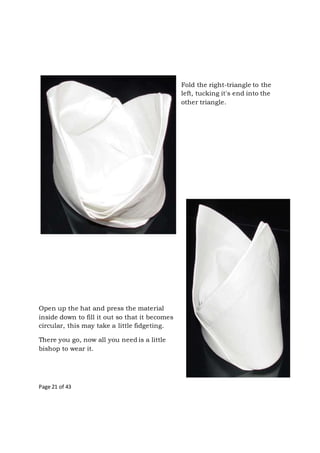
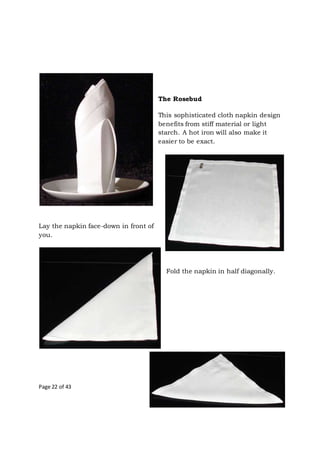
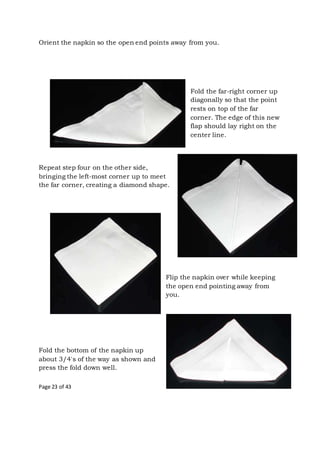
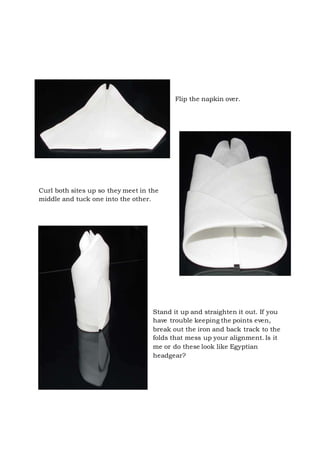
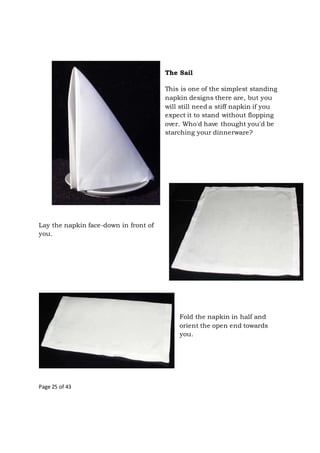
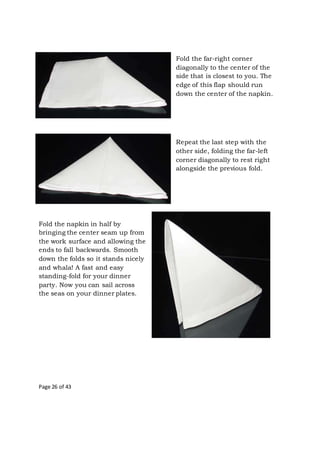
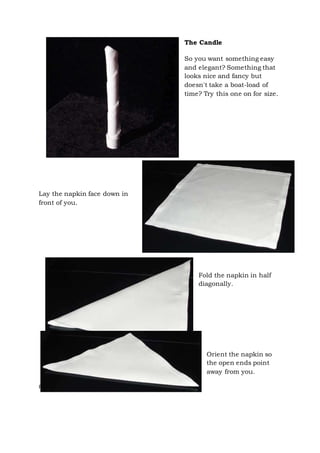
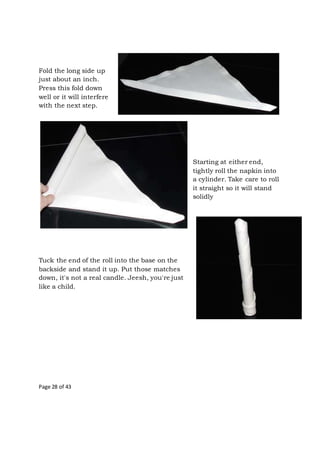
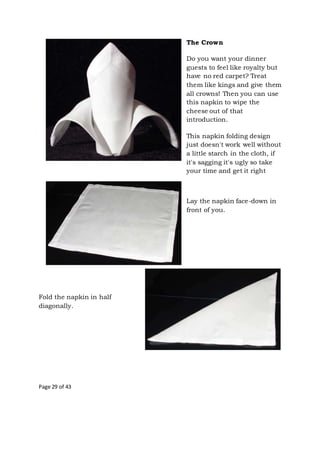
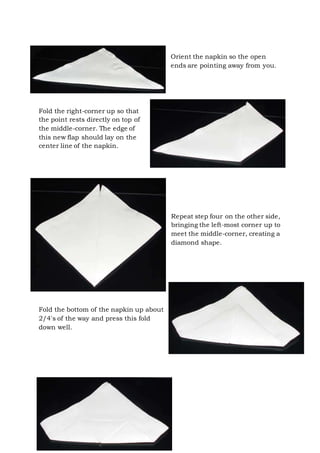
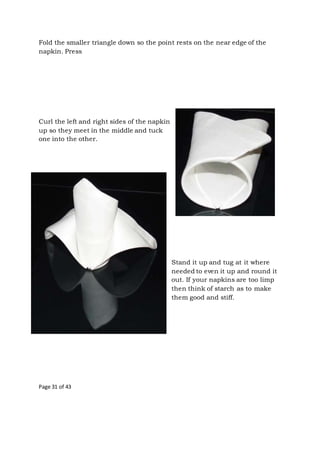
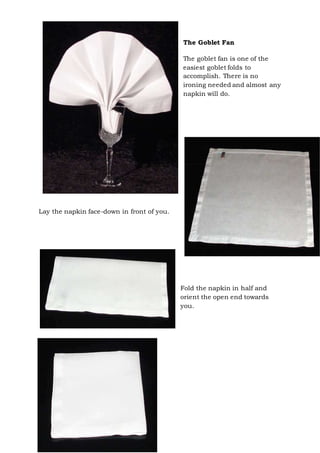
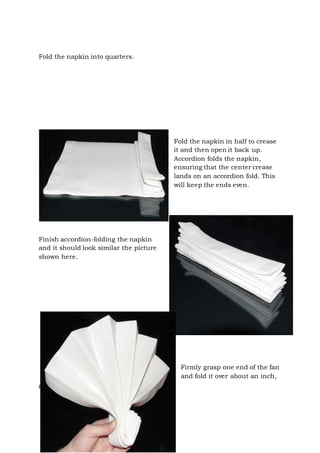
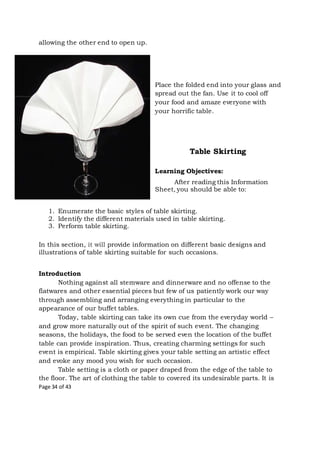
3. Several napkin folding techniques are presented, like the pyramid, bird of paradise, and bishop's hat folds, to make napkins part of an attractive table setting.