WHAT IS SPECIMENCOLLECTION
• Specimen collection is an essential procedure used for many medical
diagnoses.
• Collecting specimens is the process of acquiring tissue or fluids for
laboratory analysis.
• Some of the samples collected may include serum samples, virology
swab samples, biopsy and necropsy tissue, cerebrospinal fluid,
whole blood for PCR, and urine samples.
• Medical Assistants collect these samples and then place them in specific
containers for successful processing in a lab.
3.
WHAT IS THEPURPOSE OF SPECIMEN COLLECTION?
• Specimen collection is vital for acquiring an accurate and timely laboratory test
result.
• To properly collect specimens, they must be obtained through designated
containers, correctly labeled, and promptly transported to the lab.
5.
HOW LONG DOESIT TAKE TO COLLECT SPECIMENS?
• Most specimens can be collected in a matter of minutes.
• It normally only takes a few minutes to transport them to the lab as well.
• However, some specimen collection may require more steps.
• It often depends on the type of tissue or fluid the patient has provided.
6.
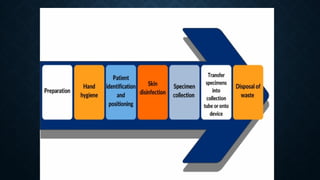
SPECIMEN COLLECTION PREPARATION
•While most collections don’t require much prep, there are some
guidelines that must be followed.
• These include reviewing the appropriate information, such as the
indicated specimen type, the volume, the procedure, the collection
materials, patient prep, and storage instructions.
8.
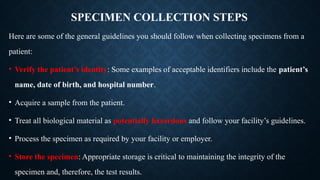
SPECIMEN COLLECTION STEPS
Hereare some of the general guidelines you should follow when collecting specimens from a
patient:
• Verify the patient’s identity: Some examples of acceptable identifiers include the patient’s
name, date of birth, and hospital number.
• Acquire a sample from the patient.
• Treat all biological material as potentially hazardous and follow your facility’s guidelines.
• Process the specimen as required by your facility or employer.
• Store the specimen: Appropriate storage is critical to maintaining the integrity of the
specimen and, therefore, the test results.
10.
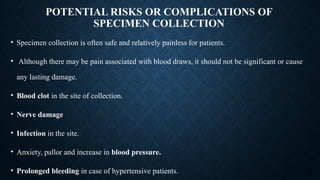
POTENTIAL RISKS ORCOMPLICATIONS OF
SPECIMEN COLLECTION
• Specimen collection is often safe and relatively painless for patients.
• Although there may be pain associated with blood draws, it should not be significant or cause
any lasting damage.
• Blood clot in the site of collection.
• Nerve damage
• Infection in the site.
• Anxiety, pallor and increase in blood pressure.
• Prolonged bleeding in case of hypertensive patients.
11.
PRO TIPS FORMASTERING THE ART OF
SPECIMEN COLLECTION
Avoid frequent problems with attention to detail. Follow the guidelines of your facility to the letter.
• Use two patient identifiers or more before collecting the sample.
• Collected at the right time
• Collected in a way that minimises contamination
• Label containers for specimens while in the presence of the patient.
• Ensure you aren’t using any expired containers.
• Ensure that you are using the correct container. Some require preservatives, while others do not.
12.
• Do NOTtransfer/pour specimens from one type of container into another.
• Obtain a large enough quantity of the specimen to ensure the test can be performed
(see the test’s requirements for more information).
• Tighten container lids to avoid any leakage or contamination.
• Keep the specimen at the recommended temperature as specified in the test
requirements.
• For urine collection, instruct the patient on how to provide a clean-catch, midstream
sample.
• Remember to add the preservative specified in the test requirements to the
collection container before you ask for a sample.
13.
VENOUS, ARTERIAL, ANDCAPILLARY BLOOD
SPECIMENS
Venous Blood
• Venous blood is deoxygenated blood that flows from tiny capillary blood vessels within the
tissues into progressively larger veins to the right side of the heart.
• Venous blood is the specimen of choice for most routine laboratory tests.
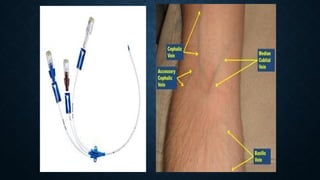
• The blood is obtained by direct puncture to a vein, most often located in the antecubital area
of the arm or the back (top) of the hand.
• At times, venous blood may be obtained using a vascular access device (VAD) such as a
central venous pressure line or an IV start.
• Most laboratory reference ranges for blood analytes are based on venous blood.
14.
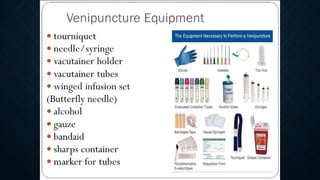
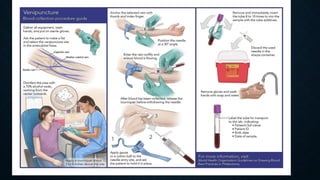
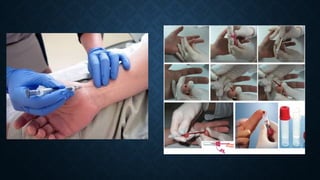
PROCEDURE
• Introduce yourselfto the patient and pleasant.
• Read patient request form carefully.
• Identify the patient by name, date, hospital or lab ID.
• If the patient should be fasting before giving the blood, inquire if the
patient has done. Decide how much blood is needed and arrange the
correct tubes to be used for each test.
• Plan the sequence in which blood sample must be taken.
15.
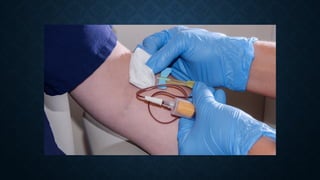
• Use personalprotective equipment's.
• Fix the needle on to the syringe, touching only top of the needle.Test the needle
and syringe to make sure that needle is not loose or blocked.
• Ask the patient sit alongside the table used for taking blood, the elbow may be
supported by armrest.
• Lay the patients arm on the table palm upwards.
• Select the vein for the puncture. Alternatively you can choose the basilica or
cephalic veins.
16.
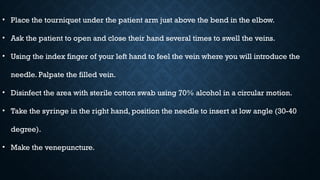
• Place thetourniquet under the patient arm just above the bend in the elbow.
• Ask the patient to open and close their hand several times to swell the veins.
• Using the index finger of your left hand to feel the vein where you will introduce the
needle. Palpate the filled vein.
• Disinfect the area with sterile cotton swab using 70% alcohol in a circular motion.
• Take the syringe in the right hand, position the needle to insert at low angle (30-40
degree).
• Make the venepuncture.
17.
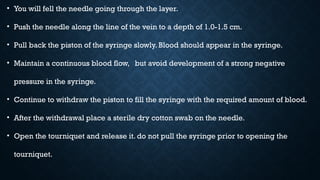
• You willfell the needle going through the layer.
• Push the needle along the line of the vein to a depth of 1.0-1.5 cm.
• Pull back the piston of the syringe slowly. Blood should appear in the syringe.
• Maintain a continuous blood flow, but avoid development of a strong negative
pressure in the syringe.
• Continue to withdraw the piston to fill the syringe with the required amount of blood.
• After the withdrawal place a sterile dry cotton swab on the needle.
• Open the tourniquet and release it. do not pull the syringe prior to opening the
tourniquet.
18.
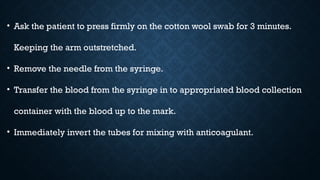
• Ask thepatient to press firmly on the cotton wool swab for 3 minutes.
Keeping the arm outstretched.
• Remove the needle from the syringe.
• Transfer the blood from the syringe in to appropriated blood collection
container with the blood up to the mark.
• Immediately invert the tubes for mixing with anticoagulant.
21.
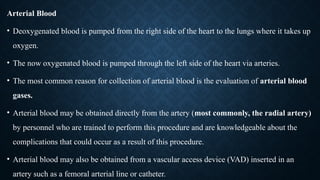
Arterial Blood
• Deoxygenatedblood is pumped from the right side of the heart to the lungs where it takes up
oxygen.
• The now oxygenated blood is pumped through the left side of the heart via arteries.
• The most common reason for collection of arterial blood is the evaluation of arterial blood
gases.
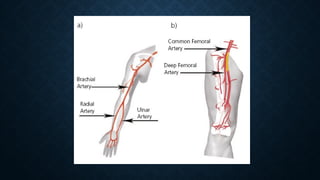
• Arterial blood may be obtained directly from the artery (most commonly, the radial artery)
by personnel who are trained to perform this procedure and are knowledgeable about the
complications that could occur as a result of this procedure.
• Arterial blood may also be obtained from a vascular access device (VAD) inserted in an
artery such as a femoral arterial line or catheter.
22.
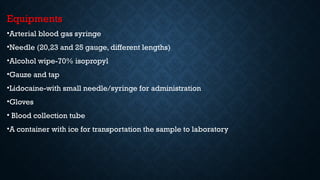
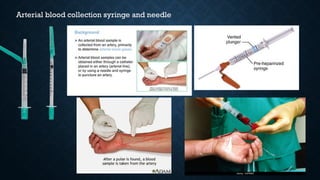
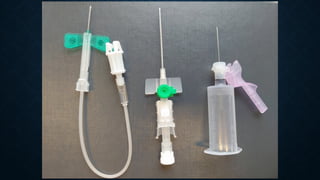
Equipments
•Arterial blood gassyringe
•Needle (20,23 and 25 gauge, different lengths)
•Alcohol wipe-70% isopropyl
•Gauze and tap
•Lidocaine-with small needle/syringe for administration
•Gloves
• Blood collection tube
•A container with ice for transportation the sample to laboratory
23.
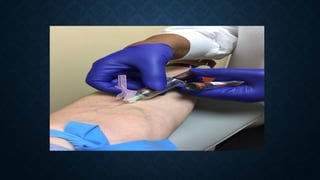
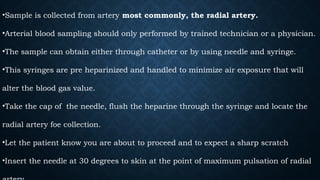
•Sample is collectedfrom artery most commonly, the radial artery.
•Arterial blood sampling should only performed by trained technician or a physician.
•The sample can obtain either through catheter or by using needle and syringe.
•This syringes are pre heparinized and handled to minimize air exposure that will
alter the blood gas value.
•Take the cap of the needle, flush the heparine through the syringe and locate the
radial artery foe collection.
•Let the patient know you are about to proceed and to expect a sharp scratch
•Insert the needle at 30 degrees to skin at the point of maximum pulsation of radial
24.
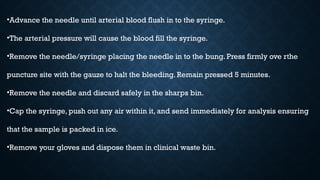
•Advance the needleuntil arterial blood flush in to the syringe.
•The arterial pressure will cause the blood fill the syringe.
•Remove the needle/syringe placing the needle in to the bung. Press firmly ove rthe
puncture site with the gauze to halt the bleeding. Remain pressed 5 minutes.
•Remove the needle and discard safely in the sharps bin.
•Cap the syringe, push out any air within it, and send immediately for analysis ensuring
that the sample is packed in ice.
•Remove your gloves and dispose them in clinical waste bin.
25.
pH: Measurement ofacidity or alkalinity, based on the hydrogen (H+). 7.35 – 7.45
Pao2 :The partial pressure oxygen that is dissolved in arterial blood. 80-100 mm Hg.
PCO2: The amount of carbon dioxide dissolved in arterial blood. 35– 45 mmHg
HCO3 : The calculated value of the amount of bicarbonate in the blood.22 – 26 mmol/L
SaO2:The arterial oxygen saturation. >95%
pH,PaO2 ,PaCO2 , Lactate and electrolytes are measured Variables
HCO3 (Measured or calculated)
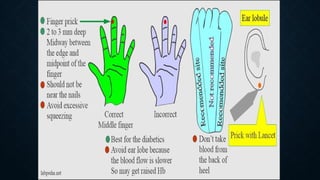
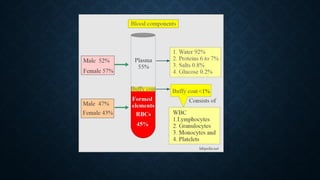
Capillary Blood
• Capillaryblood is obtained from capillary beds that consist of the smallest veins
(venules) and arteries (arterioles) of the circulatory system.
• The venules and arterioles join together in capillary beds forming a mixture of venous
and arterial blood.
• The specimen from a dermal puncture will therefore be a mixture of arterial and
venous blood along with interstitial and intracellular fluids.
• Capillary blood is often the specimen of choice for infants, very young children,
elderly patients with fragile veins, and severely burned patients.
• Point-of-care testing is often performed using a capillary blood specimen.
31.
Specimen Type Methodof Collection Common Use
Venous Direct puncture of vein
by venipuncture; vascular
access device
Routine laboratory tests
Arterial
Direct puncture of artery;
vascular access device Arterial blood gases
Capillary Dermal puncture of
fingertip or heel
•Infants and young
children
•Elderly patients with
fragile veins
•Severely burned
patients
•Point-of-care testing
40.
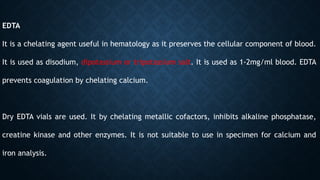
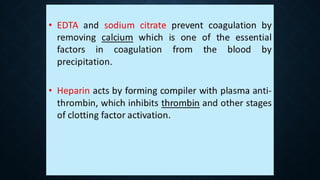
EDTA
It is achelating agent useful in hematology as it preserves the cellular component of blood.
It is used as disodium, dipotassium or tripotassium salt. It is used as 1-2mg/ml blood. EDTA
prevents coagulation by chelating calcium.
Dry EDTA vials are used. It by chelating metallic cofactors, inhibits alkaline phosphatase,
creatine kinase and other enzymes. It is not suitable to use in specimen for calcium and
iron analysis.
41.
CITRATE
Sodium citrate solutionat concentration 3.8g/dl in ratio or 1 part to 9 part of blood is
widely used for coagulation studies because its effect is reversible by addition of
calcium.
Sodium citrate:The ratio is one part of 3.8% aqueous solution to nine parts of whole
blood.Its used for blood coagulation and platelet function studies (PT &PTT) and can be
used for Erythrocyte sedimentation rate (ESR).
42.
OXALATES
Sodium, potassium, ammonium,and lithium oxalates inhibit blood coagulation by
forming insoluble complex with calcium. Potassium oxalate at concentration of 1-2
mg/ml of blood is widely used. Combined ammonium and/or potassium oxalate does
not cause shrinkage of erythrocytes. It consists of three parts by weight of ammonium
oxalate, which causes swelling of the erythrocytes, balanced by two parts of potassium
oxalate which causes shrinkage. NH4+ & K+ oxalate mixture in the ratio of 3:2, and 2 mg
/ ml of blood is the required amount.
43.
Heparin:Its concentration is0.1 to 0.2 mg/ml of blood.Its good for prevention
of hemolysis but it is not satisfactory for leukocyte or platelet counts because
of cell clumping. Its also produce a trouble some blue background in wrights
stain.
44.
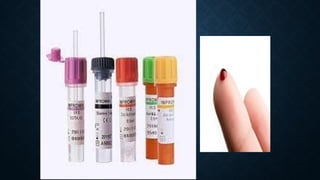
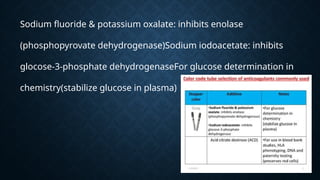
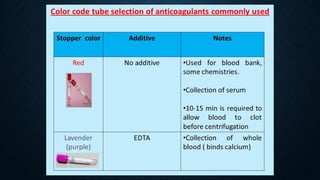
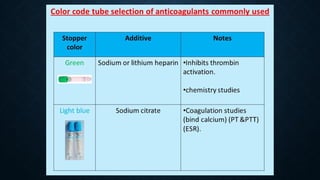
colour code tubeselection of anticoagulants commonly used
Stopper color Additive.
Additive Used for blood bank, some chemistries.
Collection of serum10-15 min is required to allow blood to clot
before centrifugation
45.
Sodium fluoride &potassium oxalate: inhibits enolase
(phosphopyrovate dehydrogenase)Sodium iodoacetate: inhibits
glocose-3-phosphate dehydrogenaseFor glucose determination in
chemistry(stabilize glucose in plasma)