Sky science lesson plan
•
0 likes•85 views

This lesson plan introduces students to the concept of why the sky appears different colors at different times of day. Students conduct an investigation using water and milk to model how light interacts with Earth's atmosphere. They observe that blue and violet light scatter more in the milk/water mixture, similar to how those colors scatter more in Earth's atmosphere. Students then plan additional tests of their model and revise their explanations based on observations. Diagrams are used to illustrate how different wavelengths of light scatter in the atmosphere, relating back to the focus question of why we see different sky colors at different times of day.

Recommended
More Related Content
Similar to Sky science lesson plan
Similar to Sky science lesson plan (20)
Recently uploaded
Recently uploaded (20)
Sky science lesson plan
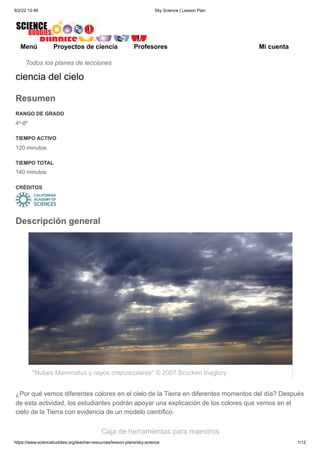
- 1. 9/2/22 12:46 Sky Science | Lesson Plan https://www.sciencebuddies.org/teacher-resources/lesson-plans/sky-science 1/12 Menú Proyectos de ciencia Profesores Mi cuenta Todos los planes de lecciones ciencia del cielo Resumen RANGO DE GRADO 4º-8º TIEMPO ACTIVO 120 minutos TIEMPO TOTAL 140 minutos CRÉDITOS Descripción general ¿Por qué vemos diferentes colores en el cielo de la Tierra en diferentes momentos del día? Después de esta actividad, los estudiantes podrán apoyar una explicación de los colores que vemos en el cielo de la Tierra con evidencia de un modelo científico. Caja de herramientas para maestros "Nubes Mammatus y rayos crepusculares" © 2007 Brocken Inaglory
- 2. 9/2/22 12:46 Sky Science | Lesson Plan https://www.sciencebuddies.org/teacher-resources/lesson-plans/sky-science 2/12 ● Plan de lección (PDF) ● Páginas del cuaderno (PDF) ● Presentación de diapositivas de ciencia del cielo (PDF) Objetivos Los estudiantes podrán: 1) Apoye una explicación de los colores que vemos en el cielo de la Tierra con evidencia de un modelo 2) Criticar un modelo científico, incluida la identificación de sus limitaciones. 3) Explique por qué vemos diferentes colores en el cielo de la Tierra en diferentes momentos del día. Materiales ● Una habitación que puede oscurecerse mucho (sin ventanas que den al exterior o ventanas que puedan oscurecerse fácilmente) ● Presentación de diapositivas de Sky Science ● Para la Parte 1 de la Investigación: Configuración del laboratorio para cada grupo, que incluye: ■ 1 gotero o pipeta ■ 1 cuchara ■ 1 linterna incandescente ■ 1 recipiente transparente lleno de agua (preferiblemente rectangular, pero también podría usar un vaso para beber o un cilindro graduado) ■ Papel de construcción negro (para colocar debajo del recipiente) ■ Vaso pequeño o taza de leche descremada ■ Lápices de colores (al menos rojo, naranja, amarillo, azul) ● Juego de hojas de cuaderno (1 copia por estudiante) ■ pags. 1: Aviso y asombro de la Tierra/Luna ■ pags. 2: Investigación del cielo en un balde ■ pags. 3: Vocabulario ligero y explicación ■ pags. 4: Planifica una investigación ■ pags. 5: Diagrama del cielo NOAA #1 ■ pags. 6: Diagrama del cielo NOAA #2 ■ pags. 7: Mapa de analogía y reflexión final
- 3. 9/2/22 12:46 Sky Science | Lesson Plan https://www.sciencebuddies.org/teacher-resources/lesson-plans/sky-science 3/12 ● Para la Parte 2 de la Investigación (cualquiera o todos los que tenga disponibles): ■ Geles de celofán de colores ■ bombillas y lámparas de colores ■ Bombillas y lámparas fluorescentes ■ Contenedores transparentes adicionales en una variedad de formas ■ Tipos adicionales de leche (mitad y mitad, leche de soya, leche de nuez, etc.) ■ Luces LED de varios colores preparación del maestro 1) Configure las diapositivas de Sky Science . 2) Imprima un juego de páginas de cuaderno para cada alumno. 3) Prepare un conjunto de materiales de laboratorio para cada grupo de 3-4 estudiantes. 4) Organice todos los materiales de "investigación adicional" en un lugar separado, para revelarlos más tarde. 5) Bloquee las ventanas u otras fuentes de luz si es necesario. 6) Es posible que desee realizar la investigación usted mismo con anticipación para asegurarse de que la habitación se oscurezca lo suficiente como para ver el efecto de agregar leche a los colores que observa. Sugerencia para el maestro del cuaderno del estudiante: Las páginas del estudiante para esta actividad se crearon para ser parte de un cuaderno en el que se recopilan el pensamiento y el trabajo del estudiante, y se diseñaron para dejar espacio para que los estudiantes usen de manera flexible el espacio alrededor de las indicaciones, diagramas, etc. Estas páginas podrían se pueden pegar en los cuadernos de ciencias de los estudiantes en su totalidad, o se pueden editar para hacer tablas de datos, indicaciones y diagramas más pequeños para que los estudiantes los peguen a medida que avanzan en la lección. Introducción (10 minutos) 1) Muestre las cuatro imágenes del cielo desde la Tierra y la Luna (Diapositiva 1). 2) Distribuya la página 1 del cuaderno (Aviso y asombro de la Tierra y la Luna). Anime a los estudiantes a escribir sus propias observaciones y preguntas, luego, cuando estén listos, comparta con su grupo de mesa o compañero de codo. 3) Recuerde a los estudiantes que no hay una respuesta correcta en este punto, que esta es una oportunidad para mirar de cerca estas imágenes y solo pensar en observaciones y preguntas, no en explicaciones. 4) Después de unos 5 minutos de pensar y hablar en grupos pequeños, invite a voluntarios a compartir sus dudas. Registre estas dudas en la pizarra en forma de preguntas. Parafrasee y confirme con los estudiantes para asegurarse de que entiende sus preguntas.
- 4. 9/2/22 12:46 Sky Science | Lesson Plan https://www.sciencebuddies.org/teacher-resources/lesson-plans/sky-science 4/12 5) Presente la pregunta de enfoque (Diapositiva 2): ¿Por qué vemos esos colores en el cielo de la Tierra? ● Tome nota de las maravillas de los estudiantes que fueron similares o abarcadas por esta pregunta. ● Indique que algunas otras maravillas que compartieron los estudiantes también pueden responderse a medida que investigue esta pregunta en las próximas lecciones. 6) ¡Reconozca que podría ser difícil investigar esta pregunta ya que no podemos traer el cielo al salón de clases para manipularlo! Por esta razón, vamos a usar un modelo y considerar lo que nos puede ayudar a entender sobre el cielo. Parte 1 - Llevar a cabo una Investigación (20 minutos) 1) Ponga a los estudiantes en grupos de 2-4. 2) Distribuya la página 2 del cuaderno. Pida a cada estudiante que escriba la pregunta de enfoque en el espacio proporcionado. 3) Usando la diapositiva 3, presente los materiales y los pasos de la investigación inicial. Es posible que desee hacer una demostración del brillo de la luz a través del agua en diferentes direcciones y observar desde abajo y desde arriba, así como desde el costado y el extremo que mira hacia la fuente de luz. 4) Entregue a cada grupo los materiales para la Investigación Parte 1 (ver Materiales ) 5) Verifique brevemente con cada grupo para asegurarse de que hayan decidido los roles y comprendan la tarea. 6) Una vez que los grupos estén listos, apague las luces y dé a los grupos de 3 a 5 minutos para observar solo el agua corriente . (Nota: si está proyectando las diapositivas de PowerPoint, recuerde apagar el proyector para que la habitación quede completamente oscura) 7) Una vez que todos los grupos hayan observado el agua pura, todos los grupos deben agregar leche descremada al agua y revolver. Dé a los grupos al menos 5 minutos para observar con las luces apagadas una vez que hayan completado este paso. 8) Anime a los estudiantes a tomar notas en sus cuadernos sobre lo que observan, usando palabras y dibujos para mostrar qué colores vieron en el balde y dónde. 9) Enciende las luces . Dé a los estudiantes de 3 a 5 minutos para terminar sus notas y bocetos ahora que tienen más luz. Consejo para el maestro: roles de trabajo en grupo para la investigación. Podría ser útil tener miembros del grupo para elegir roles, incluidos: 1) Gerente de materiales para obtener y configurar materiales; 2) Anotador para asegurarse de que las predicciones y observaciones se registren en al menos un cuaderno; y 3) Facilitador para leer las instrucciones y administrar el proceso. Estos pueden ser roles rotativos si los estudiantes quieren probar algo nuevo en la Parte 3, a continuación. Parte 2 - Reflexionar y explicar (10 minutos)
- 5. 9/2/22 12:46 Sky Science | Lesson Plan https://www.sciencebuddies.org/teacher-resources/lesson-plans/sky-science 5/12 1) Distribuya la página 3, que incluye vocabulario y conceptos ligeros. 2) Dé a los grupos este mensaje para discutir: ● Con base en lo que sabes sobre la luz y el color, ¿qué crees que le está pasando a la luz en el balde? 3) Recuérdeles que en sus debates pueden basarse en lo que observaron, sus conocimientos o experiencias anteriores, y el vocabulario y la información sobre la luz y el color que acaban de recibir en el folleto. 4) Al final de los 10 minutos, cada grupo debería haber decidido una explicación en la que todos puedan estar de acuerdo, completa con evidencia que la respalde. Usar este marco de oración puede ayudar a los estudiantes a respaldar su afirmación con evidencia: "Al principio, pensamos _______________ porque ______________". 5) Circule para asegurarse de que todos los estudiantes estén escribiendo la explicación y la evidencia de su grupo en sus cuadernos. Parte 3: planificar y llevar a cabo una investigación (30 minutos) 1) Hand out notebook page 4. 2) Tell students that their next task is to plan a new investigation in order to test their explanation: ● Groups should decide on one thing to change in their model in order to test their explanation. ● Possible things to change include: ■ Shape of the container ■ The type of milk in the water ■ The amount of milk in the water ■ The color of the light ● Reveal the optional materials to students, so they know what materials they have available as they plan their investigation. ● In addition to recording their plan in words and/or pictures, groups should be sure to make a prediction: Based on their current explanation, what effect do they predict this change to the model will have on what they observe? 3) Give groups about 10 minutes to plan, circulating to be sure everyone is recording plans and predictions in their notebooks. 4) Once all groups have planned, made a prediction, and set up their new model, turn off the lights to test! 5) Visit each group and ask open-ended questions about their test: ● What change did you make to your model and why? ● What do you notice? ● Are your observations agreeing with your prediction?
- 6. 9/2/22 12:46 Sky Science | Lesson Plan https://www.sciencebuddies.org/teacher-resources/lesson-plans/sky-science 6/12 ● What are you thinking now? What do you wonder? 6) Some groups may move faster, so you may open it up to them to make another change to their models. 7) When everyone has tested and discussed at least one change, turn the lights on. 8) Give groups 3-5 minutes again with the lights on to record their observations and new thoughts and ask them to discuss with their group: ● Based on what you observed, do you need to revise your explanation? ● What are you wondering now? ● What would you want to try next. 9) Give these sentence frames to help them shape their thinking in their notebooks: ● "Now, we think_________ because__________." ● "We confirmed our thinking because_________." ● "Now, I wonder... Part 4 - Lab Visit (5-10 minutes) 1) Ask students to leave their investigation set-up as it is, and leave their notebooks on their table open to notes that help explain their plan, what they observed, and what they are thinking now. 2) Give students directions for a "lab visit" or gallery walk: ● Visit at least one neighboring lab table to see what they have been up to. ● Look at their plan, set-up, observations, revised explanations, and questions. ● After about 5 minutes, return to your own table and talk with your group about anything new you noticed, new ideas you have, or what you're wondering now. 3) Give students a moment to record a final thought in their notebook: ● If you could continue this investigation with any materials (not just what you were limited to today), what would you want to try? ● What question would you hope to answer? 4) Clean-up lab materials before moving on to critiquing the model and closing steps. Part 5 - Comparing and Critiquing the Model 1) Remind students of the image on their first notebook page. 2) Ask students to think individually about these questions before sharing with an elbow partner: ● Which bucket (milky or plain water) is more like Earth's sky? Milky. ● Which bucket is more like the moon's sky? Plain.
- 7. 9/2/22 12:46 Sky Science | Lesson Plan https://www.sciencebuddies.org/teacher-resources/lesson-plans/sky-science 7/12 ● Why do you think that? Some possible answers: Earth has an atmosphere. Light interacts with the particles in the milky water, as it does with Earth's atmosphere, so you can see the light passing through the milky water and lighting up the bucket, as the sun lights up the sky. In the plain water, the light passes through the water without interacting with many particles. Similarly, the moon's sky stays dark because it doesn't have a thick atmosphere like Earth. You can see the sun in the distance, and you notice it when it hits the flag or the astronaut, kind of like when it hits the side of the bucket or your hand. 3) Ask for volunteers to share out their thoughts. Students will be ready to move on when most people agree that the milky bucket is more like Earth's sky. 4) Hand out page 5. 5) Ask students to think individually about these questions before sharing with an elbow partner. You may want to remind them of the focus question, which should be written in their notebook: Why do we see the colors we do in Earth's sky? ● What do you think this diagram is intended to show? ● How does it relate to the focus question? ● How does it relate to our model? 6) Ask for volunteers to share out their thoughts. Key ideas here are that the diagram is showing that different colors of light are scattered differently by Earth's atmosphere. The diagram seems to be saying that blue and violet light are scattered more easily. Students may notice that this parallels their observation of the model, where the light passing all the way through the water was yellow, or orange. Students also might notice that in our model, the milky water takes the place of (or "represents") Earth's atmosphere, and light coming from the flashlight represents the sun's rays in space. 7) Hand out page 6. 8) Ask students to think individually about these questions before sharing with an elbow partner. ● What do you think this diagram is intended to show? ● How does it relate to the focus question? ● How does it relate to our model? 9) Ask for volunteers to share out their thoughts. One key idea, again, is that the diagram is showing that different colors of light are scattered differently by Earth's atmosphere. The diagram shows in a different way that blue and violet light are scattered more easily. It also includes in this representation the idea that the distance light passes through the atmosphere to reach us depends on our position on the Earth relative to the Sun, which changes as Earth rotates. When the sun has a direct path, the blue light is scattered by the atmosphere making the sky look blue, and we often think of the sun as looking yellow. As Earth rotates away from the sun, what we think of as the sun "setting," the sunlight passes through more atmosphere, scattering more colors, including the reds, oranges, and yellows that we often see in the evening - and for the same reason in the morning as the sun is rising. Final Reflections
- 8. 9/2/22 12:46 Sky Science | Lesson Plan https://www.sciencebuddies.org/teacher-resources/lesson-plans/sky-science 8/12 1) Hand out page 7 (analogy map). Acknowledge that the class was able to figure out a lot from the model of the sky in a bucket! Using the model made it possible to manipulate, make changes, and investigate in order to building understanding and answer the focus question. However, since the model isn't the real thing, it also has limitations. 2) Draw students' attention to the parts of the model that are listed in the first column of the analogy map, then to the parts of the real world that they represent. 3) Define strengths and limitation: ● Strengths: Ways that a part of the model is like the real thing, so that it represents the real world accurately. ● Limitations: Ways that a part of the model is very different from the real thing, and doesn't represent the real world well at all. 4) Tell students to work in pairs to first decide whether they agree with the parts of the model listed, and what they represent (in the first three columns). Then work together to complete the empty boxes in the table, thinking about the strengths and limitations. 5) If students finish quickly, encourage them to fill in another row to critique another part of the model. For example, they could add the fat content of the milk, if that's something that they tested. 6) Finally, have students flip over the handout, or turn to a clean page in their notebook to do a final reflection, individually, in their notebooks. ● Rewrite the focus question at the top of the page: "Why do we see the colors we do in Earth's sky?" ● Use this time to write your answer to this question. What are you thinking now? 7) Students do not need to share this thinking, except with the teacher. Optional Extension: An opinion essay prompt for further thinking can be found in the full lesson plan. Background for Educators This activity is anchored in the phenomenon of the colors we see in Earth's sky. The phenomenon is introduced through a selection of images that contrast the colors we see in Earth's sky (at noon on a cloudless day, or at sunset) with images from the moon where the sun or sunlight is visible, but the sky remains black. The observations and questions that come out of this introduction help students connect to the focus question which guides the investigation: "Why do we see the colors we do in Earth's sky?" Investigating and critiquing a model The goal of this activity is to build towards an answer to the above question by investigating and critiquing a physical model of the phenomenon that leads to the colors in Earth's sky. Students have the opportunity to work with the model in three different ways. First, they follow step-by-step directions to create the basic model, adding skim milk to water and observing what happens to light as it passes through the milky water. This is the point where students are given some key ideas and
- 9. 9/2/22 12:46 Sky Science | Lesson Plan https://www.sciencebuddies.org/teacher-resources/lesson-plans/sky-science 9/12 vocabulary for talking about light and its interactions (transmit, reflect, refraction, and scatter), and asked to discuss and write a team explanation for what is happening to the light in the "bucket." Based on this explanation, they are given a second opportunity to investigate this model by changing one thing that they think will test their explanation. Finally, students engage in critique of the model by comparing it to scientific diagrams, and identifying the limitations and strengths of the bucket model in representing the real phenomenon. What can you expect to see in the bucket? When you shine the flashlight through the water in the bucket, there are very few particles large enough for the light to interact with. Most of the light passes through without being reflected, absorbed, or scattered, traveling in a straight line from its source. Looking down on the water or in from the side you don't see very much light and the bucket still looks dark. However, you can see the light when you look through the bucket towards the light source, shining brightly from the other side of the bucket. After skim milk has been added, light is scattered by the larger particles that have been introduced to the water. Now when you look down into the bucket, more of this randomly scattered light reaches your eye, and instead of a dark bucket, you see a bucket filled with light. Much of the light looks white, but as you observe more closely, you may notice that different colors are more visible in locations closer to or further from the light source. How does this model the sky? One phenomenon that the model helps us understand is that the sky viewed from the moon is dark, with a bright sun visible like a spotlight, while the sky viewed from Earth is filled with color. This model helps us consider how the Earth's atmosphere causes a phenomenon we may take for granted. Next Generation Science Standards Science and Engineering Practices ● Developing and Using Models: ■ Identify limitations of models. (3-5) ■ Collaboratively develop and/or revise a model based on evidence that shows the relationships among variables for frequent and regular occurring events. (3-5) ■ Develop and/or use models to describe and/or predict phenomena. (3-5) ■ Use a model to test cause and effect relationships or interactions concerning the functioning of a natural or designed system. (3-5) ■ Develop and/or revise a model to show the relationships among variables, including those that are not observable but predict observable phenomena ■ Develop a model to describe unobservable mechanisms. (6-8) ■ Develop and/or use a model to generate data to test ideas about phenomena in natural or designed systems, including those representing inputs and outputs, and those at unobservable scales. (6-8)
- 10. 9/2/22 12:46 Sky Science | Lesson Plan https://www.sciencebuddies.org/teacher-resources/lesson-plans/sky-science 10/12 Disciplinary Core Ideas ● PS4.B: Electromagnetic Radiation (4-PS4-2) ■ An object can be seen when light reflected from its surface enters the eyes. ● PS4.B: Electromagnetic Radiation (MS-PS4-2) ■ When light shines on an object, it is reflected, absorbed, or transmitted through the object, depending on the object's material and the frequency (color) of the light. ■ The path that light travels can be traced as straight lines, except at surfaces between different transparent materials (e.g., air and water, air and glass) where the light path bends. ■ A wave model of light is useful for explaining brightness, color, and the frequency-dependent bending of light at a surface between media. ■ However, because light can travel through space, it cannot be a matter wave, like sound or water waves. Crosscutting Concepts ● Cause and Effect: ■ Cause and effect relationships may be used to predict phenomena in natural or designed systems. ■ In grades 3-5, students routinely identify and test causal relationships and use these relationships to explain change. They understand events that occur together with regularity might or might not signify a cause and effect relationship. References Augustine, J. & Smith, L. (n.d.). Red sky in morning, sailor take warning. Red sky at night, sailor's delight. National Oceanic and Atmospheric Administration (NOAA) Earth System Research Laboratory, Global Monitoring Division. Retrieved from: http://www.esrl.noaa.gov/gmd/grad/about/redsky/ Blue Sky from Exploratorium Science Snacks. Retrieved from: http://www.exploratorium.edu/snacks/blue-sky Light waves and color (n.d.) on The Physics Classroom. Retrieved from: http://www.physicsclassroom.com/class/light/Lesson-2/Light-Absorption,-Reflection,-and- Transmission Rayleigh scattering (n.d.) on Hyperphysics. Retrieved from: http://hyperphysics.phy- astr.gsu.edu/hbase/atmos/blusky.html#c2 Image: "Mammatus clouds and crepuscular rays" by Brocken Inaglory, licensed and modified under CC BY-SA 3.0; originally sourced from https://commons.wikimedia.org/wiki/File:Mammatus_clouds_and_crepuscular_rays.JPG
- 11. 9/2/22 12:46 Sky Science | Lesson Plan https://www.sciencebuddies.org/teacher-resources/lesson-plans/sky-science 11/12 Reviews Leave a Review Be the first one to review this lesson plan. Explore Our Science Videos Turn Milk into Plastic! Lesson Plan Introduction How To Build a Rube Goldberg Machine Junkbots: construye robots con materiales reciclados Turn Milk into Plastic! Le Turn Milk into Plastic! Le… … How To Build a Rube Gol How To Build a Rube Gol… … Junkbots – Build Robots Junkbots – Build Robots… …
- 12. 9/2/22 12:46 Sky Science | Lesson Plan https://www.sciencebuddies.org/teacher-resources/lesson-plans/sky-science 12/12 Copyright © 2002-2022 Science Buddies. Reservados todos los derechos. Queda estrictamente prohibida la reproducción de material de este sitio web sin permiso por escrito. El uso de este sitio constituye la aceptación de nuestros Términos y Condiciones de Uso Justo . Política de privacidad EMPRESA Sobre nosotros Patrocinadores Socios Contáctenos Trabaja para nosotros Créditos de imagen Mapa del sitio AYUDA DEL PROYECTO Guía de proyectos de la feria de ciencias Guía de proyectos de diseño de ingeniería Guía avanzada de proyectos Proyectos de ciencia Pregunta a un experto INVOLUCRARSE Cómo donar Cómo ser voluntario ENCUENTRANOS AQUI Únete a nosotros en Facebook Síguenos en YouTube Síguenos en Twitter Síguenos en Pinterest Envíenos un correo electrónico