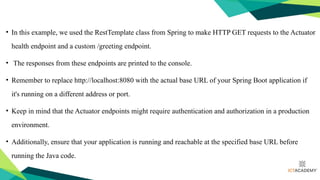
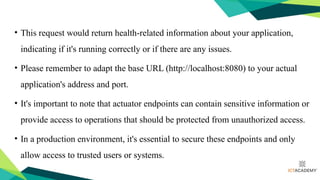
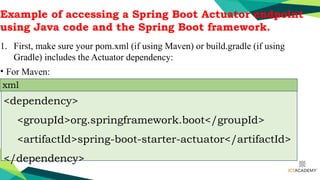
SPRING BOOT
SPRING BOOT
2
ACCESSING ACTUATOR ENDPOINT
• In a Spring Boot application, you can access the actuator
endpoints by sending HTTP requests to specific URLs
• Base path for the actuator endpoints is typically
• /actuator
Example
bash
/actuator/health
/actuator/info
/actuator/metrics
ACCESSING ACTUATOR ENDPOINT
• Ensure that the actuator module is included in your Spring Boot
project's dependencies.
• Make sure you have the appropriate dependency:
• In your pom.xml (if using Maven)
• build.gradle (if using Gradle),
For Maven
/<dependency>
<groupId>org.springframework.boot</groupId>
<artifactId>spring-boot-starter-actuator</artifactId>
</dependency>
xml
For Gradle
implementation 'org.springframework.boot:spring-
boot-starter-actuator'
gradle
• Start your Spring Boot application.
• Make an HTTP request to the desired actuator endpoint.
• For example, using tools like curl, wget, or through a web browser. For
instance:
GET http://localhost:8080/actuator/health
• bash
• This request would return health-related information about your application,
indicating if it's running correctly or if there are any issues.
• Please remember to adapt the base URL (http://localhost:8080) to your actual
application's address and port.
• It's important to note that actuator endpoints can contain sensitive information or
provide access to operations that should be protected from unauthorized access.
• In a production environment, it's essential to secure these endpoints and only
allow access to trusted users or systems.
Example of accessing a Spring Boot Actuator endpoint
using Java code and the Spring Boot framework.
1. First, make sure your pom.xml (if using Maven) or build.gradle (if using
Gradle) includes the Actuator dependency:
• For Maven:
<dependency>
<groupId>org.springframework.boot</groupId>
<artifactId>spring-boot-starter-actuator</artifactId>
</dependency>
xml
Example of accessing a Spring Boot Actuator endpoint
using Java code and the Spring Boot framework.
• For Gradle:
implementation 'org.springframework.boot:spring-boot-starter-
actuator'
gradle
• Define a simple Spring Boot application with a controller and Actuator endpoints
import org.springframework.boot.SpringApplication;
import org.springframework.boot.autoconfigure.SpringBootApplication;
import org.springframework.web.bind.annotation.GetMapping;
import org.springframework.web.bind.annotation.RestController;
@SpringBootApplication
@RestController
public class MyApplication {
public static void main(String[] args) {
SpringApplication.run(MyApplication.class, args);
}
// Simple controller to demonstrate a custom endpoint
@GetMapping("/greeting")
public String greeting() {
return "Hello, World!";
}
}
3.Run the application.
4.Now, you can access the Actuator endpoints using Java code:
import org.springframework.boot.SpringApplication;
import org.springframework.boot.web.client.RestTemplateBuilder;
import org.springframework.web.client.RestTemplate;
public class ActuatorEndpointExample {
public static void main(String[] args) {
String baseUrl = "http://localhost:8080"; // Replace with your application's URL
// Create a RestTemplate to make HTTP requests
RestTemplate restTemplate = new RestTemplateBuilder().build();
// Access the actuator health endpoint
String healthUrl = baseUrl + "/actuator/health";
String healthResponse = restTemplate.getForObject(healthUrl, String.class);
System.out.println("Health Endpoint Response:");
System.out.println(healthResponse);
// Access a custom endpoint (in this example, the "/greeting" endpoint)
String customEndpointUrl = baseUrl + "/greeting";
String customEndpointResponse = restTemplate.getForObject(customEndpointUrl, String.class);
System.out.println("Custom Endpoint Response:");
System.out.println(customEndpointResponse);
}
}
• In this example, we used the RestTemplate class from Spring to make HTTP GET requests to the Actuator
health endpoint and a custom /greeting endpoint.
• The responses from these endpoints are printed to the console.
• Remember to replace http://localhost:8080 with the actual base URL of your Spring Boot application if
it's running on a different address or port.
• Keep in mind that the Actuator endpoints might require authentication and authorization in a production
environment.
• Additionally, ensure that your application is running and reachable at the specified base URL before
running the Java code.

Session 3 - SPRING BOOT - Accessing Actuator EndPoint.pptx

  • 1.
  • 2.
  • 3.
    ACCESSING ACTUATOR ENDPOINT •In a Spring Boot application, you can access the actuator endpoints by sending HTTP requests to specific URLs • Base path for the actuator endpoints is typically • /actuator
  • 4.
  • 5.
    ACCESSING ACTUATOR ENDPOINT •Ensure that the actuator module is included in your Spring Boot project's dependencies. • Make sure you have the appropriate dependency: • In your pom.xml (if using Maven) • build.gradle (if using Gradle),
  • 6.
  • 7.
  • 8.
    • Start yourSpring Boot application. • Make an HTTP request to the desired actuator endpoint. • For example, using tools like curl, wget, or through a web browser. For instance: GET http://localhost:8080/actuator/health • bash
  • 9.
    • This requestwould return health-related information about your application, indicating if it's running correctly or if there are any issues. • Please remember to adapt the base URL (http://localhost:8080) to your actual application's address and port. • It's important to note that actuator endpoints can contain sensitive information or provide access to operations that should be protected from unauthorized access. • In a production environment, it's essential to secure these endpoints and only allow access to trusted users or systems.
  • 10.
    Example of accessinga Spring Boot Actuator endpoint using Java code and the Spring Boot framework. 1. First, make sure your pom.xml (if using Maven) or build.gradle (if using Gradle) includes the Actuator dependency: • For Maven: <dependency> <groupId>org.springframework.boot</groupId> <artifactId>spring-boot-starter-actuator</artifactId> </dependency> xml
  • 11.
    Example of accessinga Spring Boot Actuator endpoint using Java code and the Spring Boot framework. • For Gradle: implementation 'org.springframework.boot:spring-boot-starter- actuator' gradle
  • 12.
    • Define asimple Spring Boot application with a controller and Actuator endpoints import org.springframework.boot.SpringApplication; import org.springframework.boot.autoconfigure.SpringBootApplication; import org.springframework.web.bind.annotation.GetMapping; import org.springframework.web.bind.annotation.RestController; @SpringBootApplication @RestController public class MyApplication { public static void main(String[] args) { SpringApplication.run(MyApplication.class, args); } // Simple controller to demonstrate a custom endpoint @GetMapping("/greeting") public String greeting() { return "Hello, World!"; } }
  • 13.
    3.Run the application. 4.Now,you can access the Actuator endpoints using Java code:
  • 14.
    import org.springframework.boot.SpringApplication; import org.springframework.boot.web.client.RestTemplateBuilder; importorg.springframework.web.client.RestTemplate; public class ActuatorEndpointExample { public static void main(String[] args) { String baseUrl = "http://localhost:8080"; // Replace with your application's URL // Create a RestTemplate to make HTTP requests RestTemplate restTemplate = new RestTemplateBuilder().build(); // Access the actuator health endpoint String healthUrl = baseUrl + "/actuator/health"; String healthResponse = restTemplate.getForObject(healthUrl, String.class); System.out.println("Health Endpoint Response:"); System.out.println(healthResponse); // Access a custom endpoint (in this example, the "/greeting" endpoint) String customEndpointUrl = baseUrl + "/greeting"; String customEndpointResponse = restTemplate.getForObject(customEndpointUrl, String.class); System.out.println("Custom Endpoint Response:"); System.out.println(customEndpointResponse); } }
  • 15.
    • In thisexample, we used the RestTemplate class from Spring to make HTTP GET requests to the Actuator health endpoint and a custom /greeting endpoint. • The responses from these endpoints are printed to the console. • Remember to replace http://localhost:8080 with the actual base URL of your Spring Boot application if it's running on a different address or port. • Keep in mind that the Actuator endpoints might require authentication and authorization in a production environment. • Additionally, ensure that your application is running and reachable at the specified base URL before running the Java code.