Download to read offline


![Chapter 1. Introduction
1
Welcome to the Ubuntu Server Guide!
Here you can find information on how to install and configure various server applications. It is a step-by-
step, task-oriented guide for configuring and customizing your system.
This guide assumes you have a basic understanding of your Ubuntu system. Some installation details
are covered in Chapter 2, Installation [p. 3], but if you need detailed instructions installing
Ubuntu please refer to the Ubuntu Installation Guide1.
A HTML version of the manual is available online at the Ubuntu Documentation website2.
1 https://help.ubuntu.com/11.10/installation-guide/
2 https://help.ubuntu.com](https://image.slidesharecdn.com/serverguideubuntu1110-141006055509-conversion-gate02/75/Serverguide-ubuntu11-10-7-2048.jpg)

![Installation
4
1. Preparing to Install
This section explains various aspects to consider before starting the installation.
1.1. System Requirements
Ubuntu 11.10 Server Edition supports three (3) major architectures: Intel x86, AMD64 and ARM. The
table below lists recommended hardware specifications. Depending on your needs, you might manage
with less than this. However, most users risk being frustrated if they ignore these suggestions.
Table 2.1. Recommended Minimum Requirements
Hard Drive Space
Install Type RAM Base
All Tasks Installed
System
Server 128 megabytes 500
1 gigabyte
megabytes
The Server Edition provides a common base for all sorts of server applications. It is a minimalist
design providing a platform for the desired services, such as file/print services, web hosting, email
hosting, etc.
The requirements for UEC are slightly different for Front End requirements see Section 3.2.1,
“Front End Requirements” [p. 274] and for UEC Node requirements see Section 3.2.2, “Node
Requirements” [p. 275].
1.2. Server and Desktop Differences
There are a few differences between the Ubuntu Server Edition and the Ubuntu Desktop Edition. It
should be noted that both editions use the same apt repositories. Making it just as easy to install a
server application on the Desktop Edition as it is on the Server Edition.
The differences between the two editions are the lack of an X window environment in the Server
Edition, the installation process, and different Kernel options.
1.2.1. Kernel Differences:
• The Server Edition uses the Deadline I/O scheduler instead of the CFQ scheduler used by the
Desktop Edition.
• Preemption is turned off in the Server Edition.
• The timer interrupt is 100 Hz in the Server Edition and 250 Hz in the Desktop Edition.
When running a 64-bit version of Ubuntu on 64-bit processors you are not limited by
memory addressing space.](https://image.slidesharecdn.com/serverguideubuntu1110-141006055509-conversion-gate02/75/Serverguide-ubuntu11-10-10-2048.jpg)
![Installation
To see all kernel configuration options you can look through /boot/config-3.0.0-server. Also,
Linux Kernel in a Nutshell2 is a great resource on the options available.
1.3. Backing Up
• Before installing Ubuntu Server Edition you should make sure all data on the system is backed up.
See Chapter 18, Backups [p. 246] for backup options.
If this is not the first time an operating system has been installed on your computer, it is likely you
will need to re-partition your disk to make room for Ubuntu.
Any time you partition your disk, you should be prepared to lose everything on the disk should you
make a mistake or something goes wrong during partitioning. The programs used in installation are
quite reliable, most have seen years of use, but they also perform destructive actions.
5
2 http://www.kroah.com/lkn/](https://image.slidesharecdn.com/serverguideubuntu1110-141006055509-conversion-gate02/75/Serverguide-ubuntu11-10-11-2048.jpg)
![Installation
6
2. Installing from CD
The basic steps to install Ubuntu Server Edition from CD are the same for installing any operating
system from CD. Unlike the Desktop Edition the Server Edition does not include a graphical
installation program. Instead the Server Edition uses a console menu based process.
• First, download and burn the appropriate ISO file from the Ubuntu web site3.
• Boot the system from the CD-ROM drive.
• At the boot prompt you will be asked to select the language.
• From the main boot menu there are some additional options to install Ubuntu Server Edition. You
can install a basic Ubuntu Server, check the CD-ROM for defects, check the system's RAM, boot
from first hard disk, or rescue a broken system. The rest of this section will cover the basic Ubuntu
Server install.
• The installer asks for which language it should use. Afterwards, you are asked to select your
location.
• Afterwards the installation process begins by asking for your keyboard layout. You can ask the
installer to attempt auto-detecting it. Or you can select it manually from a list.
• The installer then discovers your hardware configuration, and configures the network settings using
DHCP. If you do not wish to use DHCP at the next screen choose "Go Back", and you have the
option to "Configure the network manually".
• Next, the installer asks for the system's hostname and Time Zone.
• You can then choose from several options to configure the hard drive layout. Afterwards you
are asked for which disk to install to. You may get confirmation prompts before rewriting the
partition table or setting up LVM depending on disk layout. If you choose LVM, you will be
asked for the size of the root logical volume. For advanced disk options see Section 4, “Advanced
Installation” [p. 10].
• The Ubuntu base system is then installed.
• A new user is setup, this user will have root access through the sudo utility.
• After the user is setup, you will be asked to encrypt your home directory.
• The next step in the installation process is to decide how you want to update the system. There are
three options:
• No automatic updates: this requires an administrator to log into the machine and manually install
updates.
• Install security updates automatically: will install the unattended-upgrades package, which
will install security updates without the intervention of an administrator. For more details see
Section 5, “Automatic Updates” [p. 24].
• Manage the system with Landscape: Landscape is a paid service provided by Canonical to help
manage your Ubuntu machines. See the Landscape4 site for details.](https://image.slidesharecdn.com/serverguideubuntu1110-141006055509-conversion-gate02/75/Serverguide-ubuntu11-10-12-2048.jpg)
![Installation
• You now have the option to install, or not install, several package tasks. See Section 2.1, “Package
Tasks” [p. 7] for details. Also, there is an option to launch aptitude to choose specific
packages to install. For more information see Section 4, “Aptitude” [p. 22].
• Finally, the last step before rebooting is to set the clock to UTC.
If at any point during installation you are not satisfied by the default setting, use the "Go
Back" function at any prompt to be brought to a detailed installation menu that will allow
you to modify the default settings.
At some point during the installation process you may want to read the help screen provided by the
installation system. To do this, press F1.
Once again, for detailed instructions see the Ubuntu Installation Guide5.
2.1. Package Tasks
During the Server Edition installation you have the option of installing additional packages from the
CD. The packages are grouped by the type of service they provide.
• DNS server: Selects the BIND DNS server and its documentation.
• LAMP server: Selects a ready-made Linux/Apache/MySQL/PHP server.
• Mail server: This task selects a variety of package useful for a general purpose mail server system.
• OpenSSH server: Selects packages needed for an OpenSSH server.
• PostgreSQL database: This task selects client and server packages for the PostgreSQL database.
• Print server: This task sets up your system to be a print server.
• Samba File server: This task sets up your system to be a Samba file server, which is especially
suitable in networks with both Windows and Linux systems.
• Tomcat Java server: Installs Apache Tomcat and needed dependencies.
• Virtual Machine host: Includes packages needed to run KVM virtual machines.
• Manually select packages: Executes aptitude allowing you to individually select packages.
Installing the package groups is accomplished using the tasksel utility. One of the important
difference between Ubuntu (or Debian) and other GNU/Linux distribution is that, when installed, a
package is also configured to reasonable defaults, eventually prompting you for additional required
information. Likewise, when installing a task, the packages are not only installed, but also configured
to provided a fully integrated service.
Once the installation process has finished you can view a list of available tasks by entering the
following from a terminal prompt:
7
tasksel --list-tasks
5 https://help.ubuntu.com/11.10/installation-guide/](https://image.slidesharecdn.com/serverguideubuntu1110-141006055509-conversion-gate02/75/Serverguide-ubuntu11-10-13-2048.jpg)

![Installation
1. Back in the main "Partition Disks" page, select "Configure Software RAID" at the top.
2. Select "yes" to write the changes to disk.
3. Choose "Create MD device".
4. For this example, select "RAID1", but if you are using a different setup choose the appropriate
11
type (RAID0 RAID1 RAID5).
In order to use RAID5 you need at least three drives. Using RAID0 or RAID1 only two
drives are required.
5. Enter the number of active devices "2", or the amount of hard drives you have, for the array.
Then select "Continue".
6. Next, enter the number of spare devices "0" by default, then choose "Continue".
7. Choose which partitions to use. Generally they will be sda1, sdb1, sdc1, etc. The numbers will
usually match and the different letters correspond to different hard drives.
For the swap partition choose sda1 and sdb1. Select "Continue" to go to the next step.
8. Repeat steps three through seven for the / partition choosing sda2 and sdb2.
9. Once done select "Finish".
4.1.3. Formatting
There should now be a list of hard drives and RAID devices. The next step is to format and set the
mount point for the RAID devices. Treat the RAID device as a local hard drive, format and mount
accordingly.
1. Select "#1" under the "RAID1 device #0" partition.
2. Choose "Use as:". Then select "swap area", then "Done setting up partition".
3. Next, select "#1" under the "RAID1 device #1" partition.
4. Choose "Use as:". Then select "Ext4 journaling file system".
5. Then select the "Mount point" and choose "/ - the root file system". Change any of the other
options as appropriate, then select "Done setting up partition".
6. Finally, select "Finish partitioning and write changes to disk".
If you choose to place the root partition on a RAID array, the installer will then ask if you would like
to boot in a degraded state. See Section 4.1.4, “Degraded RAID” [p. 11] for further details.
The installation process will then continue normally.
4.1.4. Degraded RAID
At some point in the life of the computer a disk failure event may occur. When this happens, using
Software RAID, the operating system will place the array into what is known as a degraded state.](https://image.slidesharecdn.com/serverguideubuntu1110-141006055509-conversion-gate02/75/Serverguide-ubuntu11-10-17-2048.jpg)
![Installation
If the array has become degraded, due to the chance of data corruption, by default Ubuntu Server
Edition will boot to initramfs after thirty seconds. Once the initramfs has booted there is a fifteen
second prompt giving you the option to go ahead and boot the system, or attempt manual recover.
Booting to the initramfs prompt may or may not be the desired behavior, especially if the machine is
in a remote location. Booting to a degraded array can be configured several ways:
• The dpkg-reconfigure utility can be used to configure the default behavior, and during the process
you will be queried about additional settings related to the array. Such as monitoring, email alerts,
etc. To reconfigure mdadm enter the following:
sudo dpkg-reconfigure mdadm
• The dpkg-reconfigure mdadm process will change the /etc/initramfs-tools/conf.d/mdadm
configuration file. The file has the advantage of being able to pre-configure the system's behavior,
and can also be manually edited:
12
BOOT_DEGRADED=true
The configuration file can be overridden by using a Kernel argument.
• Using a Kernel argument will allow the system to boot to a degraded array as well:
• When the server is booting press Shift to open the Grub menu.
• Press e to edit your kernel command options.
• Press the down arrow to highlight the kernel line.
• Add "bootdegraded=true" (without the quotes) to the end of the line.
• Press Ctrl+x to boot the system.
Once the system has booted you can either repair the array see Section 4.1.5, “RAID
Maintenance” [p. 12] for details, or copy important data to another machine due to major
hardware failure.
4.1.5. RAID Maintenance
The mdadm utility can be used to view the status of an array, add disks to an array, remove disks, etc:
• To view the status of an array, from a terminal prompt enter:
sudo mdadm -D /dev/md0
The -D tells mdadm to display detailed information about the /dev/md0 device. Replace /dev/md0
with the appropriate RAID device.
• To view the status of a disk in an array:
sudo mdadm -E /dev/sda1](https://image.slidesharecdn.com/serverguideubuntu1110-141006055509-conversion-gate02/75/Serverguide-ubuntu11-10-18-2048.jpg)
![Installation
The output if very similar to the mdadm -D command, adjust /dev/sda1 for each disk.
• If a disk fails and needs to be removed from an array enter:
13
sudo mdadm --remove /dev/md0 /dev/sda1
Change /dev/md0 and /dev/sda1 to the appropriate RAID device and disk.
• Similarly, to add a new disk:
sudo mdadm --add /dev/md0 /dev/sda1
Sometimes a disk can change to a faulty state even though there is nothing physically wrong with
the drive. It is usually worthwhile to remove the drive from the array then re-add it. This will cause
the drive to re-sync with the array. If the drive will not sync with the array, it is a good indication of
hardware failure.
The /proc/mdstat file also contains useful information about the system's RAID devices:
cat /proc/mdstat
Personalities : [linear] [multipath] [raid0] [raid1] [raid6] [raid5] [raid4] [raid10]
md0 : active raid1 sda1[0] sdb1[1]
10016384 blocks [2/2] [UU]
unused devices: <none>
The following command is great for watching the status of a syncing drive:
watch -n1 cat /proc/mdstat
Press Ctrl+c to stop the watch command.
If you do need to replace a faulty drive, after the drive has been replaced and synced, grub will need
to be installed. To install grub on the new drive, enter the following:
sudo grub-install /dev/md0
Replace /dev/md0 with the appropriate array device name.
4.1.6. Resources
The topic of RAID arrays is a complex one due to the plethora of ways RAID can be configured.
Please see the following links for more information:
• Ubuntu Wiki Articles on RAID6.
• Software RAID HOWTO7](https://image.slidesharecdn.com/serverguideubuntu1110-141006055509-conversion-gate02/75/Serverguide-ubuntu11-10-19-2048.jpg)


![Package Management
20
3. Apt-Get
The apt-get command is a powerful command-line tool used to work with Ubuntu's Advanced
Packaging Tool (APT) performing such functions as installation of new software packages, upgrade
of existing software packages, updating of the package list index, and even upgrading the entire
Ubuntu system.
Being a simple command-line tool, apt-get has numerous advantages over other package management
tools available in Ubuntu for server administrators. Some of these advantages include ease of use over
simple terminal connections (SSH) and the ability to be used in system administration scripts, which
can in turn be automated by the cron scheduling utility.
Some examples of popular uses for the apt-get utility:
• Install a Package: Installation of packages using the apt-get tool is quite simple. For example, to
install the network scanner nmap, type the following:
sudo apt-get install nmap
• Remove a Package: Removal of a package or packages is also a straightforward and simple
process. To remove the nmap package installed in the previous example, type the following:
sudo apt-get remove nmap
Multiple Packages: You may specify multiple packages to be installed or removed,
separated by spaces.
Also, adding the --purge options to apt-get remove will remove the package configuration files as
well. This may or may not be the desired effect so use with caution.
• Update the Package Index: The APT package index is essentially a database of available
packages from the repositories defined in the /etc/apt/sources.list file and in the /etc/apt/
sources.list.d directory. To update the local package index with the latest changes made in
repositories, type the following:
sudo apt-get update
• Upgrade Packages: Over time, updated versions of packages currently installed on your computer
may become available from the package repositories (for example security updates). To upgrade
your system, first update your package index as outlined above, and then type:
sudo apt-get upgrade
For information on upgrading to a new Ubuntu release see Section 3, “Upgrading” [p. 9].
Actions of the apt-get command, such as installation and removal of packages, are logged in the /var/
log/dpkg.log log file.](https://image.slidesharecdn.com/serverguideubuntu1110-141006055509-conversion-gate02/75/Serverguide-ubuntu11-10-26-2048.jpg)


![Package Management
26
6. Configuration
Configuration of the Advanced Packaging Tool (APT) system repositories is stored in the /etc/apt/
sources.list file and the /etc/apt/sources.list.d directory. An example of this file is referenced
here, along with information on adding or removing repository references from the file.
Here2 is a simple example of a typical /etc/apt/sources.list file.
You may edit the file to enable repositories or disable them. For example, to disable the requirement
of inserting the Ubuntu CD-ROM whenever package operations occur, simply comment out the
appropriate line for the CD-ROM, which appears at the top of the file:
# no more prompting for CD-ROM please
# deb cdrom:[Ubuntu 11.10 _Oneiric Ocelot_ - Release i386 (20111013.1)]/ oneiric main restricted
6.1. Extra Repositories
In addition to the officially supported package repositories available for Ubuntu, there exist additional
community-maintained repositories which add thousands more potential packages for installation.
Two of the most popular are the Universe and Multiverse repositories. These repositories are not
officially supported by Ubuntu, but because they are maintained by the community they generally
provide packages which are safe for use with your Ubuntu computer.
Packages in the Multiverse repository often have licensing issues that prevent them from
being distributed with a free operating system, and they may be illegal in your locality.
Be advised that neither the Universe or Multiverse repositories contain officially supported
packages. In particular, there may not be security updates for these packages.
Many other package sources are available, sometimes even offering only one package, as in the case
of package sources provided by the developer of a single application. You should always be very
careful and cautious when using non-standard package sources, however. Research the source and
packages carefully before performing any installation, as some package sources and their packages
could render your system unstable or non-functional in some respects.
By default, the Universe and Multiverse repositories are enabled but if you would like to disable them
edit /etc/apt/sources.list and comment the following lines:
deb http://archive.ubuntu.com/ubuntu oneiric universe multiverse
deb-src http://archive.ubuntu.com/ubuntu oneiric universe multiverse
deb http://us.archive.ubuntu.com/ubuntu/ oneiric universe
deb-src http://us.archive.ubuntu.com/ubuntu/ oneiric universe
2 ../sample/sources.list](https://image.slidesharecdn.com/serverguideubuntu1110-141006055509-conversion-gate02/75/Serverguide-ubuntu11-10-32-2048.jpg)


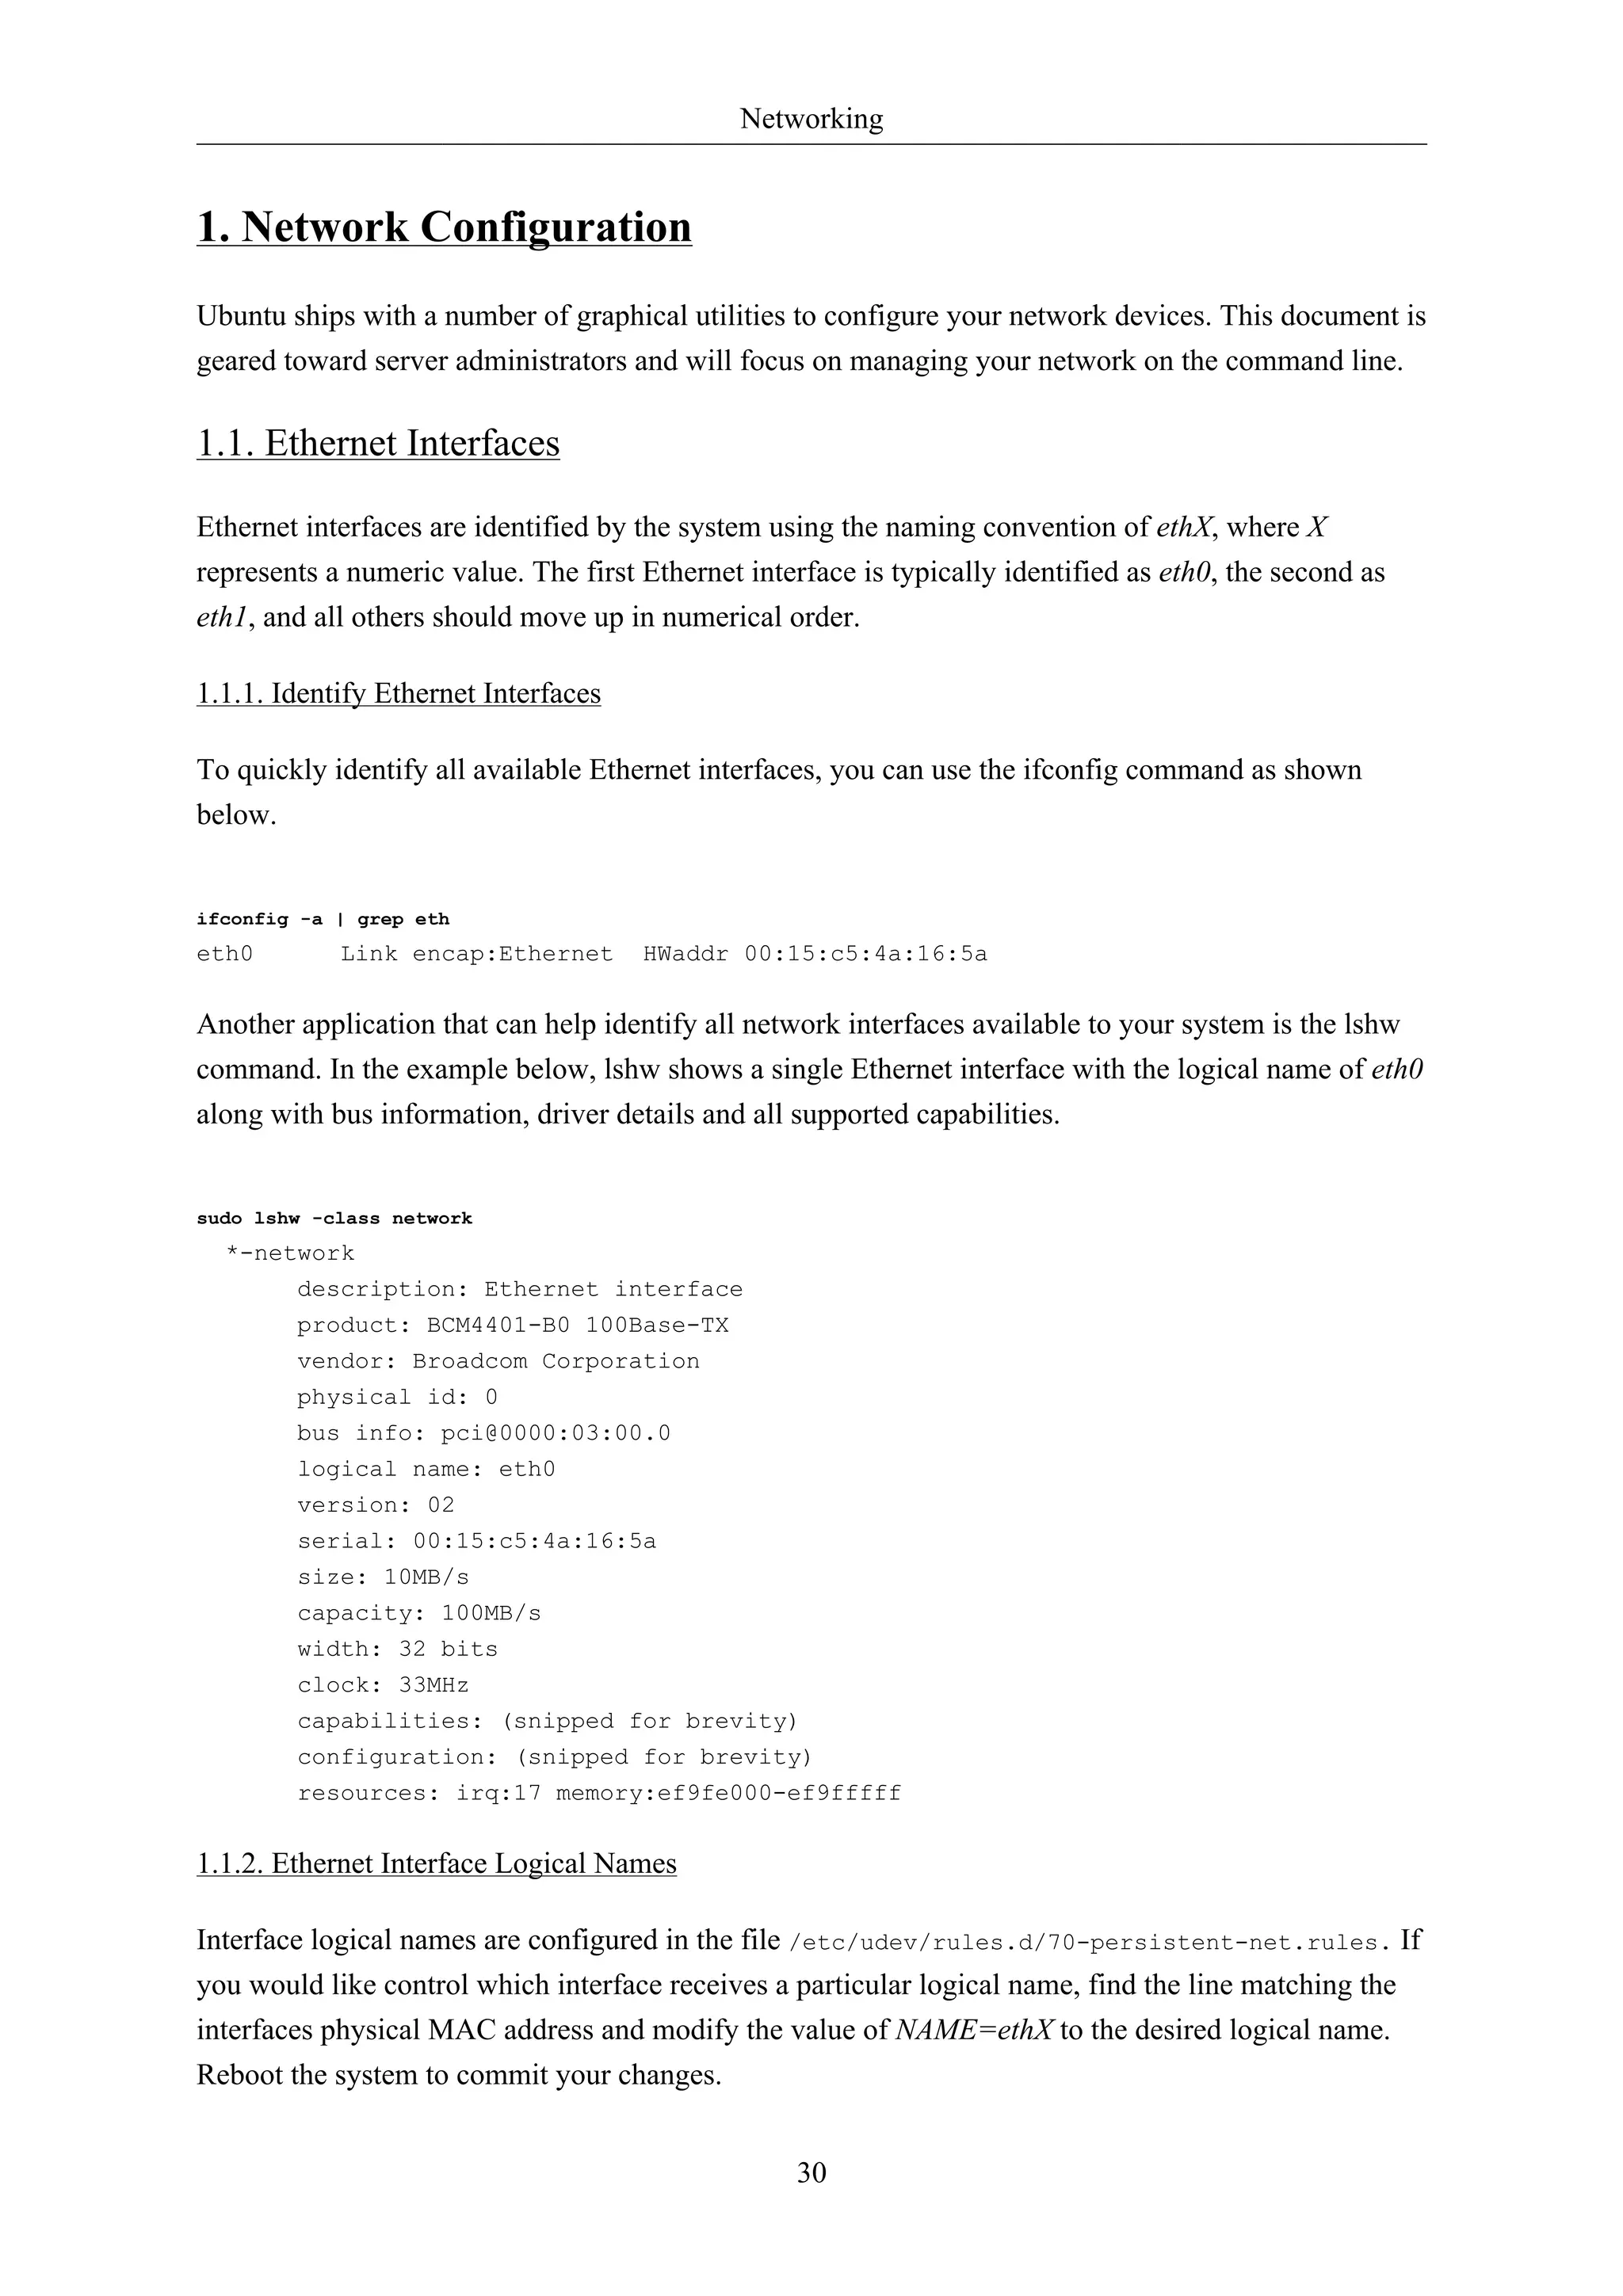
![Networking
31
1.1.3. Ethernet Interface Settings
ethtool is a program that displays and changes Ethernet card settings such as auto-negotiation, port
speed, duplex mode, and Wake-on-LAN. It is not installed by default, but is available for installation
in the repositories.
sudo apt-get install ethtool
The following is an example of how to view supported features and configured settings of an Ethernet
interface.
sudo ethtool eth0
Settings for eth0:
Supported ports: [ TP ]
Supported link modes: 10baseT/Half 10baseT/Full
100baseT/Half 100baseT/Full
1000baseT/Half 1000baseT/Full
Supports auto-negotiation: Yes
Advertised link modes: 10baseT/Half 10baseT/Full
100baseT/Half 100baseT/Full
1000baseT/Half 1000baseT/Full
Advertised auto-negotiation: Yes
Speed: 1000Mb/s
Duplex: Full
Port: Twisted Pair
PHYAD: 1
Transceiver: internal
Auto-negotiation: on
Supports Wake-on: g
Wake-on: d
Current message level: 0x000000ff (255)
Link detected: yes
Changes made with the ethtool command are temporary and will be lost after a reboot. If you would
like to retain settings, simply add the desired ethtool command to a pre-up statement in the interface
configuration file /etc/network/interfaces.
The following is an example of how the interface identified as eth0 could be permanently configured
with a port speed of 1000Mb/s running in full duplex mode.
auto eth0
iface eth0 inet static
pre-up /sbin/ethtool -s eth0 speed 1000 duplex full
Although the example above shows the interface configured to use the static method,
it actually works with other methods as well, such as DHCP. The example is meant to
demonstrate only proper placement of the pre-up statement in relation to the rest of the
interface configuration.](https://image.slidesharecdn.com/serverguideubuntu1110-141006055509-conversion-gate02/75/Serverguide-ubuntu11-10-37-2048.jpg)
![Networking
36
1.3.3. Name Service Switch Configuration
The order in which your system selects a method of resolving hostnames to IP addresses is controlled
by the Name Service Switch (NSS) configuration file /etc/nsswitch.conf. As mentioned in the
previous section, typically static hostnames defined in the systems /etc/hosts file have precedence
over names resolved from DNS. The following is an example of the line responsible for this order of
hostname lookups in the file /etc/nsswitch.conf.
hosts: files mdns4_minimal [NOTFOUND=return] dns mdns4
• files first tries to resolve static hostnames located in /etc/hosts.
• mdns4_minimal attempts to resolve the name using Multicast DNS.
• [NOTFOUND=return] means that any response of notfound by the preceding mdns4_minimal
process should be treated as authoritative and that the system should not try to continue hunting for
an answer.
• dns represents a legacy unicast DNS query.
• mdns4 represents a Multicast DNS query.
To modify the order of the above mentioned name resolution methods, you can simply change the
hosts: string to the value of your choosing. For example, if you prefer to use legacy Unicast DNS
versus Multicast DNS, you can change the string in /etc/nsswitch.conf as shown below.
hosts: files dns [NOTFOUND=return] mdns4_minimal mdns4
1.4. Bridging
Bridging multiple interfaces is a more advanced configuration, but is very useful in multiple
scenarios. One scenario is setting up a bridge with multiple network interfaces, then using a firewall
to filter traffic between two network segments. Another scenario is using bridge on a system with
one interface to allow virtual machines direct access to the outside network. The following example
covers the latter scenario.
Before configuring a bridge you will need to install the bridge-utils package. To install the package, in
a terminal enter:
sudo apt-get install bridge-utils
Next, configure the bridge by editing /etc/network/interfaces:
auto lo
iface lo inet loopback
auto br0
iface br0 inet static](https://image.slidesharecdn.com/serverguideubuntu1110-141006055509-conversion-gate02/75/Serverguide-ubuntu11-10-42-2048.jpg)

![Remote Administration
50
2. Puppet
Puppet is a cross platform framework enabling system administrators to perform common tasks using
code. The code can do a variety of tasks from installing new software, to checking file permissions,
or updating user accounts. Puppet is great not only during the initial installation of a system, but also
throughout the system's entire life cycle. In most circumstances puppet will be used in a client/server
configuration.
This section will cover installing and configuring Puppet in a client/server configuration. This simple
example will demonstrate how to install Apache using Puppet.
2.1. Installation
To install Puppet, in a terminal on the server enter:
sudo apt-get install puppetmaster
On the client machine, or machines, enter:
sudo apt-get install puppet
2.2. Configuration
Prior to configuring puppet you may want to add a DNS CNAME record for puppet.example.com,
where example.com is your domain. By default Puppet clients check DNS for puppet.example.com as
the puppet server name, or Puppet Master. See Chapter 7, Domain Name Service (DNS) [p. 97]
for more DNS details.
If you do not wish to use DNS, you can add entries to the server and client /etc/hosts file. For
example, in the Puppet server's /etc/hosts file add:
127.0.0.1 localhost.localdomain localhost puppet
192.168.1.17 meercat02.example.com meercat02
On each Puppet client, add an entry for the server:
192.168.1.16 meercat.example.com meercat puppet
Replace the example IP addresses and domain names above with your actual server and
client addresses and domain names.
Now setup some resources for apache2. Create a file /etc/puppet/manifests/site.pp containing
the following:](https://image.slidesharecdn.com/serverguideubuntu1110-141006055509-conversion-gate02/75/Serverguide-ubuntu11-10-56-2048.jpg)
![Remote Administration
51
package {
'apache2':
ensure => installed
}
service {
'apache2':
ensure => true,
enable => true,
require => Package['apache2']
}
Next, create a node file /etc/puppet/manifests/nodes.pp with:
node 'meercat02.example.com' {
include apache2
}
Replace meercat02.example.com with your actual Puppet client's host name.
The final step for this simple Puppet server is to restart the daemon:
sudo /etc/init.d/puppetmaster restart
Now everything is configured on the Puppet server, it is time to configure the client.
First, configure the Puppetagent daemon to start. Edit /etc/default/puppet, changing START to yes:
START=yes
Then start the service:
sudo /etc/init.d/puppet start
Back on the Puppet server sign the client certificate by entering:
sudo puppetca --sign meercat02.example.com
Check /var/log/syslog for any errors with the configuration. If all goes well the apache2 package
and it's dependencies will be installed on the Puppet client.
This example is very simple, and does not highlight many of Puppet's features and benefits.
For more information see Section 2.3, “Resources” [p. 51].
2.3. Resources
• See the Official Puppet Documentation4 web site.](https://image.slidesharecdn.com/serverguideubuntu1110-141006055509-conversion-gate02/75/Serverguide-ubuntu11-10-57-2048.jpg)


![Network Authentication
sudo -u openldap mkdir /var/lib/ldap/accesslog
sudo -u openldap cp /var/lib/ldap/DB_CONFIG /var/lib/ldap/accesslog
sudo service apparmor reload
3. Add the new content and, due to the apparmor change, restart the daemon:
sudo ldapadd -Q -Y EXTERNAL -H ldapi:/// -f provider_sync.ldif
sudo service slapd restart
64
The Provider is now configured.
1.6.2. Consumer Configuration
And now configure the Consumer.
1. Install the software by going through Section 1.1, “Installation” [p. 55]. Make sure the
slapd-config databse is identical to the Provider's. In particular, make sure schemas and the
databse suffix are the same.
2. Create an LDIF file with the following contents and name it consumer_sync.ldif:
dn: cn=module{0},cn=config
changetype: modify
add: olcModuleLoad
olcModuleLoad: syncprov
dn: olcDatabase={1}hdb,cn=config
changetype: modify
add: olcDbIndex
olcDbIndex: entryUUID eq
-
add: olcSyncRepl
olcSyncRepl: rid=0 provider=ldap://ldap01.example.com bindmethod=simple binddn="cn=admin,dc=example,credentials=secret searchbase="dc=example,dc=com" logbase="cn=accesslog"
logfilter="(&(objectClass=auditWriteObject)(reqResult=0))" schemachecking=on
type=refreshAndPersist retry="60 +" syncdata=accesslog
-
add: olcUpdateRef
olcUpdateRef: ldap://ldap01.example.com
Ensure the following attributes have the correct values:
• ldap01.example.com (Provider server's hostname or IP address)
• binddn (the admin DN you're using)
• credentials (the admin DN password you're using)
• searchbase (the database suffix you're using)
• olcUpdateRef: (Provider server's hostname or IP address)](https://image.slidesharecdn.com/serverguideubuntu1110-141006055509-conversion-gate02/75/Serverguide-ubuntu11-10-70-2048.jpg)

![Network Authentication
add: olcTLSCertificateKeyFile
olcTLSCertificateKeyFile: /etc/ssl/private/ldap01_slapd_key.pem
Use the ldapmodify command to tell slapd about our TLS work via the slapd-config database:
sudo ldapmodify -Y EXTERNAL -H ldapi:/// -f /etc/ssl/certinfo.ldif
Contratry to popular belief, you do not need ldaps:// in /etc/default/slapd in order to use
encryption. You should have just:
69
SLAPD_SERVICES="ldap:/// ldapi:///"
LDAP over TLS/SSL (ldaps://) is deprecated in favour of StartTLS. The latter refers to
an existing LDAP session (listening on TCP port 389) becoming protected by TLS/SSL
whereas LDAPS, like HTTPS, is a distinct encrypted-from-the-start protocol that operates
over TCP port 636.
Tighten up ownership and permissions:
sudo adduser openldap ssl-cert
sudo chgrp ssl-cert /etc/ssl/private/ldap01_slapd_key.pem
sudo chmod g+r /etc/ssl/private/ldap01_slapd_key.pem
sudo chmod o-r /etc/ssl/private/ldap01_slapd_key.pem
Restart OpenLDAP:
sudo service slapd restart
Check your host's logs (/var/log/syslog) to see if the server has started properly.
1.9. Replication and TLS
If you have set up replication between servers, it is common practice to encrypt (StartTLS) the
replication traffic to prevent evesdropping. This is distinct from using encryption with authentication
as we did above. In this section we will build on that TLS-authentication work.
The assumption here is that you have set up replication between Provider and Consumer according to
Section 1.6, “Replication” [p. 62] and have configured TLS for authentication on the Provider by
following Section 1.8, “TLS” [p. 67].
As previously stated, the objective (for us) with replication is high availablity for the LDAP service.
Since we have TLS for authentication on the Provider we will require the same on the Consumer.
In addition to this, however, we want to encrypt replication traffic. What remains to be done is to
create a key and certificate for the Consumer and then configure accordingly. We will generate the
key/certificate on the Provider, to avoid having to create another CA certificate, and then transfer the
necessary material over to the Consumer.](https://image.slidesharecdn.com/serverguideubuntu1110-141006055509-conversion-gate02/75/Serverguide-ubuntu11-10-75-2048.jpg)

![Network Authentication
72
4. On the Provider,
Check to see that a TLS session has been established. In /var/log/syslog, providing you have
'conns'-level logging set up, you should see messages similar to:
slapd[3620]: conn=1047 fd=20 ACCEPT from IP=10.153.107.229:57922 (IP=0.0.0.0:389)
slapd[3620]: conn=1047 op=0 EXT oid=1.3.6.1.4.1.1466.20037
slapd[3620]: conn=1047 op=0 STARTTLS
slapd[3620]: conn=1047 op=0 RESULT oid= err=0 text=
slapd[3620]: conn=1047 fd=20 TLS established tls_ssf=128 ssf=128
slapd[3620]: conn=1047 op=1 BIND dn="cn=admin,dc=example,dc=com" method=128
slapd[3620]: conn=1047 op=1 BIND dn="cn=admin,dc=example,dc=com" mech=SIMPLE ssf=0
slapd[3620]: conn=1047 op=1 RESULT tag=97 err=0 text
1.10. LDAP Authentication
Once you have a working LDAP server, you will need to install libraries on the client that will know
how and when to contact it. On Ubuntu, this has been traditionally accomplishd by installing the
libnss-ldap package. This package will bring in other tools that will assist you in the configuration
step. Install this package now:
sudo apt-get install libnss-ldap
You will be prompted for details of your LDAP server. If you make a mistake you can try again
using:
sudo dpkg-reconfigure ldap-auth-config
The results of the dialog can be seen in /etc/ldap.conf. If your server requires options not covered
in the menu edit this file accordingly.
Now configure the LDAP profile for NSS:
sudo auth-client-config -t nss -p lac_ldap
Configure the system to use LDAP for authentication:
sudo pam-auth-update
From the menu, choose LDAP and any other authentication mechanisms you need.
You should now be able to log in using LDAP-based credentials.
LDAP clients will need to refer to multiple servers if replication is in use. In /etc/ldap.conf you
would have something like:](https://image.slidesharecdn.com/serverguideubuntu1110-141006055509-conversion-gate02/75/Serverguide-ubuntu11-10-78-2048.jpg)
![Network Authentication
uri ldap://ldap01.example.com ldap://ldap02.example.com
The request will time out and the Consumer (ldap02) will attempt to be reached if the Provider
(ldap01) becomes unresponsive.
If you are going to use LDAP to store Samba users you will need to configure the Samba server to
authenticate using LDAP. See Section 2, “Samba and LDAP” [p. 78] for details.
An alternative to the libnss-ldap package is the libnss-ldapd package. This, however, will
bring in the nscd package which is problably not wanted. Simply remove it afterwards.
73
1.11. User and Group Management
The ldap-utils package comes with enough utilities to manage the directory but the long string of
options needed can make them a burden to use. The ldapscripts package contains wrapper scripts to
these utilities that some people find easier to use.
Install the package:
sudo apt-get install ldapscripts
Then edit the file /etc/ldapscripts/ldapscripts.conf to arrive at something similar to the
following:
SERVER=localhost
BINDDN='cn=admin,dc=example,dc=com'
BINDPWDFILE="/etc/ldapscripts/ldapscripts.passwd"
SUFFIX='dc=example,dc=com'
GSUFFIX='ou=Groups'
USUFFIX='ou=People'
MSUFFIX='ou=Computers'
GIDSTART=10000
UIDSTART=10000
MIDSTART=10000
Now, create the ldapscripts.passwd file to allow rootDN access to the directory:
sudo sh -c "echo -n 'secret' > /etc/ldapscripts/ldapscripts.passwd"
sudo chmod 400 /etc/ldapscripts/ldapscripts.passwd
Replace “secret” with the actual password for your database's rootDN user.
The scripts are now ready to help manage your directory. Here are some examples of how to use
them:
• Create a new user:](https://image.slidesharecdn.com/serverguideubuntu1110-141006055509-conversion-gate02/75/Serverguide-ubuntu11-10-79-2048.jpg)

![Network Authentication
78
2. Samba and LDAP
This section covers the integration of Samba with LDAP. The Samba server's role will be that of
a "standalone" server and the LDAP directory will provide the authentication layer in addition to
containing the user, group, and machine account information that Samba requires in order to function
(in any of it's 3 possible roles). The pre-requisite is an OpenLDAP server configured with a directory
that can accept authentication requests. See Section 1, “OpenLDAP Server” [p. 54] for details on
fulfilling this requirement. Once this section is completed, you will need to decide what specifically
you want Samba to do for you and then configure it accordingly.
2.1. Software Installation
There are three packages needed when integrating Samba with LDAP: samba, samba-doc, and
smbldap-tools packages.
Strictly speaking, the smbldap-tools package isn't needed, but unless you have some other way to
manage the various Samaba entities (users, groups, computers) in an LDAP context then you should
install it.
Install these packages now:
sudo apt-get install samba samba-doc smbldap-tools
2.2. LDAP Configuration
We will now configure the LDAP server so that it can accomodate Samba data. We will perform three
tasks in this section:
1. Import a schema
2. Index some entries
3. Add objects
2.2.1. Samba schema
In order for OpenLDAP to be used as a backend for Samba, logically, the DIT will need to use
attributes that can properly describe Samba data. Such attributes can be obtained by introducing a
Samba LDAP schema. Let's do this now.
For more information on schemas and their installation see Section 1.4, “Modifying the
slapd Configuration Database” [p. 59].
1. The schema is found in the now-installed samba-doc package. It needs to be unzipped and copied
to the /etc/ldap/schema directory:
sudo cp /usr/share/doc/samba-doc/examples/LDAP/samba.schema.gz /etc/ldap/schema](https://image.slidesharecdn.com/serverguideubuntu1110-141006055509-conversion-gate02/75/Serverguide-ubuntu11-10-84-2048.jpg)
![Network Authentication
Once you have answered the questions, the files /etc/smbldap-tools/smbldap.conf and /etc/
smbldap-tools/smbldap_bind.conf should be generated. If you made any mistakes while executing
the script you can always edit the files afterwards.
The smbldap-populate script will add the LDAP objects required for Samba. It is a good idea to first
make a backup of your entire directory using slapcat:
81
sudo slapcat -l backup.ldif
Once you have a backup proceed to populate your directory:
sudo smbldap-populate
You can create a LDIF file containing the new Samba objects by executing sudo smbldap-populate
-e samba.ldif. This allows you to look over the changes making sure everything is correct. If it is,
rerun the script without the '-e' switch. Alternatively, you can take the LDIF file and import it's data
per usual.
Your LDAP directory now has the necessary information to authenticate Samba users.
2.3. Samba Configuration
There are multiple ways to configure Samba. For details on some common configurations
see Chapter 17, Windows Networking [p. 229]. To configure Samba to use LDAP, edit it's
configuration file /etc/samba/smb.conf commenting out the default passdb backend parameter and
adding some ldap-related ones:
# passdb backend = tdbsam
# LDAP Settings
passdb backend = ldapsam:ldap://hostname
ldap suffix = dc=example,dc=com
ldap user suffix = ou=People
ldap group suffix = ou=Groups
ldap machine suffix = ou=Computers
ldap idmap suffix = ou=Idmap
ldap admin dn = cn=admin,dc=example,dc=com
ldap ssl = start tls
ldap passwd sync = yes
...
add machine script = sudo /usr/sbin/smbldap-useradd -t 0 -w "%u"
Change the values to match your environment.
Restart samba to enable the new settings:
sudo restart smbd](https://image.slidesharecdn.com/serverguideubuntu1110-141006055509-conversion-gate02/75/Serverguide-ubuntu11-10-87-2048.jpg)

![Network Authentication
83
• To add a Samba machine account:
sudo smbldap-useradd -t 0 -w username
Replace username with the name of the workstation. The -t 0 option creates the machine account
without a delay, while the -w option specifies the user as a machine account. Also, note the add
machine script parameter in /etc/samba/smb.conf was changed to use smbldap-useradd.
There are utilities in the smbldap-tools package that were not covered here. Here is a complete list:
smbldap-groupadd37
smbldap-groupdel38
smbldap-groupmod39
smbldap-groupshow40
smbldap-passwd41
smbldap-populate42
smbldap-useradd43
smbldap-userdel44
smbldap-userinfo45
smbldap-userlist46
smbldap-usermod47
smbldap-usershow48
2.4. Resources
• For more information on installing and configuring Samba see Chapter 17, Windows
Networking [p. 229] of this Ubuntu Server Guide.
• There are multiple places where LDAP and Samba is documented in the upstream Samba HOWTO
Collection49.
• Regarding the above, see specifically the passdb section50.
• Although dated (2007), the Linux Samba-OpenLDAP HOWTO51 contains valuable notes.
• The main page of the Samba Ubuntu community documentation52 has a plethora of links to articles
that may prove useful.
37 http://manpages.ubuntu.com/manpages/en/man8/smbldap-groupadd.8.html
38 http://manpages.ubuntu.com/manpages/en/man8/smbldap-groupdel.8.html
39 http://manpages.ubuntu.com/manpages/en/man8/smbldap-groupmod.8.html
40 http://manpages.ubuntu.com/manpages/en/man8/smbldap-groupshow.8.html
41 http://manpages.ubuntu.com/manpages/en/man8/smbldap-passwd.8.html
42 http://manpages.ubuntu.com/manpages/en/man8/smbldap-populate.8.html
43 http://manpages.ubuntu.com/manpages/en/man8/smbldap-useradd.8.html
44 http://manpages.ubuntu.com/manpages/en/man8/smbldap-userdel.8.html
45 http://manpages.ubuntu.com/manpages/en/man8/smbldap-userinfo.8.html
46 http://manpages.ubuntu.com/manpages/en/man8/smbldap-userlist.8.html
47 http://manpages.ubuntu.com/manpages/en/man8/smbldap-usermod.8.html
48 http://manpages.ubuntu.com/manpages/en/man8/smbldap-usershow.8.html](https://image.slidesharecdn.com/serverguideubuntu1110-141006055509-conversion-gate02/75/Serverguide-ubuntu11-10-89-2048.jpg)
![Network Authentication
85
3.2. Kerberos Server
3.2.1. Installation
Before installing the Kerberos server a properly configured DNS server is needed for your
domain. Since the Kerberos Realm by convention matches the domain name, this section uses the
example.com domain configured in Section 2.3, “Primary Master” [p. 100].
Also, Kerberos is a time sensitive protocol. So if the local system time between a client machine
and the server differs by more than five minutes (by default), the workstation will not be able to
authenticate. To correct the problem all hosts should have their time synchronized using the Network
Time Protocol (NTP). For details on setting up NTP see Section 4, “Time Synchronisation with
NTP” [p. 44].
The first step in installing a Kerberos Realm is to install the krb5-kdc and krb5-admin-server
packages. From a terminal enter:
sudo apt-get install krb5-kdc krb5-admin-server
You will be asked at the end of the install to supply a name for the Kerberos and Admin servers,
which may or may not be the same server, for the realm.
Next, create the new realm with the kdb5_newrealm utility:
sudo krb5_newrealm
3.2.2. Configuration
The questions asked during installation are used to configure the /etc/krb5.conf file. If you need
to adjust the Key Distribution Center (KDC) settings simply edit the file and restart the krb5-kdc
daemon.
1. Now that the KDC running an admin user is needed. It is recommended to use a different
username from your everyday username. Using the kadmin.local utility in a terminal prompt
enter:
sudo kadmin.local
Authenticating as principal root/admin@EXAMPLE.COM with password.
kadmin.local: addprinc steve/admin
WARNING: no policy specified for steve/admin@EXAMPLE.COM; defaulting to no policy
Enter password for principal "steve/admin@EXAMPLE.COM":
Re-enter password for principal "steve/admin@EXAMPLE.COM":
Principal "steve/admin@EXAMPLE.COM" created.
kadmin.local: quit](https://image.slidesharecdn.com/serverguideubuntu1110-141006055509-conversion-gate02/75/Serverguide-ubuntu11-10-91-2048.jpg)
![Network Authentication
Replace EXAMPLE.COM, kdc01, and kdc02 with your domain name, primary KDC,
and secondary KDC.
See Chapter 7, Domain Name Service (DNS) [p. 97] for detailed instructions on setting up
DNS.
Your new Kerberos Realm is now ready to authenticate clients.
3.3. Secondary KDC
Once you have one Key Distribution Center (KDC) on your network, it is good practice to have a
Secondary KDC in case the primary becomes unavailable.
1. First, install the packages, and when asked for the Kerberos and Admin server names enter the
87
name of the Primary KDC:
sudo apt-get install krb5-kdc krb5-admin-server
2. Once you have the packages installed, create the Secondary KDC's host principal. From a
terminal prompt, enter:
kadmin -q "addprinc -randkey host/kdc02.example.com"
After, issuing any kadmin commands you will be prompted for your username/
admin@EXAMPLE.COM principal password.
3. Extract the keytab file:
kadmin -q "ktadd -k keytab.kdc02 host/kdc02.example.com"
4. There should now be a keytab.kdc02 in the current directory, move the file to /etc/
krb5.keytab:
sudo mv keytab.kdc02 /etc/krb5.keytab
If the path to the keytab.kdc02 file is different adjust accordingly.
Also, you can list the principals in a Keytab file, which can be useful when troubleshooting,
using the klist utility:
sudo klist -k /etc/krb5.keytab
5. Next, there needs to be a kpropd.acl file on each KDC that lists all KDCs for the Realm. For
example, on both primary and secondary KDC, create /etc/krb5kdc/kpropd.acl:](https://image.slidesharecdn.com/serverguideubuntu1110-141006055509-conversion-gate02/75/Serverguide-ubuntu11-10-93-2048.jpg)
![Network Authentication
89
3.4. Kerberos Linux Client
This section covers configuring a Linux system as a Kerberos client. This will allow access to any
kerberized services once a user has successfully logged into the system.
3.4.1. Installation
In order to authenticate to a Kerberos Realm, the krb5-user and libpam-krb5 packages are needed,
along with a few others that are not strictly necessary but make life easier. To install the packages
enter the following in a terminal prompt:
sudo apt-get install krb5-user libpam-krb5 libpam-ccreds auth-client-config
The auth-client-config package allows simple configuration of PAM for authentication from multiple
sources, and the libpam-ccreds will cache authentication credentials allowing you to login in case
the Key Distribution Center (KDC) is unavailable. This package is also useful for laptops that may
authenticate using Kerberos while on the corporate network, but will need to be accessed off the
network as well.
3.4.2. Configuration
To configure the client in a terminal enter:
sudo dpkg-reconfigure krb5-config
You will then be prompted to enter the name of the Kerberos Realm. Also, if you don't have DNS
configured with Kerberos SRV records, the menu will prompt you for the hostname of the Key
Distribution Center (KDC) and Realm Administration server.
The dpkg-reconfigure adds entries to the /etc/krb5.conf file for your Realm. You should have
entries similar to the following:
[libdefaults]
default_realm = EXAMPLE.COM
...
[realms]
EXAMPLE.COM = }
kdc = 192.168.0.1
admin_server = 192.168.0.1
}
You can test the configuration by requesting a ticket using the kinit utility. For example:
kinit steve@EXAMPLE.COM
Password for steve@EXAMPLE.COM:
When a ticket has been granted, the details can be viewed using klist:](https://image.slidesharecdn.com/serverguideubuntu1110-141006055509-conversion-gate02/75/Serverguide-ubuntu11-10-95-2048.jpg)

![Network Authentication
91
4. Kerberos and LDAP
Replicating a Kerberos principal database between two servers can be complicated, and adds an
additional user database to your network. Fortunately, MIT Kerberos can be configured to use an
LDAP directory as a principal database. This section covers configuring a primary and secondary
kerberos server to use OpenLDAP for the principal database.
4.1. Configuring OpenLDAP
First, the necessary schema needs to be loaded on an OpenLDAP server that has network connectivity
to the Primary and Secondary KDCs. The rest of this section assumes that you also have LDAP
replication configured between at least two servers. For information on setting up OpenLDAP see
Section 1, “OpenLDAP Server” [p. 54].
It is also required to configure OpenLDAP for TLS and SSL connections, so that traffic between the
KDC and LDAP server is encrypted. See Section 1.8, “TLS” [p. 67] for details.
• To load the schema into LDAP, on the LDAP server install the krb5-kdc-ldap package. From a
terminal enter:
sudo apt-get install krb5-kdc-ldap
• Next, extract the kerberos.schema.gz file:
sudo gzip -d /usr/share/doc/krb5-kdc-ldap/kerberos.schema.gz
sudo cp /usr/share/doc/krb5-kdc-ldap/kerberos.schema /etc/ldap/schema/
• The kerberos schema needs to be added to the cn=config tree. The procedure to add a new schema
to slapd is also detailed in Section 1.4, “Modifying the slapd Configuration Database” [p. 59].
1. First, create a configuration file named schema_convert.conf, or a similar descriptive name,
containing the following lines:
include /etc/ldap/schema/core.schema
include /etc/ldap/schema/collective.schema
include /etc/ldap/schema/corba.schema
include /etc/ldap/schema/cosine.schema
include /etc/ldap/schema/duaconf.schema
include /etc/ldap/schema/dyngroup.schema
include /etc/ldap/schema/inetorgperson.schema
include /etc/ldap/schema/java.schema
include /etc/ldap/schema/misc.schema
include /etc/ldap/schema/nis.schema
include /etc/ldap/schema/openldap.schema
include /etc/ldap/schema/ppolicy.schema
include /etc/ldap/schema/kerberos.schema
2. Create a temporary directory to hold the LDIF files:](https://image.slidesharecdn.com/serverguideubuntu1110-141006055509-conversion-gate02/75/Serverguide-ubuntu11-10-97-2048.jpg)
![Network Authentication
93
add: olcAccess
olcAccess: to dn.base="" by * read
-
add: olcAccess
olcAccess: to * by dn="cn=admin,dc=example,dc=com" write by * read
modifying entry "olcDatabase={1}hdb,cn=config"
That's it, your LDAP directory is now ready to serve as a Kerberos principal database.
4.2. Primary KDC Configuration
With OpenLDAP configured it is time to configure the KDC.
• First, install the necessary packages, from a terminal enter:
sudo apt-get install krb5-kdc krb5-admin-server krb5-kdc-ldap
• Now edit /etc/krb5.conf adding the following options to under the appropriate sections:
[libdefaults]
default_realm = EXAMPLE.COM
...
[realms]
EXAMPLE.COM = {
kdc = kdc01.example.com
kdc = kdc02.example.com
admin_server = kdc01.example.com
admin_server = kdc02.example.com
default_domain = example.com
database_module = openldap_ldapconf
}
...
[domain_realm]
.example.com = EXAMPLE.COM
...
[dbdefaults]
ldap_kerberos_container_dn = dc=example,dc=com
[dbmodules]
openldap_ldapconf = {
db_library = kldap
ldap_kdc_dn = "cn=admin,dc=example,dc=com"](https://image.slidesharecdn.com/serverguideubuntu1110-141006055509-conversion-gate02/75/Serverguide-ubuntu11-10-99-2048.jpg)
![Network Authentication
There should now be krbPrincipalName, krbPrincipalKey, krbLastPwdChange, and krbExtraData
attributes added to the uid=steve,ou=people,dc=example,dc=com user object. Use the kinit and klist
utilities to test that the user is indeed issued a ticket.
If the user object is already created the -x dn="..." option is needed to add the Kerberos
attributes. Otherwise a new principal object will be created in the realm subtree.
95
4.3. Secondary KDC Configuration
Configuring a Secondary KDC using the LDAP backend is similar to configuring one using the
normal Kerberos database.
• First, install the necessary packages. In a terminal enter:
sudo apt-get install krb5-kdc krb5-admin-server krb5-kdc-ldap
• Next, edit /etc/krb5.conf to use the LDAP backend:
[libdefaults]
default_realm = EXAMPLE.COM
...
[realms]
EXAMPLE.COM = {
kdc = kdc01.example.com
kdc = kdc02.example.com
admin_server = kdc01.example.com
admin_server = kdc02.example.com
default_domain = example.com
database_module = openldap_ldapconf
}
...
[domain_realm]
.example.com = EXAMPLE.COM
...
[dbdefaults]
ldap_kerberos_container_dn = dc=example,dc=com
[dbmodules]
openldap_ldapconf = {
db_library = kldap
ldap_kdc_dn = "cn=admin,dc=example,dc=com"
# this object needs to have read rights on
# the realm container, principal container and realm sub-trees
ldap_kadmind_dn = "cn=admin,dc=example,dc=com"](https://image.slidesharecdn.com/serverguideubuntu1110-141006055509-conversion-gate02/75/Serverguide-ubuntu11-10-101-2048.jpg)

![Domain Name Service (DNS)
See Section 3.1.2, “dig” [p. 104] for information on testing a caching DNS server.
2.3. Primary Master
In this section BIND9 will be configured as the Primary Master for the domain example.com. Simply
replace example.com with your FQDN (Fully Qualified Domain Name).
100
2.3.1. Forward Zone File
To add a DNS zone to BIND9, turning BIND9 into a Primary Master server, the first step is to edit /
etc/bind/named.conf.local:
zone "example.com" {
type master;
file "/etc/bind/db.example.com";
};
Now use an existing zone file as a template to create the /etc/bind/db.example.com file:
sudo cp /etc/bind/db.local /etc/bind/db.example.com
Edit the new zone file /etc/bind/db.example.com change localhost. to the FQDN of your
server, leaving the additional "." at the end. Change 127.0.0.1 to the nameserver's IP Address and
root.localhost to a valid email address, but with a "." instead of the usual "@" symbol, again leaving
the "." at the end.
Also, create an A record for ns.example.com. The name server in this example:
;
; BIND data file for local loopback interface
;
$TTL 604800
@ IN SOA ns.example.com. root.example.com. (
2 ; Serial
604800 ; Refresh
86400 ; Retry
2419200 ; Expire
604800 ) ; Negative Cache TTL
;
@ IN NS ns.example.com.
@ IN A 192.168.1.10
@ IN AAAA ::1
ns IN A 192.168.1.10
You must increment the Serial Number every time you make changes to the zone file. If you make
multiple changes before restarting BIND9, simply increment the Serial once.
Now, you can add DNS records to the bottom of the zone file. See Section 4.1, “Common Record
Types” [p. 108] for details.](https://image.slidesharecdn.com/serverguideubuntu1110-141006055509-conversion-gate02/75/Serverguide-ubuntu11-10-106-2048.jpg)
![Domain Name Service (DNS)
103
Restart BIND9 on the Secondary Master:
sudo service bind9 restart
In /var/log/syslog you should see something similar to:
client 192.168.1.10#39448: received notify for zone '1.168.192.in-addr.arpa'
zone 1.168.192.in-addr.arpa/IN: Transfer started.
transfer of '100.18.172.in-addr.arpa/IN' from 192.168.1.10#53: connected using 192.168.1.11#37531
zone 1.168.192.in-addr.arpa/IN: transferred serial 5
transfer of '100.18.172.in-addr.arpa/IN' from 192.168.1.10#53: Transfer completed: 1 messages,
6 records, 212 bytes, 0.002 secs (106000 bytes/sec)
zone 1.168.192.in-addr.arpa/IN: sending notifies (serial 5)
client 192.168.1.10#20329: received notify for zone 'example.com'
zone example.com/IN: Transfer started.
transfer of 'example.com/IN' from 192.168.1.10#53: connected using 192.168.1.11#38577
zone example.com/IN: transferred serial 5
transfer of 'example.com/IN' from 192.168.1.10#53: Transfer completed: 1 messages,
8 records, 225 bytes, 0.002 secs (112500 bytes/sec)
Note: A zone is only transferred if the Serial Number on the Primary is larger than the
one on the Secondary. If you want to have your Primary Master DNS notifying Secondary
DNS Servers of zone changes, you can add also-notify { ipaddress; }; in to /etc/bind/
named.conf.local as shown in the example below:
zone "example.com" {
type master;
file "/etc/bind/db.example.com";
allow-transfer { 192.168.1.11; };
also-notify { 192.168.1.11; };
};
zone "1.168.192.in-addr.arpa" {
type master;
file "/etc/bind/db.192";
allow-transfer { 192.168.1.11; };
also-notify { 192.168.1.11; };
};
The default directory for non-authoritative zone files is /var/cache/bind/. This directory
is also configured in AppArmor to allow the named daemon to write to it. For more
information on AppArmor see Section 4, “AppArmor” [p. 124].](https://image.slidesharecdn.com/serverguideubuntu1110-141006055509-conversion-gate02/75/Serverguide-ubuntu11-10-109-2048.jpg)
![Domain Name Service (DNS)
If no logging option is configured the default option is:
106
logging {
category default { default_syslog; default_debug; };
category unmatched { null; };
};
This section covers configuring BIND9 to send debug messages related to DNS queries to a separate
file.
• First, we need to configure a channel to specify which file to send the messages to. Edit /etc/
bind/named.conf.local and add the following:
logging {
channel query.log {
file "/var/log/query.log";
severity debug 3;
};
};
• Next, configure a category to send all DNS queries to the query file:
logging {
channel query.log {
file "/var/log/query.log";
severity debug 3;
};
category queries { query.log; };
};
Note: the debug option can be set from 1 to 3. If a level isn't specified level 1 is the default.
• Since the named daemon runs as the bind user the /var/log/query.log file must be created and
the ownership changed:
sudo touch /var/log/query.log
sudo chown bind /var/log/query.log
• Before named daemon can write to the new log file the AppArmor profile must be updated. First,
edit /etc/apparmor.d/usr.sbin.named and add:
/var/log/query.log w,
Next, reload the profile:
cat /etc/apparmor.d/usr.sbin.named | sudo apparmor_parser -r
For more information on AppArmor see Section 4, “AppArmor” [p. 124]](https://image.slidesharecdn.com/serverguideubuntu1110-141006055509-conversion-gate02/75/Serverguide-ubuntu11-10-112-2048.jpg)
![Domain Name Service (DNS)
• Now restart BIND9 for the changes to take effect:
107
sudo service bind9 restart
You should see the file /var/log/query.log fill with query information. This is a simple
example of the BIND9 logging options. For coverage of advanced options see Section 4.2, “More
Information” [p. 108].](https://image.slidesharecdn.com/serverguideubuntu1110-141006055509-conversion-gate02/75/Serverguide-ubuntu11-10-113-2048.jpg)


![Security
110
1. User Management
User management is a critical part of maintaining a secure system. Ineffective user and privilege
management often lead many systems into being compromised. Therefore, it is important that you
understand how you can protect your server through simple and effective user account management
techniques.
1.1. Where is root?
Ubuntu developers made a conscientious decision to disable the administrative root account by default
in all Ubuntu installations. This does not mean that the root account has been deleted or that it may
not be accessed. It merely has been given a password which matches no possible encrypted value,
therefore may not log in directly by itself.
Instead, users are encouraged to make use of a tool by the name of sudo to carry out system
administrative duties. Sudo allows an authorized user to temporarily elevate their privileges
using their own password instead of having to know the password belonging to the root account.
This simple yet effective methodology provides accountability for all user actions, and gives the
administrator granular control over which actions a user can perform with said privileges.
• If for some reason you wish to enable the root account, simply give it a password:
sudo passwd
Sudo will prompt you for your password, and then ask you to supply a new password for root as
shown below:
[sudo] password for username: (enter your own password)
Enter new UNIX password: (enter a new password for root)
Retype new UNIX password: (repeat new password for root)
passwd: password updated successfully
• To disable the root account, use the following passwd syntax:
sudo passwd -l root
• You should read more on Sudo by checking out it's man page:
man sudo
By default, the initial user created by the Ubuntu installer is a member of the group "admin" which is
added to the file /etc/sudoers as an authorized sudo user. If you wish to give any other account full
root access through sudo, simply add them to the admin group.](https://image.slidesharecdn.com/serverguideubuntu1110-141006055509-conversion-gate02/75/Serverguide-ubuntu11-10-116-2048.jpg)

![Security
113
1.4.1. Minimum Password Length
By default, Ubuntu requires a minimum password length of 6 characters, as well as some basic
entropy checks. These values are controlled in the file /etc/pam.d/common-password, which is
outlined below.
password [success=2 default=ignore] pam_unix.so obscure sha512
If you would like to adjust the minimum length to 8 characters, change the appropriate variable to
min=8. The modification is outlined below.
password [success=2 default=ignore] pam_unix.so obscure sha512 min=8
1.4.2. Password Expiration
When creating user accounts, you should make it a policy to have a minimum and maximum
password age forcing users to change their passwords when they expire.
• To easily view the current status of a user account, use the following syntax:
sudo chage -l username
The output below shows interesting facts about the user account, namely that there are no policies
applied:
Last password change : Jan 20, 2008
Password expires : never
Password inactive : never
Account expires : never
Minimum number of days between password change : 0
Maximum number of days between password change : 99999
Number of days of warning before password expires : 7
• To set any of these values, simply use the following syntax, and follow the interactive prompts:
sudo chage username
The following is also an example of how you can manually change the explicit expiration date (-
E) to 01/31/2008, minimum password age (-m) of 5 days, maximum password age (-M) of 90 days,
inactivity period (-I) of 5 days after password expiration, and a warning time period (-W) of 14
days before password expiration.
sudo chage -E 01/31/2011 -m 5 -M 90 -I 30 -W 14 username
• To verify changes, use the same syntax as mentioned previously:
sudo chage -l username](https://image.slidesharecdn.com/serverguideubuntu1110-141006055509-conversion-gate02/75/Serverguide-ubuntu11-10-119-2048.jpg)

![Security
sudo ufw allow proto tcp from 192.168.0.2 to any port 22
Replace 192.168.0.2 with 192.168.0.0/24 to allow ssh access from the entire subnet.
• Adding the --dry-run option to a ufw command will output the resulting rules, but not apply them.
For example, the following is what would be applied if opening the HTTP port:
118
sudo ufw --dry-run allow http
*filter
:ufw-user-input - [0:0]
:ufw-user-output - [0:0]
:ufw-user-forward - [0:0]
:ufw-user-limit - [0:0]
:ufw-user-limit-accept - [0:0]
### RULES ###
### tuple ### allow tcp 80 0.0.0.0/0 any 0.0.0.0/0
-A ufw-user-input -p tcp --dport 80 -j ACCEPT
### END RULES ###
-A ufw-user-input -j RETURN
-A ufw-user-output -j RETURN
-A ufw-user-forward -j RETURN
-A ufw-user-limit -m limit --limit 3/minute -j LOG --log-prefix "[UFW LIMIT]: "
-A ufw-user-limit -j REJECT
-A ufw-user-limit-accept -j ACCEPT
COMMIT
Rules updated
• ufw can be disabled by:
sudo ufw disable
• To see the firewall status, enter:
sudo ufw status
• And for more verbose status information use:
sudo ufw status verbose
• To view the numbered format:
sudo ufw status numbered
If the port you want to open or close is defined in /etc/services, you can use the port
name instead of the number. In the above examples, replace 22 with ssh.](https://image.slidesharecdn.com/serverguideubuntu1110-141006055509-conversion-gate02/75/Serverguide-ubuntu11-10-124-2048.jpg)
![Security
120
3.3.1. ufw Masquerading
IP Masquerading can be achieved using custom ufw rules. This is possible because the current back-end
for ufw is iptables-restore with the rules files located in /etc/ufw/*.rules. These files are a
great place to add legacy iptables rules used without ufw, and rules that are more network gateway or
bridge related.
The rules are split into two different files, rules that should be executed before ufw command line
rules, and rules that are executed after ufw command line rules.
• First, packet forwarding needs to be enabled in ufw. Two configuration files will need to be
adjusted, in /etc/default/ufw change the DEFAULT_FORWARD_POLICY to “ACCEPT”:
DEFAULT_FORWARD_POLICY="ACCEPT"
Then edit /etc/ufw/sysctl.conf and uncomment:
net/ipv4/ip_forward=1
Similarly, for IPv6 forwarding uncomment:
net/ipv6/conf/default/forwarding=1
• Now we will add rules to the /etc/ufw/before.rules file. The default rules only configure the
filter table, and to enable masquerading the nat table will need to be configured. Add the following
to the top of the file just after the header comments:
# nat Table rules
*nat
:POSTROUTING ACCEPT [0:0]
# Forward traffic from eth1 through eth0.
-A POSTROUTING -s 192.168.0.0/24 -o eth0 -j MASQUERADE
# don't delete the 'COMMIT' line or these nat table rules won't be processed
COMMIT
The comments are not strictly necessary, but it is considered good practice to document your
configuration. Also, when modifying any of the rules files in /etc/ufw, make sure these lines are
the last line for each table modified:
# don't delete the 'COMMIT' line or these rules won't be processed
COMMIT
For each Table a corresponding COMMIT statement is required. In these examples only the nat and
filter tables are shown, but you can also add rules for the raw and mangle tables.](https://image.slidesharecdn.com/serverguideubuntu1110-141006055509-conversion-gate02/75/Serverguide-ubuntu11-10-126-2048.jpg)
![Security
sudo iptables -A FORWARD -s 192.168.0.0/16 -o ppp0 -j ACCEPT
sudo iptables -A FORWARD -d 192.168.0.0/16 -m state --state ESTABLISHED,RELATED -i ppp0 -j ACCEPT
The above commands will allow all connections from your local network to the Internet and all
traffic related to those connections to return to the machine that initiated them.
• If you want masquerading to be enabled on reboot, which you probably do, edit /etc/rc.local
and add any commands used above. For example add the first command with no filtering:
iptables -t nat -A POSTROUTING -s 192.168.0.0/16 -o ppp0 -j MASQUERADE
3.4. Logs
Firewall logs are essential for recognizing attacks, troubleshooting your firewall rules, and noticing
unusual activity on your network. You must include logging rules in your firewall for them to be
generated, though, and logging rules must come before any applicable terminating rule (a rule with a
target that decides the fate of the packet, such as ACCEPT, DROP, or REJECT).
If you are using ufw, you can turn on logging by entering the following in a terminal:
122
sudo ufw logging on
To turn logging off in ufw, simply replace on with off in the above command.
If using iptables instead of ufw, enter:
sudo iptables -A INPUT -m state --state NEW -p tcp --dport 80 -j LOG --log-prefix "NEW_HTTP_CONN: "
A request on port 80 from the local machine, then, would generate a log in dmesg that looks like this:
[4304885.870000] NEW_HTTP_CONN: IN=lo OUT= MAC=00:00:00:00:00:00:00:00:00:00:00:00:08:00 SRC=127.0.0.1 The above log will also appear in /var/log/messages, /var/log/syslog, and /var/log/kern.log.
This behavior can be modified by editing /etc/syslog.conf appropriately or by installing and
configuring ulogd and using the ULOG target instead of LOG. The ulogd daemon is a userspace
server that listens for logging instructions from the kernel specifically for firewalls, and can log to any
file you like, or even to a PostgreSQL or MySQL database. Making sense of your firewall logs can be
simplified by using a log analyzing tool such as fwanalog, fwlogwatch, or lire.
3.5. Other Tools
There are many tools available to help you construct a complete firewall without intimate knowledge
of iptables. For the GUI-inclined:
• Firestarter1 is quite popular and easy to use.](https://image.slidesharecdn.com/serverguideubuntu1110-141006055509-conversion-gate02/75/Serverguide-ubuntu11-10-128-2048.jpg)
![Security
• Capability entries: determine what privileges a confined process is allowed to use.
As an example take a look at /etc/apparmor.d/bin.ping:
126
#include <tunables/global>
/bin/ping flags=(complain) {
#include <abstractions/base>
#include <abstractions/consoles>
#include <abstractions/nameservice>
capability net_raw,
capability setuid,
network inet raw,
/bin/ping mixr,
/etc/modules.conf r,
}
• #include <tunables/global>: include statements from other files. This allows statements pertaining
to multiple applications to be placed in a common file.
• /bin/ping flags=(complain): path to the profiled program, also setting the mode to complain.
• capability net_raw,: allows the application access to the CAP_NET_RAW Posix.1e capability.
• /bin/ping mixr,: allows the application read and execute access to the file.
After editing a profile file the profile must be reloaded. See Section 4.1, “Using
AppArmor” [p. 124] for details.
4.2.1. Creating a Profile
• Design a test plan: Try to think about how the application should be exercised. The test plan should
be divided into small test cases. Each test case should have a small description and list the steps to
follow.
Some standard test cases are:
• Starting the program.
• Stopping the program.
• Reloading the program.
• Testing all the commands supported by the init script.
• Generate the new profile: Use aa-genprof to generate a new profile. From a terminal:
sudo aa-genprof executable
For example:
sudo aa-genprof slapd](https://image.slidesharecdn.com/serverguideubuntu1110-141006055509-conversion-gate02/75/Serverguide-ubuntu11-10-132-2048.jpg)
![Security
by your own CA, allows the various services using the certificates to easily trust other services using
certificates issued from the same CA.
1. First, create the directories to hold the CA certificate and related files:
131
sudo mkdir /etc/ssl/CA
sudo mkdir /etc/ssl/newcerts
2. The CA needs a few additional files to operate, one to keep track of the last serial number used
by the CA, each certificate must have a unique serial number, and another file to record which
certificates have been issued:
sudo sh -c "echo '01' > /etc/ssl/CA/serial"
sudo touch /etc/ssl/CA/index.txt
3. The third file is a CA configuration file. Though not strictly necessary, it is very convenient
when issuing multiple certificates. Edit /etc/ssl/openssl.cnf, and in the [ CA_default ]
change:
dir = /etc/ssl/ # Where everything is kept
database = $dir/CA/index.txt # database index file.
certificate = $dir/certs/cacert.pem # The CA certificate
serial = $dir/CA/serial # The current serial number
private_key = $dir/private/cakey.pem# The private key
4. Next, create the self-singed root certificate:
openssl req -new -x509 -extensions v3_ca -keyout cakey.pem -out cacert.pem -days 3650
You will then be asked to enter the details about the certificate.
5. Now install the root certificate and key:
sudo mv cakey.pem /etc/ssl/private/
sudo mv cacert.pem /etc/ssl/certs/
6. You are now ready to start signing certificates. The first item needed is a Certificate Signing
Request (CSR), see Section 5.2, “Generating a Certificate Signing Request (CSR)” [p. 129]
for details. Once you have a CSR, enter the following to generate a certificate signed by the CA:
sudo openssl ca -in server.csr -config /etc/ssl/openssl.cnf
After entering the password for the CA key, you will be prompted to sign the certificate, and
again to commit the new certificate. You should then see a somewhat large amount of output
related to the certificate creation.
7. There should now be a new file, /etc/ssl/newcerts/01.pem, containing the same output. Copy
and paste everything beginning with the line: -----BEGIN CERTIFICATE----- and continuing
through the line: ----END CERTIFICATE----- lines to a file named after the hostname of the](https://image.slidesharecdn.com/serverguideubuntu1110-141006055509-conversion-gate02/75/Serverguide-ubuntu11-10-137-2048.jpg)
![Security
134
ecryptfs_passthrough=n
ecryptfs_enable_filename_crypto=n
Adjust the ecryptfs_sig to the signature in /root/.ecryptfs/sig-cache.txt.
Next, create the /mnt/usb/passwd_file.txt passphrase file:
passphrase_passwd=[secrets]
Now add the necessary lines to /etc/fstab:
/dev/sdb1 /mnt/usb ext3 ro 0 0
/srv /srv ecryptfs defaults 0 0
Make sure the USB drive is mounted before the encrypted partition.
Finally, reboot and the /srv should be mounted using eCryptfs.
6.3. Other Utilities
The ecryptfs-utils package includes several other useful utilities:
• ecryptfs-setup-private: creates a ~/Private directory to contain encrypted information. This utility
can be run by unprivileged users to keep data private from other users on the system.
• ecryptfs-mount-private and ecryptfs-umount-private: will mount and unmount respectively, a users
~/Private directory.
• ecryptfs-add-passphrase: adds a new passphrase to the kernel keyring.
• ecryptfs-manager: manages eCryptfs objects such as keys.
• ecryptfs-stat: allows you to view the ecryptfs meta information for a file.
6.4. References
• For more information on eCryptfs see the Launchpad project page19.
• There is also a Linux Journal20 article covering eCryptfs.
• Also, for more ecryptfs options see the ecryptfs man page21.
• The eCryptfs Ubuntu Wiki22 page also has more details.](https://image.slidesharecdn.com/serverguideubuntu1110-141006055509-conversion-gate02/75/Serverguide-ubuntu11-10-140-2048.jpg)

![Monitoring
See Section 1, “HTTPD - Apache2 Web Server” [p. 144] for details on setting up Apache,
Chapter 7, Domain Name Service (DNS) [p. 97] for DNS, and Section 1, “MySQL” [p.
162] for MySQL.
Additionally, there are some terms that once explained will hopefully make understanding Nagios
configuration easier:
• Host: a server, workstation, network device, etc that is being monitored.
• Host Group: a group of similar hosts. For example, you could group all web servers, file server, etc.
• Service: the service being monitored on the host. Such as HTTP, DNS, NFS, etc.
• Service Group: allows you to group multiple services together. This is useful for grouping multiple
HTTP for example.
• Contact: person to be notified when an event takes place. Nagios can be configured to send emails,
SMS messages, etc.
By default Nagios is configured to check HTTP, disk space, SSH, current users, processes, and load
on the localhost. Nagios will also ping check the gateway.
Large Nagios installations can be quite complex to configure. It is usually best to start small, one or
two hosts, get things configured the way you like then expand.
2.3. Configuration
• 1. First, create a host configuration file for server02. Unless otherwise specified, run all these
commands on server01. In a terminal enter:
sudo cp /etc/nagios3/conf.d/localhost_nagios2.cfg /etc/nagios3/conf.d/server02.cfg
In the above and following command examples, replace "server01", "server02"
172.18.100.100, and 172.18.100.101 with the host names and IP addresses of your
servers.
2. Next, edit /etc/nagios3/conf.d/server02.cfg:
138
define host{
use generic-host ; Name of host template to use
host_name server02
alias Server 02
address 172.18.100.101
}
# check DNS service.
define service {
use generic-service
host_name server02
service_description DNS](https://image.slidesharecdn.com/serverguideubuntu1110-141006055509-conversion-gate02/75/Serverguide-ubuntu11-10-144-2048.jpg)

![Monitoring
2. Now on server02 edit /etc/nagios/nrpe.cfg changing:
140
allowed_hosts=172.18.100.100
And below in the command definition area add:
command[check_all_disks]=/usr/lib/nagios/plugins/check_disk -w 20% -c 10% -e
3. Finally, restart nagios-nrpe-server:
sudo /etc/init.d/nagios-nrpe-server restart
4. Also, on server01 restart nagios:
sudo /etc/init.d/nagios3 restart
You should now be able to see the host and service checks in the Nagios CGI files. To access them
point a browser to http://server01/nagios3. You will then be prompted for the nagiosadmin username
and password.
2.4. References
This section has just scratched the surface of Nagios' features. The nagios-plugins-extra and nagios-snmp-
plugins contain many more service checks.
• For more information see Nagios1 website.
• Specifically the Online Documentation2 site.
• There is also a list of books3 related to Nagios and network monitoring:
• The Nagios Ubuntu Wiki4 page also has more details.](https://image.slidesharecdn.com/serverguideubuntu1110-141006055509-conversion-gate02/75/Serverguide-ubuntu11-10-146-2048.jpg)
![Monitoring
141
3. Munin
3.1. Installation
Before installing Munin on server01 apache2 will need to be installed. The default configuration
is fine for running a munin server. For more information see Section 1, “HTTPD - Apache2 Web
Server” [p. 144].
First, on server01 install munin. In a terminal enter:
sudo apt-get install munin
Now on server02 install the munin-node package:
sudo apt-get install munin-node
3.2. Configuration
On server01 edit the /etc/munin/munin.conf adding the IP address for server02:
## First our "normal" host.
[server02]
address 172.18.100.101
Replace server02 and 172.18.100.101 with the actual hostname and IP address for your
server.
Next, configure munin-node on server02. Edit /etc/munin/munin-node.conf to allow access by
server01:
allow ^172.18.100.100$
Replace ^172.18.100.100$ with IP address for your munin server.
Now restart munin-node on server02 for the changes to take effect:
sudo /etc/init.d/munin-node restart
Finally, in a browser go to http://server01/munin, and you should see links to nice graphs displaying
information from the standard munin-plugins for disk, network, processes, and system.
Since this is a new install it may take some time for the graphs to display anything useful.](https://image.slidesharecdn.com/serverguideubuntu1110-141006055509-conversion-gate02/75/Serverguide-ubuntu11-10-147-2048.jpg)


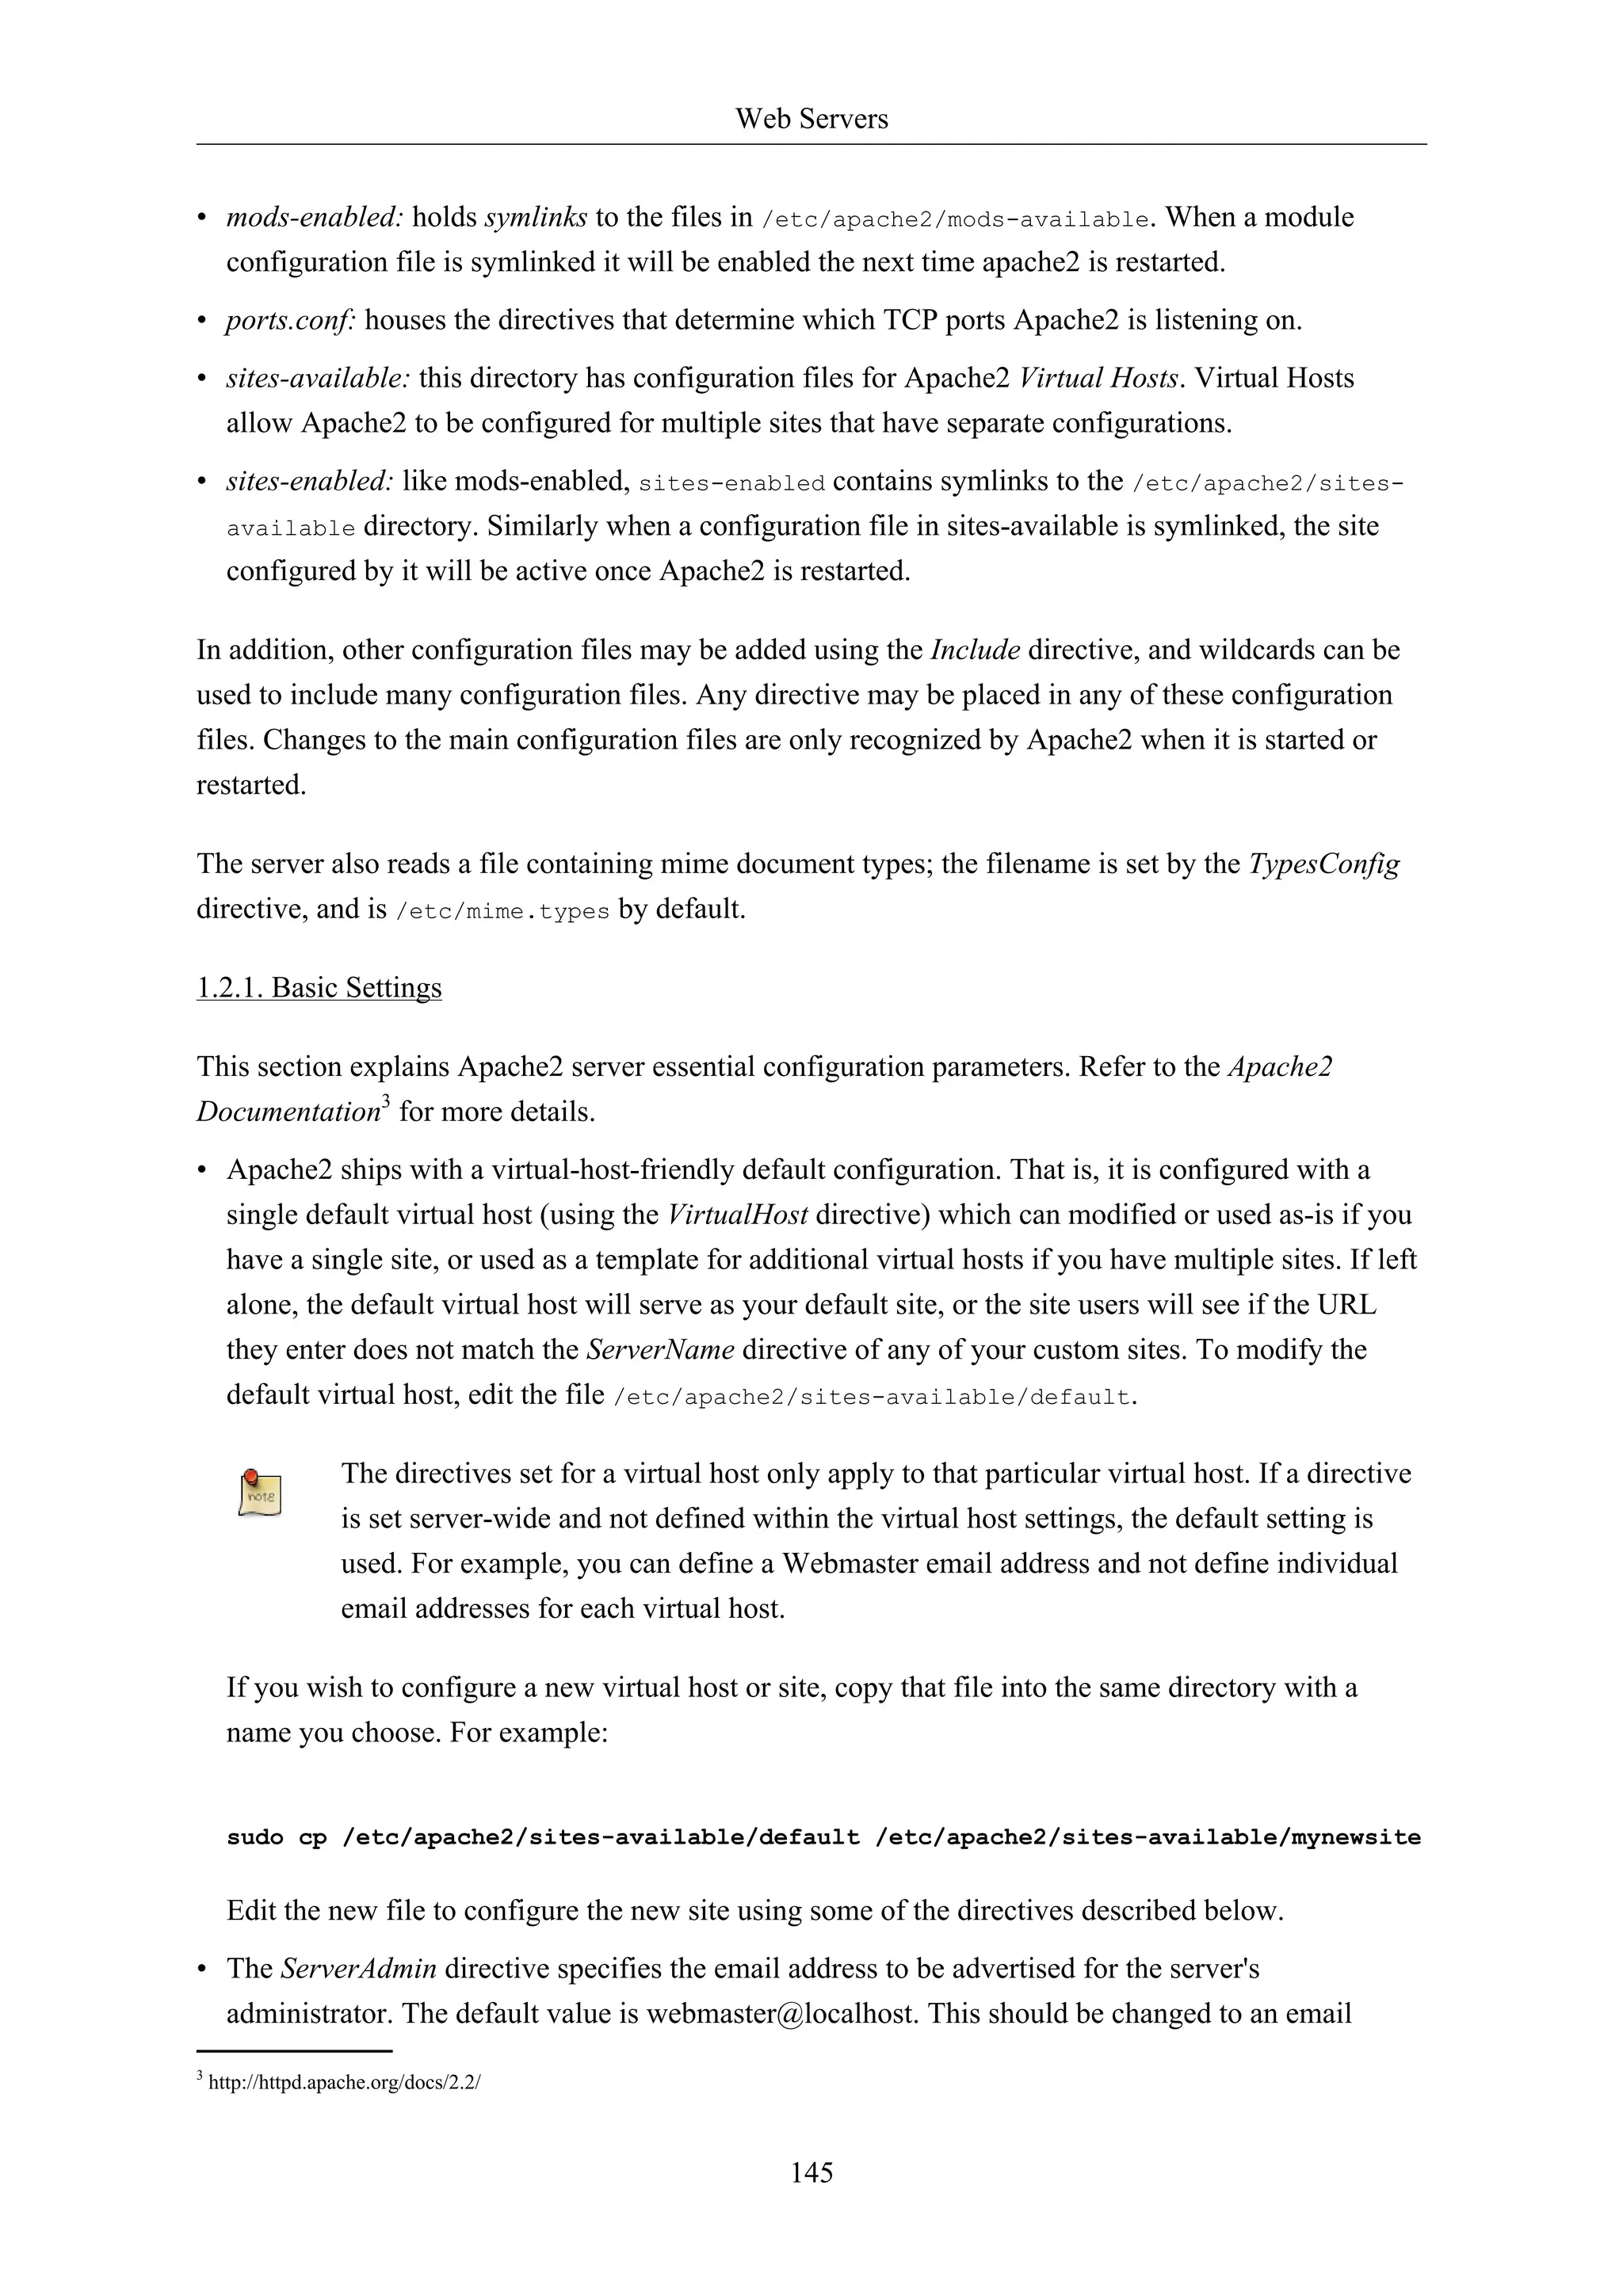
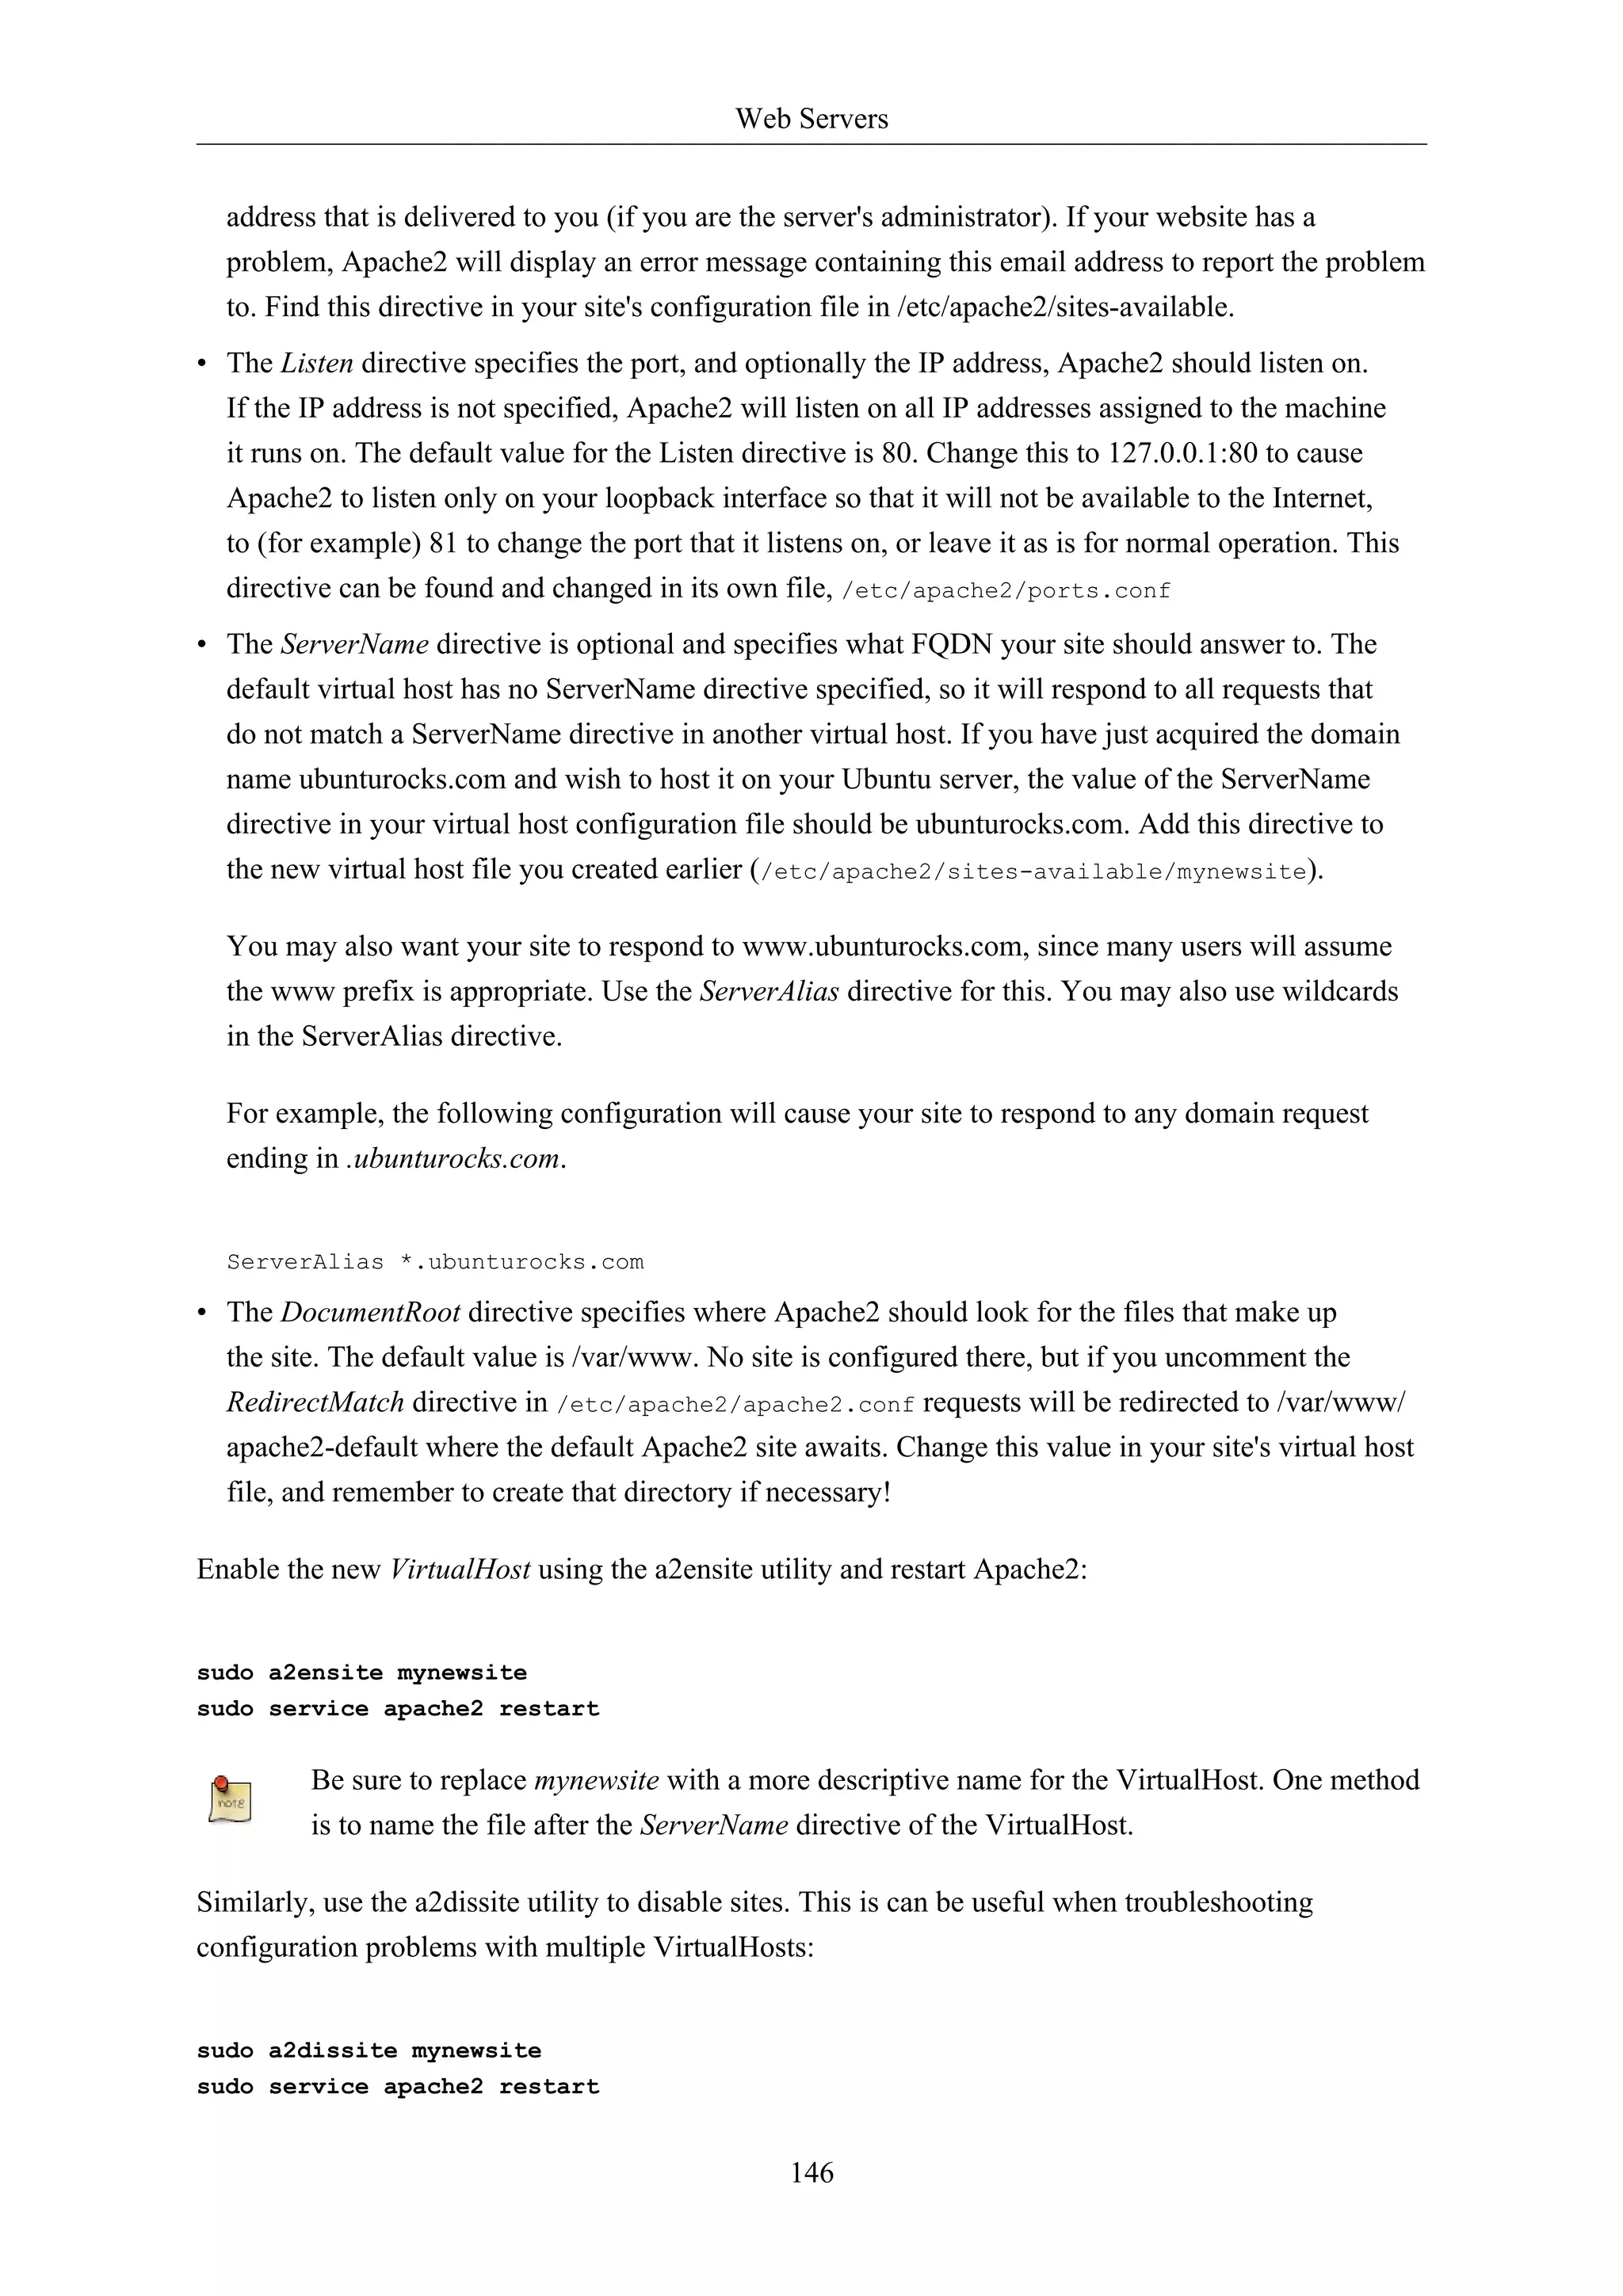
![Web Servers
149
1.2.4. Apache2 Modules
Apache2 is a modular server. This implies that only the most basic functionality is included in the
core server. Extended features are available through modules which can be loaded into Apache2. By
default, a base set of modules is included in the server at compile-time. If the server is compiled to use
dynamically loaded modules, then modules can be compiled separately, and added at any time using
the LoadModule directive. Otherwise, Apache2 must be recompiled to add or remove modules.
Ubuntu compiles Apache2 to allow the dynamic loading of modules. Configuration directives may be
conditionally included on the presence of a particular module by enclosing them in an <IfModule>
block.
You can install additional Apache2 modules and use them with your Web server. For example, run
the following command from a terminal prompt to install the MySQL Authentication module:
sudo apt-get install libapache2-mod-auth-mysql
See the /etc/apache2/mods-available directory, for additional modules.
Use the a2enmod utility to enable a module:
sudo a2enmod auth_mysql
sudo service apache2 restart
Similarly, a2dismod will disable a module:
sudo a2dismod auth_mysql
sudo service apache2 restart
1.3. HTTPS Configuration
The mod_ssl module adds an important feature to the Apache2 server - the ability to encrypt
communications. Thus, when your browser is communicating using SSL, the https:// prefix is used at
the beginning of the Uniform Resource Locator (URL) in the browser navigation bar.
The mod_ssl module is available in apache2-common package. Execute the following command from
a terminal prompt to enable the mod_ssl module:
sudo a2enmod ssl
There is a default HTTPS configuration file in /etc/apache2/sites-available/default-ssl. In
order for Apache2 to provide HTTPS, a certificate and key file are also needed. The default HTTPS
configuration will use a certificate and key generated by the ssl-cert package. They are good for
testing, but the auto-generated certificate and key should be replaced by a certificate specific to
the site or server. For information on generating a key and obtaining a certificate see Section 5,
“Certificates” [p. 128]](https://image.slidesharecdn.com/serverguideubuntu1110-141006055509-conversion-gate02/75/Serverguide-ubuntu11-10-155-2048.jpg)

![Web Servers
155
4. Ruby on Rails
Ruby on Rails is an open source web framework for developing database backed web applications. It
is optimized for sustainable productivity of the programmer since it lets the programmer to write code
by favouring convention over configuration.
4.1. Installation
Before installing Rails you should install Apache and MySQL. To install the Apache package, please
refer to Section 1, “HTTPD - Apache2 Web Server” [p. 144]. For instructions on installing MySQL
refer to Section 1, “MySQL” [p. 162].
Once you have Apache and MySQL packages installed, you are ready to install Ruby on Rails
package.
To install the Ruby base packages and Ruby on Rails, you can enter the following command in the
terminal prompt:
sudo apt-get install rails
4.2. Configuration
Modify the /etc/apache2/sites-available/default configuration file to setup your domains.
The first thing to change is the DocumentRoot directive:
DocumentRoot /path/to/rails/application/public
Next, change the <Directory "/path/to/rails/application/public"> directive:
<Directory "/path/to/rails/application/public">
Options Indexes FollowSymLinks MultiViews ExecCGI
AllowOverride All
Order allow,deny
allow from all
AddHandler cgi-script .cgi
</Directory>
You should also enable the mod_rewrite module for Apache. To enable mod_rewrite module, please
enter the following command in a terminal prompt:
sudo a2enmod rewrite
Finally you will need to change the ownership of the /path/to/rails/application/public and /
path/to/rails/application/tmp directories to the user used to run the Apache process:](https://image.slidesharecdn.com/serverguideubuntu1110-141006055509-conversion-gate02/75/Serverguide-ubuntu11-10-161-2048.jpg)


![LAMP Applications
168
2. Moin Moin
MoinMoin is a Wiki engine implemented in Python, based on the PikiPiki Wiki engine, and licensed
under the GNU GPL.
2.1. Installation
To install MoinMoin, run the following command in the command prompt:
sudo apt-get install python-moinmoin
You should also install apache2 web server. For installing apache2 web server, please refer to
Section 1.1, “Installation” [p. 144] sub-section in Section 1, “HTTPD - Apache2 Web Server” [p.
144] section.
2.2. Configuration
For configuring your first Wiki application, please run the following set of commands. Let us assume
that you are creating a Wiki named mywiki:
cd /usr/share/moin
sudo mkdir mywiki
sudo cp -R data mywiki
sudo cp -R underlay mywiki
sudo cp server/moin.cgi mywiki
sudo chown -R www-data.www-data mywiki
sudo chmod -R ug+rwX mywiki
sudo chmod -R o-rwx mywiki
Now you should configure MoinMoin to find your new Wiki mywiki. To configure MoinMoin, open /
etc/moin/mywiki.py file and change the following line:
data_dir = '/org/mywiki/data'
to
data_dir = '/usr/share/moin/mywiki/data'
Also, below the data_dir option add the data_underlay_dir:
data_underlay_dir='/usr/share/moin/mywiki/underlay'
If the /etc/moin/mywiki.py file does not exists, you should copy /etc/moin/
moinmaster.py file to /etc/moin/mywiki.py file and do the above mentioned change.
If you have named your Wiki as my_wiki_name you should insert a line “("my_wiki_name",
r".*")” in /etc/moin/farmconfig.py file after the line “("mywiki", r".*")”.](https://image.slidesharecdn.com/serverguideubuntu1110-141006055509-conversion-gate02/75/Serverguide-ubuntu11-10-174-2048.jpg)
![LAMP Applications
172
4. phpMyAdmin
phpMyAdmin is a LAMP application specifically written for administering MySQL servers. Written
in PHP, and accessed through a web browser, phpMyAdmin provides a graphical interface for
database administration tasks.
4.1. Installation
Before installing phpMyAdmin you will need access to a MySQL database either on the same host as
that phpMyAdmin is installed on, or on a host accessible over the network. For more information see
Section 1, “MySQL” [p. 162]. From a terminal prompt enter:
sudo apt-get install phpmyadmin
At the prompt choose which web server to be configured for phpMyAdmin. The rest of this section
will use Apache2 for the web server.
In a browser go to http://servername/phpmyadmin, replacing serveranme with the server's actual
hostname. At the login, page enter root for the username, or another MySQL user if you any setup,
and enter the MySQL user's password.
Once logged in you can reset the root password if needed, create users, create/destroy databases and
tables, etc.
4.2. Configuration
The configuration files for phpMyAdmin are located in /etc/phpmyadmin. The main configuration
file is /etc/phpmyadmin/config.inc.php. This file contains configuration options that apply globally
to phpMyAdmin.
To use phpMyAdmin to administer a MySQL database hosted on another server, adjust the following
in /etc/phpmyadmin/config.inc.php:
$cfg['Servers'][$i]['host'] = 'db_server';
Replace db_server with the actual remote database server name or IP address. Also, be sure
that the phpMyAdmin host has permissions to access the remote database.
Once configured, log out of phpMyAdmin and back in, and you should be accessing the new server.
The config.header.inc.php and config.footer.inc.php files are used to add a HTML header and
footer to phpMyAdmin.
Another important configuration file is /etc/phpmyadmin/apache.conf, this file is symlinked to /
etc/apache2/conf.d/phpmyadmin.conf, and is used to configure Apache2 to serve the phpMyAdmin](https://image.slidesharecdn.com/serverguideubuntu1110-141006055509-conversion-gate02/75/Serverguide-ubuntu11-10-178-2048.jpg)
![LAMP Applications
site. The file contains directives for loading PHP, directory permissions, etc. For more information on
configuring Apache2 see Section 1, “HTTPD - Apache2 Web Server” [p. 144].
4.3. References
• The phpMyAdmin documentation comes installed with the package and can be accessed from the
phpMyAdmin Documentation link (a question mark with a box around it) under the phpMyAdmin
logo. The official docs can also be access on the phpMyAdmin7 site.
• Also, Mastering phpMyAdmin8 is a great resource.
• A third resource is the phpMyAdmin Ubuntu Wiki9 page.
173](https://image.slidesharecdn.com/serverguideubuntu1110-141006055509-conversion-gate02/75/Serverguide-ubuntu11-10-179-2048.jpg)

![File Servers
177
sudo restart vsftpd
Also, the /etc/ftpusers file is a list of users that are disallowed FTP access. The default list includes
root, daemon, nobody, etc. To disable FTP access for additional users simply add them to the list.
FTP can also be encrypted using FTPS. Different from SFTP, FTPS is FTP over Secure Socket Layer
(SSL). SFTP is a FTP like session over an encrypted SSH connection. A major difference is that users
of SFTP need to have a shell account on the system, instead of a nologin shell. Providing all users
with a shell may not be ideal for some environments, such as a shared web host.
To configure FTPS, edit /etc/vsftpd.conf and at the bottom add:
ssl_enable=Yes
Also, notice the certificate and key related options:
rsa_cert_file=/etc/ssl/certs/ssl-cert-snakeoil.pem
rsa_private_key_file=/etc/ssl/private/ssl-cert-snakeoil.key
By default these options are set the certificate and key provided by the ssl-cert package. In a
production environment these should be replaced with a certificate and key generated for the specific
host. For more information on certificates see Section 5, “Certificates” [p. 128].
Now restart vsftpd, and non-anonymous users will be forced to use FTPS:
sudo restart vsftpd
To allow users with a shell of /usr/sbin/nologin access to FTP, but have no shell access, edit /etc/
shells adding the nologin shell:
# /etc/shells: valid login shells
/bin/csh
/bin/sh
/usr/bin/es
/usr/bin/ksh
/bin/ksh
/usr/bin/rc
/usr/bin/tcsh
/bin/tcsh
/usr/bin/esh
/bin/dash
/bin/bash
/bin/rbash
/usr/bin/screen
/usr/sbin/nologin
This is necessary because, by default vsftpd uses PAM for authentication, and the /etc/pam.d/
vsftpd configuration file contains:](https://image.slidesharecdn.com/serverguideubuntu1110-141006055509-conversion-gate02/75/Serverguide-ubuntu11-10-183-2048.jpg)

![File Servers
You should now be able to connect to the iSCSI target, and depending on your target setup you may
have to enter user credentials. Login to the iSCSI node:
182
sudo iscsiadm -m node --login
Check to make sure that the new disk has been detected using dmesg:
dmesg | grep sd
[ 4.322384] sd 2:0:0:0: Attached scsi generic sg1 type 0
[ 4.322797] sd 2:0:0:0: [sda] 41943040 512-byte logical blocks: (21.4 GB/20.0 GiB)
[ 4.322843] sd 2:0:0:0: [sda] Write Protect is off
[ 4.322846] sd 2:0:0:0: [sda] Mode Sense: 03 00 00 00
[ 4.322896] sd 2:0:0:0: [sda] Cache data unavailable
[ 4.322899] sd 2:0:0:0: [sda] Assuming drive cache: write through
[ 4.323230] sd 2:0:0:0: [sda] Cache data unavailable
[ 4.323233] sd 2:0:0:0: [sda] Assuming drive cache: write through
[ 4.325312] sda: sda1 sda2 < sda5 >
[ 4.325729] sd 2:0:0:0: [sda] Cache data unavailable
[ 4.325732] sd 2:0:0:0: [sda] Assuming drive cache: write through
[ 4.325735] sd 2:0:0:0: [sda] Attached SCSI disk
[ 2486.941805] sd 4:0:0:3: Attached scsi generic sg3 type 0
[ 2486.952093] sd 4:0:0:3: [sdb] 1126400000 512-byte logical blocks: (576 GB/537 GiB)
[ 2486.954195] sd 4:0:0:3: [sdb] Write Protect is off
[ 2486.954200] sd 4:0:0:3: [sdb] Mode Sense: 8f 00 00 08
[ 2486.954692] sd 4:0:0:3: [sdb] Write cache: disabled, read cache: enabled, doesn't support DPO or FUA
[ 2486.960577] sdb: sdb1
[ 2486.964862] sd 4:0:0:3: [sdb] Attached SCSI disk
In the output above sdb is the new iSCSI disk. Remember this is just an example the output you on
your screen will vary.
Next, create a partition, format the file system, and mount the new iSCSI disk. In a terminal enter:
sudo fdisk /dev/sdb
n
p
enter
w
The above commands are from inside the fdisk utility see man fdisk for more detailed
instructions. Also, the cfdisk utility is sometimes more user friendly.
Now format the file system and mount it to /srv as an example:
sudo mkfs.ext4 /dev/sdb1
sudo /dev/sdb1 /srv](https://image.slidesharecdn.com/serverguideubuntu1110-141006055509-conversion-gate02/75/Serverguide-ubuntu11-10-188-2048.jpg)


![Email Services
188
1. Postfix
Postfix is the default Mail Transfer Agent (MTA) in Ubuntu. It attempts to be fast and easy to
administer and secure. It is compatible with the MTA sendmail. This section explains how to install
and configure postfix. It also explains how to set it up as an SMTP server using a secure connection
(for sending emails securely).
This guide does not cover setting up Postfix Virtual Domains, for information on Virtual
Domains and other advanced configurations see Section 1.7.3, “References” [p. 193].
1.1. Installation
To install postfix run the following command:
sudo apt-get install postfix
Simply press return when the installation process asks questions, the configuration will be done in
greater detail in the next stage.
1.2. Basic Configuration
To configure postfix, run the following command:
sudo dpkg-reconfigure postfix
The user interface will be displayed. On each screen, select the following values:
• Internet Site
• mail.example.com
• steve
• mail.example.com, localhost.localdomain, localhost
• No
• 127.0.0.0/8 [::ffff:127.0.0.0]/104 [::1]/128 192.168.0.0/24
• 0
• +
• all
Replace mail.example.com with the domain for which you'll accept email, 192.168.0.0/24
with the actual network and class range of your mail server, and steve with the appropriate
username.
Now is a good time to decide which mailbox format you want to use. By default Postfix will use
mbox for the mailbox format. Rather than editing the configuration file directly, you can use the
postconf command to configure all postfix parameters. The configuration parameters will be stored in](https://image.slidesharecdn.com/serverguideubuntu1110-141006055509-conversion-gate02/75/Serverguide-ubuntu11-10-194-2048.jpg)
![Email Services
/etc/postfix/main.cf file. Later if you wish to re-configure a particular parameter, you can either
run the command or change it manually in the file.
189
To configure the mailbox format for Maildir:
sudo postconf -e 'home_mailbox = Maildir/'
This will place new mail in /home/username/Maildir so you will need to configure your
Mail Delivery Agent (MDA) to use the same path.
1.3. SMTP Authentication
SMTP-AUTH allows a client to identify itself through an authentication mechanism (SASL).
Transport Layer Security (TLS) should be used to encrypt the authentication process. Once
authenticated the SMTP server will allow the client to relay mail.
1. Configure Postfix for SMTP-AUTH using SASL (Dovecot SASL):
sudo postconf -e 'smtpd_sasl_type = dovecot'
sudo postconf -e 'smtpd_sasl_path = private/auth-client'
sudo postconf -e 'smtpd_sasl_local_domain ='
sudo postconf -e 'smtpd_sasl_security_options = noanonymous'
sudo postconf -e 'broken_sasl_auth_clients = yes'
sudo postconf -e 'smtpd_sasl_auth_enable = yes'
sudo postconf -e 'smtpd_recipient_restrictions = permit_sasl_authenticated,permit_mynetworks,reject_The smtpd_sasl_path configuration is a path relative to the Postfix queue directory.
2. Next, generate or obtain a digital certificate for TLS. See Section 5, “Certificates” [p. 128] for
details. This example also uses a Certificate Authority (CA). For information on generating a CA
certificate see Section 5.5, “Certification Authority” [p. 130].
MUAs connecting to your mail server via TLS will need to recognize the certificate
used for TLS. This can either be done using a certificate from a commercial CA or
with a self-signed certificate that users manually install/accept. For MTA to MTA
TLS certficates are never validated without advance agreement from the affected
organizations. For MTA to MTA TLS, unless local policy requires it, there is no
reason not to use a self-signed certificate. Refer to Section 5.3, “Creating a Self-Signed
Certificate” [p. 130] for more details.
3. Once you have a certificate, configure Postfix to provide TLS encryption for both incoming and
outgoing mail:
sudo postconf -e 'smtp_tls_security_level = may'
sudo postconf -e 'smtpd_tls_security_level = may'
sudo postconf -e 'smtp_tls_note_starttls_offer = yes'](https://image.slidesharecdn.com/serverguideubuntu1110-141006055509-conversion-gate02/75/Serverguide-ubuntu11-10-195-2048.jpg)
![Email Services
sudo postconf -e 'smtpd_tls_key_file = /etc/ssl/private/server.key'
sudo postconf -e 'smtpd_tls_cert_file = /etc/ssl/certs/server.crt'
sudo postconf -e 'smtpd_tls_loglevel = 1'
sudo postconf -e 'smtpd_tls_received_header = yes'
sudo postconf -e 'myhostname = mail.example.com'
4. If you are using your own Certificate Authority to sign the certificate enter:
sudo postconf -e 'smtpd_tls_CAfile = /etc/ssl/certs/cacert.pem'
Again, for more details about certificates see Section 5, “Certificates” [p. 128].
After running all the commands, Postfix is configured for SMTP-AUTH and a self-signed
certificate has been created for TLS encryption.
Now, the file /etc/postfix/main.cf should look like this1.
The postfix initial configuration is complete. Run the following command to restart the postfix
daemon:
190
sudo /etc/init.d/postfix restart
Postfix supports SMTP-AUTH as defined in RFC25542. It is based on SASL3. However it is still
necessary to set up SASL authentication before you can use SMTP-AUTH.
1.4. Configuring SASL
Postfix supports two SASL implementations Cyrus SASL and Dovecot SASL. To enable Dovecot
SASL the dovecot-common package will need to be installed. From a terminal prompt enter the
following:
sudo apt-get install dovecot-common
Next you will need to edit /etc/dovecot/dovecot.conf. In the auth default section uncomment the
socket listen option and change the following:
socket listen {
#master {
# Master socket provides access to userdb information. It's typically
# used to give Dovecot's local delivery agent access to userdb so it
# can find mailbox locations.
#path = /var/run/dovecot/auth-master
#mode = 0600
# Default user/group is the one who started dovecot-auth (root)
1 ../sample/postfix_configuration
2 http://www.ietf.org/rfc/rfc2554.txt
3 http://www.ietf.org/rfc/rfc2222.txt](https://image.slidesharecdn.com/serverguideubuntu1110-141006055509-conversion-gate02/75/Serverguide-ubuntu11-10-196-2048.jpg)
![Email Services
191
#user =
#group =
#}
client {
# The client socket is generally safe to export to everyone. Typical use
# is to export it to your SMTP server so it can do SMTP AUTH lookups
# using it.
path = /var/spool/postfix/private/auth-client
mode = 0660
user = postfix
group = postfix
}
}
In order to let Outlook clients use SMTP-AUTH, in the auth default section of /etc/dovecot/
dovecot.conf add "login":
mechanisms = plain login
Once you have Dovecot configured restart it with:
sudo /etc/init.d/dovecot restart
1.5. Mail-Stack Delivery
Another option for configuring Postfix for SMTP-AUTH is using the mail-stack-delivery package
(previously packaged as dovecot-postfix). This package will install Dovecot and configure Postfix
to use it for both SASL authentication and as a Mail Delivery Agent (MDA). The package also
configures Dovecot for IMAP, IMAPS, POP3, and POP3S.
You may or may not want to run IMAP, IMAPS, POP3, or POP3S on your mail server. For
example, if you are configuring your server to be a mail gateway, spam/virus filter, etc. If
this is the case it may be easier to use the above commands to configure Postfix for SMTP-AUTH.
To install the package, from a terminal prompt enter:
sudo apt-get install mail-stack-delivery
You should now have a working mail server, but there are a few options that you may wish to further
customize. For example, the package uses the certificate and key from the ssl-cert package, and in a
production environment you should use a certificate and key generated for the host. See Section 5,
“Certificates” [p. 128] for more details.
Once you have a customized certificate and key for the host, change the following options in /etc/
postfix/main.cf:](https://image.slidesharecdn.com/serverguideubuntu1110-141006055509-conversion-gate02/75/Serverguide-ubuntu11-10-197-2048.jpg)


![Email Services
If you have enabled imap, or pop3, you can also try to log in with the commands telnet localhost
pop3 or telnet localhost imap2. If you see something like the following, the installation has been
successful:
199
bhuvan@rainbow:~$ telnet localhost pop3
Trying 127.0.0.1...
Connected to localhost.localdomain.
Escape character is '^]'.
+OK Dovecot ready.
3.3. Dovecot SSL Configuration
To configure dovecot to use SSL, you can edit the file /etc/dovecot/dovecot.conf and amend
following lines:
ssl_cert_file = /etc/ssl/certs/ssl-cert-snakeoil.pem
ssl_key_file = /etc/ssl/private/ssl-cert-snakeoil.key
ssl_disable = no
disable_plaintext_auth = no
You can get the SSL certificate from a Certificate Issuing Authority or you can create self signed SSL
certificate. The latter is a good option for email, because SMTP clients rarely complain about "self-signed
certificates". Please refer to Section 5, “Certificates” [p. 128] for details about how to create
self signed SSL certificate. Once you create the certificate, you will have a key file and a certificate
file. Please copy them to the location pointed in the /etc/dovecot/dovecot.conf configuration file.
3.4. Firewall Configuration for an Email Server
To access your mail server from another computer, you must configure your firewall to allow
connections to the server on the necessary ports.
• IMAP - 143
• IMAPS - 993
• POP3 - 110
• POP3S - 995
3.5. References
• See the Dovecot website15 for more information.
• Also, the Dovecot Ubuntu Wiki16 page has more details.](https://image.slidesharecdn.com/serverguideubuntu1110-141006055509-conversion-gate02/75/Serverguide-ubuntu11-10-205-2048.jpg)
![Email Services
200
4. Mailman
Mailman is an open source program for managing electronic mail discussions and e-newsletter lists.
Many open source mailing lists (including all the Ubuntu mailing lists17) use Mailman as their mailing
list software. It is powerful and easy to install and maintain.
4.1. Installation
Mailman provides a web interface for the administrators and users, using an external mail server to
send and receive emails. It works perfectly with the following mail servers:
• Postfix
• Exim
• Sendmail
• Qmail
We will see how to install and configure Mailman with, the Apache web server, and either the Postfix
or Exim mail server. If you wish to install Mailman with a different mail server, please refer to the
references section.
You only need to install one mail server and Postfix is the default Ubuntu Mail Transfer
Agent.
4.1.1. Apache2
To install apache2 you refer to Section 1.1, “Installation” [p. 144] for details.
4.1.2. Postfix
For instructions on installing and configuring Postfix refer to Section 1, “Postfix” [p. 188]
4.1.3. Exim4
To install Exim4 refer to Section 2, “Exim4” [p. 195].
Once exim4 is installed, the configuration files are stored in the /etc/exim4 directory. In Ubuntu, by
default, the exim4 configuration files are split across different files. You can change this behavior by
changing the following variable in the /etc/exim4/update-exim4.conf file:
dc_use_split_config='true'
4.1.4. Mailman
To install Mailman, run following command at a terminal prompt:
17 http://lists.ubuntu.com](https://image.slidesharecdn.com/serverguideubuntu1110-141006055509-conversion-gate02/75/Serverguide-ubuntu11-10-206-2048.jpg)
![Email Services
206
5. Mail Filtering
One of the largest issues with email today is the problem of Unsolicited Bulk Email (UBE). Also
known as SPAM, such messages may also carry viruses and other forms of malware. According to
some reports these messages make up the bulk of all email traffic on the Internet.
This section will cover integrating Amavisd-new, Spamassassin, and ClamAV with the Postfix Mail
Transport Agent (MTA). Postfix can also check email validity by passing it through external content
filters. These filters can sometimes determine if a message is spam without needing to process it with
more resource intensive applications. Two common filters are opendkim and python-policyd-spf.
• Amavisd-new is a wrapper program that can call any number of content filtering programs for spam
detection, antivirus, etc.
• Spamassassin uses a variety of mechanisms to filter email based on the message content.
• ClamAV is an open source antivirus application.
• opendkim implements a Sendmail Mail Filter (Milter) for the DomainKeys Identified Mail (DKIM)
standard.
• python-policyd-spf enables Sender Policy Framework (SPF) checking with Postfix.
This is how the pieces fit together:
• An email message is accepted by Postfix.
• The message is passed through any external filters opendkim and python-policyd-spf in this case.
• Amavisd-new then processes the message.
• ClamAV is used to scan the message. If the message contains a virus Postfix will reject the
message.
• Clean messages will then be analyzed by Spamassassin to find out if the message is spam.
Spamassassin will then add X-Header lines allowing Amavisd-new to further manipulate the
message.
For example, if a message has a Spam score of over fifty the message could be automatically dropped
from the queue without the recipient ever having to be bothered. Another, way to handle flagged
messages is to deliver them to the Mail User Agent (MUA) allowing the user to deal with the message
as they see fit.
5.1. Installation
See Section 1, “Postfix” [p. 188] for instructions on installing and configuring Postfix.
To install the rest of the applications enter the following from a terminal prompt:
sudo apt-get install amavisd-new spamassassin clamav-daemon
sudo apt-get install opendkim postfix-policyd-spf-python
There are some optional packages that integrate with Spamassassin for better spam detection:](https://image.slidesharecdn.com/serverguideubuntu1110-141006055509-conversion-gate02/75/Serverguide-ubuntu11-10-212-2048.jpg)
![Email Services
209
sudo /etc/init.d/amavis restart
5.2.3.1. DKIM Whitelist
Amavisd-new can be configured to automatically Whitelist addresses from domains with
valid Domain Keys. There are some pre-configured domains in the /etc/amavis/conf.d/40-
policy_banks.
There are multiple ways to configure the Whitelist for a domain:
• 'example.com' => 'WHITELIST',: will whitelist any address from the "example.com" domain.
• '.example.com' => 'WHITELIST',: will whitelist any address from any subdomains of
"example.com" that have a valid signature.
• '.example.com/@example.com' => 'WHITELIST',: will whitelist subdomains of "example.com" that
use the signature of example.com the parent domain.
• './@example.com' => 'WHITELIST',: adds addresses that have a valid signature from
"example.com". This is usually used for discussion groups that sign their messages.
A domain can also have multiple Whitelist configurations. After editing the file, restart amavisd-new:
sudo /etc/init.d/amavis restart
In this context, once a domain has been added to the Whitelist the message will not receive
any anti-virus or spam filtering. This may or may not be the intended behavior you wish for
a domain.
5.2.4. Postfix
For Postfix integration, enter the following from a terminal prompt:
sudo postconf -e 'content_filter = smtp-amavis:[127.0.0.1]:10024'
Next edit /etc/postfix/master.cf and add the following to the end of the file:
smtp-amavis unix - - - - 2 smtp
-o smtp_data_done_timeout=1200
-o smtp_send_xforward_command=yes
-o disable_dns_lookups=yes
-o max_use=20
127.0.0.1:10025 inet n - - - - smtpd
-o content_filter=
-o local_recipient_maps=
-o relay_recipient_maps=
-o smtpd_restriction_classes=
-o smtpd_delay_reject=no
-o smtpd_client_restrictions=permit_mynetworks,reject](https://image.slidesharecdn.com/serverguideubuntu1110-141006055509-conversion-gate02/75/Serverguide-ubuntu11-10-215-2048.jpg)
![Email Services
-o smtpd_helo_restrictions=
-o smtpd_sender_restrictions=
-o smtpd_recipient_restrictions=permit_mynetworks,reject
-o smtpd_data_restrictions=reject_unauth_pipelining
-o smtpd_end_of_data_restrictions=
-o mynetworks=127.0.0.0/8
-o smtpd_error_sleep_time=0
-o smtpd_soft_error_limit=1001
-o smtpd_hard_error_limit=1000
-o smtpd_client_connection_count_limit=0
-o smtpd_client_connection_rate_limit=0
-o receive_override_options=no_header_body_checks,no_unknown_recipient_checks
Also add the following two lines immediately below the "pickup" transport service:
-o content_filter=
-o receive_override_options=no_header_body_checks
This will prevent messages that are generated to report on spam from being classified as spam.
210
Now restart Postfix:
sudo /etc/init.d/postfix restart
Content filtering with spam and virus detection is now enabled.
5.2.5. Amavisd-new and Spamassassin
When integrating Amavisd-new with Spamassassin, if you choose to disable the bayes filtering by
editing /etc/spamassassin/local.cf and use cron to update the nightly rules, the result can cause a
situation where a large amount of error messages are sent to the amavis user via the amavisd-new cron
job.
There are several ways to handle this situation:
• Configure your MDA to filter messages you do not wish to see.
• Change /usr/sbin/amavisd-new-cronjob to check for use_bayes 0. For example, edit /usr/sbin/
amavisd-new-cronjob and add the following to the top before the test statements:
egrep -q "^[ t]*use_bayes[ t]*0" /etc/spamassassin/local.cf && exit 0
5.3. Testing
First, test that the Amavisd-new SMTP is listening:
telnet localhost 10024
Trying 127.0.0.1...
Connected to localhost.](https://image.slidesharecdn.com/serverguideubuntu1110-141006055509-conversion-gate02/75/Serverguide-ubuntu11-10-216-2048.jpg)
![Email Services
Escape character is '^]'.
220 [127.0.0.1] ESMTP amavisd-new service ready
^]
In the Header of messages that go through the content filter you should see:
X-Spam-Level:
X-Virus-Scanned: Debian amavisd-new at example.com
X-Spam-Status: No, hits=-2.3 tagged_above=-1000.0 required=5.0 tests=AWL, BAYES_00
X-Spam-Level:
Your output will vary, but the important thing is that there are X-Virus-Scanned and X-Spam-
211
Status entries.
5.4. Troubleshooting
The best way to figure out why something is going wrong is to check the log files.
• For instructions on Postfix logging see the Section 1.7, “Troubleshooting” [p. 192] section.
• Amavisd-new uses Syslog to send messages to /var/log/mail.log. The amount of detail can be
increased by adding the $log_level option to /etc/amavis/conf.d/50-user, and setting the value
from 1 to 5.
$log_level = 2;
When the Amavisd-new log output is increased Spamassassin log output is also increased.
• The ClamAV log level can be increased by editing /etc/clamav/clamd.conf and setting the
following option:
LogVerbose true
By default ClamAV will send log messages to /var/log/clamav/clamav.log.
After changing an applications log settings remember to restart the service for the new
settings to take affect. Also, once the issue you are troubleshooting is resolved it is a good
idea to change the log settings back to normal.
5.5. References
For more information on filtering mail see the following links:
• Amavisd-new Documentation22
• ClamAV Documentation23 and ClamAV Wiki24
• Spamassassin Wiki25
• Pyzor Homepage26](https://image.slidesharecdn.com/serverguideubuntu1110-141006055509-conversion-gate02/75/Serverguide-ubuntu11-10-217-2048.jpg)


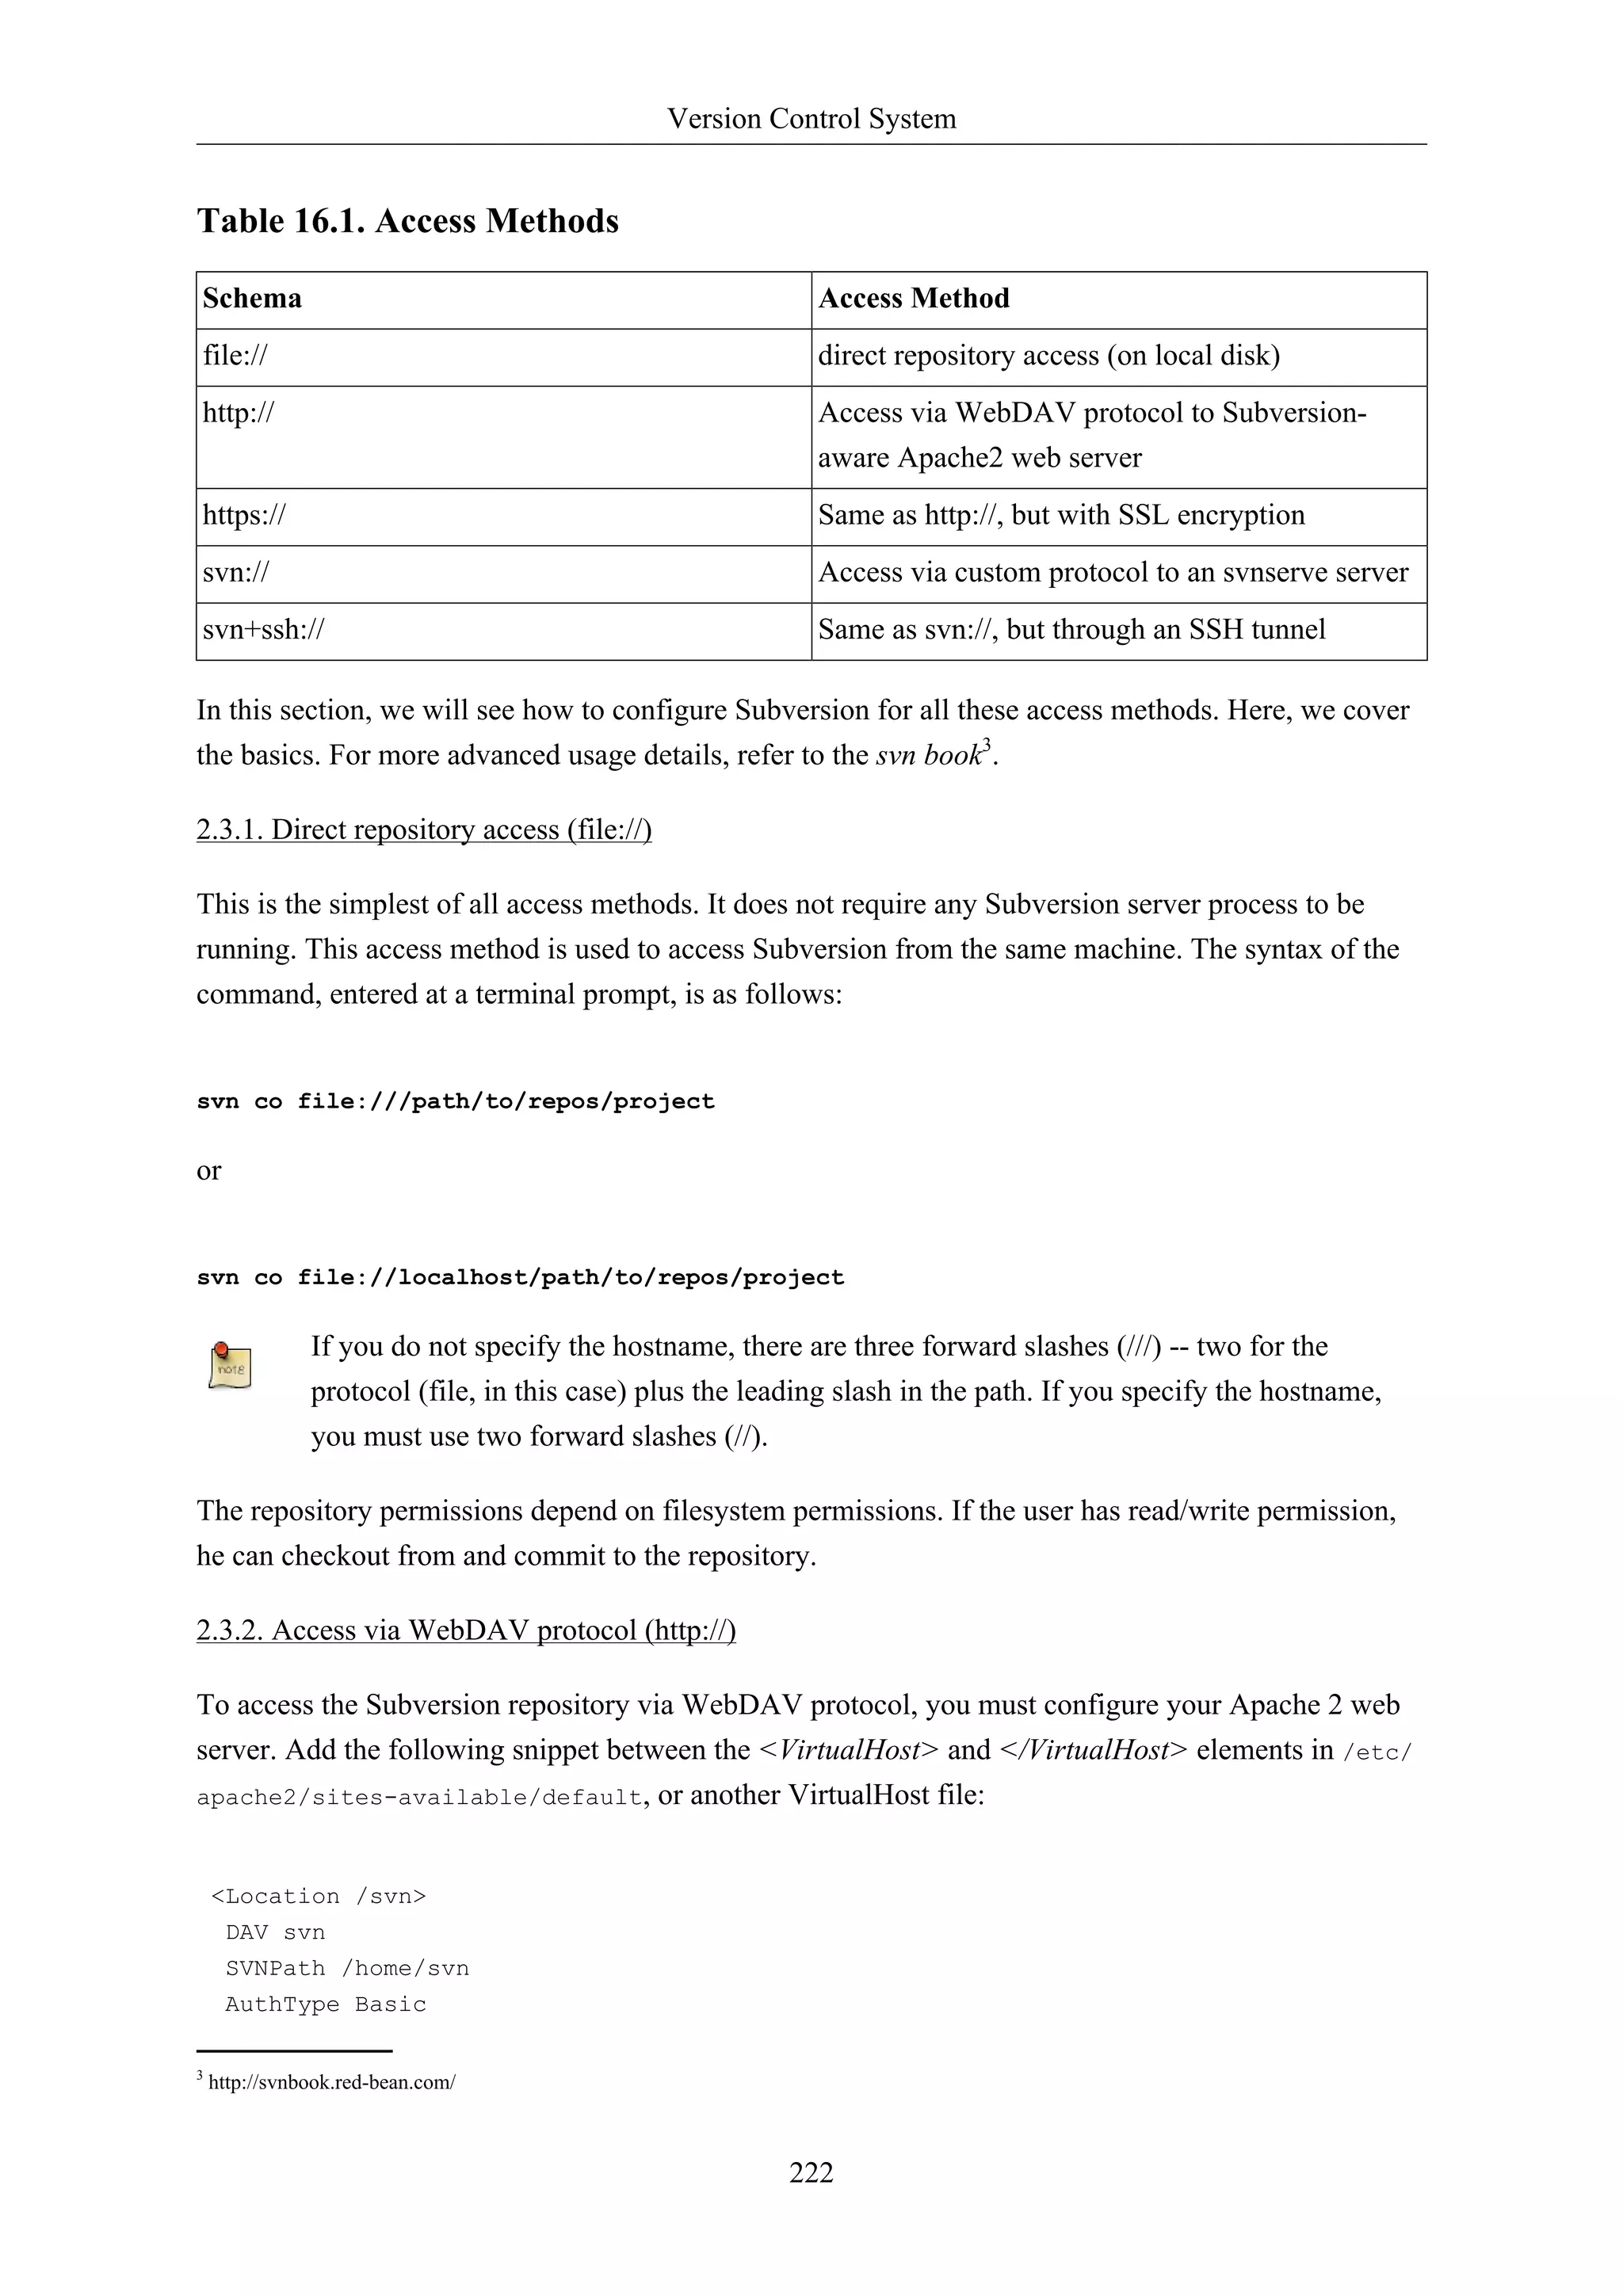
![Version Control System
223
AuthName "Your repository name"
AuthUserFile /etc/subversion/passwd
Require valid-user
</Location>
The above configuration snippet assumes that Subversion repositories are created under
/home/svn/ directory using svnadmin command. They can be accessible using http://
hostname/svn/repos_name url.
To import or commit files to your Subversion repository over HTTP, the repository should be
owned by the HTTP user. In Ubuntu systems, normally the HTTP user is www-data. To change the
ownership of the repository files enter the following command from terminal prompt:
sudo chown -R www-data:www-data /path/to/repos
By changing the ownership of repository as www-data you will not be able to import or
commit files into the repository by running svn import file:/// command as any user other
than www-data.
Next, you must create the /etc/subversion/passwd file that will contain user authentication details.
To create a file issue the following command at a command prompt (which will create the file and add
the first user):
sudo htpasswd -c /etc/subversion/passwd user_name
To add additional users omit the "-c" option as this option replaces the old file. Instead use this form:
sudo htpasswd /etc/subversion/passwd user_name
This command will prompt you to enter the password. Once you enter the password, the user is added.
Now, to access the repository you can run the following command:
svn co http://servername/svn
The password is transmitted as plain text. If you are worried about password snooping, you
are advised to use SSL encryption. For details, please refer next section.
2.3.3. Access via WebDAV protocol with SSL encryption (https://)
Accessing Subversion repository via WebDAV protocol with SSL encryption (https://) is similar
to http:// except that you must install and configure the digital certificate in your Apache2 web
server. To use SSL with Subversion add the above Apache2 configuration to /etc/apache2/sites-available/
default-ssl. For more information on setting up Apache2 with SSL see Section 1.3,
“HTTPS Configuration” [p. 149].
You can install a digital certificate issued by a signing authority. Alternatively, you can install your
own self-signed certificate.](https://image.slidesharecdn.com/serverguideubuntu1110-141006055509-conversion-gate02/75/Serverguide-ubuntu11-10-229-2048.jpg)
![Version Control System
This step assumes you have installed and configured a digital certificate in your Apache 2 web server.
Now, to access the Subversion repository, please refer to the above section! The access methods are
exactly the same, except the protocol. You must use https:// to access the Subversion repository.
224
2.3.4. Access via custom protocol (svn://)
Once the Subversion repository is created, you can configure the access control. You can edit the /
path/to/repos/project/conf/svnserve.conf file to configure the access control. For example, to
set up authentication, you can uncomment the following lines in the configuration file:
# [general]
# password-db = passwd
After uncommenting the above lines, you can maintain the user list in the passwd file. So, edit the file
passwd in the same directory and add the new user. The syntax is as follows:
username = password
For more details, please refer to the file.
Now, to access Subversion via the svn:// custom protocol, either from the same machine or a different
machine, you can run svnserver using svnserve command. The syntax is as follows:
$ svnserve -d --foreground -r /path/to/repos
# -d -- daemon mode
# --foreground -- run in foreground (useful for debugging)
# -r -- root of directory to serve
For more usage details, please refer to:
$ svnserve --help
Once you run this command, Subversion starts listening on default port (3690). To access the project
repository, you must run the following command from a terminal prompt:
svn co svn://hostname/project project --username user_name
Based on server configuration, it prompts for password. Once you are authenticated, it checks out
the code from Subversion repository. To synchronize the project repository with the local copy, you
can run the update sub-command. The syntax of the command, entered at a terminal prompt, is as
follows:
cd project_dir ; svn update
For more details about using each Subversion sub-command, you can refer to the manual. For
example, to learn more about the co (checkout) command, please run the following command from a
terminal prompt:
svn co help](https://image.slidesharecdn.com/serverguideubuntu1110-141006055509-conversion-gate02/75/Serverguide-ubuntu11-10-230-2048.jpg)
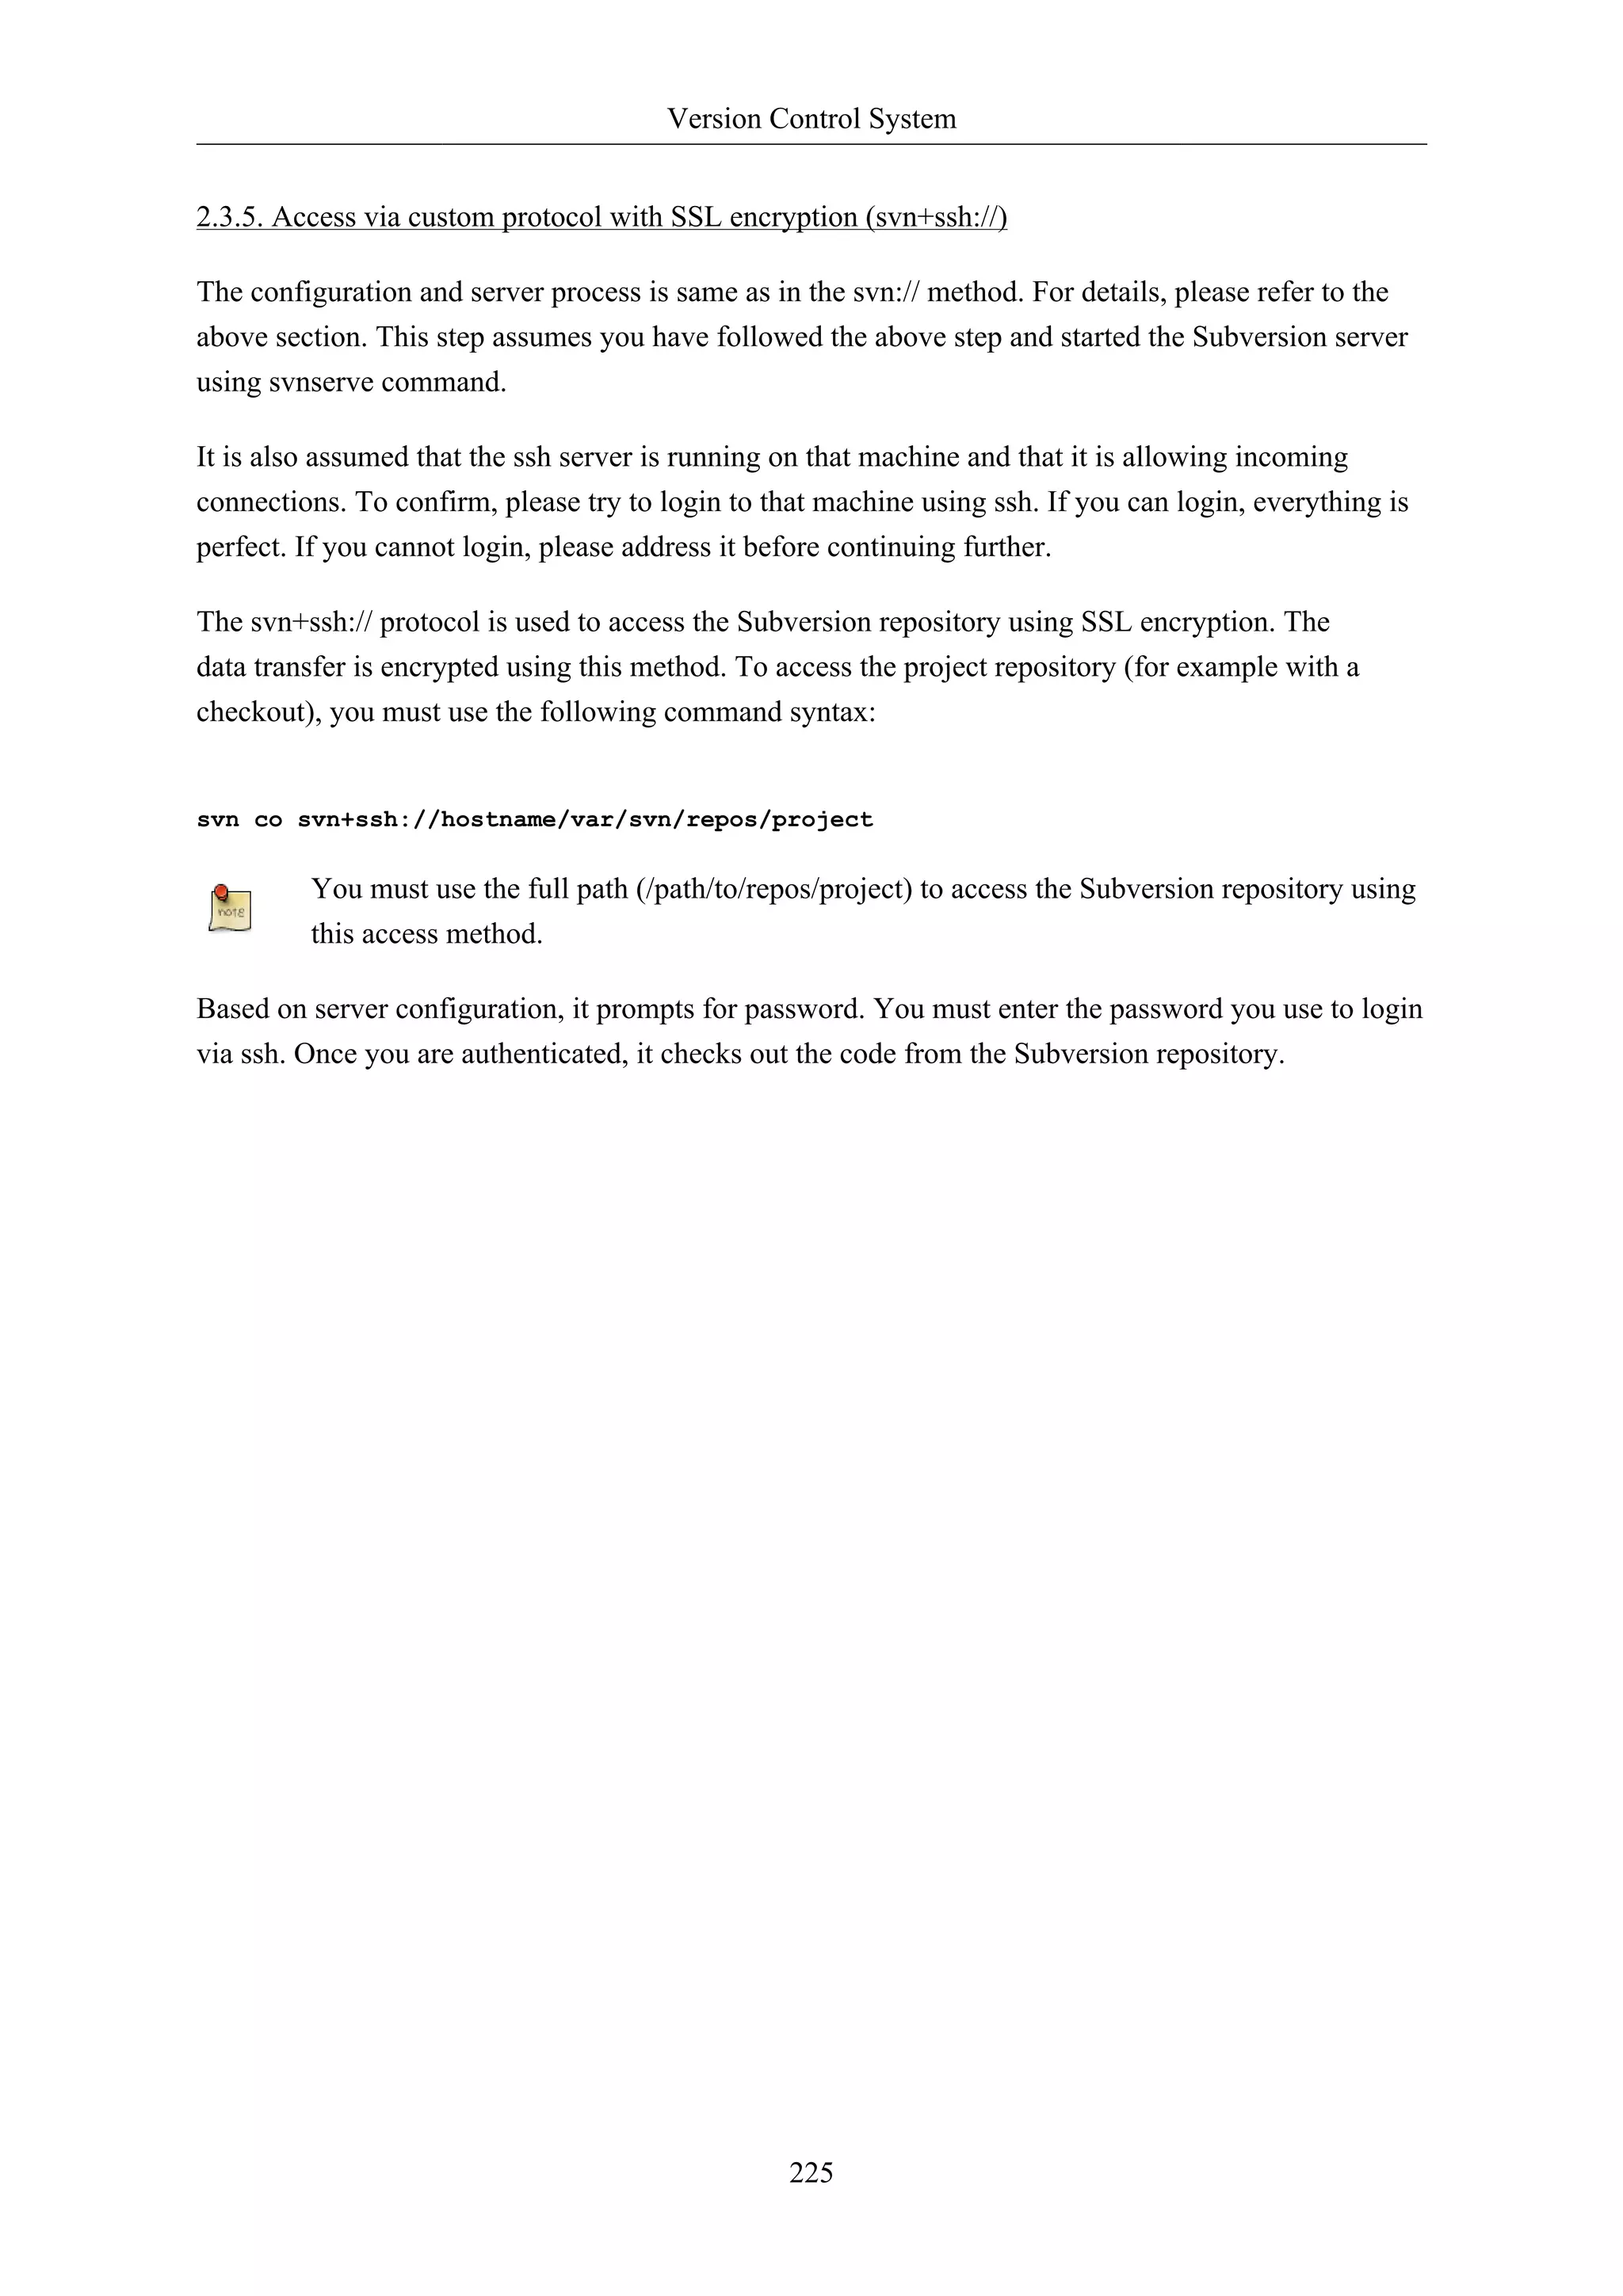

![Windows Networking
231
2. Samba File Server
One of the most common ways to network Ubuntu and Windows computers is to configure Samba as
a File Server. This section covers setting up a Samba server to share files with Windows clients.
The server will be configured to share files with any client on the network without prompting for a
password. If your environment requires stricter Access Controls see Section 4, “Securing a Samba
File and Print Server” [p. 236]
2.1. Installation
The first step is to install the samba package. From a terminal prompt enter:
sudo apt-get install samba
That's all there is to it; you are now ready to configure Samba to share files.
2.2. Configuration
The main Samba configuration file is located in /etc/samba/smb.conf. The default configuration file
has a significant amount of comments in order to document various configuration directives.
Not all the available options are included in the default configuration file. See the smb.conf
man page or the Samba HOWTO Collection2 for more details.
1. First, edit the following key/value pairs in the [global] section of /etc/samba/smb.conf:
workgroup = EXAMPLE
...
security = user
The security parameter is farther down in the [global] section, and is commented by default.
Also, change EXAMPLE to better match your environment.
2. Create a new section at the bottom of the file, or uncomment one of the examples, for the
directory to be shared:
[share]
comment = Ubuntu File Server Share
path = /srv/samba/share
browsable = yes
guest ok = yes
read only = no
create mask = 0755
• comment: a short description of the share. Adjust to fit your needs.](https://image.slidesharecdn.com/serverguideubuntu1110-141006055509-conversion-gate02/75/Serverguide-ubuntu11-10-237-2048.jpg)
![Windows Networking
232
• path: the path to the directory to share.
This example uses /srv/samba/sharename because, according to the Filesystem Hierarchy
Standard (FHS), /srv3 is where site-specific data should be served. Technically Samba shares
can be placed anywhere on the filesystem as long as the permissions are correct, but adhering
to standards is recommended.
• browsable: enables Windows clients to browse the shared directory using Windows Explorer.
• guest ok: allows clients to connect to the share without supplying a password.
• read only: determines if the share is read only or if write privileges are granted. Write
privileges are allowed only when the value is no, as is seen in this example. If the value is yes,
then access to the share is read only.
• create mask: determines the permissions new files will have when created.
3. Now that Samba is configured, the directory needs to be created and the permissions changed.
From a terminal enter:
sudo mkdir -p /srv/samba/share
sudo chown nobody.nogroup /srv/samba/share/
The -p switch tells mkdir to create the entire directory tree if it doesn't exist.
4. Finally, restart the samba services to enable the new configuration:
sudo restart smbd
sudo restart nmbd
Once again, the above configuration gives all access to any client on the local network. For
a more secure configuration see Section 4, “Securing a Samba File and Print Server” [p.
236].
From a Windows client you should now be able to browse to the Ubuntu file server and see the shared
directory. If your client doesn't show your share automatically, try to access your server by its IP
address, e.g. 192.168.1.1, in a Windows Explorer window. To check that everything is working try
creating a directory from Windows.
To create additional shares simply create new [dir] sections in /etc/samba/smb.conf, and restart
Samba. Just make sure that the directory you want to share actually exists and the permissions are
correct.
The file share named "[share]" and the path /srv/samba/share are just examples. Adjust
the share and path names to fit your environment. It is a good idea to name a share after a
directory on the file system. Another example would be a share name of [qa] with a path of
/srv/samba/qa.](https://image.slidesharecdn.com/serverguideubuntu1110-141006055509-conversion-gate02/75/Serverguide-ubuntu11-10-238-2048.jpg)

![Windows Networking
234
3. Samba Print Server
Another common use of Samba is to configure it to share printers installed, either locally or over
the network, on an Ubuntu server. Similar to Section 2, “Samba File Server” [p. 231] this section
will configure Samba to allow any client on the local network to use the installed printers without
prompting for a username and password.
For a more secure configuration see Section 4, “Securing a Samba File and Print Server” [p. 236].
3.1. Installation
Before installing and configuring Samba it is best to already have a working CUPS installation. See
Section 4, “CUPS - Print Server” [p. 184] for details.
To install the samba package, from a terminal enter:
sudo apt-get install samba
3.2. Configuration
After installing samba edit /etc/samba/smb.conf. Change the workgroup attribute to what is
appropriate for your network, and change security to user:
workgroup = EXAMPLE
...
security = user
In the [printers] section change the guest ok option to yes:
browsable = yes
guest ok = yes
After editing smb.conf restart Samba:
sudo restart smbd
sudo restart nmbd
The default Samba configuration will automatically share any printers installed. Simply install the
printer locally on your Windows clients.
3.3. Resources
• For in depth Samba configurations see the Samba HOWTO Collection8
• The guide is also available in printed format9.
• O'Reilly's Using Samba10 is another good reference.](https://image.slidesharecdn.com/serverguideubuntu1110-141006055509-conversion-gate02/75/Serverguide-ubuntu11-10-240-2048.jpg)

![Windows Networking
4. Securing a Samba File and Print Server
236
4.1. Samba Security Modes
There are two security levels available to the Common Internet Filesystem (CIFS) network protocol
user-level and share-level. Samba's security mode implementation allows more flexibility, providing
four ways of implementing user-level security and one way to implement share-level:
• security = user: requires clients to supply a username and password to connect to shares. Samba
user accounts are separate from system accounts, but the libpam-smbpass package will sync system
users and passwords with the Samba user database.
• security = domain: this mode allows the Samba server to appear to Windows clients as a Primary
Domain Controller (PDC), Backup Domain Controller (BDC), or a Domain Member Server
(DMS). See Section 5, “Samba as a Domain Controller” [p. 240] for further information.
• security = ADS: allows the Samba server to join an Active Directory domain as a native member.
See Section 6, “Samba Active Directory Integration” [p. 244] for details.
• security = server: this mode is left over from before Samba could become a member server, and
due to some security issues should not be used. See the Server Security13 section of the Samba
guide for more details.
• security = share: allows clients to connect to shares without supplying a username and password.
The security mode you choose will depend on your environment and what you need the Samba server
to accomplish.
4.2. Security = User
This section will reconfigure the Samba file and print server, from Section 2, “Samba File Server” [p.
231] and Section 3, “Samba Print Server” [p. 234], to require authentication.
First, install the libpam-smbpass package which will sync the system users to the Samba user
database:
sudo apt-get install libpam-smbpass
If you chose the Samba Server task during installation libpam-smbpass is already installed.
Edit /etc/samba/smb.conf, and in the [share] section change:
guest ok = no
Finally, restart Samba for the new settings to take effect:](https://image.slidesharecdn.com/serverguideubuntu1110-141006055509-conversion-gate02/75/Serverguide-ubuntu11-10-242-2048.jpg)
![Windows Networking
237
sudo restart smbd
sudo restart nmbd
Now when connecting to the shared directories or printers you should be prompted for a username
and password.
If you choose to map a network drive to the share you can check the “Reconnect at Logon”
check box, which will require you to only enter the username and password once, at least
until the password changes.
4.3. Share Security
There are several options available to increase the security for each individual shared directory. Using
the [share] example, this section will cover some common options.
4.3.1. Groups
Groups define a collection of computers or users which have a common level of access to particular
network resources and offer a level of granularity in controlling access to such resources. For
example, if a group qa is defined and contains the users freda, danika, and rob and a second group
support is defined and consists of users danika, jeremy, and vincent then certain network resources
configured to allow access by the qa group will subsequently enable access by freda, danika, and rob,
but not jeremy or vincent. Since the user danika belongs to both the qa and support groups, she will
be able to access resources configured for access by both groups, whereas all other users will have
only access to resources explicitly allowing the group they are part of.
By default Samba looks for the local system groups defined in /etc/group to determine which
users belong to which groups. For more information on adding and removing users from groups see
Section 1.2, “Adding and Deleting Users” [p. 111].
When defining groups in the Samba configuration file, /etc/samba/smb.conf, the recognized syntax
is to preface the group name with an "@" symbol. For example, if you wished to define a group
named sysadmin in a certain section of the /etc/samba/smb.conf, you would do so by entering the
group name as @sysadmin.
4.3.2. File Permissions
File Permissions define the explicit rights a computer or user has to a particular directory, file, or set
of files. Such permissions may be defined by editing the /etc/samba/smb.conf file and specifying
the explicit permissions of a defined file share.
For example, if you have defined a Samba share called share and wish to give read-only permissions
to the group of users known as qa, but wanted to allow writing to the share by the group called
sysadmin and the user named vincent, then you could edit the /etc/samba/smb.conf file, and add the
following entries under the [share] entry:](https://image.slidesharecdn.com/serverguideubuntu1110-141006055509-conversion-gate02/75/Serverguide-ubuntu11-10-243-2048.jpg)
![Windows Networking
238
read list = @qa
write list = @sysadmin, vincent
Another possible Samba permission is to declare administrative permissions to a particular shared
resource. Users having administrative permissions may read, write, or modify any information
contained in the resource the user has been given explicit administrative permissions to.
For example, if you wanted to give the user melissa administrative permissions to the share example,
you would edit the /etc/samba/smb.conf file, and add the following line under the [share] entry:
admin users = melissa
After editing /etc/samba/smb.conf, restart Samba for the changes to take effect:
sudo restart smbd
sudo restart nmbd
For the read list and write list to work the Samba security mode must not be set to security =
share
Now that Samba has been configured to limit which groups have access to the shared directory, the
filesystem permissions need to be updated.
Traditional Linux file permissions do not map well to Windows NT Access Control Lists (ACLs).
Fortunately POSIX ACLs are available on Ubuntu servers providing more fine grained control. For
example, to enable ACLs on /srv an EXT3 filesystem, edit /etc/fstab adding the acl option:
UUID=66bcdd2e-8861-4fb0-b7e4-e61c569fe17d /srv ext3 noatime,relatime,acl 0 1
Then remount the partition:
sudo mount -v -o remount /srv
The above example assumes /srv on a separate partition. If /srv, or wherever you have
configured your share path, is part of the / partition a reboot may be required.
To match the Samba configuration above the sysadmin group will be given read, write, and execute
permissions to /srv/samba/share, the qa group will be given read and execute permissions, and the
files will be owned by the username melissa. Enter the following in a terminal:
sudo chown -R melissa /srv/samba/share/
sudo chgrp -R sysadmin /srv/samba/share/
sudo setfacl -R -m g:qa:rx /srv/samba/share/
The setfacl command above gives execute permissions to all files in the /srv/samba/share
directory, which you may or may not want.](https://image.slidesharecdn.com/serverguideubuntu1110-141006055509-conversion-gate02/75/Serverguide-ubuntu11-10-244-2048.jpg)
![Windows Networking
Now from a Windows client you should notice the new file permissions are implemented. See the acl
and setfacl man pages for more information on POSIX ACLs.
4.4. Samba AppArmor Profile
Ubuntu comes with the AppArmor security module, which provides mandatory access controls. The
default AppArmor profile for Samba will need to be adapted to your configuration. For more details
on using AppArmor see Section 4, “AppArmor” [p. 124].
There are default AppArmor profiles for /usr/sbin/smbd and /usr/sbin/nmbd, the Samba daemon
binaries, as part of the apparmor-profiles packages. To install the package, from a terminal prompt
enter:
sudo apt-get install apparmor-profiles apparmor-utils
This package contains profiles for several other binaries.
By default the profiles for smbd and nmbd are in complain mode allowing Samba to work without
modifying the profile, and only logging errors. To place the smbd profile into enforce mode, and have
Samba work as expected, the profile will need to be modified to reflect any directories that are shared.
Edit /etc/apparmor.d/usr.sbin.smbd adding information for [share] from the file server example:
239
/srv/samba/share/ r,
/srv/samba/share/** rwkix,
Now place the profile into enforce and reload it:
sudo aa-enforce /usr/sbin/smbd
cat /etc/apparmor.d/usr.sbin.smbd | sudo apparmor_parser -r
You should now be able to read, write, and execute files in the shared directory as normal, and the
smbd binary will have access to only the configured files and directories. Be sure to add entries for
each directory you configure Samba to share. Also, any errors will be logged to /var/log/syslog.
4.5. Resources
• For in depth Samba configurations see the Samba HOWTO Collection14
• The guide is also available in printed format15.
• O'Reilly's Using Samba16 is also a good reference.
• Chapter 1817 of the Samba HOWTO Collection is devoted to security.
• For more information on Samba and ACLs see the Samba ACLs page 18.
• The Ubuntu Wiki Samba 19 page.](https://image.slidesharecdn.com/serverguideubuntu1110-141006055509-conversion-gate02/75/Serverguide-ubuntu11-10-245-2048.jpg)
![Windows Networking
5. Samba as a Domain Controller
Although it cannot act as an Active Directory Primary Domain Controller (PDC), a Samba server
can be configured to appear as a Windows NT4-style domain controller. A major advantage of this
configuration is the ability to centralize user and machine credentials. Samba can also use multiple
backends to store the user information.
5.1. Primary Domain Controller
This section covers configuring Samba as a Primary Domain Controller (PDC) using the default
smbpasswd backend.
1. First, install Samba, and libpam-smbpass to sync the user accounts, by entering the following in
240
a terminal prompt:
sudo apt-get install samba libpam-smbpass
2. Next, configure Samba by editing /etc/samba/smb.conf. The security mode should be set to
user, and the workgroup should relate to your organization:
workgroup = EXAMPLE
...
security = user
3. In the commented “Domains” section add or uncomment the following:
domain logons = yes
logon path = %N%Uprofile
logon drive = H:
logon home = %N%U
logon script = logon.cmd
add machine script = sudo /usr/sbin/useradd -N -g machines -c Machine -d /var/lib/samba -s /If you wish to not use Roaming Profiles leave the logon home and logon path options
commented.
• domain logons: provides the netlogon service causing Samba to act as a domain controller.
• logon path: places the user's Windows profile into their home directory. It is also possible to
configure a [profiles] share placing all profiles under a single directory.
• logon drive: specifies the home directory local path.
• logon home: specifies the home directory location.
• logon script: determines the script to be run locally once a user has logged in. The script needs
to be placed in the [netlogon] share.
• add machine script: a script that will automatically create the Machine Trust Account needed
for a workstation to join the domain.](https://image.slidesharecdn.com/serverguideubuntu1110-141006055509-conversion-gate02/75/Serverguide-ubuntu11-10-246-2048.jpg)
![Windows Networking
In this example the machines group will need to be created using the addgroup utility see
Section 1.2, “Adding and Deleting Users” [p. 111] for details.
4. Uncomment the [homes] share to allow the logon home to be mapped:
241
[homes]
comment = Home Directories
browseable = no
read only = no
create mask = 0700
directory mask = 0700
valid users = %S
5. When configured as a domain controller a [netlogon] share needs to be configured. To enable the
share, uncomment:
[netlogon]
comment = Network Logon Service
path = /srv/samba/netlogon
guest ok = yes
read only = yes
share modes = no
The original netlogon share path is /home/samba/netlogon, but according to the
Filesystem Hierarchy Standard (FHS), /srv20 is the correct location for site-specific data
provided by the system.
6. Now create the netlogon directory, and an empty (for now) logon.cmd script file:
sudo mkdir -p /srv/samba/netlogon
sudo touch /srv/samba/netlogon/logon.cmd
You can enter any normal Windows logon script commands in logon.cmd to customize the
client's environment.
7. Restart Samba to enable the new domain controller:
sudo restart smbd
sudo restart nmbd
8. Lastly, there are a few additional commands needed to setup the appropriate rights.
With root being disabled by default, in order to join a workstation to the domain, a system group
needs to be mapped to the Windows Domain Admins group. Using the net utility, from a terminal
enter:
sudo net groupmap add ntgroup="Domain Admins" unixgroup=sysadmin rid=512 type=d](https://image.slidesharecdn.com/serverguideubuntu1110-141006055509-conversion-gate02/75/Serverguide-ubuntu11-10-247-2048.jpg)
![Windows Networking
Change sysadmin to whichever group you prefer. Also, the user used to join the domain
needs to be a member of the sysadmin group, as well as a member of the system admin
group. The admin group allows sudo use.
If the user does not have Samba credentials yet, you can add them with the smbpasswd
utility, change the sysadmin username appropriately:
242
sudo smbpasswd -a sysadmin
Also, rights need to be explicitly provided to the Domain Admins group to allow the add machine
script (and other admin functions) to work. This is achieved by executing:
net rpc rights grant -U sysadmin "EXAMPLEDomain Admins" SeMachineAccountPrivilege
SePrintOperatorPrivilege SeAddUsersPrivilege SeDiskOperatorPrivilege SeRemoteShutdownPrivilege
9. You should now be able to join Windows clients to the Domain in the same manner as joining
them to an NT4 domain running on a Windows server.
5.2. Backup Domain Controller
With a Primary Domain Controller (PDC) on the network it is best to have a Backup Domain
Controller (BDC) as well. This will allow clients to authenticate in case the PDC becomes
unavailable.
When configuring Samba as a BDC you need a way to sync account information with the PDC. There
are multiple ways of accomplishing this scp, rsync, or by using LDAP as the passdb backend.
Using LDAP is the most robust way to sync account information, because both domain controllers
can use the same information in real time. However, setting up a LDAP server may be overly
complicated for a small number of user and computer accounts. See Section 2, “Samba and
LDAP” [p. 78] for details.
1. First, install samba and libpam-smbpass. From a terminal enter:
sudo apt-get install samba libpam-smbpass
2. Now, edit /etc/samba/smb.conf and uncomment the following in the [global]:
workgroup = EXAMPLE
...
security = user
3. In the commented Domains uncomment or add:
domain logons = yes
domain master = no](https://image.slidesharecdn.com/serverguideubuntu1110-141006055509-conversion-gate02/75/Serverguide-ubuntu11-10-248-2048.jpg)

![Windows Networking
6. Samba Active Directory Integration
244
6.1. Accessing a Samba Share
Another, use for Samba is to integrate into an existing Windows network. Once part of an Active
Directory domain, Samba can provide file and print services to AD users.
The simplest way to join an AD domain is to use Likewise-open. For detailed instructions see the
Likewise Open Installation and Administration Guide27.
Once part of the Active Directory domain, enter the following command in the terminal prompt:
sudo apt-get install samba smbfs smbclient
Next, edit /etc/samba/smb.conf changing:
workgroup = EXAMPLE
...
security = ads
realm = EXAMPLE.COM
...
idmap backend = lwopen
idmap uid = 50-9999999999
idmap gid = 50-9999999999
Restart samba for the new settings to take effect:
sudo restart smbd
sudo restart nmbd
You should now be able to access any Samba shares from a Windows client. However, be sure to give
the appropriate AD users or groups access to the share directory. See Section 4, “Securing a Samba
File and Print Server” [p. 236] for more details.
6.2. Accessing a Windows Share
Now that the Samba server is part of the Active Directory domain you can access any Windows server
shares:
• To mount a Windows file share enter the following in a terminal prompt:
mount.cifs //fs01.example.com/share mount_point
It is also possible to access shares on computers not part of an AD domain, but a username and
password will need to be provided.
27 http://www.likewise.com/resources/documentation_library/manuals/open/likewise-open-guide.html](https://image.slidesharecdn.com/serverguideubuntu1110-141006055509-conversion-gate02/75/Serverguide-ubuntu11-10-250-2048.jpg)
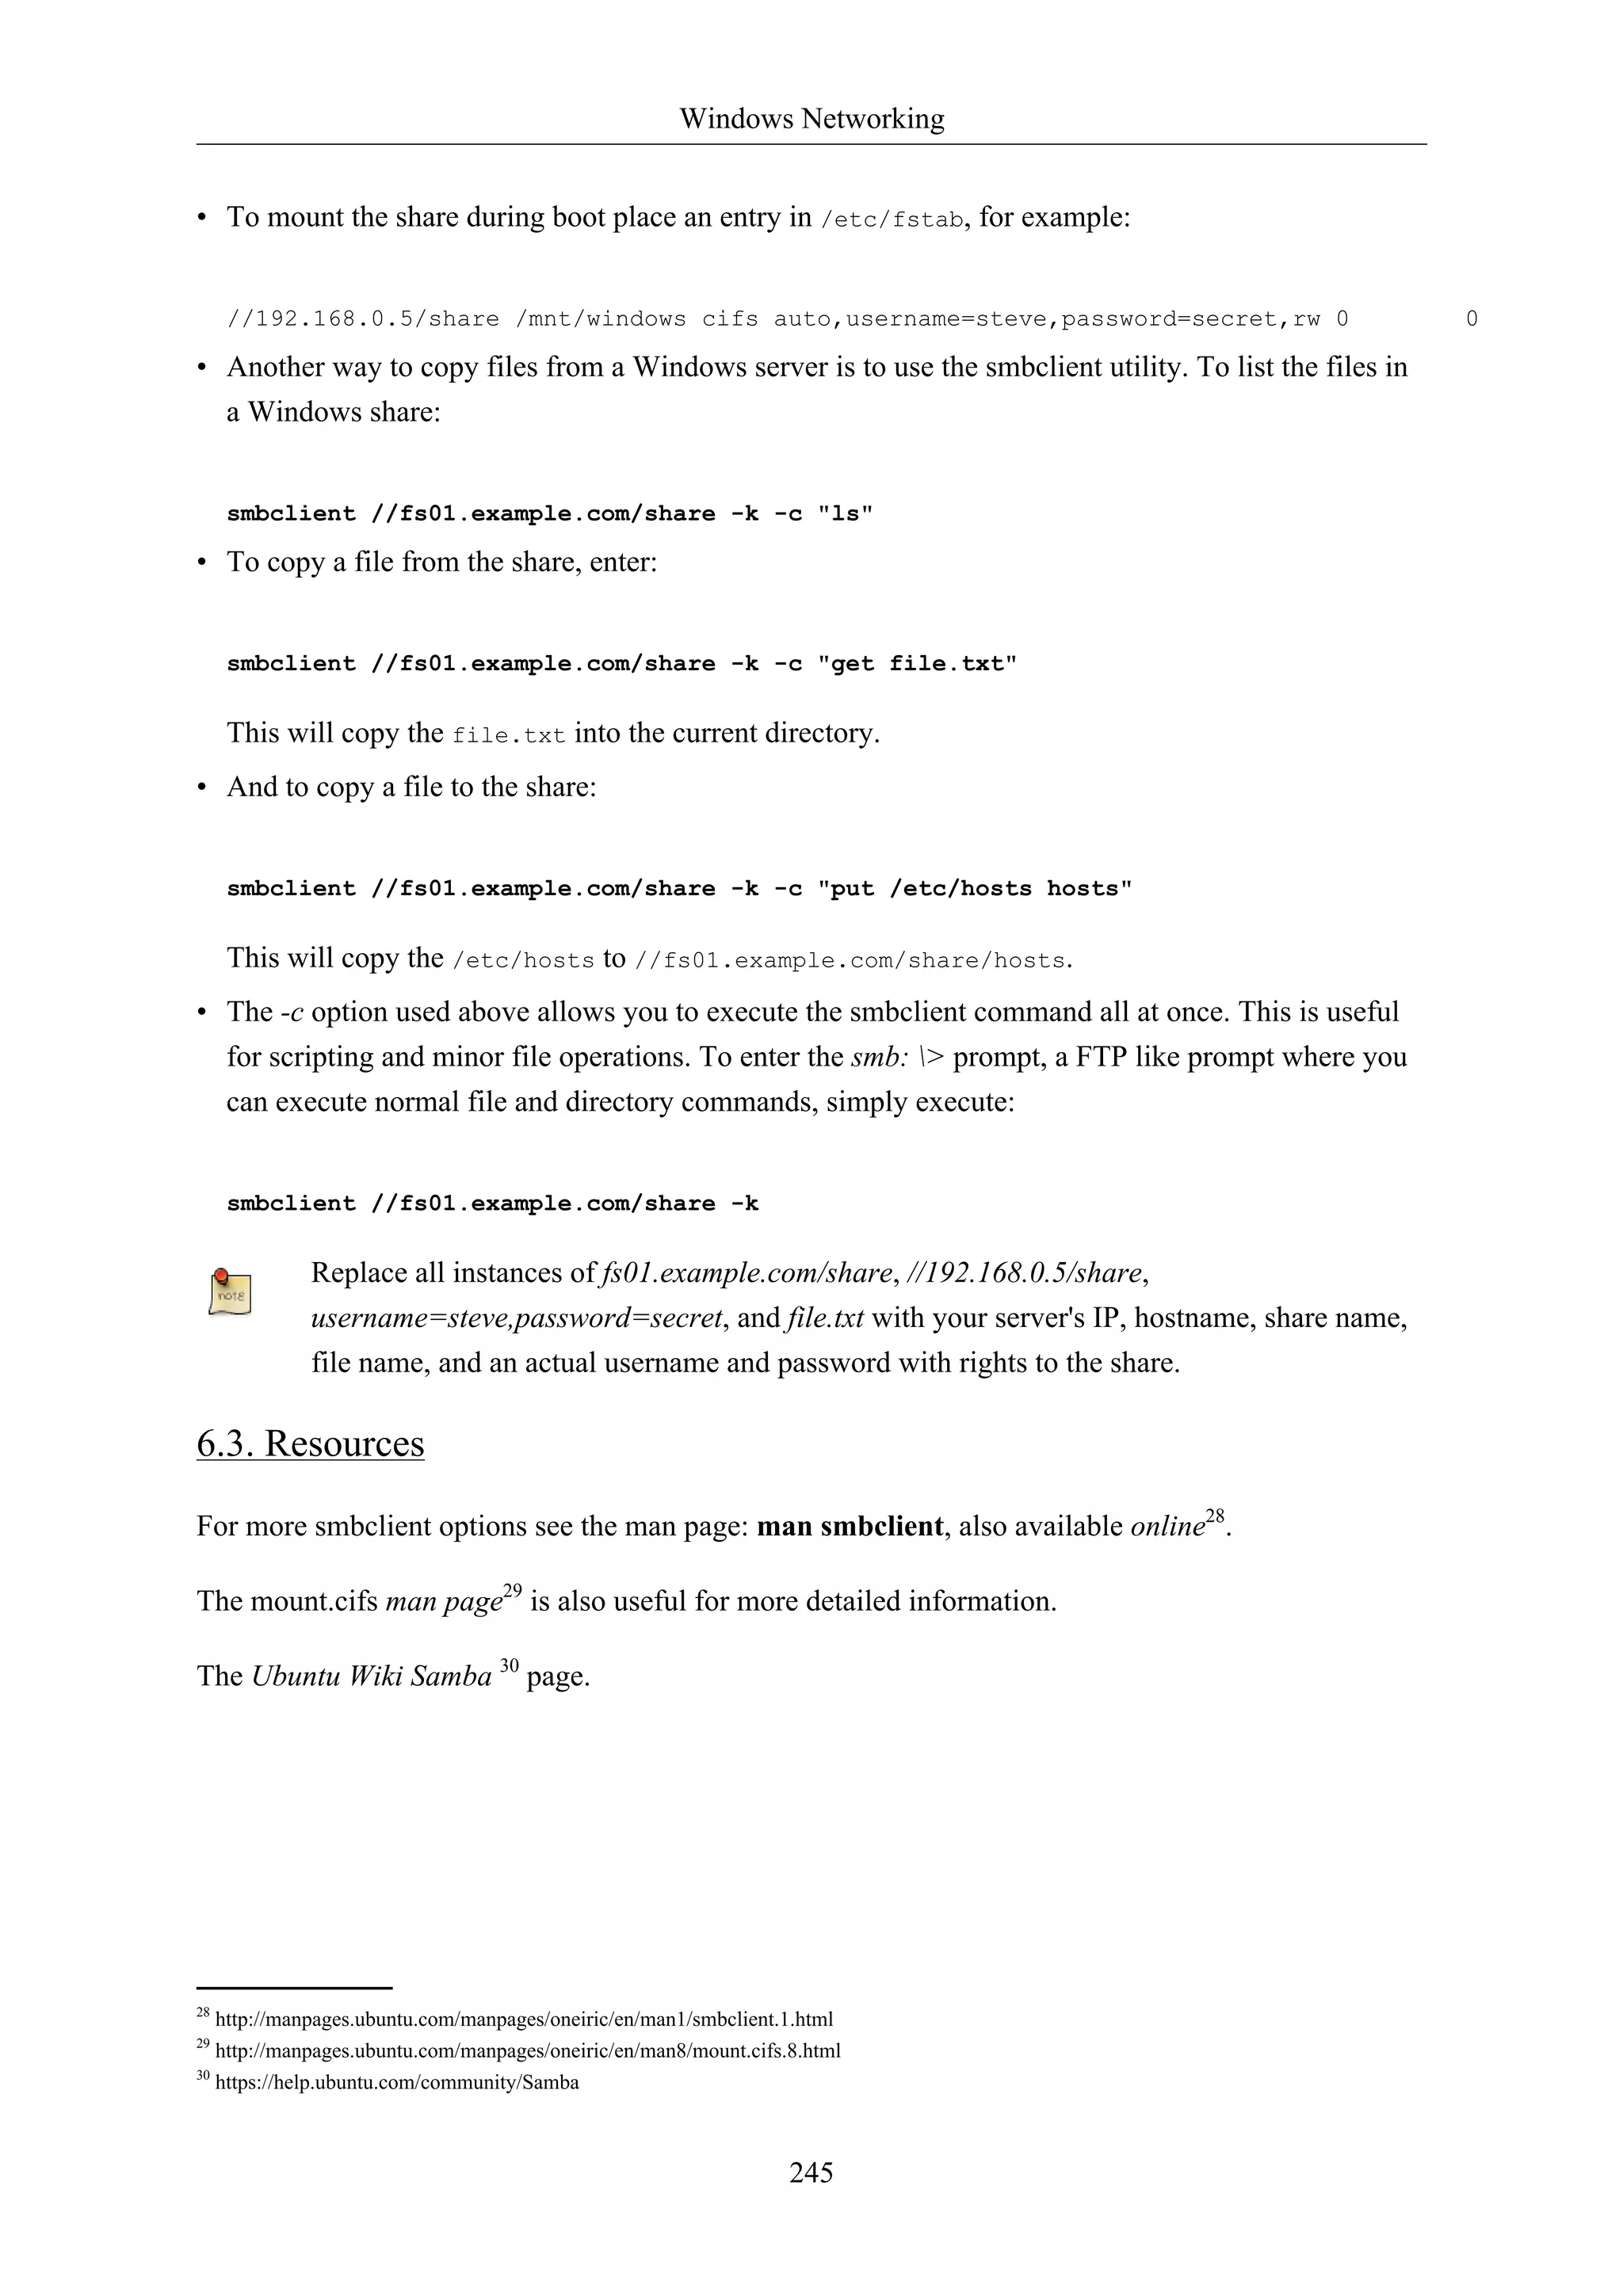


![Backups
• $backup_files: a variable listing which directories you would like to backup. The list should be
customized to fit your needs.
• $day: a variable holding the day of the week (Monday, Tuesday, Wednesday, etc). This is used to
create an archive file for each day of the week, giving a backup history of seven days. There are
other ways to accomplish this including other ways using the date utility.
• $hostname: variable containing the short hostname of the system. Using the hostname in the
archive filename gives you the option of placing daily archive files from multiple systems in the
same directory.
• $archive_file: the full archive filename.
• $dest: destination of the archive file. The directory needs to be created and in this case mounted
before executing the backup script. See Section 2, “Network File System (NFS)” [p. 179] for
details using NFS.
• status messages: optional messages printed to the console using the echo utility.
• tar czf $dest/$archive_file $backup_files: the tar command used to create the archive file.
• c: creates an archive.
• z: filter the archive through the gzip utility compressing the archive.
• f: use archive file. Otherwise the tar output will be sent to STDOUT.
• ls -lh $dest: optional statement prints a -l long listing in -h human readable format of the destination
directory. This is useful for a quick file size check of the archive file. This check should not replace
testing the archive file.
This is a simple example of a backup shell script. There are large amount of options that can be
included in a backup script. See Section 1.4, “References” [p. 250] for links to resources providing
more in depth shell scripting information.
248
1.2. Executing the Script
1.2.1. Executing from a Terminal
The simplest way of executing the above backup script is to copy and paste the contents into a file.
backup.sh for example. Then from a terminal prompt:
sudo bash backup.sh
This is a great way to test the script to make sure everything works as expected.
1.2.2. Executing with cron
The cron utility can be used to automate the script execution. The cron daemon allows the execution
of scripts, or commands, at a specified time and date.
cron is configured through entries in a crontab file. crontab files are separated into fields:](https://image.slidesharecdn.com/serverguideubuntu1110-141006055509-conversion-gate02/75/Serverguide-ubuntu11-10-254-2048.jpg)
![Backups
# m h dom mon dow command
• m: minute the command executes on between 0 and 59.
• h: hour the command executes on between 0 and 23.
• dom: day of month the command executes on.
• mon: the month the command executes on between 1 and 12.
• dow: the day of the week the command executes on between 0 and 7. Sunday may be specified by
using 0 or 7, both values are valid.
• command: the command to execute.
To add or change entries in a crontab file the crontab -e command should be used. Also, the contents
of a crontab file can be viewed using the crontab -l command.
To execute the backup.sh script listed above using cron. Enter the following from a terminal prompt:
249
sudo crontab -e
Using sudo with the crontab -e command edits the root user's crontab. This is necessary if
you are backing up directories only the root user has access to.
Add the following entry to the crontab file:
# m h dom mon dow command
0 0 * * * bash /usr/local/bin/backup.sh
The backup.sh script will now be executed every day at 12:00 am.
The backup.sh script will need to be copied to the /usr/local/bin/ directory in order for
this entry to execute properly. The script can reside anywhere on the file system simply
change the script path appropriately.
For more in depth crontab options see Section 1.4, “References” [p. 250].
1.3. Restoring from the Archive
Once an archive has been created it is important to test the archive. The archive can be tested by
listing the files it contains, but the best test is to restore a file from the archive.
• To see a listing of the archive contents. From a terminal prompt:
tar -tzvf /mnt/backup/host-Monday.tgz
• To restore a file from the archive to a different directory enter:
tar -xzvf /mnt/backup/host-Monday.tgz -C /tmp etc/hosts](https://image.slidesharecdn.com/serverguideubuntu1110-141006055509-conversion-gate02/75/Serverguide-ubuntu11-10-255-2048.jpg)
![Backups
251
2. Archive Rotation
The shell script in section Section 1, “Shell Scripts” [p. 247] only allows for seven different archives.
For a server whose data doesn't change often this may be enough. If the server has a large amount of
data a more robust rotation scheme should be used.
2.1. Rotating NFS Archives
In this section the shell script will be slightly modified to implement a grandfather-father-son rotation
scheme (monthly-weekly-daily):
• The rotation will do a daily backup Sunday through Friday.
• On Saturday a weekly backup is done giving you four weekly backups a month.
• The monthly backup is done on the first of the month rotating two monthly backups based on if the
month is odd or even.
Here is the new script:
#!/bin/bash
####################################
#
# Backup to NFS mount script with
# grandfather-father-son rotation.
#
####################################
# What to backup.
backup_files="/home /var/spool/mail /etc /root /boot /opt"
# Where to backup to.
dest="/mnt/backup"
# Setup variables for the archive filename.
day=$(date +%A)
hostname=$(hostname -s)
# Find which week of the month 1-4 it is.
day_num=$(date +%d)
if (( $day_num <= 7 )); then
week_file="$hostname-week1.tgz"
elif (( $day_num > 7 && $day_num <= 14 )); then
week_file="$hostname-week2.tgz"
elif (( $day_num > 14 && $day_num <= 21 )); then
week_file="$hostname-week3.tgz"
elif (( $day_num > 21 && $day_num < 32 )); then
week_file="$hostname-week4.tgz"
fi](https://image.slidesharecdn.com/serverguideubuntu1110-141006055509-conversion-gate02/75/Serverguide-ubuntu11-10-257-2048.jpg)
![Backups
252
# Find if the Month is odd or even.
month_num=$(date +%m)
month=$(expr $month_num % 2)
if [ $month -eq 0 ]; then
month_file="$hostname-month2.tgz"
else
month_file="$hostname-month1.tgz"
fi
# Create archive filename.
if [ $day_num == 1 ]; then
archive_file=$month_file
elif [ $day != "Saturday" ]; then
archive_file="$hostname-$day.tgz"
else
archive_file=$week_file
fi
# Print start status message.
echo "Backing up $backup_files to $dest/$archive_file"
date
echo
# Backup the files using tar.
tar czf $dest/$archive_file $backup_files
# Print end status message.
echo
echo "Backup finished"
date
# Long listing of files in $dest to check file sizes.
ls -lh $dest/
The script can be executed using the same methods as in Section 1.2, “Executing the Script” [p. 248].
It is good practice to take backup media off site in case of a disaster. In the shell script example the
backup media is another server providing an NFS share. In all likelihood taking the NFS server to
another location would not be practical. Depending upon connection speeds it may be an option to
copy the archive file over a WAN link to a server in another location.
Another option is to copy the archive file to an external hard drive which can then be taken off site.
Since the price of external hard drives continue to decrease it may be cost-effective to use two drives
for each archive level. This would allow you to have one external drive attached to the backup server
and one in another location.
2.2. Tape Drives
A tape drive attached to the server can be used instead of a NFS share. Using a tape drive simplifies
archive rotation, and taking the media off site as well.](https://image.slidesharecdn.com/serverguideubuntu1110-141006055509-conversion-gate02/75/Serverguide-ubuntu11-10-258-2048.jpg)


![Backups
During the install process you will be asked to supply credentials for the database administrator and
the bacula database owner. The database administrator will need to have the appropriate rights to
create a database, see Section 1, “MySQL” [p. 162] for more information.
3.3. Configuration
Bacula configuration files are formatted based on resources comprising of directives surrounded by
“{}” braces. Each Bacula component has an individual file in the /etc/bacula directory.
The various Bacula components must authorize themselves to each other. This is accomplished using
the password directive. For example, the Storage resource password in the /etc/bacula/bacula-dir.
conf file must match the Director resource password in /etc/bacula/bacula-sd.conf.
By default the backup job named Client1 is configured to archive the Bacula Catalog. If you plan on
using the server to backup more than one client you should change the name of this job to something
more descriptive. To change the name edit /etc/bacula/bacula-dir.conf:
#
# Define the main nightly save backup job
# By default, this job will back up to disk in
Job {
Name = "BackupServer"
JobDefs = "DefaultJob"
Write Bootstrap = "/var/lib/bacula/Client1.bsr"
255
}
The example above changes the job name to BackupServer matching the machine's host
name. Replace “BackupServer” with your appropriate hostname, or other descriptive name.
The Console can be used to query the Director about jobs, but to use the Console with a non-root
user, the user needs to be in the bacula group. To add a user to the bacula group enter the following
from a terminal:
sudo adduser $username bacula
Replace $username with the actual username. Also, if you are adding the current user to the
group you should log out and back in for the new permissions to take effect.
3.4. Localhost Backup
This section describes how to backup specified directories on a single host to a local tape drive.
• First, the Storage device needs to be configured. Edit /etc/bacula/bacula-sd.conf add:
Device {
Name = "Tape Drive"
Device Type = tape](https://image.slidesharecdn.com/serverguideubuntu1110-141006055509-conversion-gate02/75/Serverguide-ubuntu11-10-261-2048.jpg)
![Virtualization
260
1. libvirt
The libvirt library is used to interface with different virtualization technologies. Before getting started
with libvirt it is best to make sure your hardware supports the necessary virtualization extensions for
KVM. Enter the following from a terminal prompt:
kvm-ok
A message will be printed informing you if your CPU does or does not support hardware
virtualization.
On most computer whose processor supports virtualization, it is necessary to activate an
option in the BIOS to enable it.
1.1. Virtual Networking
There are a few different ways to allow a virtual machine access to the external network. The default
virtual network configuration is usermode networking, which uses the SLIRP protocol and traffic is
NATed through the host interface to the outside network.
To enable external hosts to directly access services on virtual machines a bridge needs to be
configured. This allows the virtual interfaces to connect to the outside network through the physical
interface, making them appear as normal hosts to the rest of the network. For information on setting
up a bridge see Section 1.4, “Bridging” [p. 36].
1.2. Installation
To install the necessary packages, from a terminal prompt enter:
sudo apt-get install kvm libvirt-bin
After installing libvirt-bin, the user used to manage virtual machines will need to be added to the
libvirtd group. Doing so will grant the user access to the advanced networking options.
In a terminal enter:
sudo adduser $USER libvirtd
If the user chosen is the current user, you will need to log out and back in for the new group
membership to take effect.
You are now ready to install a Guest operating system. Installing a virtual machine follows the same
process as installing the operating system directly on the hardware. You either need a way to automate
the installation, or a keyboard and monitor will need to be attached to the physical machine.](https://image.slidesharecdn.com/serverguideubuntu1110-141006055509-conversion-gate02/75/Serverguide-ubuntu11-10-266-2048.jpg)
![Virtualization
In the case of virtual machines a Graphical User Interface (GUI) is analogous to using a physical
keyboard and mouse. Instead of installing a GUI the virt-viewer application can be used to connect
to a virtual machine's console using VNC. See Section 1.6, “Virtual Machine Viewer” [p. 263] for
more information.
There are several ways to automate the Ubuntu installation process, for example using preseeds,
kickstart, etc. Refer to the Ubuntu Installation Guide1 for details.
Yet another way to install an Ubuntu virtual machine is to use ubuntu-vm-builder. ubuntu-vm-builder
allows you to setup advanced partitions, execute custom post-install scripts, etc. For details see
Section 2, “JeOS and vmbuilder” [p. 265]
261
1.3. virt-install
virt-install is part of the virtinst package. To install it, from a terminal prompt enter:
sudo apt-get install virtinst
There are several options available when using virt-install. For example:
sudo virt-install -n web_devel -r 256
--disk path=/var/lib/libvirt/images/web_devel.img,bus=virtio,size=4 -c jeos.iso --accelerate
--network network=default,model=virtio --connect=qemu:///system --vnc
--noautoconsole -v
• -n web_devel: the name of the new virtual machine will be web_devel in this example.
• -r 256: specifies the amount of memory the virtual machine will use in megabytes.
• --disk path=/var/lib/libvirt/images/web_devel.img,size=4: indicates the path to the virtual disk
which can be a file, partition, or logical volume. In this example a file named web_devel.img in
the /var/lib/libvirt/images/ directory, with a size of 4 gigabytes, and using virtio for the disk bus.
• -c jeos.iso: file to be used as a virtual CDROM. The file can be either an ISO file or the path to the
host's CDROM device.
• --accelerate: enables the kernel's acceleration technologies.
• --network provides details related to the VM's network interface. Here the default network is used,
and the interface model is configured for virtio.
• --vnc: exports the guest's virtual console using VNC.
• --noautoconsole: will not automatically connect to the virtual machine's console.
• -v: creates a fully virtualized guest.
After launching virt-install you can connect to the virtual machine's console either locally using a GUI
or with the virt-viewer utility.
1 https://help.ubuntu.com/11.10/installation-guide/](https://image.slidesharecdn.com/serverguideubuntu1110-141006055509-conversion-gate02/75/Serverguide-ubuntu11-10-267-2048.jpg)
![Virtualization
virsh -c qemu:///system restore web_devel-022708.state
• To shutdown a virtual machine do:
virsh -c qemu:///system shutdown web_devel
• A CDROM device can be mounted in a virtual machine by entering:
virsh -c qemu:///system attach-disk web_devel /dev/cdrom /media/cdrom
In the above examples replace web_devel with the appropriate virtual machine name, and
web_devel-022708.state with a descriptive file name.
263
1.5.2. Virtual Machine Manager
The virt-manager package contains a graphical utility to manage local and remote virtual machines.
To install virt-manager enter:
sudo apt-get install virt-manager
Since virt-manager requires a Graphical User Interface (GUI) environment it is recommended to
be installed on a workstation or test machine instead of a production server. To connect to the local
libvirt service enter:
virt-manager -c qemu:///system
You can connect to the libvirt service running on another host by entering the following in a terminal
prompt:
virt-manager -c qemu+ssh://virtnode1.mydomain.com/system
The above example assumes that SSH connectivity between the management system
and virtnode1.mydomain.com has already been configured, and uses SSH keys for
authentication. SSH keys are needed because libvirt sends the password prompt to another
process. For details on configuring SSH see Section 1, “OpenSSH Server” [p. 47]
1.6. Virtual Machine Viewer
The virt-viewer application allows you to connect to a virtual machine's console. virt-viewer does
require a Graphical User Interface (GUI) to interface with the virtual machine.
To install virt-viewer from a terminal enter:
sudo apt-get install virt-viewer
Once a virtual machine is installed and running you can connect to the virtual machine's console by
using:](https://image.slidesharecdn.com/serverguideubuntu1110-141006055509-conversion-gate02/75/Serverguide-ubuntu11-10-269-2048.jpg)
![Virtualization
264
virt-viewer -c qemu:///system web_devel
Similar to virt-manager, virt-viewer can connect to a remote host using SSH with key authentication,
as well:
virt-viewer -c qemu+ssh://virtnode1.mydomain.com/system web_devel
Be sure to replace web_devel with the appropriate virtual machine name.
If configured to use a bridged network interface you can also setup SSH access to the virtual machine.
See Section 1, “OpenSSH Server” [p. 47] and Section 1.4, “Bridging” [p. 36] for more details.
1.7. Resources
• See the KVM2 home page for more details.
• For more information on libvirt see the libvirt home page3
• The Virtual Machine Manager4 site has more information on virt-manager development.
• Also, stop by the #ubuntu-virt IRC channel on freenode5 to discuss virtualization technology in
Ubuntu.
• Another good resource is the Ubuntu Wiki KVM6 page.](https://image.slidesharecdn.com/serverguideubuntu1110-141006055509-conversion-gate02/75/Serverguide-ubuntu11-10-270-2048.jpg)
![Virtualization
Ubuntu virtualization specialist, not the golf player) decided to rewrite it from scratch for Intrepid as a
python script with a few new design goals:
• Develop it so that it can be reused by other distributions.
• Use a plugin mechanisms for all virtualization interactions so that others can easily add logic for
other virtualization environments.
• Provide an easy to maintain web interface as an option to the command line interface.
But the general principles and commands remain the same.
266
2.2. Initial Setup
It is assumed that you have installed and configured libvirt and KVM locally on the machine you are
using. For details on how to perform this, please refer to:
• Section 1, “libvirt” [p. 260]
• The KVM7 Wiki page.
We also assume that you know how to use a text based text editor such as nano or vi. If you have not
used any of them before, you can get an overview of the various text editors available by reading the
PowerUsersTextEditors8 page. This tutorial has been done on KVM, but the general principle should
remain on other virtualization technologies.
2.2.1. Install vmbuilder
The name of the package that we need to install is python-vm-builder. In a terminal prompt enter:
sudo apt-get install python-vm-builder
If you are running Hardy, you can still perform most of this using the older version of the
package named ubuntu-vm-builder, there are only a few changes to the syntax of the tool.
2.3. Defining Your Virtual Machine
Defining a virtual machine with Ubuntu's vmbuilder is quite simple, but here are a few thing to
consider:
• If you plan on shipping a virtual appliance, do not assume that the end-user will know how to
extend disk size to fit their need, so either plan for a large virtual disk to allow for your appliance to
grow, or explain fairly well in your documentation how to allocate more space. It might actually be
a good idea to store data on some separate external storage.
• Given that RAM is much easier to allocate in a VM, RAM size should be set to whatever you think
is a safe minimum for your appliance.
8 https://help.ubuntu.com/community/PowerUsersTextEditors](https://image.slidesharecdn.com/serverguideubuntu1110-141006055509-conversion-gate02/75/Serverguide-ubuntu11-10-272-2048.jpg)
![Virtualization
• --bcast VALUE: IP broadcast (default: X.X.X.255)
• --gw ADDRESS: Gateway address (default: X.X.X.1)
• --dns ADDRESS: Name server address (default: X.X.X.1)
We assume for now that default values are good enough, so the resulting invocation becomes:
sudo vmbuilder kvm ubuntu --suite oneiric --flavour virtual --arch i386 -o --libvirt qemu:///system 2.3.2.1.2. Bridging
Because our appliance will be likely to need to be accessed by remote hosts, we need to configure
libvirt so that the appliance uses bridge networking. To do this add the --bridge option to the
command:
sudo vmbuilder kvm ubuntu --suite oneiric --flavour virtual --arch i386 -o --libvirt qemu:///system You will need to have previously setup a bridge interface, see Section 1.4, “Bridging” [p.
36] for more information. Also, if the interface name is different change br0 to the actual
bridge interface.
268
2.3.2.2. Partitioning
Partitioning of the virtual appliance will have to take into consideration what you are planning to do
with is. Because most appliances want to have a separate storage for data, having a separate /var
would make sense.
In order to do this vmbuilder provides us with --part:
--part PATH
Allows you to specify a partition table in a partition file, located at PATH. Each line of the partition (root first):
mountpoint size
where size is in megabytes. You can have up to 4 virtual disks, a new disk starts on a
line with ’---’. ie :
root 1000
/opt 1000
swap 256
---
/var 2000
/log 1500
In our case we will define a text file name vmbuilder.partition which will contain the following:
root 8000
swap 4000
---
/var 20000](https://image.slidesharecdn.com/serverguideubuntu1110-141006055509-conversion-gate02/75/Serverguide-ubuntu11-10-274-2048.jpg)
![Virtualization
271
--mirror http://mirroraddress:9999/ubuntu
The mirror address specified here will also be used in the /etc/apt/sources.list of the
newly created guest, so it is useful to specify here an address that can be resolved by the
guest or to plan on reseting this address later on.
2.3.4.2. Install a Local Mirror
If we are in a larger environment, it may make sense to setup a local mirror of the Ubuntu
repositories. The package apt-mirror provides you with a script that will handle the mirroring for you.
You should plan on having about 20 gigabyte of free space per supported release and architecture.
By default, apt-mirror uses the configuration file in /etc/apt/mirror.list. As it is set up, it will
replicate only the architecture of the local machine. If you would like to support other architectures on
your mirror, simply duplicate the lines starting with “deb”, replacing the deb keyword by /deb-{arch}
where arch can be i386, amd64, etc... For example, on an amd64 machine, to have the i386 archives
as well, you will have:
deb http://archive.ubuntu.com/ubuntu oneiric main restricted universe multiverse
/deb-i386 http://archive.ubuntu.com/ubuntu oneiric main restricted universe multiverse
deb http://archive.ubuntu.com/ubuntu oneiric-updates main restricted universe multiverse
/deb-i386 http://archive.ubuntu.com/ubuntu oneiric-updates main restricted universe multiverse
deb http://archive.ubuntu.com/ubuntu/ oneiric-backports main restricted universe multiverse
/deb-i386 http://archive.ubuntu.com/ubuntu oneiric-backports main restricted universe multiverse
deb http://security.ubuntu.com/ubuntu oneiric-security main restricted universe multiverse
/deb-i386 http://security.ubuntu.com/ubuntu oneiric-security main restricted universe multiverse
deb http://archive.ubuntu.com/ubuntu oneiric main/debian-installer restricted/debian-installer universe//deb-i386 http://archive.ubuntu.com/ubuntu oneiric main/debian-installer restricted/debian-installer Notice that the source packages are not mirrored as they are seldom used compared to the binaries and
they do take a lot more space, but they can be easily added to the list.
Once the mirror has finished replicating (and this can be quite long), you need to configure Apache
so that your mirror files (in /var/spool/apt-mirror if you did not change the default), are published
by your Apache server. For more information on Apache see Section 1, “HTTPD - Apache2 Web
Server” [p. 144].
2.4. Package the Application
Two option are available to us:
• The recommended method to do so is to make a Debian package. Since this is outside of the
scope of this tutorial, we will not perform this here and invite the reader to read the documentation](https://image.slidesharecdn.com/serverguideubuntu1110-141006055509-conversion-gate02/75/Serverguide-ubuntu11-10-277-2048.jpg)

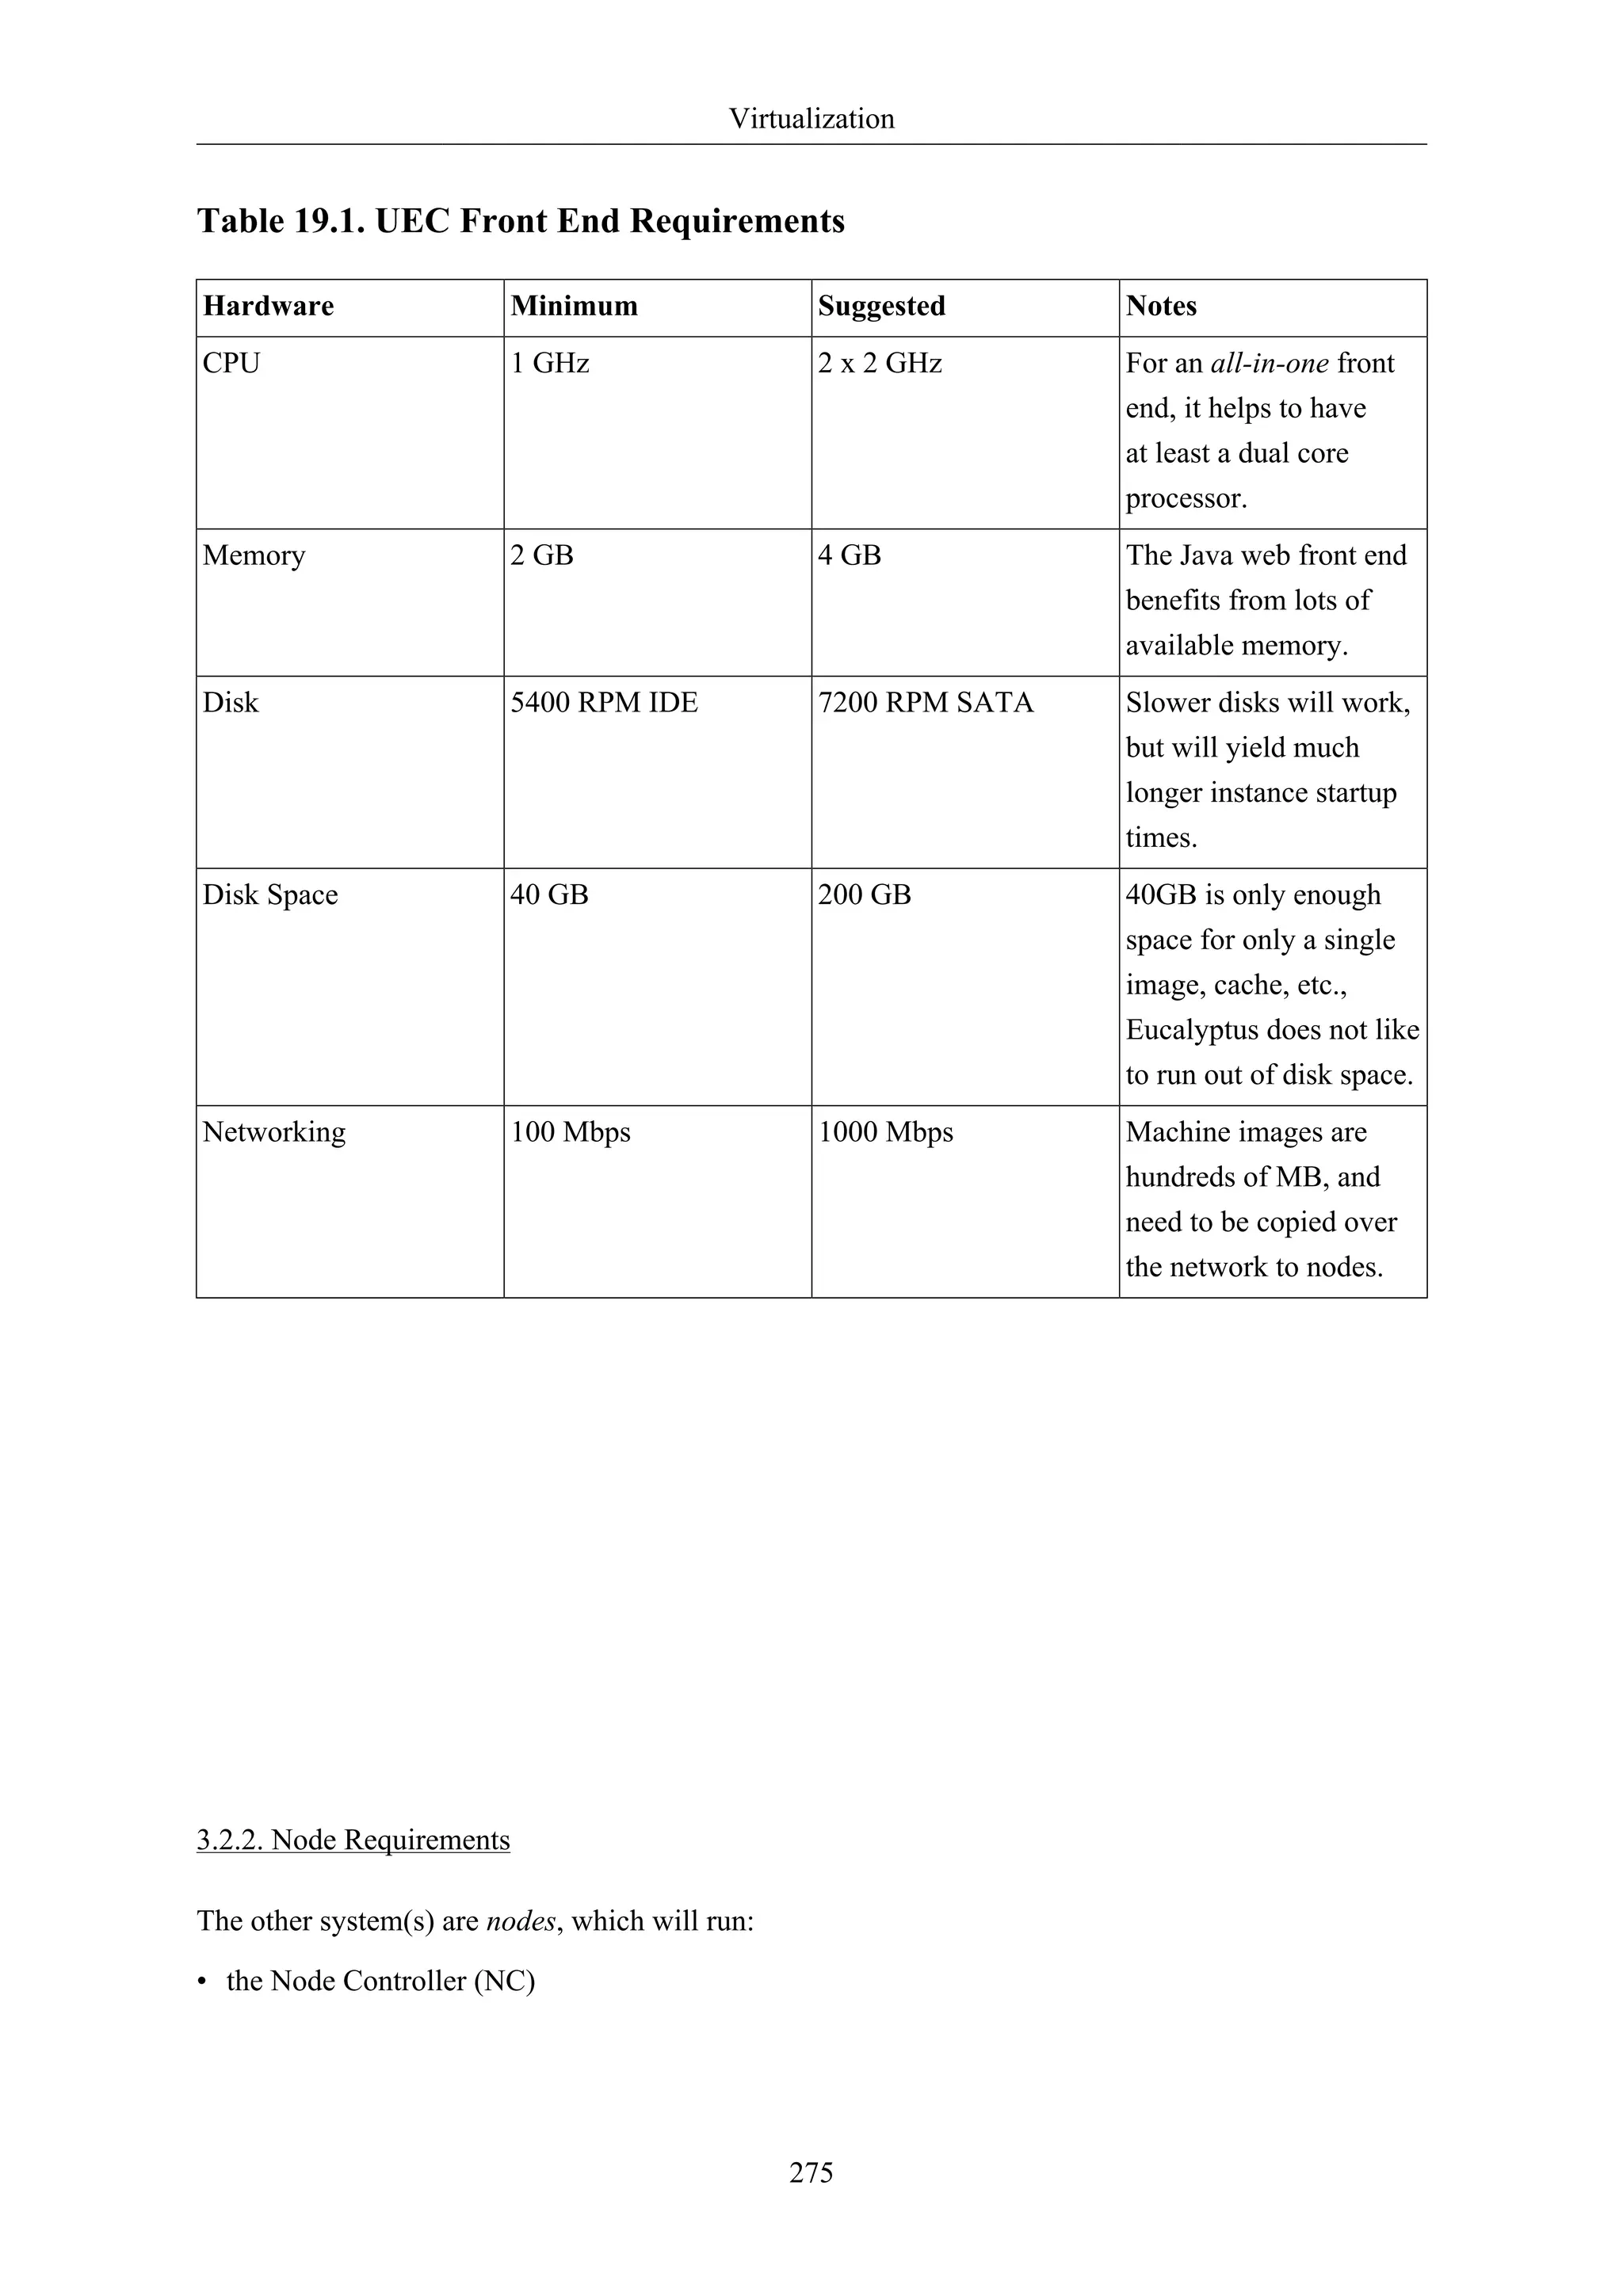

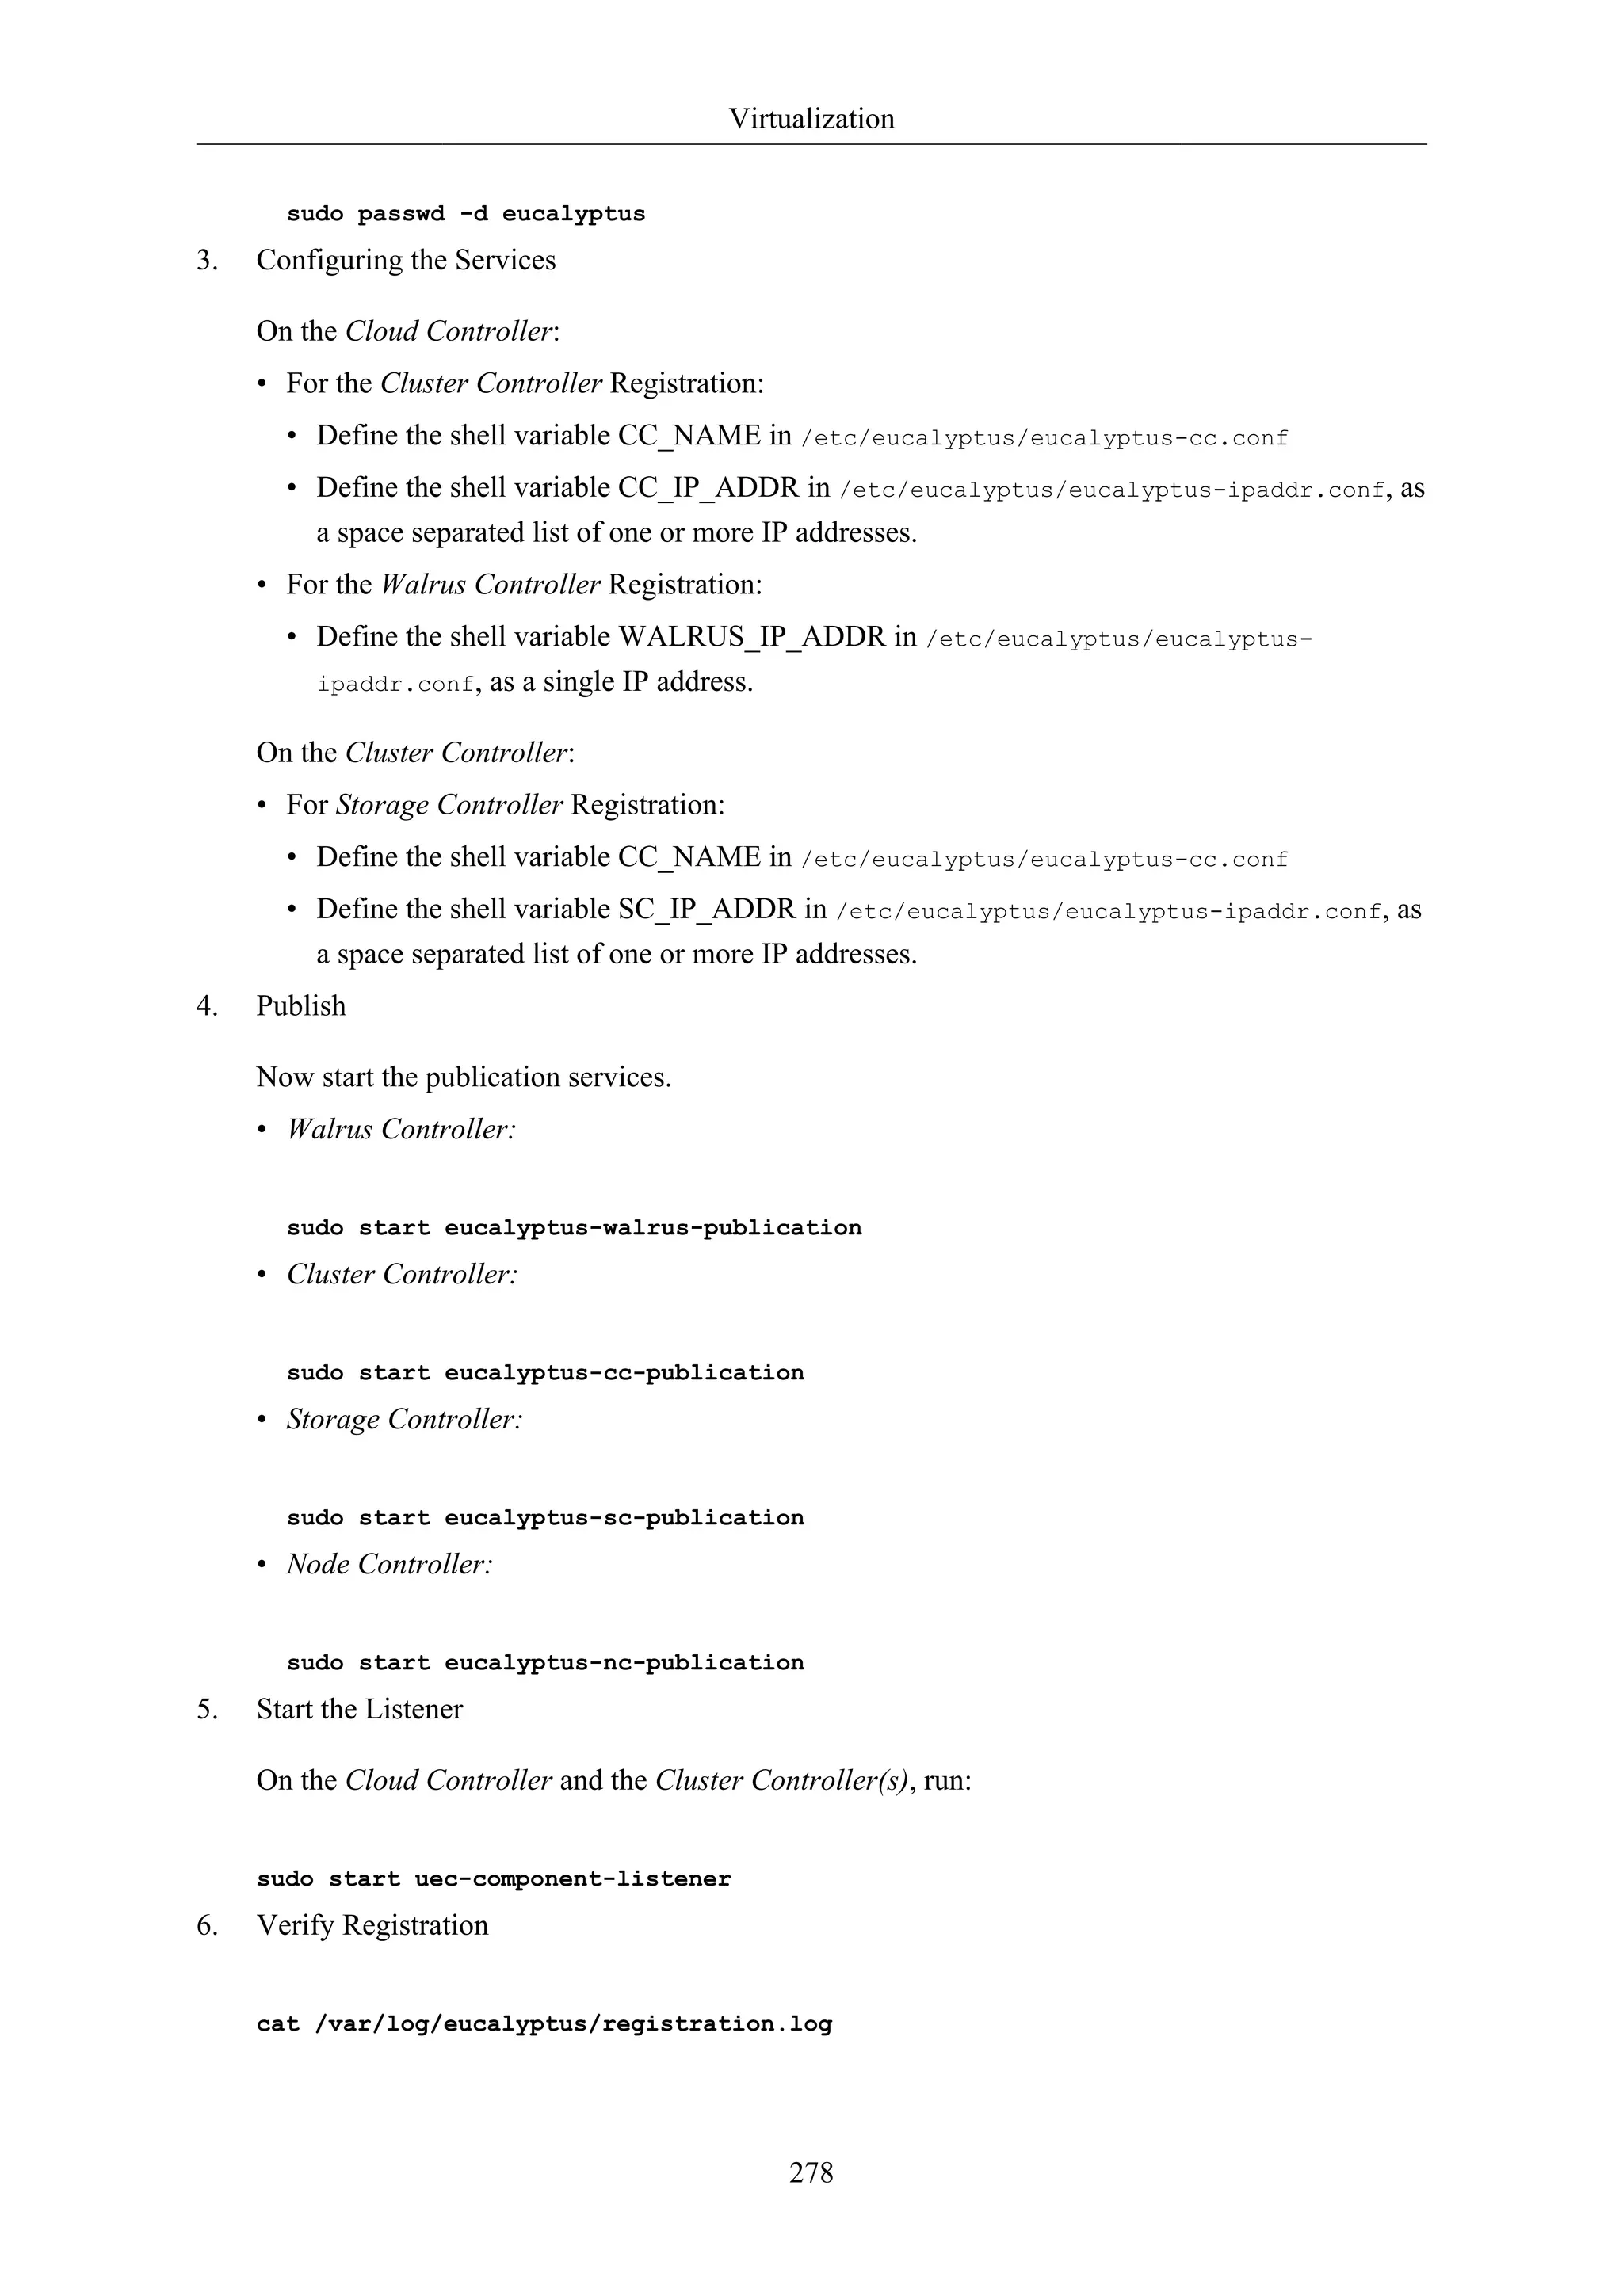
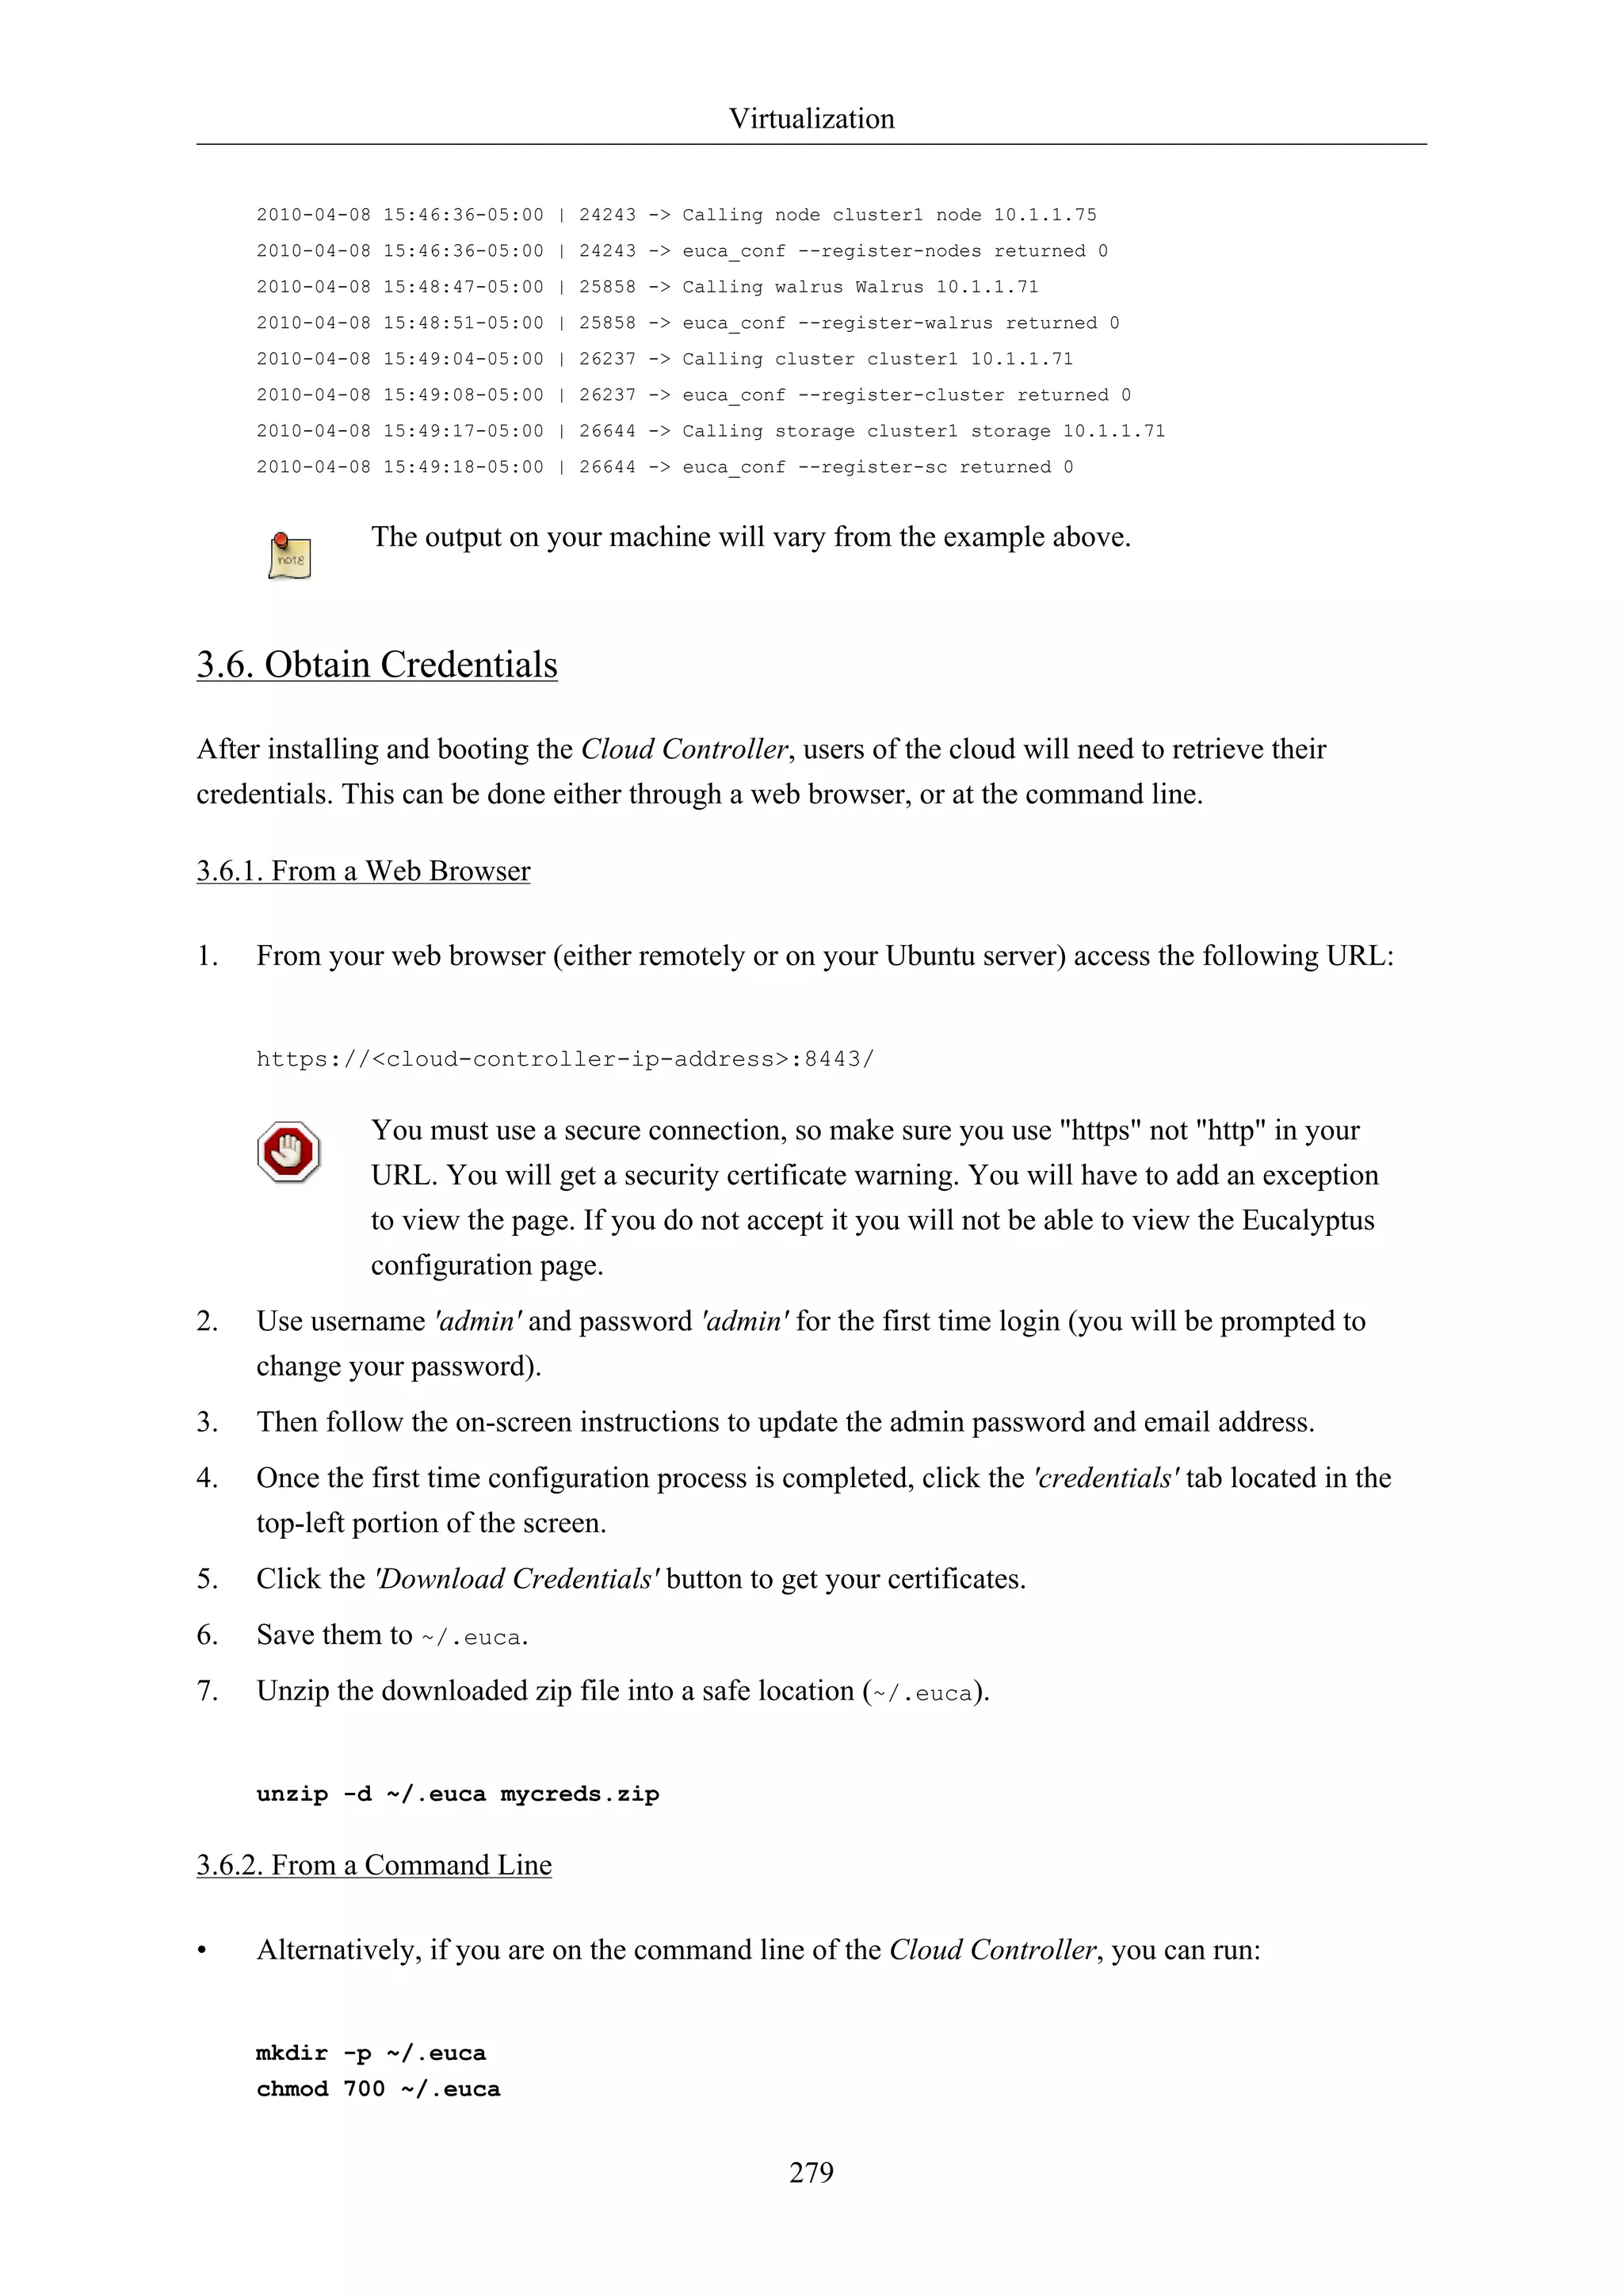
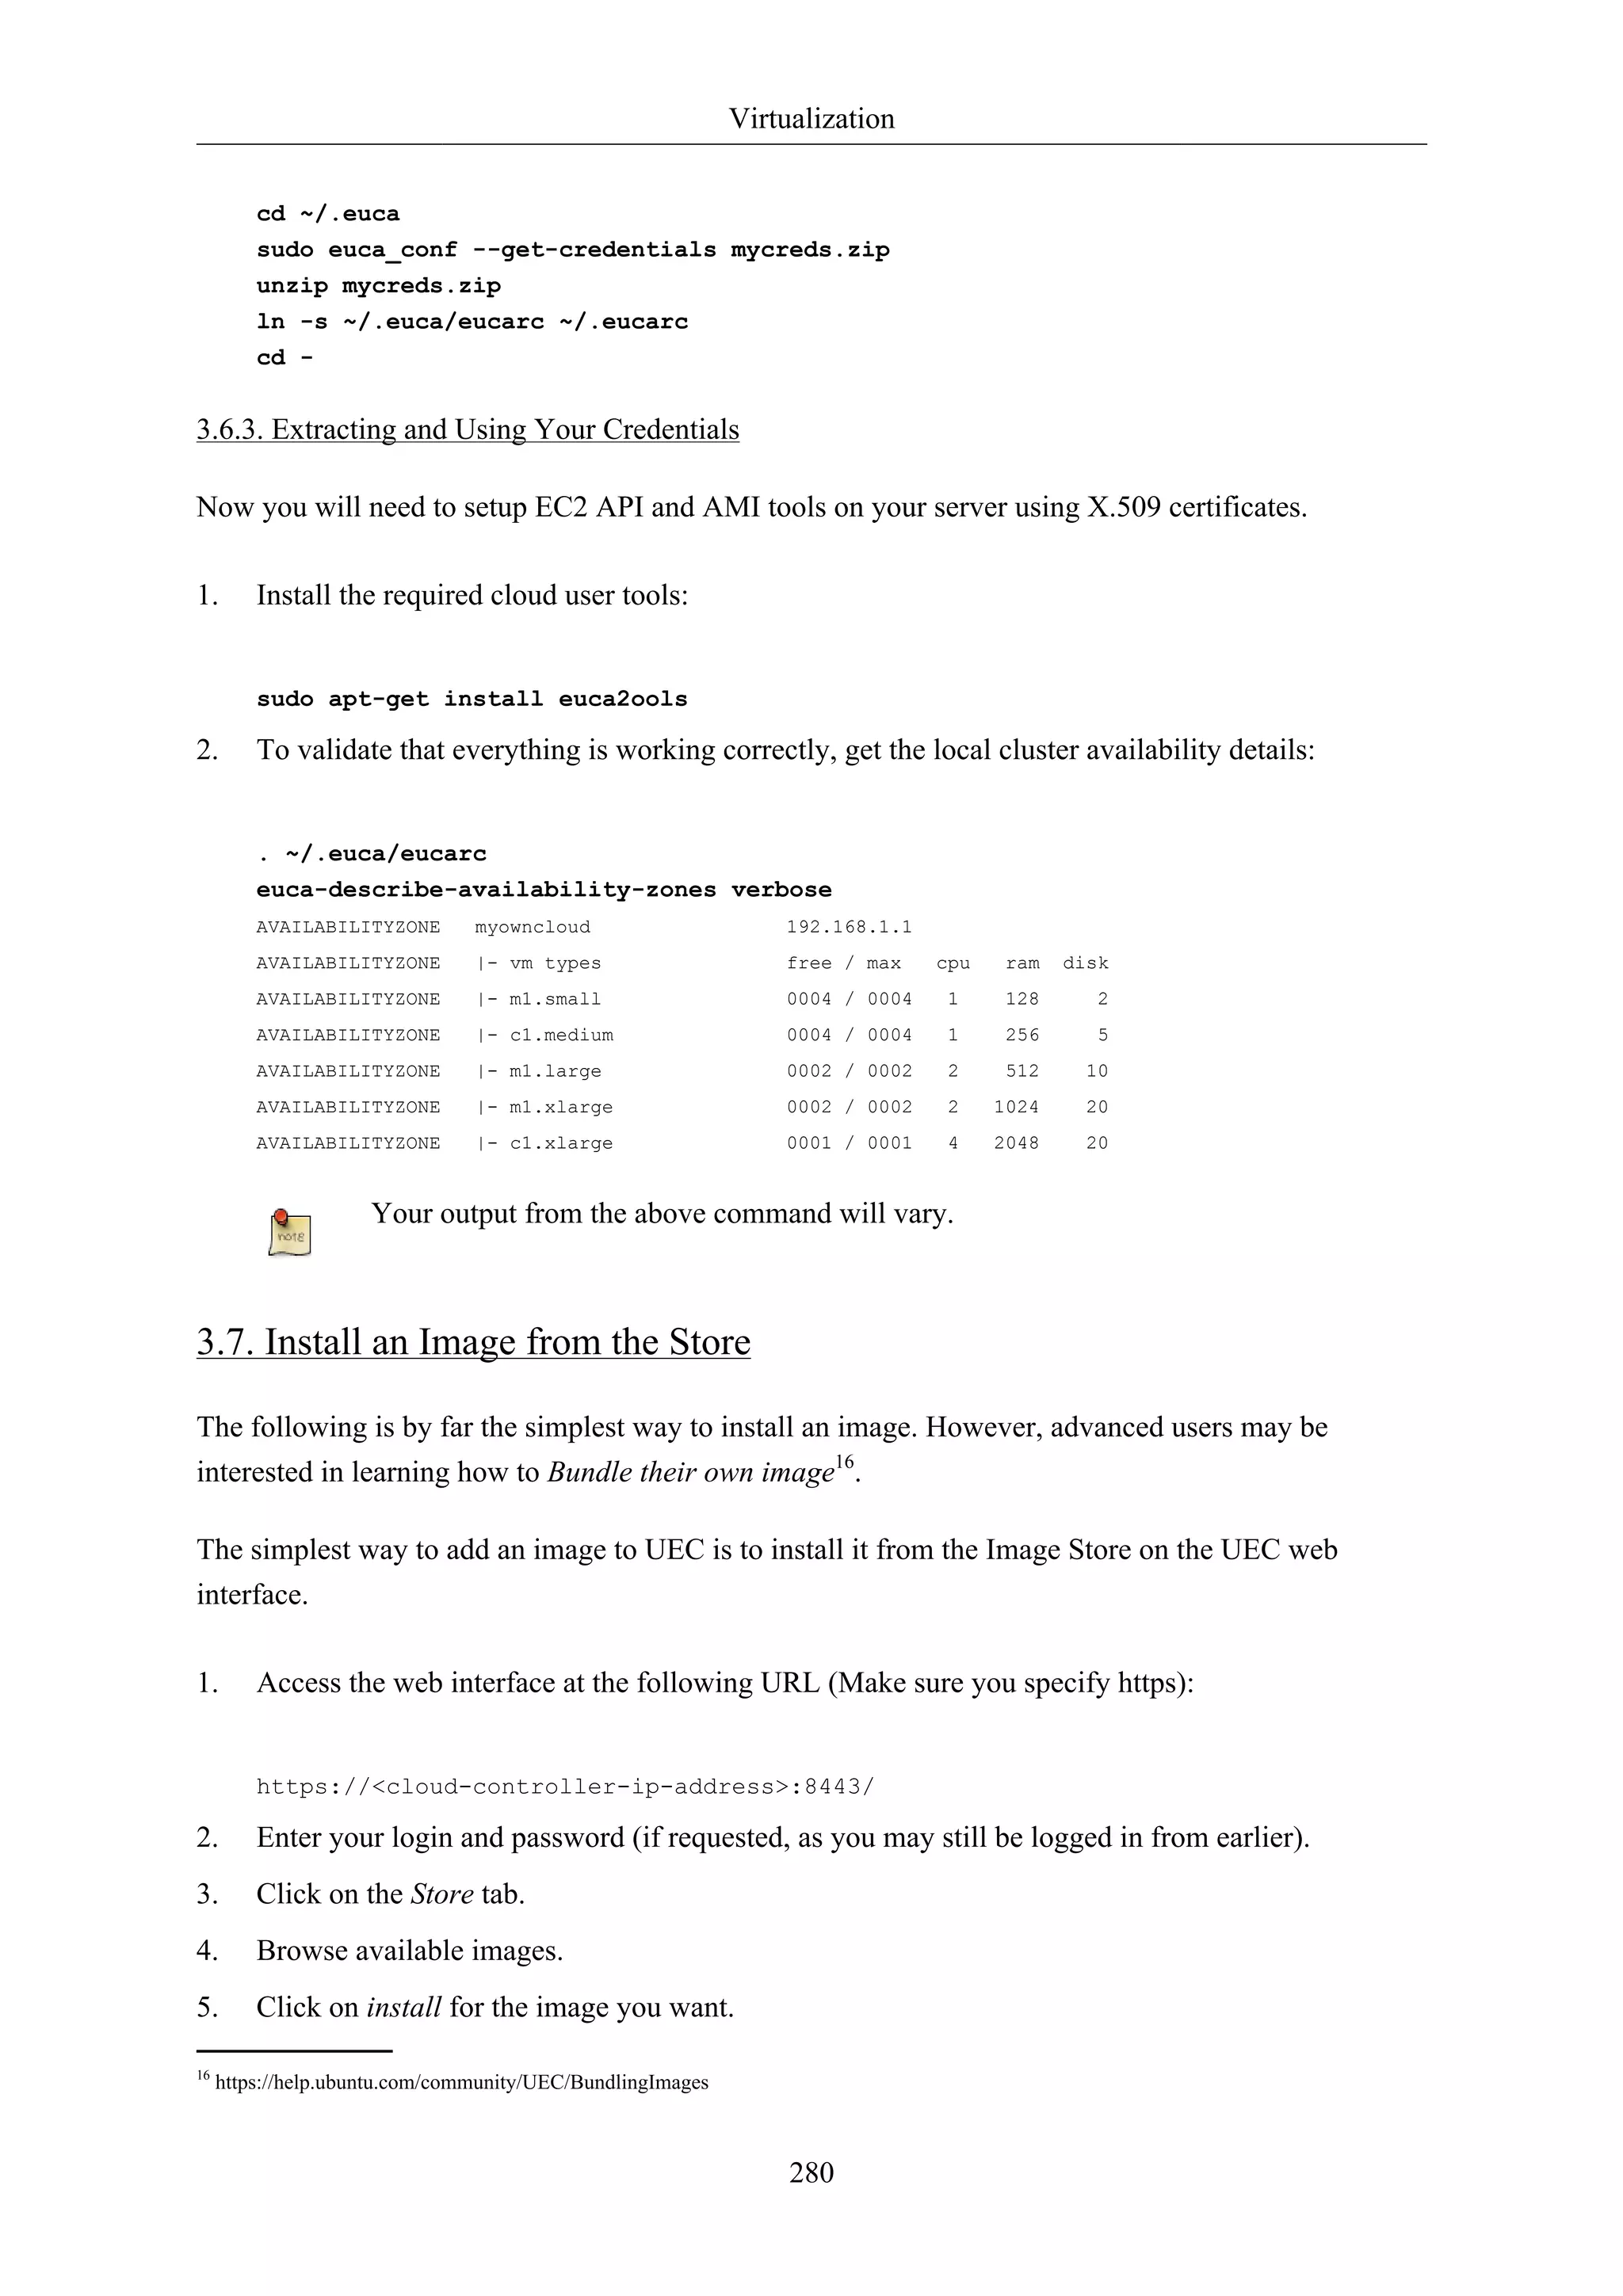
![Virtualization
Once the image has been downloaded and installed, you can click on "How to run?" that will be
displayed below the image button to view the command to execute to instantiate (start) this image.
The image will also appear on the list given on the Image tab.
281
3.8. Run an Image
There are multiple ways to instantiate an image in UEC:
• Use the command line.
• Use one of the UEC compatible management tools such as Landscape.
• Use the ElasticFox17 extension to Firefox.
Here we will describe the process from the command line:
1. Before running an instance of your image, you should first create a keypair (ssh key) that you
can use to log into your instance as root, once it boots. The key is stored, so you will only have to
do this once.
Run the following command:
if [ ! -e ~/.euca/mykey.priv ]; then
mkdir -p -m 700 ~/.euca
touch ~/.euca/mykey.priv
chmod 0600 ~/.euca/mykey.priv
euca-add-keypair mykey > ~/.euca/mykey.priv
fi
You can call your key whatever you like (in this example, the key is called 'mykey'), but
remember what it is called. If you forget, you can always run euca-describe-keypairs
to get a list of created keys stored in the system.
2. You must also allow access to port 22 in your instances:
euca-authorize default -P tcp -p 22 -s 0.0.0.0/0
3. Next, you can create instances of your registered image:
euca-run-instances $EMI -k mykey -t m1.small
If you receive an error regarding image_id, you may find it by viewing Images page or
click "How to Run" on the Store page to see the sample command.
4. The first time you run an instance, the system will be setting up caches for the image from which
it will be created. This can often take some time the first time an instance is run given that VM
images are usually quite large.
To monitor the state of your instance, run:](https://image.slidesharecdn.com/serverguideubuntu1110-141006055509-conversion-gate02/75/Serverguide-ubuntu11-10-287-2048.jpg)

![Virtualization
The Apache Edgers PPA, in the above example, contains the latest version of Apache from
upstream source repositories. Package versions in the PPA are unsupported, and depending
on your situation, this may or may not be desirable. See the Ubuntu Server Edgers19 web
page for more details.
The 'runcmd' commands are run at the same point in boot that the '#!' script would run in the previous
example. It is present to allow you to get the full power of a scripting language if you need it without
abandoning cloud-config.
For more information on what kinds of things can be done with cloud-config, see doc/examples20 in
the source.
3.9. More Information
284
How to use the Storage Controller21
Controlling eucalyptus services:
• sudo service eucalyptus [start|stop|restart] (on the CLC/CC/SC/Walrus side)
• sudo service eucalyptus-nc [start|stop|restart] (on the Node side)
Locations of some important files:
• Log files:
• /var/log/eucalyptus
• Configuration files:
• /etc/eucalyptus
• Database:
• /var/lib/eucalyptus/db
• Keys:
• /var/lib/eucalyptus
• /var/lib/eucalyptus/.ssh
Don't forget to source your ~/.euca/eucarc before running the client tools.
3.10. References
• For information on loading instances see the Eucalyptus Wiki22 page.
• Eucalyptus Project Site (forums, documentation, downloads)23.
• Eucalyptus on Launchpad (bugs, code)24.
• Eucalyptus Troubleshooting (1.5)25.
20 http://bazaar.launchpad.net/~cloud-init-dev/cloud-init/trunk/files/head:/doc/examples/
21 https://help.ubuntu.com/community/UEC/StorageController](https://image.slidesharecdn.com/serverguideubuntu1110-141006055509-conversion-gate02/75/Serverguide-ubuntu11-10-290-2048.jpg)


![Clustering
288
1. DRBD
Distributed Replicated Block Device (DRBD) mirrors block devices between multiple hosts. The
replication is transparent to other applications on the host systems. Any block device hard disks,
partitions, RAID devices, logical volumes, etc can be mirrored.
To get started using drbd, first install the necessary packages. From a terminal enter:
sudo apt-get install drbd8-utils
If you are using the virtual kernel as part of a virtual machine you will need to manually
compile the drbd module. It may be easier to install the linux-server package inside the
virtual machine.
This section covers setting up a drbd to replicate a separate /srv partition, with an ext3 filesystem
between two hosts. The partition size is not particularly relevant, but both partitions need to be the
same size.
1.1. Configuration
The two hosts in this example will be called drbd01 and drbd02. They will need to have name
resolution configured either through DNS or the /etc/hosts file. See Chapter 7, Domain Name
Service (DNS) [p. 97] for details.
• To configure drbd, on the first host edit /etc/drbd.conf:
global { usage-count no; }
common { syncer { rate 100M; } }
resource r0 {
protocol C;
startup {
wfc-timeout 15;
degr-wfc-timeout 60;
}
net {
cram-hmac-alg sha1;
shared-secret "secret";
}
on drbd01 {
device /dev/drbd0;
disk /dev/sdb1;
address 192.168.0.1:7788;
meta-disk internal;
}
on drbd02 {
device /dev/drbd0;
disk /dev/sdb1;
address 192.168.0.2:7788;](https://image.slidesharecdn.com/serverguideubuntu1110-141006055509-conversion-gate02/75/Serverguide-ubuntu11-10-294-2048.jpg)


![VPN
293
export KEY_COUNTRY="US"
export KEY_PROVINCE="NC"
export KEY_CITY="Winston-Salem"
export KEY_ORG="Example Company"
export KEY_EMAIL="steve@example.com"
Enter the following to generate the master Certificate Authority (CA) certificate and key:
cd /etc/openvpn/easy-rsa/
source vars
./clean-all
./build-ca
1.2.2. Server Certificates
Next, we will generate a certificate and private key for the server:
./build-key-server myservername
As in the previous step, most parameters can be defaulted. Two other queries require positive
responses, "Sign the certificate? [y/n]" and "1 out of 1 certificate requests certified, commit? [y/n]".
Diffie Hellman parameters must be generated for the OpenVPN server:
./build-dh
All certificates and keys have been generated in the subdirectory keys/. Common practice is to copy
them to /etc/openvpn/:
cd keys/
cp myservername.crt myservername.key ca.crt dh1024.pem /etc/openvpn/
1.2.3. Client Certificates
The VPN client will also need a certificate to authenticate itself to the server. Usually you create a
different certificate for each client. To create the certificate, enter the following in a terminal while
being user root:
cd /etc/openvpn/easy-rsa/
source vars
./build-key client1
Copy the following files to the client using a secure method:
• /etc/openvpn/ca.crt
• /etc/openvpn/easy-rsa/keys/client1.crt
• /etc/openvpn/easy-rsa/keys/client1.key](https://image.slidesharecdn.com/serverguideubuntu1110-141006055509-conversion-gate02/75/Serverguide-ubuntu11-10-299-2048.jpg)
![VPN
As the client certificates and keys are only required on the client machine, you should remove them
from the server.
1.3. Simple Server Configuration
Along with your OpenVPN installation you got these sample config files (and many more if if you
check):
root@server:/# ls -l /usr/share/doc/openvpn/examples/sample-config-files/
total 68
-rw-r--r-- 1 root root 3427 2011-07-04 15:09 client.conf
-rw-r--r-- 1 root root 4141 2011-07-04 15:09 server.conf.gz
Start with copying and unpacking server.conf.gz to /etc/openvpn/server.conf.
sudo cp /usr/share/doc/openvpn/examples/sample-config-files/server.conf.gz /etc/openvpn/
sudo gzip -d /etc/openvpn/server.conf.gz
Edit /etc/openvpn/server.conf to make sure the following lines are pointing to the certificates and
keys you created in the section above.
294
ca ca.crt
cert myservername.crt
key myservername.key
dh dh1024.pem
That is the minimum you have to configure to get a working OpenVPN server. You can use all the
default settings in the sample server.conf file. Now start the server. You will find logging and error
messages in your syslog.
root@server:/etc/openvpn# /etc/init.d/openvpn start
* Starting virtual private network daemon(s)...
* Autostarting VPN 'server' [ OK ]
Now check if OpenVPN created a tun0 interface:
root@server:/etc/openvpn# ifconfig tun0
tun0 Link encap:UNSPEC HWaddr 00-00-00-00-00-00-00-00-00-00-00-00-00-00-00-00
inet addr:10.8.0.1 P-t-P:10.8.0.2 Mask:255.255.255.255
UP POINTOPOINT RUNNING NOARP MULTICAST MTU:1500 Metric:1
[...]
1.4. Simple Client Configuration
There are various different OpenVPN client implementations with and without GUIs. You can
read more about clients in a later section. For now we use the OpenVPN client for Ubuntu which](https://image.slidesharecdn.com/serverguideubuntu1110-141006055509-conversion-gate02/75/Serverguide-ubuntu11-10-300-2048.jpg)
![VPN
is the same executable as the server. So you have to install the openvpn package again on the client
machine:
295
sudo apt-get install openvpn
This time copy the client.conf sample config file to /etc/openvpn/.
sudo cp /usr/share/doc/openvpn/examples/sample-config-files/client.conf /etc/openvpn/
Copy the client keys and the certificate of the CA you created in the section above to e.g. /etc/
openvpn/ and edit /etc/openvpn/client.conf to make sure the following lines are pointing to those
files. If you have the files in /etc/openvpn/ you can omit the path.
ca ca.crt
cert client1.crt
key client1.key
And you have to at least specify the OpenVPN server name or address. Make sure the keyword client
is in the config. That's what enables client mode.
client
remote vpnserver.example.com 1194
Now start the OpenVPN client:
root@client:/etc/openvpn# /etc/init.d/openvpn start
* Starting virtual private network daemon(s)...
* Autostarting VPN 'client' [ OK ]
Check if it created a tun0 interface:
root@client:/etc/openvpn# ifconfig tun0
tun0 Link encap:UNSPEC HWaddr 00-00-00-00-00-00-00-00-00-00-00-00-00-00-00-00
inet addr:10.8.0.6 P-t-P:10.8.0.5 Mask:255.255.255.255
UP POINTOPOINT RUNNING NOARP MULTICAST MTU:1500 Metric:1
Check if you can ping the OpenVPN server:
root@client:/etc/openvpn# ping 10.8.0.1
PING 10.8.0.1 (10.8.0.1) 56(84) bytes of data.
64 bytes from 10.8.0.1: icmp_req=1 ttl=64 time=0.920 ms
The OpenVPN server always uses the first usable IP address in the client network and only
that IP is pingable. E.g. if you configured a /24 for the client network mask, the .1 address
will be used. The P-t-P address you see in the ifconfig output above is usually not answering
ping requests.](https://image.slidesharecdn.com/serverguideubuntu1110-141006055509-conversion-gate02/75/Serverguide-ubuntu11-10-301-2048.jpg)
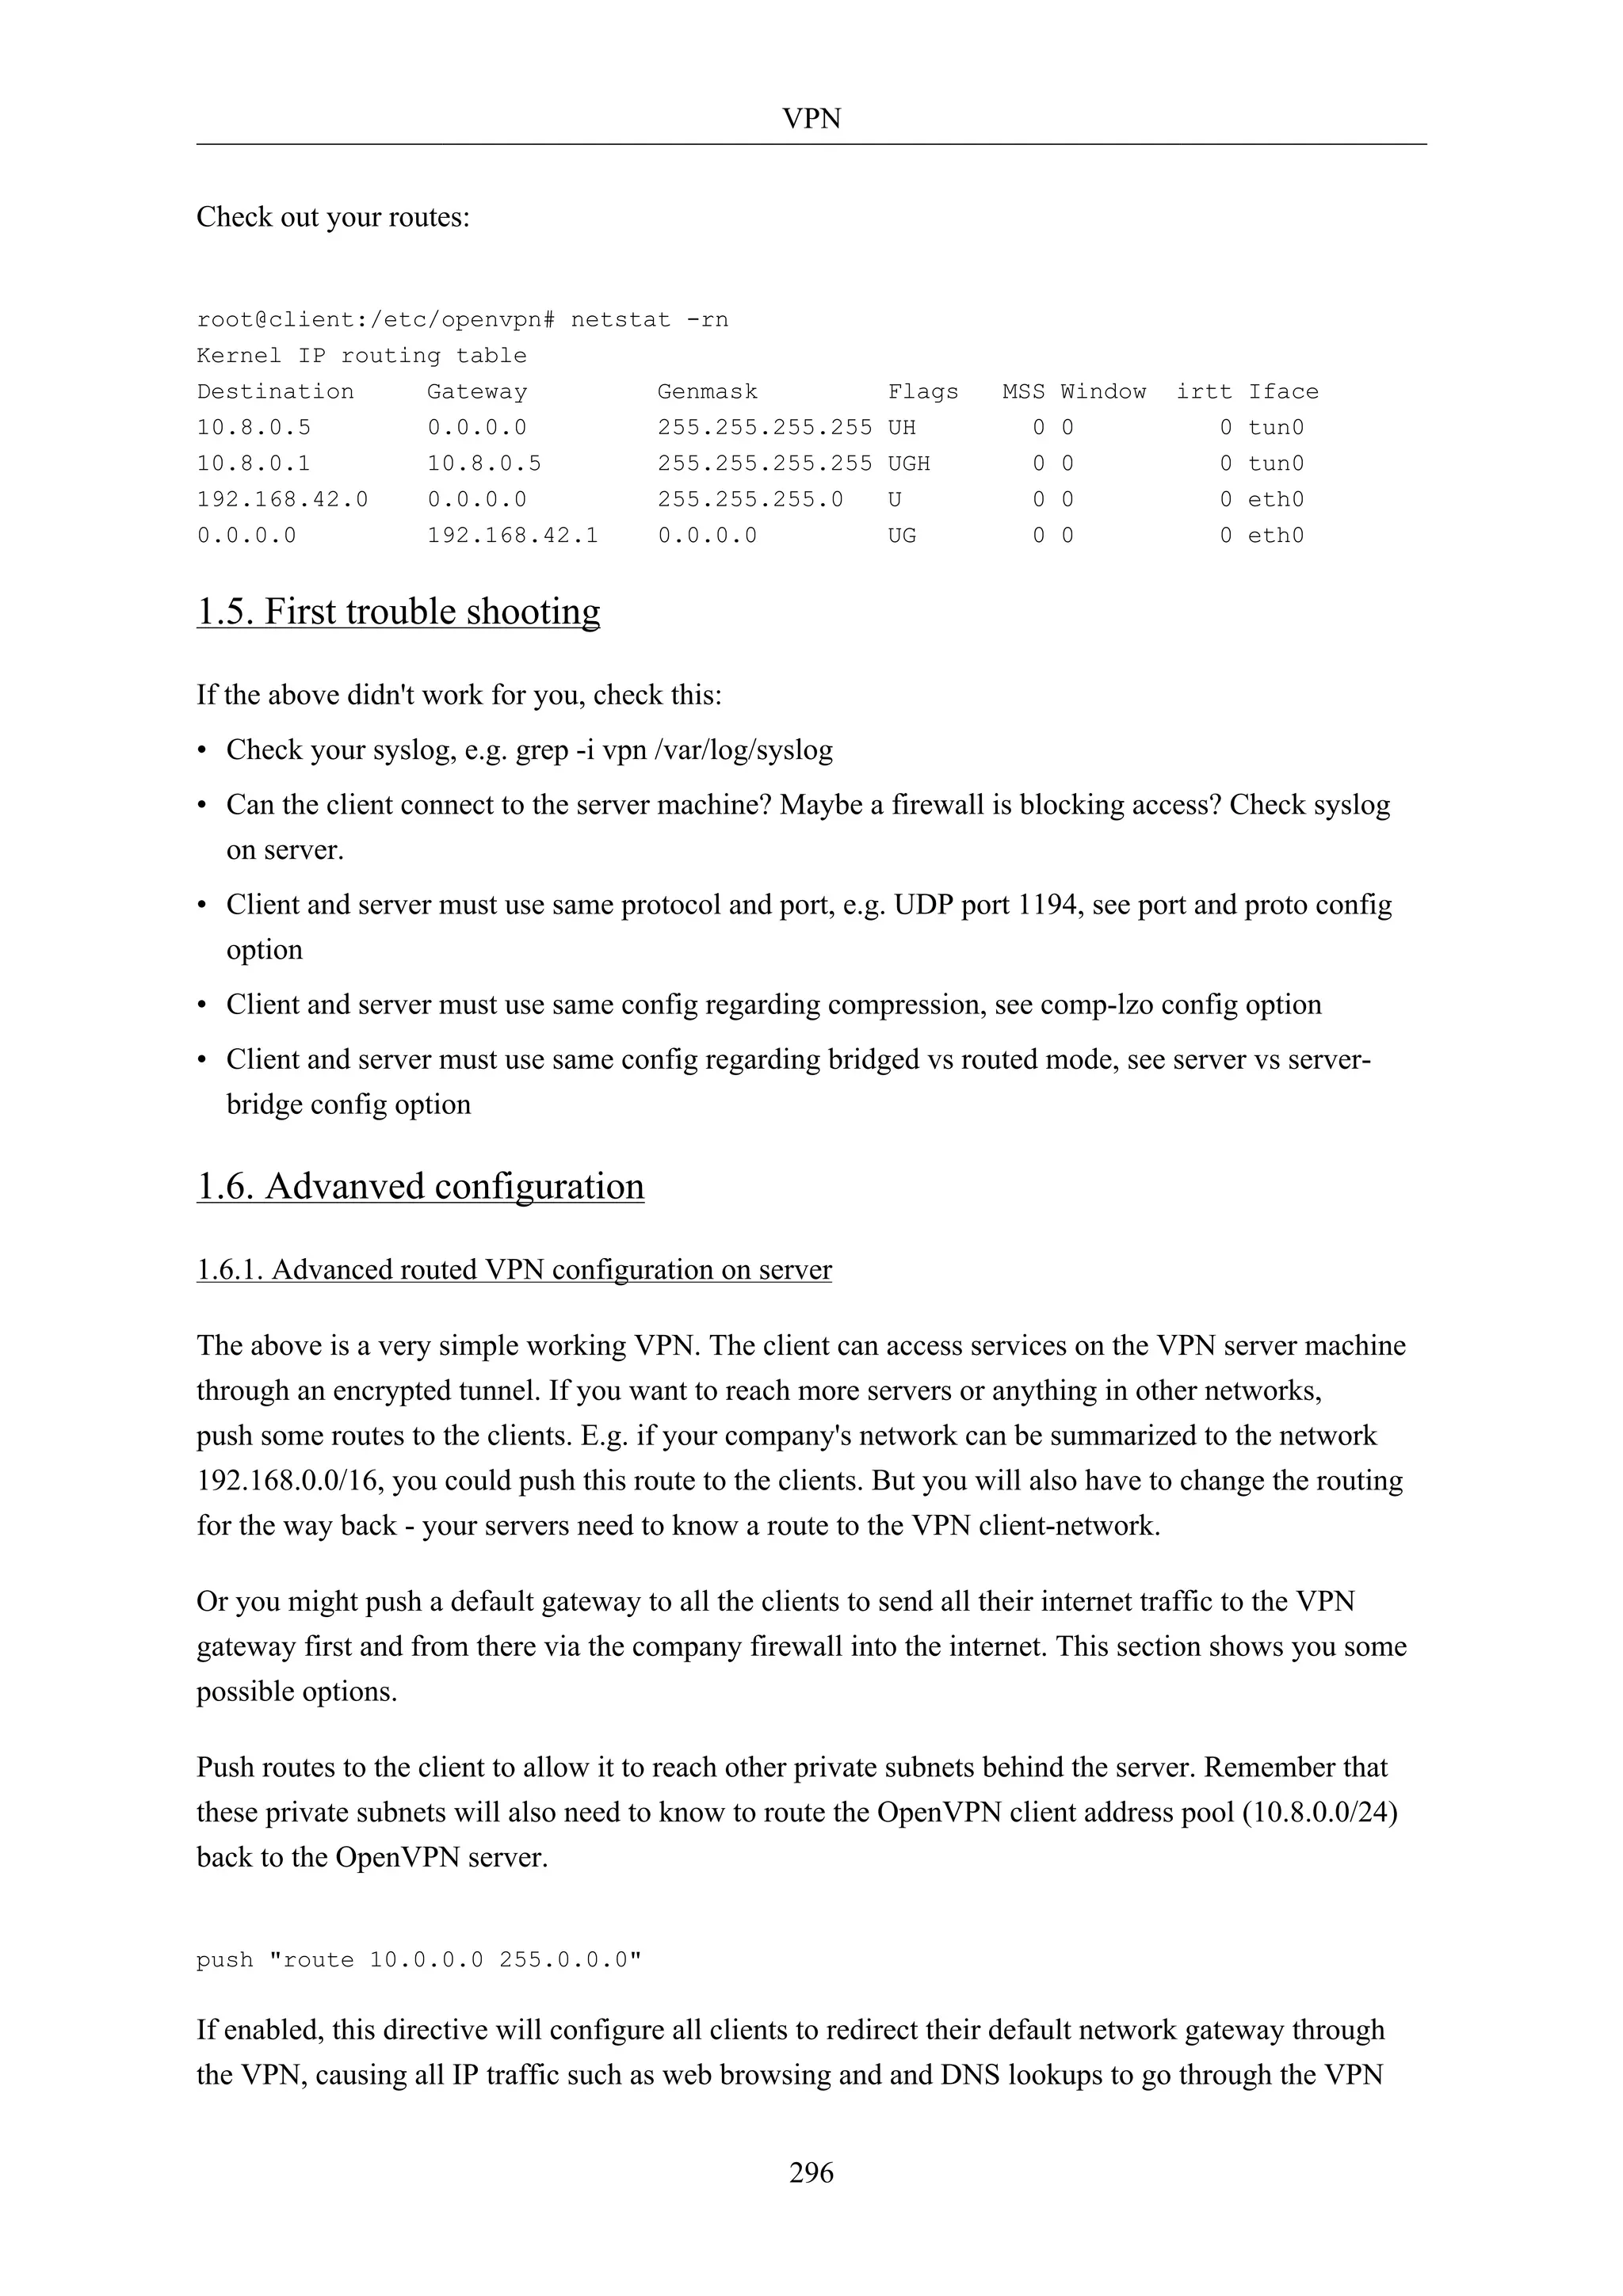


![VPN
0 upgraded, 5 newly installed, 0 to remove and 631 not upgraded.
Need to get 700 kB of archives.
After this operation, 3,031 kB of additional disk space will be used.
Do you want to continue [Y/n]?
To inform network-manager about the new installed packages you will have to restart it:
root@client:~# restart network-manager
network-manager start/running, process 3078
Open the Network Manager GUI, select the VPN tab and then the 'Add' button. Select OpenVPN as
the VPN type in the opening requester and press 'Create'. In the next window add the OpenVPN's
server name as the 'Gateway', set 'Type' to 'Certificates (TLS)', point 'User Certificate' to your user
certificate, 'CA Certificate' to your CA certificate and 'Private Key' to your private key file. Use the
advanced button to enable compression or other special settings you set on the server. Now try to
establish your VPN.
1.7.2. OpenVPN with GUI for Mac OS X: Tunnelblick
Tunnelblick is an excellent free, open source implementation of a GUI for OpenVPN for OS X. The
project's homepage is at http://code.google.com/p/tunnelblick/. Download the latest OS X installer
from there and install it. Then put your client.ovpn config file together with the certificates and keys
in /Users/username/Library/Application Support/Tunnelblick/Configurations/ and lauch Tunnelblick
from your Application folder.
301
# sample client.ovpn for Tunnelblick
client
remote blue.example.com
port 1194
proto udp
dev tun
dev-type tun
ns-cert-type server
reneg-sec 86400
auth-user-pass
auth-nocache
auth-retry interact
comp-lzo yes
verb 3
ca ca.crt
cert client.crt
key client.key
1.7.3. OpenVPN with GUI for Win 7
First download and install the latest OpenVPN Windows Installer2. OpenVPN 2.2.1 was the latest
when this was written. Additionally download an alternative Open VPN Windows GUI. The
2 http://www.openvpn.net/index.php/open-source/downloads.html](https://image.slidesharecdn.com/serverguideubuntu1110-141006055509-conversion-gate02/75/Serverguide-ubuntu11-10-307-2048.jpg)


![Other Useful Applications
308
added resolvconf
added rsyslog.d
modified shadow
modified shadow-added
init.d/postfix
added network/if-down.d/postfix
added network/if-up.d/postfix
added postfix/dynamicmaps.cf
added postfix/main.cf
added postfix/master.cf
added postfix/post-install
added postfix/postfix-files
added postfix/postfix-script
added postfix/sasl
added ppp/ip-down.d
added ppp/ip-down.d/postfix
added ppp/ip-up.d/postfix
added rc0.d/K20postfix
added rc1.d/K20postfix
added rc2.d/S20postfix
added rc3.d/S20postfix
added rc4.d/S20postfix
added rc5.d/S20postfix
added rc6.d/K20postfix
added resolvconf/update-libc.d
added resolvconf/update-libc.d/postfix
added rsyslog.d/postfix.conf
added ufw/applications.d/postfix
Committed revision 2.
For an example of how etckeeper tracks manual changes, add new a host to /etc/hosts. Using bzr
you can see which files have been modified:
sudo bzr status /etc/
modified:
hosts
Now commit the changes:
sudo etckeeper commit "new host"
For more information on bzr see Section 1, “Bazaar” [p. 220].](https://image.slidesharecdn.com/serverguideubuntu1110-141006055509-conversion-gate02/75/Serverguide-ubuntu11-10-314-2048.jpg)


![Appendix
1. Reporting Bugs in Ubuntu Server Edition
While the Ubuntu Project attempts to release software with as few bugs as possible, they do occur.
You can help fix these bugs by reporting ones that you find to the project. The Ubuntu Project uses
Launchpad1 to track its bug reports. In order to file a bug about Ubuntu Server on Launchpad, you
will need to create an account2.
313
1.1. Reporting Bugs With ubuntu-bug
The preferred way to report a bug is with the ubuntu-bug command. The ubuntu-bug tool gathers
information about the system useful to developers in diagnosing the reported problem that will then
be included in the bug report filed on Launchpad. Bug reports in Ubuntu need to be filed against a
specific software package, thus the name of the package that the bug occurs in needs to be given to
ubuntu-bug:
ubuntu-bug PACKAGENAME
For example, to file a bug against the openssh-server package, you would do:
ubuntu-bug openssh-server
You can specify either a binary package or the source package for ubuntu-bug. Again using openssh-server
as an example, you could also generate the report against the source package for openssh-server,
openssh:
ubuntu-bug openssh
See Chapter 3, Package Management [p. 17] for more information about packages in
Ubuntu.
The ubuntu-bug command will gather information about the system in question, possibly including
information specific to the specified package, and then ask you what you would like to do with
collected information:
ubuntu-bug postgresql
*** Collecting problem information
The collected information can be sent to the developers to improve the
application. This might take a few minutes.
..........
1 https://launchpad.net/
2 https://help.launchpad.net/YourAccount/NewAccount](https://image.slidesharecdn.com/serverguideubuntu1110-141006055509-conversion-gate02/75/Serverguide-ubuntu11-10-319-2048.jpg)
![Appendix
315
adduser 3.112ubuntu1
base-files 5.0.0ubuntu10
base-passwd 3.5.22
coreutils 7.4-2ubuntu2
...
After viewing the report, you will be brought back to the same menu asking what you would like to
do with the report.
• Keep Report File Selecting Keep Report File causes the gathered information to be written to a
file. This file can then be used to later file a bug report or transferred to a different Ubuntu system
for reporting. To submit the report file, simply give it as an argument to the ubuntu-bug command:
What would you like to do? Your options are:
S: Send report (1.7 KiB)
V: View report
K: Keep report file for sending later or copying to somewhere else
C: Cancel
Please choose (S/V/K/C): k
Problem report file: /tmp/apport.postgresql.v4MQas.apport
ubuntu-bug /tmp/apport.postgresql.v4MQas.apport
*** Send problem report to the developers?
...
• Cancel Selecting Cancel causes the collected information to be discarded.
1.2. Reporting Application Crashes
The software package that provides the ubuntu-bug utility, apport, can be configured to trigger
when applications crash. This is disabled by default, as capturing a crash can be resource intensive
depending on how much memory the application that crashed was using as apport captures and
processes the core dump.
Configuring apport to capture information about crashing applications requires a couple of steps.
First, gdb needs to be installed; it is not installed by default in Ubuntu Server Edition.
sudo apt-get install gdb
See Chapter 3, Package Management [p. 17] for more information about managing packages in
Ubuntu.
Once you have ensured that gdb is installed, open the file /etc/default/apport in your text editor,
and change the enabled setting to be 1 like so:
# set this to 0 to disable apport, or to 1 to enable it
# you can temporarily override this with
# sudo service apport start force_start=1](https://image.slidesharecdn.com/serverguideubuntu1110-141006055509-conversion-gate02/75/Serverguide-ubuntu11-10-321-2048.jpg)
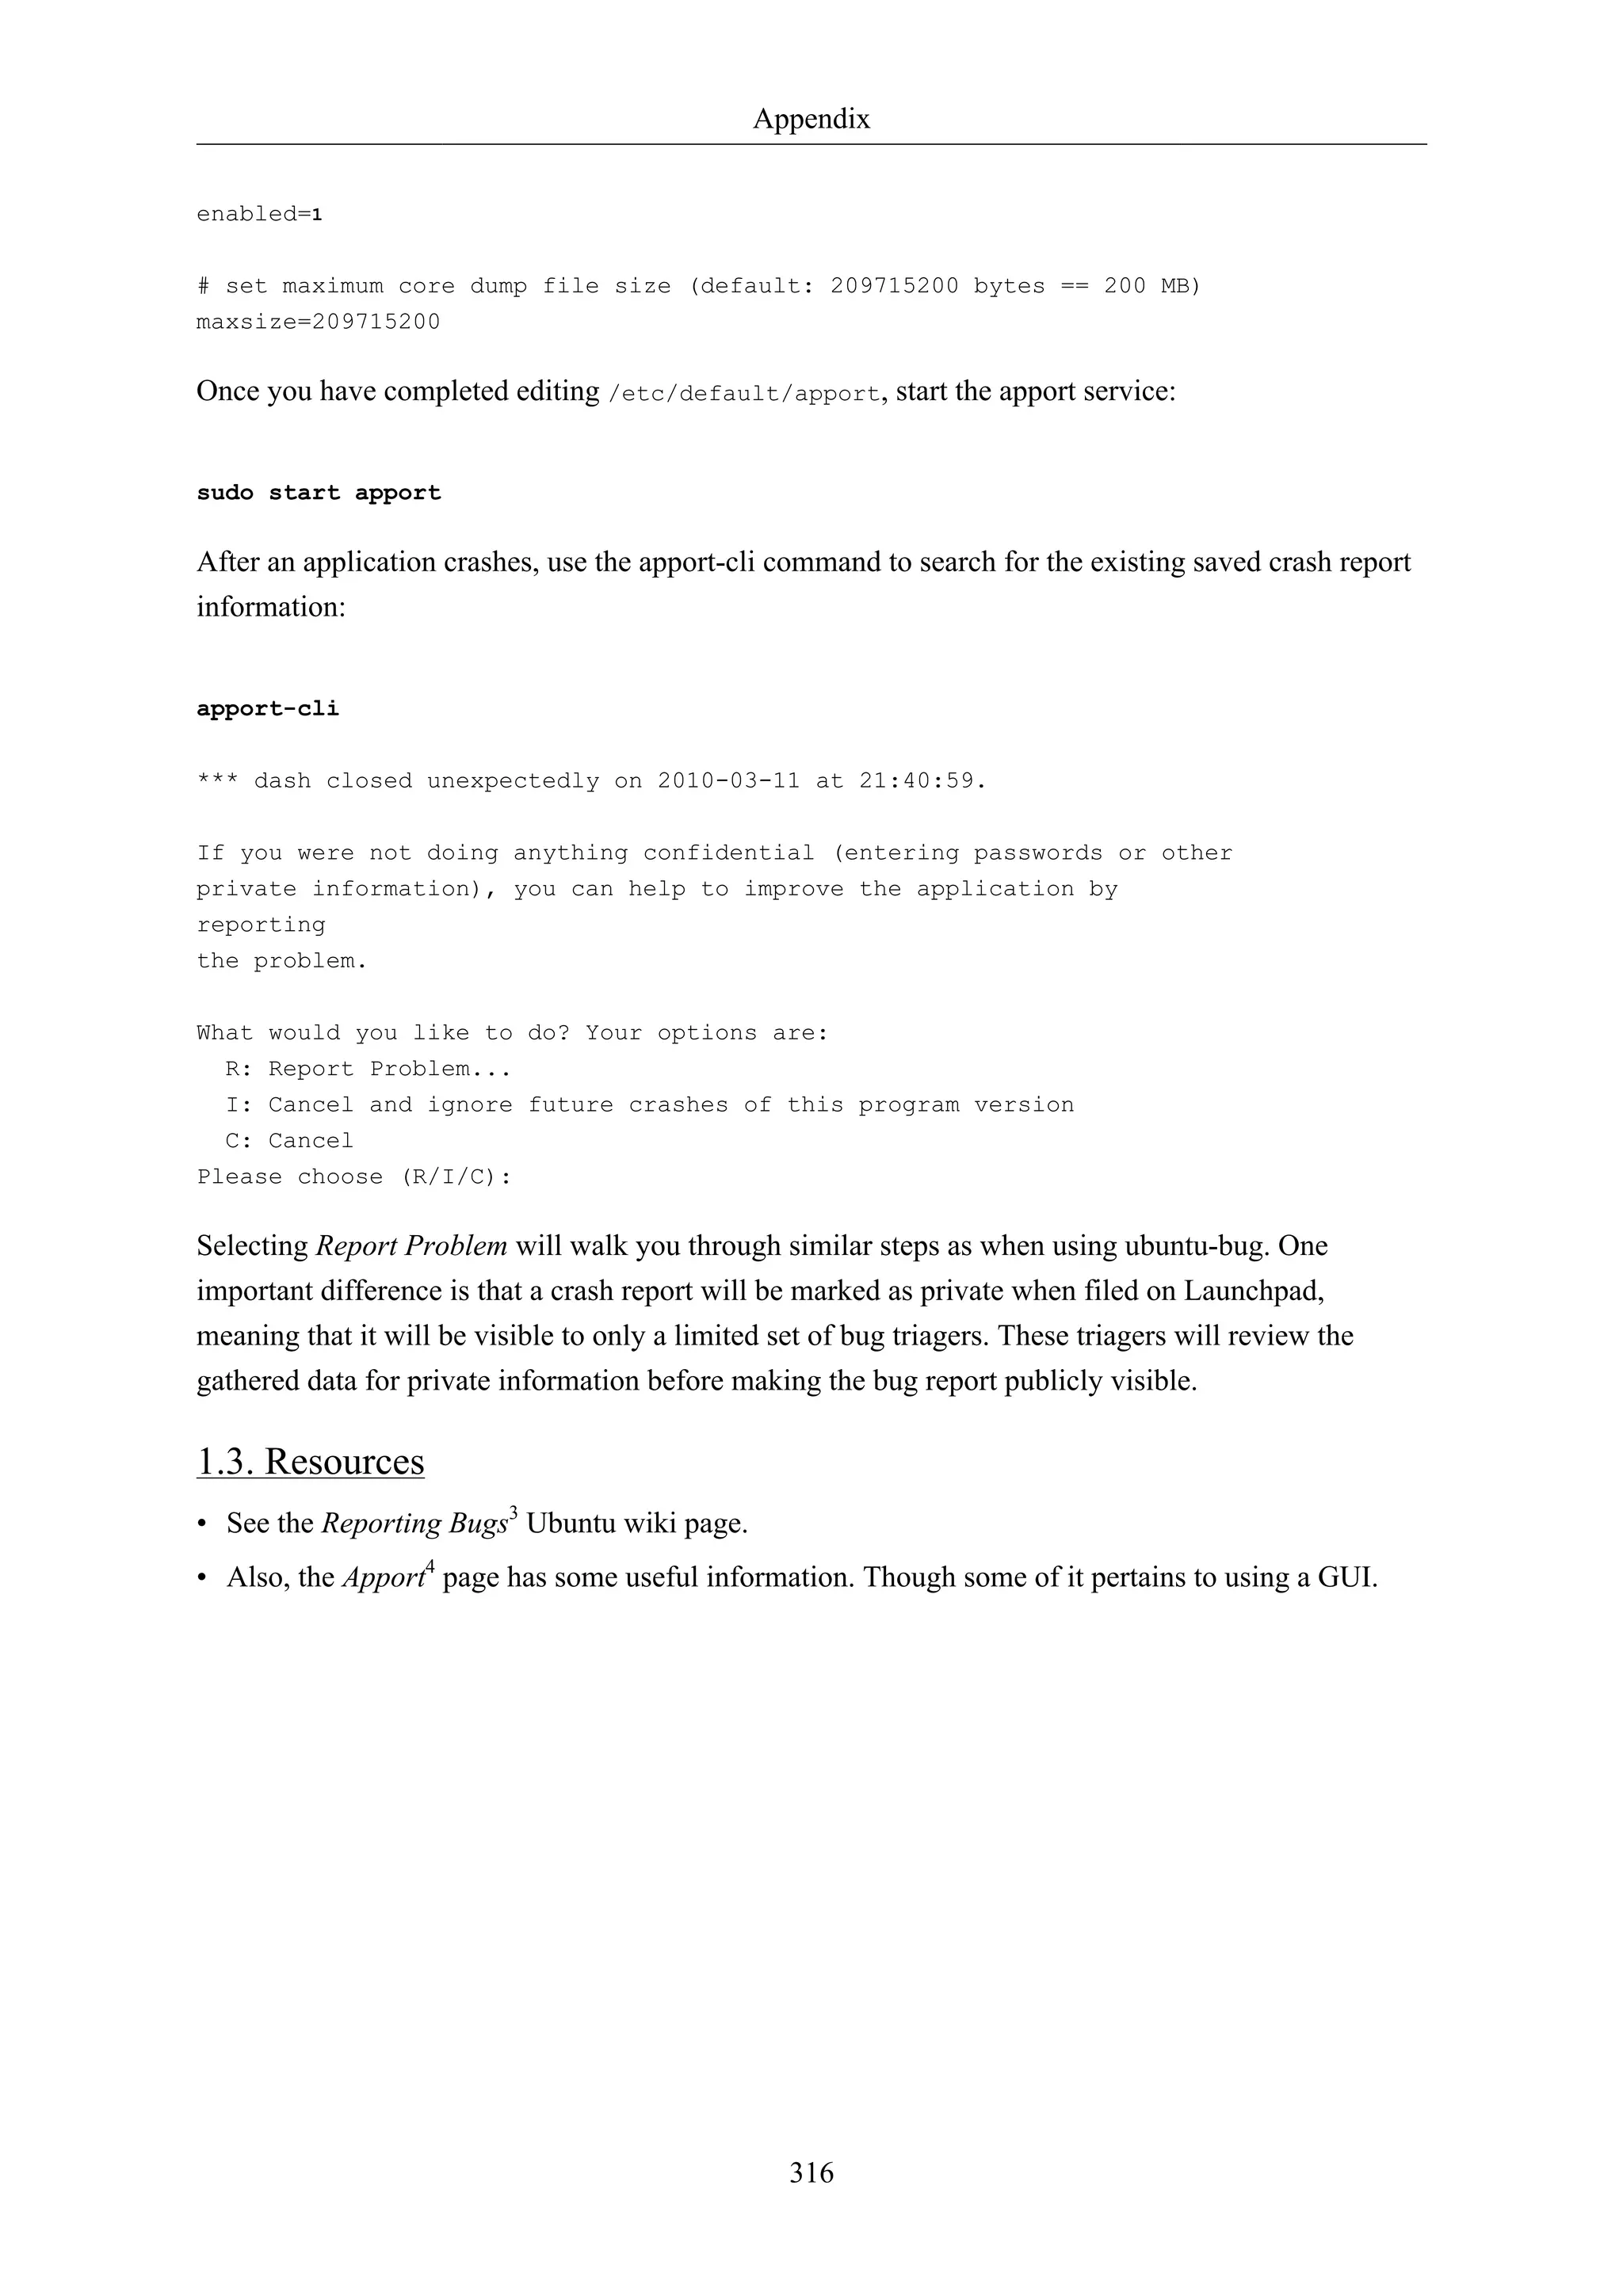

The Ubuntu Server Guide provides comprehensive instructions for installing and configuring various server applications on Ubuntu systems. It is designed as a step-by-step resource for users with basic knowledge of Ubuntu, covering topics such as package management, networking, security, and system monitoring. The document is maintained by the Ubuntu documentation team and is available under the Creative Commons ShareAlike license.