


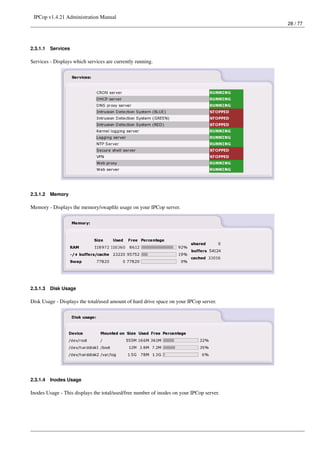
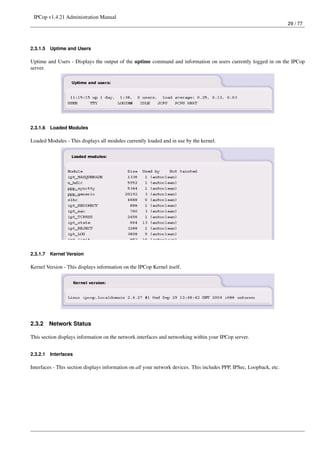
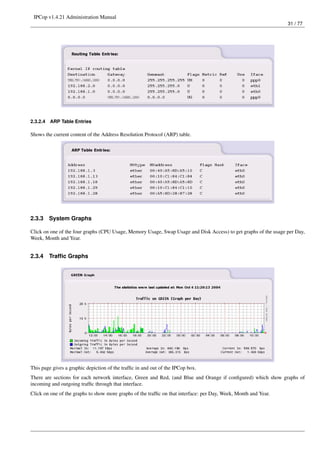
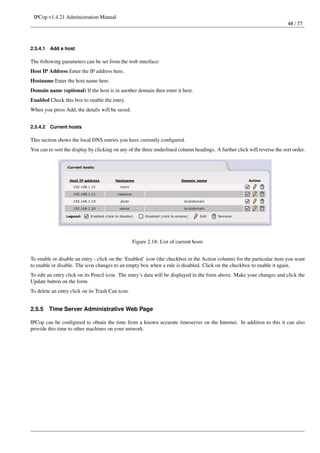
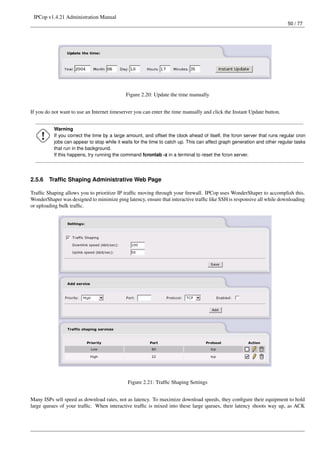
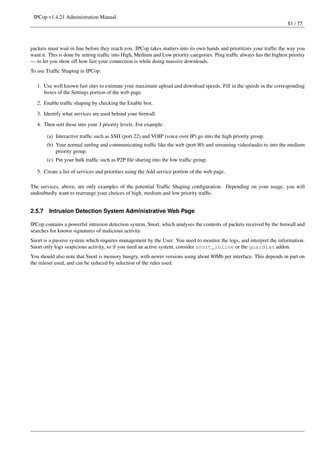
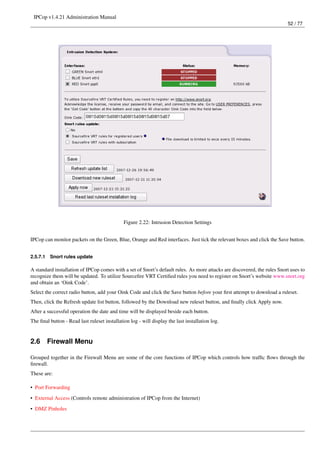
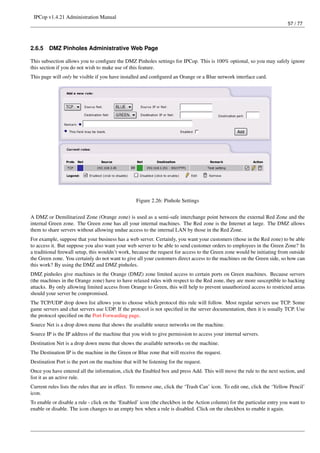
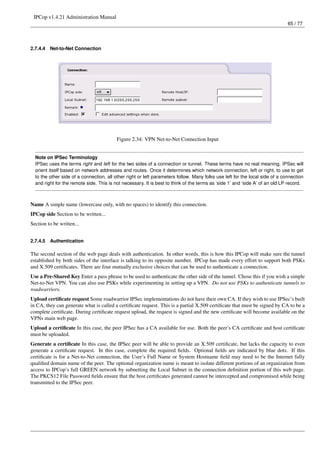
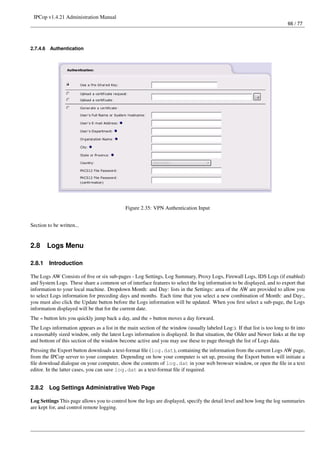
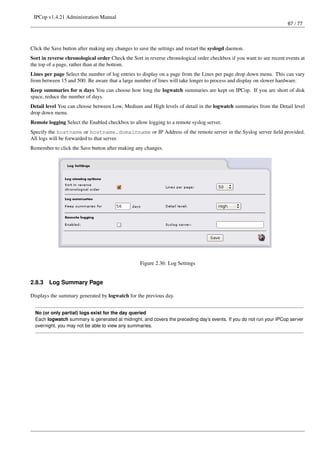
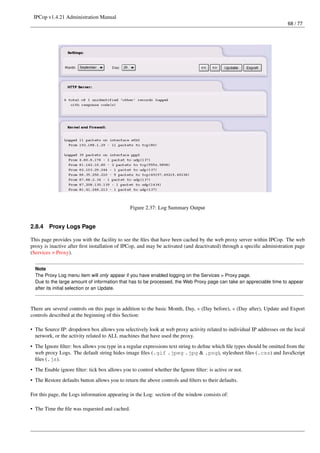
![IPCop v1.4.21 Administration Manual
20 / 77
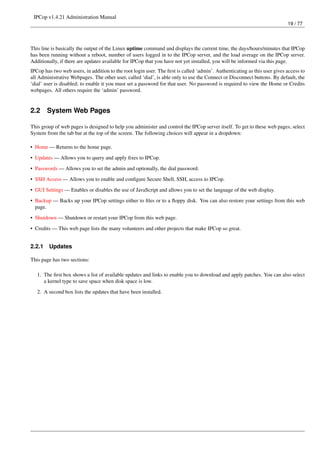
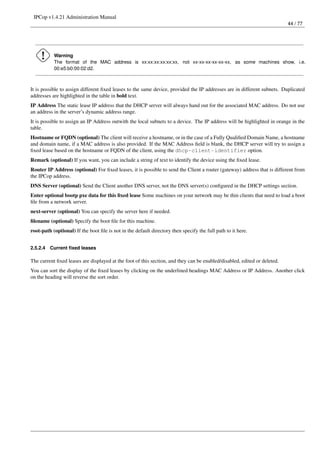
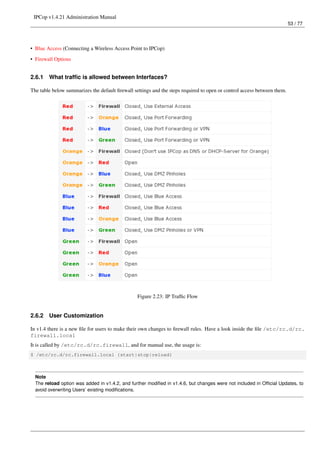
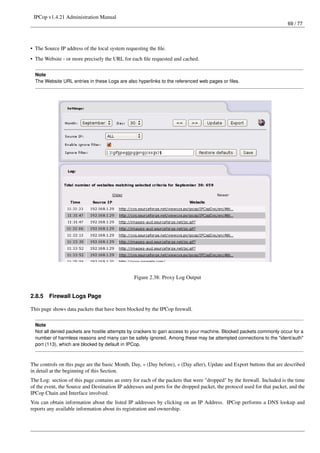
Every time you connect to the Internet IPCop will check for any new updates that may be available. You may also manually
check for updates by clicking the Refresh update list button. When a new update is available you will see the information on
screen with a short description and a link to download the update file.
Clicking on the Download button will download the .tgz.gpg file directly onto the IPCop system. (A bug in the 1.4.20 update
broke this feature, which is why you still have to manually install the 1.4.21 update).
The earlier manual method requires you to download the .tgz.gpg file onto your client PC with a web browser, not directly
onto IPCop. Once you have downloaded the file, in the Upload [the] update file: section, by using the Browse... button to locate
the file on your client PC, the Upload button then uploads the .tgz.gpg file to IPCop and applies the changes.
Kernel updates are sometimes split into two parts to accommodate lack of free space on disks.
A way of recovering some free space has been created, allowing you to select one of the two ’kernel types’ installed - monopro-
cessor or smp kernel.
After installing IPCop 1.4.17, Use the Refresh update list button to see the new Update page. If you see a red section in Disk
usage, you need to click the Kernel type selection button to select a ’kernel type’. That will free up space on the /dev/root
and /boot partitions. On the next reboot, you may need to select the kernel from the grub boot menu if the wrong kernel is not
on the first line.
The limits for the red disk usage warning are 20 MB free on /dev/root, and 1 MB on /boot. Any scsi disk with two kernel
versions (2.4.31 and 2.4.34) and two kernel types will have filled the /boot partition. Starting from IPCop 1.4.18, the /boot
partition size was increased from 8 to 10 MB.
Clearing the web proxy’s cache (squid) can also save disk space on /var/log. The Clear cache (squid) button is provided for
this purpose.](https://image.slidesharecdn.com/ipcop-admin-en-1-4-21-130204002648-phpapp02/85/Ipcop-admin-en-1-4-21-20-320.jpg)


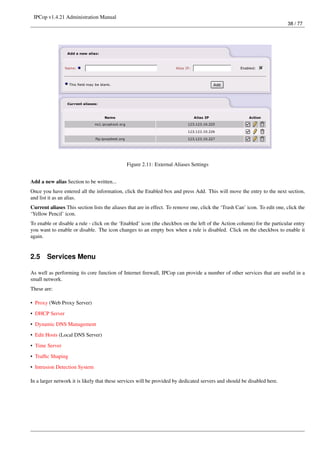


This document provides instructions for administering IPCop v1.4.21, an open-source firewall/router operating system. It discusses the administrative web interface for configuring system updates, passwords, SSH access, backups and shutdown. It also describes how to view system status information like services, memory/disk usage, networks status and traffic graphs. The document outlines how to configure network services like the web proxy, DHCP server, and external network aliases.