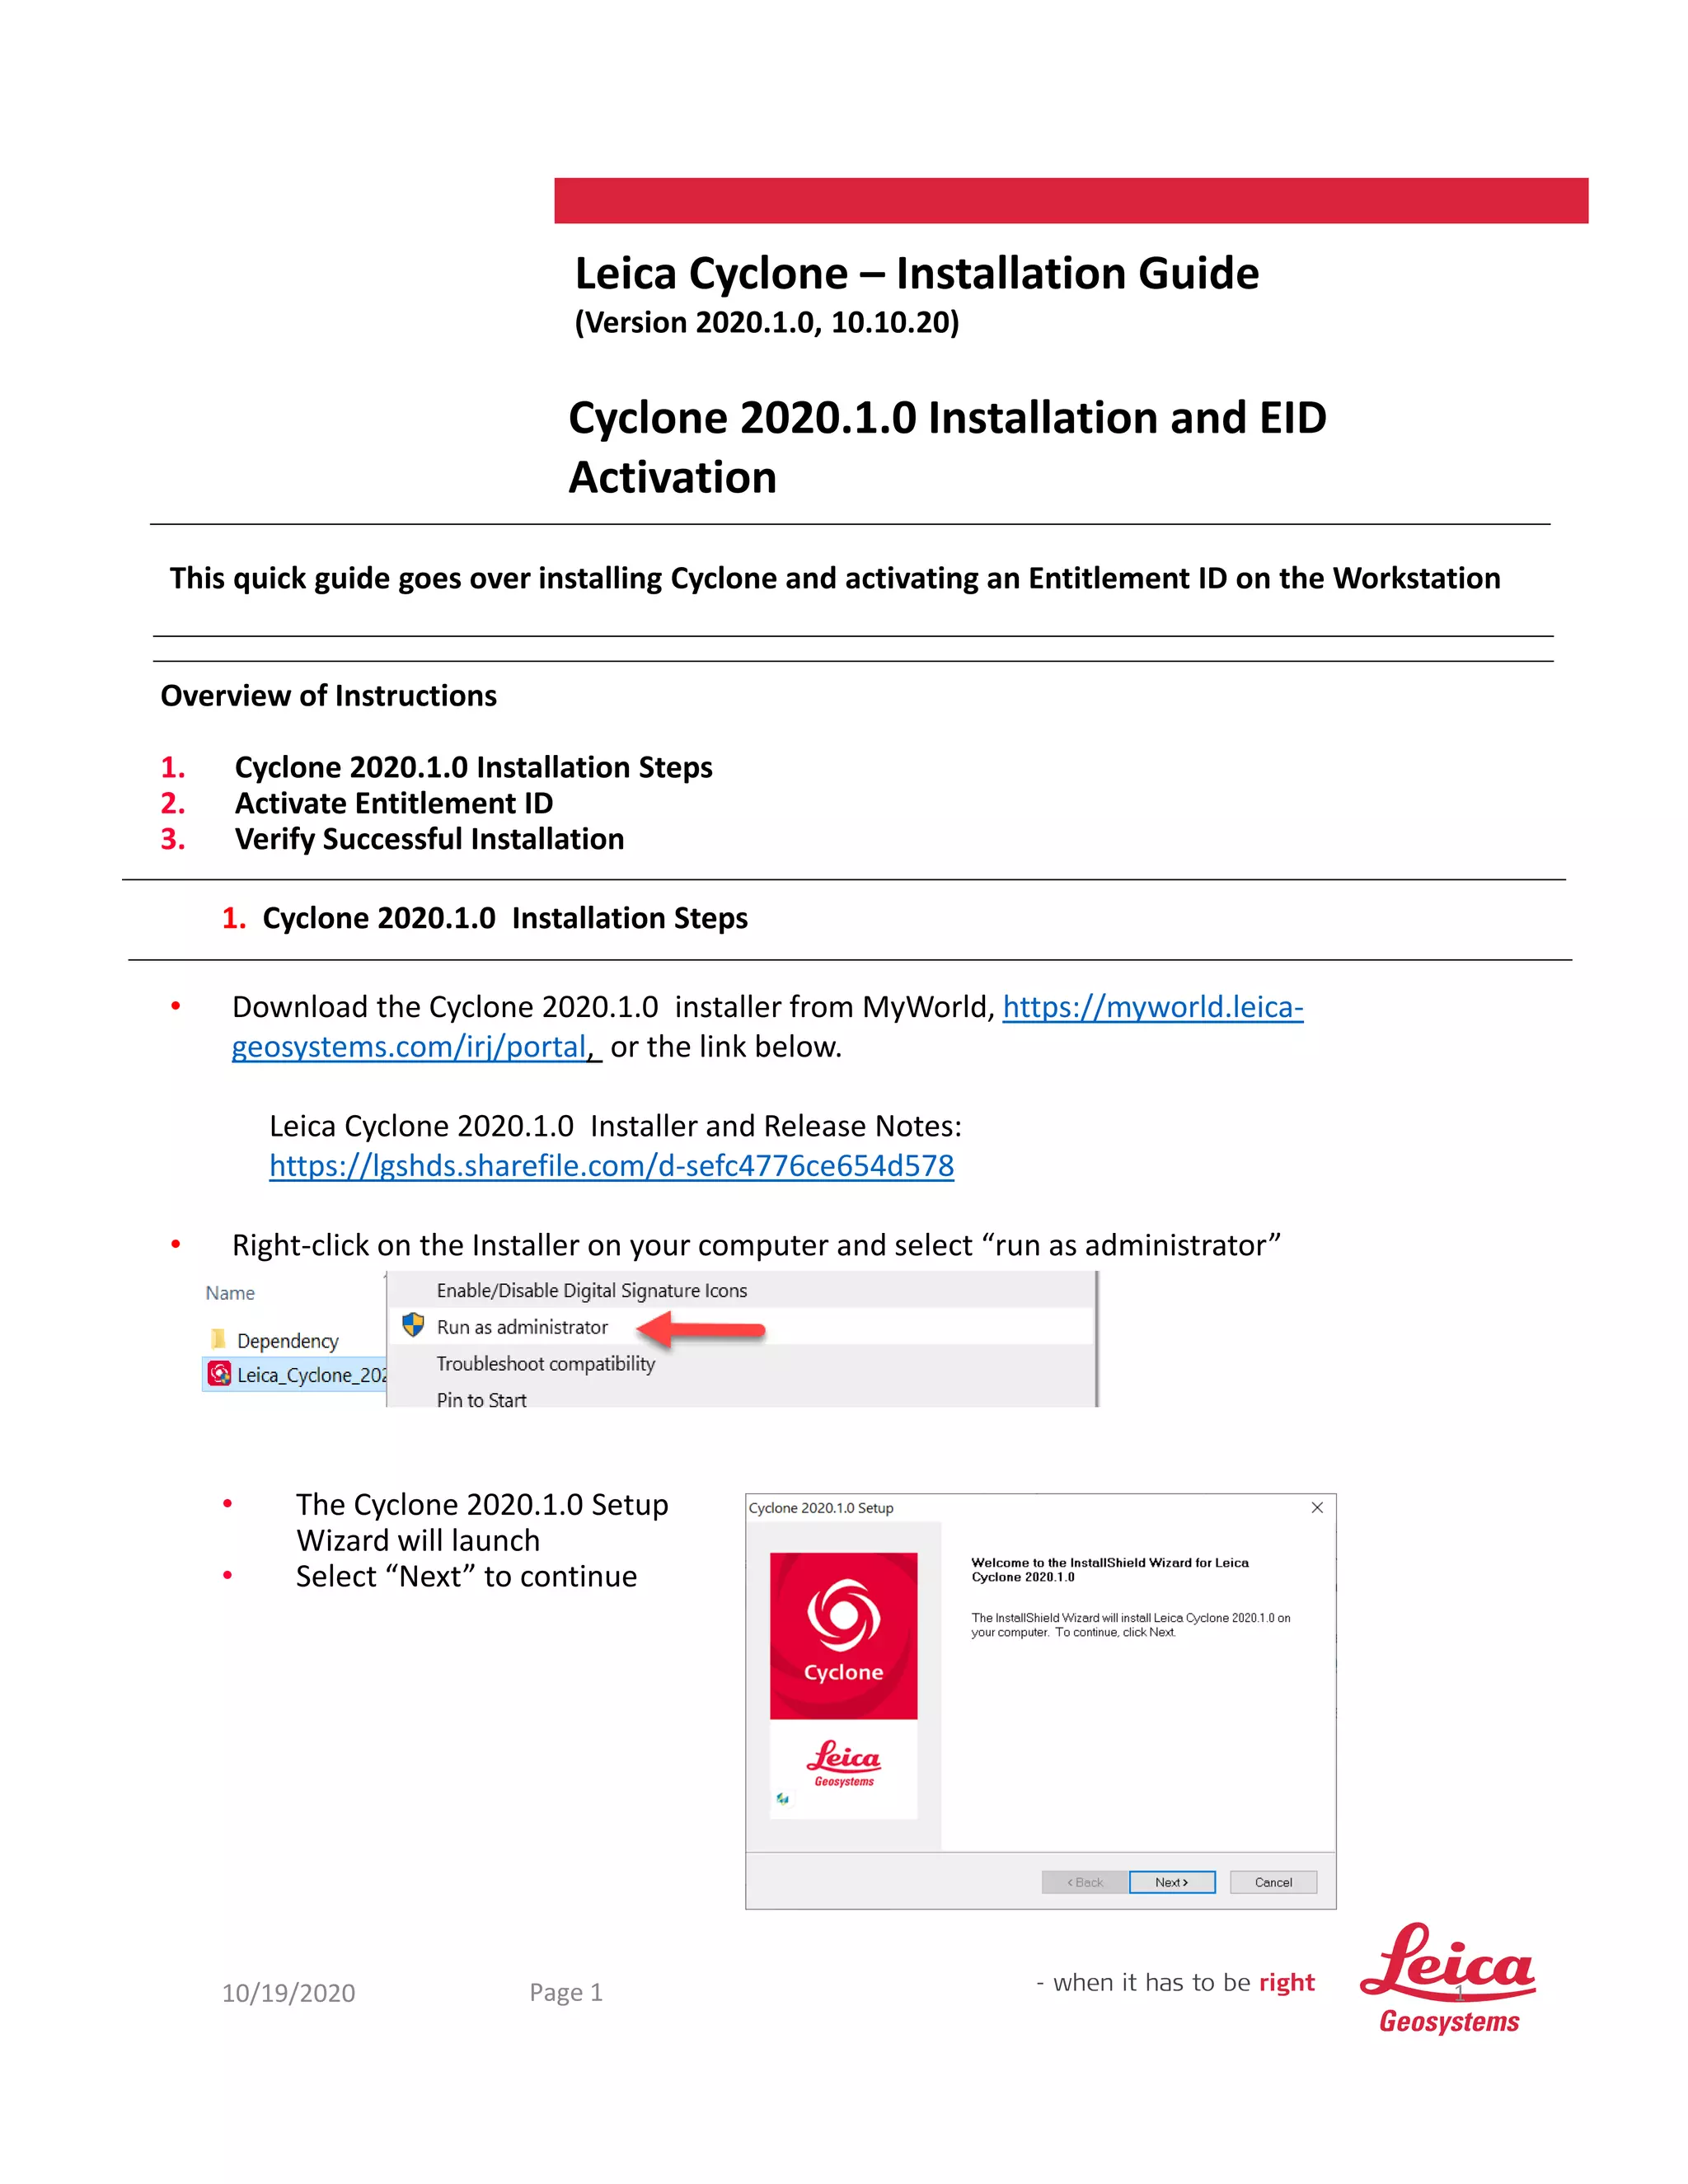
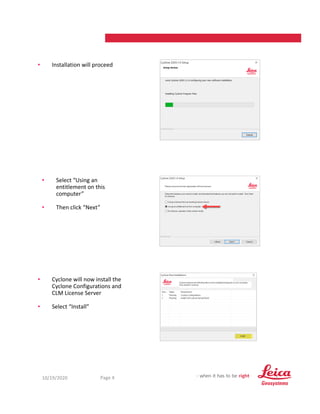
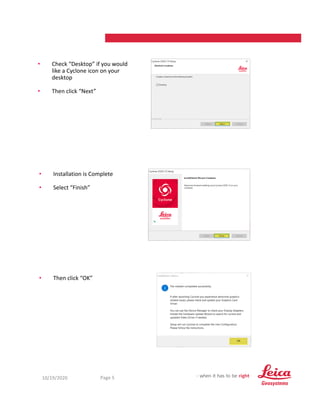
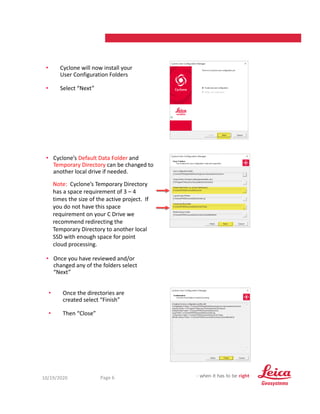
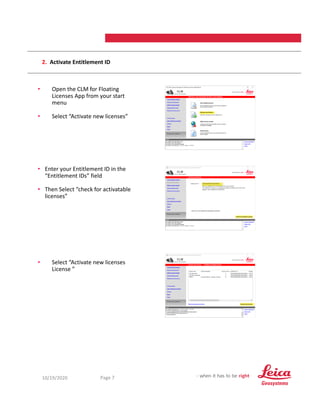
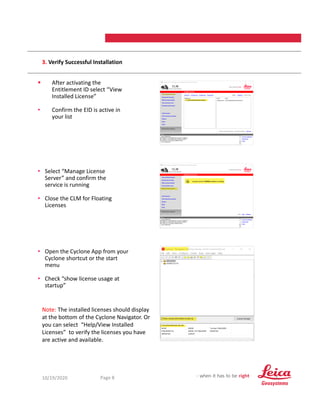
Leica Cyclone – Installation Guide
(Version 2020.1.0, 10.10.20)
Cyclone 2020.1.0 Installation and EID
Activation
This quick guide goes over installing Cyclone and activating an Entitlement ID on the Workstation
Overview of Instructions
1. Cyclone 2020.1.0 Installation Steps
2. Activate Entitlement ID
3. Verify Successful Installation
10/19/2020 1
Page 1
1. Cyclone 2020.1.0 Installation Steps
• The Cyclone 2020.1.0 Setup
Wizard will launch
• Select “Next” to continue
• Download the Cyclone 2020.1.0 installer from MyWorld, https://myworld.leica‐
geosystems.com/irj/portal, or the link below.
Leica Cyclone 2020.1.0 Installer and Release Notes:
https://lgshds.sharefile.com/d‐sefc4776ce654d578
• Right‐click on the Installer on your computer and select “run as administrator”
10/19/2020 2
Page 2
• If you agree to the License
Agreement terms, select “Yes”
• Cyclone’s program files will
install on the C Drive by
default
• Click “Next”
• Cyclone Customization Installation
should be selected
• Then select “Next”
10/19/2020 3
Page 3
• Confirm all of the features to
are selected
• Then select “Next”
• The Cyclone Program Folders
is listed and can be modified
if needed.
• Select “Next”
• The Cyclone Installer will
now copy the files to the
directories listed
• Select “Next”
10/19/2020 4
Page 4
• Installation will proceed
• Cyclone will now install the
Cyclone Configurations and
CLM License Server
• Select “Install”
• Select “Using an
entitlement on this
computer”
• Then click “Next”
10/19/2020 5
Page 5
• Check “Desktop” if you would
like a Cyclone icon on your
desktop
• Then click “Next”
• Then click “OK”
• Installation is Complete
• Select “Finish”
10/19/2020 6
Page 6
• Cyclone will now install your
User Configuration Folders
• Select “Next”
• Once the directories are
created select “Finish”
• Then “Close”
• Cyclone’s Default Data Folder and
Temporary Directory can be changed to
another local drive if needed.
Note: Cyclone’s Temporary Directory
has a space requirement of 3 – 4
times the size of the active project. If
you do not have this space
requirement on your C Drive we
recommend redirecting the
Temporary Directory to another local
SSD with enough space for point
cloud processing.
• Once you have reviewed and/or
changed any of the folders select
“Next”
10/19/2020 7
Page 7
2. Activate Entitlement ID
• Open the CLM for Floating
Licenses App from your start
menu
• Select “Activate new licenses”
• Select “Activate new licenses
License ”
• Enter your Entitlement ID in the
“Entitlement IDs” field
• Then Select “check for activatable
licenses”
10/19/2020 8
Page 8
3. Verify Successful Installation
 After activating the
Entitlement ID select “View
Installed License”
• Confirm the EID is active in
your list
• Open the Cyclone App from your
Cyclone shortcut or the start
menu
• Check “show license usage at
startup”
• Select “Manage License
Server” and confirm the
service is running
• Close the CLM for Floating
Licenses
Note: The installed licenses should display
at the bottom of the Cyclone Navigator. Or
you can select “Help/View Installed
Licenses” to verify the licenses you have
are active and available.

QG-Cyclone-Installation.pdf

  • 1.
    Leica Cyclone –Installation Guide (Version 2020.1.0, 10.10.20) Cyclone 2020.1.0 Installation and EID Activation This quick guide goes over installing Cyclone and activating an Entitlement ID on the Workstation Overview of Instructions 1. Cyclone 2020.1.0 Installation Steps 2. Activate Entitlement ID 3. Verify Successful Installation 10/19/2020 1 Page 1 1. Cyclone 2020.1.0 Installation Steps • The Cyclone 2020.1.0 Setup Wizard will launch • Select “Next” to continue • Download the Cyclone 2020.1.0 installer from MyWorld, https://myworld.leica‐ geosystems.com/irj/portal, or the link below. Leica Cyclone 2020.1.0 Installer and Release Notes: https://lgshds.sharefile.com/d‐sefc4776ce654d578 • Right‐click on the Installer on your computer and select “run as administrator”
  • 2.
    10/19/2020 2 Page 2 •If you agree to the License Agreement terms, select “Yes” • Cyclone’s program files will install on the C Drive by default • Click “Next” • Cyclone Customization Installation should be selected • Then select “Next”
  • 3.
    10/19/2020 3 Page 3 •Confirm all of the features to are selected • Then select “Next” • The Cyclone Program Folders is listed and can be modified if needed. • Select “Next” • The Cyclone Installer will now copy the files to the directories listed • Select “Next”
  • 4.
    10/19/2020 4 Page 4 •Installation will proceed • Cyclone will now install the Cyclone Configurations and CLM License Server • Select “Install” • Select “Using an entitlement on this computer” • Then click “Next”
  • 5.
    10/19/2020 5 Page 5 •Check “Desktop” if you would like a Cyclone icon on your desktop • Then click “Next” • Then click “OK” • Installation is Complete • Select “Finish”
  • 6.
    10/19/2020 6 Page 6 •Cyclone will now install your User Configuration Folders • Select “Next” • Once the directories are created select “Finish” • Then “Close” • Cyclone’s Default Data Folder and Temporary Directory can be changed to another local drive if needed. Note: Cyclone’s Temporary Directory has a space requirement of 3 – 4 times the size of the active project. If you do not have this space requirement on your C Drive we recommend redirecting the Temporary Directory to another local SSD with enough space for point cloud processing. • Once you have reviewed and/or changed any of the folders select “Next”
  • 7.
    10/19/2020 7 Page 7 2.Activate Entitlement ID • Open the CLM for Floating Licenses App from your start menu • Select “Activate new licenses” • Select “Activate new licenses License ” • Enter your Entitlement ID in the “Entitlement IDs” field • Then Select “check for activatable licenses”
  • 8.
    10/19/2020 8 Page 8 3.Verify Successful Installation  After activating the Entitlement ID select “View Installed License” • Confirm the EID is active in your list • Open the Cyclone App from your Cyclone shortcut or the start menu • Check “show license usage at startup” • Select “Manage License Server” and confirm the service is running • Close the CLM for Floating Licenses Note: The installed licenses should display at the bottom of the Cyclone Navigator. Or you can select “Help/View Installed Licenses” to verify the licenses you have are active and available.