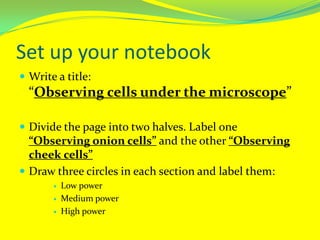
Observing human cellsand plant cellsWhat are the differences?
How this presentation worksWhile the screen is BLUE, watch and listenWhen the screen is YELLOW, do what the instructions tell youYou will need to watch some videos during this lab, they are on the same page of the website, just press escape to get out of full screen mode.
Your objectiveAt the end of this lab, you will have seen real animal cells from your own body and plant cells from an onion and will be able to list the differences between them.
Set up your notebookWrite a title: “Observing cells under the microscope”Divide the page into two halves. Label one “Observing onion cells” and the other “Observing cheek cells”Draw three circles in each section and label them:Low powerMedium powerHigh power
EquipmentYou will use a microscope for this lab. Take out the Parts of the Microscope card and watch the Using a Microscope video on the class website. Fill in the blanks. If you need to, you can pause and rewind the video.Glue the finished worksheet into your notebook
SafetyYou will be using biological specimens – there is always a risk of spreading disease or poisoning in a lab – especially when using biological specimens like human cells. Wash your hands and dispose of used Q-Tips immediately in the waste bin.Be careful while cutting onion.The stains we are using will stain your skin and clothes – wear an apron and gloves whenever you are handling the stain or slides. TAKE CARE.
Preparing the slidesYou will prepare two slide to look at under the microscope:One from your own cells, taken from the inside of your cheekOne from an onion
Onion Cells - ProcedureRemember, this is a BLUE slide, just read the instructions this timeObtain a clean slide and cover slip.Take a piece of onion and cut a piece about as big as your thumbnail. Using the forceps, carefully peel of the very thin skin between the onion layers and put it in the middle of your slide.
Onion cells – continued.Using the dropper, put a drop of Iodine stain on a slide. Be careful, stains can ruin clothing and other materials.Wait 3-4 minutes before putting a coverslip on the slide. Prepare your cheek cell slides while you wait.Put a cover slip over the stain. Do not press or you might burst the cells.
Cheek cells - procedureObtain a clean slide and cover slip.Gently rub the end of a Q-tip on the inside of your mouth along the cheek. Some of the cells from your cheek will come off on the Q-Tip. Be careful! Do not gouge out your cheek.Wipe the Q-Tip on the center of the slide so that the cells from your cheek are transferred to the slide.
Cheek cells – continuedUsing the dropper, put a drop of Methylene Blue stain on a slide. Be careful, stains can ruin clothing and other materials.Immediately, throw the Q-tip away.Put a cover slip over the stain. Do not press or you may crush the cells.
Review the procedure.Now watch the Preparing Slides of Cheek and Onion Cells video on the class website
Prepare onion cell slideObtain a clean slide and cover slip.Take a piece of onion and cut a piece about as big as your thumbnail. Using the forceps, carefully peel of the very thin skin between the onion layers and put it in the middle of your slide.
Onion cells – continued.Using the dropper, put a drop of Iodine stain on a slide. Be careful, stains can ruin clothing and other materials.Wait 3-4 minutes before putting a coverslip on the slide. Prepare your cheek cell slides while you wait.Put a cover slip over the stain. Do not press or you might burst the cells.
Cheek cells - procedureObtain a clean slide and cover slip.Gently rub the end of a Q-tip on the inside of your mouth along the cheek. Some of the cells from your cheek will come off on the Q-Tip. Be careful! Do not gouge out your cheek.Wipe the Q-Tip on the center of the slide so that the cells from your cheek are transferred to the slide.
Cheek cells – continuedUsing the dropper, put a drop of Methylene Blue stain on a slide. Be careful, stains can ruin clothing and other materials.Immediately, throw the Q-tip away.Put a cover slip over the stain. Do not press or you may crush the cells.
Using the microscopeSwitch on the microscope lamp.Adjust the Diaphramso that the right amount of light is shining on the slideUsing the Course Focus knob, move the microscope stage so that it is as high as it will go.Turn the microscope Nose so that the Low Power Objective lens is in use.Put the slide onto the microscope stage and fix with the Stage Clips.Use the Course focus knob to move the stage down until the cells are in focus.Ask the teacher to check your focusDraw your observations in one of the Low Power circles in your notebook.
Medium powerTurn the microscope Nose so that the Medium Power Objective lens is in use.Adjust the focus with the Fine Focus knob.Ask the teacher to check your focusDraw your observations in the Medium power circle in your notebook.
High powerTurn the microscope Nose so that the High Power Objective lens is in use.Adjust the focus with the Fine Focus knob. DO NOT USE THE COURSE FOCUS KNOB.Ask the teacher to check your focusDraw your observations in the High power circle in your notebook.
AnalysisLook at the observations you recorded in your notebook.What differences do you see between the animal and plant cells?Write notes of the differences in your notebook.
ReflectionWrite a heading in your notebook, “Reflections”.What did you enjoy most about this lab?

Procedure

  • 1.
    Observing human cellsandplant cellsWhat are the differences?
  • 2.
    How this presentationworksWhile the screen is BLUE, watch and listenWhen the screen is YELLOW, do what the instructions tell youYou will need to watch some videos during this lab, they are on the same page of the website, just press escape to get out of full screen mode.
  • 3.
    Your objectiveAt theend of this lab, you will have seen real animal cells from your own body and plant cells from an onion and will be able to list the differences between them.
  • 4.
    Set up yournotebookWrite a title: “Observing cells under the microscope”Divide the page into two halves. Label one “Observing onion cells” and the other “Observing cheek cells”Draw three circles in each section and label them:Low powerMedium powerHigh power
  • 5.
    EquipmentYou will usea microscope for this lab. Take out the Parts of the Microscope card and watch the Using a Microscope video on the class website. Fill in the blanks. If you need to, you can pause and rewind the video.Glue the finished worksheet into your notebook
  • 6.
    SafetyYou will beusing biological specimens – there is always a risk of spreading disease or poisoning in a lab – especially when using biological specimens like human cells. Wash your hands and dispose of used Q-Tips immediately in the waste bin.Be careful while cutting onion.The stains we are using will stain your skin and clothes – wear an apron and gloves whenever you are handling the stain or slides. TAKE CARE.
  • 7.
    Preparing the slidesYouwill prepare two slide to look at under the microscope:One from your own cells, taken from the inside of your cheekOne from an onion
  • 8.
    Onion Cells -ProcedureRemember, this is a BLUE slide, just read the instructions this timeObtain a clean slide and cover slip.Take a piece of onion and cut a piece about as big as your thumbnail. Using the forceps, carefully peel of the very thin skin between the onion layers and put it in the middle of your slide.
  • 9.
    Onion cells –continued.Using the dropper, put a drop of Iodine stain on a slide. Be careful, stains can ruin clothing and other materials.Wait 3-4 minutes before putting a coverslip on the slide. Prepare your cheek cell slides while you wait.Put a cover slip over the stain. Do not press or you might burst the cells.
  • 10.
    Cheek cells -procedureObtain a clean slide and cover slip.Gently rub the end of a Q-tip on the inside of your mouth along the cheek. Some of the cells from your cheek will come off on the Q-Tip. Be careful! Do not gouge out your cheek.Wipe the Q-Tip on the center of the slide so that the cells from your cheek are transferred to the slide.
  • 11.
    Cheek cells –continuedUsing the dropper, put a drop of Methylene Blue stain on a slide. Be careful, stains can ruin clothing and other materials.Immediately, throw the Q-tip away.Put a cover slip over the stain. Do not press or you may crush the cells.
  • 12.
    Review the procedure.Nowwatch the Preparing Slides of Cheek and Onion Cells video on the class website
  • 13.
    Prepare onion cellslideObtain a clean slide and cover slip.Take a piece of onion and cut a piece about as big as your thumbnail. Using the forceps, carefully peel of the very thin skin between the onion layers and put it in the middle of your slide.
  • 14.
    Onion cells –continued.Using the dropper, put a drop of Iodine stain on a slide. Be careful, stains can ruin clothing and other materials.Wait 3-4 minutes before putting a coverslip on the slide. Prepare your cheek cell slides while you wait.Put a cover slip over the stain. Do not press or you might burst the cells.
  • 15.
    Cheek cells -procedureObtain a clean slide and cover slip.Gently rub the end of a Q-tip on the inside of your mouth along the cheek. Some of the cells from your cheek will come off on the Q-Tip. Be careful! Do not gouge out your cheek.Wipe the Q-Tip on the center of the slide so that the cells from your cheek are transferred to the slide.
  • 16.
    Cheek cells –continuedUsing the dropper, put a drop of Methylene Blue stain on a slide. Be careful, stains can ruin clothing and other materials.Immediately, throw the Q-tip away.Put a cover slip over the stain. Do not press or you may crush the cells.
  • 17.
    Using the microscopeSwitchon the microscope lamp.Adjust the Diaphramso that the right amount of light is shining on the slideUsing the Course Focus knob, move the microscope stage so that it is as high as it will go.Turn the microscope Nose so that the Low Power Objective lens is in use.Put the slide onto the microscope stage and fix with the Stage Clips.Use the Course focus knob to move the stage down until the cells are in focus.Ask the teacher to check your focusDraw your observations in one of the Low Power circles in your notebook.
  • 18.
    Medium powerTurn themicroscope Nose so that the Medium Power Objective lens is in use.Adjust the focus with the Fine Focus knob.Ask the teacher to check your focusDraw your observations in the Medium power circle in your notebook.
  • 19.
    High powerTurn themicroscope Nose so that the High Power Objective lens is in use.Adjust the focus with the Fine Focus knob. DO NOT USE THE COURSE FOCUS KNOB.Ask the teacher to check your focusDraw your observations in the High power circle in your notebook.
  • 20.
    AnalysisLook at theobservations you recorded in your notebook.What differences do you see between the animal and plant cells?Write notes of the differences in your notebook.
  • 21.
    ReflectionWrite a headingin your notebook, “Reflections”.What did you enjoy most about this lab?