Download to read offline


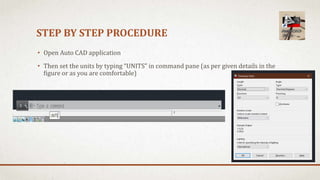
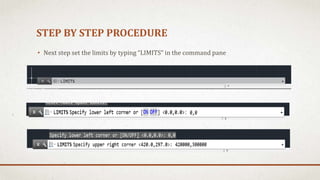
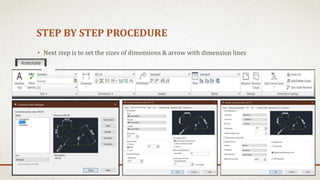
The document outlines a step-by-step guide for starting a CAD drawing using AutoCAD, prepared by Arvind Kolaki. It includes instructions on setting units, limits, and dimensions, followed by detailed steps for drawing a fully panelled door, including the use of various commands and adding measurements. The final steps involve hatching components and adding text to complete the drawing.


