Partner finding town twinning webinar 16.11.12 final
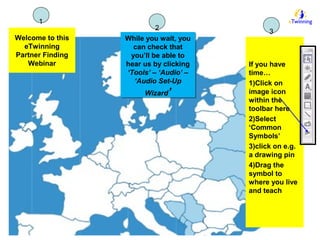
1. Welcome to this
eTwinning
Partner Finding
Webinar
While you wait, you
can check that
you’ll be able to
hear us by clicking
‘Tools’ – ‘Audio’ –
‘Audio Set-Up
Wizard’
While you wait, you
can check that
you’ll be able to
hear us by clicking
‘Tools’ – ‘Audio’ –
‘Audio Set-Up
Wizard’
If you have
time…
1)Click on
image icon
within the
toolbar here
2)Select
‘Common
Symbols’
3)click on e.g.
a drawing pin
4)Drag the
symbol to
where you live
and teach
1
2 3
3. eTwinning
Partner
Finding
Agenda
• Blackboard Collaborate tools
• Project planning document
• Tasks to define groups
• Partner finding exercise
• Adding your partner as a contact
• Discuss project planning document
• Next steps (Register your project)
4. Nice to
meet you
An
Introduction
to the
eTwinning
team
Karen Cleland
British Council (Belfast)
Product Support Officer: East & West
Midlands
Guitar player keen walker
enthusiastic cook
5. Ni ce to
m eet
you
An
Introduction
to the
eTwinning
team
Rosalyn Kennedy
British Council: Belfast,
Writing, Painting, Mountain
Climbing, general exploring
6. Nice to
meet you
An
Introduction
to the
eTwinning
team
Yassen Spassov
Human Resource Development Centre
(Sofia)
eTwinning Project Coordinator
Finance, Music, Drum player
7. Blackboard
Collaborate
The Basics
• Chat facility
• Vote
• Multiple choice
• Non-verbal communication tools
• Text Tool
• Common Symbols
• Raising your hand
• Using your microphone
8. When you sign in you
will see your own
name, as well as the
names of the
moderator and the
other webinar
participants
9. Write your message in
the text box and hit
enter
This is the chat facility
where you can ask
questions and talk to
other participants
10. Task 1
Use the Chat function to
introduce yourself.
Hi, my name is… I am
from….
12. Task 2
Use the green tick or red
cross to answer this question
Have you attended an
eTwinning webinar before
now?
Yes
x No
13. Just click on the letter that
corresponds to your answer
14. Task 3
Use the vote function to
answer our poll…
How long have you been
eTwinning?
A. Less than one month
B. Less than one year
C. More than one year
D. I don’t know
15. Click on the text tool
and type your answer
onto the whiteboard
16. If you have a
question you can
raise your hand
20. Task 5
If you’re still with us and
raring to go give us a smiley
face!
21. Project
Planning
Document
• Title
• Short Description
• Languages
• Pupil's age
• How many pupils will participate in
total
• Subjects Areas
• Tools to be used
• Aims
• Work process
• Expected results
• Is your project based on a Project
Kit?
34. ROOM 1
A) Age 5-7
Discuss
project
planning
document
Title
Short Description
Languages
Pupil's age
How many pupils will participate in total
Subjects Areas
Tools to be used
Aims
35. ROOM 1
A) Age 5-7
Discuss
project
planning
document
Title
Short Description
Languages
Pupil's age
How many pupils will participate in total
Subjects Areas
Tools to be used
Aims
36. ROOM 1
A) Age 5-7
Discuss
project
planning
document
Title
Short Description
Languages
Pupil's age
How many pupils will participate in total
Subjects Areas
Tools to be used
Aims
37. ROOM 1
A) Age 5-7
Discuss
project
planning
document
Title
Short Description
Languages
Pupil's age
How many pupils will participate in total
Subjects Areas
Tools to be used
Aims
38. ROOM 1
A) Age 5-7
Discuss
project
planning
document
Title
Short Description
Languages
Pupil's age
How many pupils will participate in total
Subjects Areas
Tools to be used
Aims
39. ROOM 1
A) Age 5-7
Discuss
project
planning
document
Title
Short Description
Languages
Pupil's age
How many pupils will participate in total
Subjects Areas
Tools to be used
Aims
43. Select the one partner
that you want to set the
project up with
44. Project Description Page –
these are details for the project
as a whole not just your
school, you are writing on
behalf of your partners too so
don’t be UK-centric.
45. Give your project a title.
This should be agreed
with your partner(s)
A brief overview of your
project. Try to explain
simply what your
project is about
Tick the languages that
you will use to
communicate
46.
47. Select the age range of
students in the project
and the overall number
of students involved
Select all the subject
areas that the project
covers. From yours and
your partner’s point of
view
Select the ICT tools that
you will be using
48. Project aims – specifically what you are
aiming the impact on your pupils to be.
What skills they are going to enhance,
what areas of the curriculum are going to
be enriched by working in this way
through the project
How are you going to carry out
your project? What are you
going to do when? How are you
going to collaborate and
communicate together?
What outputs and outcomes
are you planning to create
throughout and at the end of
the project?
49. This is the Preview Screen. You
can view and review all the
information that you just entered
in the Project Description Page.
If you want to change any of the
information at this point you can
click on Change which takes you
back a step, but if you’re happy just
click Submit.
51. Registering
your project
Recap
1. Can you register a project
without a partner?
2. Do you need to think about
the end of the project when
I’m registering it?
3. Can you change your
project details before you
submit it?
53. At this point you are told your
project is created but it will remain
pending until firstly your partner
and then the National Support
Services approve it.
You can find your project now in
the Pending tab of your Projects
page.
54. You can view the current status of
the project here. It will either be
‘waiting for partner approval’ or
‘waiting for NSS approval’.
At this stage
you can Delete
the project or
Edit the details
55. Your partner will have received a
notification in their Desktop saying
that the project has been registered
and that you are waiting for them to
accept the project.
They will also be able to find it in
the Pending tab of their Projects
page and there they will have the
option to Accept or Reject the
project.
56.
57. Once your partner has approved the
project it get’s sent to the NSS in
each country for each of them to
verify and approve (to check the
project is appropriate, well planned
etc). This shouldn’t take more than
3 days.
58. Project
approval
Recap
1. Does my project “go live”
straight away?
2. Will my partner be
automatically e-mailed when
the project is ready?
3. Do I need to contact my
NSS to tell them about my
project?
15:00-15:10 INTROS & Blackboard Collaborate tools KAREN RECORD thank you for joining us today and welcome to this session which is all about finding an eTwinning partner – here - online within the next hour or so. Amongst our participants today, we have 13 teachers at a workshop in Leicester - within the UK and 15 teachers at a workshop within Haskovo in Bulgaria. We also have ? Teachers from (Strasbourg) in France and ? Teachers from (Krefeld) in Germany. You may be aware that the UK city of Leicester is a twinned town - with Haskovo in Bulgaria (Strasbourg in France / Krefeld in Germany). So we’re hoping to see lot’s of etwinning partnerships particularly between twinned towns. Of course if you don’t find a suitable partner online today, we will provide details at the end of the session for you to contact us for further support.
KAREN Our agenda for todays webinar is as follows: Blackboard Collaborate tools I will then share a Project planning document with you all – we’ll all look at this document, as you will need it later on in the webinar After this we will be splitting you into groups Then We’ll then get straight to the Partner finding exercise After this exercise you will hopefully have a partner to add, as your contact on the teachers desktop – if you’re not clear on how to do this we will explain at this point What we would then like you to do is discuss the project planning document in your group In the final part of this webinar, we’ll show you the next steps you’ll need to take to register your project
KAREN First of all nice to meet you all…intro
Roz
Yassen Introduce…. PASS MIC BACK TO KAREN I would also like to introduce our eTwinning ambassadors who will be helping with the partner finding element of todays webinar – Anne Jakins, Nick Falk and Helen Trilling, …..
KAREN so the tool we are using today is called b/board collaborate and we want the session to be as interactive as possible so we are going to look at the Chat facility Using the voting buttons the multiple choice non-verbal communication tools Text Tool Common Symbols ..and finally Raising your hand and Using your microphone
SKIP IF PARTICIPATED BEFORE KAREN Participants box
KAREN SKIP IF PARTICIPATED BEFORE Chat facility
KAREN SKIP IF PARTICIPATED BEFORE This is the first task 1 out of 5 if you would all like to introduce yourselves in the chat box
KAREN
KAREN ------------------- CHANGE AFTER TOOLS -> POLLING – > POLLING TYPE –> A-D
KAREN We might ask you to pick a multiple choice answer
KAREN
KAREN There is no task for this tool – you will be able to use it when you are in your groups. When you put into groups you can write on the whiteboard, to do this you will need to click on the tool bar to the right of the chat box, on the little ‘A’ symbol. With your cursor hovering over the whiteboard type your answer
KAREN If you wish to come in on the mic please do so – just good netiquette to raise your hand first to let us know So that we can pass the mic to you The next and final task is going to…..
KAREN See who is quickest of the mark
KAREN SKIP IF PARTICIPATED BEFORE So here is the talk button – don’t be shy - use the mic don’t forget to press the talk button again once you have finished I am going to pass you over to John who will take you through the next part of this session
KAREN also you can use non-verbal emoticons – if your confused, if we are going to fast – let us know
KAREN PASS MIC TO YASSEN
15:10-15:20 Project planning document YASSEN Karen will transfer the Project planning document to you now. Please save this file to your computer. These are all of the details required when you register a project on eTwinning. The planning document has an example project detailed already to help. Title Short Description Languages Pupil's age How many pupils will participate in total Subjects Areas Tools to be used Aims Work process Expected results Is your project based on a Project Kit? After the partner finding exercise, we will be asking you to discuss this document in groups.
15:20-15:25 Tasks to define groups ROZ *** (KAREN WILL DO TOOLS) CHANGE - TOOLS -> POLLING – > POLLING TYPE –> A-E As a first step to help match you with a European partner, we will be splitting you into groups. If you can indicate which age group you teach, we will move to another room and we will give you a further task within this room. ROZ MOVES PARTICIPANTS
15:25-15:35 Partner finding exercise *** THE NEXT FIVE SLIDES WILL BE PRELOADED IN THE BREAKOUT ROOMS ROOM 1 - KAREN Age 5-7 ********** Teachers discuss subject area, project idea etc + plus use text tool to write a message if haven’t done so via wallwisher If necessary moderator will split group further by creating another room. TASK: get partners full name
15:25-15:35 Partner finding exercise ROOM 2 - ROZ Age 8-9 Teachers discuss subject area, project idea etc + plus use text tool to write a message if haven’t done so via wallwisher If necessary moderator will split group further by creating another room. TASK: get partners full name
15:25-15:35 Partner finding exercise ROOM 3 ANNE Age 10-12 Teachers discuss subject area, project idea etc + plus use text tool to write a message if haven’t done so via wallwisher If necessary moderator will split group further by creating another room. TASK: get partners full name
15:25-15:35 Partner finding exercise ROOM 4 NICK Age 13-15 Teachers discuss subject area, project idea etc + plus use text tool to write a message if haven’t done so via wallwisher If necessary moderator will split group further by creating another room. TASK: get partners full name
15:25-15:35 Partner finding exercise ROOM 5 YASSEN Age 16-18 Teachers discuss subject area, project idea etc + plus use text tool to write a message if haven’t done so via wallwisher If necessary moderator will split group further by creating another room. TASK: get partners full name
15:35-15:50 Adding your partner as a contact ROZ *** (KAREN WILL DO TOOLS) CHANGE - TOOLS -> POLLING – > POLLING TYPE –> A-E As a first step to help match you with a European partner, we will be splitting you into groups. If you can indicate which age group you teach, we will move to another room and we will give you a further task within this room. ROZ MOVES PARTICIPANTS BACK TO MAIN ROOM
ROZ To begin with, a reminder that you always logon first to the eTwinning.net homepage and you do this in the top right corner
ROZ Once you are in your Desktop, you can check whether you are ready to register your project. Firstly, in the “Profile” section you should view your list of contacts. Click on “see all contacts” to expand the list
ROZ You will now see the complete list of all your contacts. Your partner will most likely not be listed in your contacts list. You will need your partner to be listed as a contact in order for you to submit your project.
ROZ So - Search for your partner, click in to their profile and click the add to Contacts icon Can everyone who has a partner do that now?
15:50-16:00 Discuss project planning document KAREN CHANGE VOTING TOOLS -> YES /NO ROZ Has everyone added their partner via the teachers desktop? Please use the voting tools to Indicate yes or no ALL NO’S KEEP IN MAIN ROOM ALL YES’S ASK THEM TO MOVE THEMSELVES BACK TO THE ROOM THEY WERE IN BY DRAGGING THEIR NAME INTO THAT ROOM ROZ HELPS THOSE IN MAIN ROOM – KAREN YASSEN ANNE NICK MOVE TO RESPECTIVE ROOMS
ROOM 1 - KAREN Age 5-7 Moderator oversees and helps with discussion
ROOM 2 - KAREN Age 8-9 Moderator oversees and helps with discussion
ROOM 1 - KAREN Age 5-7 Moderator oversees and helps with discussion
ROOM 3 ANNE Age 10-12 Moderator oversees and helps with discussion
ROOM 4 NICK Age 13-15 Moderator oversees and helps with discussion
ROOM 5 YASSEN Age 16-18 Moderator oversees and helps with discussion
YASSEN EVERYONE BACK IN MAIN ROOM Next Karen will quick overview of how to register your project.
16:00-16:10 Next steps (Register your project) KAREN Hopefully you will all have found a partner or at least know how to do this The next step is to register your project, so what I will do is give you a tour of the teachers desktop and guide you through this process. You will see how useful your project planning doc will come in and finally getting your project approved
KAREN Once you have checked that your partner is in your contacts list you should go back to the Projects Tab. In here you can see that there is the option to “Create A New Project”. Click on this button. If you have other eTwinning projects they will be listed here as well
KAREN The first screen you will come to is your list of contacts. Scroll up and down and select the one partner that you want to set up the project with. NOTE – Any eTwinning project that is being registered need to have at least one partner. You may have more than one partner school you are working with. If so, you can add more partners to your project later on. This is going to be explained later on in the webinar. At this stage you must only select one partner though. When you’ve done this you click on “Next Step”
KAREN Once you have done this you will come to the next step called “Project Description” Notice that your selected partner is listed at the top (show with pointer). In this screen you are going to give your project a title and a description. Remember we talked about whether you had planned a project idea with your partner already? This is why it’s a good idea to have had this conversation already if possible. It makes registering the project easier.
KAREN So, you should have an agreed title, and you should be able to give a brief overview of the project. Also, remember that this is a partnership project, so you should be giving consideration to this in your registration form. You will also need to tick the language or languages in which you will be communicating.
KAREN Ok so at this point I would like for one of you to put your hand up and then use the text tool to type in a suggested title and short description for a project
KAREN The next step is to indicate the age range of the students and you should also choose the subject area There is also a section to ask which ICT tools you wish to use. So that’s anything from simple e-mail correspondence or sharing photos or PowerPoint presentations, all the way up to blogging or video conferencing. Perhaps you’ve already given this some thought in conversation with your partner school?
KAREN The final step is probably the one that requires the most thought. The Aims of the project should be what you hope to accomplish. So that could be non specific things like students working in teams, or learning how to use an IT tool like PowerPoint or Video, to more specific things that cover certain parts of your lesson plans or curriculum. Work process means literally the steps you will go through to work on the project. “What”, “How” and “When” are all questions to consider here Expected results are how you intend to complete the aims. For example, students will have learnt how to use PowerPoint and will we will have published our presentations on the TwinSpace
KAREN When you have completed all these stages you will come to the Preview screen where you can see everything that you have added. If you want to amend anything, click “Change” in the bottom left corner. Or if you’re happy with it you can click “submit”
YASSEN IF TIME DOES NOT ALLOW MOVE TO SLIDE 60
YASSEN (RECAP) and a quick test for you if you can all use the tick and cross tool at the top of the chat box that would be great 1. Can you register a project without a partner? A) NO 2. Do you need to think about the end of the project when I’m registering it? A) YES 3. Can you change your project details before you submit it? A) YES
KAREN Section 2. Project Approval. In this section we are going to look at what happens after you have completed your registration and hit that submit button
KAREN Firstly, back in the “Projects” tab of your Desktop, you can click in the section called “pending” to see the status of your project. As it says on the screen, your project will remain in pending until: Your partner has approved it (or vice versa if it is your partner who submitted the project) The National Support Service has approved it The National Support Service, or NSS for short, is the organisation who run eTwinning in each country. So, in the UK for example it is the British Council. We are the UK National Support Service. It’s different organisations in each country but we do the same thing in running eTwinning.
KAREN Note that you can also edit or even delete your project at this stage
KAREN As mentioned, your partner will need to approve the project. They will have received a notification in their Desktop to say that the project has been registered and is waiting to approved. To approve it, they need to go to their own Pending list where they can accept (or reject) the project. As mentioned, the notification will come to their eTwinning Desktop. But it’s a good idea for you to let them know you have registered the project anyway. They will not receive automatic notification to their e-mail address unless they have specified so in their settings. To set automatic notification, click on the blue “notifications” tab. (see next screen)
KAREN Click on subscribe to get the e-mail notification. You get a daily summary of activity if you do this.
KAREN So, it’s important to remember that your partner needs to approve the project to begin with. Or if your partner has registered the project, you need to approve it before you can carry onto the next step. The next step is that the project is sent to the NSS in each of the two countries to verify and approve it. NSS’s will differ in their approach. We check new projects every day – other NSS’s may work differently, but verification would not take longer than three days. You do not need to contact your NSS to let them know you have registered a project. We receive automatic notification of t his. End of this first section.
ROZ (RECAP) and a quick test for you if you can all use the tick and cross tool at the top of the chat box Does my project “go live” straight away? NO 2) Will my partner be automatically e-mailed when the project is ready? YES 3) Do I need to contact my NSS to tell them about my project? A) NO So either yourself or your partner needs to approve the project before the National Support Service will receive notification of this – then myself and my colleagues can approve – that’s the process. *** PASS mic to JOHN
16:10-16:20 YASSEN We’ll pause for a minute now for any questions. If possible we would like you to register your project IF TIME ALLOWS ! *** Pass mic back to ROZ
16:20-16:30 Evaluation & close ROZ We’d be grateful if you could take a minute to fill this Evaluation form for this webinar. Karen will be push this through to you now. *********** need to make a new evaluation form for all webinar participants http://etwinning.wufoo.eu/forms/etwinning-webinar-participant-feedback/
ROZ Like to take this opportunity to thank you for attending - we hope you enjoyed ……….