Downloaded 135 times

![www.bisptrainings.com www.bispsolutions.com
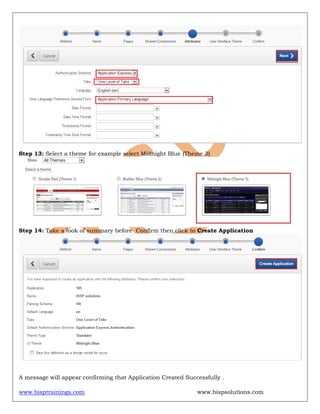
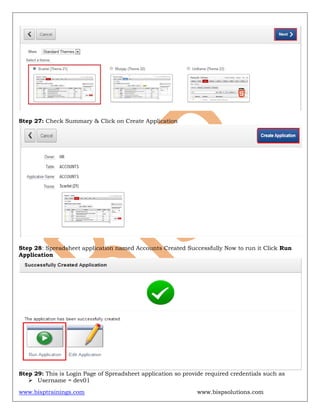
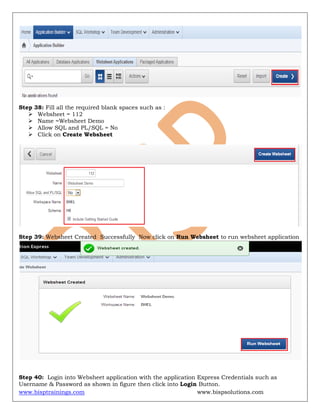
Step 10: Click Next Button
Step 11: Select No if don't want to copy shared components from another application & then Click
Next
Step 12 : Page for authentication is open so fill all the required fields
Authentication Scheme = Application Express
Note : This Authentication consists primarily three schemes for login security purpose &
these are [1] Application express [2] Database Account [3] No Authentication
Tabs = One Level of Tabs
Language = English (en)
User Language Preference Derived From = Application Primary Language
Click to Next](https://image.slidesharecdn.com/oracleapexhands-onlab2-140314080506-phpapp01/85/Oracle-apex-hands-on-lab-2-7-320.jpg)
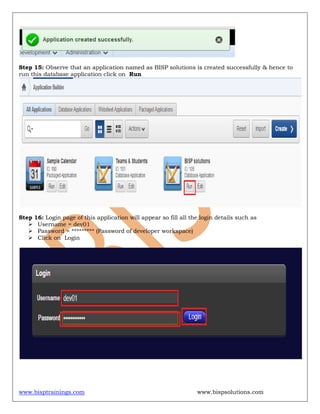
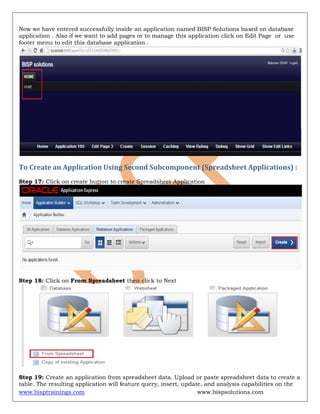
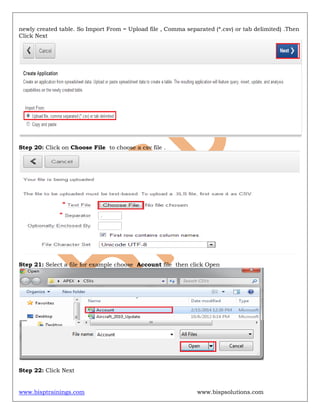
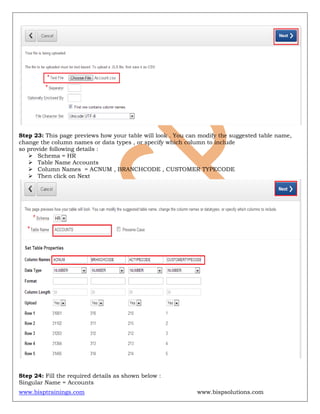

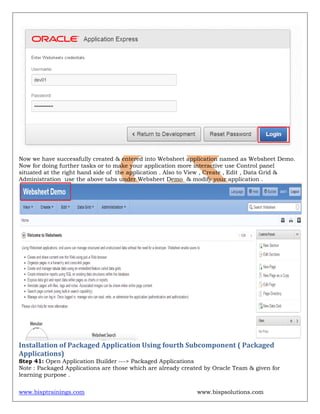
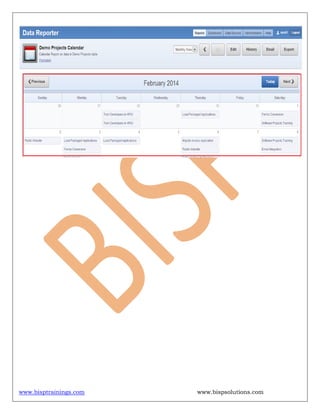

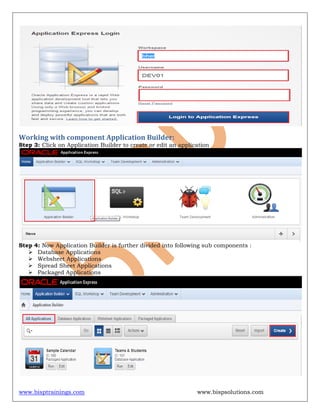
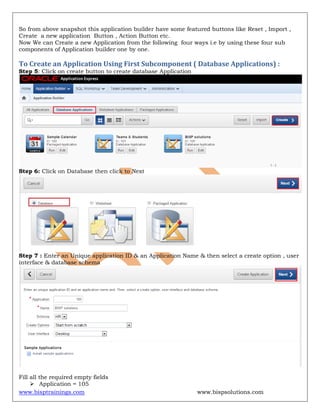
The document provides instructions for creating different types of applications in Oracle Application Express (APEX) using the Application Builder component. It describes how to create database applications, spreadsheet applications, and websheet applications step-by-step. It also explains how to install pre-built packaged applications available in APEX. The goal is to provide beginners with guidance on building their first APEX applications through the different subcomponents of the Application Builder.


![Reem Mohamed[ABAP]](https://cdn.slidesharecdn.com/ss_thumbnails/8dbc3870-a277-4050-9582-180c05b49a23-150508195753-lva1-app6891-thumbnail.jpg?width=640&height=640&fit=bounds)