OP Art uses optical illusions created by precise patterns and colors to give the appearance of movement. The document then provides instructions for creating a weaving project in 3 sentences or less:
The instructions show how to measure and cut black paper to create the weft border and warp strings for a weaving, then measure and cut patterned threads to weave through the warp to complete the project. The threads are woven over and under the warp alternately and glued at the edges to finish the weaving illusion.
Để xem full tài liệu Xin vui long liên hệ page để được hỗ trợ
: https://www.facebook.com/thuvienluanvan01
HOẶC
https://www.facebook.com/garmentspace/
https://www.facebook.com/thuvienluanvan01
tai lieu tong hop, thu vien luan van, luan van tong hop, do an chuyen nganh
41 fabric manipulation tutorials
Từ khóa tìm kiếm tài liệu :
Nhận biết và phân biệt các loại vải, cotton, chiffon, silk, wool
Từ khóa tìm kiếm tài liệu :
CÁCH MAY – QUY CÁCH LẮP RÁP – QUY CÁCH ĐÁNH SỐ
TÀI LIỆU KỸ THUẬT NGÀNH MAY –TIÊU CHUẨN KỸ THUẬT – QUY CÁCH ĐÁNH SỐ - QUY CÁCH LẮP RÁP – QUY CÁCH MAY – QUY TRÌNH MAY – GẤP XẾP ĐÓNG GÓI – GIÁC SƠ ĐỒ MÃ HÀNG - Công nghệ may,kỹ thuật may dây kéo đồ án công nghệ may, công nghệ may trang phục, thiết kế trang phục, anh văn chuyên ngành may, thiết bị may công nghiệp,ngành may,báo cáo thực tập ngành may, từ điển chuyên ngành may, thiết kế trang phục 1, thiết kế trang phục thể thao, nguyên phụ liệu ngành may,vest, một số sai hỏng thường gặp ở sản phẩm may công nghiệp, quy trình may, tài liệu kỹ thuật, hình vẽ mô tả mẫu áo jacket, giác sơ đồ, giáo trình công nghệ may 3 – võ phước tấn – đại học công nghiệp tp.hcm,sách tiếng anh ngành may, sách hay ngành may,công nghệ may trang phục 1, công nghệ may tran phục 2, khoa công nghệ may và thời trang, trường đại học sư phạm kỹ thuật thành phố hồ chí minh,kỹ thuật may căn bản, quản lý đơn hàng ngành may,giáo trình thiết kế trang phục 5, thiết kế dây chuyền may, cân bằng chuyền, thiết kế đầm váy, cắt may căn bản, cắt may toàn tập, TÀI LIỆU KỸ THUẬT NGÀNH MAY, TECH PACK, QC CHUYỀN MAY, CHỨC NĂNG TỔ TRƯỞNG CHUYỀN MAY,hướng dẫn gấp xếp, đóng gói sản phẩm may,mẫu pre-production, giáo trình thiết bị trong công nghiệp may, cân bằng chuyền, mẫu trước sản xuất, ĐỒ ÁN CÔNG NGHỆ MAY, BÁO CÁO THỰC TẬP CÔNG NGHỆ MAY, may công nghiệp, quản lý sản xuất, vị trí công việc ngành may, Plat sketch, dictionary for fashion, textile, cottton, congnghemay.net ENGLISH FOR GARMENT TECHNOLOGY, Atlas.of.fashion.designers.bd, một số loại chuyền may, cơ sở sản xuất may công nghiệp,công nghệ may trang phục 1, lập kế hoạch sản xuất, giáo trình công nghệ may 2, vật liệu may trần thủy bình, công nghệ may trang phục 2, giáo trình công nghệ may 2 đại học công nghiệp tp.hcm – võ phước tấn, Fashion illustration for designers, công nghệ may 4 võ phước tấn, giáo trình thiết kế trang phục 1 võ phước tấn đại học công nghiệp,giáo trình thiết kế trang phục 2 võ phước tấn đại học công
This document provides instructions and information for a color theory layout and painting exercise. It includes a list of supplies needed and definitions of color theory terms like primary, secondary, hue, value, and complementary. Detailed steps are provided to layout various shapes and patterns on the paper including triangles, hexagons, circles and grids. Sections are dedicated to demonstrating primary colors, secondary colors, color scales like tint, shade, analogous and complementary. The final part provides procedures for painting the layout, such as not overloading brushes and keeping paint at the lower half of bristles.
1) The document provides instructions for making classic Christmas stockings from red fleece, white faux fur, and yellow felt.
2) The stocking shapes are cut out and pinned together with the fur sides inside and red fleece outside before being sewn together.
3) Additional details like stars cut from felt, names written in fabric paint, and hanging cords are added to complete the stockings.
The document provides instructions for crocheting several items including a basket, star pattern, silk bag over rings, crochet purse over rings, brioche cushion, lace, and covering an arm chair with crochet. The instructions include lists of materials and multiple rounds of detailed stitching instructions to create each item.
This document provides instructions for making felt succulents. It explains that you need 8 small felt leaves, 8 large felt leaves, and 1 long strip to make one succulent. The instructions say to print out the page, carefully cut out the leaf shapes and long strip. Then trace around each leaf shape and the strip onto the felt 8 times and 1 time respectively. Finally, cut along the traced lines to make all the pieces needed for the succulent and follow additional steps in the instruction booklet to finish it.
Foundation piecing is a technique for precisely piecing small or oddly shaped fabric pieces. There are several methods, including classic paper piecing where fabric is sewn to paper templates, freezer paper piecing where fabric is sewn along folded freezer paper, and single template piecing where individual fabric pieces are cut out and precisely positioned. Each method has pros like precision and reuseable templates, but also cons like tedious paper removal or difficulty lining up pieces.
Paper weaving is an ancient craft that involves interlacing paper strips in a loom. The document defines key weaving terms like warp, weft, and loom. It then provides a 13-step process to make a paper weaving, including cutting a paper loom, weaving colored paper strips in an over-under pattern, and framing the finished weaving. Various weaving patterns like plain, basket, twill, and satin weaves are also explained.
The document provides instructions for assembling a quilted basket with a handle. It involves piecing fabric strips together to form the basket shape, quilting the basket layer to a backing, and then sewing the basket and lining together with an attached handle. Key steps include piecing the basket sides with alternating fabric strips, quilting the basket layer in a gathered strip design, attaching the handle to the basket sides, and sewing the basket into the lining with an opening to turn right side out.
Paper bags and file folders can both be made from recycled materials like newspaper and decorated to be more aesthetically pleasing. Paper bags are a more environmentally friendly alternative to plastic bags. Instructions are provided on how to fold newspaper or paper into a bag or file folder shape and then decorate them. The objectives are to develop craft and organization skills while reusing materials.
Simple napkin designs step by step.
Join the Food Health Education Pub and SUBSCRIBE! My videos includes creative artwork, educational, health videos and much more.
SUBSCRIBE HERE:
https://www.youtube.com/channel/UCJGIUBHMmFmj9BqG7N0kUNg?view_as=public
JOIN US ON FACEBOOK: https://www.facebook.com/Food-Health-Edu-109744533798479/
The document discusses tools and techniques for technical drawing and applied geometry. It provides instructions on how to prepare drawing tools like pencils, compasses, and templates. It then explains how to use tools like T-squares, triangles, and compasses to draw different shapes, including straight lines, arcs, circles, and lines at various angles. It also covers techniques for drawing tangent lines and arcs, fillets and rounds, and intersecting or tangent circles.
1. The document describes various embroidery stitches including backstitch, bullion stitch, chain stitch, cross-stitch, feather stitch, fish bone stitch, French knot, herringbone stitch, lazy daisy chain stitch, looped stitch, running stitch, satin stitch, split stitch, seed stitch, and stem stitch.
2. It also provides instructions for transferring embroidery designs using hot-iron transfer, tracing, and stamping methods.
3. Finally, it lists good habits for clean and quality embroidery work such as having a clean work space, proper materials, hair control, using the right needles, proper thread and fabric handling, and cleaning the work area.
This is a tutorial that covers making moccasins. I learned this while working at Fort William Historical Park in Thunder Bay, ON. This tutorial is transcribed from the one I learned from and IS NOT of my creation. I just made it into a more shareable format.
The document provides instructions for making a folding photo album with three sheets of paper. It describes:
1. Cutting the paper into squares and folding each sheet in half horizontally and vertically, creating a center crease on one diagonal fold.
2. Assembling the folded sheets with the diagonal creases facing inward and alternating the open points.
3. Adhering the sheets together to form the album pages and attaching patterned cardboard covers with ribbon.
The document provides instructions for making a tissue paper flower in 7 steps: 1) Arrange tissue paper sheets neatly, 2) Fold the sheets accordion-style into 1-inch folds, 3) Fold the sheets in half for easier unfolding, 4) Wrap wire around the center fold to hold the flower shape, 5) Form a stem by extending the wire or cutting it short, 6) Unfold the accordion folds to fan out the petals, 7) Pull the petals apart to shape the flower.
This document provides instructions for making a Peepsqueak book bag with embroidery and quilting. The instructions include cutting fabric and batting pieces, assembling the bag sides by quilting strips of fabric to the batting and lining, adding a pocket and nameplate with embroidery, attaching a zipper, sewing the sides together, and adding handles. Optional instructions are given for making a matching pencil bag with similar construction.
The document provides instructions for creating a zoetrope in 12 steps. It explains that a zoetrope is a device that gives the illusion of motion when spun by having images placed inside a drum with slits. The instructions include cutting a circular base, rolling a paper tube to fit around the base, dividing the paper into cells for images, drawing a walking animation across the cells, adding a black paper behind with lines to guide cutting windows, and assembling the zoetrope by sticking the papers to the base and adding an axle.
Scrub Cap For Long Hair Printable Pattern and DIY TutorialLarissa Fontenot
Custom made scrub caps for surgeons is a REALLY big deal! https://etsy.me/2XJGbTt
Scrub Cap For Long Hair printable pattern comes in PDF format and prints on letter size (8.5" x 11") and A4 paper. You will get a PDF with instructions and pictures, and a link to video instructions.
Make sure you check the right paper size and your printer settings (100% scale of image in particular) when you are about to send the file to printer. If you don't have these capabilities on your home printer, take the file to the nearest copy/print service location (here in US it is FedEx/Kinkos and office supplies stores) and they will help you to print them out.
This document provides instructions for creating Escher-type tessellations in 4 steps: starting with a square and cutting curves into the top and side, then translating and rotating the side pieces to the other sides and taping together to form a pattern; cutting out the pattern and using it to tessellate a large piece of paper by tracing the shape and sliding it to fit into the previous tracing until the paper is filled, then adding details and color.
This document provides instructions for making paper flowers using an accordion folding technique. The instructions are divided into 11 steps. First, a strip of paper is folded into an accordion pleat and formed into a circular fan. Then, a paper flower and button are glued in the center. Separately, leaves are cut out and attached to a stick with tape to form the stem. Finally, the stem is taped to the back of the fan flower and covered with a green circle, completing the paper flower. The summary reminds crafters to use thin paper for easy folding and encourages customizing the flowers with different colors and designs.
This document provides instructions for a classic ripple afghan crochet pattern. The pattern uses four colors of yarn and requires two different sized crochet hooks. It consists of zigzags created by alternating between 9 and 10 single crochets separated by chain stitches. The afghan measures approximately 46 by 58 inches. Detailed instructions are provided for creating the ripple pattern and completing the project.
This document provides information about nets and how to construct them for various three-dimensional geometric shapes such as cubes, rectangular prisms, pyramids, cylinders, and cones. It includes directions for folding nets to create models and investigations into properties of shapes made from different nets. The document contains overviews of key aspects of nets, examples of specific nets, and questions or activities for students to explore nets and the relationships between two-dimensional net patterns and the three-dimensional shapes they form.
To make a paper mat, you will need scissors and a piece of paper. First, fold the paper into a triangle and cut off the excess to form a square. Then fold the square repeatedly into smaller squares and rectangles. Next, fold the square into a triangle and cut out patterns on each side. Finally, unfold the mat and put any trash in the recycling bin.
This document provides instructions for making various quilling patterns including a Christmas card wreath, daisy card, and bunch of flowers. The Christmas card wreath instructions include making florets, flames, candles, and Christmas roses to assemble onto a card. The daisy card instructions describe making a daisy head, bud, leaves, and assembling the pieces onto a card. The bunch of flowers instructions describe an alternate side-looping method for making varied leaf designs in different shades of green and assembling flower petals and leaves.
This is a design tutorial by Judy Larson which first appeared on The Beading Gem's Journal - www.beadinggem.com. Check out the site for free tutorials, featured designers, inspirations and so much more.
The document provides instructions for various knitting basics including how to cast on stitches using different methods, how to make knit and purl stitches, how to make stockinette and rib stitch patterns, how to cast off stitches, fix dropped stitches, increase and decrease stitches, and includes common knitting abbreviations. It describes two methods for casting on stitches, how to make knit and purl stitches by bringing the yarn to the front or back, how stockinette stitch is created by alternating rows of knit and purl stitches, and how single and double rib stitches are formed.
This document provides instructions for making a rainbow placemat. It lists the steps as: 1) fold paper in half, 2) make five cuts from the fold that are 1 inch from the edge, 3) cut strips of paper that are 1 inch wide, 4) weave the strips into the paper, and 5) tape the strips together. It then writes these steps as a paragraph with a topic sentence and details the order of completing the tasks.
KALYAN MATKA | MATKA RESULT | KALYAN MATKA TIPS | SATTA MATKA | MATKA.COM | MATKA PANA JODI TODAY | BATTA SATKA | MATKA PATTI JODI NUMBER | MATKA RESULTS | MATKA CHART | MATKA JODI | SATTA COM | FULL RATE GAME | MATKA GAME | MATKA WAPKA | ALL MATKA RESULT LIVE ONLINE | MATKA RESULT | KALYAN MATKA RESULT | DPBOSS MATKA 143 | MAIN MATKA
Heart Touching Romantic Love Shayari In English with ImagesShort Good Quotes
Explore our beautiful collection of Romantic Love Shayari in English to express your love. These heartfelt shayaris are perfect for sharing with your loved one. Get the best words to show your love and care.
➒➌➎➏➑➐➋➑➐➐KALYAN MATKA | MATKA RESULT | KALYAN MATKA TIPS | SATTA MATKA | MATKA.COM | MATKA PANA JODI TODAY | BATTA SATKA | MATKA PATTI JODI NUMBER | MATKA RESULTS | MATKA CHART | MATKA JODI | SATTA COM | FULL RATE GAME | MATKA GAME | MATKA WAPKA | ALL MATKA RESULT LIVE ONLINE | MATKA RESULT | KALYAN MATKA RESULT | DPBOSS MATKA 143 | MAIN MATKA
Tanjore Painting: Rich Heritage and Intricate Craftsmanship | Cottage9Cottage9 Enterprises
Explore the exquisite art of Tanjore Painting, known for its vibrant colors, gold foil work, and traditional themes. Discover its cultural significance today!
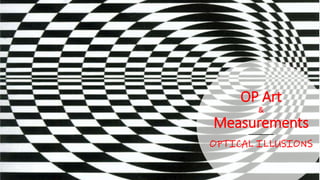
2. What is OP Art?
OP Art is a form of
abstract art that gives the
illusion of movement
with the precise use of
pattern and color or by
using conflicting patterns
that overlap each other.
8. Make the weft (border)
1. Fold the black paper in
half
2. On the opposite side from
the folded edge, make a
line 1 1/8” from the edge.
• At the corners, measure 1
1/8” in from the edge that
opens
• Line the ruler up on that
edge and draw the line
3. On the sides of the paper,
make a line 1” from the
edge.
• At the folded edge and the
corner, measure 1”
• Line the ruler up on the two
points and draw a line
9. Make the weft (border)
1. Fold the black paper in
half
2. On the opposite side from
the folded edge, make a
line 1 1/8” from the edge.
• At the corners, measure 1
1/8” in from the edge that
opens
• Line the ruler up on that
edge and draw the line
3. On the sides of the paper,
make a line 1” from the
edge.
• At the folded edge and the
corner, measure 1”
• Line the ruler up on the two
points and draw a line
10. Make the weft (border)
1. Fold the black paper in
half
2. On the opposite side from
the folded edge, make a
line 1 1/8” from the edge.
• At the corners, measure 1
1/8” in from the edge that
opens
• Line the ruler up on that
edge and draw the line
3. On the sides of the paper,
make a line 1” from the
edge.
• At the folded edge and the
corner, measure 1”
• Line the ruler up on the two
points and draw a line
11. Make the weft (border)
1. Fold the black paper in
half
2. On the opposite side from
the folded edge, make a
line 1 1/8” from the edge.
• At the corners, measure 1
1/8” in from the edge that
opens
• Line the ruler up on that
edge and draw the line
3. On the sides of the paper,
make a line 1” from the
edge.
• At the folded edge and the
corner, measure 1”
• Line the ruler up on the two
points and draw a line
12. Make the weft (border)
1. Fold the black paper in
half
2. On the opposite side from
the folded edge, make a
line 1 1/8” from the edge.
• At the corners, measure 1
1/8” in from the edge that
opens
• Line the ruler up on that
edge and draw the line
3. On the sides of the paper,
make a line 1” from the
edge.
• At the folded edge and the
corner, measure 1”
• Line the ruler up on the two
points and draw a line
13. Make the weft (border)
1. Fold the black paper in
half
2. On the opposite side from
the folded edge, make a
line 1 1/8” from the edge.
• At the corners, measure 1
1/8” in from the edge that
opens
• Line the ruler up on that
edge and draw the line
3. On the sides of the paper,
make a line 1” from the
edge.
• At the folded edge and the
corner, measure 1”
• Line the ruler up on the two
points and draw a line
14. Make the weft (border)
1. Fold the black paper in
half
2. On the opposite side from
the folded edge, make a
line 1 1/8” from the edge.
• At the corners, measure 1
1/8” in from the edge that
opens
• Line the ruler up on that
edge and draw the line
3. On the sides of the paper,
make a line 1” from the
edge.
• At the folded edge and the
corner, measure 1”
• Line the ruler up on the two
points and draw a line
15. Make the weft (border)
1. Fold the black paper in
half
2. On the opposite side from
the folded edge, make a
line 1 1/8” from the edge.
• At the corners, measure 1
1/8” in from the edge that
opens
• Line the ruler up on that
edge and draw the line
3. On the sides of the paper,
make a line 1” from the
edge.
• At the folded edge and the
corner, measure 1”
• Line the ruler up on the two
points and draw a line
16. Make the weft (border)
1. Fold the black paper in
half
2. On the opposite side from
the folded edge, make a
line 1 1/8” from the edge.
• At the corners, measure 1
1/8” in from the edge that
opens
• Line the ruler up on that
edge and draw the line
3. On the sides of the paper,
make a line 1” from the
edge.
• At the folded edge and the
corner, measure 1”
• Line the ruler up on the two
points and draw a line
17. Make the weft (border)
1. Fold the black paper in
half
2. On the opposite side from
the folded edge, make a
line 1 1/8” from the edge.
• At the corners, measure 1
1/8” in from the edge that
opens
• Line the ruler up on that
edge and draw the line
3. On the sides of the paper,
make a line 1” from the
edge.
• At the folded edge and the
corner, measure 1”
• Line the ruler up on the two
points and draw a line
18. Make the warp
1. Fold the black paper in
half again
2. Line up the ruler and
make a line down the
middle.
3. One the first line, make
three measurements
marks on either side of
the center line 1/2"
apart.
4. On the folded edge,
make three
measurements on
either side of the center
line 1” apart.
19. Make the warp
1. Fold the black paper in
half again
2. Line up the ruler and
make a line down the
middle.
3. One the first line, make
three measurements
marks on either side of
the center line 1/2" apart.
4. On the folded edge, make
three measurements on
either side of the center
line 1” apart.
5. Make a line from the first
dot on the folded edge to
the first dot on the weft.
Repeat for all 6 dots.
20. Make the warp
1. Fold the black paper in
half again
2. Line up the ruler and
make a line down the
middle.
3. One the first line, make
three measurements
marks on either side of
the center line 1/2" apart.
4. On the folded edge, make
three measurements on
either side of the center
line 1” apart.
5. Make a line from the first
dot on the folded edge to
the first dot on the weft.
Repeat for all 6 dots.
21. Make the warp
1. Fold the black paper in
half again
2. Line up the ruler and
make a line down the
middle.
3. One the first line, make
three measurements
marks on either side of
the center line 1/2" apart.
4. On the folded edge, make
three measurements on
either side of the center
line 1” apart.
5. Make a line from the first
dot on the folded edge to
the first dot on the weft.
Repeat for all 6 dots.
22. Make the warp
1. Fold the black paper in half
again
2. Line up the ruler and make a
line down the middle.
3. One the first line, make
three measurements marks
on either side of the center
line 1/2" apart.
4. On the folded edge, make
three measurements on
either side of the center line
1” apart.
5. Make a line from the first
dot on the folded edge to
the first dot on the weft.
Repeat for all 6 dots.
6. Cut the 7 lines you just
made.
23. Make the warp
1. Fold the black paper in half
again
2. Line up the ruler and make a
line down the middle.
3. One the first line, make
three measurements marks
on either side of the center
line 1/2" apart.
4. On the folded edge, make
three measurements on
either side of the center line
1” apart.
5. Make a line from the first
dot on the folded edge to
the first dot on the weft.
Repeat for all 6 dots.
6. Cut the 7 lines you just
made.
24. Make the warp
1. Fold the black paper in half
again
2. Line up the ruler and make a
line down the middle.
3. One the first line, make
three measurements marks
on either side of the center
line 1/2" apart.
4. On the folded edge, make
three measurements on
either side of the center line
1” apart.
5. Make a line from the first
dot on the folded edge to
the first dot on the weft.
Repeat for all 6 dots.
6. Cut the 7 lines you just
made.
25. Make the warp
1. Fold the black paper in half
again
2. Line up the ruler and make a
line down the middle.
3. One the first line, make
three measurements marks
on either side of the center
line 1/2" apart.
4. On the folded edge, make
three measurements on
either side of the center line
1” apart.
5. Make a line from the first
dot on the folded edge to
the first dot on the weft.
Repeat for all 6 dots.
6. Cut the 7 lines you just
made.
26. Make the warp
1. Fold the black paper in half
again
2. Line up the ruler and make a
line down the middle.
3. One the first line, make
three measurements marks
on either side of the center
line 1/2" apart.
4. On the folded edge, make
three measurements on
either side of the center line
1” apart.
5. Make a line from the first
dot on the folded edge to
the first dot on the weft.
Repeat for all 6 dots.
6. Cut the 7 lines you just
made.
27. Make the warp
1. Fold the black paper in half
again
2. Line up the ruler and make a
line down the middle.
3. One the first line, make
three measurements marks
on either side of the center
line 1/2" apart.
4. On the folded edge, make
three measurements on
either side of the center line
1” apart.
5. Make a line from the first
dot on the folded edge to
the first dot on the weft.
Repeat for all 6 dots.
6. Cut the 7 lines you just
made.
28. Make the threads
1. Measure 2” on one side
to cut off.
• Measure 2” twice along the
same side of the paper
• Draw a line between the two
dots
• Cut off the marked area
2. Draw a straight, crooked
line near along one short
edge.
3. Draw 5 more lines. You
will need two of each line:
• Straight
• Zig Zag
4. Curved Cut along the six
lines.
29. Make the threads
1. Measure 2” on one side
to cut off.
• Measure 2” twice along the
same side of the paper
• Draw a line between the two
dots
• Cut off the marked area
2. Draw a straight, crooked
line near along one short
edge.
3. Draw 5 more lines. You
will need two of each line:
• Straight
• Zig Zag
4. Curved Cut along the six
lines.
30. Make the threads
1. Measure 2” on one side
to cut off.
• Measure 2” twice along the
same side of the paper
• Draw a line between the two
dots
• Cut off the marked area
2. Draw a straight, crooked
line near along one short
edge.
3. Draw 5 more lines. You
will need two of each line:
• Straight
• Zig Zag
4. Curved Cut along the six
lines.
31. Make the threads
1. Measure 2” on one side
to cut off.
• Measure 2” twice along the
same side of the paper
• Draw a line between the two
dots
• Cut off the marked area
2. Draw a straight, crooked
line near along one short
edge.
3. Draw 5 more lines. You
will need two of each line:
• Straight
• Zig Zag
4. Curved Cut along the six
lines.
32. Make the threads
1. Measure 1” on one side
to cut off.
• Measure 1” twice along the
same side of the paper
• Draw a line between the two
dots
• Cut off the marked area
2. Draw a straight, crooked
line near along one short
edge.
3. Draw 5 more lines. You
will need two of each line:
• Straight
• Zig Zag
• Curved
4. Cut along the six lines. longer edge
shorter
edge
33. Make the threads
1. Measure 1” on one side
to cut off.
• Measure 1” twice along the
same side of the paper
• Draw a line between the two
dots
• Cut off the marked area
2. Draw a straight, crooked
line near along one short
edge.
3. Draw 5 more lines. You
will need two of each
line:
• Straight
• Zig Zag
• Curved
4. Cut along the six lines.
longer edge
shorter
edge
2 3 4 5 6
1
34. Make the threads
1. Measure 1” on one side
to cut off.
• Measure 1” twice along the
same side of the paper
• Draw a line between the two
dots
• Cut off the marked area
2. Draw a straight, crooked
line near along one short
edge.
3. Draw 5 more lines. You
will need two of each line:
• Straight
• Zig Zag
• Curved
4. Cut along the six lines.
longer edge
shorter
edge
2 3 4 5 6
1
35. Weave the parts together
1. Keeping the white
pieces in order, weave
the threads under and
over the warp.
2. Push the piece to the
top.
3. Repeat steps 1 and 2
with all the pieces,
alternating starting
under or over with each
piece.