Download as PDF, PPTX


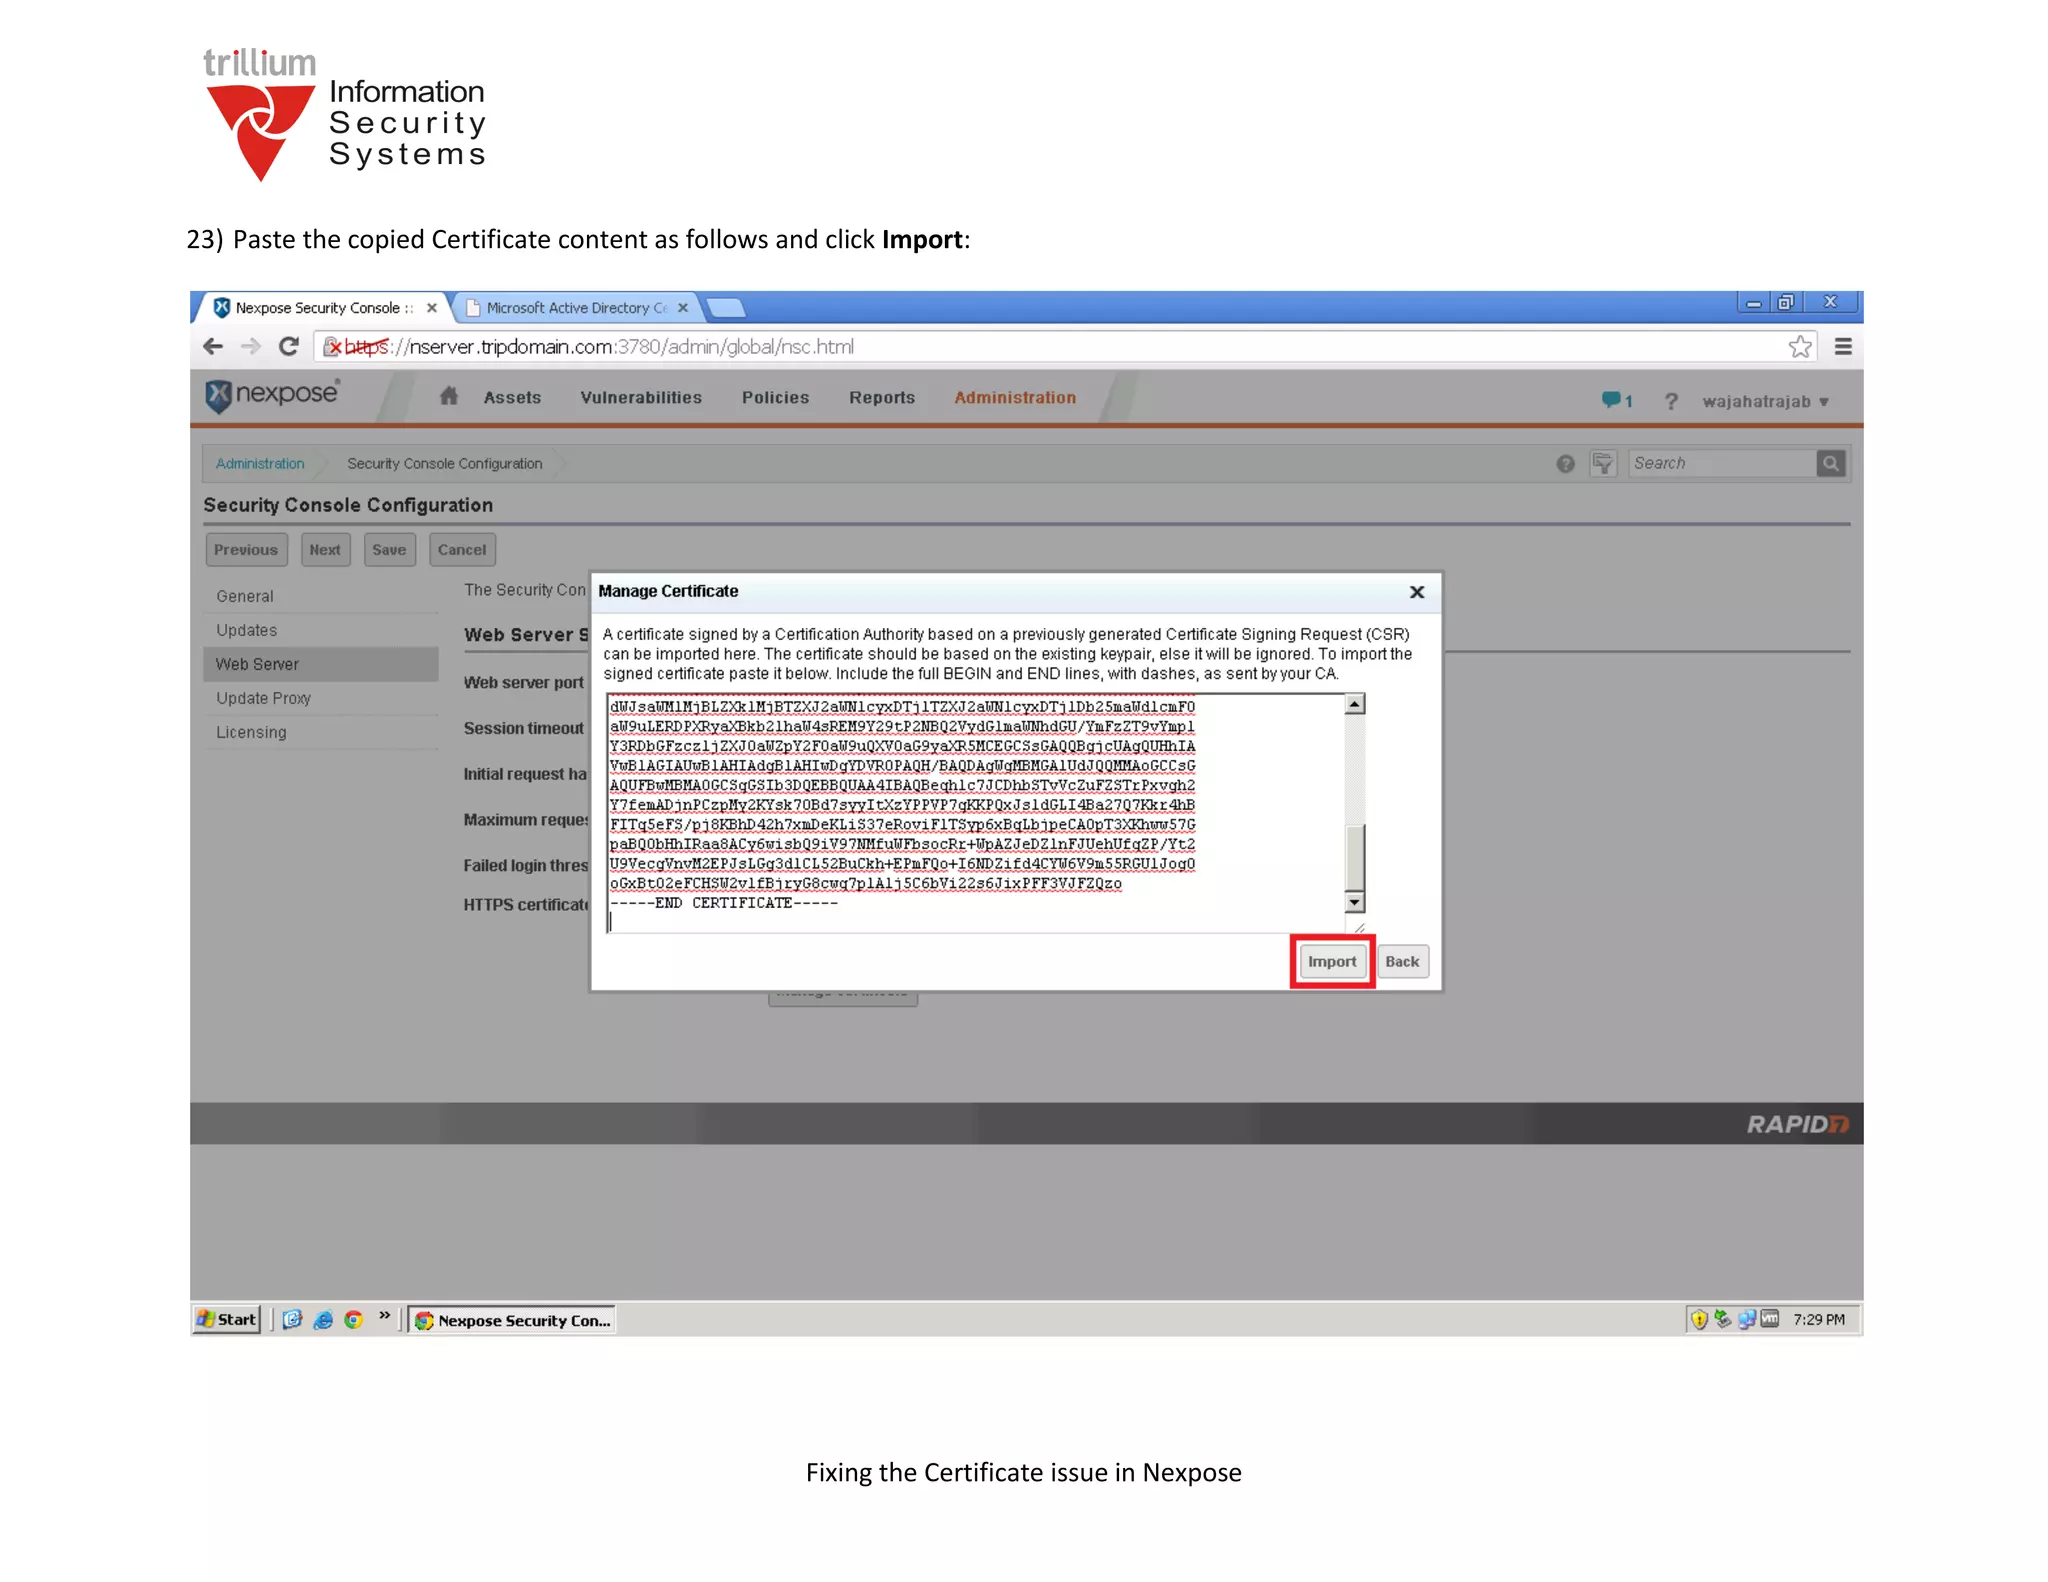


The document provides steps to fix a certificate issue in Nexpose. It involves generating a new certificate signing request, signing it with a certification authority, importing the signed certificate into Nexpose, and adding the CA certificate to the trusted root store via group policy so that the certificate is trusted on client machines. Testing in different browsers confirms the certificate issue has been permanently resolved.


![[智慧創新應用自造松]LPWAN]技術現況與應用實務](https://cdn.slidesharecdn.com/ss_thumbnails/20170701-lpwanv1-170701080729-thumbnail.jpg?width=640&height=640&fit=bounds)


