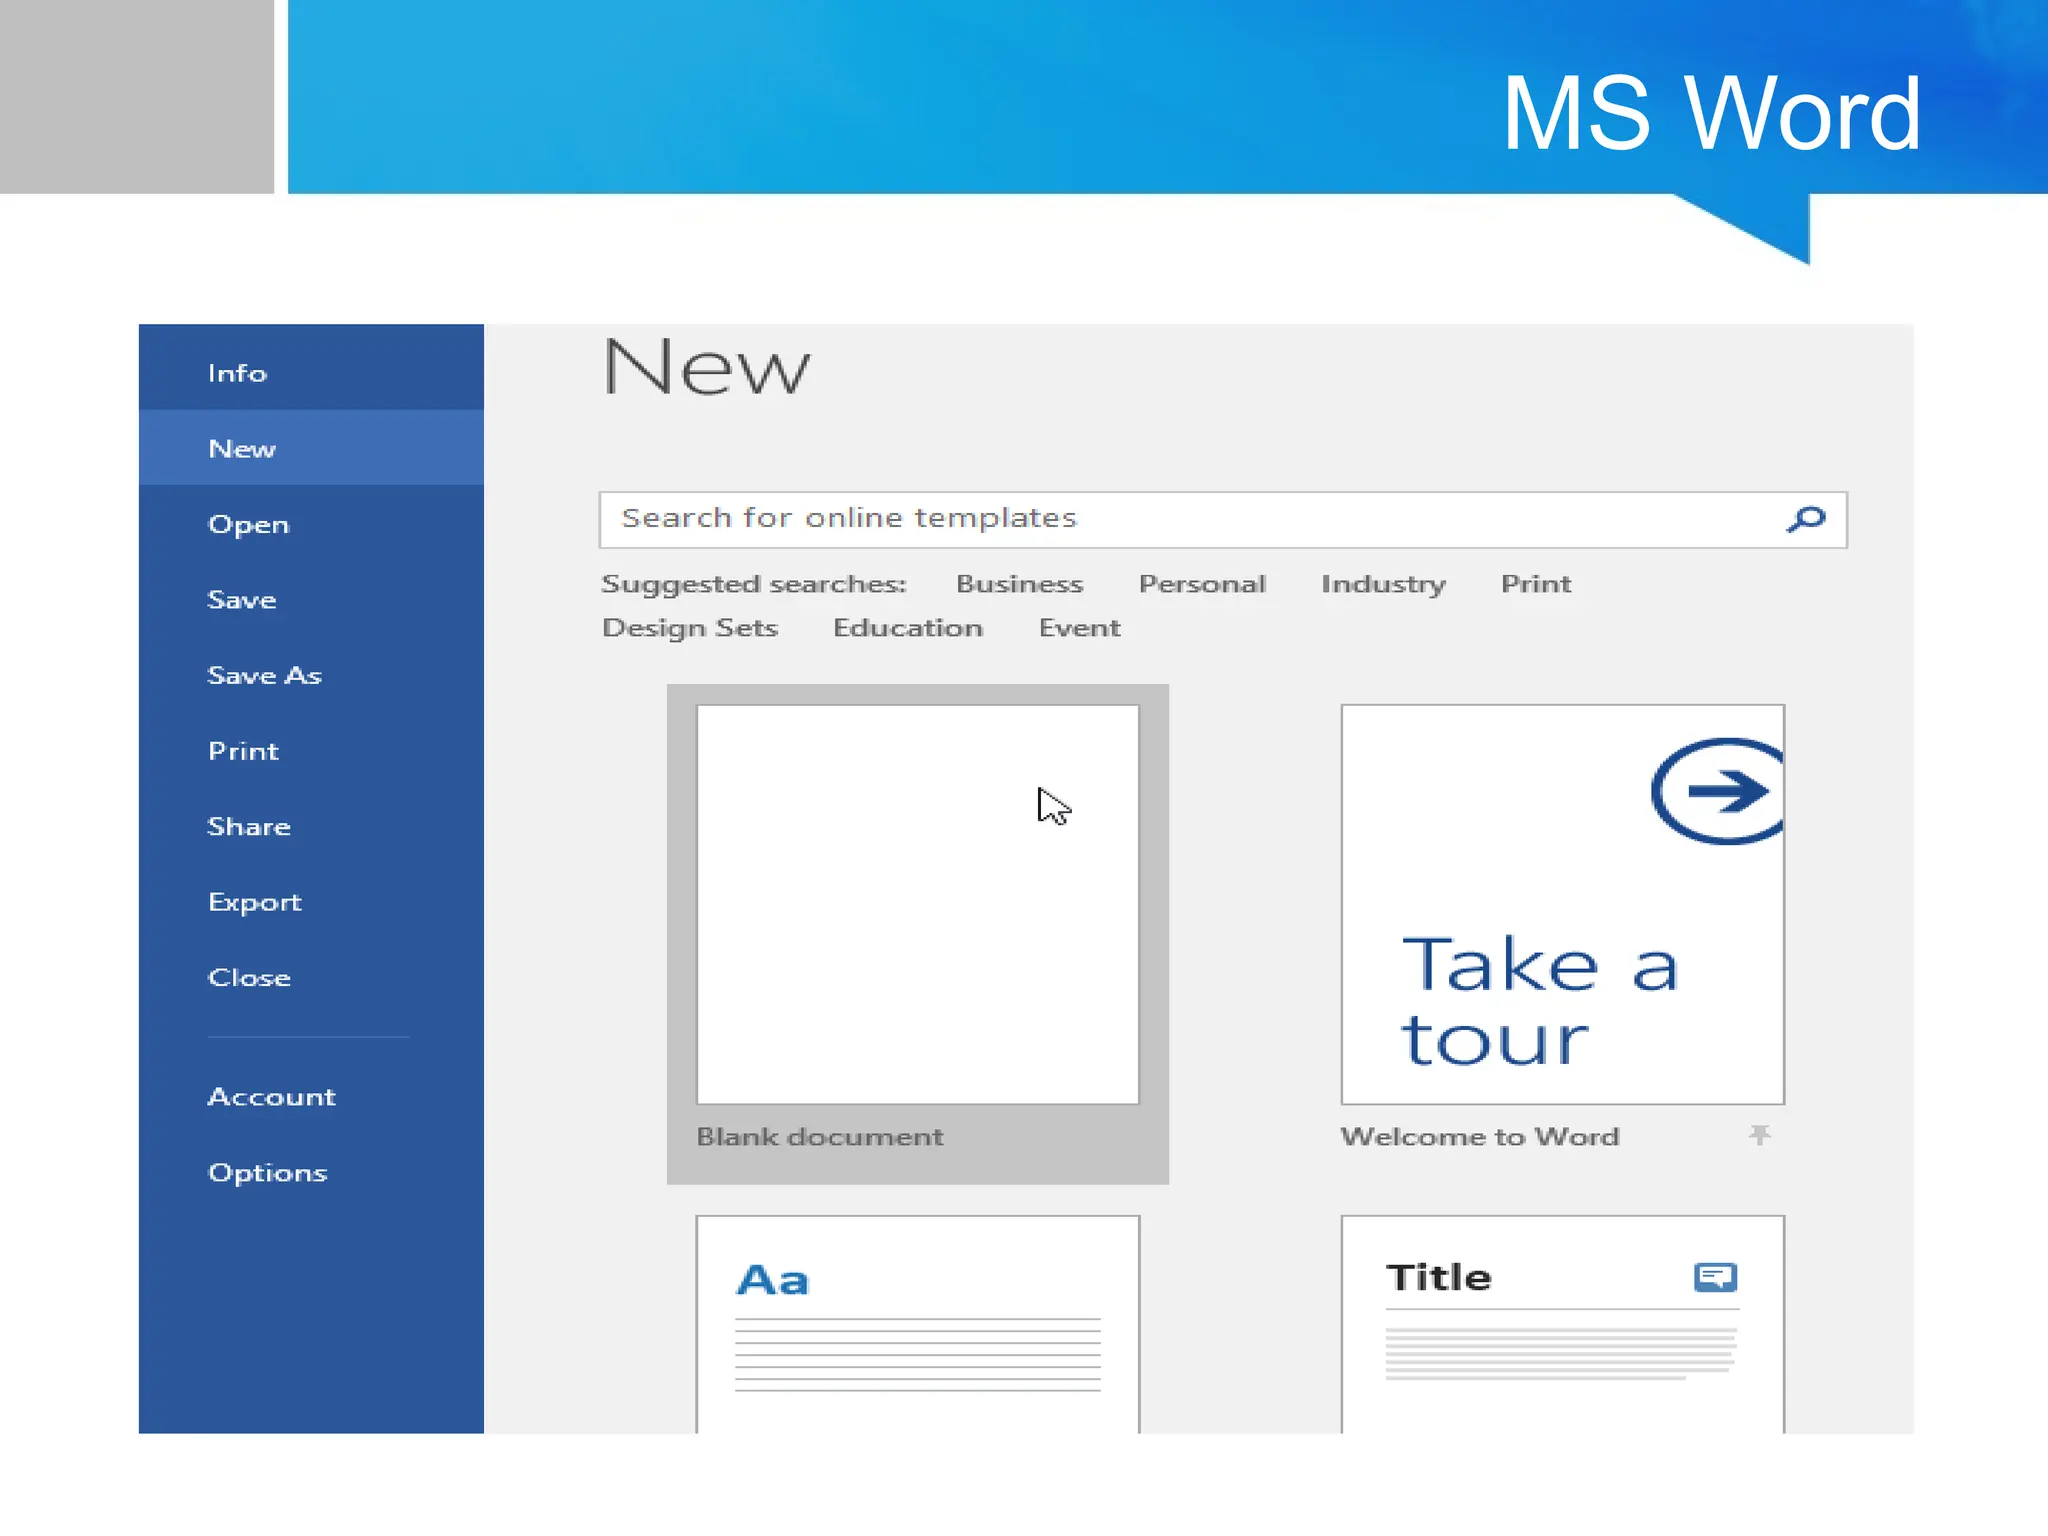
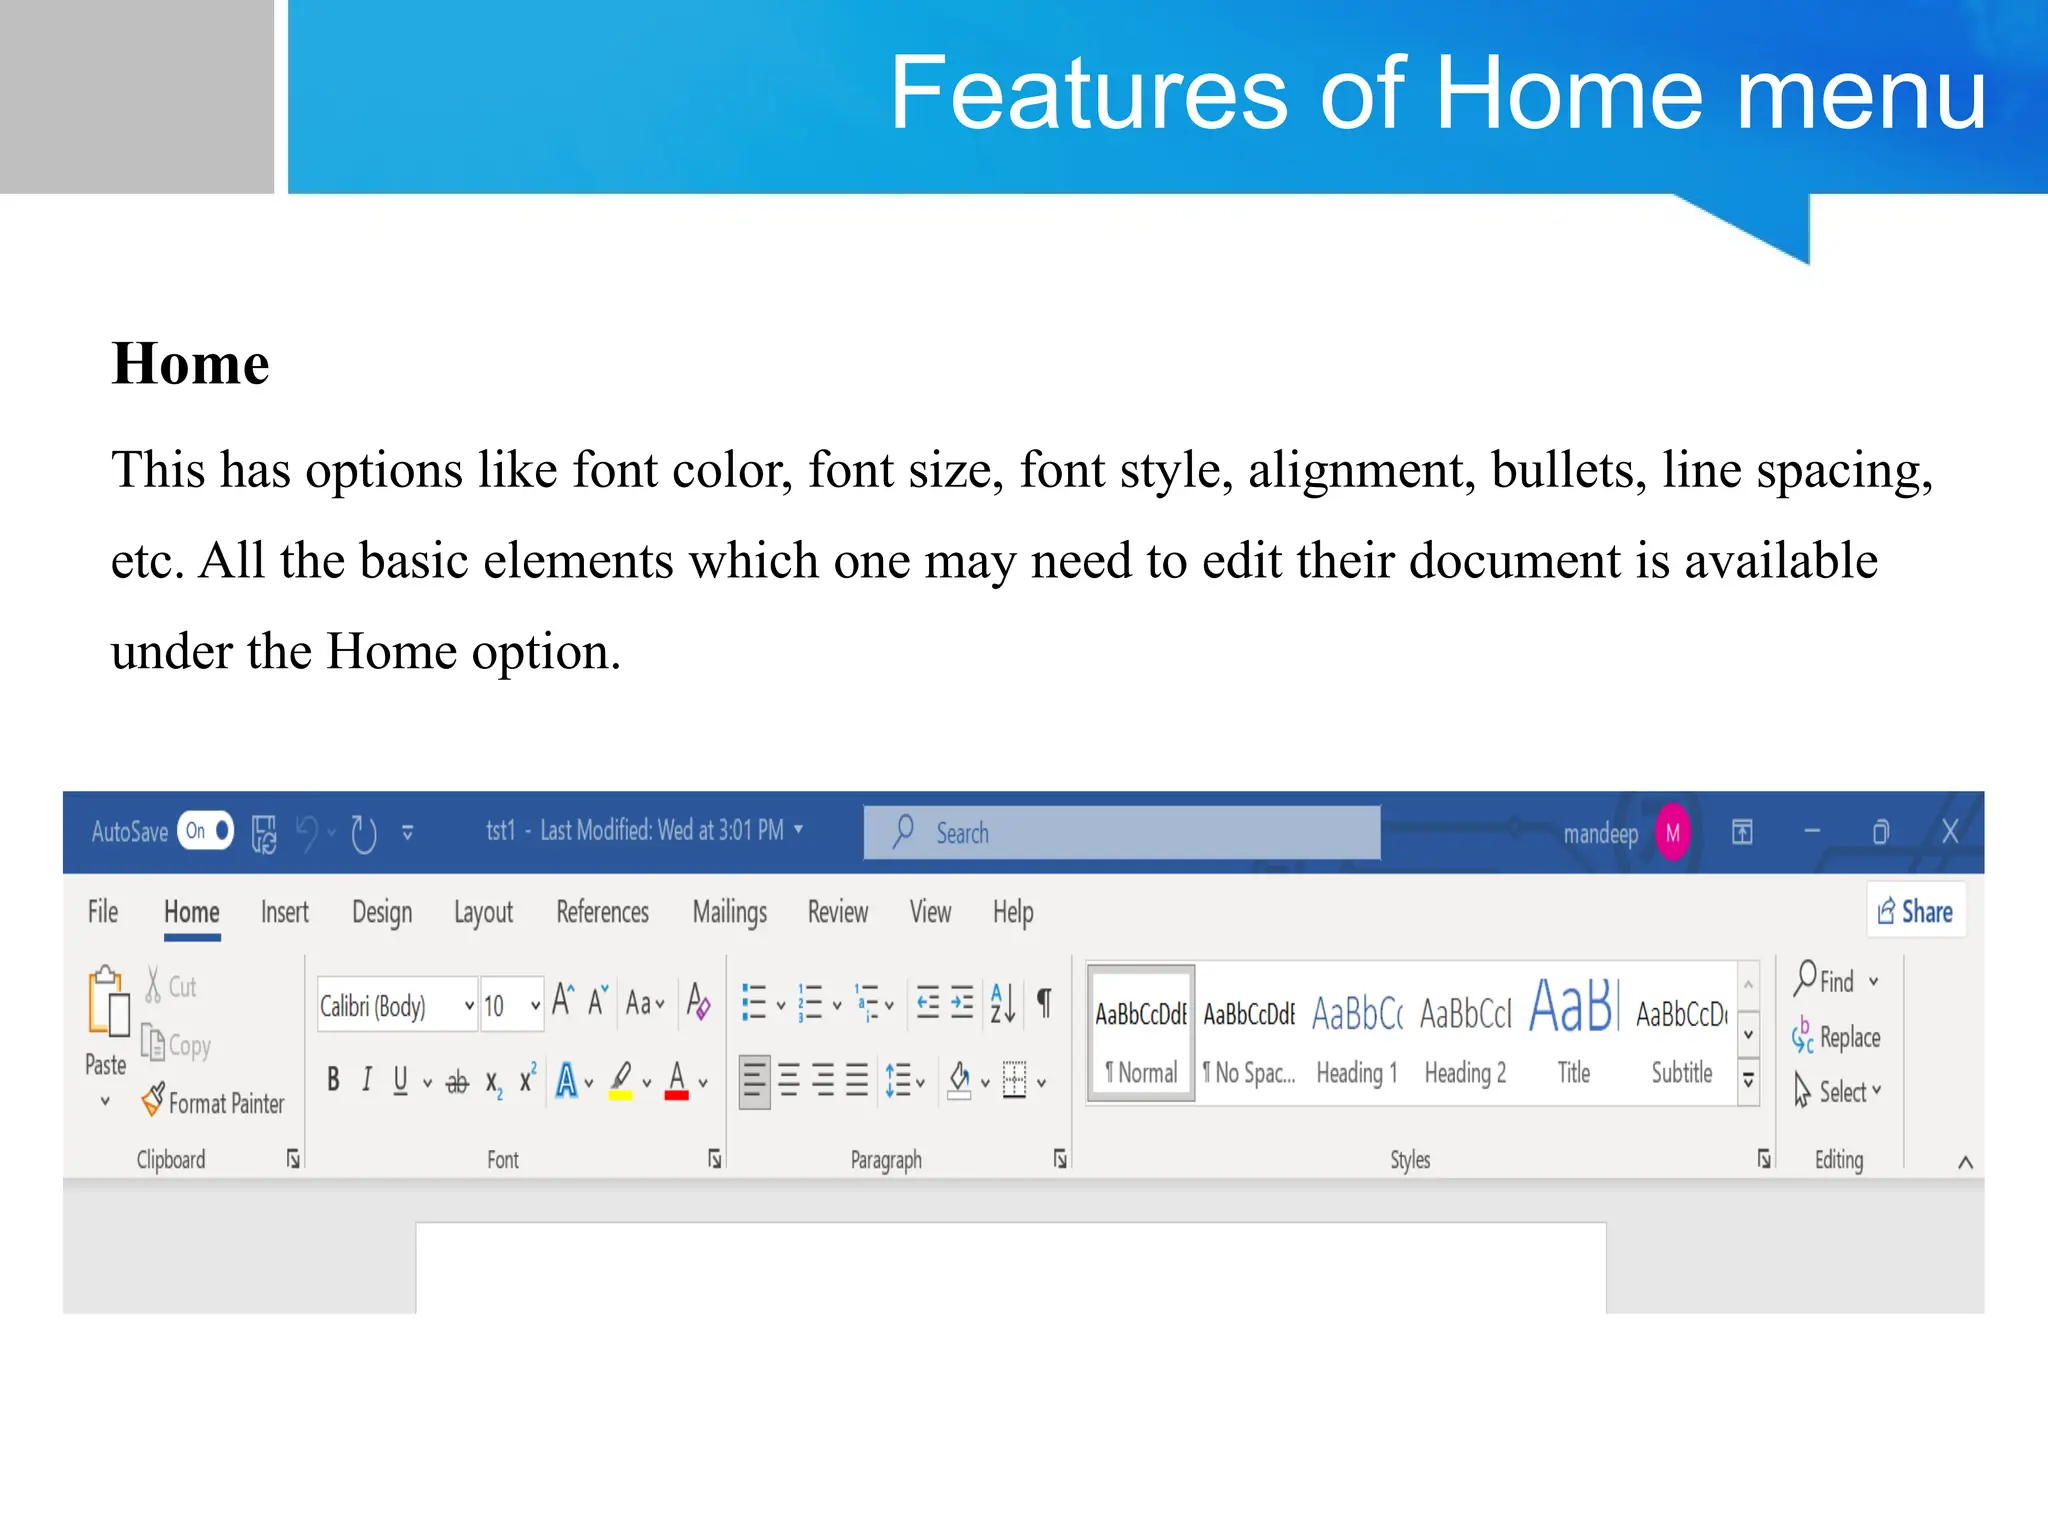
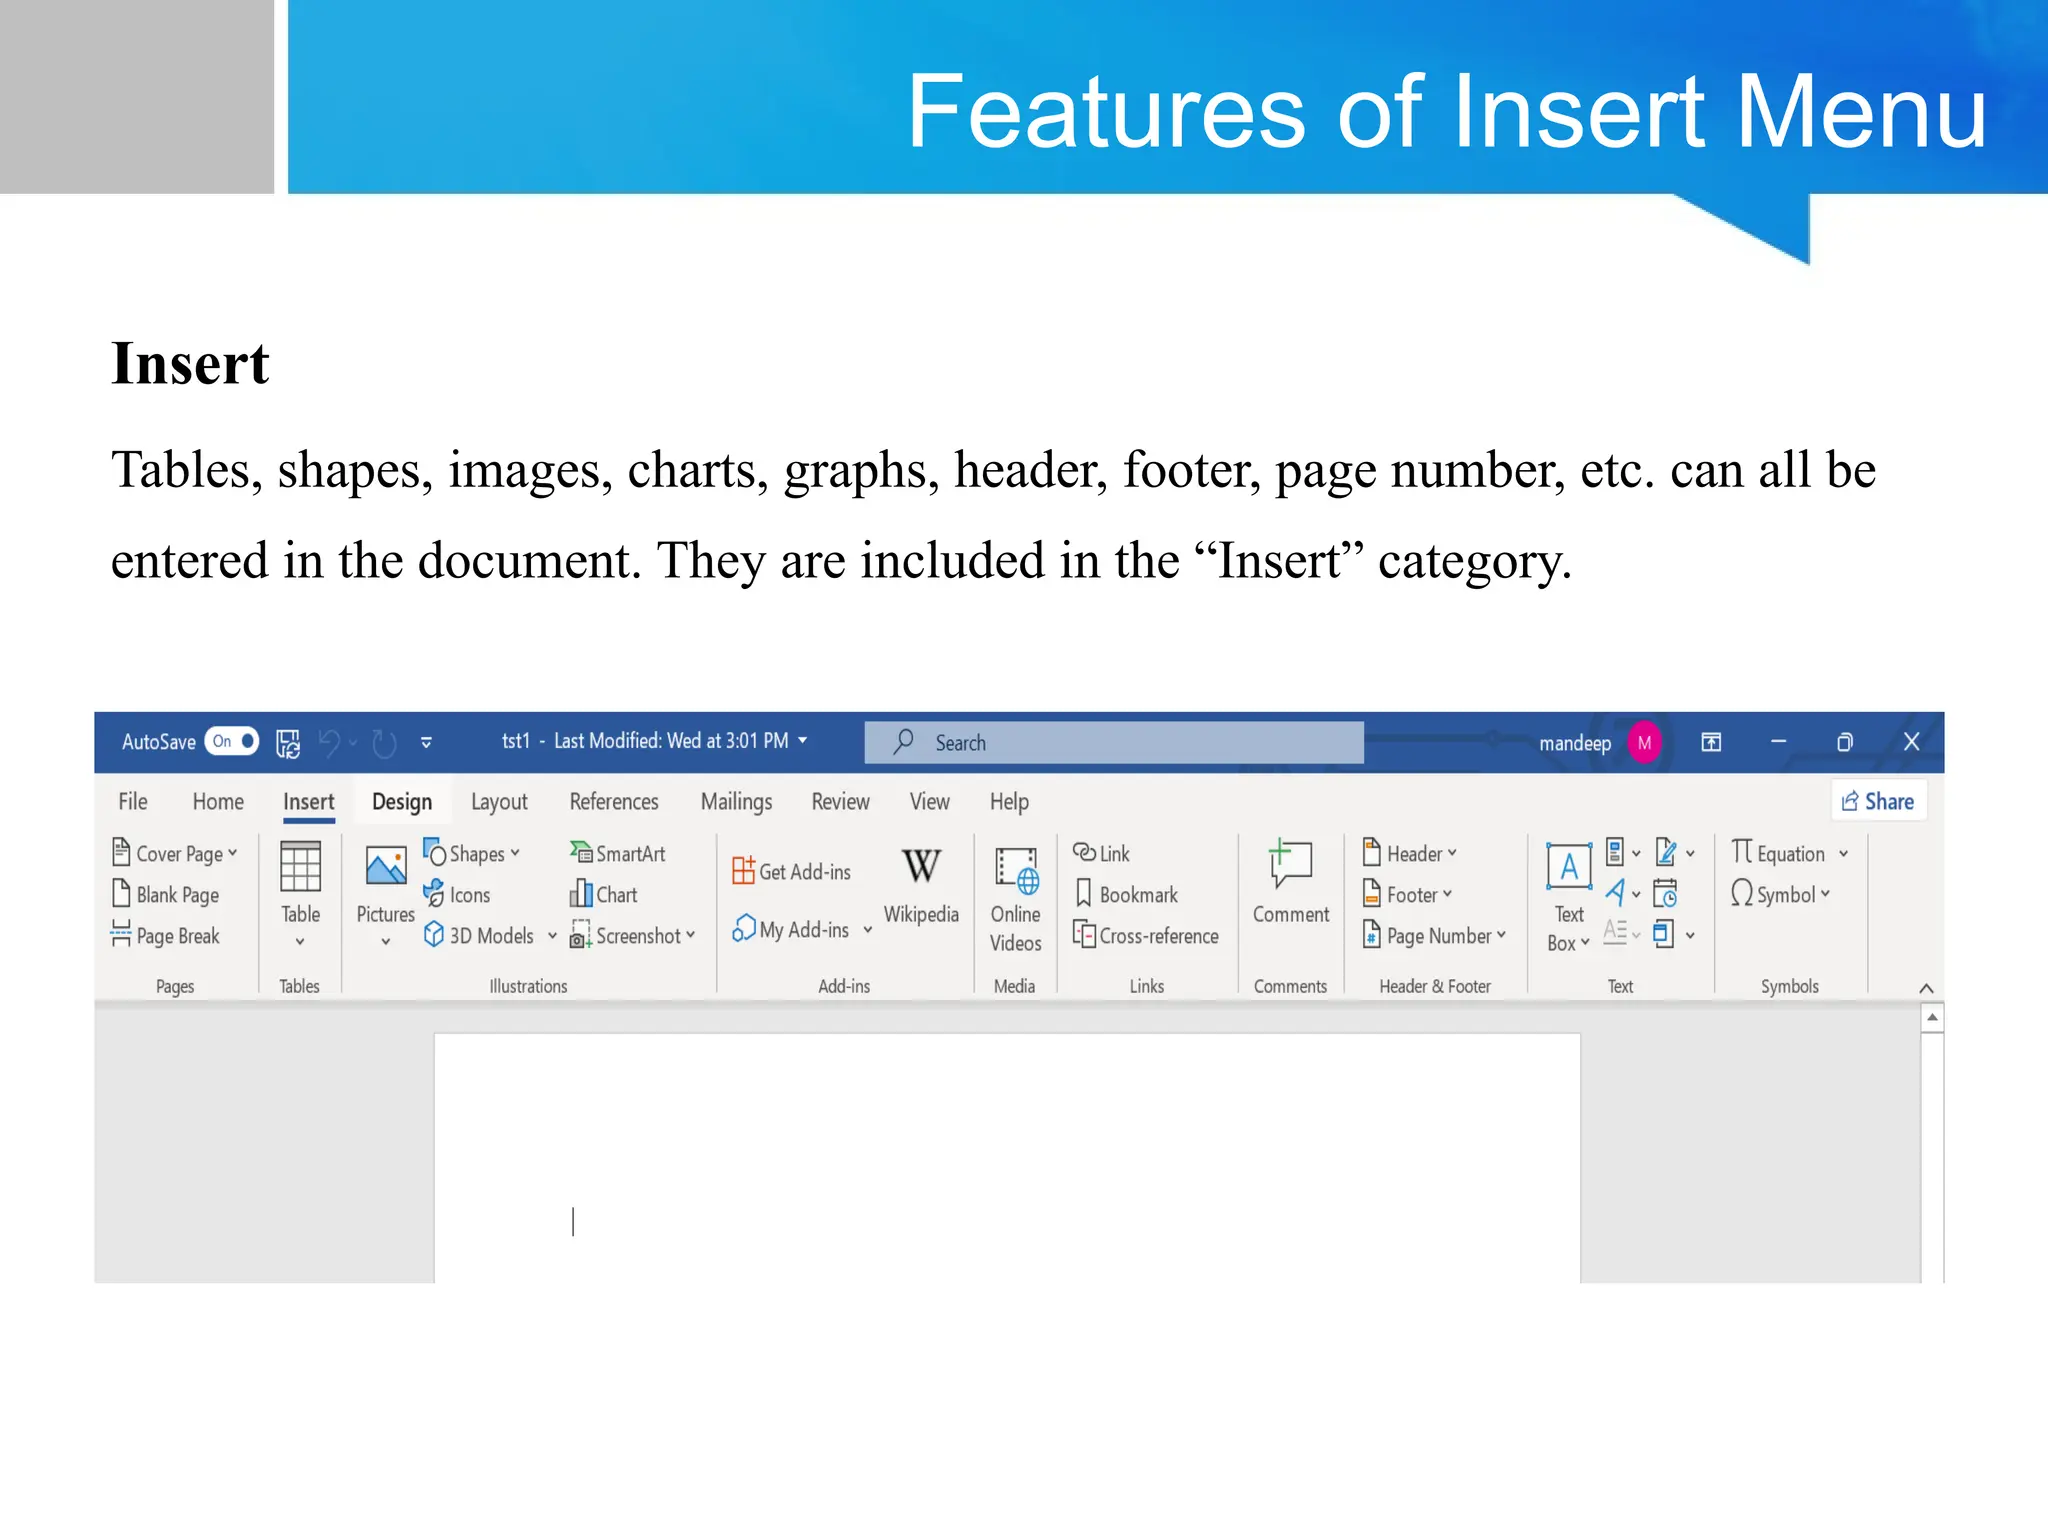
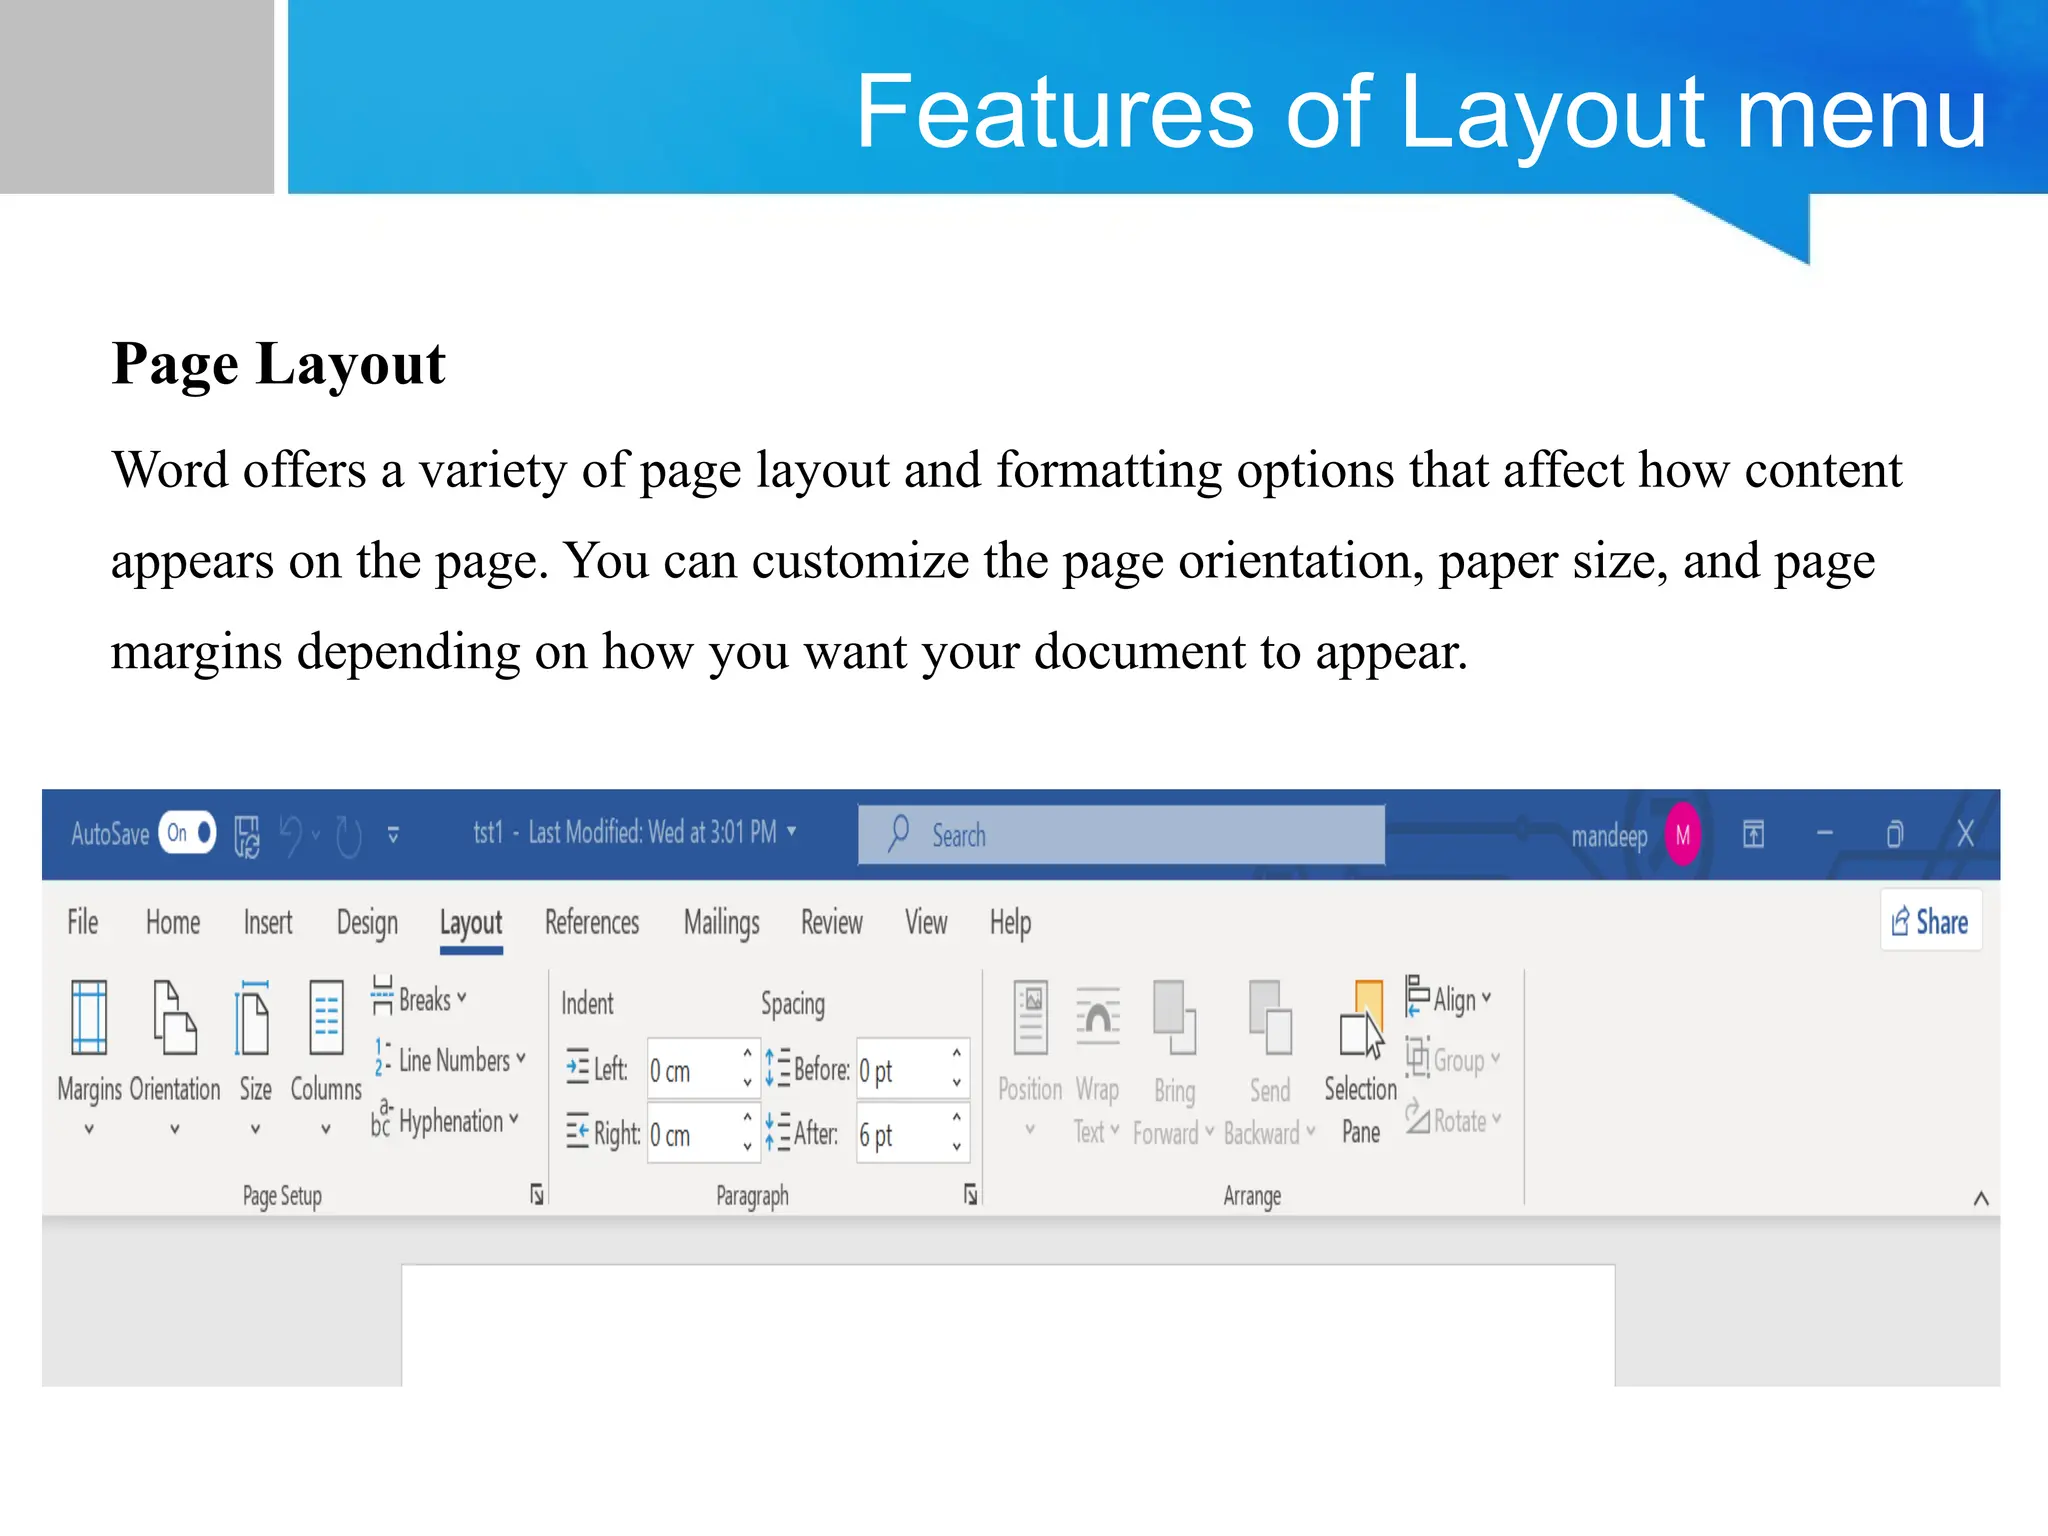
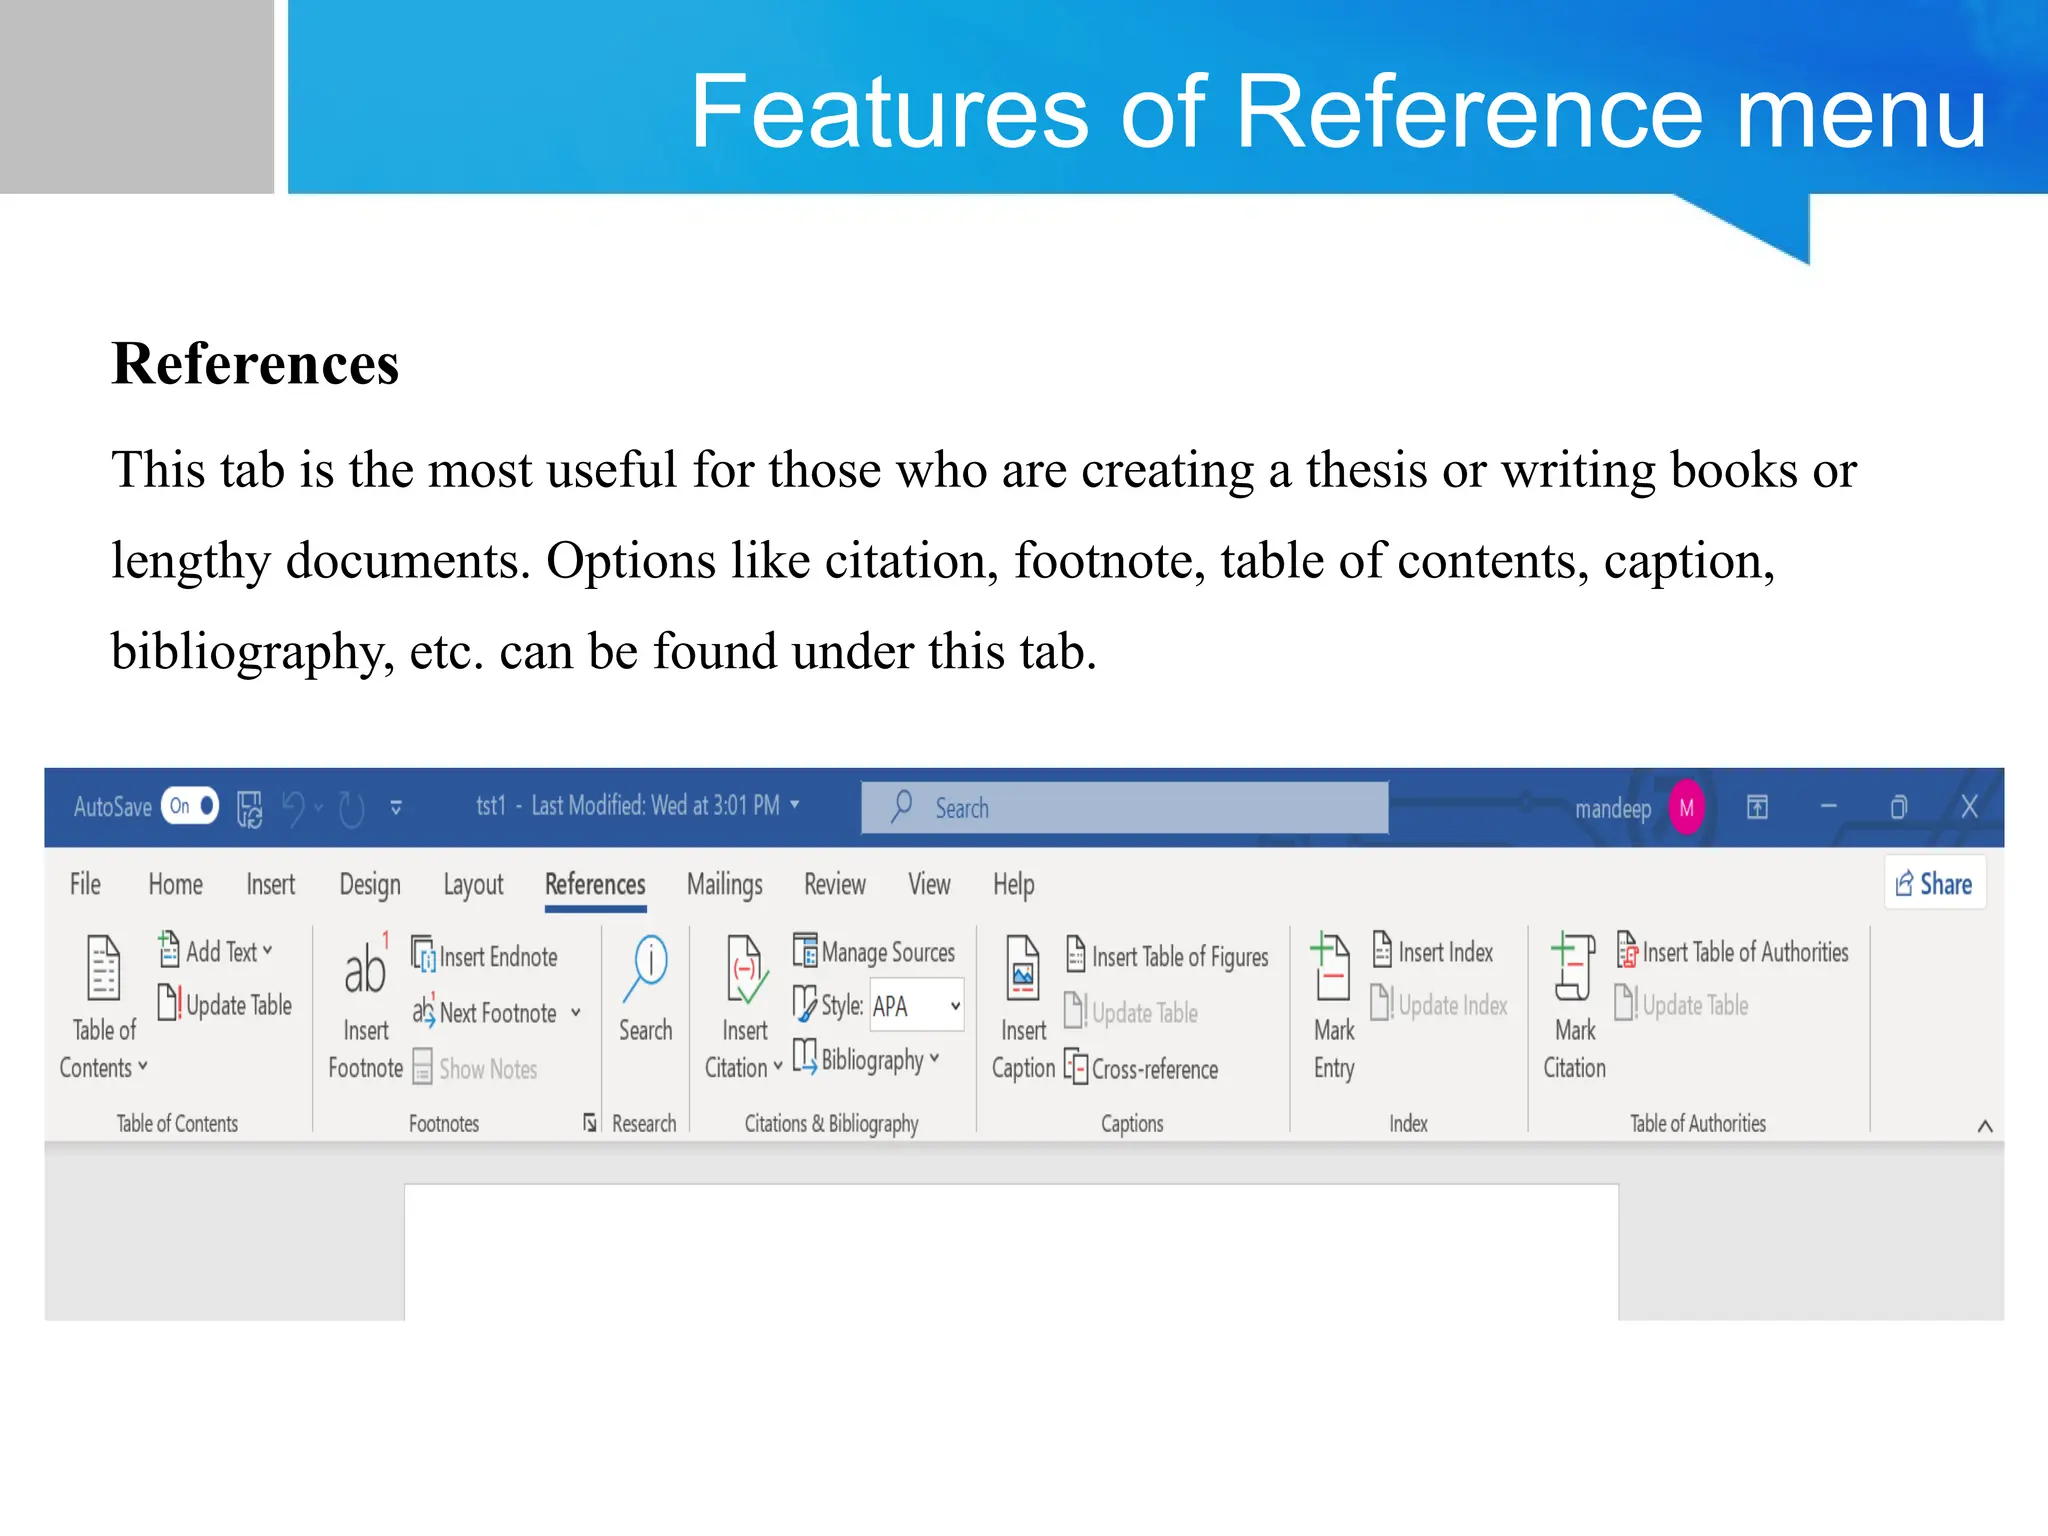
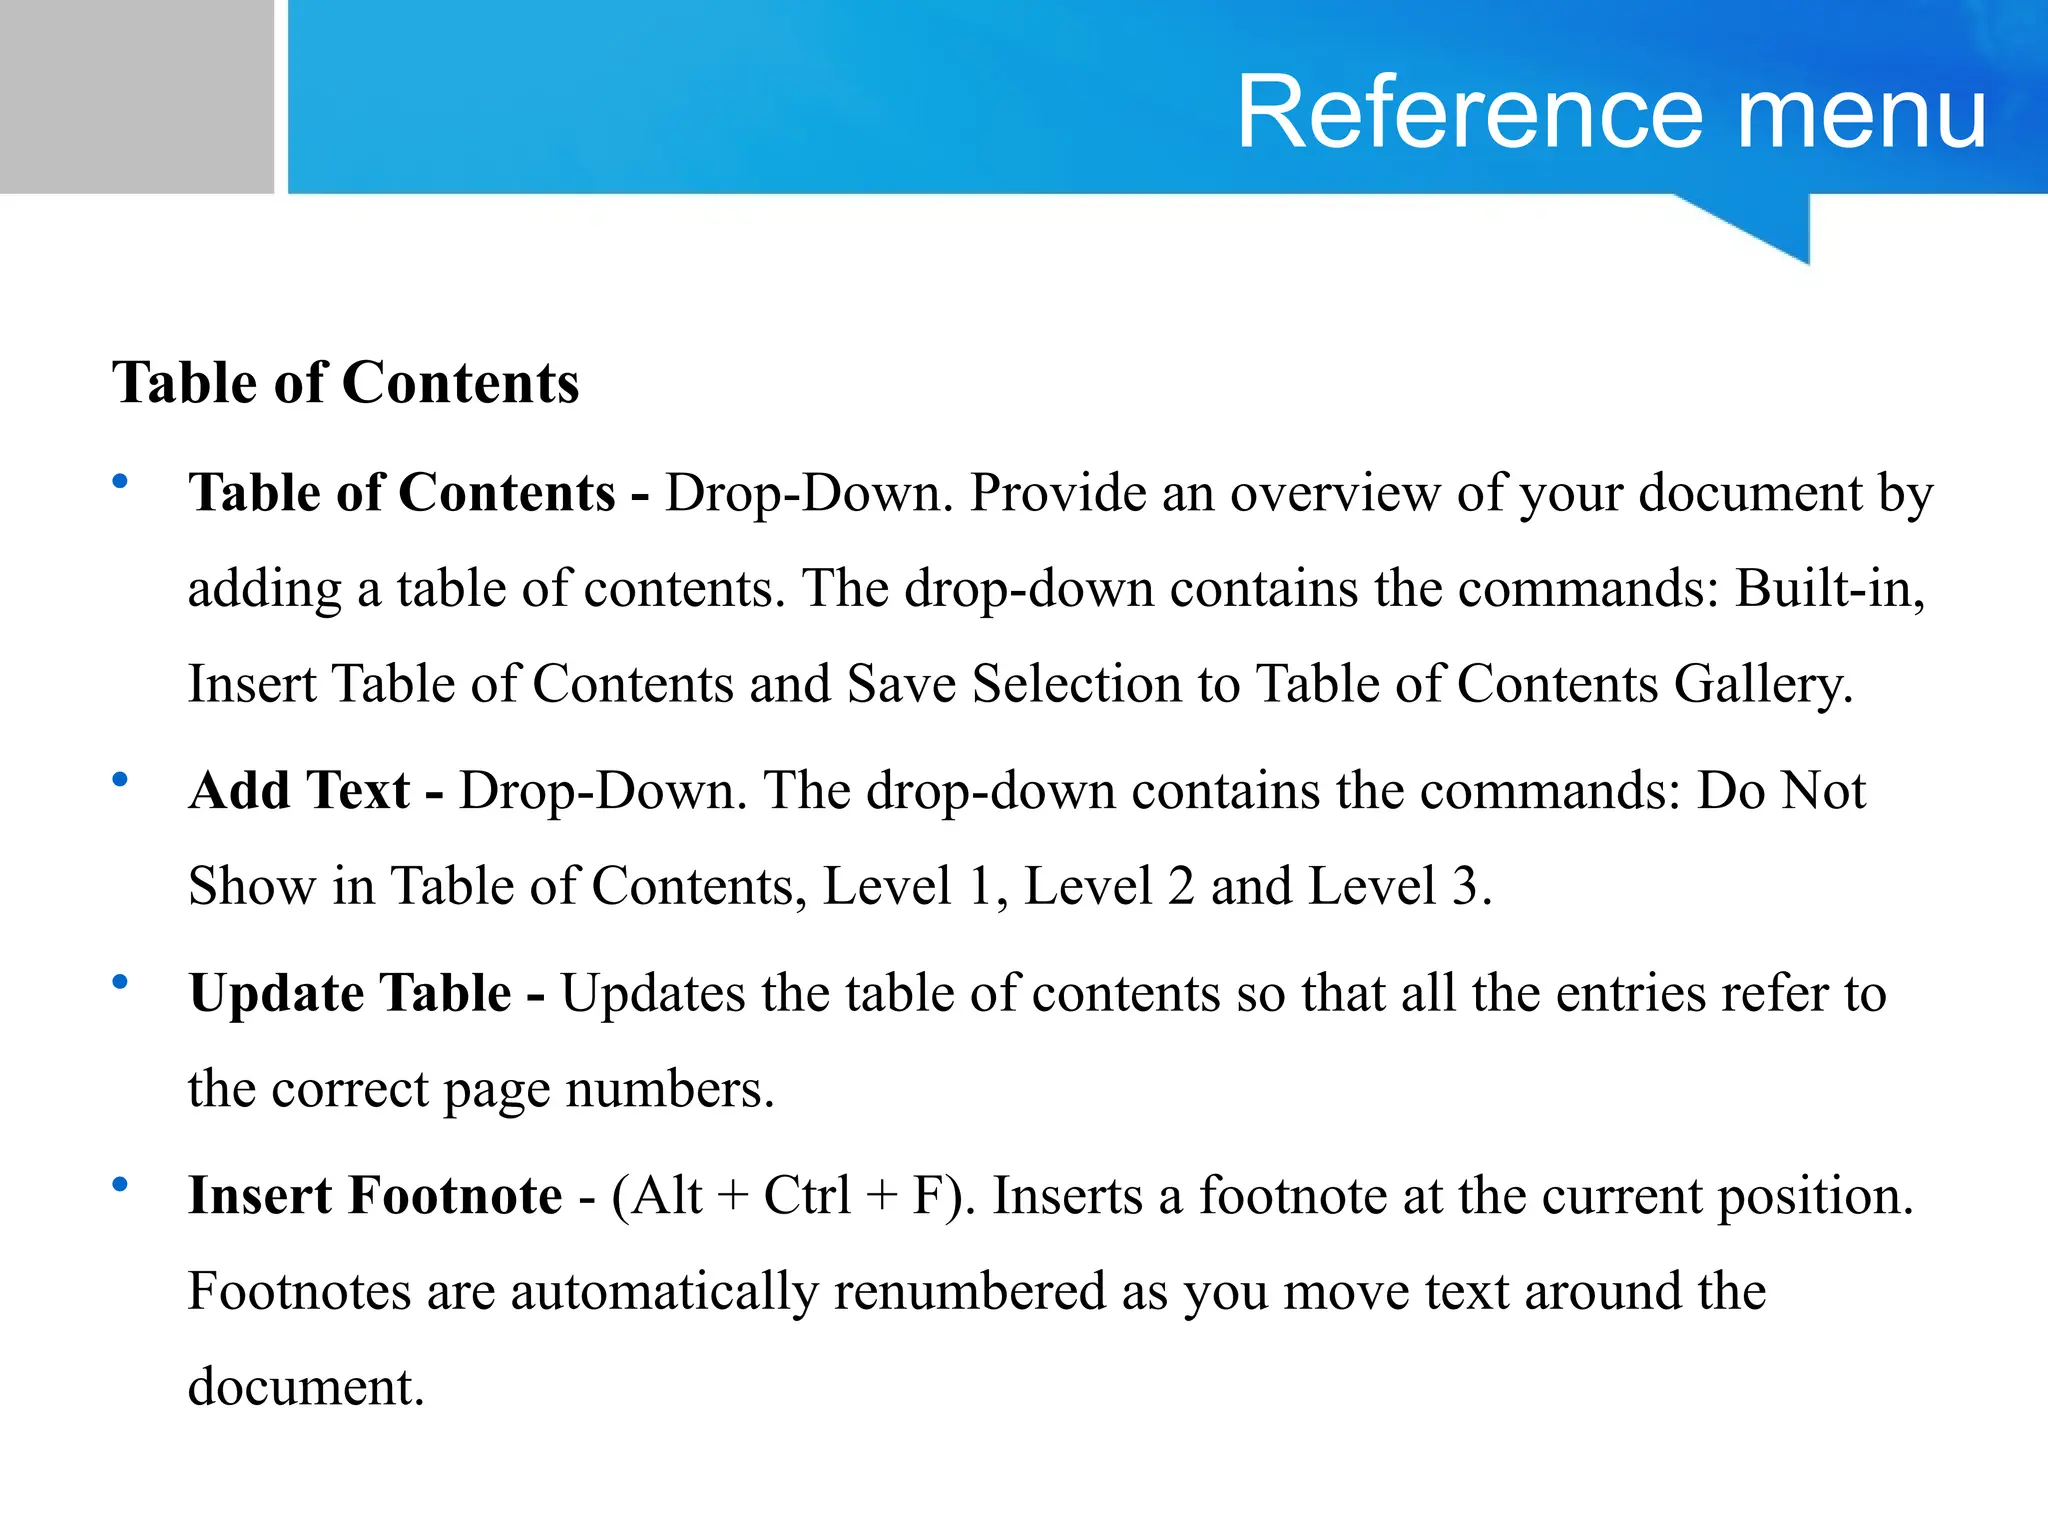
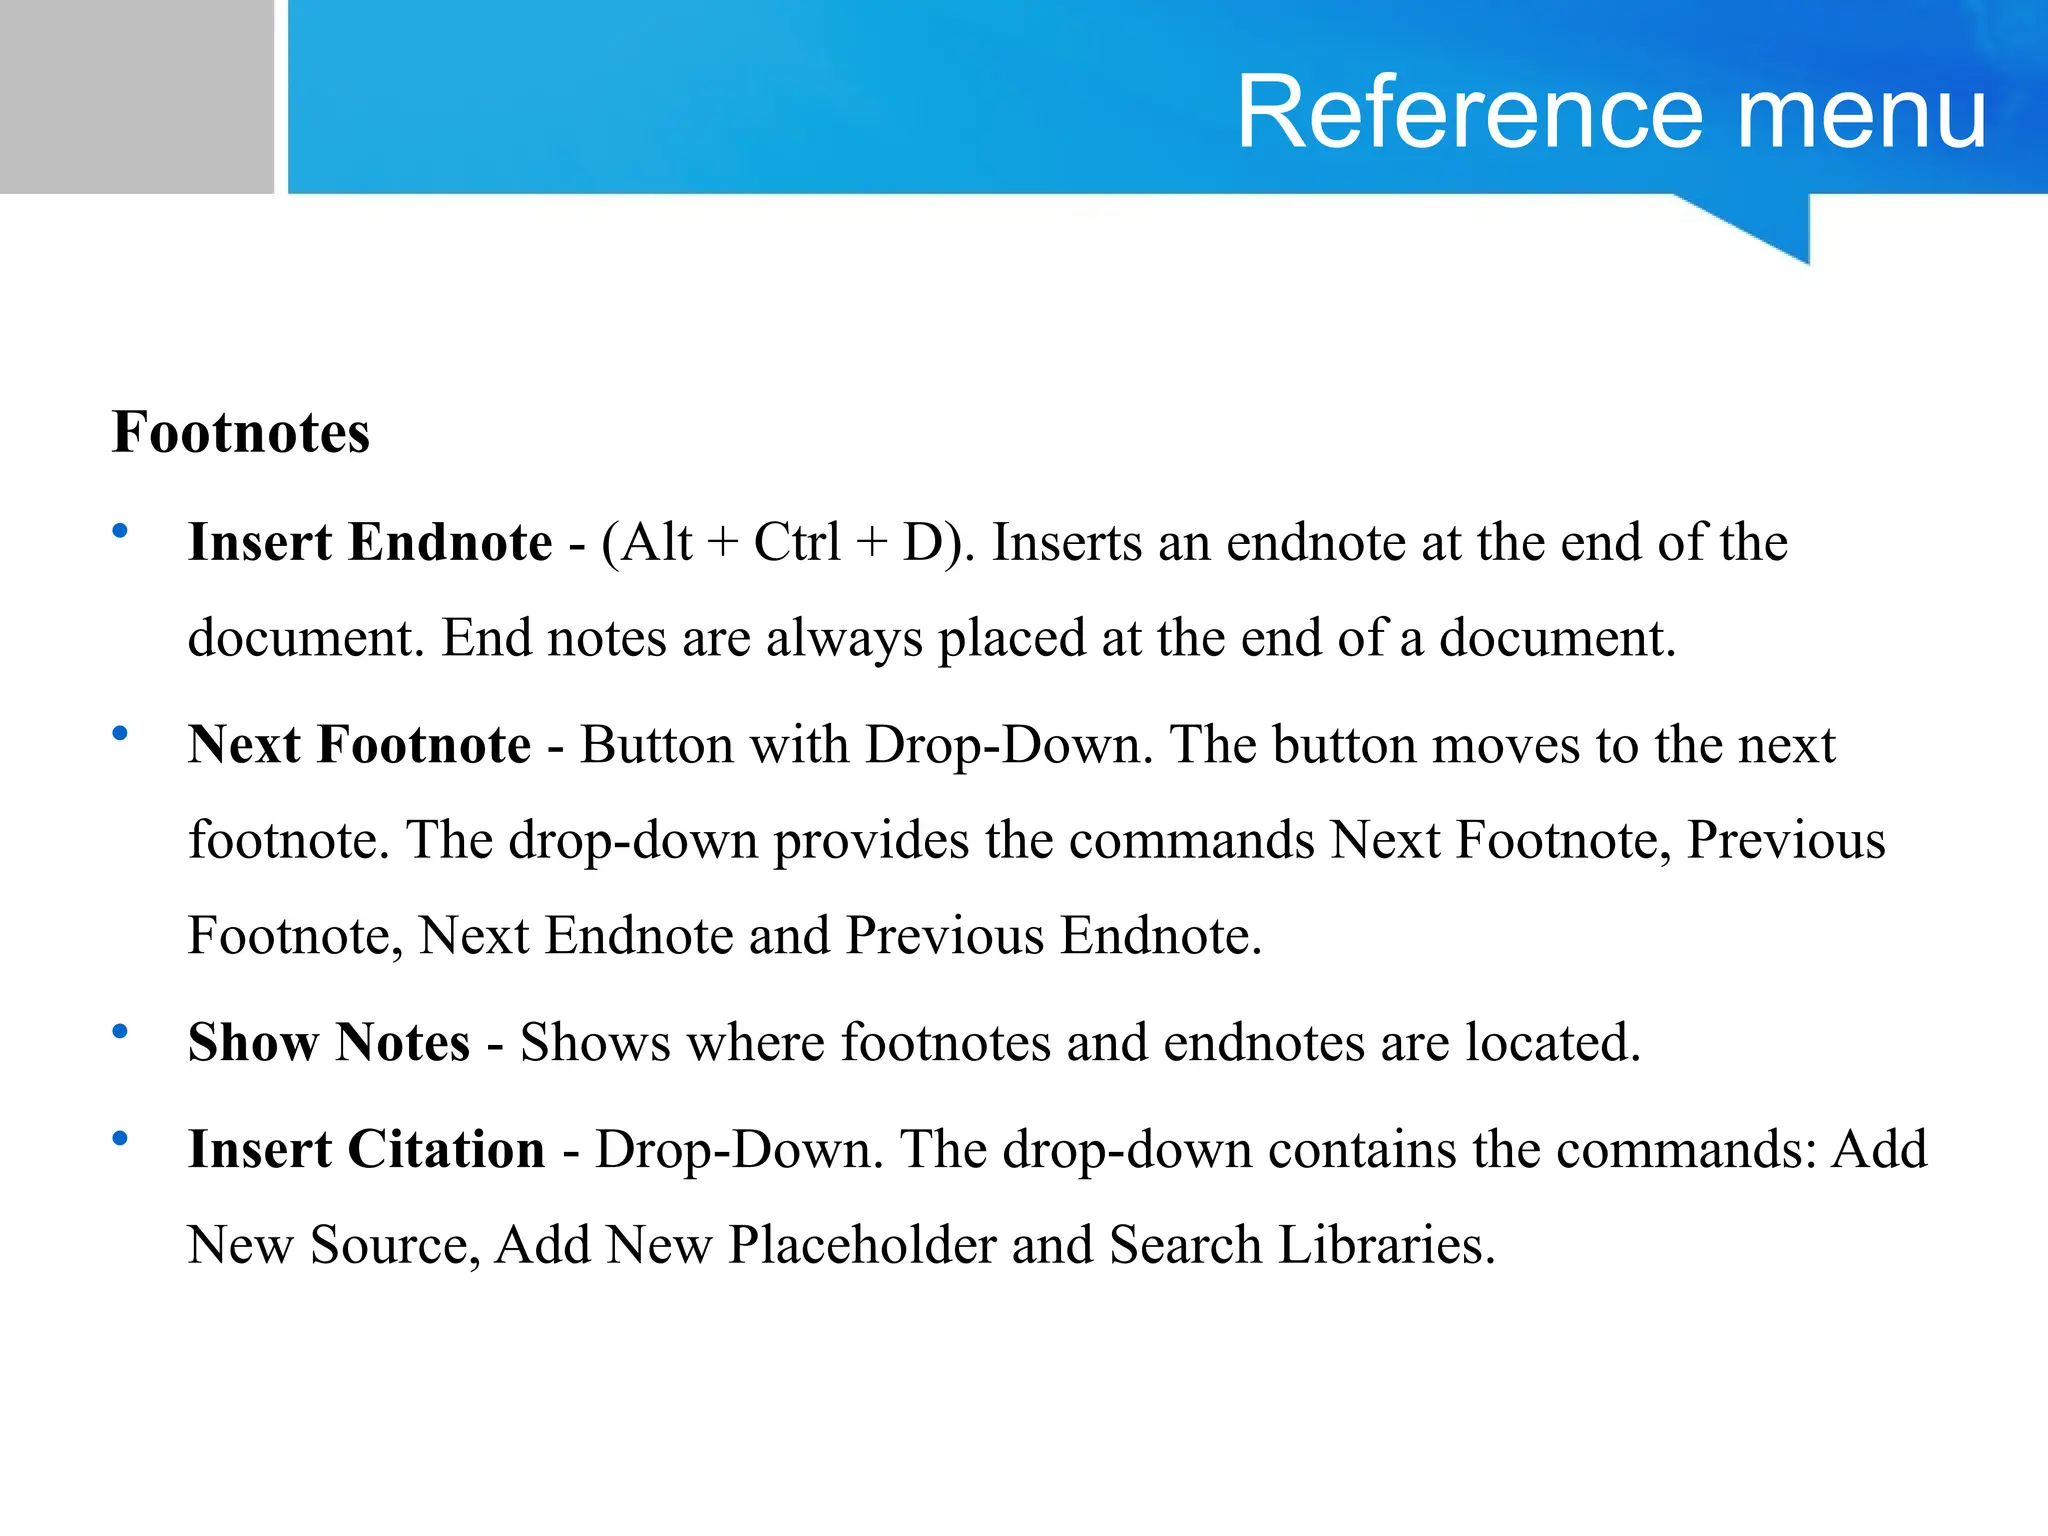
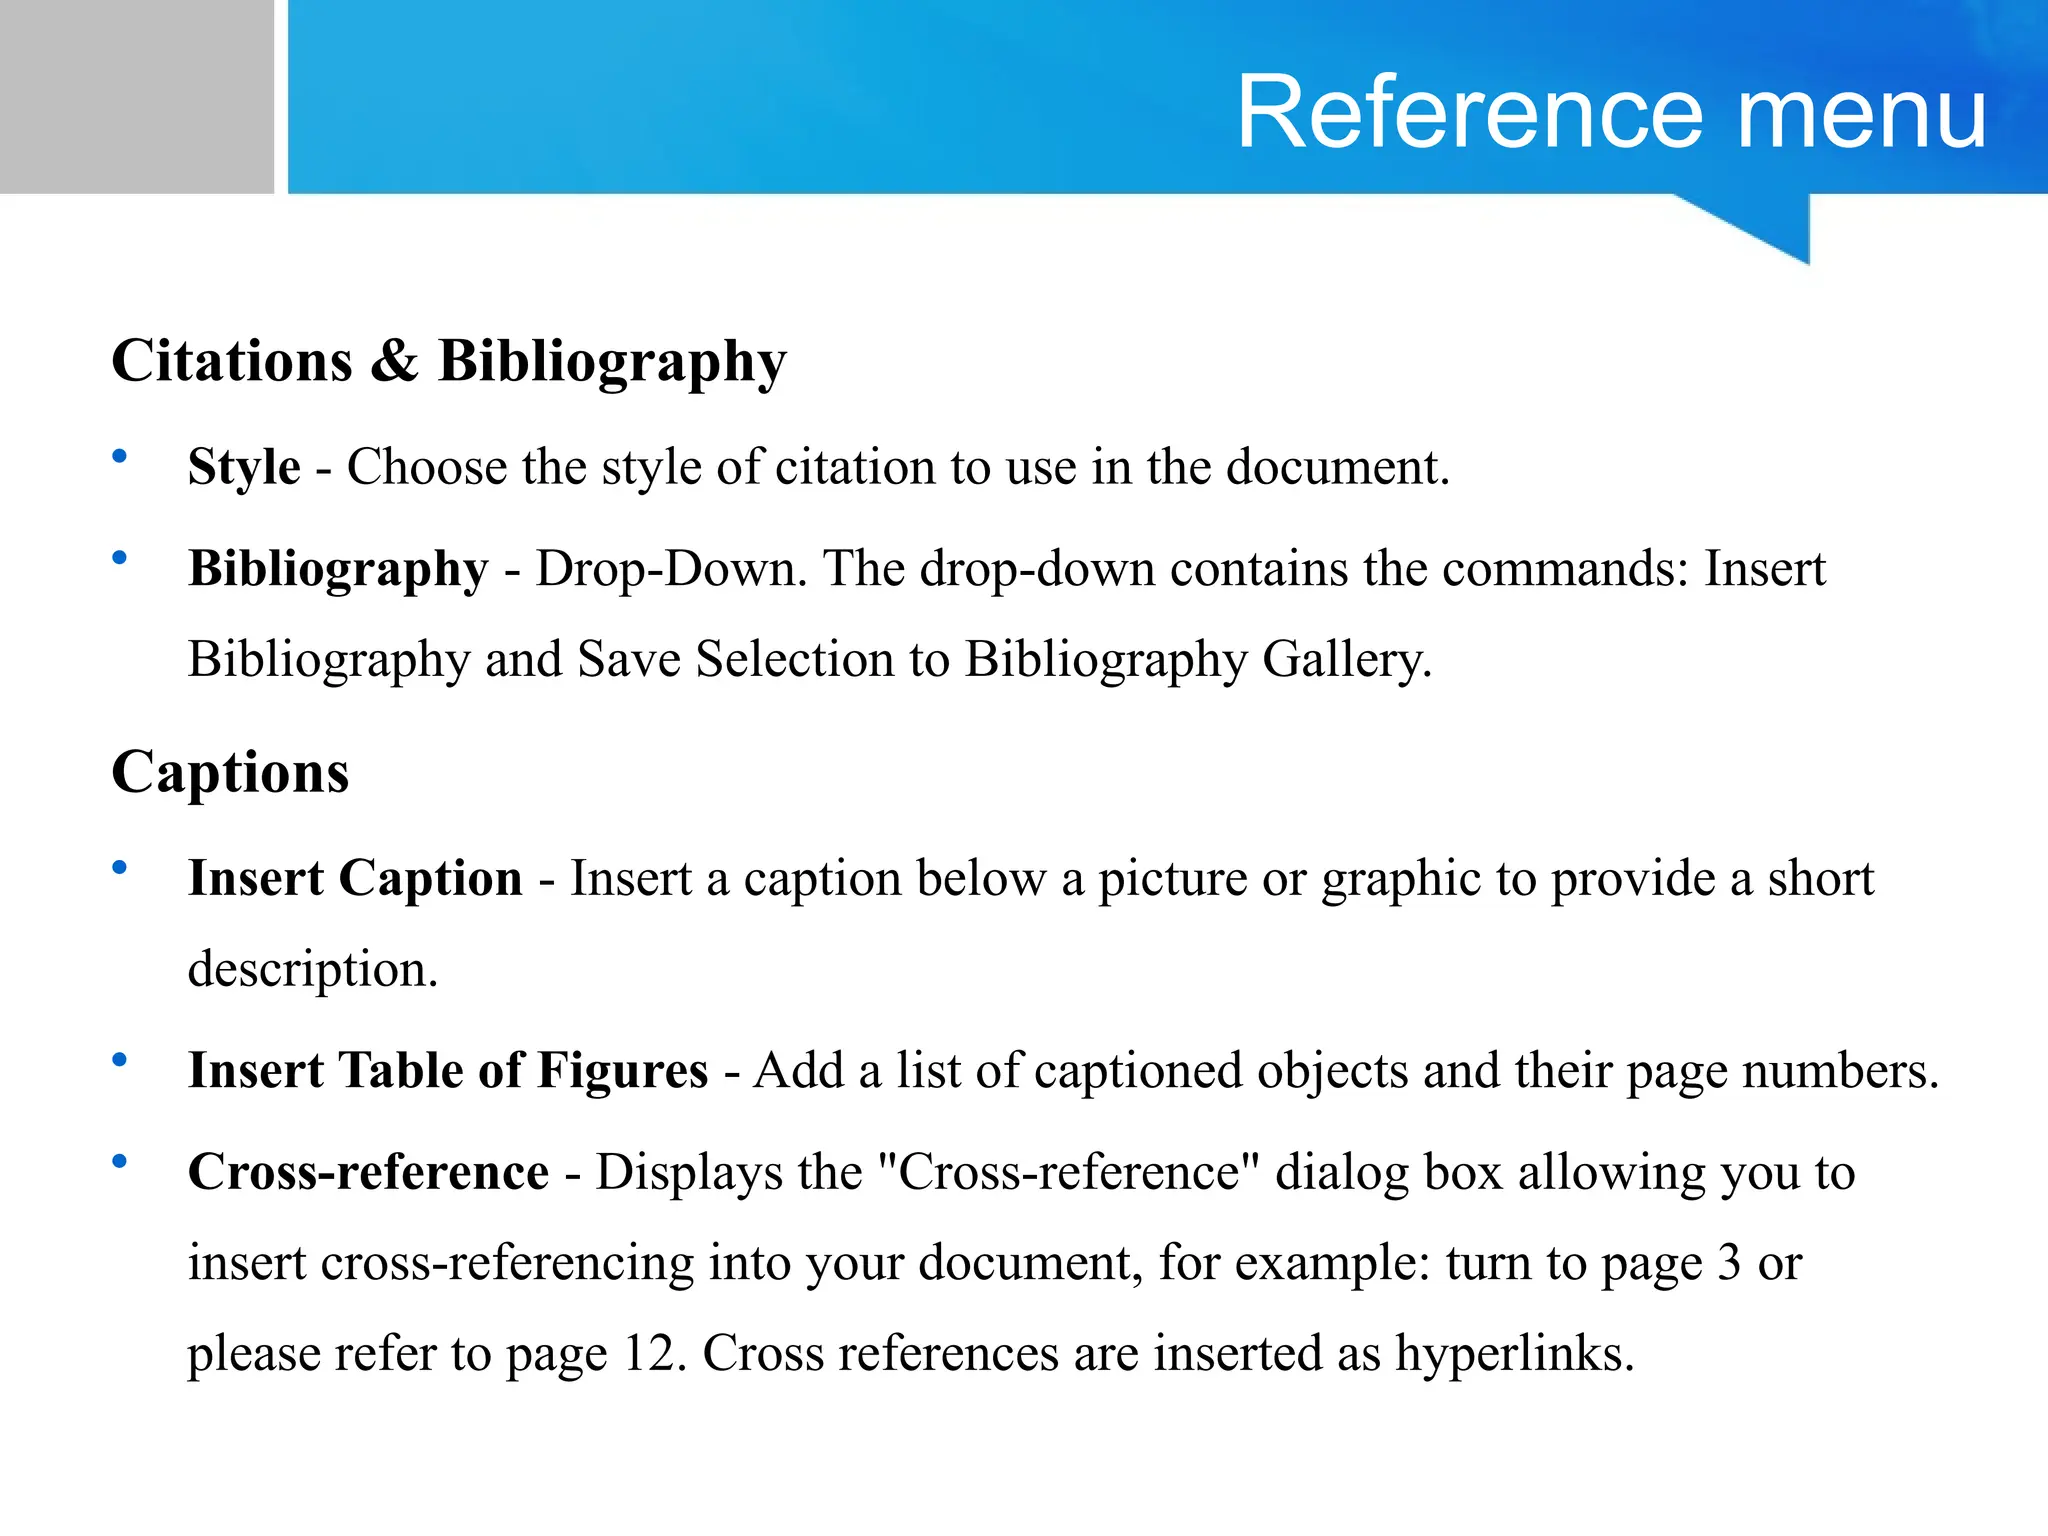
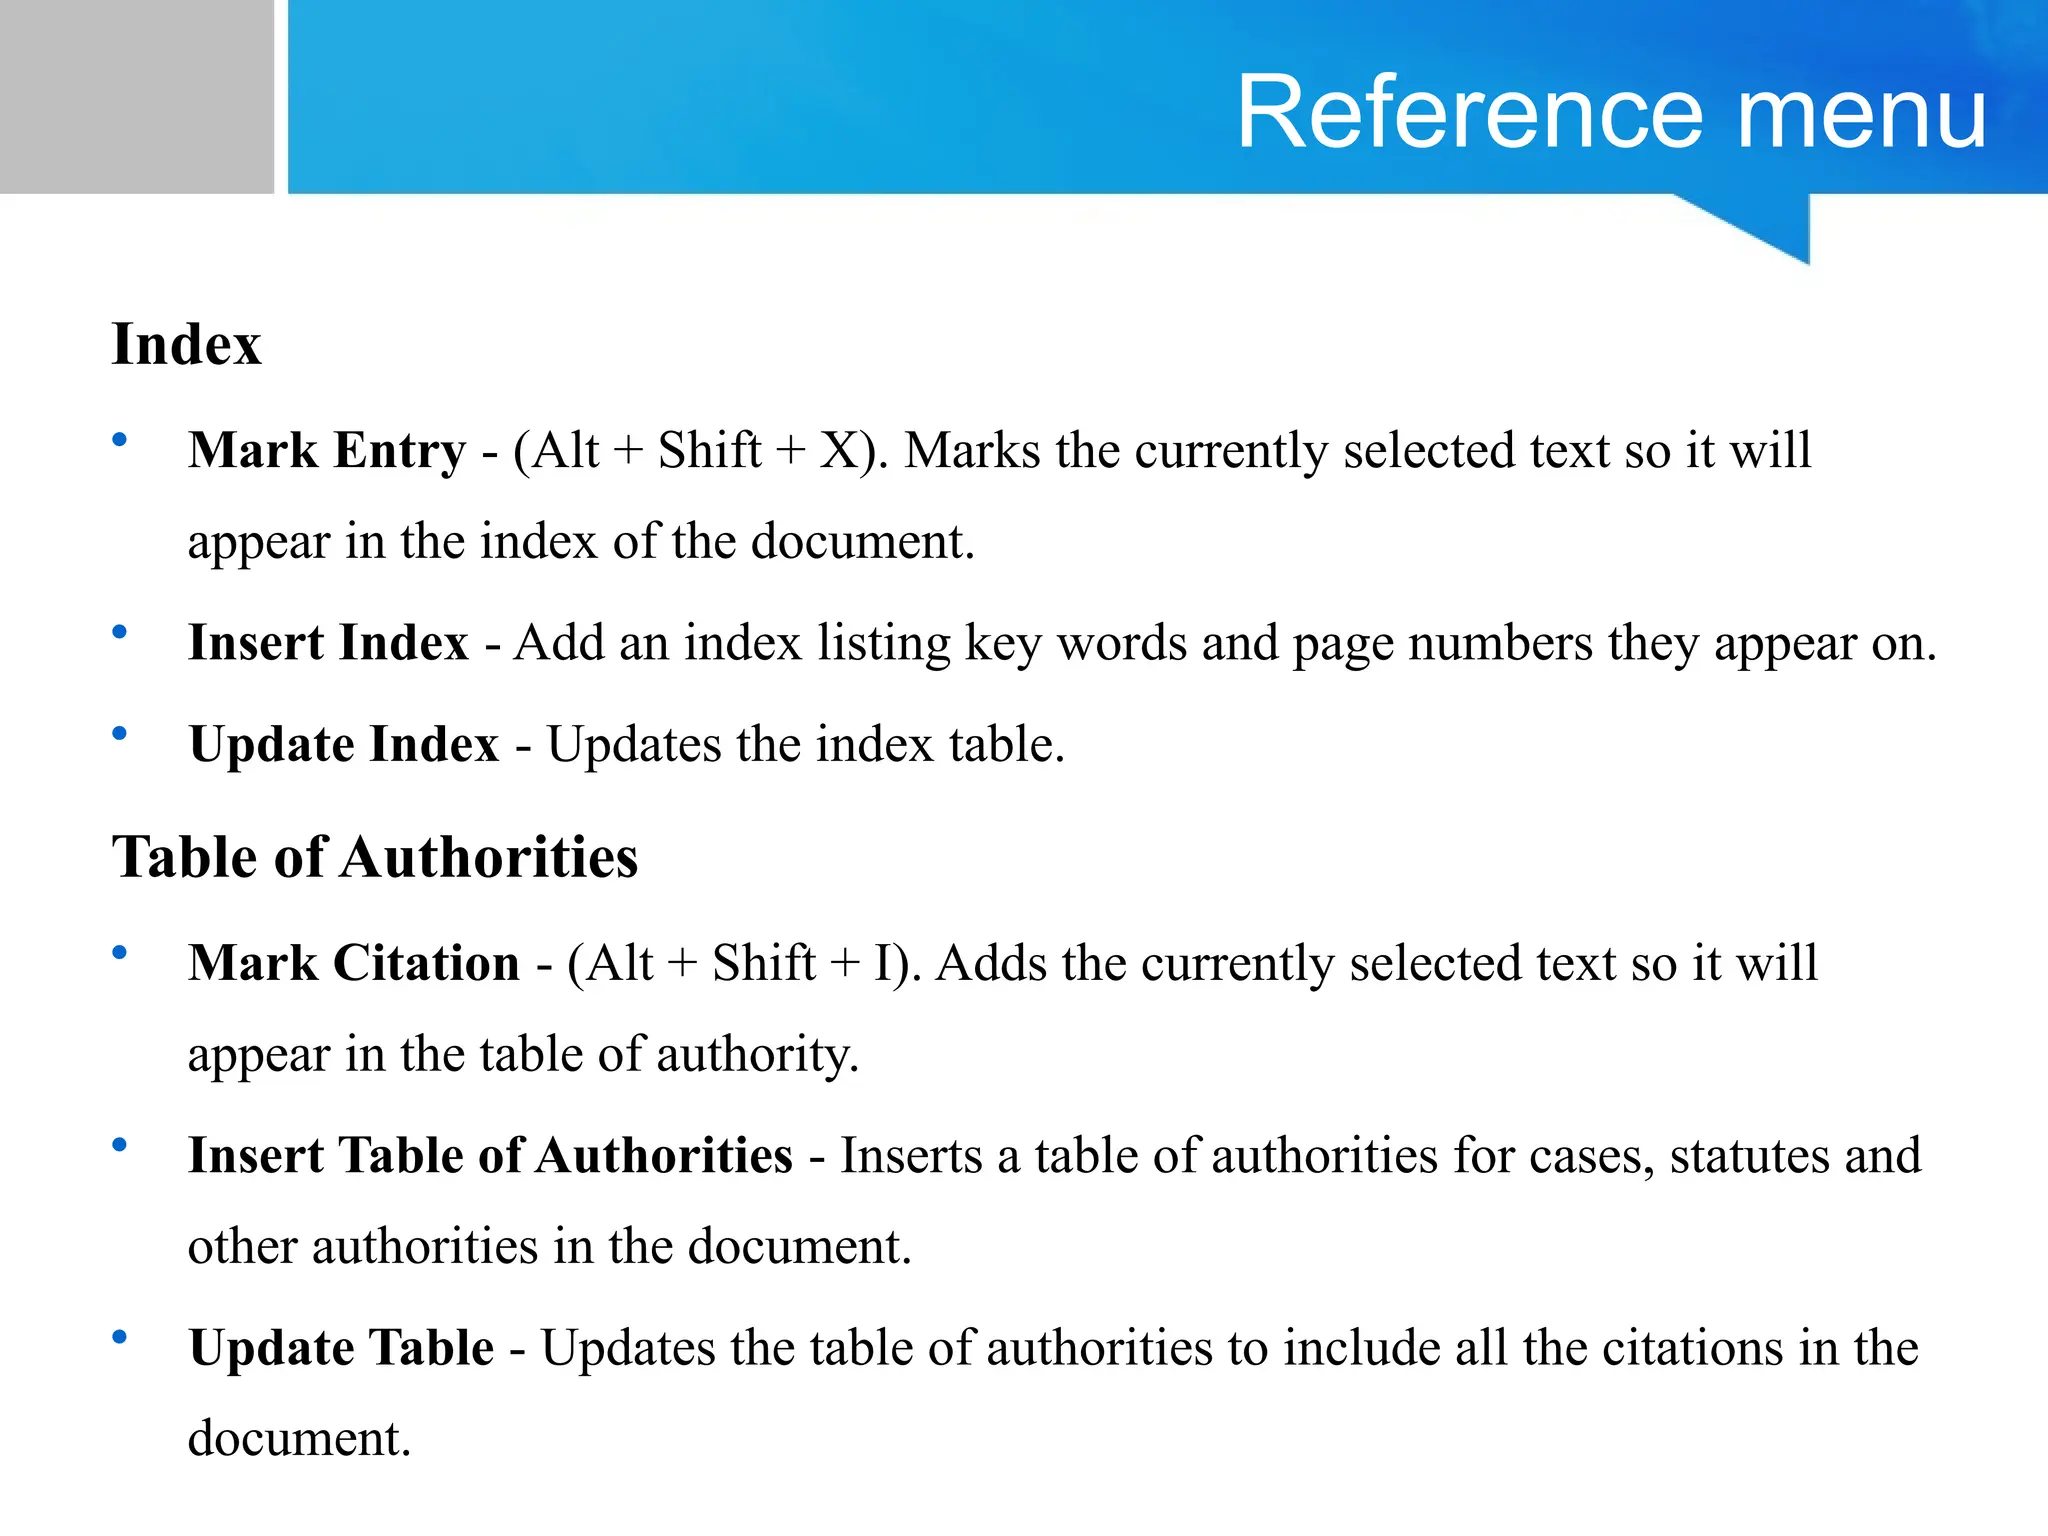
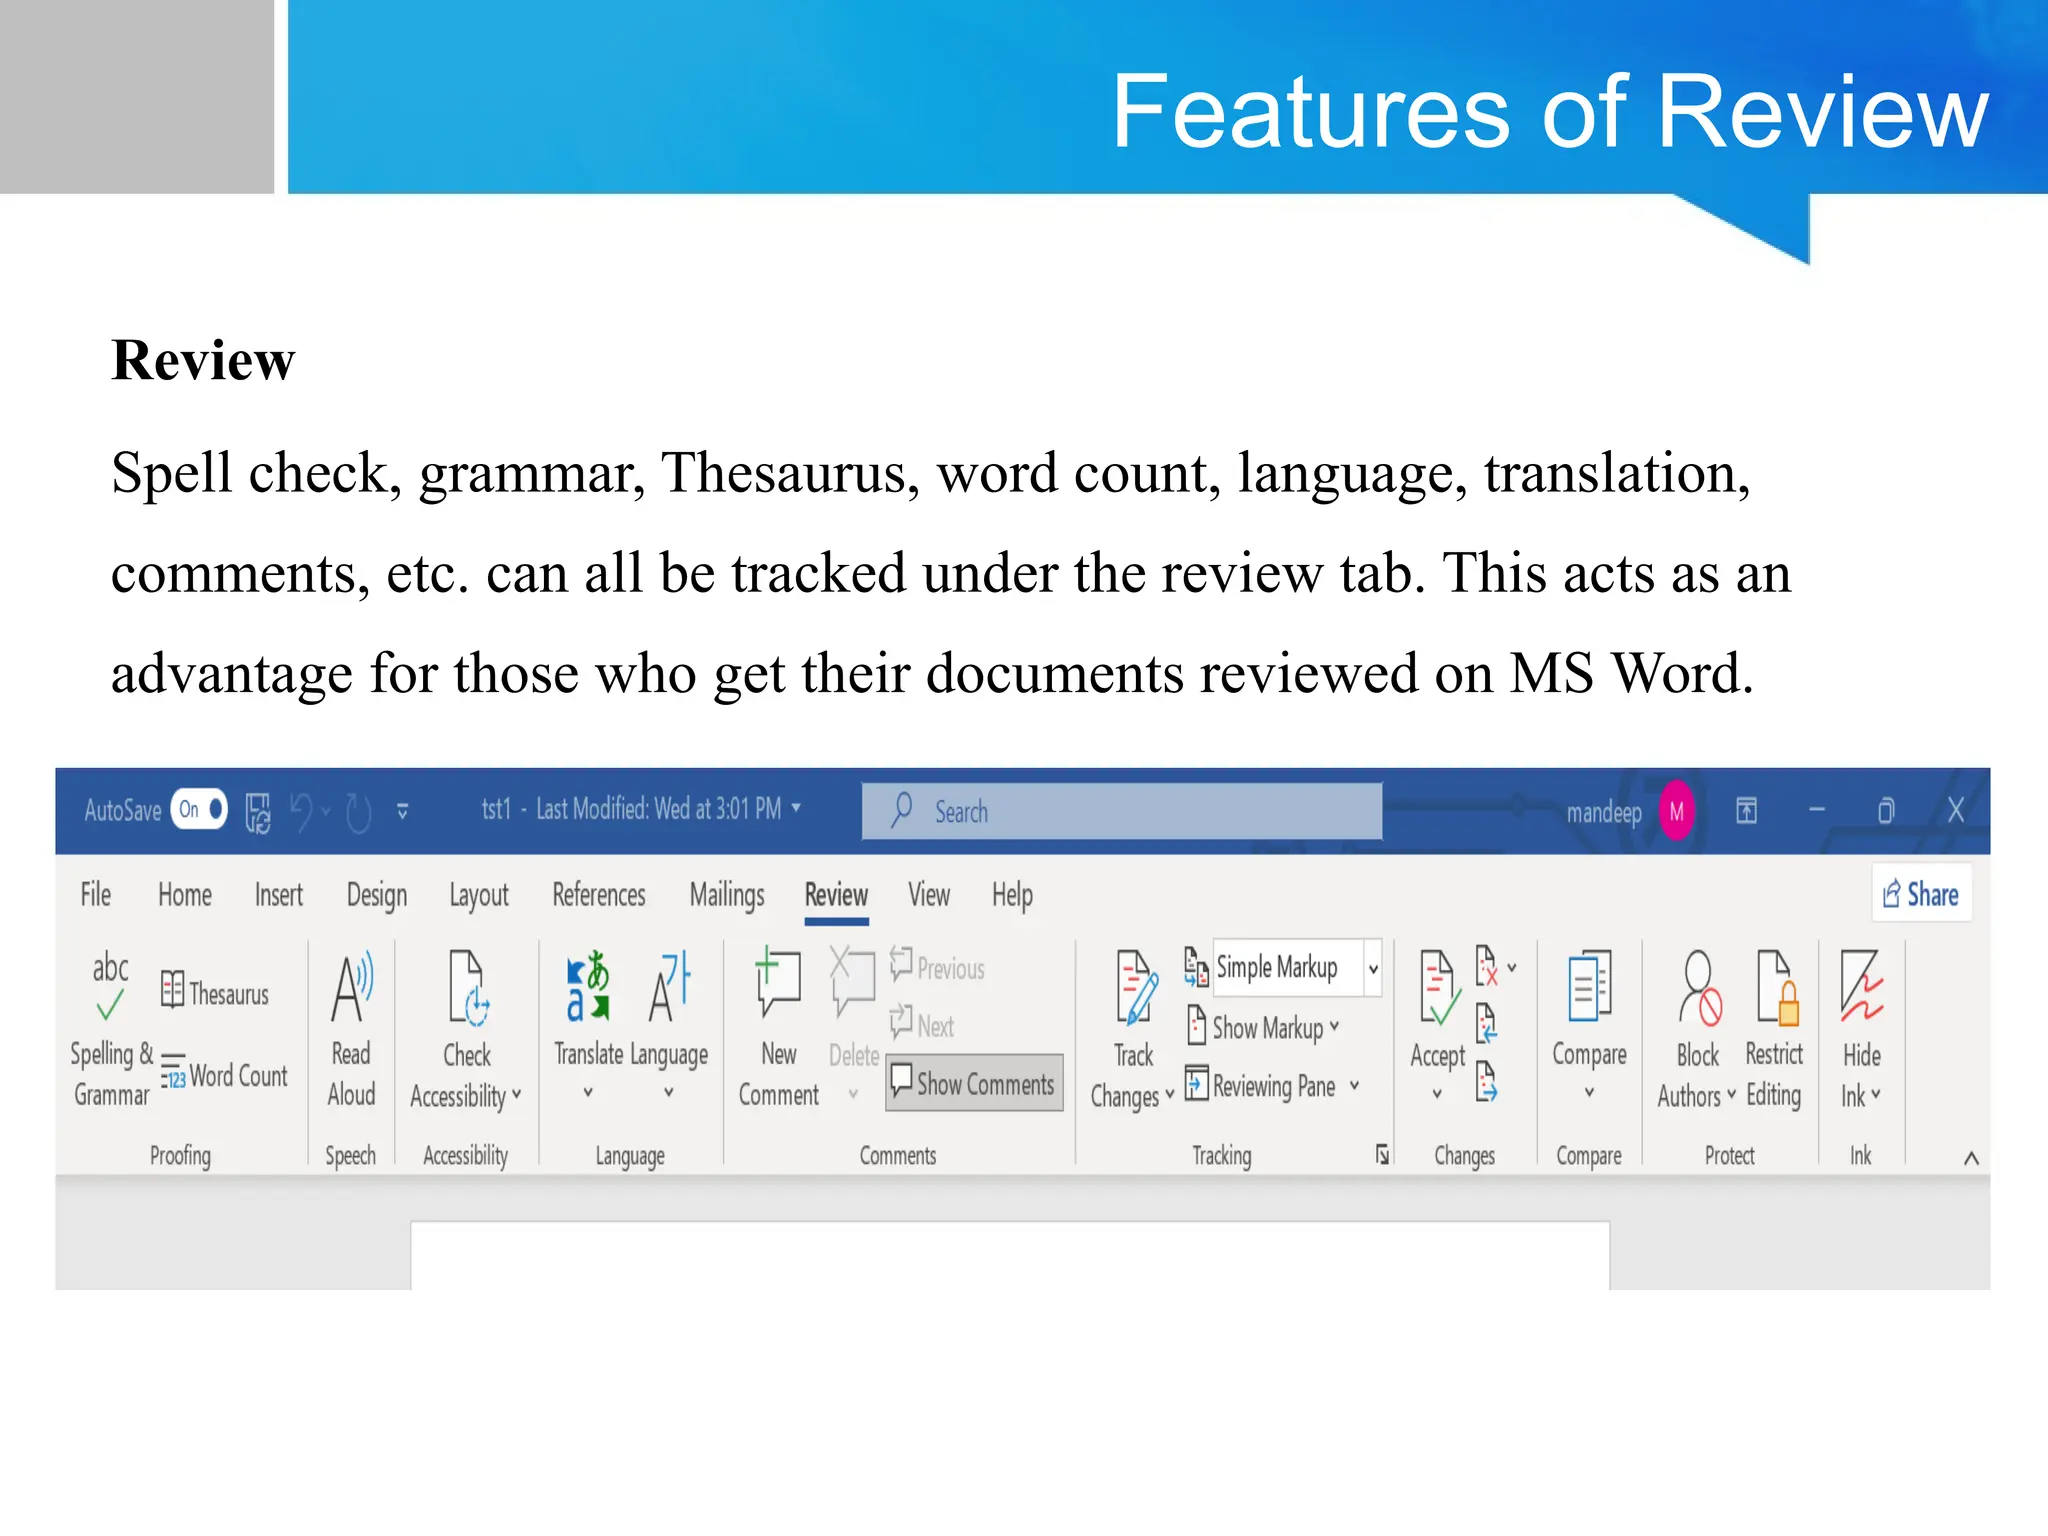
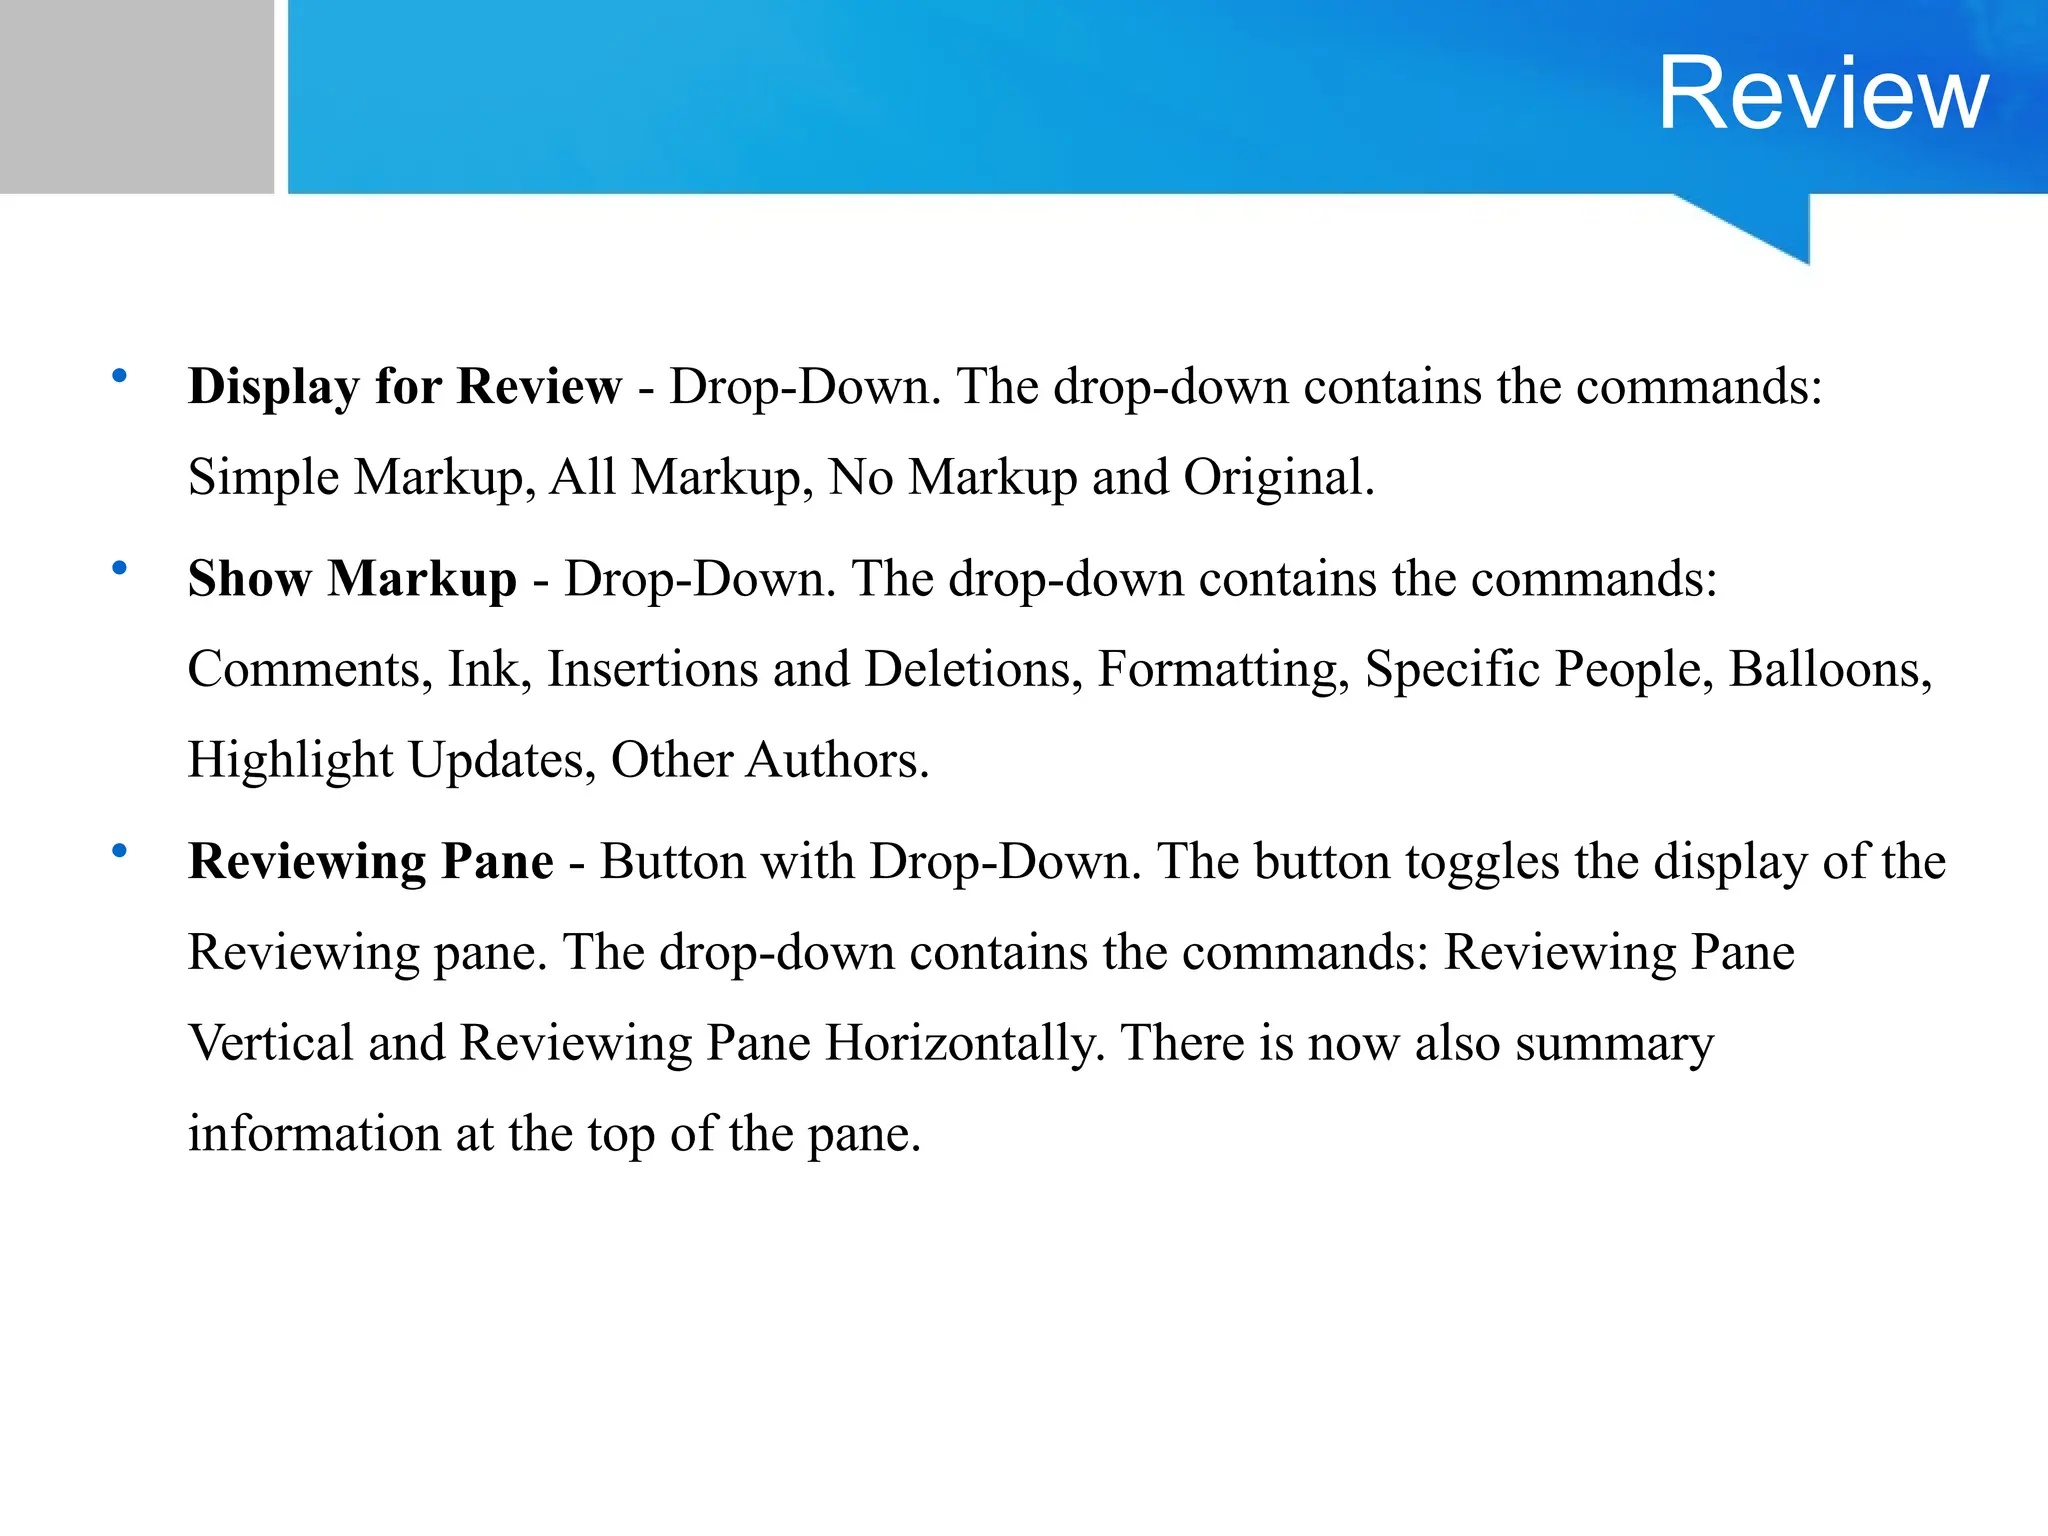
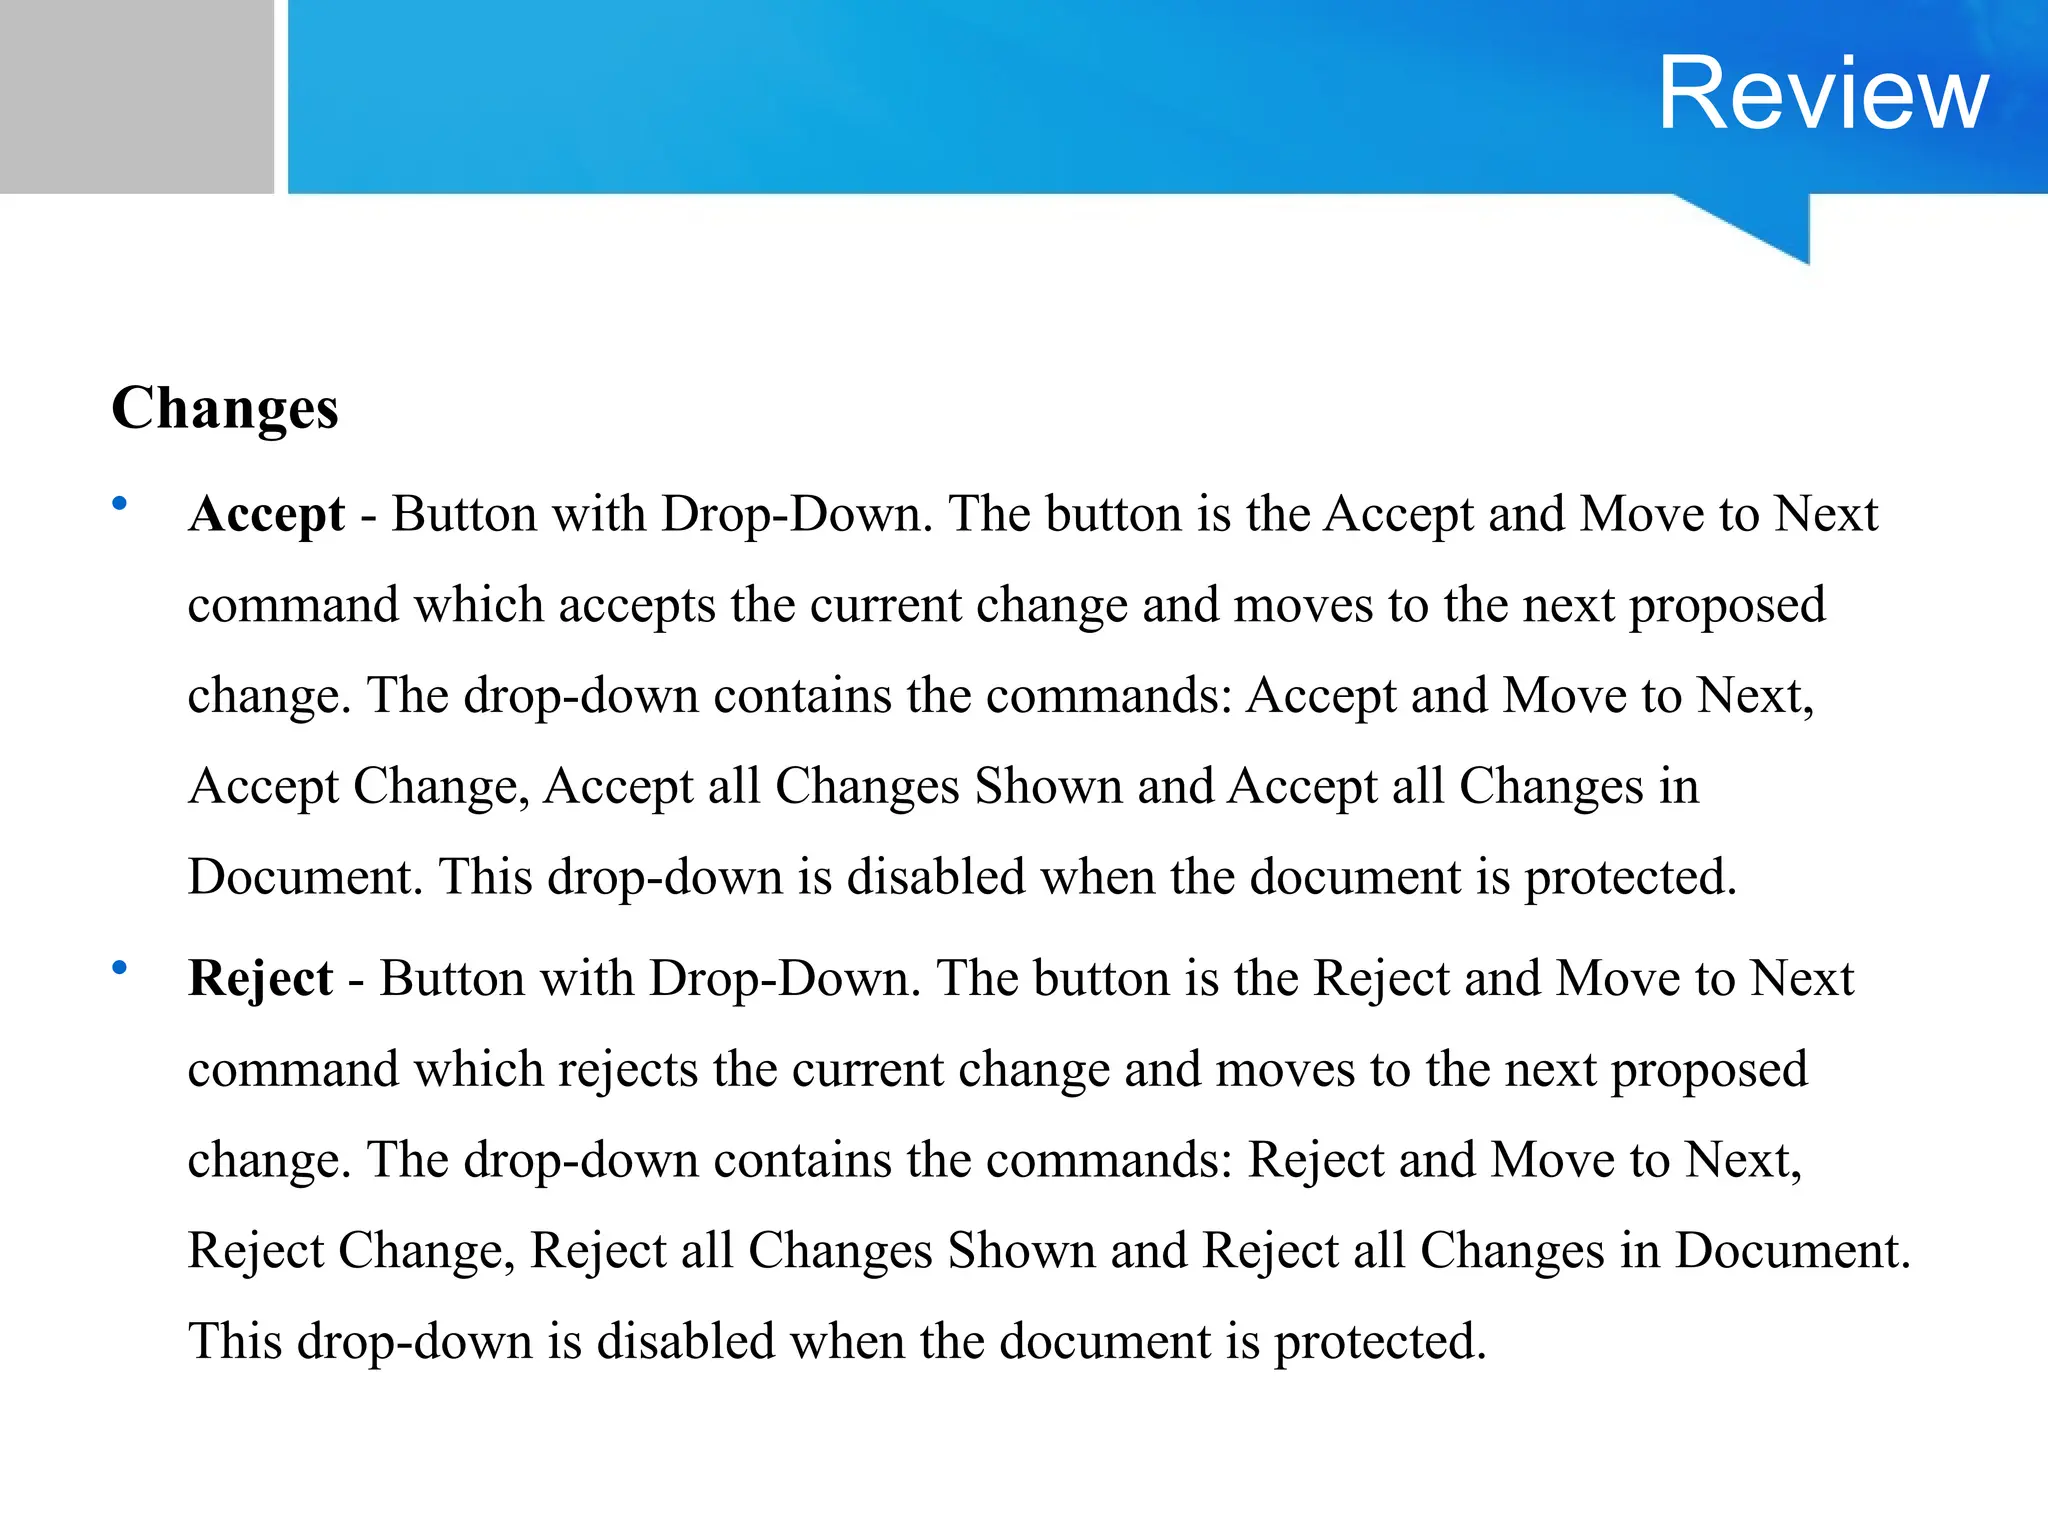
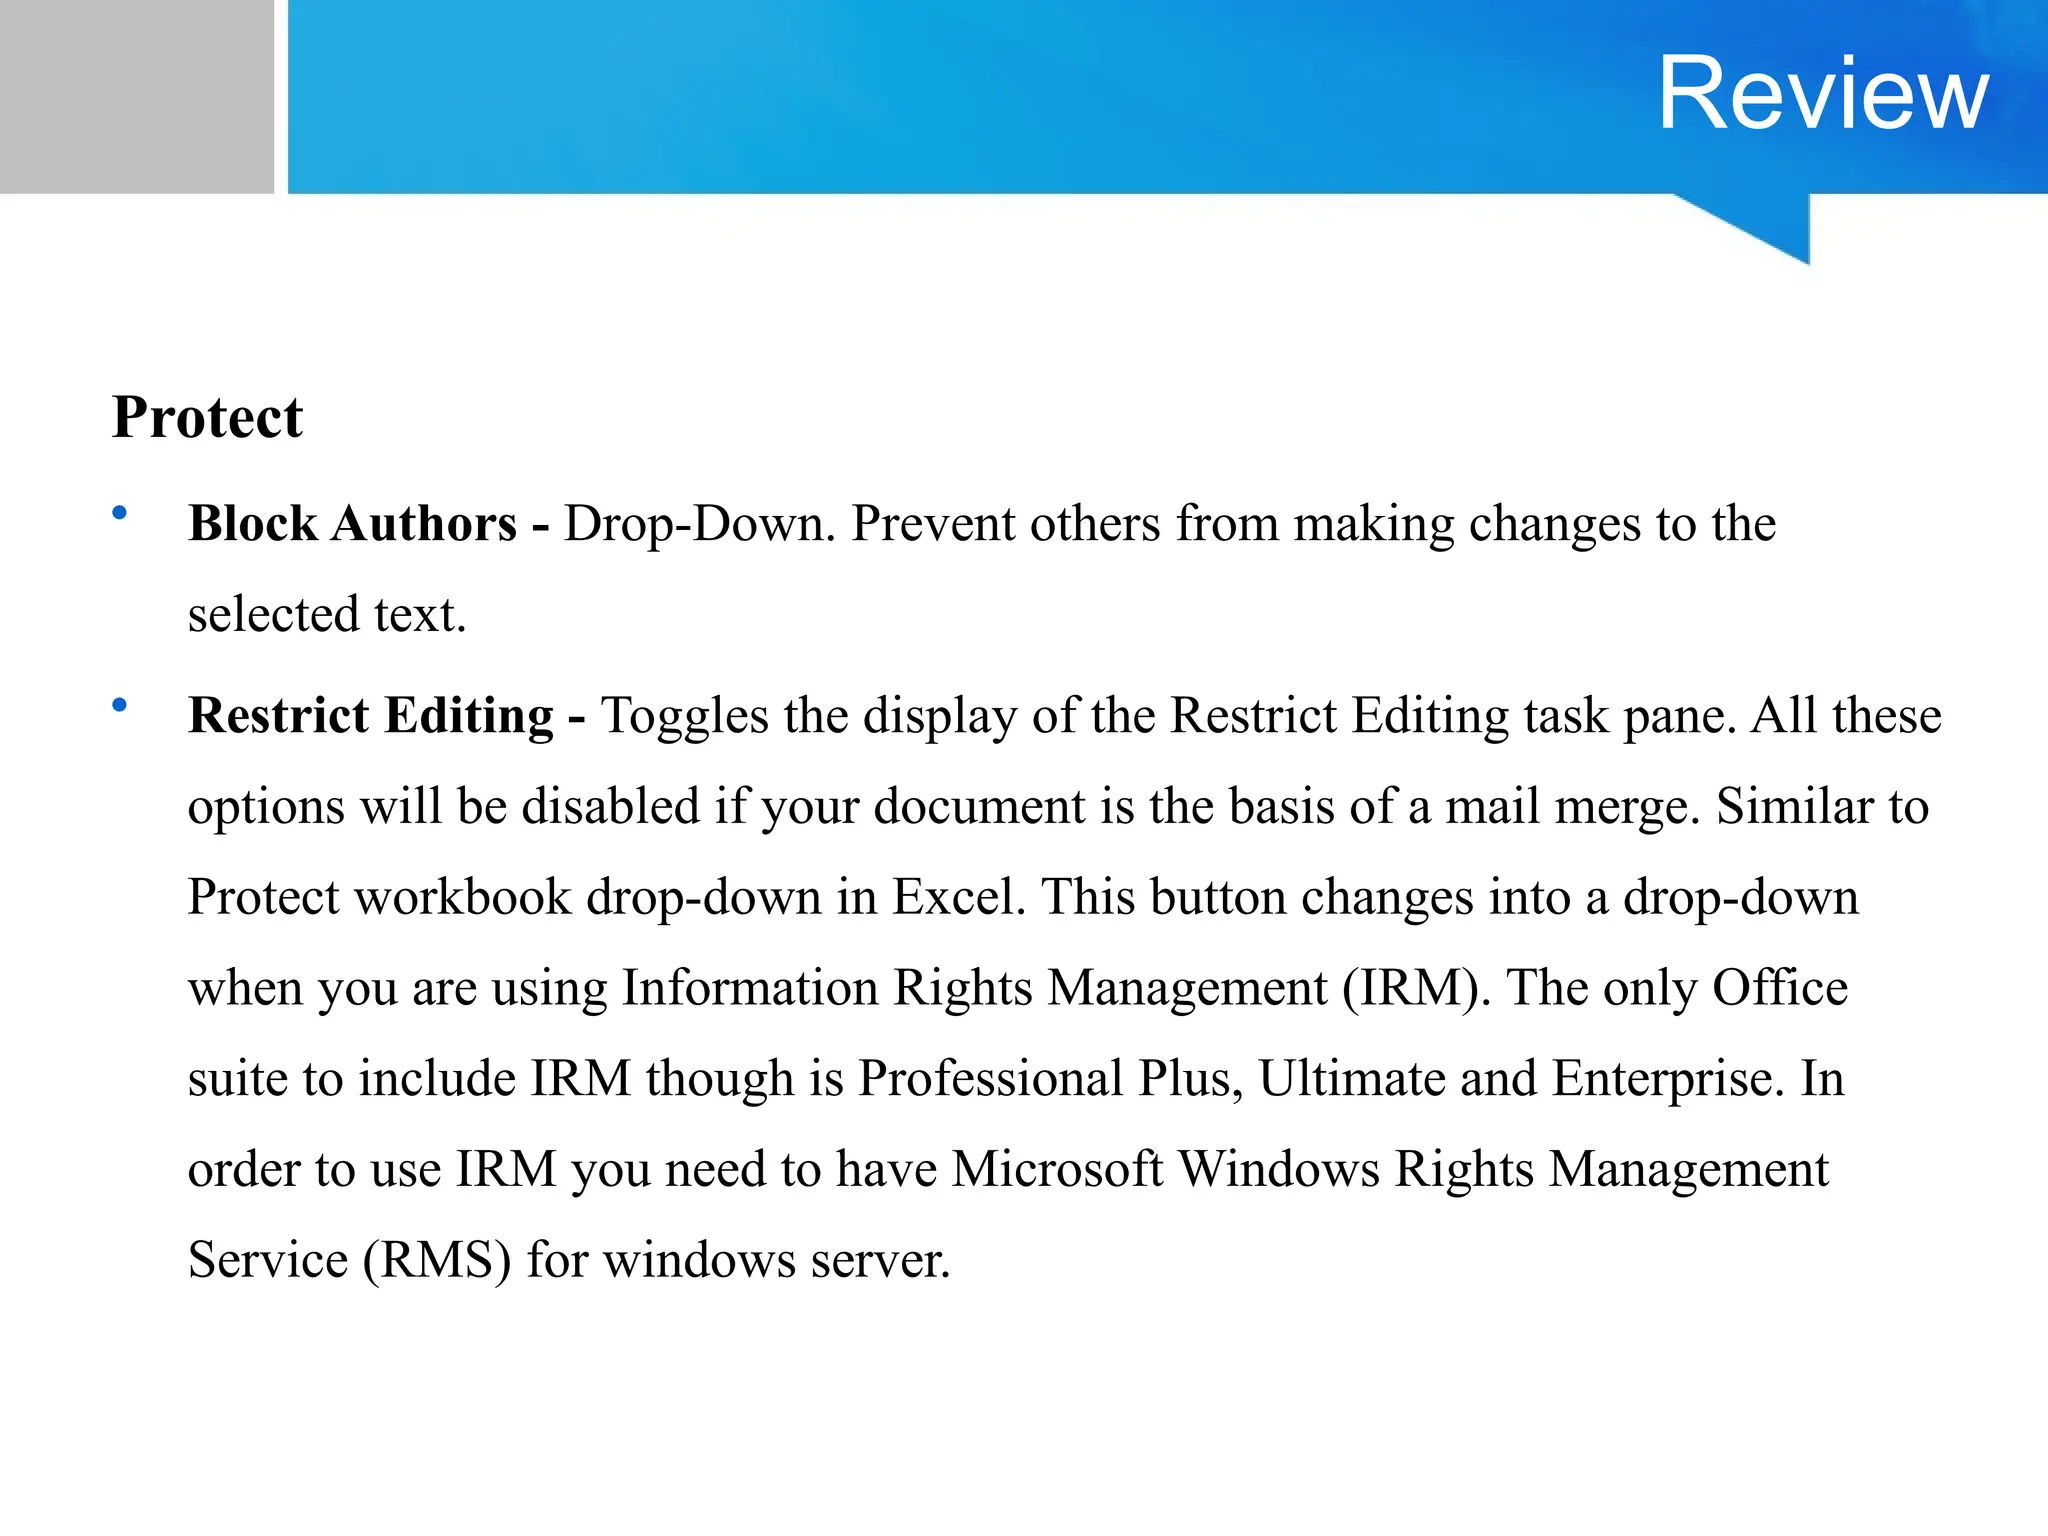
Introduction to MS Word
Prepared by: Ms. Mandeep Kaur
Assistant Professor
Computer Applications
MS Word
Microsoft Word is a word processing application that allows you to create a
variety of documents, including letters, resumes, and more. In this lesson, you'll
learn how to navigate the Word interface and become familiar with some of its
most important features, such as the Ribbon, Quick Access Toolbar, and
Backstage view.
The Word interface
When you open Word for the first time, the Start Screen will appear. From here,
you'll be able to create a new document, choose a template, and access your
recently edited documents. From the Start Screen, locate and select Blank
document to access the Word interface.
The Word interface
MS Word
Working with the Word environment
All recent versions of Word include the Ribbon and the Quick Access Toolbar, where
you'll find commands to perform common tasks in Word, as well as Backstage view.
The Ribbon
Word uses a tabbed Ribbon system instead of traditional menus. The Ribbon
contains multiple tabs, which you can find near the top of the Word window.
Showing and hiding the Ribbon
If you find that the Ribbon takes up too much screen space, you can hide it. To do
this, click the Ribbon Display Options arrow in the upper-right corner of the Ribbon,
then select the desired option from the drop-down menu:
MS Word
Auto-hide Ribbon: Auto-hide displays your
document in full-screen mode and completely
hides the Ribbon from view. To show the Ribbon,
click the Expand Ribbon command at the top of
screen.
Show Tabs: This option hides all command
groups when they're not in use, but tabs will
remain visible. To show the Ribbon, simply click
a tab.
Show Tabs and Commands: This option
maximizes the Ribbon. All of the tabs and
commands will be visible. This option is selected
by default when you open Word for the first time.
MS Word
Using the Tell me feature
If you're having trouble finding a command you want, the Tell Me feature can help.
It works just like a regular search bar. Type what you're looking for, and a list of
options will appear. You can then use the command directly from the menu without
having to find it on the Ribbon.
The Quick Access Toolbar
Located just above the Ribbon, the Quick Access Toolbar lets you access common
commands no matter which tab is selected. By default, it shows the Save, Undo, and
Redo commands, but you can add other commands depending on your needs.
MS Word
File Menu
New :
It used for crating new document. For creating new
• Click on file menu and select new option. The new document dialog box appears.
• Select blank document and click on OK button.
Open :
By using this option you can open any existing file. To open existing
• Click open from file menu. The open dialog box appears as
• Select your file or type name of file in file name text box and click on
Open button.
File Menu
Save :
Under this option you can save of active file for further references. To saving a file
• Click on Save from file menu. The Save As dialog box appears as
• Type your file in file name text box and click on Save button.
Save As :
Save command, save a file only one time but by using save as option you
can save a file multiple times on different location from same name or on same
location with different name. It creates multiple copy of current file. You can also
use this command to save a file with a password or to protect a file so that other
cannot change its document.
File Menu
Save As web page :
By using this option you can create a web page of your document. This document
automatically converts in HTML format. This document open only on web browser
like Internet Explorer.
Page Setup :
When you open of MS- Word document then word provide default setting of page
like margin, paper size etc. We can change these settings as per our requirement by
using page setup option. To change these setting :
• Click on Page setup from File Menu. The page setup dialog box appears. It has
four tab Margins, Paper Size, Paper Source & Layout.
File Menu
• Change the setting of page like Paper Size, Margin, Orientation etc. and click on
OK.
Print Preview :
It shows how the page will look when you print the page.
Features of Home menu
Home
This has options like font color, font size, font style, alignment, bullets, line spacing,
etc. All the basic elements which one may need to edit their document is available
under the Home option.
Home Menu
Undo:
If you want to reverse the last command or the delete the last entries you typed by
using Undo command or press Ctrl+Z. To reverse more than one action at a time.
Redo :
If an action or actions reversed by mistake then you can use Redo command from
edit menu or press Ctrl+Y.
Moving and Copying of Text :
You can move and copy text within a document, between document and to
and between other windows based applications.
Home Menu
For Moving Text
• Select text or lines or paragraph, which you want to move in same document or
any other application.
• Click Cut from Edit Menu or press Ctrl+X.
• Set the insertion of point where text to be moved and click paste from Edit or Press
Ctrl+V.
For Copying Text
• Select text or lines or paragraph, which you want to move in same document or
any other application.
• Click Copy from Edit Menu or press Ctrl+C.
• Set the insertion of point where text to be moved and click paste from Edit or Press
Ctrl+V.
Home Menu
Finding and Replacing Text :
When you want to search or change text in a document. You can easily find it using
this feature and change it using the replace feature of MS-Word.
For finding text
• Click find from edit menu. The Find and Replace dialog box appears as :
• Type the text to find in find what box.
• Choose the direction to search from drop down list. And specify the search
criteria.
• Click the find next button to start search.
Home Menu
For Replacing Text :
• Choose the Replace tab from the Find and Replace dialog box.
• Type the text to be finds in Find What box
• Type the text to replace the earlier used text, in replace with box.
• To replace the text, click the replace command button.
Goto :
By using Goto option you can directly jump on desired location. It moves the
insertion point to the items you want to go to. You can move to a page number,
comment, footnote, lines or other location.
Features of Insert Menu
Insert
Tables, shapes, images, charts, graphs, header, footer, page number, etc. can all be
entered in the document. They are included in the “Insert” category.
Insert Menu
Break
Under this option you can inert number of pages into document. For insert page click
Break from Insert menu, select break and click on OK.
Page Number :
Under this option you insert page number on each page. It inserts page numbers that
automatically update when you deletes or add pages.
To insert page number
• Click page number from insert menu, the insert page number dialog box appears
as :
• Select the alignment (such as left right or center) of page number and select
position of page number (Top or Bottom) and click on OK.
Insert Menu
Date and Time :
Using this option you insert current date and time in different format into document.
Auto Text :
From auto text, you insert auto text entries from list such as thanks, Sincerely yours
etc.
Comment :
If you want explain or give description on any word or picture then you can use
comment. Comment is display when you point at that word.To insert the comment
• Set the insertion of point where you want to insert comment
• Click comment from insert menu. Type the comment in bottom of page.
• Click on close button.
Insert Menu
Footnote :
Comment is display only on computer. It is not print on paper but footnote prints on
the paper in the bottom of page or end of document. To insert footnote
• Click where you want to insert the note reference mark.
• On the Insert menu, click Footnote.
• Click Footnote or Endnote.
• Under Numbering, click the option you want.
• Click OK.
Insert Menu
• Word inserts the note number and places the insertion point next to the note
number.
• Type the note text.
• Scroll to your place in the document and continue typing.
Picture:
To insert a picture follow the steps given below:
• 1. Point the cursor to the location where you want to insert the picture and then
click on to Insert option available in the menu bar.
• 2. Now click on to Picture option you will get a sub- menu.
Insert Menu
Clip Art: Click on to clip art you will get a menu, which shows different categories
of available pictures.
From file:
• Point the cursor to the location where you want to insert picture and click on to
Insert→ Picture → From File
• Now give the path of the picture file, where the picture you want to insert in your
document is stored.
Symbols :
The Symbol dialog box provides an extensive list of symbols and characters you can
insert:
Insert Menu
To insert a symbol
• Click where you want to insert the symbol.
• On the Insert menu, click Symbol, and then click the Symbols tab.
• In the Font box, click the font that you want.
• If you want to get a close-up view of a symbol, click it.
• Double-click the symbol that you want to insert.
Insert Menu
Object :
By using this command you insert any object into document such as Paint, Excel
Worksheet etc.
Book Mark :
A bookmark is a location or selection of text that you name or reference purposes.
Microsoft Word marks the location with the name you specify.
• Select an item you want a bookmark assigned to, or click where you want to
insert a bookmark.
• On the Insert menu, click Bookmark.
• Under Bookmark name, type or select a name.
• Click Add.
Insert Menu
Hyperlink :
To create hyperlink
• Select the text or object you want to display as the hyperlink.
• Select the hyperlink option from the insert menu. The Insert Hyperlink dialog
box appears as:
• Browse the file or web page name and click on OK button
Features of Design menu
Design
The template or the design in which you want your document to be created can be
selected under the Design tab. Choosing an appropriate tab will enhance the
appearance of your document.
Design Menu
Document Formatting (MS Word Design Menu):-
Under this, the text can be styled in different ways, can be given different colors. It
has the following options for designing the text:-
• Themes :- Through this you can use any of the various themes given in the word
file.
• Colors :- Through this option the colors used in the theme can be changed.
• Fonts:- Through this you can change the font used in the theme.
• Paragraph Spacing:- Through this you can increase or decrease the space
between text/paragraphs. In this you get options like No Paragraph Space,
Compact, Tight, Open, Relaxed, Double, Custom Paragraph Spacing etc.,
through which you can change the space as per your requirement.
Features of Layout menu
Page Layout
Word offers a variety of page layout and formatting options that affect how content
appears on the page. You can customize the page orientation, paper size, and page
margins depending on how you want your document to appear.
Page Layout
Page orientation:- Word offers two page orientation options: landscape and
portrait. Compare our example below to see how orientation can affect the
appearance and spacing of text and images.
• Landscape means the page is oriented horizontally.
• Portrait means the page is oriented vertically.
Page size:- By default, the page size of a new document is 8.5 inches by 11
inches. Depending on your project, you may need to adjust your document's page
size. It's important to note that before modifying the default page size, you should
check to see which page sizes your printer can accommodate.
Page Layout
Page margins:- A margin is the space between the text and the edge of your
document. By default, a new document's margins are set to Normal, which means it
has a one-inch space between the text and each edge. Depending on your needs,
Word allows you to change your document's margin size.
Features of Reference menu
References
This tab is the most useful for those who are creating a thesis or writing books or
lengthy documents. Options like citation, footnote, table of contents, caption,
bibliography, etc. can be found under this tab.
Reference menu
Table of Contents
• Table of Contents - Drop-Down. Provide an overview of your document by
adding a table of contents. The drop-down contains the commands: Built-in,
Insert Table of Contents and Save Selection to Table of Contents Gallery.
• Add Text - Drop-Down. The drop-down contains the commands: Do Not
Show in Table of Contents, Level 1, Level 2 and Level 3.
• Update Table - Updates the table of contents so that all the entries refer to
the correct page numbers.
• Insert Footnote - (Alt + Ctrl + F). Inserts a footnote at the current position.
Footnotes are automatically renumbered as you move text around the
document.
Reference menu
Footnotes
• Insert Endnote - (Alt + Ctrl + D). Inserts an endnote at the end of the
document. End notes are always placed at the end of a document.
• Next Footnote - Button with Drop-Down. The button moves to the next
footnote. The drop-down provides the commands Next Footnote, Previous
Footnote, Next Endnote and Previous Endnote.
• Show Notes - Shows where footnotes and endnotes are located.
• Insert Citation - Drop-Down. The drop-down contains the commands: Add
New Source, Add New Placeholder and Search Libraries.
Reference menu
Citations & Bibliography
• Style - Choose the style of citation to use in the document.
• Bibliography - Drop-Down. The drop-down contains the commands: Insert
Bibliography and Save Selection to Bibliography Gallery.
Captions
• Insert Caption - Insert a caption below a picture or graphic to provide a short
description.
• Insert Table of Figures - Add a list of captioned objects and their page numbers.
• Cross-reference - Displays the "Cross-reference" dialog box allowing you to
insert cross-referencing into your document, for example: turn to page 3 or
please refer to page 12. Cross references are inserted as hyperlinks.
Reference menu
Index
• Mark Entry - (Alt + Shift + X). Marks the currently selected text so it will
appear in the index of the document.
• Insert Index - Add an index listing key words and page numbers they appear on.
• Update Index - Updates the index table.
Table of Authorities
• Mark Citation - (Alt + Shift + I). Adds the currently selected text so it will
appear in the table of authority.
• Insert Table of Authorities - Inserts a table of authorities for cases, statutes and
other authorities in the document.
• Update Table - Updates the table of authorities to include all the citations in the
document.
Features of Review
Review
Spell check, grammar, Thesaurus, word count, language, translation,
comments, etc. can all be tracked under the review tab. This acts as an
advantage for those who get their documents reviewed on MS Word.
Review
Proofing
• Thesaurus - Toggles the display of the Research task pane defaulting the
research service to the thesaurus. Same as Excel.
• Word Count - This displays the "Word Count" dialog box displaying the
document statistics. This dialog box can also be displayed by clicking on the
word count indicator on the status bar.
• Translate - Drop-Down. Displays the Research task pane. This drop-down
contains the commands: Translate Document, Translate Selected Text, Mini
Translator and Choose Translation Language.
• Language - Drop-Down. This drop-down contains the commands: Set Proofing
Language and Language Preferences. Set Proofing Language display the
"Language" dialog box. Language Preferences displays the "Options" dialog box,
Language Tab.
Review
Spelling & Grammar
• From the Review tab, click the Spelling & Grammar command.
• The Spelling and Grammar pane will appear on the right. For each error
in your document, Word will offer one or more suggestions. Click a
suggestion to correct the error.
• Word will move through each error until you have reviewed all of them.
After the last error has been reviewed, a dialog box will appear
confirming that the spelling and grammar check is complete. Click OK.
Review
Ignoring "errors"
The spelling and grammar check is not always correct. Particularly with grammar,
there are many errors Word will not notice. There are also times when the spelling
and grammar check will say something is an error when it's actually not. This often
happens with names and other proper nouns, which may not be in the dictionary.
For spelling "errors":
• Ignore Once: This will skip the word without changing it.
• Ignore All: This will skip the word without changing it, and it will also skip all
other instances of the word in the document.
• Add to Dictionary: This adds the word to the dictionary so it will never come up
as an error. Make sure the word is spelled correctly before choosing this option.
Review
Automatic spelling and grammar checking
By default, Word automatically checks your document for spelling and
grammar errors, so you may not even need to run a separate check. These
errors are indicated by colored lines below the text.
• The red line indicates a misspelled word.
• The blue line indicates a grammatical error, which can include misused
words.
Review
Language
• Translate - Drop-Down. Displays the Research task pane. This drop-down
contains the commands: Translate Document, Translate Selected Text, Mini
Translator and Choose Translation Language.
• Language - Drop-Down. This drop-down contains the commands: Set Proofing
Language and Language Preferences. Set Proofing Language display the
"Language" dialog box. Language Preferences displays the "Options" dialog box,
Language Tab.
Comments
• New Comment - (Shift + F2). Inserts a comment at the active cell. This
command does not change to Edit Comment when a comment is selected like it
does in Excel.
Review
• Delete - Button with Drop-Down. Deletes the selected comment. The button
deletes the comment in the active selection. The drop-down contains the
commands: Delete All Comments Shown and Delete all comments in Document.
This is disabled when the document does not contain any comments.
• Previous - Goes to the previous comment in the active document. This is
disabled when the document does not contain any comments.
• Next - Goes to the next comment in the active document. This is disabled when
the document does not contain any comments.
Review
Tracking
• Track Changes - (Ctrl + Shift + E). Button with Drop-Down. The drop-down is
the old (Show > Options) from the Reviewing toolbar and contains the
commands Track Changes, Change Tracking Options and Change User Name.
Change Tracking Options displays the Track Changes Options dialog box.
Change User Name displays the Word Options dialog box (Popular tab).
• Balloons - Drop-Down. Lets you choose how to display the revisions either in
the margin or in the actual document. The drop-down contains the commands:
Show Revisions in Balloons, Show all Revisions Inline and Show Only
Comments and Formatting in Balloons.
Review
• Display for Review - Drop-Down. The drop-down contains the commands:
Simple Markup, All Markup, No Markup and Original.
• Show Markup - Drop-Down. The drop-down contains the commands:
Comments, Ink, Insertions and Deletions, Formatting, Specific People, Balloons,
Highlight Updates, Other Authors.
• Reviewing Pane - Button with Drop-Down. The button toggles the display of the
Reviewing pane. The drop-down contains the commands: Reviewing Pane
Vertical and Reviewing Pane Horizontally. There is now also summary
information at the top of the pane.
Review
Changes
• Accept - Button with Drop-Down. The button is the Accept and Move to Next
command which accepts the current change and moves to the next proposed
change. The drop-down contains the commands: Accept and Move to Next,
Accept Change, Accept all Changes Shown and Accept all Changes in
Document. This drop-down is disabled when the document is protected.
• Reject - Button with Drop-Down. The button is the Reject and Move to Next
command which rejects the current change and moves to the next proposed
change. The drop-down contains the commands: Reject and Move to Next,
Reject Change, Reject all Changes Shown and Reject all Changes in Document.
This drop-down is disabled when the document is protected.
Review
Protect
• Block Authors - Drop-Down. Prevent others from making changes to the
selected text.
• Restrict Editing - Toggles the display of the Restrict Editing task pane. All these
options will be disabled if your document is the basis of a mail merge. Similar to
Protect workbook drop-down in Excel. This button changes into a drop-down
when you are using Information Rights Management (IRM). The only Office
suite to include IRM though is Professional Plus, Ultimate and Enterprise. In
order to use IRM you need to have Microsoft Windows Rights Management
Service (RMS) for windows server.

MS_Word.pptx course AOTT for semester 1..

  • 1.
    Introduction to MSWord Prepared by: Ms. Mandeep Kaur Assistant Professor Computer Applications
  • 2.
    MS Word Microsoft Wordis a word processing application that allows you to create a variety of documents, including letters, resumes, and more. In this lesson, you'll learn how to navigate the Word interface and become familiar with some of its most important features, such as the Ribbon, Quick Access Toolbar, and Backstage view. The Word interface When you open Word for the first time, the Start Screen will appear. From here, you'll be able to create a new document, choose a template, and access your recently edited documents. From the Start Screen, locate and select Blank document to access the Word interface.
  • 3.
  • 4.
    MS Word Working withthe Word environment All recent versions of Word include the Ribbon and the Quick Access Toolbar, where you'll find commands to perform common tasks in Word, as well as Backstage view. The Ribbon Word uses a tabbed Ribbon system instead of traditional menus. The Ribbon contains multiple tabs, which you can find near the top of the Word window. Showing and hiding the Ribbon If you find that the Ribbon takes up too much screen space, you can hide it. To do this, click the Ribbon Display Options arrow in the upper-right corner of the Ribbon, then select the desired option from the drop-down menu:
  • 5.
    MS Word Auto-hide Ribbon:Auto-hide displays your document in full-screen mode and completely hides the Ribbon from view. To show the Ribbon, click the Expand Ribbon command at the top of screen. Show Tabs: This option hides all command groups when they're not in use, but tabs will remain visible. To show the Ribbon, simply click a tab. Show Tabs and Commands: This option maximizes the Ribbon. All of the tabs and commands will be visible. This option is selected by default when you open Word for the first time.
  • 6.
    MS Word Using theTell me feature If you're having trouble finding a command you want, the Tell Me feature can help. It works just like a regular search bar. Type what you're looking for, and a list of options will appear. You can then use the command directly from the menu without having to find it on the Ribbon. The Quick Access Toolbar Located just above the Ribbon, the Quick Access Toolbar lets you access common commands no matter which tab is selected. By default, it shows the Save, Undo, and Redo commands, but you can add other commands depending on your needs.
  • 7.
  • 8.
    File Menu New : Itused for crating new document. For creating new • Click on file menu and select new option. The new document dialog box appears. • Select blank document and click on OK button. Open : By using this option you can open any existing file. To open existing • Click open from file menu. The open dialog box appears as • Select your file or type name of file in file name text box and click on Open button.
  • 9.
    File Menu Save : Underthis option you can save of active file for further references. To saving a file • Click on Save from file menu. The Save As dialog box appears as • Type your file in file name text box and click on Save button. Save As : Save command, save a file only one time but by using save as option you can save a file multiple times on different location from same name or on same location with different name. It creates multiple copy of current file. You can also use this command to save a file with a password or to protect a file so that other cannot change its document.
  • 10.
    File Menu Save Asweb page : By using this option you can create a web page of your document. This document automatically converts in HTML format. This document open only on web browser like Internet Explorer. Page Setup : When you open of MS- Word document then word provide default setting of page like margin, paper size etc. We can change these settings as per our requirement by using page setup option. To change these setting : • Click on Page setup from File Menu. The page setup dialog box appears. It has four tab Margins, Paper Size, Paper Source & Layout.
  • 11.
    File Menu • Changethe setting of page like Paper Size, Margin, Orientation etc. and click on OK. Print Preview : It shows how the page will look when you print the page.
  • 12.
    Features of Homemenu Home This has options like font color, font size, font style, alignment, bullets, line spacing, etc. All the basic elements which one may need to edit their document is available under the Home option.
  • 13.
    Home Menu Undo: If youwant to reverse the last command or the delete the last entries you typed by using Undo command or press Ctrl+Z. To reverse more than one action at a time. Redo : If an action or actions reversed by mistake then you can use Redo command from edit menu or press Ctrl+Y. Moving and Copying of Text : You can move and copy text within a document, between document and to and between other windows based applications.
  • 14.
    Home Menu For MovingText • Select text or lines or paragraph, which you want to move in same document or any other application. • Click Cut from Edit Menu or press Ctrl+X. • Set the insertion of point where text to be moved and click paste from Edit or Press Ctrl+V. For Copying Text • Select text or lines or paragraph, which you want to move in same document or any other application. • Click Copy from Edit Menu or press Ctrl+C. • Set the insertion of point where text to be moved and click paste from Edit or Press Ctrl+V.
  • 15.
    Home Menu Finding andReplacing Text : When you want to search or change text in a document. You can easily find it using this feature and change it using the replace feature of MS-Word. For finding text • Click find from edit menu. The Find and Replace dialog box appears as : • Type the text to find in find what box. • Choose the direction to search from drop down list. And specify the search criteria. • Click the find next button to start search.
  • 16.
    Home Menu For ReplacingText : • Choose the Replace tab from the Find and Replace dialog box. • Type the text to be finds in Find What box • Type the text to replace the earlier used text, in replace with box. • To replace the text, click the replace command button. Goto : By using Goto option you can directly jump on desired location. It moves the insertion point to the items you want to go to. You can move to a page number, comment, footnote, lines or other location.
  • 17.
    Features of InsertMenu Insert Tables, shapes, images, charts, graphs, header, footer, page number, etc. can all be entered in the document. They are included in the “Insert” category.
  • 18.
    Insert Menu Break Under thisoption you can inert number of pages into document. For insert page click Break from Insert menu, select break and click on OK. Page Number : Under this option you insert page number on each page. It inserts page numbers that automatically update when you deletes or add pages. To insert page number • Click page number from insert menu, the insert page number dialog box appears as : • Select the alignment (such as left right or center) of page number and select position of page number (Top or Bottom) and click on OK.
  • 19.
    Insert Menu Date andTime : Using this option you insert current date and time in different format into document. Auto Text : From auto text, you insert auto text entries from list such as thanks, Sincerely yours etc. Comment : If you want explain or give description on any word or picture then you can use comment. Comment is display when you point at that word.To insert the comment • Set the insertion of point where you want to insert comment • Click comment from insert menu. Type the comment in bottom of page. • Click on close button.
  • 20.
    Insert Menu Footnote : Commentis display only on computer. It is not print on paper but footnote prints on the paper in the bottom of page or end of document. To insert footnote • Click where you want to insert the note reference mark. • On the Insert menu, click Footnote. • Click Footnote or Endnote. • Under Numbering, click the option you want. • Click OK.
  • 21.
    Insert Menu • Wordinserts the note number and places the insertion point next to the note number. • Type the note text. • Scroll to your place in the document and continue typing. Picture: To insert a picture follow the steps given below: • 1. Point the cursor to the location where you want to insert the picture and then click on to Insert option available in the menu bar. • 2. Now click on to Picture option you will get a sub- menu.
  • 22.
    Insert Menu Clip Art:Click on to clip art you will get a menu, which shows different categories of available pictures. From file: • Point the cursor to the location where you want to insert picture and click on to Insert→ Picture → From File • Now give the path of the picture file, where the picture you want to insert in your document is stored. Symbols : The Symbol dialog box provides an extensive list of symbols and characters you can insert:
  • 23.
    Insert Menu To inserta symbol • Click where you want to insert the symbol. • On the Insert menu, click Symbol, and then click the Symbols tab. • In the Font box, click the font that you want. • If you want to get a close-up view of a symbol, click it. • Double-click the symbol that you want to insert.
  • 24.
    Insert Menu Object : Byusing this command you insert any object into document such as Paint, Excel Worksheet etc. Book Mark : A bookmark is a location or selection of text that you name or reference purposes. Microsoft Word marks the location with the name you specify. • Select an item you want a bookmark assigned to, or click where you want to insert a bookmark. • On the Insert menu, click Bookmark. • Under Bookmark name, type or select a name. • Click Add.
  • 25.
    Insert Menu Hyperlink : Tocreate hyperlink • Select the text or object you want to display as the hyperlink. • Select the hyperlink option from the insert menu. The Insert Hyperlink dialog box appears as: • Browse the file or web page name and click on OK button
  • 26.
    Features of Designmenu Design The template or the design in which you want your document to be created can be selected under the Design tab. Choosing an appropriate tab will enhance the appearance of your document.
  • 27.
    Design Menu Document Formatting(MS Word Design Menu):- Under this, the text can be styled in different ways, can be given different colors. It has the following options for designing the text:- • Themes :- Through this you can use any of the various themes given in the word file. • Colors :- Through this option the colors used in the theme can be changed. • Fonts:- Through this you can change the font used in the theme. • Paragraph Spacing:- Through this you can increase or decrease the space between text/paragraphs. In this you get options like No Paragraph Space, Compact, Tight, Open, Relaxed, Double, Custom Paragraph Spacing etc., through which you can change the space as per your requirement.
  • 28.
    Features of Layoutmenu Page Layout Word offers a variety of page layout and formatting options that affect how content appears on the page. You can customize the page orientation, paper size, and page margins depending on how you want your document to appear.
  • 29.
    Page Layout Page orientation:-Word offers two page orientation options: landscape and portrait. Compare our example below to see how orientation can affect the appearance and spacing of text and images. • Landscape means the page is oriented horizontally. • Portrait means the page is oriented vertically. Page size:- By default, the page size of a new document is 8.5 inches by 11 inches. Depending on your project, you may need to adjust your document's page size. It's important to note that before modifying the default page size, you should check to see which page sizes your printer can accommodate.
  • 30.
    Page Layout Page margins:-A margin is the space between the text and the edge of your document. By default, a new document's margins are set to Normal, which means it has a one-inch space between the text and each edge. Depending on your needs, Word allows you to change your document's margin size.
  • 31.
    Features of Referencemenu References This tab is the most useful for those who are creating a thesis or writing books or lengthy documents. Options like citation, footnote, table of contents, caption, bibliography, etc. can be found under this tab.
  • 32.
    Reference menu Table ofContents • Table of Contents - Drop-Down. Provide an overview of your document by adding a table of contents. The drop-down contains the commands: Built-in, Insert Table of Contents and Save Selection to Table of Contents Gallery. • Add Text - Drop-Down. The drop-down contains the commands: Do Not Show in Table of Contents, Level 1, Level 2 and Level 3. • Update Table - Updates the table of contents so that all the entries refer to the correct page numbers. • Insert Footnote - (Alt + Ctrl + F). Inserts a footnote at the current position. Footnotes are automatically renumbered as you move text around the document.
  • 33.
    Reference menu Footnotes • InsertEndnote - (Alt + Ctrl + D). Inserts an endnote at the end of the document. End notes are always placed at the end of a document. • Next Footnote - Button with Drop-Down. The button moves to the next footnote. The drop-down provides the commands Next Footnote, Previous Footnote, Next Endnote and Previous Endnote. • Show Notes - Shows where footnotes and endnotes are located. • Insert Citation - Drop-Down. The drop-down contains the commands: Add New Source, Add New Placeholder and Search Libraries.
  • 34.
    Reference menu Citations &Bibliography • Style - Choose the style of citation to use in the document. • Bibliography - Drop-Down. The drop-down contains the commands: Insert Bibliography and Save Selection to Bibliography Gallery. Captions • Insert Caption - Insert a caption below a picture or graphic to provide a short description. • Insert Table of Figures - Add a list of captioned objects and their page numbers. • Cross-reference - Displays the "Cross-reference" dialog box allowing you to insert cross-referencing into your document, for example: turn to page 3 or please refer to page 12. Cross references are inserted as hyperlinks.
  • 35.
    Reference menu Index • MarkEntry - (Alt + Shift + X). Marks the currently selected text so it will appear in the index of the document. • Insert Index - Add an index listing key words and page numbers they appear on. • Update Index - Updates the index table. Table of Authorities • Mark Citation - (Alt + Shift + I). Adds the currently selected text so it will appear in the table of authority. • Insert Table of Authorities - Inserts a table of authorities for cases, statutes and other authorities in the document. • Update Table - Updates the table of authorities to include all the citations in the document.
  • 36.
    Features of Review Review Spellcheck, grammar, Thesaurus, word count, language, translation, comments, etc. can all be tracked under the review tab. This acts as an advantage for those who get their documents reviewed on MS Word.
  • 37.
    Review Proofing • Thesaurus -Toggles the display of the Research task pane defaulting the research service to the thesaurus. Same as Excel. • Word Count - This displays the "Word Count" dialog box displaying the document statistics. This dialog box can also be displayed by clicking on the word count indicator on the status bar. • Translate - Drop-Down. Displays the Research task pane. This drop-down contains the commands: Translate Document, Translate Selected Text, Mini Translator and Choose Translation Language. • Language - Drop-Down. This drop-down contains the commands: Set Proofing Language and Language Preferences. Set Proofing Language display the "Language" dialog box. Language Preferences displays the "Options" dialog box, Language Tab.
  • 38.
    Review Spelling & Grammar •From the Review tab, click the Spelling & Grammar command. • The Spelling and Grammar pane will appear on the right. For each error in your document, Word will offer one or more suggestions. Click a suggestion to correct the error. • Word will move through each error until you have reviewed all of them. After the last error has been reviewed, a dialog box will appear confirming that the spelling and grammar check is complete. Click OK.
  • 39.
    Review Ignoring "errors" The spellingand grammar check is not always correct. Particularly with grammar, there are many errors Word will not notice. There are also times when the spelling and grammar check will say something is an error when it's actually not. This often happens with names and other proper nouns, which may not be in the dictionary. For spelling "errors": • Ignore Once: This will skip the word without changing it. • Ignore All: This will skip the word without changing it, and it will also skip all other instances of the word in the document. • Add to Dictionary: This adds the word to the dictionary so it will never come up as an error. Make sure the word is spelled correctly before choosing this option.
  • 40.
    Review Automatic spelling andgrammar checking By default, Word automatically checks your document for spelling and grammar errors, so you may not even need to run a separate check. These errors are indicated by colored lines below the text. • The red line indicates a misspelled word. • The blue line indicates a grammatical error, which can include misused words.
  • 41.
    Review Language • Translate -Drop-Down. Displays the Research task pane. This drop-down contains the commands: Translate Document, Translate Selected Text, Mini Translator and Choose Translation Language. • Language - Drop-Down. This drop-down contains the commands: Set Proofing Language and Language Preferences. Set Proofing Language display the "Language" dialog box. Language Preferences displays the "Options" dialog box, Language Tab. Comments • New Comment - (Shift + F2). Inserts a comment at the active cell. This command does not change to Edit Comment when a comment is selected like it does in Excel.
  • 42.
    Review • Delete -Button with Drop-Down. Deletes the selected comment. The button deletes the comment in the active selection. The drop-down contains the commands: Delete All Comments Shown and Delete all comments in Document. This is disabled when the document does not contain any comments. • Previous - Goes to the previous comment in the active document. This is disabled when the document does not contain any comments. • Next - Goes to the next comment in the active document. This is disabled when the document does not contain any comments.
  • 43.
    Review Tracking • Track Changes- (Ctrl + Shift + E). Button with Drop-Down. The drop-down is the old (Show > Options) from the Reviewing toolbar and contains the commands Track Changes, Change Tracking Options and Change User Name. Change Tracking Options displays the Track Changes Options dialog box. Change User Name displays the Word Options dialog box (Popular tab). • Balloons - Drop-Down. Lets you choose how to display the revisions either in the margin or in the actual document. The drop-down contains the commands: Show Revisions in Balloons, Show all Revisions Inline and Show Only Comments and Formatting in Balloons.
  • 44.
    Review • Display forReview - Drop-Down. The drop-down contains the commands: Simple Markup, All Markup, No Markup and Original. • Show Markup - Drop-Down. The drop-down contains the commands: Comments, Ink, Insertions and Deletions, Formatting, Specific People, Balloons, Highlight Updates, Other Authors. • Reviewing Pane - Button with Drop-Down. The button toggles the display of the Reviewing pane. The drop-down contains the commands: Reviewing Pane Vertical and Reviewing Pane Horizontally. There is now also summary information at the top of the pane.
  • 45.
    Review Changes • Accept -Button with Drop-Down. The button is the Accept and Move to Next command which accepts the current change and moves to the next proposed change. The drop-down contains the commands: Accept and Move to Next, Accept Change, Accept all Changes Shown and Accept all Changes in Document. This drop-down is disabled when the document is protected. • Reject - Button with Drop-Down. The button is the Reject and Move to Next command which rejects the current change and moves to the next proposed change. The drop-down contains the commands: Reject and Move to Next, Reject Change, Reject all Changes Shown and Reject all Changes in Document. This drop-down is disabled when the document is protected.
  • 46.
    Review Protect • Block Authors- Drop-Down. Prevent others from making changes to the selected text. • Restrict Editing - Toggles the display of the Restrict Editing task pane. All these options will be disabled if your document is the basis of a mail merge. Similar to Protect workbook drop-down in Excel. This button changes into a drop-down when you are using Information Rights Management (IRM). The only Office suite to include IRM though is Professional Plus, Ultimate and Enterprise. In order to use IRM you need to have Microsoft Windows Rights Management Service (RMS) for windows server.