This document discusses classes and objects in Python. It defines a Point class to represent points in 2D space and a Rectangle class that uses a Point object for its corner attribute. Methods like find_center and grow_rectangle are defined that take objects as arguments and return or modify objects. Deep copying objects is discussed as an alternative to aliasing that allows modifying objects without changing the original. Pure functions that return new objects without modifying parameters are introduced.
I am Irene M. I am a C++ Homework Expert at cpphomeworkhelp.com. I hold a Masters in Programming from from California, USA. I have been helping students with their homework for the past 10 years. I solve homework related to C++.
Visit cpphomeworkhelp.com or email info@cpphomeworkhelp.com. You can also call on +1 678 648 4277 for any assistance with C++ Homework.
Assignment 6 as a reference public class ArrExample pr.pdfkksrivastava1
Assignment 6 as a reference
public class ArrExample {
private int[] arr;
public ArrExample(int length) {
this.arr = new int[length];
}
public ArrExample(int[] arr) {
this.arr = arr;
}
public void arrDisplay() {
if (arr.length == 0) {
System.out.println("{}");
} else {
System.out.print("{");
System.out.print(arr[0]);
for (int i = 1; i < arr.length; i++) {
System.out.print("," + arr[i]);
}
System.out.println("}");
}
}
public int arrTot() {
int total = 0;
for (int i = 0; i < arr.length; i++) {
total += arr[i];
}
return total;
}
public int arrMax() {
int maxSeen = arr.length == 0 ? 0 : arr[0];
for (int i = 1; i < arr.length; i++) {
if (arr[i] > maxSeen) {
maxSeen = arr[i];
}
}
return maxSeen;
}
public int arrMin() {
int minSeen = arr.length == 0 ? 0 : arr[0];
for (int i = 1; i < arr.length; i++) {
if (arr[i] < minSeen) {
minSeen = arr[i];
}
}
return minSeen;
}
public int arrRange() {
return arrMax() - arrMin();
}
public double arrAverage() {
return (double) arrTot() / arr.length;
}
public void arrClip(int clipValue) {
for (int i = 0; i < arr.length; i++) {
if (arr[i] > clipValue) {
arr[i] = clipValue;
}
}
}
public int arrfindCount(int value) {
int count = 0;
for (int i = 0; i < arr.length; i++) {
if (arr[i] == value) {
count++;
}
}
return count;
}
public static void testData() {
int[] arr0 = { -2, -1 };
int[] arr1 = { 1, 2, 3, 4, 5, 6, 7, 8, 9, 10 };
int[] arr2 = { 2, 4, 6, 8, 10, 12, 14, 16, 7, 6, 22, 8, 9, 16, 5, 2, 7, 8, 12, 2, 0, 14, 17, 19, 22 };
ArrExample A1 = new ArrExample(arr0);
ArrExample A2 = new ArrExample(arr1);
ArrExample A3 = new ArrExample(arr2);
A1.arrDisplay();
A2.arrDisplay();
A3.arrDisplay();
System.out.println("Total of A1: " + A1.arrTot());
System.out.println("Total of A2: " + A2.arrTot());
}
1)a) This assignment builds on Assignment 6. In Assignment 6, your arrInt class always used a
completely
filled array. But what if you add values only one at a time, and dont know how many items you will
have
when you are done? In this assignment, you will create an array bffr without filling it right away.
That
means that you have an array but most of the values are meaningless zeroes. At the beginning, all
of the
values are meaningless zeroes. Only as you begin putting values into the array do some of the
elements
become meaningful. The important idea to capture, is that the size or capacity of the array, and
the
number of values in the array (or count), are two separate numbers. Start a project, as always.
Create
your main class with the same name as the project. Then create a new class called
BffrIntFirstname
(Use your first name ). The BffrIntFirstname class will have two private variables: an array of ints
(private int bffr[];), and a count of the number of values that have been added, called count. The
class
should have two constructors. The constructor that takes no arguments should create an array of
8 ints
(using a constant called BFFR_SZ) for initializing the array: bffr = new int[BFFR_SZ];. The other
constructor takes an in.
On the tomcat drive in folder cosc210 you will find file named Paint.docxdunhamadell
On the tomcat drive in folder cosc210 you will find file named PainterStartup.zip. This file contains the source code for the start of a Painter program. In its current state, Painter can create boxes and text objects at given locations. Both boxes and text objects can be repositioned and resized using a mouse. The task is to add to the program the implementation for an oval, line, image, and group objects.
Instructions:
Add an oval object. An oval is very similar in implementation as the box, except it renders an oval instead of a rectangle. The oval can be repositioned by dragging the object to a new location. The oval can be resized by first clicking over the oval to display grab handles and then dragging a grab handle to a new position. The grab handles are to be rendered at the same positions as the box. Likewise, clicking anywhere in the smallest rectangle that encloses the oval performs selection.
Add a Line object. A Line is to be created by selecting a Line tool and then click and drag over the canvas. The line is rendered from the point of the initial click to the mouse pointer. On releasing the mouse the construction of the line object is completed. A partial implementation of a PtrDrawLine object is provided. You will need to fix the rendering, click over, and test for inside a rectangle.
A Line is selected by clicking anywhere over the line. Right now if you click anywhere in the rectangular region hold the line, then the line is selected. The implementation is in the isOver method. This needs to be fixed to only select when the click is on the line.
Given below is a partial solution to determine if a mouse click position (the x and y parameters to the isOver method) is over a line:
double ratio = (double) getDeltaY( ) / (double) getDeltaX( );
if (Math.abs(((x - getX( )) * ratio) - (y - getY( ))) <= 1) {
return true;
}
You need to modify this code when the y to x ratio is less than -1 or greater than 1. (hint: Inverse the roles of x and y)
The isInside method provides the implementation for determining if the line is inside a rectangular area as specified by the parameters. This code does not work right if the ending point of the line is to the left or above the starting point. Fix this to work in all cases.
Add an Image object. An Image object is created by selecting an Image tool and then clicking anywhere on the canvas. On clicking the canvas, a File Selection Dialog should be displayed. The dialog prompts for selection of .gif and .jpg files. On selecting a .gif or .jpg file and clicking “Open”, an Image object that renders the image of the selected file is created at the click position. Image selection and drag behaviors are the same as a Box object. The image object additionally renders lines at the edges of the image (as done in Box).
The code for displaying a File Selection Dialog is:
JFileChooser fileChooser = new JFileChooser();
f.
asmt7/~$sc_210_-_assignment_7_fall_15.doc
asmt7/cosc_210_-_assignment_7_fall_15.doc
COSC 210 - Object Oriented Programming
Assignment 7
The objectives of this assignment are to:
1) Gain further understanding and experience with inheritance.
2) Gain understanding and experience with polymorphism.
3) Gain further understanding and experience with interfaces.
4) Gain understanding and experience with low level graphics.
5) Modify an existing program to meet new requirements applying concepts of objectives 1 through 4.
6) Gain experience with medium-size Java program.
7) Continue to practice good programming techniques.
AFTER YOU HAVE COMPLETED, create a zip file named [your name]Assignment7.zip containing your entire project. Upload the .zip file to Moodle. Printout all source files you created or modified. Include a screen shot of the editor with boxes, ellipses, lines and images shown in the editor. Turn-in all printouts.
COSC 210 – Fundamentals of Computer Science
Assignment 7 Problem Statement
Updated
On the tomcat drive in folder cosc210 you will find file named PainterStartup.zip. This file contains the source code for the start of a Painter program. In its current state, Painter can create boxes and text objects at given locations. Both boxes and text objects can be repositioned and resized using a mouse. The task is to add to the program the implementation for an ellipse, line, image, and group objects.
Instructions:
1) Add an ellipse object. An ellipse is very similar in implementation as the box, except it renders an oval instead of a rectangle. The ellipse can be repositioned by dragging the object to a new location. The ellipse can be resized by first clicking over the ellipse to display grab handles and then dragging a grab handle to a new position. The grab handles are to be rendered at the same positions as the box. Likewise, clicking anywhere in the smallest rectangle that encloses the ellipse performs selection.
2) Add a Line object. A Line is to be created by selecting a Line tool and then click and drag over the canvas. The line is rendered from the point of the initial click to the mouse pointer. On releasing the mouse the construction of the line object is completed. Have the Line object inherit from PtrDrawAbstractAreaObject. Thus it will have only two grab handles.
A Line is selected by clicking anywhere over the line. Right now if you click anywhere in the rectangular region hold the line, then the line is selected. To accomplish this task, override the isOver method in PtrDrawAbstractAreaObject.
Given below is a partial solution to determine if a mouse click position (the x and y parameters to the isOver method) is over a line:
double ratio = (double) getWidth() / (double) getHeight();
if (Math.abs((x - getX()) * ratio) - (y - getY()) <= 1) {
return true;
}
You need to modify this code when the y to x ratio is less than -1 or greater than 1. (Hint: Inverse the r ...
Acetabularia Information For Class 9 .docxvaibhavrinwa19
Acetabularia acetabulum is a single-celled green alga that in its vegetative state is morphologically differentiated into a basal rhizoid and an axially elongated stalk, which bears whorls of branching hairs. The single diploid nucleus resides in the rhizoid.
Embracing GenAI - A Strategic ImperativePeter Windle
Artificial Intelligence (AI) technologies such as Generative AI, Image Generators and Large Language Models have had a dramatic impact on teaching, learning and assessment over the past 18 months. The most immediate threat AI posed was to Academic Integrity with Higher Education Institutes (HEIs) focusing their efforts on combating the use of GenAI in assessment. Guidelines were developed for staff and students, policies put in place too. Innovative educators have forged paths in the use of Generative AI for teaching, learning and assessments leading to pockets of transformation springing up across HEIs, often with little or no top-down guidance, support or direction.
This Gasta posits a strategic approach to integrating AI into HEIs to prepare staff, students and the curriculum for an evolving world and workplace. We will highlight the advantages of working with these technologies beyond the realm of teaching, learning and assessment by considering prompt engineering skills, industry impact, curriculum changes, and the need for staff upskilling. In contrast, not engaging strategically with Generative AI poses risks, including falling behind peers, missed opportunities and failing to ensure our graduates remain employable. The rapid evolution of AI technologies necessitates a proactive and strategic approach if we are to remain relevant.
How to Make a Field invisible in Odoo 17Celine George
It is possible to hide or invisible some fields in odoo. Commonly using “invisible” attribute in the field definition to invisible the fields. This slide will show how to make a field invisible in odoo 17.
Introduction to AI for Nonprofits with Tapp NetworkTechSoup
Dive into the world of AI! Experts Jon Hill and Tareq Monaur will guide you through AI's role in enhancing nonprofit websites and basic marketing strategies, making it easy to understand and apply.
Honest Reviews of Tim Han LMA Course Program.pptxtimhan337
Personal development courses are widely available today, with each one promising life-changing outcomes. Tim Han’s Life Mastery Achievers (LMA) Course has drawn a lot of interest. In addition to offering my frank assessment of Success Insider’s LMA Course, this piece examines the course’s effects via a variety of Tim Han LMA course reviews and Success Insider comments.
1. Classes and objects
Programmer-defined types
A programmer-defined type is also called a class. A class is a user defined type that contains
attributes methods and constructors. A class definition looks like this:
class Point:
"""Represents a point in 2-D space.
attributes : x,y
"""
Attributes
You can assign values to an instance using dot notation:
>>> blank.x = 3.0
>>> blank.y = 4.0
In this case, though, we are assigning values to named elements of an object. These elements are
called attributes. Figure 15.1 is a state diagram that shows the result of these assignments. A state
diagram that shows an object and its attributes is called an object diagram. The variable blank
refers to a Point object, which contains two attributes. Each attribute refers to a floating-point
number. You can read the value of an attribute using the same syntax:
>>> blank.y 4.0
>>> x = blank.x
>>> x
3.0
Rectangles
There are at least two possibilities:
You could specify one corner of the rectangle (or the center), the width, and the height.
You could specify two opposing corners.
At this point it is hard to say whether either is better than the other, so we’ll implement the first
one, just as an example. Here is the class definition
class Rectangle:
"""Represents a rectangle.
attributes: width, height, corner.
"""
2. To represent a rectangle, you have to instantiate a Rectangle object and assign values to
the attributes:
box = Rectangle()
box.width = 100.0
box.height = 200.0
box.corner = Point()
box.corner.x = 0.0
box.corner.y = 0.0
Instances as return values
Functions can return instances. For example, find_center takes a Rectangle as an argument and
returns a Point that contains the coordinates of the center of the Rectangle:
def find_center(rect):
p = Point()
p.x = rect.corner.x + rect.width/2
p.y = rect.corner.y + rect.height/2
return p
Here is an example that passes box as an argument and assigns the resulting Point to center:
>>> center = find_center(box)
>>> print_point(center)
(50, 100)
Objects are mutable
You can change the state of an object by making an assignment to one of its attributes.
For example, to change the size of a rectangle without changing its position, you can modify the
values of width and height:
box.width = box.width + 50
box.height = box.height + 100
You can also write functions that modify objects.
For example, grow_rectangle takes a Rectangle object and two numbers, dwidth and dheight,
and adds the numbers to the width and height of the rectangle:
3. def grow_rectangle(rect, dwidth, dheight):
rect.width += dwidth
rect.height += dheight
Here is an example that demonstrates the effect:
>>> box.width, box.height (150.0, 300.0)
>>> grow_rectangle(box, 50, 100)
>>> box.width, box.height (200.0, 400.0)
Inside the function, rect is an alias for box, so when the function modifies rect, box changes.
Class
Point:
"""Represents a point in 2-D space.
attributes: x, y
"""
def print_point(p):
"""Print a Point object in human-readable format."""
print('(%g, %g)' % (p.x, p.y))
class Rectangle:
"""Represents a rectangle.
attributes: width, height, corner.
"""
def find_center(rect):
"""Returns a Point at the center of a Rectangle.
rect: Rectangle
returns: new Point
"""
p = Point()
p.x = rect.corner.x + rect.width/2.0
p.y = rect.corner.y + rect.height/2.0
return p
4. def grow_rectangle(rect, dwidth, dheight):
"""Modifies the Rectangle by adding to its width and height.
rect: Rectangle object.
dwidth: change in width (can be negative).
dheight: change in height (can be negative).
"""
rect.width += dwidth
rect.height += dheight
def main():
blank = Point()
blank.x = 3
blank.y = 4
print('blank', end=' ')
print_point(blank)
box = Rectangle()
box.width = 100.0
box.height = 200.0
box.corner = Point()
box.corner.x = 0.0
box.corner.y = 0.0
center = find_center(box)
print('center', end=' ')
print_point(center)
print(box.width)
print(box.height)
print('grow')
grow_rectangle(box, 50, 100)
print(box.width)
print(box.height)
5. if __name__ == '__main__':
main()
Solutions to the exercises are available
from
__future__
import
print_function,
division
import copy
import math
from Point1 import Point, Rectangle
def distance_between_points(p1, p2):
"""Computes the distance between two Point objects.
p1: Point
p2: Point
returns: float
"""
dx = p1.x - p2.x
dy = p1.y - p2.y
dist = math.sqrt(dx**2 + dy**2)
return dist
def move_rectangle(rect, dx, dy):
"""Move the Rectangle by modifying its corner object.
rect: Rectangle object.
dx: change in x coordinate (can be negative).
dy: change in y coordinate (can be negative).
"""
rect.corner.x += dx
rect.corner.y += dy
6. def move_rectangle_copy(rect, dx, dy):
"""Move the Rectangle and return a new Rectangle object.
rect: Rectangle object.
dx: change in x coordinate (can be negative).
dy: change in y coordinate (can be negative).
returns: new Rectangle
"""
new = copy.deepcopy(rect)
move_rectangle(new, dx, dy)
return new
def main():
blank = Point()
blank.x = 0
blank.y = 0
grosse = Point()
grosse.x = 3
grosse.y = 4
print('distance', end=' ')
print(distance_between_points(grosse, blank))
box = Rectangle()
box.width = 100.0
box.height = 200.0
box.corner = Point()
box.corner.x = 50.0
box.corner.y = 50.0
print(box.corner.x)
print(box.corner.y)
print('move')
move_rectangle(box, 50, 100)
print(box.corner.x)
7. print(box.corner.y)
new_box = move_rectangle_copy(box, 50, 100)
print(new_box.corner.x)
print(new_box.corner.y)
if __name__ == '__main__':
main()
Copying an object is often an alternative to aliasing. The copy module contains a function called
copy that can duplicate any object:
>>> p1 = Point()
>>> p1.x = 3.0
>>> p1.y = 4.0
>>> import copy
>>> p2 = copy.copy(p1)
p1 and p2 contain the same data, but they are not the same Point.
>>> print_point(p1)
(3, 4)
>>> print_point(p2)
(3, 4)
>>> p1 is p2
False
The is operator indicates that p1 and p2 are not the same object, which is what we expected. But
you might have expected == to yield True because these points contain the same data. In that case,
you will be disappointed to learn that for instances, the default behavior of the == operator is the
same as the is operator; it checks object identity, not object equivalence. That’s because for
programmer-defined types, Python doesn’t know what should be considered equivalent. At least,
not yet.
8. If you use copy.copy to duplicate a Rectangle, you will find that it copies the Rectangle object but
not the embedded Point.
>>> box2 = copy.copy(box)
>>> box2 is box
False
>>> box2.corner is box.corner
True
Figure 15.3 shows what the object diagram looks like. This operation is called a shallow copy
because it copies the object and any references it contains, but not the embedded objects.
Fortunately, the copy module provides a method named deepcopy that copies not only the object
but also the objects it refers to, and the objects they refer to, and so on. You will not be surprised
to learn that this operation is called a deep copy.
>>> box3 = copy.deepcopy(box)
>>> box3 is box
False
>>> box3.corner is box.corner
False
box3 and box are completely separate objects. As an exercise, write a version of move_rectangle
that creates and returns a new Rectangle instead of modifying the old one.
Classes and functions
Time: As another example of a programmer-defined type, we’ll define a class called Time
that records the time of day. The class definition looks like this:
class Time:
"""Represents the time of day.
attributes: hour, minute, second
"""
We can create a new Time object and assign attributes for hours, minutes, and seconds:
time = Time()
time.hour = 11
time.minute = 59
time.second = 30
The state diagram for the Time object looks like Figure 16.1. As an exercise, write a
function called print_time that takes a Time object and prints it in the form
hour:minute:second. Hint: the format sequence '%.2d' prints an integer using at least two
9. digits, including a leading zero if necessary. Write a boolean function called is_after that
takes two Time objects, t1 and t2, and returns True if t1 follows t2 chronologically and
False otherwise. Challenge: don’t use an if statement.
Pure functions
The function creates a new Time object, initializes its attributes, and returns a reference to
the new object. This is called a pure function because it does not modify any of the objects
passed to it as arguments and it has no effect, like displaying a value or getting user input,
other than returning a value.
def add_time(t1, t2):
sum = Time()
sum.hour = t1.hour + t2.hour
sum.minute = t1.minute + t2.minute
sum.second = t1.second + t2.second
return sum
To test this function, I’ll create two Time objects: start contains the start time of a movie,
like Monty Python and the Holy Grail, and duration contains the run time of the movie,
which is one hour 35 minutes. add_time figures out when the movie will be done.
>>> start = Time()
>>> start.hour = 9
>>> start.minute = 45
>>> start.second = 0
>>> duration = Time()
>>> duration.hour = 1
>>> duration.minute = 35
>>> duration.second = 0
>>> done = add_time(start, duration)
>>> print_time(done)
10:80:00
The result, 10:80:00 might not be what you were hoping for. The problem is that this
function does not deal with cases where the number of seconds or minutes adds up to more
10. than sixty. When that happens, we have to “carry” the extra seconds into the minute column
or the extra minutes into the hour column. Here’s an improved version:
def add_time(t1, t2):
sum = Time()
sum.hour = t1.hour + t2.hour
sum.minute = t1.minute + t2.minute
sum.second = t1.second + t2.second
if sum.second >= 60:
sum.second -= 60
sum.minute += 1
if sum.minute >= 60:
sum.minute -= 60
sum.hour += 1
return sum
Although this function is correct, it is starting to get big. We will see a shorter alternative later.
Modifiers
Sometimes it is useful for a function to modify the objects it gets as parameters. In that case, the
changes are visible to the caller. Functions that work this way are called modifiers. increment,
which adds a given number of seconds to a Time object, can be written naturally as a modifier.
Here is a rough draft:
def increment(time, seconds):
time.second += seconds
if time.second >= 60:
time.second -= 60
time.minute += 1
if time.minute >= 60:
time.minute -= 60
time.hour += 1
Classes and methods
Object-oriented features
Python is an object-oriented programming language, which means that it provides features that
support object-oriented programming, which has these defining characteristics:
Programs include class and method definitions.
Most of the computation is expressed in terms of operations on objects.
Objects often represent things in the real world, and methods often correspond to the ways
things in the real world interact.
11. The init method
The init method (short for “initialization”) is a special method that gets invoked when an object is
instantiated. Its full name is __init__ (two underscore characters, followed by init, and then two
more underscores). An init method for the Time class might look like this:
# inside
class Time:
def _ _init_ _(self, hour=0, minute=0, second=0):
self.hour = hour
self.minute = minute
self.second = second
It is common for the parameters of __init__ to have the same names as the attributes.
The statement self.hour = hour
stores the value of the parameter hour as an attribute of self. The parameters are optional, so if you
call Time with no arguments, you get the default values.
>>> time = Time()
>>> time.print_time()
00:00:00
If you provide one argument, it overrides hour:
>>> time = Time (9)
>>> time.print_time()
09:00:00
If you provide two arguments, they override hour and minute.
>>> time = Time(9, 45)
>>> time.print_time() 09:45:00
And if you provide three arguments, they override all three default values.
The __str__ method
__str__ is a special method, like __init__, that is supposed to return a string representation of an
object. For example, here is a str method for Time objects:
# inside class Time:
def _ _str_ _(self):
return '%.2d:%.2d:%.2d' % (self.hour, self.minute, self.second)
When you print an object, Python invokes the str method:
>>> time = Time(9, 45)
>>> print(time)
09:45:00
When I write a new class, I almost always start by writing __init__, which makes it easier to
instantiate objects, and __str__, which is useful for debugging.
12. Example
class Time:
"""Represents the time of day.
attributes: hour, minute, second
"""
def __init__(self, hour=0, minute=0, second=0):
self.hour = hour
self.minute = minute
self.second = second
def __str__(self):
return '%.2d:%.2d:%.2d' % (self.hour, self.minute, self.second)
def print_time(t):
print('%.2d:%.2d:%.2d' % (t.hour, t.minute, t.second))
time = Time(9, 45)
print(time)
Operator overloading
Changing the behavior of an operator so that it works with programmer-defined types is called
operator overloading.
class A:
def __init__(self, a):
self.a = a
# adding two objects
def __add__(self, o):
return self.a + o.a
ob1 = A(1)
ob2 = A(2)
ob3 = A("Geeks")
ob4 = A("For")
print(ob1 + ob2)
print(ob3 + ob4)
What is Polymorphism: The word polymorphism means having many forms. In programming,
polymorphism means the same function name (but different signatures) being used for different
types.
Example of inbuilt polymorphic functions :
print(len("geeks"))
# len() being used for a list
print(len([10, 20, 30]))
13. Examples of user-defined polymorphic functions:
def add(x, y, z = 0):
return x + y+z
# Driver code
print(add(2, 3))
print(add(2, 3, 4))
Polymorphism with Inheritance
In Python, Polymorphism lets us define methods in the child class that have the same name as the
methods in the parent class. In inheritance, the child class inherits the methods from the parent
class. However, it is possible to modify a method in a child class that it has inherited from the
parent class. This is particularly useful in cases where the method inherited from the parent class
doesn’t quite fit the child class. In such cases, we re-implement the method in the child class. This
process of re-implementing a method in the child class is known as Method Overriding.
class Bird:
def intro(self):
print("There are many types of birds.")
def flight(self):
print("Most of the birds can fly but some cannot.")
class sparrow(Bird):
def flight(self):
print("Sparrows can fly.")
class ostrich(Bird):
def flight(self):
print("Ostriches cannot fly.")
obj_bird = Bird()
obj_spr = sparrow()
obj_ost = ostrich()
obj_bird.intro()
obj_bird.flight()
obj_spr.intro()
obj_spr.flight()
obj_ost.intro()
obj_ost.flight()
obj_bird=obj_spr
14. obj_bird.flight()
obj_bird=obj_ost
obj_bird.flight()
Method Overloading
Like other languages (for example, method overloading in C++) do, python does not support
method overloading by default. But there are different ways to achieve method overloading in
Python. The problem with method overloading in Python is that we may overload the methods but
can only use the latest defined method.
# First product method.
# Takes two argument and print their
# product
def product(a, b):
p = a * b
print(p)
def product(a, b, c):
p = a * b*c
print(p)
# Uncommenting the below line shows an error
# product(4, 5)
# This line will call the second product method
product(4, 5, 5)
Inheritance
The language feature most often associated with object-oriented programming is inheritance.
Inheritance is the ability to define a new class that is a modified version of an existing class. In
this chapter I demonstrate inheritance using classes that represent playing cards, decks of cards,
and poker hands.
Card objects
There are fifty-two cards in a deck, each of which belongs to one of four suits and one of thirteen
ranks. The suits are Spades, Hearts, Diamonds, and Clubs (in descending order in bridge). The
ranks are Ace, 2, 3, 4, 5, 6, 7, 8, 9, 10, Jack, Queen, and King. Depending on the game that you
are playing, an Ace may be higher than King or lower than 2.
15. class Card:
"""Represents a standard playing card.
Attributes:
suit: integer 0-3
rank: integer 1-13
"""
suit_names = ["Clubs", "Diamonds", "Hearts", "Spades"]
rank_names = [None, "Ace", "2", "3", "4", "5", "6", "7",
"8", "9", "10", "Jack", "Queen", "King"]
def __init__(self, suit=0, rank=2):
self.suit = suit
self.rank = rank
To create a Card, you call Card with the suit and rank of the card you want.
queen_of_diamonds = Card(1, 12)
Class attributes
In order to print Card objects in a way that people can easily read, we need a mapping from the
integer codes to the corresponding ranks and suits. A natural way to do that is with lists of strings.
We assign these lists to class attributes:
class Card:
"""Represents a standard playing card.
suit_names = ["Clubs", "Diamonds", "Hearts", "Spades"]
rank_names = [None, "Ace", "2", "3", "4", "5", "6", "7",
"8", "9", "10", "Jack", "Queen", "King"]
def __str__(self):
"""Returns a human-readable string representation."""
return '%s of %s' % (Card.rank_names[self.rank],Card.suit_names[self.suit])
16. >>> card1 = Card(2, 11)
>>> print(card1)
Jack of Hearts
Figure 18.1 is a diagram of the Card class object and one Card instance. Card is a class
object; its type is type. card1 is an instance of Card, so its type is Card. To save space, I
didn’t draw the contents of suit_names and rank_names.
Comparing cards
For built-in types, there are relational operators (<, >, ==, etc.) that compare values and determine
when one is greater than, less than, or equal to another. For programmer-defined types, we can
override the behavior of the built-in operators by providing a method named __lt__, which stands
for “less than”. __lt__ takes two parameters, self and other, and returns True if self is strictly less
than other.
With that decided, we can write __lt__:
# inside class Card:
def __lt__(self, other):
# check the suits
if self.suit < other.suit: return True
if self.suit > other.suit: return False
# suits are the same... check ranks
return self.rank < other.rank
17. You can write this more concisely using tuple comparison:
# inside class Card:
def __lt__(self, other):
t1 = self.suit, self.rank
t2 = other.suit, other.rank
return t1 < t2
As an exercise, write an __lt__ method for Time objects. You can use tuple comparison,
but you also might consider comparing integers.
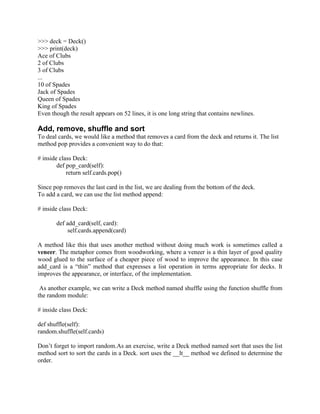
Decks
Now that we have Cards, the next step is to define Decks. Since a deck is made up of cards, it is
natural for each Deck to contain a list of cards as an attribute. The following is a class definition
for Deck. The init method creates the attribute cards and generates the standard set of fifty-two
cards:
class Deck:
"""Represents a deck of cards.
Attributes:
cards: list of Card objects.
"""
def __init__(self):
"""Initializes the Deck with 52 cards.
"""
self.cards = []
for suit in range(4):
for rank in range(1, 14):
card = Card(suit, rank)
self.cards.append(card)
Printing the deck
Here is a __str__ method for Deck:
# inside class Deck:
def __str__(self):
res = []
for card in self.cards:
res.append(str(card))
return 'n'.join(res)
This method demonstrates an efficient way to accumulate a large string: building a list of strings
and then using the string method join. The built-in function str invokes the __str__ method on each
card and returns the string representation. Since we invoke join on a newline character, the cards
are separated by newlines. Here’s what the result looks like:
18. >>> deck = Deck()
>>> print(deck)
Ace of Clubs
2 of Clubs
3 of Clubs
...
10 of Spades
Jack of Spades
Queen of Spades
King of Spades
Even though the result appears on 52 lines, it is one long string that contains newlines.
Add, remove, shuffle and sort
To deal cards, we would like a method that removes a card from the deck and returns it. The list
method pop provides a convenient way to do that:
# inside class Deck:
def pop_card(self):
return self.cards.pop()
Since pop removes the last card in the list, we are dealing from the bottom of the deck.
To add a card, we can use the list method append:
# inside class Deck:
def add_card(self, card):
self.cards.append(card)
A method like this that uses another method without doing much work is sometimes called a
veneer. The metaphor comes from woodworking, where a veneer is a thin layer of good quality
wood glued to the surface of a cheaper piece of wood to improve the appearance. In this case
add_card is a “thin” method that expresses a list operation in terms appropriate for decks. It
improves the appearance, or interface, of the implementation.
As another example, we can write a Deck method named shuffle using the function shuffle from
the random module:
# inside class Deck:
def shuffle(self):
random.shuffle(self.cards)
Don’t forget to import random.As an exercise, write a Deck method named sort that uses the list
method sort to sort the cards in a Deck. sort uses the __lt__ method we defined to determine the
order.
19. Inheritance
Inheritance is the ability to define a new class that is a modified version of an existing class.As an
example, let’s say we want a class to represent a “hand”, that is, the cards held by one player. A
hand is similar to a deck: both are made up of a collection of cards, and both require operations
like adding and removing cards.
A hand is also different from a deck; there are operations we want for hands that don’t make sense
for a deck. For example, in poker we might compare two hands to see which one wins. In bridge,
we might compute a score for a hand in order to make a bid.
class Hand(Deck):
"""Represents a hand of playing cards."""
This definition indicates that Hand inherits from Deck; that means we can use methods like
pop_card and add_card for Hands as well as Decks. When a new class inherits from an existing
one, the existing one is called the parent and the new class is called the child.
In this example, Hand inherits __init__ from Deck, but it doesn’t really do what we want: instead
of populating the hand with 52 new cards, the init method for Hands should initialize cards with
an empty list. If we provide an init method in the Hand class, it overrides the one in the Deck class:
# inside class Hand:
def __init__(self, label=''):
self.cards = []
self.label = label
When you create a Hand, Python invokes this init method, not the one in Deck.
>>> hand = Hand('new hand')
>>> hand.cards []
>>> hand.label
'new hand'
The other methods are inherited from Deck, so we can use pop_card and add_card to deal
a card:
>>> deck = Deck()
>>> card = deck.pop_card()
>>> hand.add_card(card)
>>> print(hand)
King of Spades
A natural next step is to encapsulate this code in a method called move_cards:
# inside class Deck:
def move_cards(self, hand, num):
for i in range(num):
20. hand.add_card(self.pop_card())
move_cards takes two arguments, a Hand object and the number of cards to deal. It modifies both
self and hand, and returns None. In some games, cards are moved from one hand to another, or
from a hand back to the deck. You can use move_cards for any of these operations: self can be
either a Deck or a Hand, and hand, despite the name, can also be a Deck.
Inheritance is a useful feature. Some programs that would be repetitive without inheritance can be
written more elegantly with it. Inheritance can facilitate code reuse, since you can customize the
behavior of parent classes without having to modify them. In some cases, the inheritance structure
reflects the natural structure of the problem, which makes the design easier to understand.
On the other hand, inheritance can make programs difficult to read. When a method is invoked, it
is sometimes not clear where to find its definition. The relevant code may be spread across several
modules. Also, many of the things that can be done using inheritance can be done as well or better
without it.
Class diagrams
There are several kinds of relationship between classes:
Objects in one class might contain references to objects in another class. For example,
each Rectangle contains a reference to a Point, and each Deck contains references to
many Cards. This kind of relationship is called HAS-A, as in, “a Rectangle has a Point.”
One class might inherit from another. This relationship is called IS-A, as in, “a Hand is a
kind of a Deck.”
One class might depend on another in the sense that objects in one class take objects in
the second class as parameters, or use objects in the second class as part of a
computation. This kind of relationship is called a dependency.
A class diagram is a graphical representation of these relationships. For example, Figure
18.2 shows the relationships between Card, Deck and Hand.
The arrow with a hollow triangle head represents an IS-A relationship; in this case it indicates
that Hand inherits from Deck.The standard arrow head represents a HAS-A relationship; in this
case a Deck has references
21. to Card objects.
The star (*) near the arrow head is a multiplicity; it indicates how many Cards a Deck has.
A multiplicity can be a simple number, like 52, a range, like 5..7 or a star, which indicates
that a Deck can have any number of Cards.
There are no dependencies in this diagram. They would normally be shown with a dashed
arrow. Or if there are a lot of dependencies, they are sometimes omitted.
A more detailed diagram might show that a Deck actually contains a list of Cards, but built-in
types like list and dict are usually not included in class diagrams.
Data encapsulation
22. import random
class Card:
"""Represents a standard playing card.
Attributes:
suit: integer 0-3
rank: integer 1-13
"""
suit_names = ["Clubs", "Diamonds", "Hearts", "Spades"]
rank_names = [None, "Ace", "2", "3", "4", "5", "6", "7",
"8", "9", "10", "Jack", "Queen", "King"]
def __init__(self, suit=0, rank=2):
self.suit = suit
self.rank = rank
def __str__(self):
"""Returns a human-readable string representation."""
return '%s of %s' % (Card.rank_names[self.rank],
Card.suit_names[self.suit])
def __eq__(self, other):
"""Checks whether self and other have the same rank and suit.
returns: boolean
"""
return self.suit == other.suit and self.rank == other.rank
def __lt__(self, other):
"""Compares this card to other, first by suit, then rank.
returns: boolean
"""
t1 = self.suit, self.rank
t2 = other.suit, other.rank
return t1 < t2
class Deck:
"""Represents a deck of cards.
Attributes:
cards: list of Card objects.
"""
def __init__(self):
23. """Initializes the Deck with 52 cards.
"""
self.cards = []
for suit in range(4):
for rank in range(1, 14):
card = Card(suit, rank)
self.cards.append(card)
def __str__(self):
"""Returns a string representation of the deck.
"""
res = []
for card in self.cards:
res.append(str(card))
return 'n'.join(res)
def add_card(self, card):
"""Adds a card to the deck.
card: Card
"""
self.cards.append(card)
def remove_card(self, card):
"""Removes a card from the deck or raises exception if it is not there.
card: Card
"""
self.cards.remove(card)
def pop_card(self, i=-1):
"""Removes and returns a card from the deck.
i: index of the card to pop; by default, pops the last card.
"""
return self.cards.pop(i)
def shuffle(self):
"""Shuffles the cards in this deck."""
random.shuffle(self.cards)
def sort(self):
"""Sorts the cards in ascending order."""
self.cards.sort()
def move_cards(self, hand, num):
"""Moves the given number of cards from the deck into the Hand.
24. hand: destination Hand object
num: integer number of cards to move
"""
for i in range(num):
hand.add_card(self.pop_card())
class Hand(Deck):
"""Represents a hand of playing cards."""
def __init__(self, label=''):
self.cards = []
self.label = label
def find_defining_class(obj, method_name):
"""Finds and returns the class object that will provide
the definition of method_name (as a string) if it is
invoked on obj.
obj: any python object
method_name: string method name
"""
for ty in type(obj).mro():
if method_name in ty.__dict__:
return ty
return None
if __name__ == '__main__':
deck = Deck()
deck.shuffle()
hand = Hand()
print(find_defining_class(hand, 'shuffle'))
deck.move_cards(hand, 5)
hand.sort()
print(hand)