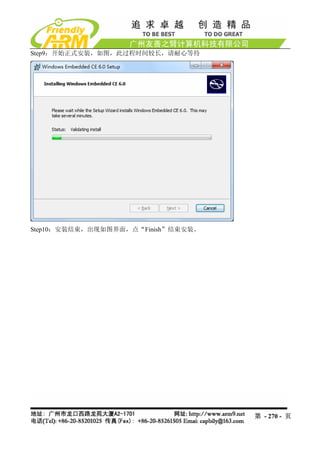
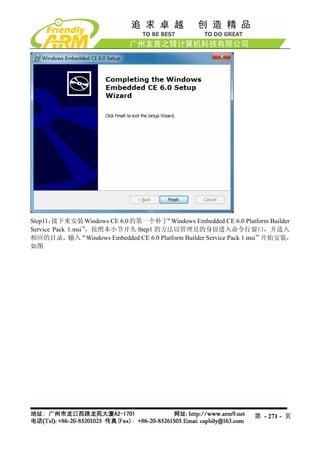
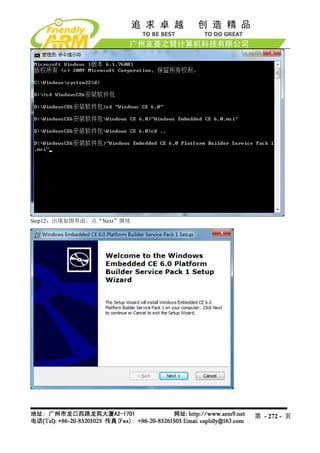
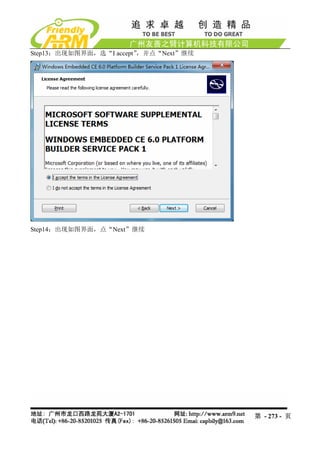
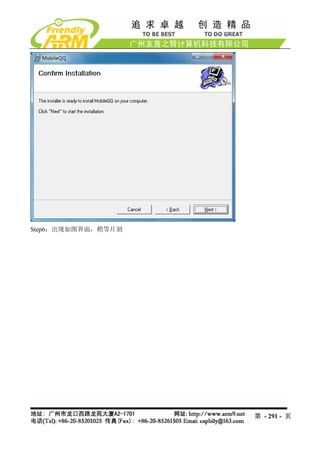
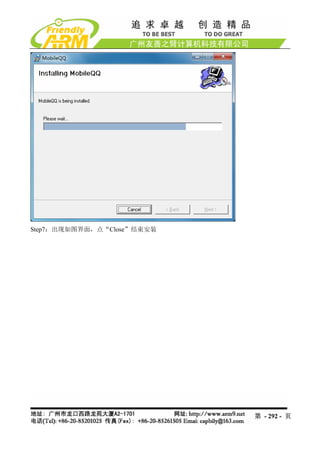
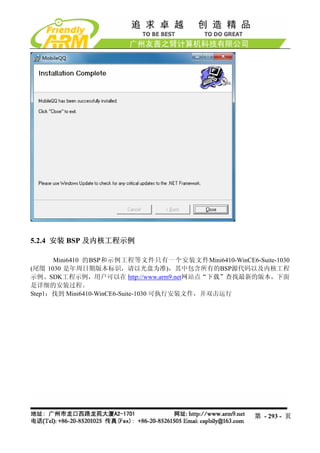
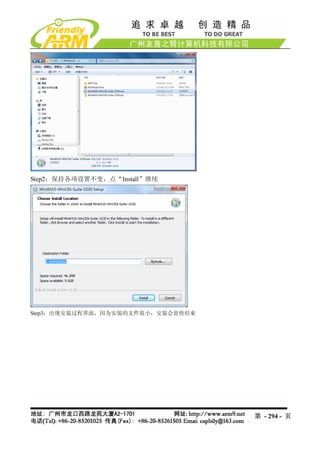
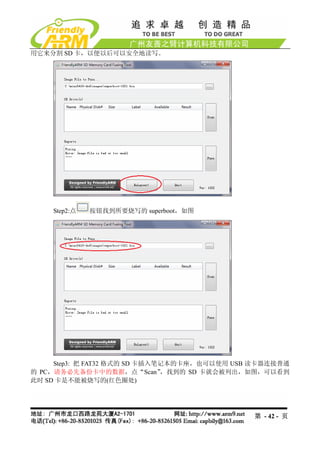
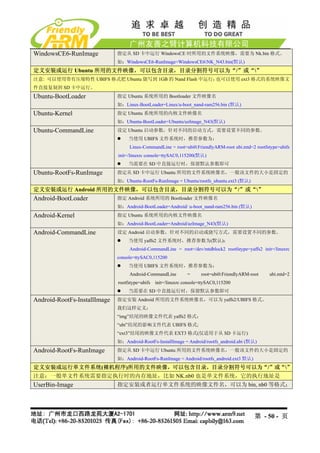
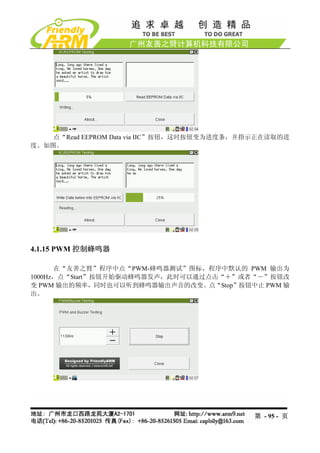
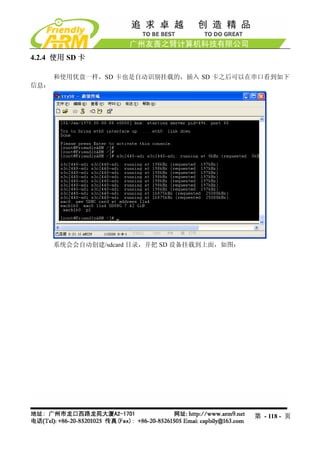
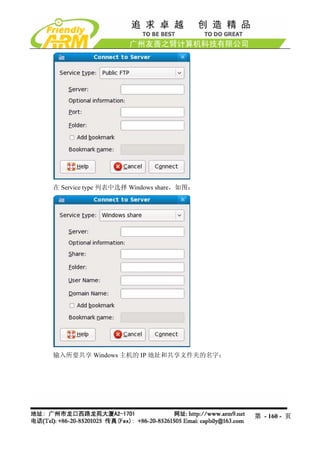
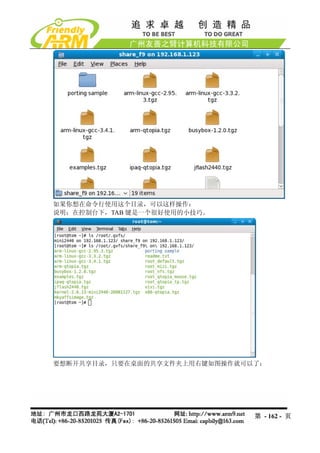
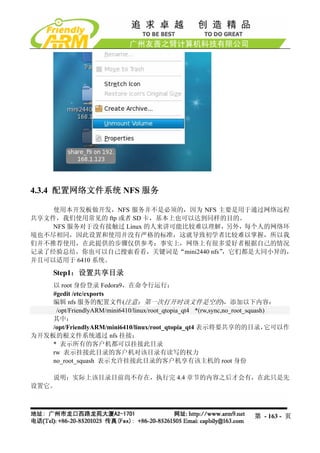
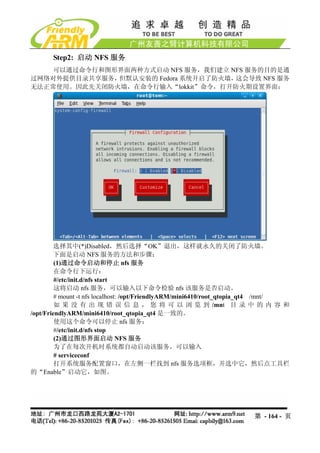
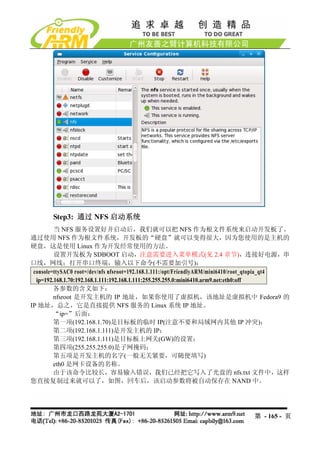
Step1: 把 SD卡插入电脑,双击打开”imagesFriendlyARM.ini”文件
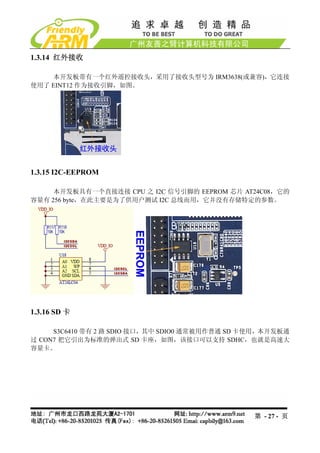
Step2: 找 到 ”OS=Linux” , 并 改 为 ”OS=Ubuntu” , 找 到 ”Action=Install” , 并 改
;
为”Action=Run”;保存修改,取出 SD 卡插到开发板上。
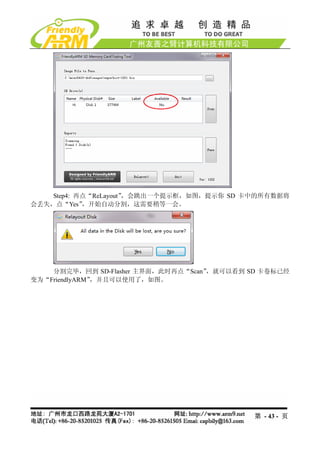
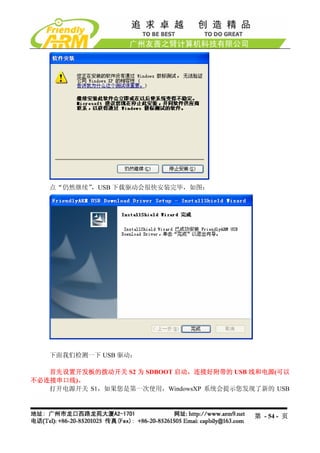
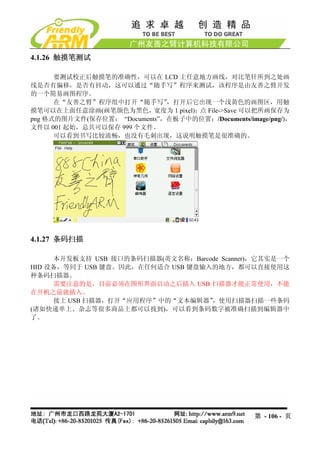
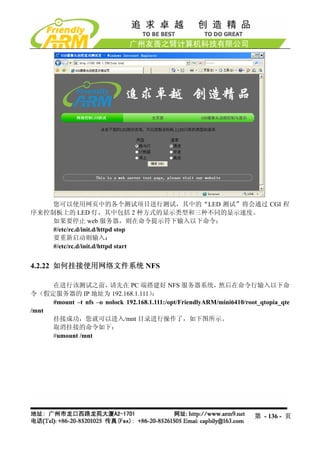
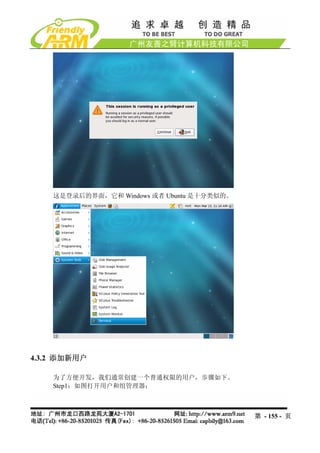
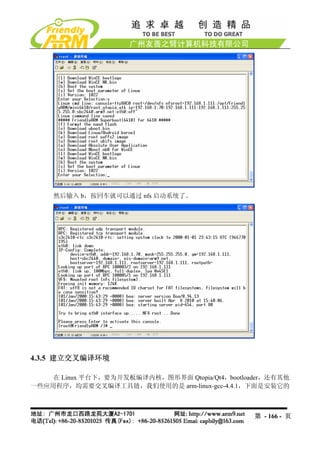
Step3: 上电开机,现在你就可以玩一玩 Ubuntu 了,你可以修改里面的设置并保存,
它们不会丢失,除非你的卡丢失了;它们一般也不会破坏 NAND 里面的内容,除非有特殊的
软件是专门针对 NAND 操作的。
注意:如果你听到急促的“滴滴”声,或者看四个 LED 并行闪烁,那说明你可能拼
写出错了
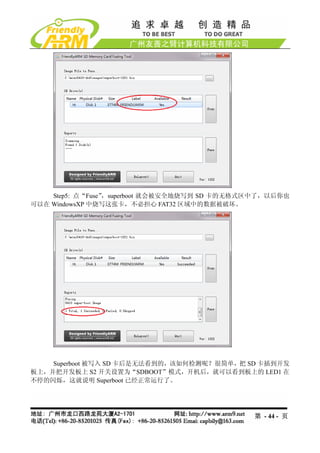
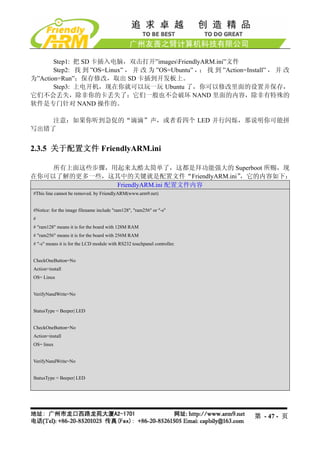
2.3.5 关于配置文件 FriendlyARM.ini
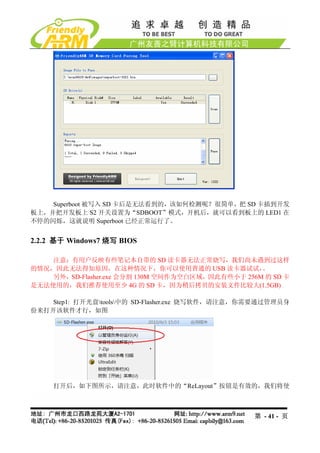
所有上面这些步骤,用起来太酷太简单了,这都是拜功能强大的 Superboot 所赐,现
在你可以了解的更多一些,这其中的关键就是配置文件“FriendlyARM.ini”,它的内容如下:
FriendlyARM.ini 配置文件内容
#This line cannot be removed. by FriendlyARM(www.arm9.net)
#Notice: for the image filename include "ram128", "ram256" or "-s"
#
# "ram128" means it is for the board with 128M RAM
# "ram256" means it is for the board with 256M RAM
# "-s" means it is for the LCD module with RS232 touchpanel controller.
CheckOneButton=No
Action=install
OS= Linux
VerifyNandWrite=No
StatusType = Beeper| LED
CheckOneButton=No
Action=install
OS= linux
VerifyNandWrite=No
StatusType = Beeper| LED
第 - 47 - 页
static void set_buzzer_freq(intfreq)
{
// this IOCTL command is the key to set frequency
int ret = ioctl(fd, PWM_IOCTL_SET_FREQ, freq);
if(ret < 0) {
perror("set the frequency of the buzzer");
exit(1);
}
}
static void stop_buzzer(void)
{
int ret = ioctl(fd, PWM_IOCTL_STOP);
if(ret < 0) {
perror("stop the buzzer");
exit(1);
}
}
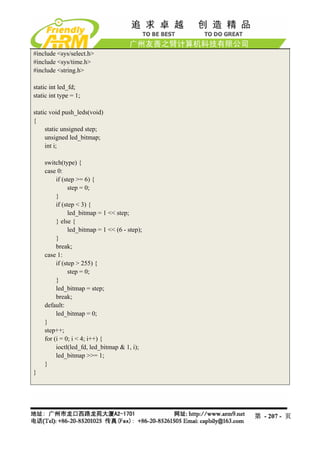
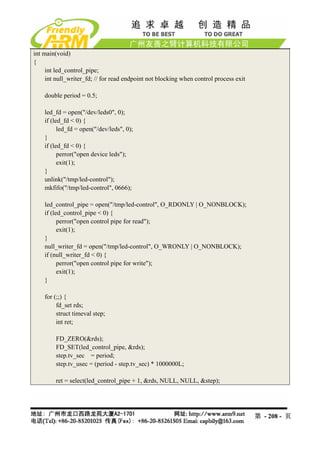
int main(int argc, char **argv)
{
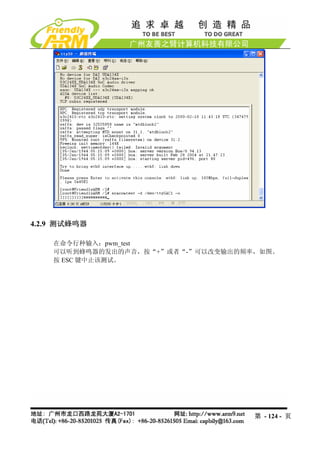
int freq = 1000 ;
open_buzzer();
printf( "nBUZZER TEST ( PWM Control )n" );
printf( "Press +/- to increase/reduce the frequency of the BUZZERn" ) ;
printf( "Press 'ESC' key to Exit this programnn" );
while( 1 )
{
int key;
set_buzzer_freq(freq);
printf( "tFreq = %dn", freq );
key = getch();
switch(key) {
case '+':
第 - 188 - 页
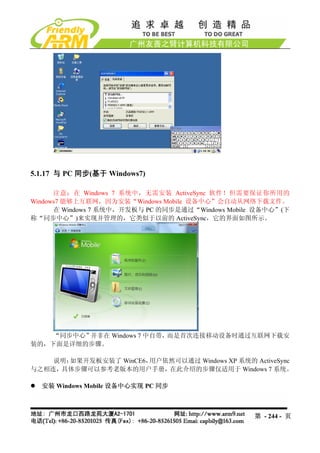
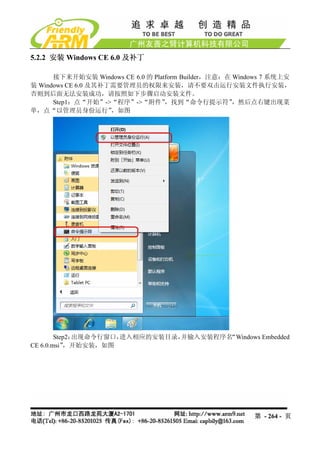
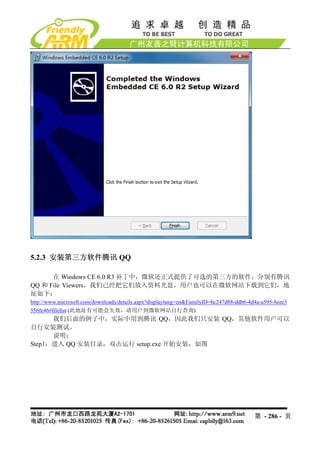
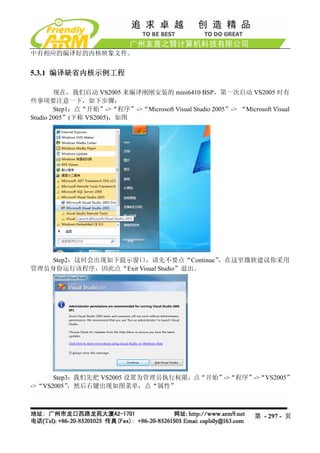
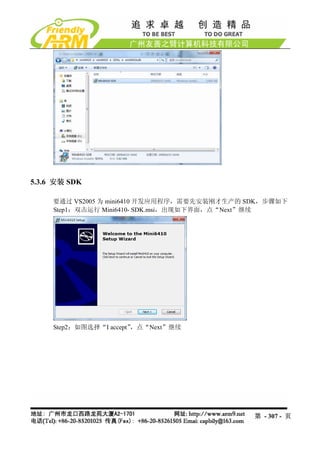
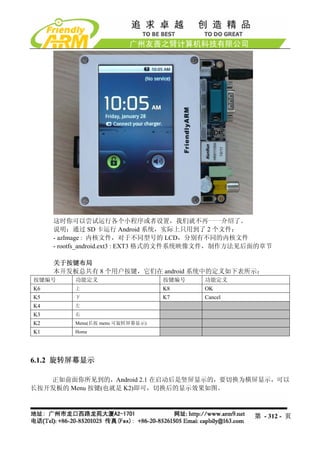
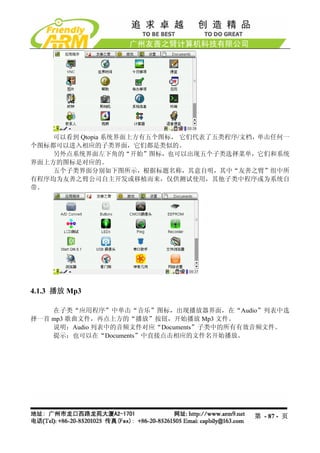
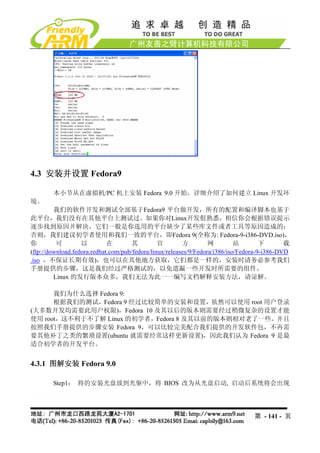
5.1.17 与 PC同步(基于 Windows7)
注意:在 Windows 7 系统中,无需安装 ActiveSync 软件!但需要保证你所用的
Windows7 能够上互联网,因为安装“Windows Mobile 设备中心”会自动从网络下载文件。
在 Windows 7 系统中,开发板与 PC 的同步是通过“Windows Mobile 设备中心”(下
称“同步中心”)来实现并管理的,它类似于以前的 ActiveSync,它的界面如图所示。
“同步中心”并非在 Windows 7 中自带,而是首次连接移动设备时通过互联网下载安
装的,下面是详细的步骤。
说明:如果开发板安装了 WinCE6,用户依然可以通过 Windows XP 系统的 ActiveSync
与之相连,具体步骤可以参考老版本的用户手册,在此介绍的步骤仅适用于 Windows 7 系统。
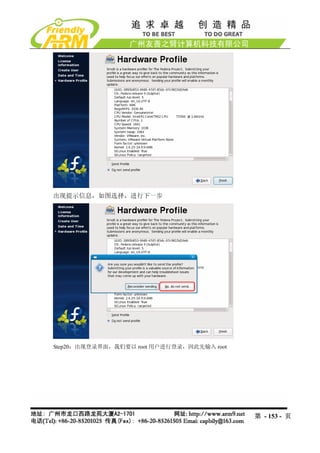
安装 Windows Mobile 设备中心实现 PC 同步
第 - 244 - 页
245.
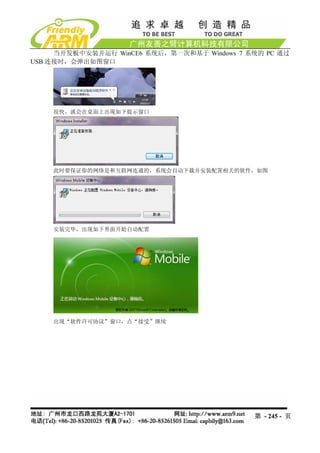
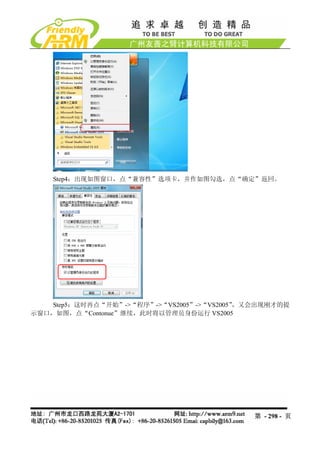
当开发板中安装并运行 WinCE6 系统后,第一次和基于Windows 7 系统的 PC 通过
USB 连接时,会弹出如图窗口
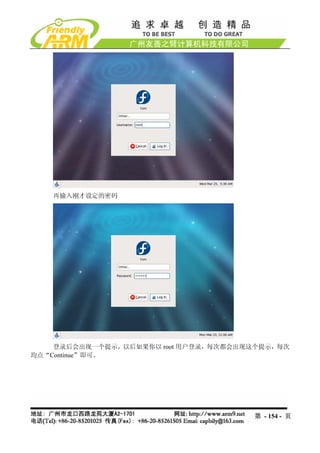
很快,就会在桌面上出现如下提示窗口
此时要保证你的网络是和互联网连通的,系统会自动下载并安装配置相关的软件,如图
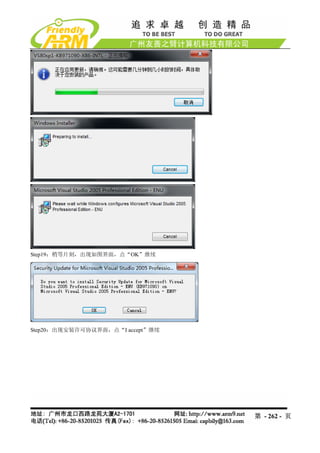
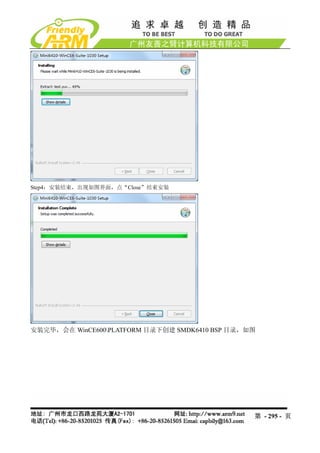
安装完毕,出现如下界面开始自动配置
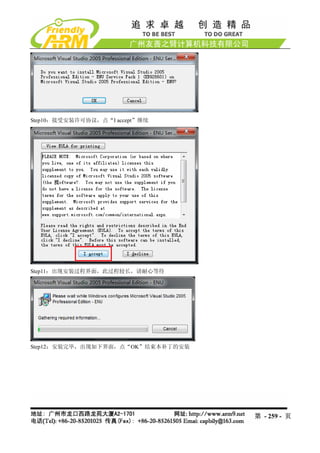
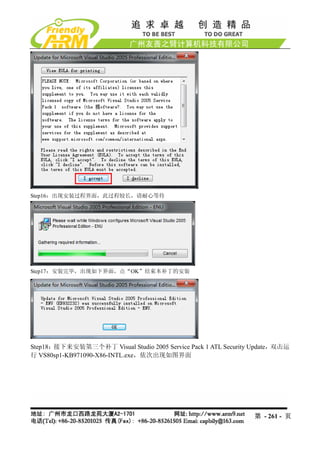
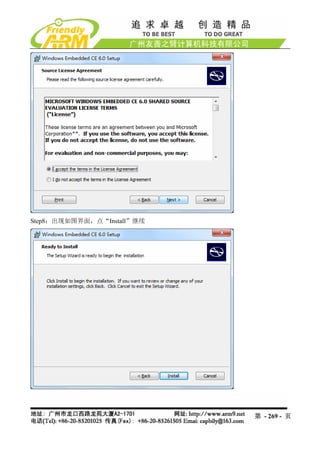
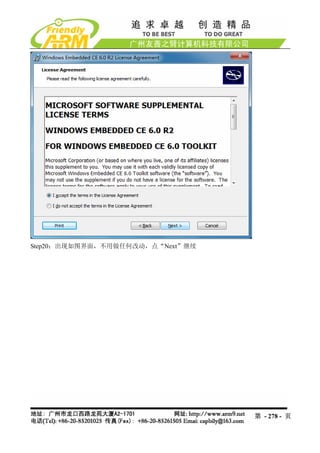
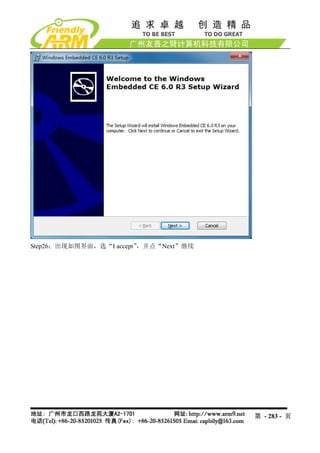
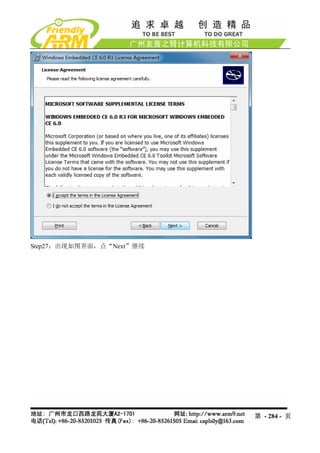
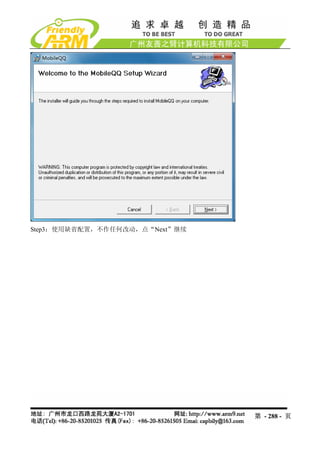
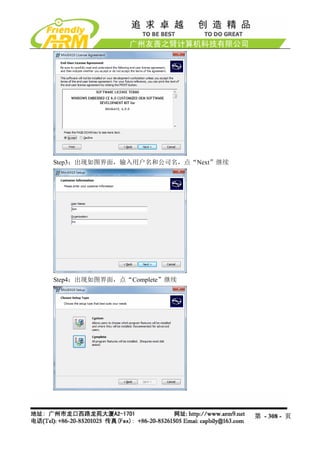
出现“软件许可协议”窗口,点“接受”继续
第 - 245 - 页
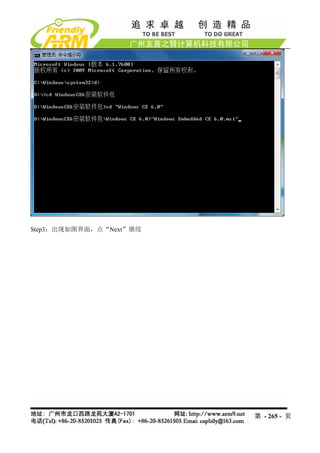
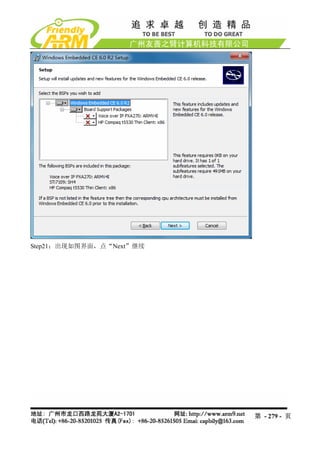
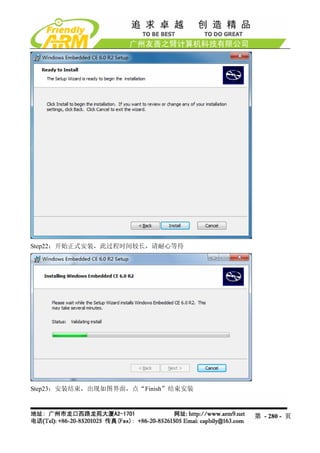
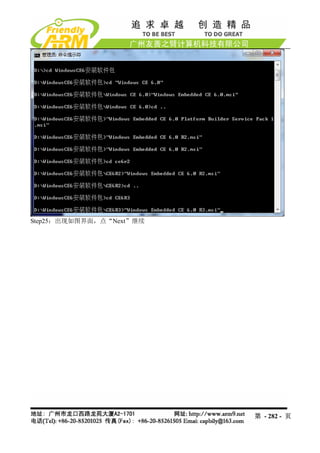
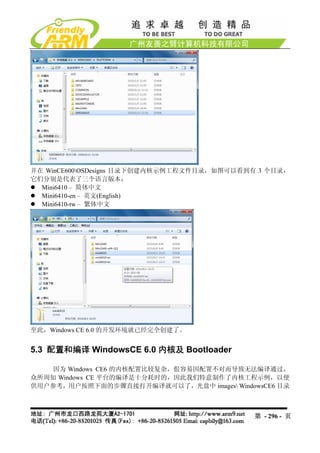
Windows CE 6.0的安装过程十分繁琐,并且对开发主机的要求比较高(否则会很慢),
我们建议用户特别是初学者务必按照我们介绍的步骤安装开发环境。
这里是我们采用的开发主机的关键配置,仅供参考:
CPU:Intel Core Duo E8400
内存:DDR2 4GB
硬盘空间:500GB
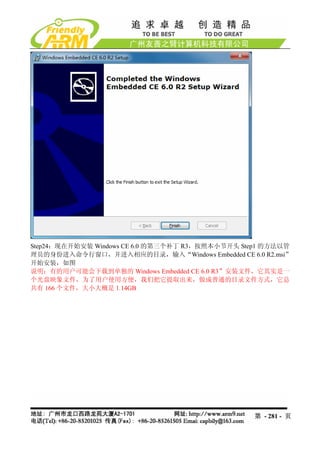
安装所需的软件列表如下(本公司并不提供 Windows Embedded 6.0 CE 6 的安装文件,
用户可以到微软网站自行下载它的试用版):
Visual Studio 2005
(试用版下载地址:
http://download.microsoft.com/download/e/1/4/e1405d9e-47e3-404c-8b09-489437b27
fb0/En_vs_2005_Pro_90_Trial.img )
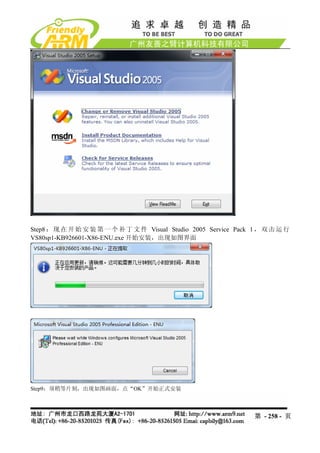
Visual Studio 2005 Service Pack 1(文件名:VS80sp1-KB926601-X86-ENU.exe)
下载地址:
http://www.microsoft.com/downloads/details.aspx?familyid=bb4a75ab-e2d4-4c96-b39
d-37baf6b5b1dc&displaylang=en
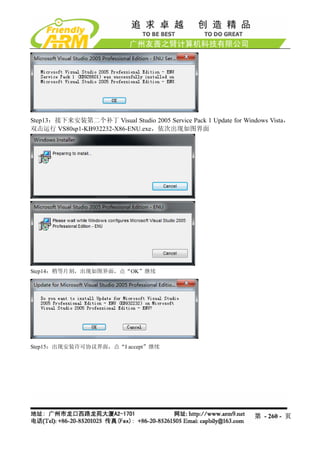
Visual Studio 2005 Service Pack 1 Update for Windows Vista
(文件名:VS80sp1-KB932232-X86-ENU.exe)
下载地址:
http://www.microsoft.com/downloads/details.aspx?FamilyID=90E2942D-3AD1-4873-
A2EE-4ACC0AACE5B6&displaylang=en )
Visual Studio 2005 Service Pack 1 ATL Security Update
(文件名:VS80sp1-KB971090-X86-INTL.exe)
下载地址:
http://www.microsoft.com/downloads/details.aspx?familyid=7C8729DC-06A2-4538-
A90D-FF9464DC0197&displaylang=en
Windows Embedded CE 6.0
试用版下载地址:
http://www.microsoft.com/downloads/details.aspx?displaylang=en&FamilyID=7e2868
47-6e06-4a0c-8cac-ca7d4c09cb56
第 - 248 - 页
249.
Windows Embedded CE6.0 Platform Builder Service Pack 1
下载地址:
http://www.microsoft.com/downloads/details.aspx?FamilyId=BF0DC0E3-8575-4860-
A8E3-290ADF242678&displaylang=en
Windows Embedded CE 6.0 R2
下载地址:
http://www.microsoft.com/downloads/details.aspx?FamilyId=F41FC7C1-F0F4-4FD6-
9366-B61E0AB59565&displaylang=en
Windows Embedded CE 6.0 R3
下载地址:
http://www.microsoft.com/downloads/details.aspx?FamilyID=BC247D88-DDB6-4D4
A-A595-8EEE3556FE46&displaylang=ja&displaylang=en
腾讯 QQ(第三方软件)
下载地址:
http://www.microsoft.com/downloads/details.aspx?FamilyID=527042f7-bb5b-4831-a6
ad-5081808824ec&displaylang=en
WesttekFileViewers6.exe(office 文件浏览器,亦属于第三方软件)
下载地址:
http://www.microsoft.com/downloads/details.aspx?FamilyID=d2fd14eb-7d5c-428b-95
1c-343f910047c1&displaylang=en
以上列表顺序基本也说明了这些软件的安装顺序:先安装 Visual Studio 2005 及补丁,
再安装 Windows CE 6.0 及补丁,最后安装第三方软件。
说明:Windows CE 6.0 所使用的 Platform Builder 和以往的 Windows CE 5.0/4.2 等均
不同,它并不是独立的开发平台软件,而是作为 VS2005 的一个插件来安装使用的,因此必
须先安装 VS2005,以后所有的内核配置编译等开发都基于 VS2005 进行。
下面是详细的步骤。
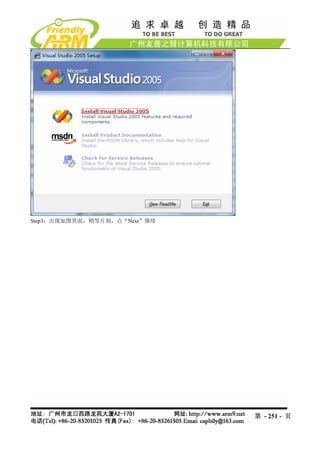
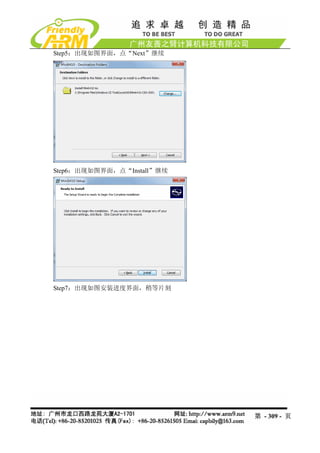
5.2.1 安装 Visual Studio 2005 及补丁
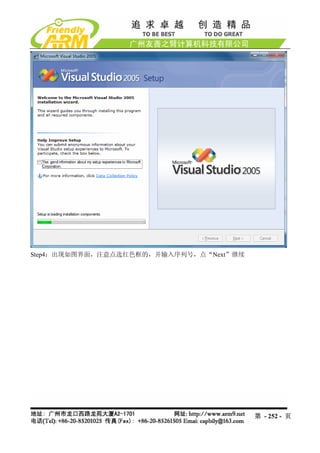
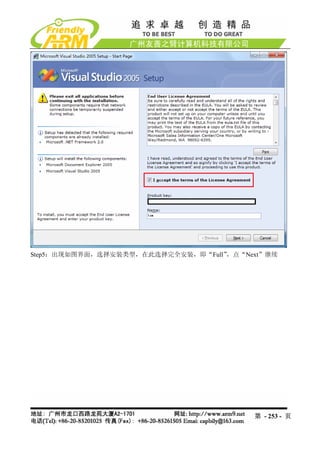
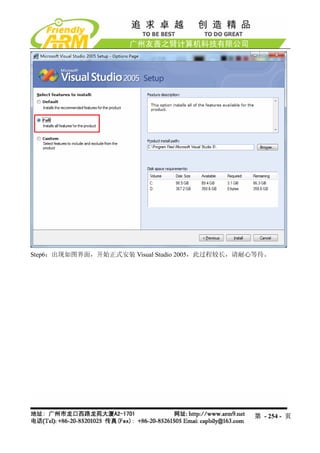
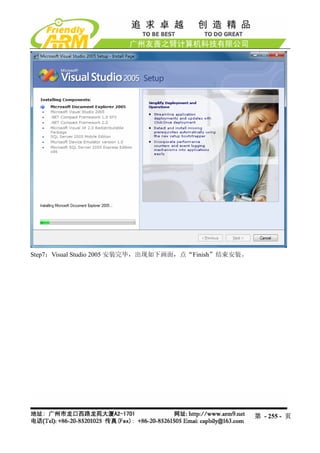
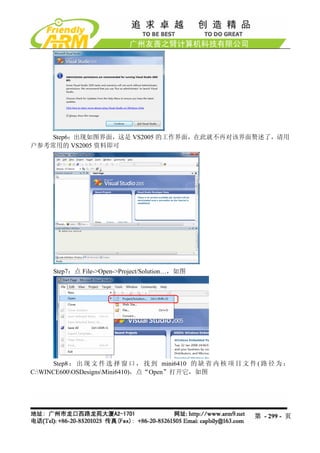
Step1:打开 Visual Studio 2005 文件夹,找到 setup.exe,双击运行开始安装。
第 - 249 - 页

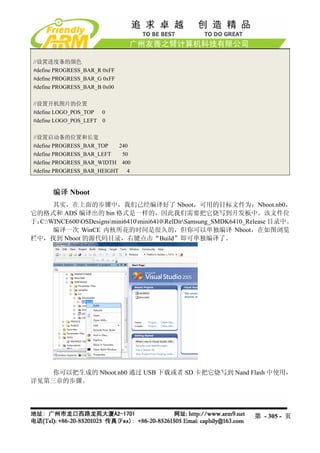
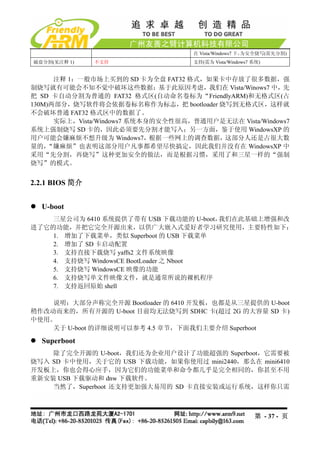
![更新说明:
日期 说明
2010-09-23 主要更新简介:
1- Mini6410 升级内存至 256M(今后作为标配), 同时售价增加 30 元
2- Superboot 升级: 可以自动探测 128M/256M 内存, 可以烧写超过内存大小的 image 文件,
比如你可以把 ubuntu 制作成 ubi 格式的映像烧写到 Nand Flash 中运行, 运行效果比在 SD 卡
中要好很多
3- u-boot 升级: 根据不同的情况,根目录下分别有如下四种配置,你可以使用这些配置编
译出你所需要的 U-boot.bin
- mini6410_sd_config-ram128 : 支持从 SD 卡启动,适用于 RAM 为 128M 的 Mini6410
- mini6410_nand_config-ram128 : 支持从 Nand Flash 启动,适用于 RAM 为 128M 的
Mini6410
- mini6410_sd_config-ram256 : 支持从 SD 卡启动,适用于 RAM 为 256M 的 Mini6410
- mini6410_nand_config-ram128 : 支持从 Nand Flash 启动,适用于 RAM 为 256M 的
Mini6410
4- Nboot 升级: 根据不同的内存版本,有两个源代码包(分别带 ram128 或 ram256 尾缀)。
5- WinCE 中增加了 TCPMP 播放器,支持 Mpeg4/H.263/H.264 硬解码,效果流畅,完美发
挥 6410 的多媒体 MFC 特性。
6- WINCE 中增加了 SD WiFi 的使用方法(5.1.16 章节)
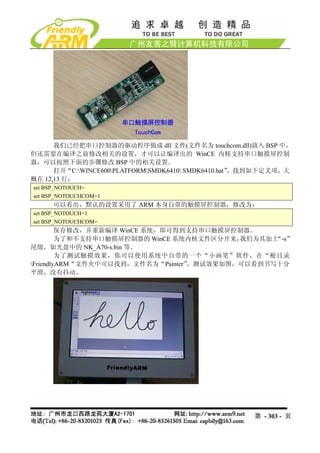
7- 增加了串口触摸屏控制器配件及相应的驱动和使用说明,可以在大尺寸触摸屏上实现精
准触摸,支持 Linux/WinCE/Android/Ubuntu
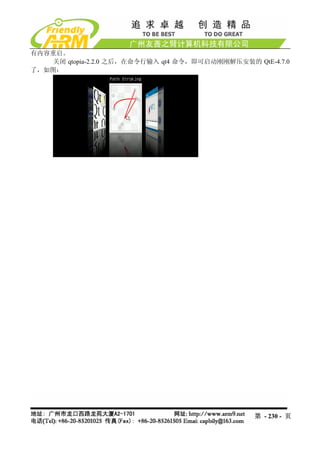
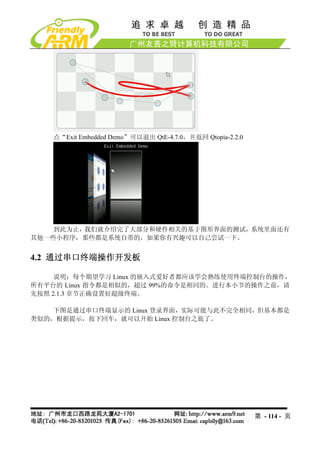
8- 首家移植提供 QtE-4.7.0,内含一键式移植脚本 build 和 mktarget
(Nokia 于 2010-9-21 日正式发布 Qt-4.7.0)
2010-09-03 本次更新简介:
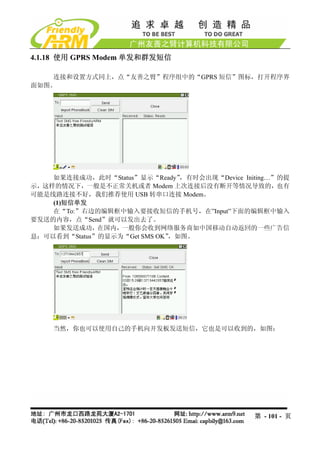
- 增加了 GPRS Modem 拨号上网,及短信单发、群发实用程序,基于 Qtopia-2.2.0
- 修正了接 LCD2VGA 模块时,无法输出 800x600 和 640x480 的 bug
使用 GPRS Modem 拨号上网和发送短信的说明分别见 4.1.17 和 4.1.18 章节
2010-08-14 本次更新简介:
- 升级到 Android 2.1
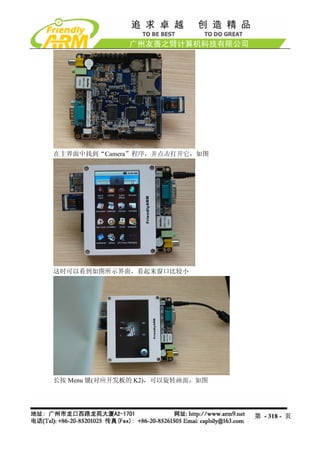
- 增加 Android 系统中 CMOS 摄像头驱动及使用说明
- 增加 Android 系统中 SD-WiFi 驱动及使用说明
- Superboot 升级为 1031 版本,增加了[i]选项中 Nand Flash 实际容量显示
2010-08-04 本次更新简介:
第 -3- 页](https://image.slidesharecdn.com/mini6410umchinese-101013074457-phpapp01/85/Mini6410-um-chinese-3-320.jpg)


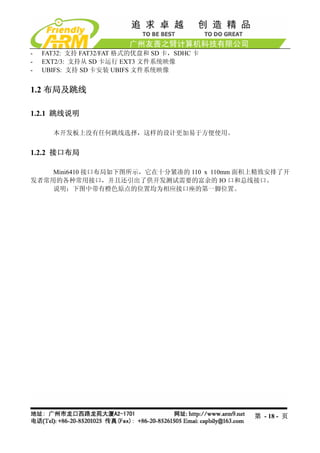

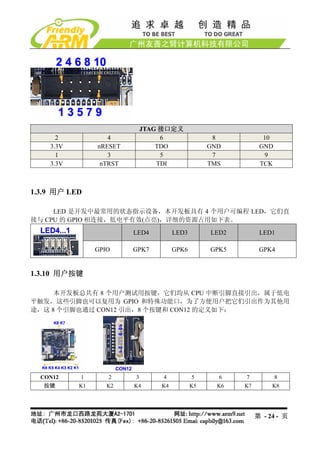


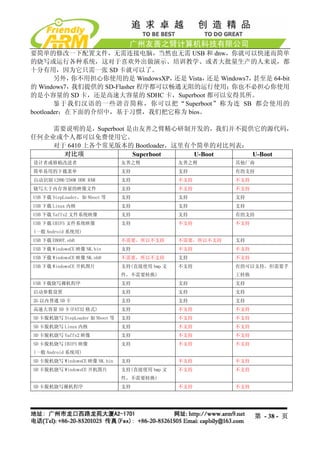


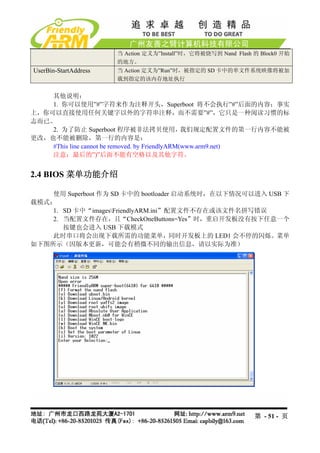
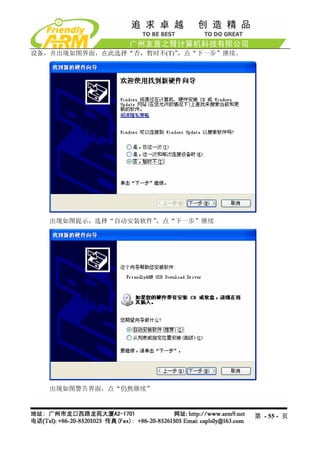

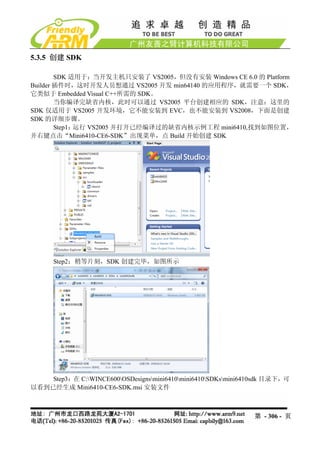
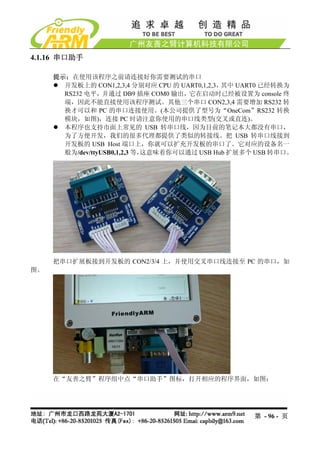
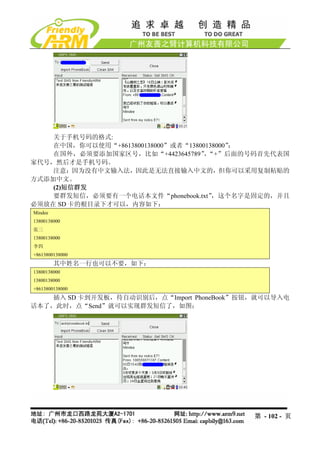
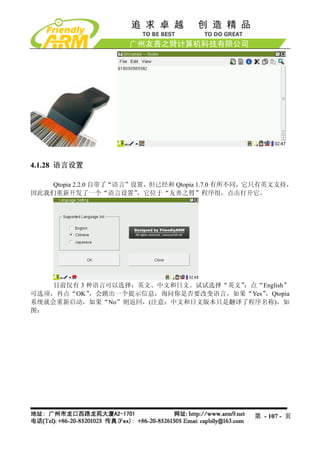
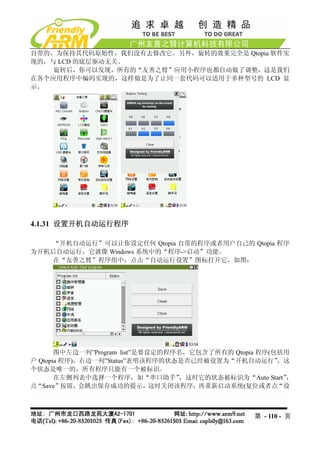
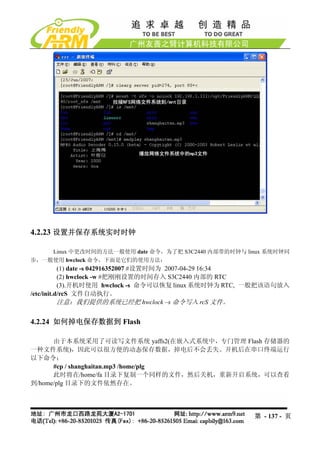
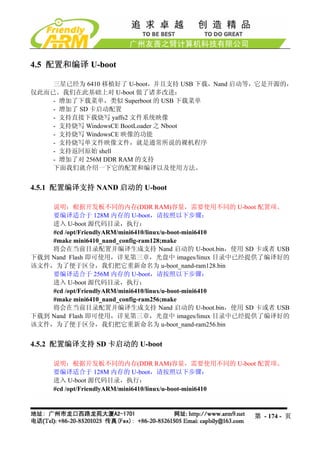
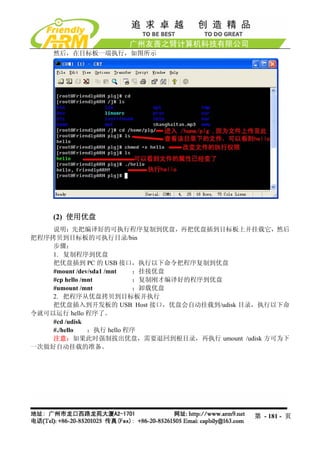
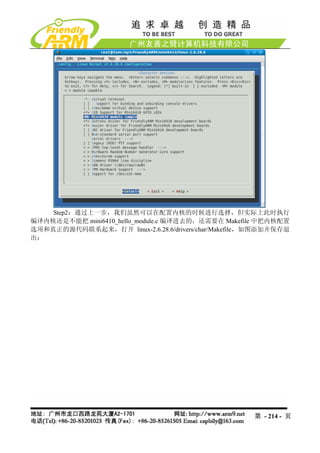
![2.2.2 功能主菜单说明
功能[f]:对 Nand Flash 进行格式化,实际上就是擦除整片 Nand Flash。
功能[v]:通过 USB 下载 Linux BootLoader 到 Nand Flash 的 bootloader 分区, U-boot
如
功能[k]:通过 USB 下载 Linux 内核到 Nand Flash 的 kernel 分区
功能[y]:通过 USB 下载 yaffs2 文件系统映象到 Nand Flash 的 root 分区
功能[u]:通过 USB 下载 UBIFS 文件系统映象到 Nand Flash 的 root 分区
功能[a]:通过 USB 下载用户程序到 Nand Flash 中,一般这样的用户程序为 bin 格式的
单系统映像文件,如 uCos2 或者裸机程序等
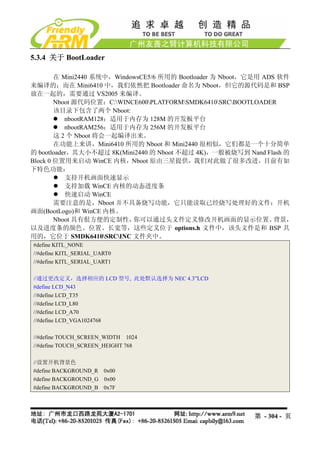
功能[n]:通过 USB 下载 WinCE 之启动程序 Nboot 到 Nand Flash 的 Block0
功能[l]:通过 USB 下载 WinCE 启动时的开机 Logo(bmp 格式的图片)
功能[w]:通过 USB 下载 WinCE 发行映象 NK.bin 到 Nand Flash
功能[b]:启动系统,如果烧入了 Linux 或者 Wince,执行该命令将自动辨认识别启动
系统。
功能[s]:设置 Linux 启动参数
功能[i]:Superboot 的版本信息,并显示开发板 Nand Flash 实际容量大小。
第 - 58 - 页](https://image.slidesharecdn.com/mini6410umchinese-101013074457-phpapp01/85/Mini6410-um-chinese-58-320.jpg)
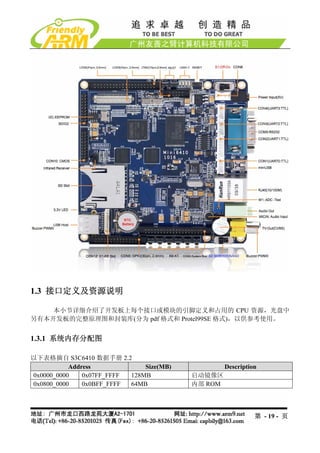
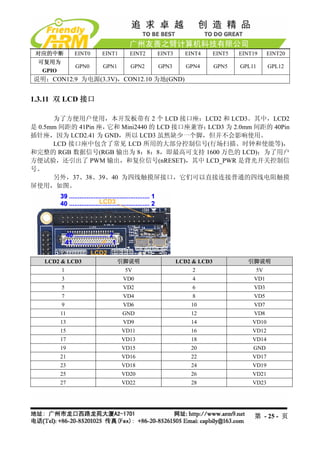
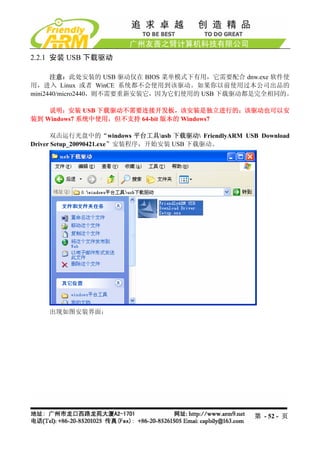
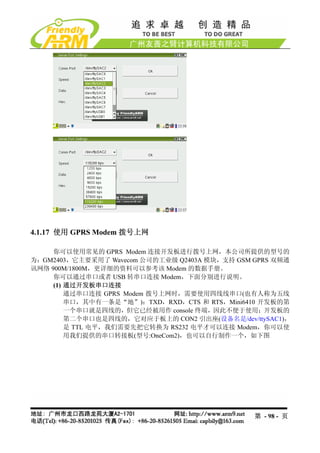
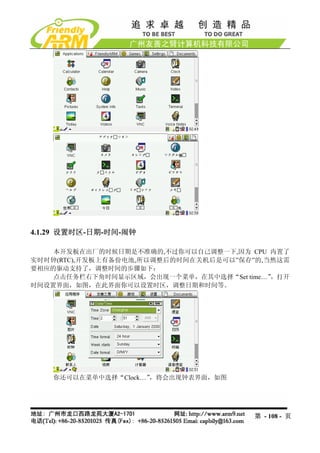
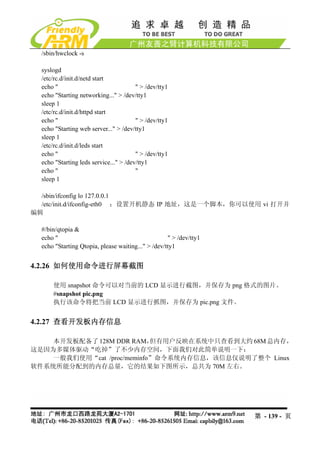
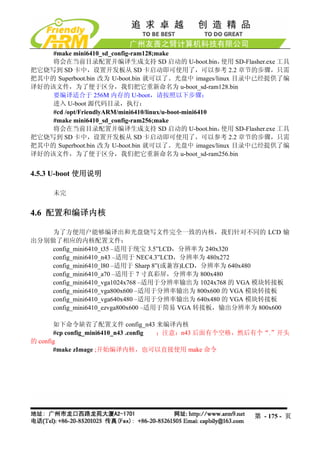
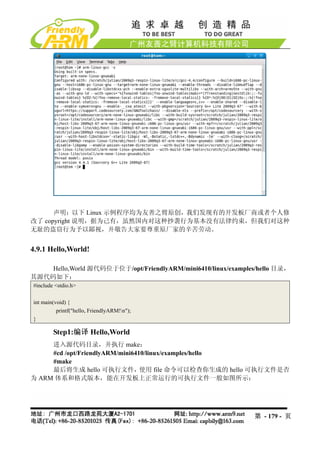
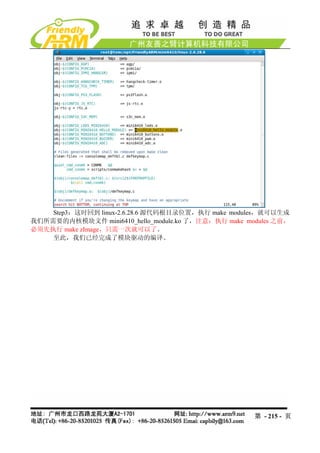
![3.1.1 一键安装 Linux 系统(yaffs2 或 UBIFS 格式)
注意:本小节假定您已经安装好了 USB 驱动,并把开发板设置 SD 启动;因版本更
新,以下截图有可能和实际稍微不同,请以实际为准。
说明:安装 Linux 所需要的二进制文件位于光盘的 imagesLinux 目录中,该目录中
有详细的文件说明。
安装 Linux 系统主要有以下步骤:
(1)对 Nand Flash 进行格式化,对应命令[f]
(2)安装 Bootloader,对应命令[v]
(3)安装内核文件,对应命令[k]
(4)安装目标文件系统(yaffs2 或 ubifs 格式),对应命令[y]或[u]
下面以在 4.3”LCD 套餐上安装 UBIFS 格式的 Linux 系统为例, 介绍详细的安装步骤:
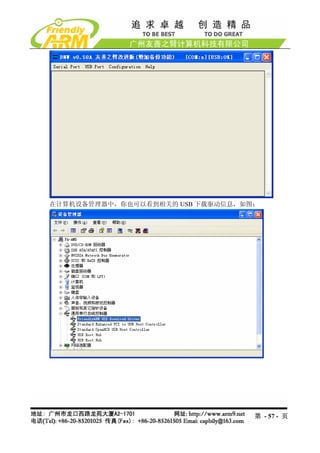
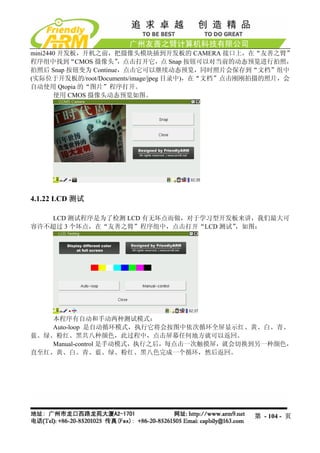
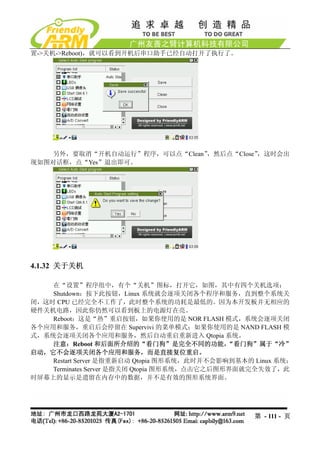
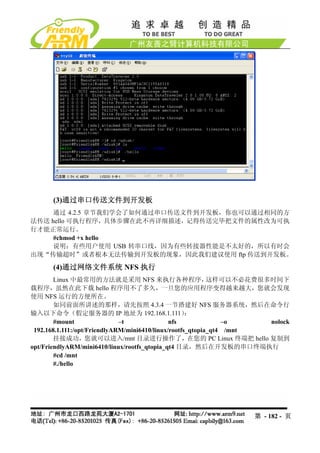
Step1 : 格式化 Nand Flash
提示:格式化将会擦除 Nand Flash 里面的所有数据
连接好串口,打开超级终端,上电启动开发板,进入 BIOS 功能菜单,选择功能号[f]
开始对 Nand Flash 进行分区,如图所示。
说明:有的 Nand Flash 分区时会出现坏区报告提示,因为 supervivi 会对坏区做检测
记录,因此这将不会影响板子的正常使用。
提示:普通的 Nand Flash 并不能保证所有扇区都是完好的,如果有坏区,系统软件会
对它们做检测处理,而不会影响整个软件系统的使用。保证完全无坏区的 Nand Flash 另有型
第 - 60 - 页](https://image.slidesharecdn.com/mini6410umchinese-101013074457-phpapp01/85/Mini6410-um-chinese-60-320.jpg)
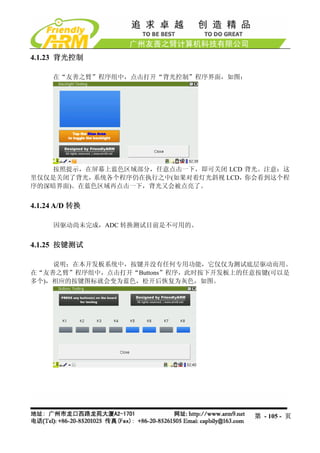
![号,而且订货周期长,价格昂贵,一般场合很少用到;其他品牌的 Nand Flash 也与此类似。
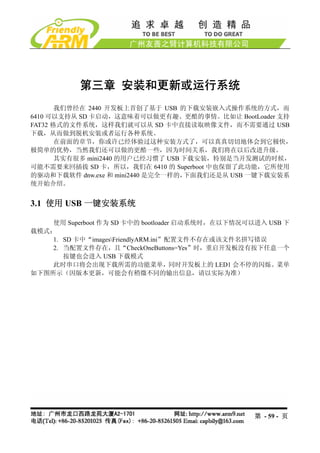
Step2: 安装 Bootloader
根据不同的开发板硬件配置,我们提供了不同的 u-boot 烧写文件(源代码中有相应的
配置项):
u-boot_sd-ram128.bin : 支持 SD 启动,适用于 DDR RAM 内存容量为 128M 的配置
u-boot_sd-ram256.bin : 支持 SD 启动,适用于 DDR RAM 内存容量为 256M 的配置
u-boot_nand-ram128.bin : 支持 NAND 启动,适用于 DDR RAM 内存容量为 128M 的配置
u-boot_nand-ram256.bin : 支持 NAND 启动,适用于 DDR RAM 内存容量为 256M 的配置
此处安装的 Bootloader 具体文件名为 U-boot_nand-ram256.bin(以下简称 U-boot.bin),
它将被下载烧写到 Nand Flash 的 Block 0 位置,也就是起始位置;关于 U-boot 的配置和编译
等,可以参考本手册 4.5 章节。
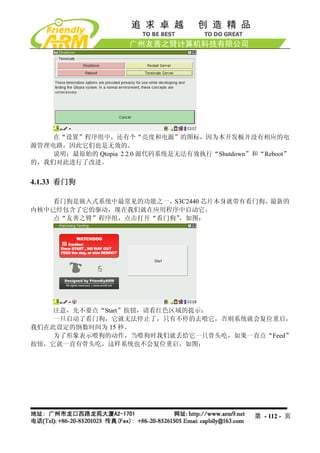
(1) 打开 DNW 程序,接上 USB 电缆,如果 DNW 标题栏提示[USB:OK],说明 USB
连接成功,这时根据菜单选择功能号[v]开始下载 U-boot.bin
第 - 61 - 页](https://image.slidesharecdn.com/mini6410umchinese-101013074457-phpapp01/85/Mini6410-um-chinese-61-320.jpg)
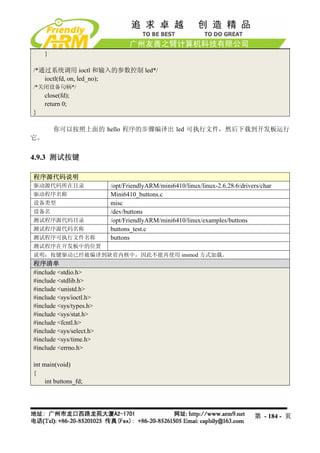
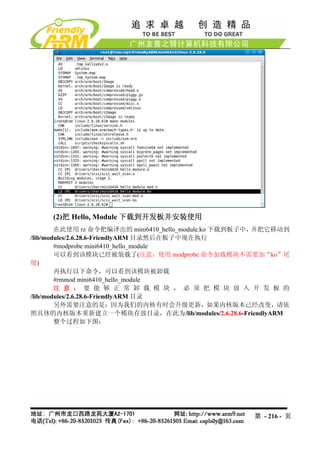
![Step3: 安装 Linux 内核
不同的 LCD 型号套餐,需要使用不同的内核文件,在后面的步骤我们把 Linux 内核
统称为 zImage,如下为光盘中的内核文件(位于 images/linux 目录)说明:
zImage_t35 – 适用于统宝 3.5”LCD,分辨率为 240x320
zImage_n43 – 适用于 NEC4.3”LCD,分辨率为 480x272
zImage_a70 – 适用于 7 寸真彩屏,分辨率为 800x480
zImage_L80 – 适用于 Sharp 8”(或兼容)LCD,分辨率为 640x480
zImage_VGA1024x768 – 适用于分辨率输出为 1024x768 的 VGA 模块转接板
zImage_VGA800x600 – 适用于分辨率输出为 800x600 的 VGA 模块转接板
zImage_VGA640x480 – 适用于分辨率输出为 640x480 的 VGA 模块转接板
zImage_EZVGA800x600 – 适用于简易 VGA 转接板,输出分辨率为 800x600
(1)在 BIOS 主菜单中选择功能号[k],开始下载 Linux 内核 zImage
第 - 63 - 页](https://image.slidesharecdn.com/mini6410umchinese-101013074457-phpapp01/85/Mini6410-um-chinese-63-320.jpg)
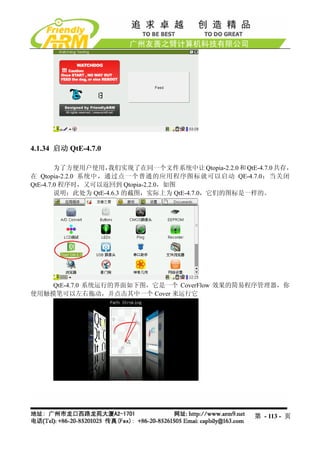
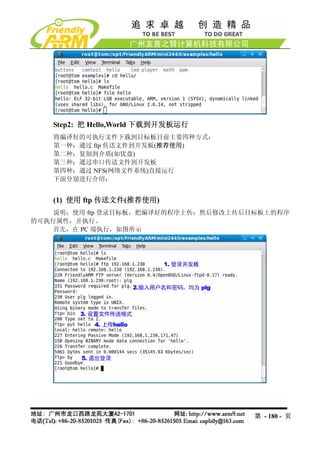
![Step4: 安装目标文件系统
说明:我们提供的目标文件系统包含 Qtopia-2.2.0 和 QtE-4.7.0 两种嵌入式图形系统,
并且包含了一些多媒体示例文件,因此映像文件比较大。
运行于 SD 卡中的 Superboot 可以支持 yaffs2 和 ubifs 两种格式的文件系统映像烧写,
根据文件系统的压制类型和是否支持串口触摸屏控制器, 我们分别制作了以下几种映像文件,
请根据自己的实际情况选择:
rootfs_qtopia_qt4.img : 支持 ARM 本身触摸屏接口,采用 yaffs2 格式压制的文件系统映像,
可以使用[y]命令烧写到 Nand Flash 中运行使用
rootfs_qtopia_qt4.ubi : 支持 ARM 本身触摸屏接口,采用 UBIFS 格式压制的文件系统映像,
可以使用[u]命令烧写到 Nand Flash 中运行使用
rootfs_qtopia_qt4.ext3 : 支持 ARM 本身触摸屏接口,采用 EXT3 格式压制的文件系统映像,
可以直接复制到 SD 中运行使用
rootfs_qtopia_qt4-s.img : 支持专业串口触摸屏控制器, 采用 yaffs2 格式压制的文件系统映
像,可以使用[y]命令烧写到 Nand Flash 中运行使用
rootfs_qtopia_qt4-s.ubi: 支持专业串口触摸屏控制器, 采用 UBIFS 格式压制的文件系统映像,
可以使用[u]命令烧写到 Nand Flash 中运行使用
rootfs_qtopia_qt4-s.ext3: 支持专业串口触摸屏控制器, 采用 EXT3 格式压制的文件系统映像,
可以直接复制到 SD 中运行使用
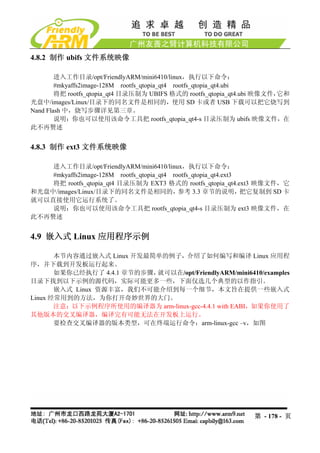
下面以烧写 UBIFS 格式的文件系统映像为例, 介绍一下烧写的步骤, 对于烧写 yaffs2
格式的文件系统,你只要更改一下命令和烧写的文件名就可以了,不再赘述。
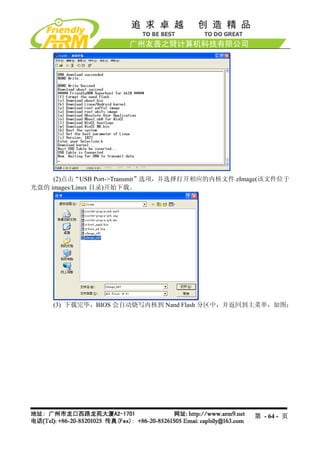
(1)在 BIOS 主菜单中选择功能号[u],开始下载 UBIFS 根文件系统映象文件
第 - 65 - 页](https://image.slidesharecdn.com/mini6410umchinese-101013074457-phpapp01/85/Mini6410-um-chinese-65-320.jpg)
![注意:下载完毕,请拔下 USB 连接线,如果不取下来,有可能在复位或者启动系统
的时候导致您的电脑死机。
在 BIOS 主菜单中选择功能号[b],将会启动系统。
如果您把开发板的启动模式设置为 Nand Flash 启动,则系统会在上电后自动启动。
3.1.2 一键安装 WinCE 系统
使用 Superboot 作为 SD 卡中的 bootloader 启动系统时,在以下情况可以进入 USB 下
载模式:
1. SD 卡中“imagesFriendlyARM.ini”配置文件不存在或该文件名拼写错误
2. 当配置文件存在,且“CheckOneButtons=Yes”时,重启开发板没有按下任意一个
按键也会进入 USB 下载模式
此时串口将会出现下载所需的功能菜单,同时开发板上的 LED1 会不停的闪烁。菜单
如下图所示(因版本更新,可能会有稍微不同的输出信息,请以实际为准)
注意:本小节假定您已经安装好了 USB 驱动,并把开发板设置 SD 启动;因版本更
新,以下截图有可能和实际稍微不同,请以实际为准
第 - 67 - 页](https://image.slidesharecdn.com/mini6410umchinese-101013074457-phpapp01/85/Mini6410-um-chinese-67-320.jpg)
![说明: 安装 WinCE6 所需要的二进制文件位于光盘的“imagesWindowsCE6”目录中,
以下简称 WinCE6
安装 WinCE6 主要有以下步骤:
(1)格式化 Nand Flash,对应命令[f]
(2)安装 Bootloader ,对应命令[n]
(3)安装 BootLogo(bmp 格式),对应命令[l]
(4)安装 WindowsCE 内核映象,对应命令[w]
提示:请先连接好串口,打开超级终端,上电启动开发板,进入 BIOS 功能菜单,下
面以 4.3”LCD 套餐为例,介绍详细的安装步骤:
Step1 : 格式化 Nand Flash
提示:格式化将会擦除 Nand Flash 里面的所有数据
连接好串口,打开超级终端,上电启动开发板,进入 BIOS 功能菜单,选择功能号[f]
开始对 Nand Flash 进行分区,如图所示。
说明:有的 Nand Flash 分区时会出现坏区报告提示,因为 Supervivi 会对坏区做检测
记录,因此这将不会影响板子的正常使用。
普通的 Nand Flash 并不能保证所有扇区都是完好的,如果有坏区, 系统软件会对它们
做检测处理,而不会影响整个软件系统的使用。保证完全无坏区的 Nand Flash 另有型号,而
且订货周期长,价格昂贵,一般场合很少用到;其他品牌的 Nand Flash 也与此类似。
第 - 68 - 页](https://image.slidesharecdn.com/mini6410umchinese-101013074457-phpapp01/85/Mini6410-um-chinese-68-320.jpg)
![Step2: 安装 Bootloader
在 WinCE 系统中, 我们使用的 Bootloader 为 Nboot,因为 Nboot 并不能自动识别 LCD
类型,根据不同型号的 LCD,和不同容量的内存配置,有不同的映像文件(源代码中有相应的
配置项)。本手册第五章介绍了如何修改 LCD 类型,及如何编译 Nboot。
(1)打开 DNW 程序,接上 USB 电缆,如果 DNW 标题栏提示[USB:OK],说明 USB
连接成功,这时根据菜单选择功能号[n]开始下载 Nboot(在此为统称).nb0
第 - 69 - 页](https://image.slidesharecdn.com/mini6410umchinese-101013074457-phpapp01/85/Mini6410-um-chinese-69-320.jpg)
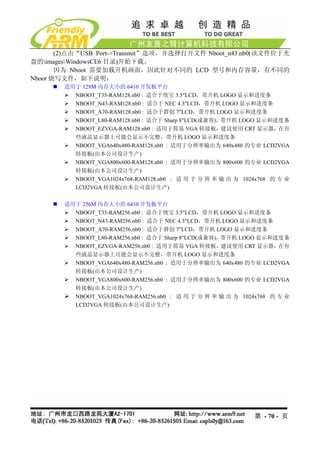
![(4)下载完毕,BIOS 会自动把 Nboot_n43.nb0 烧写到 Nand Flash 的 Block 0
Step3: 下载烧写 BootLogo
Bootlogo 是开机上电后由 Nboot 加载显示的, 它必须是 24bit 真彩 bmp 图片(一般 bmp
都是真彩的),并且不能大于 2M,分辨率为 1024x768 的 24 位真彩图片刚好为 2M。
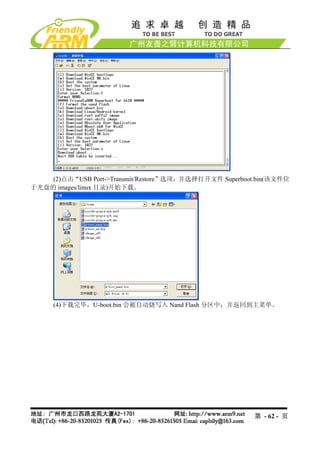
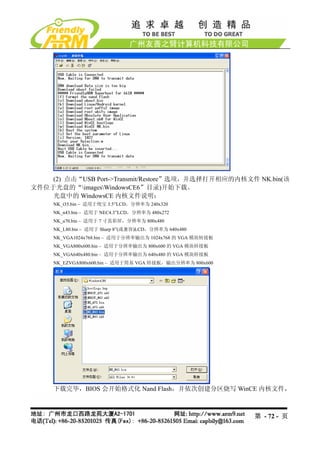
(1)在 BIOS 主菜单中选择功能号[l],开始下载 bmp 图片作为 BootLogo(光盘中已经准
备好一个 BootLogo.bmp 图片)
(2) 点击“USB Port->Transmit/Restore”选项,并选择文件 bootlogo.bmp
(3) 下载完毕,BIOS 会自动烧写 bootlogo.bmp 到 Nand Flash 中,并返回到主菜单。
Step3: 安装 wince 内核映象
(1)在 BIOS 主菜单中选择功能号[w],开始下载 WINCE 内核
第 - 71 - 页](https://image.slidesharecdn.com/mini6410umchinese-101013074457-phpapp01/85/Mini6410-um-chinese-71-320.jpg)
![烧写完毕,会自动启动 WinCE 系统,整个过程串口信息如下图:
3.1.3 一键安装 Android(yaffs2 或 UBIFS 格式)
注意:本小节假定您已经安装好了 USB 驱动,并把开发板设置 SD 启动;因版本更
新,以下截图有可能和实际稍微不同,请以实际为准。
说明:安装 Android 所需要的二进制文件位于光盘的 images/Android 目录中。
安装 Android 系统主要有以下步骤:
(1)对 Nand Flash 进行格式化,对应命令[f]
(2)安装 Bootloader,对应命令[v]
(3)安装内核文件,对应命令[k]
(4)安装目标文件系统(yaffs2 或 ubifs 格式),对应命令[y]或[u]
下面以在 4.3”LCD 套餐上安装 UBIFS 格式的 Android 系统为例,介绍详细的安装步
骤:
Step1 : 格式化 Nand Flash
提示:格式化将会擦除 Nand Flash 里面的所有数据
连接好串口,打开超级终端,上电启动开发板,进入 BIOS 功能菜单,选择功能号[f]
开始对 Nand Flash 进行分区,如图所示。
说明:有的 Nand Flash 分区时会出现坏区报告提示,因为 Supervivi 会对坏区做检测
记录,因此这将不会影响板子的正常使用。
普通的 Nand Flash 并不能保证所有扇区都是完好的,如果有坏区, 系统软件会对它们
做检测处理,而不会影响整个软件系统的使用。保证完全无坏区的 Nand Flash 另有型号,而
且订货周期长,价格昂贵,一般场合很少用到;其他品牌的 Nand Flash 也与此类似。
第 - 73 - 页](https://image.slidesharecdn.com/mini6410umchinese-101013074457-phpapp01/85/Mini6410-um-chinese-73-320.jpg)
![Step2: 安装 Bootloader
根据不同的开发板硬件配置,我们提供了不同的 u-boot 烧写文件(源代码中有相应的
配置项):
u-boot_sd-ram128.bin : 支持 SD 启动,适用于 DDR RAM 内存容量为 128M 的配置
u-boot_sd-ram256.bin : 支持 SD 启动,适用于 DDR RAM 内存容量为 256M 的配置
u-boot_nand-ram128.bin : 支持 NAND 启动,适用于 DDR RAM 内存容量为 128M 的配置
u-boot_nand-ram256.bin : 支持 NAND 启动,适用于 DDR RAM 内存容量为 256M 的配置
此处安装的 Bootloader 具体文件名为 u-boot_nand-ram256.bin (以下简称 U-boot.bin),
它将被下载烧写到 Nand Flash 的 Block 0 位置,也就是起始位置;关于 U-boot 的配置和编译
等,可以参考本手册第六章。
(1) 打开 DNW 程序,接上 USB 电缆,如果 DNW 标题栏提示[USB:OK],说明 USB
连接成功,这时根据菜单选择功能号[v]开始下载 U-boot.bin
第 - 74 - 页](https://image.slidesharecdn.com/mini6410umchinese-101013074457-phpapp01/85/Mini6410-um-chinese-74-320.jpg)
![Step3: 安装 Android 内核
不同的 LCD 型号套餐,需要使用不同的内核文件,在后面的步骤我们把 Android 内
核统称为 azImage,如下为光盘中的内核文件(位于 images/Android 目录)说明:
azImage_n43 – 适用于 NEC4.3”LCD,分辨率为 480x272
azImage_a70 – 适用于 7 寸真彩屏,分辨率为 800x480
(1)在 BIOS 主菜单中选择功能号[k],开始下载内核 azImage
(2)点击“USB Port->Transmit”选项,并选择打开相应的内核文件 azImage(该文件位
于光盘的 images/Android 目录)开始下载。
第 - 76 - 页](https://image.slidesharecdn.com/mini6410umchinese-101013074457-phpapp01/85/Mini6410-um-chinese-76-320.jpg)
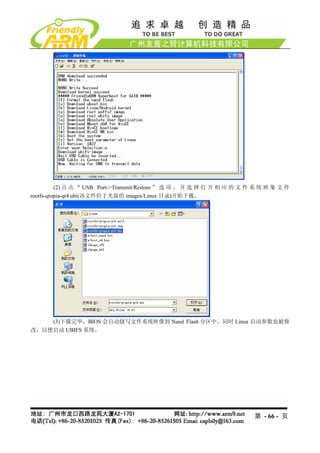
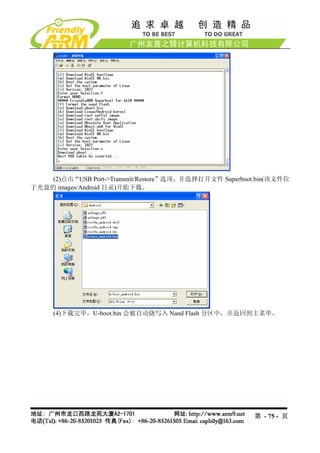
![(3) 下载完毕,BIOS 会自动烧写内核到 Nand Flash 分区中,并返回到主菜单。
Step4: 安装目标文件系统
运行于 SD 卡中的 Superboot 可以支持 yaffs2 和 ubifs 两种格式的文件系统映像烧写,
根据文件系统的压制类型和是否支持串口触摸屏控制器, 我们分别制作了以下几种映像文件,
请根据自己的实际情况选择:
rootfs_android.img : 支持 ARM 本身触摸屏接口,采用 yaffs2 格式压制的文件系统映像,可
以使用[y]命令烧写到 Nand Flash 中运行使用
rootfs_android.ubi : 支持 ARM 本身触摸屏接口,采用 UBIFS 格式压制的文件系统映像,可
以使用[u]命令烧写到 Nand Flash 中运行使用
rootfs_android.ext3 : 支持 ARM 本身触摸屏接口,采用 EXT3 格式压制的文件系统映像,可
以直接复制到 SD 中运行使用
rootfs_android -s.img : 支持专业串口触摸屏控制器, 采用 yaffs2 格式压制的文件系统映像,
可以使用[y]命令烧写到 Nand Flash 中运行使用
rootfs_android -s.ubi: 支持专业串口触摸屏控制器, 采用 UBIFS 格式压制的文件系统映像, 可
以使用[u]命令烧写到 Nand Flash 中运行使用
rootfs_android -s.ext3: 支持专业串口触摸屏控制器, 采用 EXT3 格式压制的文件系统映像, 可
以直接复制到 SD 中运行使用
说明:UBIFS 文件系统具有一定的压缩性,因为映像文件要比 yaffs2 小一些。下面以
烧写 UBIFS 格式的文件系统映像为例,介绍一下烧写的步骤,对于烧写 yaffs2 格式的文件系
统,你只要更改一下命令和烧写的文件名就可以了,不再赘述。
(1)在 BIOS 主菜单中选择功能号[u],开始下载 UBIFS 根文件系统映象文件
第 - 77 - 页](https://image.slidesharecdn.com/mini6410umchinese-101013074457-phpapp01/85/Mini6410-um-chinese-77-320.jpg)

![注意:下载完毕,请拔下 USB 连接线,如果不取下来,有可能在复位或者启动系统
的时候导致您的电脑死机。
在 BIOS 主菜单中选择功能号[b],将会启动系统。
如果您把开发板的启动模式设置为 Nand Flash 启动,则系统会在上电后自动启动。
3.2 使用 SD 卡脱机快速安装系统
要通过 SD 卡脱机烧写系统, 必须先使用 SD-Flasher 工具把 Superboot 烧写到 SD 中(见
2.2 章节),并把必要的系统文件复制到 SD 卡的 images 目录中才可以,其实你只要把光盘中
的 images 目录直接复制到 SD 卡就可以了,里面已经包含了各个系统的安装文件,如果你打
算烧写自己制作生成的文件,可以使用替换同名文件的方法,或者更改配置文件中的相应文
件名。
Superboot 可以支持普通 SD 卡高速大容量 SDHC 卡启动系统。下面我们以使用光盘
中的现成文件为例,介绍如何快速烧写各个系统。
注意:请先把光盘中的 images 目录复制到已经烧写好 Superboot 的 SD 卡中,以下安
装过程不需要连接串口线和 USB,只要一张 SD 卡和电源就可以了。
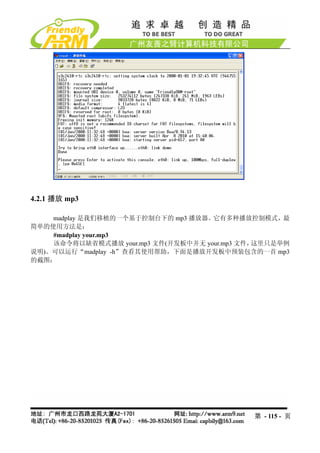
3.2.1 快速安装 Linux(yaffs2 格式)
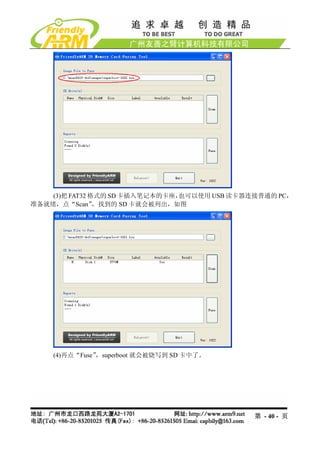
Step1: 打开 SD 卡中 images 目录下的配置文件 FriendlyARM.ini,修改安装 Linux 系
统相关的定义:
定义项 修改为(所有定义均不分大小写)
Action Install
OS Linux
第 - 79 - 页](https://image.slidesharecdn.com/mini6410umchinese-101013074457-phpapp01/85/Mini6410-um-chinese-79-320.jpg)
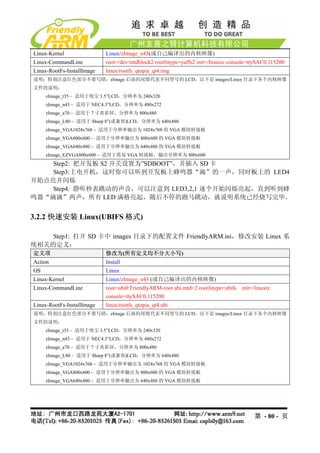


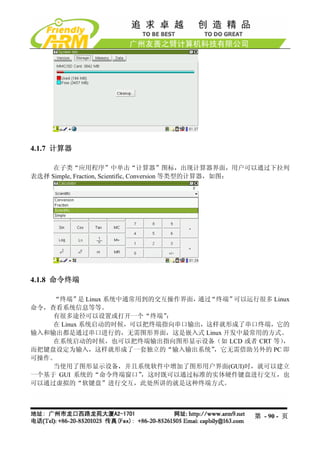


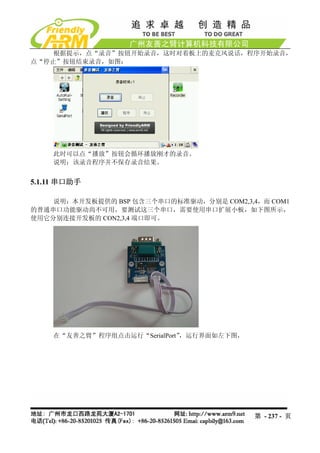
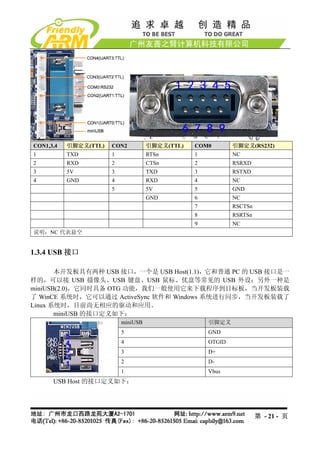
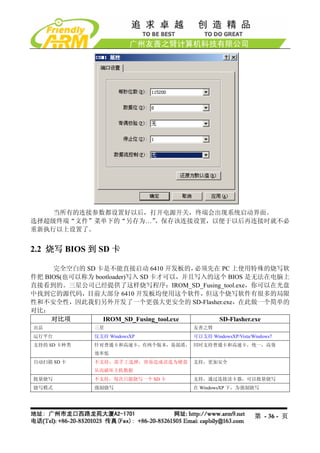
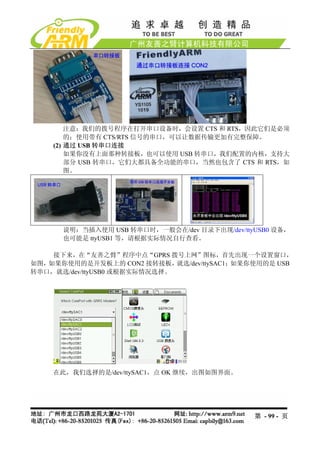
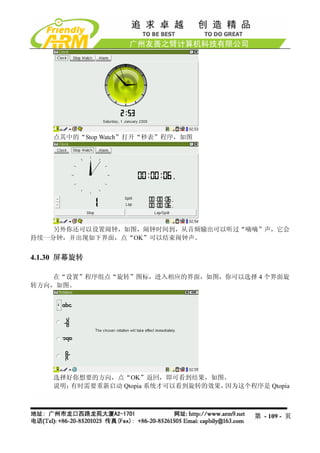
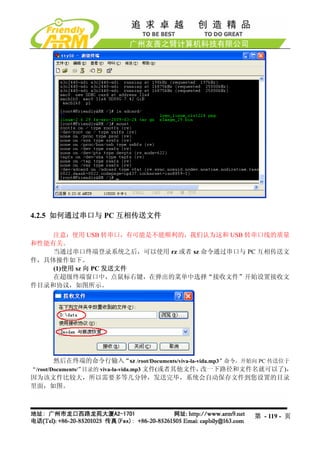
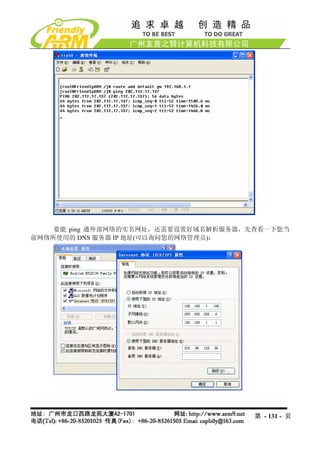
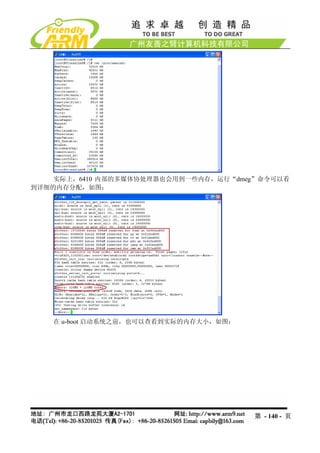
![从该程序窗口的标题可以看到,默认设置为“ttySAC1 115200 8N1 [C]”,它表示默认
端口的设置:
- 串口设备:/dev/ttySAC1,它对应 CPU 的第二个串口 UART1
- 波特率:115200
- 数据位:8
- 流控制:无
- 停止位:1
- [C]:表示字符模式,如果是[H]则表示 16 进制模式
上图中有两个“编辑框”区域,上面的“编辑框”是用于显示接收到的数据,它实际
上是不能编辑的;下面的“编辑框”可以通过 USB 键盘或者 Qtopia 的软键盘获取输入。
点 Connect 按钮,以打开开发板串口/dev/ttySAC1,在窗口下面的编辑框输入一些字
符,点 Send 按钮,就可以向与它相连的串口设备发送数据了,下图显示的是通过 Windows
超级终端接收的数据截图(注意:与此终端对应的串口也应该设置为 115200 8N1)。
点 Disconnect 断开连接,再点 Setting…按钮进入端口设置界面,如图,在此列出了最
常见的一些串口设置参数项:
Comm Port:可以选择 CPU 自带的/dev/ttySAC0,1,2,3 三个串口;也可以选择 USB 转
串口对应的/dev/ttyUSB0,1,2,3
Speed:可以选择各种常见的波特率
Data:可以选择数据位是 8 位/7 位,常见的是 8 位
Hex:此项表示采用 16 进制输入或者显示数据。
第 - 97 - 页](https://image.slidesharecdn.com/mini6410umchinese-101013074457-phpapp01/85/Mini6410-um-chinese-97-320.jpg)


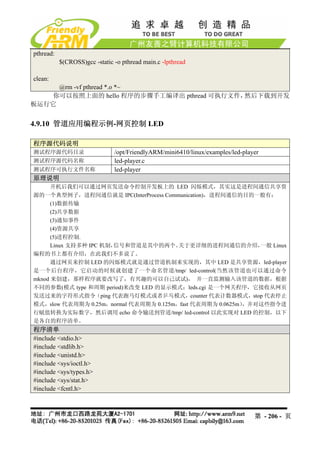
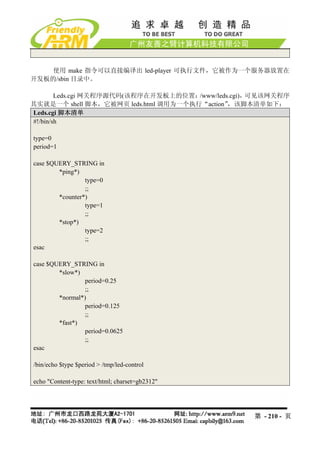
![(1) LED 服务器
开机进入系统后, 将会自动运行运行一个 LED 服务程序(/etc/rc.d/init.d/leds),它其实
是调用了 led-player 的一个脚本,led-player 开始运行后,将会在/tmp 目录下创建一个
led-control 管道文件,向该管道发送不同的参数可以改变 led 的闪烁模式:
#echo 0 0.2 > /tmp/led-control
运行该命令后,4 个用户 led 将会以每个间隔 0.2 秒的时间运行跑马灯。
#echo 1 0.2 >/tmp/led-control
运行该命令后,4 个用户 led 将会以间隔 0.2 秒的时间运行累加器。
#/etc/rc.d/init.d/leds stop
运行该命令后,4 个用户 led 将会停止闪动。
#/etc/rc.d/init.d/leds start
运行该命令后,4 个用户 led 将会重新开始闪动。
(2)单独控制 LED
/bin/leds 是一个可以控制单个 led 的实用程序,要使用 leds 必须先停止 led-player,如
下命令:
#/etc/rc.d/init.d/leds stop
该命令将停止 led-player 对 led 的操纵。led 的使用方法如下:
[root@fa /]# led
Usage: leds led_no 0|1
led_no 是要操作的 led(可为 0,1,2,3),0 和 1 分别代表关闭和点亮。
#led 2 1
将点亮 LED3
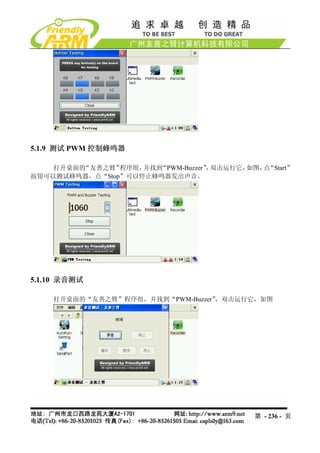
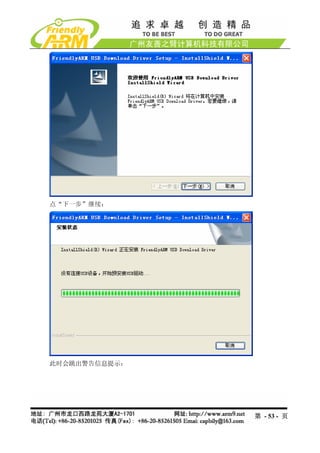
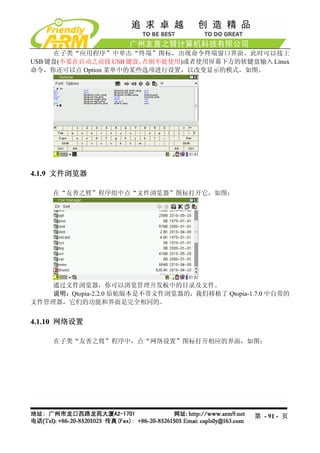
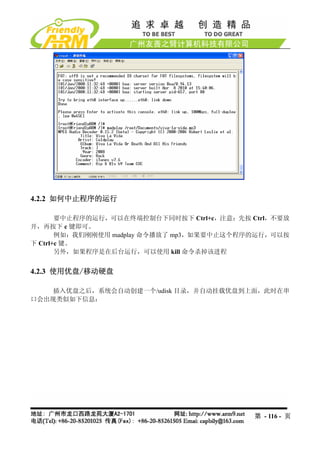
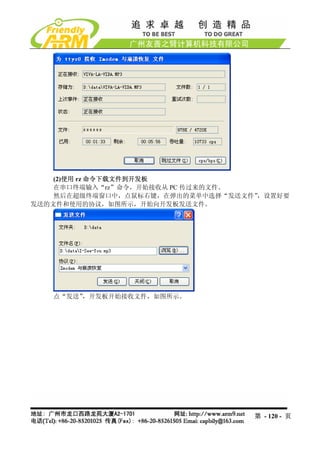
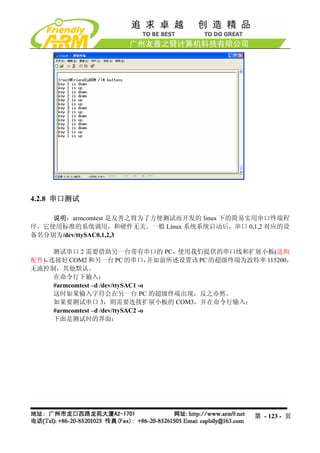
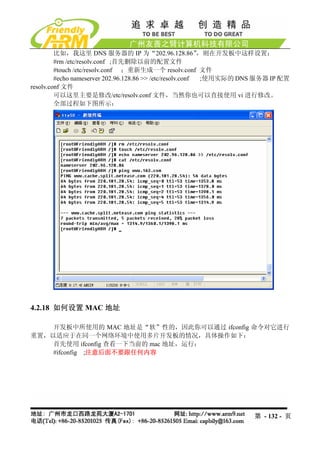
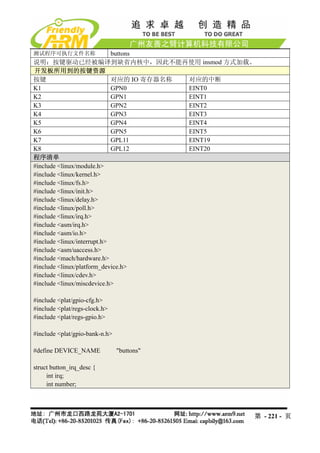
4.2.7 测试板上的按键
测试程序名称: buttons 备注
测试程序源代码文件名 Buttons_test.c
测试程序源代码位置 解压 linuxexamples.tgz 可得
开发板上对应的设备名 /dev/buttons
对应的内核驱动源代码 Linux-2.6.28/drivers/char/mini6410_buttons.c
其他:
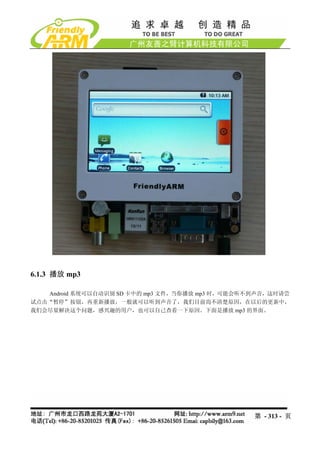
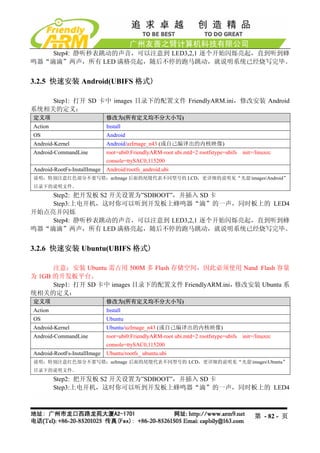
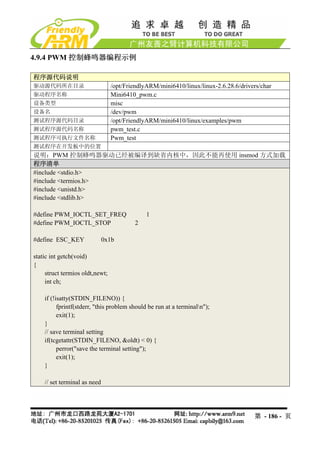
在命令行输入“buttons”命令,然后按开发板上的按键,可以显示对应的键值,如图
第 - 122 - 页](https://image.slidesharecdn.com/mini6410umchinese-101013074457-phpapp01/85/Mini6410-um-chinese-122-320.jpg)

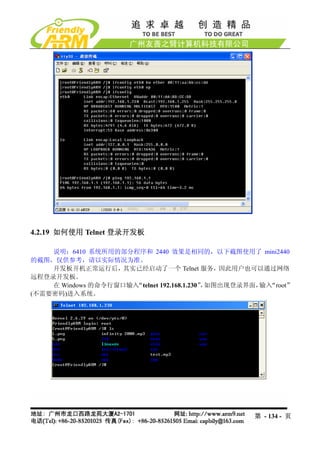


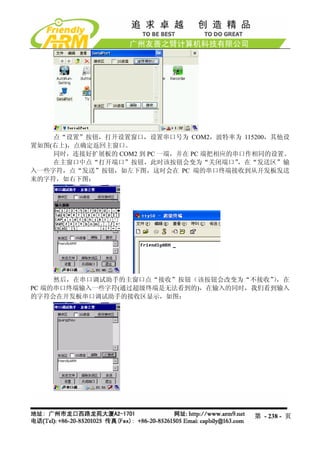
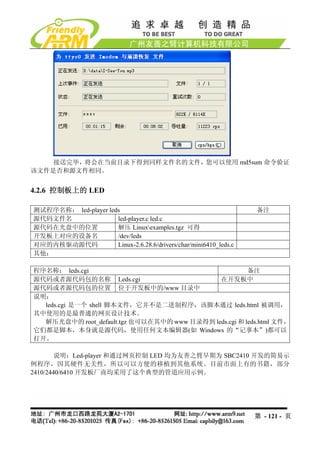
![4.9.2 LED 测试程序
程序源代码说明
驱动源代码所在目录 /opt/FriendlyARM/mini6410/linux/linux-2.6.28.6/drivers/char
驱动程序名称 mini6410_leds.c
设备类型 misc
设备名 /dev/leds
测试程序源代码目录 /opt/FriendlyARM/mini6410/linux/examples/leds
测试程序名称 led.c
测试程序可执行文件名称 led
测试程序在开发板中的位置
说明:LED 驱动已经被编译到缺省内核中,因此不能再使用 insmod 方式加载。
程序清单
#include <stdio.h>
#include <stdlib.h>
#include <unistd.h>
#include <sys/ioctl.h>
int main(int argc, char **argv)
{
int on;
int led_no;
int fd;
/* 检查 led 控制的两个参数,如果没有参数输入则退出。*/
if (argc != 3 || sscanf(argv[1], "%d", &led_no) != 1 || sscanf(argv[2],"%d", &on) != 1 ||
on < 0 || on > 1 || led_no < 0 || led_no > 3) {
fprintf(stderr, "Usage: leds led_no 0|1n");
exit(1);
}
/*打开/dev/leds 设备文件*/
fd = open("/dev/leds0", 0);
if (fd < 0) {
fd = open("/dev/leds", 0);
}
if (fd < 0) {
perror("open device leds");
exit(1);
第 - 183 - 页](https://image.slidesharecdn.com/mini6410umchinese-101013074457-phpapp01/85/Mini6410-um-chinese-183-320.jpg)
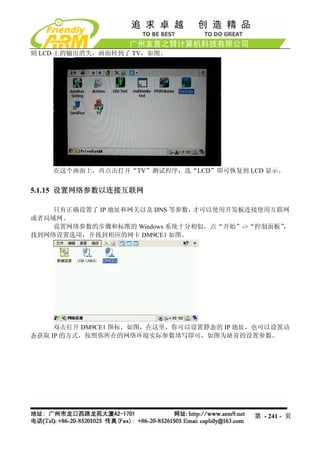
![char buttons[6] = {'0', '0', '0', '0', '0', '0'};
buttons_fd = open("/dev/buttons", 0);
if (buttons_fd < 0) {
perror("open device buttons");
exit(1);
}
for (;;) {
char current_buttons[6];
int count_of_changed_key;
int i;
if (read(buttons_fd, current_buttons, sizeof current_buttons) != sizeof current_buttons) {
perror("read buttons:");
exit(1);
}
for (i = 0, count_of_changed_key = 0; i < sizeof buttons / sizeof buttons[0]; i++) {
if (buttons[i] != current_buttons[i]) {
buttons[i] = current_buttons[i];
printf("%skey %d is %s", count_of_changed_key? ", ": "", i+1, buttons[i] ==
'0' ? "up" : "down");
count_of_changed_key++;
}
}
if (count_of_changed_key) {
printf("n");
}
}
close(buttons_fd);
return 0;
}
你可以按照上面的 hello 程序的步骤手编译出 buttons 可执行文件,然后下载到开发板
运行它
第 - 185 - 页](https://image.slidesharecdn.com/mini6410umchinese-101013074457-phpapp01/85/Mini6410-um-chinese-185-320.jpg)
![#include <unistd.h>
#include <stdlib.h>
#include <errno.h>
#include <string.h>
#include <sys/types.h>
#include <sys/stat.h>
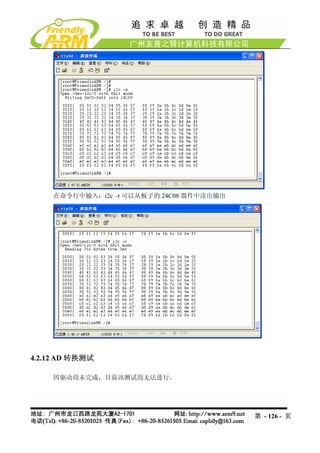
#include "24cXX.h"
#define usage_if(a) do { do_usage_if( a , __LINE__); } while(0);
void do_usage_if(int b, int line)
{
const static char *eeprog_usage =
"I2C-24C08(256 bytes) Read/Write Program, ONLY FOR TEST!n"
"FriendlyARM Computer Tech. 2009n";
if(!b)
return;
fprintf(stderr, "%sn[line %d]n", eeprog_usage, line);
exit(1);
}
#define die_if(a, msg) do { do_die_if( a , msg, __LINE__); } while(0);
void do_die_if(int b, char* msg, int line)
{
if(!b)
return;
fprintf(stderr, "Error at line %d: %sn", line, msg);
fprintf(stderr, " sysmsg: %sn", strerror(errno));
exit(1);
}
static int read_from_eeprom(struct eeprom *e, int addr, int size)
{
int ch, i;
for(i = 0; i < size; ++i, ++addr)
{
die_if((ch = eeprom_read_byte(e, addr)) < 0, "read error");
if( (i % 16) == 0 )
printf("n %.4x| ", addr);
第 - 190 - 页](https://image.slidesharecdn.com/mini6410umchinese-101013074457-phpapp01/85/Mini6410-um-chinese-190-320.jpg)
![else if( (i % 8) == 0 )
printf(" ");
printf("%.2x ", ch);
fflush(stdout);
}
fprintf(stderr, "nn");
return 0;
}
static int write_to_eeprom(struct eeprom *e, int addr)
{
int i;
for(i=0, addr=0; i<256; i++, addr++)
{
if( (i % 16) == 0 )
printf("n %.4x| ", addr);
else if( (i % 8) == 0 )
printf(" ");
printf("%.2x ", i);
fflush(stdout);
die_if(eeprom_write_byte(e, addr, i), "write error");
}
fprintf(stderr, "nn");
return 0;
}
int main(int argc, char** argv)
{
struct eeprom e;
int op;
op = 0;
usage_if(argc != 2 || argv[1][0] != '-' || argv[1][2] != '0');
op = argv[1][1];
fprintf(stderr, "Open /dev/i2c/0 with 8bit moden");
die_if(eeprom_open("/dev/i2c/0", 0x50, EEPROM_TYPE_8BIT_ADDR, &e) < 0,
"unable to open eeprom device file "
"(check that the file exists and that it's readable)");
第 - 191 - 页](https://image.slidesharecdn.com/mini6410umchinese-101013074457-phpapp01/85/Mini6410-um-chinese-191-320.jpg)
![static void PrintUsage(void)
{
fprintf(stderr, "comtest - interactive program of comm portn");
fprintf(stderr, "press [ESC] 3 times to quitnn");
fprintf(stderr, "Usage: comtest [-d device] [-t tty] [-s speed] [-7] [-c] [-x] [-o] [-h]n");
fprintf(stderr, " -7 7 bitn");
fprintf(stderr, " -x hex moden");
fprintf(stderr, " -o output to stdout toon");
fprintf(stderr, " -c stdout output use colorn");
fprintf(stderr, " -h print this helpn");
exit(-1);
}
static inline void WaitFdWriteable(int Fd)
{
fd_set WriteSetFD;
FD_ZERO(&WriteSetFD);
FD_SET(Fd, &WriteSetFD);
if (select(Fd + 1, NULL, &WriteSetFD, NULL, NULL) < 0) {
Error(strerror(errno));
}
}
int main(int argc, char **argv)
{
int CommFd, TtyFd;
struct termios TtyAttr;
struct termios BackupTtyAttr;
int DeviceSpeed = B115200;
int TtySpeed = B115200;
int ByteBits = CS8;
const char *DeviceName = "/dev/ttyS0";
const char *TtyName = "/dev/tty";
int OutputHex = 0;
int OutputToStdout = 0;
第 - 194 - 页](https://image.slidesharecdn.com/mini6410umchinese-101013074457-phpapp01/85/Mini6410-um-chinese-194-320.jpg)
![int UseColor = 0;
opterr = 0;
for (;;) {
int c = getopt(argc, argv, "d:s:t:7xoch");
if (c == -1)
break;
switch(c) {
case 'd':
DeviceName = optarg;
break;
case 't':
TtyName = optarg;
break;
case 's':
if (optarg[0] == 'd') {
DeviceSpeed = SerialSpeed(optarg + 1);
} else if (optarg[0] == 't') {
TtySpeed = SerialSpeed(optarg + 1);
} else
TtySpeed = DeviceSpeed = SerialSpeed(optarg);
break;
case 'o':
OutputToStdout = 1;
break;
case '7':
ByteBits = CS7;
break;
case 'x':
OutputHex = 1;
break;
case 'c':
UseColor = 1;
break;
case '?':
case 'h':
default:
PrintUsage();
}
}
第 - 195 - 页](https://image.slidesharecdn.com/mini6410umchinese-101013074457-phpapp01/85/Mini6410-um-chinese-195-320.jpg)
![if (optind != argc)
PrintUsage();
CommFd = open(DeviceName, O_RDWR, 0);
if (CommFd < 0)
Error("Unable to open device");
if (fcntl(CommFd, F_SETFL, O_NONBLOCK) < 0)
Error("Unable set to NONBLOCK mode");
memset(&TtyAttr, 0, sizeof(struct termios));
TtyAttr.c_iflag = IGNPAR;
TtyAttr.c_cflag = DeviceSpeed | HUPCL | ByteBits | CREAD | CLOCAL;
TtyAttr.c_cc[VMIN] = 1;
if (tcsetattr(CommFd, TCSANOW, &TtyAttr) < 0)
Warning("Unable to set comm port");
TtyFd = open(TtyName, O_RDWR | O_NDELAY, 0);
if (TtyFd < 0)
Error("Unable to open tty");
TtyAttr.c_cflag = TtySpeed | HUPCL | ByteBits | CREAD | CLOCAL;
if (tcgetattr(TtyFd, &BackupTtyAttr) < 0)
Error("Unable to get tty");
if (tcsetattr(TtyFd, TCSANOW, &TtyAttr) < 0)
Error("Unable to set tty");
for (;;) {
unsigned char Char = 0;
fd_set ReadSetFD;
void OutputStdChar(FILE *File) {
char Buffer[10];
int Len = sprintf(Buffer, OutputHex ? "%.2X " : "%c", Char);
fwrite(Buffer, 1, Len, File);
}
第 - 196 - 页](https://image.slidesharecdn.com/mini6410umchinese-101013074457-phpapp01/85/Mini6410-um-chinese-196-320.jpg)

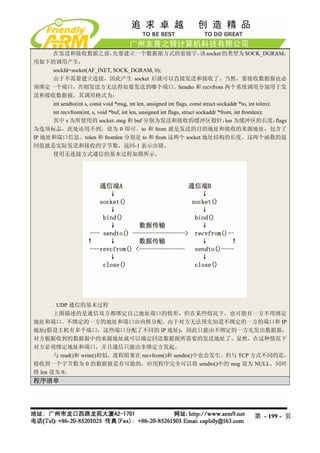
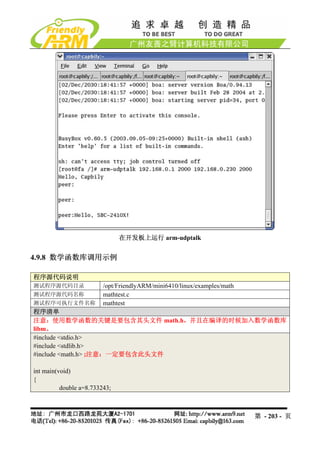
![/*
* udptalk :Example for Matrix V ;说明:本程序同样适用于 mini2440
*
* Copyright (C) 2004 capbily - friendly-arm
* capbily@hotmail.com
*/
#include <sys/types.h>
#include <sys/socket.h>
#include <arpa/inet.h>
#include <stdio.h>
#define BUFLEN 255
int main(int argc, char **argv)
{
struct sockaddr_in peeraddr, /*存放谈话对方 IP 和端口的 socket 地址*/
localaddr;/*本端 socket 地址*/
int sockfd;
char recmsg[BUFLEN+1];
int socklen, n;
if(argc!=5){
printf("%s <dest IP address> <dest port> <source IP address> <source port>n",
argv[0]);
exit(0);
}
sockfd = socket(AF_INET, SOCK_DGRAM, 0);
if(sockfd<0){
printf("socket creating err in udptalkn");
exit(1);
}
socklen = sizeof(struct sockaddr_in);
memset(&peeraddr, 0, socklen);
peeraddr.sin_family=AF_INET;
peeraddr.sin_port=htons(atoi(argv[2]));
if(inet_pton(AF_INET, argv[1], &peeraddr.sin_addr)<=0){
printf("Wrong dest IP address!n");
exit(0);
}
第 - 200 - 页](https://image.slidesharecdn.com/mini6410umchinese-101013074457-phpapp01/85/Mini6410-um-chinese-200-320.jpg)
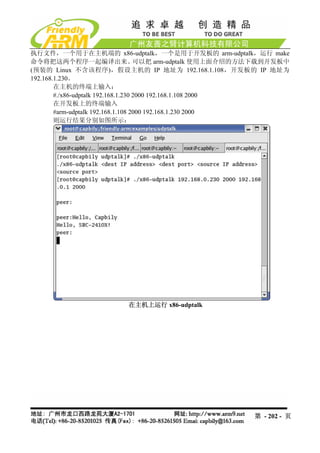
![memset(&localaddr, 0, socklen);
localaddr.sin_family=AF_INET;
if(inet_pton(AF_INET, argv[3], &localaddr.sin_addr)<=0){
printf("Wrong source IP address!n");
exit(0);
}
localaddr.sin_port=htons(atoi(argv[4]));
if(bind(sockfd, &localaddr, socklen)<0){
printf("bind local address err in udptalk!n");
exit(2);
}
if(fgets(recmsg, BUFLEN, stdin) == NULL) exit(0);
if(sendto(sockfd, recmsg, strlen(recmsg), 0, &peeraddr, socklen)<0){
printf("sendto err in udptalk!n");
exit(3);
}
for(;;){
/*recv&send message loop*/
n = recvfrom(sockfd, recmsg, BUFLEN, 0, &peeraddr, &socklen);
if(n<0){
printf("recvfrom err in udptalk!n");
exit(4);
}else{
/*成功接收到数据报*/
recmsg[n]=0;
printf("peer:%s", recmsg);
}
if(fgets(recmsg, BUFLEN, stdin) == NULL) exit(0);
if(sendto(sockfd, recmsg, strlen(recmsg), 0, &peeraddr, socklen)<0){
printf("sendto err in udptalk!n");
exit(3);
}
}
}
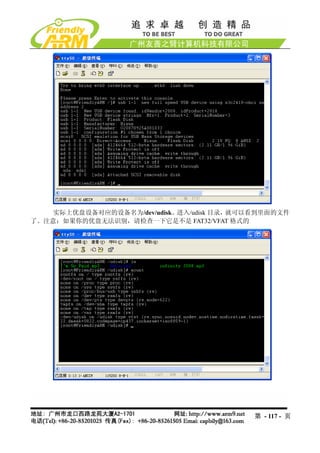
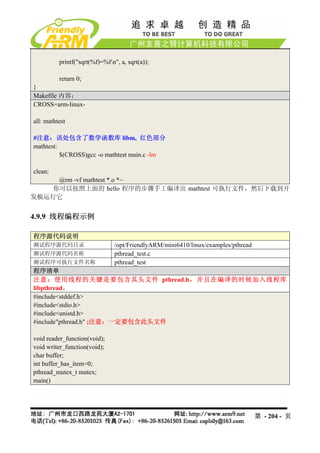
测试
将 udptalk.c 编 译 好 后 就 可 以 运 行 了 ,
/opt/FriendlyARM/mini6410/linux/examples/udptalk 目录下的 Makefile 指定了两个编译目标可
第 - 201 - 页](https://image.slidesharecdn.com/mini6410umchinese-101013074457-phpapp01/85/Mini6410-um-chinese-201-320.jpg)
![if (ret < 0) {
perror("select");
exit(1);
}
if (ret == 0) {
push_leds();
} else if (FD_ISSET(led_control_pipe, &rds)) {
static char buffer[200];
for (;;) {
char c;
int len = strlen(buffer);
if (len >= sizeof buffer - 1) {
memset(buffer, 0, sizeof buffer);
break;
}
if (read(led_control_pipe, &c, 1) != 1) {
break;
}
if (c == 'r') {
continue;
}
if (c == 'n') {
int tmp_type;
double tmp_period;
if (sscanf(buffer,"%d%lf", &tmp_type, &tmp_period) == 2) {
type = tmp_type;
period = tmp_period;
}
fprintf(stderr, "type is %d, period is %lfn", type, period);
memset(buffer, 0, sizeof buffer);
break;
}
buffer[len] = c;
}
}
}
close(led_fd);
return 0;
}
第 - 209 - 页](https://image.slidesharecdn.com/mini6410umchinese-101013074457-phpapp01/85/Mini6410-um-chinese-209-320.jpg)
![echo
/bin/cat led-result.template
exit 0
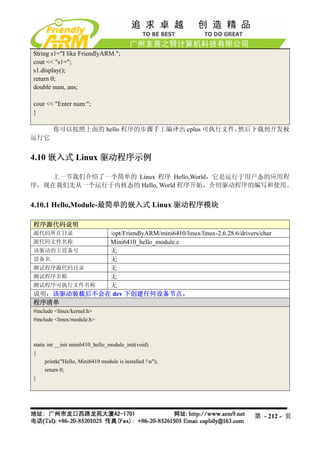
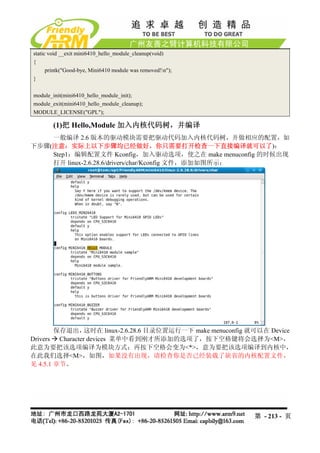
4.9.11 基于 C++的 Hello,World
程序源代码说明
测试程序源代码目录 /opt/FriendlyARM/mini6410/linux/examples/c++
测试程序源代码名称 cplus.c++
测试程序可执行文件名称 cplus
程序清单
#include <iostream>
#include <cstring>
using namespace std;
class String
{
private:
char *str;
public:
String(char *s)
{
int lenght=strlen(s);
str = new char[lenght+1];
strcpy(str, s);
}
~String()
{
cout << "Deleting str.n";
delete[] str;
}
void display()
{
cout << str <<endl;
}
};
int main(void)
{
第 - 211 - 页](https://image.slidesharecdn.com/mini6410umchinese-101013074457-phpapp01/85/Mini6410-um-chinese-211-320.jpg)
![char *name;
};
static struct button_irq_desc button_irqs [] = {
{IRQ_EINT( 0), 0, "KEY0"},
{IRQ_EINT( 1), 1, "KEY1"},
{IRQ_EINT( 2), 2, "KEY2"},
{IRQ_EINT( 3), 3, "KEY3"},
{IRQ_EINT( 4), 4, "KEY4"},
{IRQ_EINT( 5), 5, "KEY5"},
{IRQ_EINT(19), 6, "KEY6"},
{IRQ_EINT(20), 7, "KEY7"},
};
static volatile char key_values [] = {'0', '0', '0', '0', '0', '0', '0', '0'};
static DECLARE_WAIT_QUEUE_HEAD(button_waitq);
static volatile int ev_press = 0;
static irqreturn_t buttons_interrupt(int irq, void *dev_id)
{
struct button_irq_desc *button_irqs = (struct button_irq_desc *)dev_id;
int down;
int number;
unsigned tmp;
udelay(0);
number = button_irqs->number;
switch(number) {
case 0: case 1: case 2: case 3: case 4: case 5:
tmp = readl(S3C64XX_GPNDAT);
down = !(tmp & (1<<number));
break;
case 6: case 7:
tmp = readl(S3C64XX_GPLDAT);
down = !(tmp & (1 << (number + 5)));
break;
default:
down = 0;
第 - 222 - 页](https://image.slidesharecdn.com/mini6410umchinese-101013074457-phpapp01/85/Mini6410-um-chinese-222-320.jpg)
![}
if (down != (key_values[number] & 1)) {
key_values[number] = '0' + down;
ev_press = 1;
wake_up_interruptible(&button_waitq);
}
return IRQ_RETVAL(IRQ_HANDLED);
}
static int s3c64xx_buttons_open(struct inode *inode, struct file *file)
{
int i;
int err = 0;
for (i = 0; i < sizeof(button_irqs)/sizeof(button_irqs[0]); i++) {
if (button_irqs[i].irq < 0) {
continue;
}
err = request_irq(button_irqs[i].irq, buttons_interrupt, IRQ_TYPE_EDGE_BOTH,
button_irqs[i].name, (void *)&button_irqs[i]);
if (err)
break;
}
if (err) {
i--;
for (; i >= 0; i--) {
if (button_irqs[i].irq < 0) {
continue;
}
disable_irq(button_irqs[i].irq);
free_irq(button_irqs[i].irq, (void *)&button_irqs[i]);
}
return -EBUSY;
}
第 - 223 - 页](https://image.slidesharecdn.com/mini6410umchinese-101013074457-phpapp01/85/Mini6410-um-chinese-223-320.jpg)
![ev_press = 1;
return 0;
}
static int s3c64xx_buttons_close(struct inode *inode, struct file *file)
{
int i;
for (i = 0; i < sizeof(button_irqs)/sizeof(button_irqs[0]); i++) {
if (button_irqs[i].irq < 0) {
continue;
}
free_irq(button_irqs[i].irq, (void *)&button_irqs[i]);
}
return 0;
}
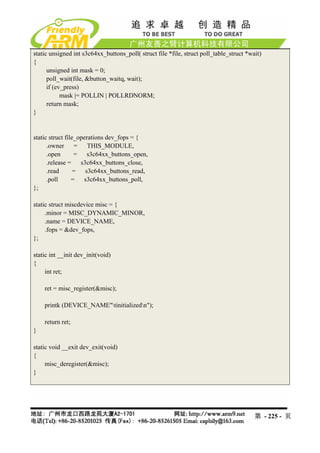
static int s3c64xx_buttons_read(struct file *filp, char __user *buff, size_t count, loff_t *offp)
{
unsigned long err;
if (!ev_press) {
if (filp->f_flags & O_NONBLOCK)
return -EAGAIN;
else
wait_event_interruptible(button_waitq, ev_press);
}
ev_press = 0;
err = copy_to_user((void *)buff, (const void *)(&key_values), min(sizeof(key_values),
count));
return err ? -EFAULT : min(sizeof(key_values), count);
}
第 - 224 - 页](https://image.slidesharecdn.com/mini6410umchinese-101013074457-phpapp01/85/Mini6410-um-chinese-224-320.jpg)