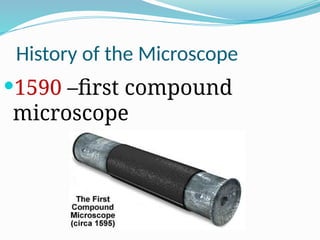
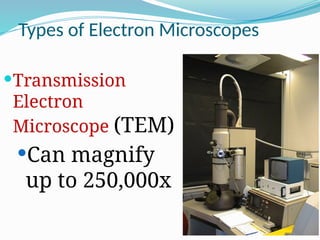
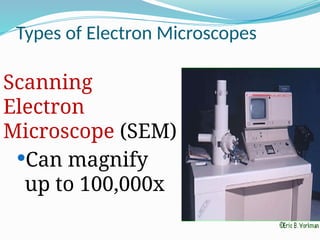
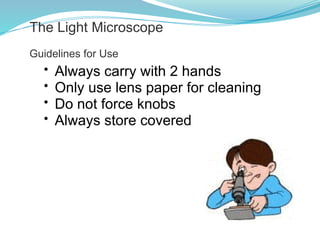
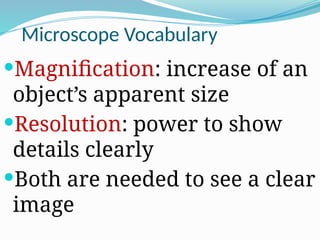
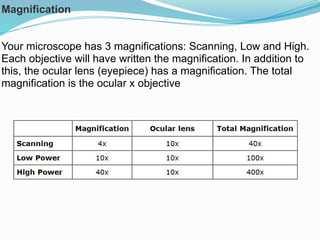
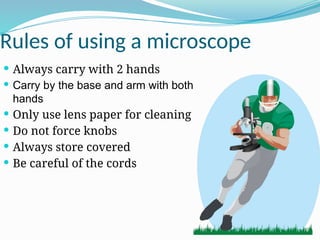
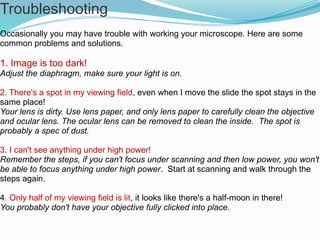
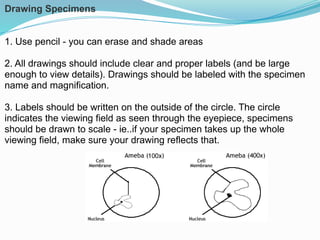
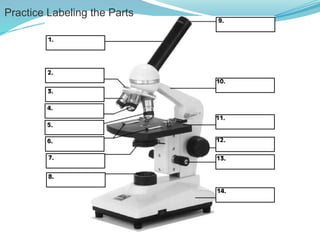
NAME;-DR ABDUL SAMAD
KHAN
DESIGNATION;-SENIOR LECTURER
DEPARTMENT;-PHYSIOLOGY
E-MAIL;-
abdulsamad.2318@duhs.edu.pk
niseaday@yahoo.com
Cell No:-03343859565
Microscopes
DR ABDUL SAMAD KHAN
SENIOR LECTURER-DIKIOS
DOW UNIVERSITY OF HEALTH SCIENCES.
History of the Microscope
1590 –first compound
microscope
History of the Microscope
1655 – Robert Hooke
used a compound
microscope to
observe pores in
cork.
 He called them
“cells”
History of the Microscope
Antoine van
Leeuwenhoek
1st
to see single-celled
organisms in pond water
Types of Microscopes
1. Compound Light
Microscope
1st
type of microscope, most
widely used
light passes through 2
lenses
Can magnify up to 2000x
Types of Microscopes
2. Electron Microscope
Used to observe VERY small
objects: viruses, DNA, parts
of cells
Uses beams of electrons
rather than light
Much more powerful
Types of Electron Microscopes
Transmission
Electron
Microscope (TEM)
Can magnify
up to 250,000x
Types of Electron Microscopes
Scanning
Electron
Microscope (SEM)
Can magnify
up to 100,000x
• Always carry with 2 hands
• Only use lens paper for cleaning
• Do not force knobs
• Always store covered
The Light Microscope
Guidelines for Use
Microscope Vocabulary
Magnification: increase of an
object’s apparent size
Resolution: power to show
details clearly
Both are needed to see a clear
image
Magnification
Your microscope has 3 magnifications: Scanning, Low and High.
Each objective will have written the magnification. In addition to
this, the ocular lens (eyepiece) has a magnification. The total
magnification is the ocular x objective
Rules of using a microscope
 Always carry with 2 hands
 Carry by the base and arm with both
hands
 Only use lens paper for cleaning
 Do not force knobs
 Always store covered
 Be careful of the cords
How to use a microscope
 Place the slide on the stage
 Use stage clips to secure slide
 Adjust nosepiece to lowest setting
 (Lowest = shortest objective)
 Look into eyepiece
 Use coarse focus knob
Focusing Specimens
1. Always start with the Scanning Objective.
2. Place your specimen in the center of your field of view.
3. Use the Coarse Knob to focus.
4. Next, use the Fine knob until clear.
5. Once you've focused on Scanning, switch to Low Power.
6. Repeat steps 3-4.
7. Now, switch to High Power.
8. At this point, ONLY use the ____ ___________ _____
to focus specimens.
Fine Adjustment Knob
Eyepiece
Body Tube
Revolving Nosepiece
Arm
Objective Lens
Stage
Stage Clips
Coarse Focus
Fine Focus
Base
Diaphragm
Light
Parts of a microscope
 Eyepiece
Parts of a microscope
 Body tube
Parts of a microscope
 Nosepiece
Parts of a microscope
 Objectives
 Low power (short)
 High power (long)
Parts of a microscope
 Arm
Parts of a microscope
 Stage
Parts of a microscope
 Stage clips
Parts of a microscope
 Diaphragm
Parts of a microscope
 Coarse and fine
adjustment knobs
Parts of a microscope
 Light source
Parts of a microscope
 Base
Magnification
 Multiply the eyepiece magnification (10X) by the
objective magnification (4X, 10X, 40X)
 Example: 4 x 10 = 40X total
How to use a microscope
Place the slide on the stage
Use stage clips to secure slide
Adjust nosepiece to lowest setting
(Lowest = shortest objective)
Look into eyepiece
Use coarse focus knob
Cleanup
1. Store microscopes with the scanning objective in
place.
2. Wrap cords and cover microscopes.
*Double check to make sure you didn't
leave a slide
3. Place microscopes in their designated location
(probably a cabinet)
Troubleshooting
Occasionally you may have trouble with working your microscope. Here are some
common problems and solutions.
1. Image is too dark!
Adjust the diaphragm, make sure your light is on.
2. There's a spot in my viewing field, even when I move the slide the spot stays in the
same place!
Your lens is dirty. Use lens paper, and only lens paper to carefully clean the objective
and ocular lens. The ocular lens can be removed to clean the inside. The spot is
probably a spec of dust.
3. I can't see anything under high power!
Remember the steps, if you can't focus under scanning and then low power, you won't
be able to focus anything under high power. Start at scanning and walk through the
steps again.
4. Only half of my viewing field is lit, it looks like there's a half-moon in there!
You probably don't have your objective fully clicked into place..
Drawing Specimens
1. Use pencil - you can erase and shade areas
2. All drawings should include clear and proper labels (and be large
enough to view details). Drawings should be labeled with the specimen
name and magnification.
3. Labels should be written on the outside of the circle. The circle
indicates the viewing field as seen through the eyepiece, specimens
should be drawn to scale - ie..if your specimen takes up the whole
viewing field, make sure your drawing reflects that.
Practice Labeling the Parts

Microscope and Features of Its Essential Components.pptx

  • 1.
    NAME;-DR ABDUL SAMAD KHAN DESIGNATION;-SENIORLECTURER DEPARTMENT;-PHYSIOLOGY E-MAIL;- abdulsamad.2318@duhs.edu.pk niseaday@yahoo.com Cell No:-03343859565
  • 2.
    Microscopes DR ABDUL SAMADKHAN SENIOR LECTURER-DIKIOS DOW UNIVERSITY OF HEALTH SCIENCES.
  • 3.
    History of theMicroscope 1590 –first compound microscope
  • 4.
    History of theMicroscope 1655 – Robert Hooke used a compound microscope to observe pores in cork.  He called them “cells”
  • 5.
    History of theMicroscope Antoine van Leeuwenhoek 1st to see single-celled organisms in pond water
  • 6.
    Types of Microscopes 1.Compound Light Microscope 1st type of microscope, most widely used light passes through 2 lenses Can magnify up to 2000x
  • 7.
    Types of Microscopes 2.Electron Microscope Used to observe VERY small objects: viruses, DNA, parts of cells Uses beams of electrons rather than light Much more powerful
  • 8.
    Types of ElectronMicroscopes Transmission Electron Microscope (TEM) Can magnify up to 250,000x
  • 9.
    Types of ElectronMicroscopes Scanning Electron Microscope (SEM) Can magnify up to 100,000x
  • 10.
    • Always carrywith 2 hands • Only use lens paper for cleaning • Do not force knobs • Always store covered The Light Microscope Guidelines for Use
  • 11.
    Microscope Vocabulary Magnification: increaseof an object’s apparent size Resolution: power to show details clearly Both are needed to see a clear image
  • 12.
    Magnification Your microscope has3 magnifications: Scanning, Low and High. Each objective will have written the magnification. In addition to this, the ocular lens (eyepiece) has a magnification. The total magnification is the ocular x objective
  • 13.
    Rules of usinga microscope  Always carry with 2 hands  Carry by the base and arm with both hands  Only use lens paper for cleaning  Do not force knobs  Always store covered  Be careful of the cords
  • 14.
    How to usea microscope  Place the slide on the stage  Use stage clips to secure slide  Adjust nosepiece to lowest setting  (Lowest = shortest objective)  Look into eyepiece  Use coarse focus knob
  • 15.
    Focusing Specimens 1. Alwaysstart with the Scanning Objective. 2. Place your specimen in the center of your field of view. 3. Use the Coarse Knob to focus. 4. Next, use the Fine knob until clear. 5. Once you've focused on Scanning, switch to Low Power. 6. Repeat steps 3-4. 7. Now, switch to High Power. 8. At this point, ONLY use the ____ ___________ _____ to focus specimens. Fine Adjustment Knob
  • 16.
    Eyepiece Body Tube Revolving Nosepiece Arm ObjectiveLens Stage Stage Clips Coarse Focus Fine Focus Base Diaphragm Light
  • 17.
    Parts of amicroscope
  • 18.
    Parts of amicroscope  Eyepiece
  • 19.
    Parts of amicroscope  Body tube
  • 20.
    Parts of amicroscope  Nosepiece
  • 21.
    Parts of amicroscope  Objectives  Low power (short)  High power (long)
  • 22.
    Parts of amicroscope  Arm
  • 23.
    Parts of amicroscope  Stage
  • 24.
    Parts of amicroscope  Stage clips
  • 25.
    Parts of amicroscope  Diaphragm
  • 26.
    Parts of amicroscope  Coarse and fine adjustment knobs
  • 27.
    Parts of amicroscope  Light source
  • 28.
    Parts of amicroscope  Base
  • 29.
    Magnification  Multiply theeyepiece magnification (10X) by the objective magnification (4X, 10X, 40X)  Example: 4 x 10 = 40X total
  • 30.
    How to usea microscope Place the slide on the stage Use stage clips to secure slide Adjust nosepiece to lowest setting (Lowest = shortest objective) Look into eyepiece Use coarse focus knob
  • 31.
    Cleanup 1. Store microscopeswith the scanning objective in place. 2. Wrap cords and cover microscopes. *Double check to make sure you didn't leave a slide 3. Place microscopes in their designated location (probably a cabinet)
  • 32.
    Troubleshooting Occasionally you mayhave trouble with working your microscope. Here are some common problems and solutions. 1. Image is too dark! Adjust the diaphragm, make sure your light is on. 2. There's a spot in my viewing field, even when I move the slide the spot stays in the same place! Your lens is dirty. Use lens paper, and only lens paper to carefully clean the objective and ocular lens. The ocular lens can be removed to clean the inside. The spot is probably a spec of dust. 3. I can't see anything under high power! Remember the steps, if you can't focus under scanning and then low power, you won't be able to focus anything under high power. Start at scanning and walk through the steps again. 4. Only half of my viewing field is lit, it looks like there's a half-moon in there! You probably don't have your objective fully clicked into place..
  • 33.
    Drawing Specimens 1. Usepencil - you can erase and shade areas 2. All drawings should include clear and proper labels (and be large enough to view details). Drawings should be labeled with the specimen name and magnification. 3. Labels should be written on the outside of the circle. The circle indicates the viewing field as seen through the eyepiece, specimens should be drawn to scale - ie..if your specimen takes up the whole viewing field, make sure your drawing reflects that.
  • 34.

Editor's Notes

  • #10 Teacher demonstrates how to hold the microscope, where the lens paper is located and how to use it. Students will be invited to turn the knobs and observe the stage as it moves up and down. Teacher will demonstrate how to store the microscope.
  • #16 This is the microscope used in class. Students will be identifying the parts on the microscopes at their desks as we go along and what their functions are.
  • #17 Contains the lens and magnifies the image for the viewer
  • #18 Contains the lens and magnifies the image for the viewer
  • #19 Tube extending from eyepiece to the objectives
  • #20 Revolving circular structure containing the objectives
  • #21 Lens that receives light from object to form a magnified image that you view through the eyepiece
  • #22 Part of the microscope that is used for carrying
  • #23 Surface on which the slide is placed
  • #24 Used to hold the slide on the stage
  • #25 Controls the amount of light that passes up through the bottom of the stage
  • #26 Used for focusing the microscope at different objectives
  • #27 Provides a steady stream of light that passes up through the bottom of the stage
  • #28 Supports the microscope