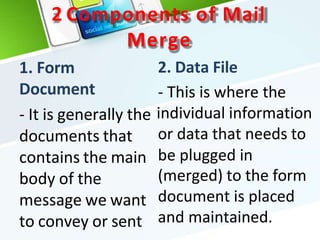
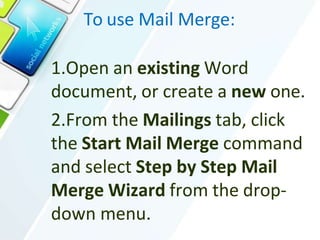
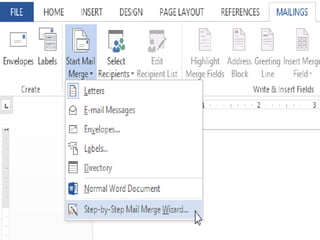
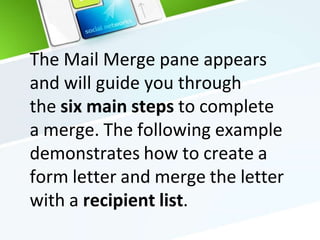
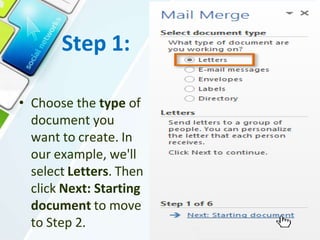
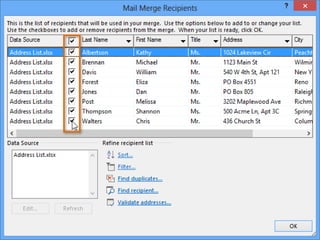
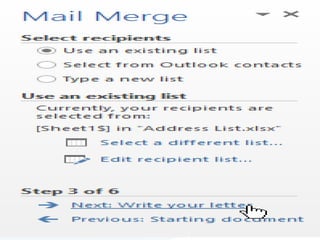
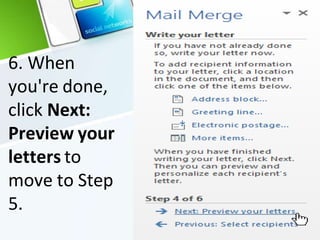
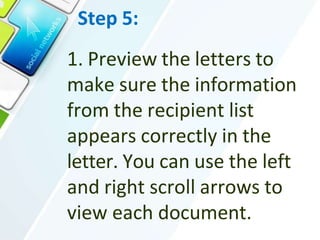
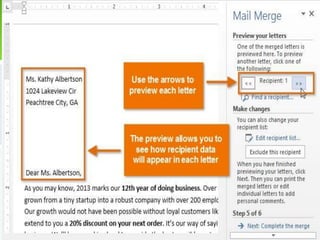
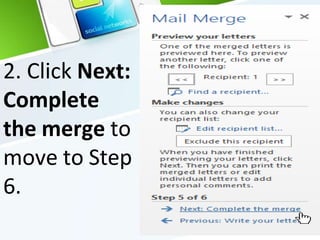
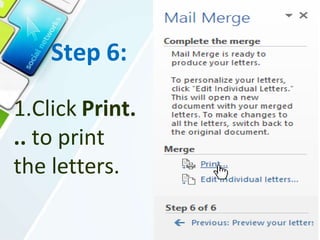
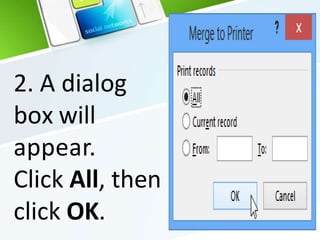
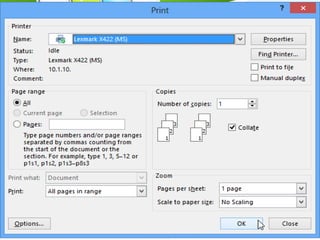
Mail merge
OBJECTIVES
• Introduce Mail Merge
• Discuss the functions of a mail
merge
• Identify the components of a mail
merge
MAIL MERGE
• is a useful tool that allows you
to produce multiple letters,
labels, envelopes, name tags,
and more using information
stored in a list, database, or
spreadsheet.
• The linking of the data source to the
document is done through merged fields.
• The reason why mail merging is considered
productive is because of the ability to send
a letter, label and/or envelope to multiple
persons at once
2 Components of Mail
Merge
1. Form
Document
documents that
body of the
message we want
to convey or sent
2. Data File
- This is where the
- It is generally the individual information
or data that needs to
contains the main be plugged in
(merged) to the form
document is placed
and maintained.
When performing a Mail
Merge, you will need a Word
document (you can start with
an existing one or create a
new one) and a recipient list,
which is typically an Excel
workbook.
To use Mail Merge:
1.Open an existing Word
document, or create a new one.
2.From the Mailings tab, click
the Start Mail Merge command
and select Step by Step Mail
Merge Wizard from the drop-
down menu.
The Mail Merge pane appears
and will guide you through
the six main steps to complete
a merge. The following example
demonstrates how to create a
form letter and merge the letter
with a recipient list.
Step 1:
• Choose the type of
document you
want to create. In
our example, we'll
select Letters. Then
click Next: Starting
document to move
to Step 2.
Step 2:
Select Use the
current
document, then
click Next: Select
recipients to
move to Step 3.
Step 3:
Now you'll need an address list so
Word can automatically place each
address into the document. The list
can be in an existing file, such as
an Excel workbook, or you can type a
new address list from within the Mail
Merge Wizard.
From the Mail
Merge task
pane,
select Use an
existing list,
then
click Browse...
to select the
file.
2.
Locate
your
file and
click
3. If the
address list is
in an Excel
workbook,
select
the worksheet
that contains
the list and
click OK
4. In the Mail Merge
Recipients dialog box, you
can check or uncheck each
box to control which
recipients are included in the
merge. By default, all
recipients should be selected.
When you're done, click OK.
5. From the Mail
Merge task pane,
click Next: Write your
letter to move to Step 4.
If you don't have an existing
address list, you can click
the Type a new list button and
click Create. You can then type
your address list.
Step 4:
• Now you're ready to write your letter.
When it's printed, each copy of the
letter will basically be the same; only
the recipient data (such as
the name and address) will be different.
You'll need to add placeholders for the
recipient data so Mail Merge knows
exactly where to add the data.
To insert recipient data:
1. Place the insertion
point in the document
where you want the
information to appear.
2. Choose one of
the
four placeholder
options: Address
block, Greeting
line, Electronic
postage, or More
items.
3. Depending on your selection,
a dialog box may appear with
various options. Select the
desired options and click OK.
4. A placeholder will appear
in your document (for
example, «AddressBlock»).
5. Repeat these steps each
time you need to enter
information from your data
record. In our example,
we'll add a Greeting line.
6. When
you're done,
click Next:
Preview your
letters to
move to Step
5.
* For some letters, you'll only need
to add an Address
block and Greeting line. Sometimes,
however, you may want to
place recipient data within the body
of the letter to personalize it even
further.
Step 5:
1. Preview the letters to
make sure the information
from the recipient list
appears correctly in the
letter. You can use the left
and right scroll arrows to
view each document.
2. Click Next:
Complete
the merge to
move to Step
6.
Step 6:
1.Click Print.
.. to print
the letters.
2. A dialog
box will
appear.
Click All, then
click OK.
3. The Print dialog box
will appear. Adjust the
print settings if
needed, then click OK.
The letters will be
printed.
mailmerge.pptx

mailmerge.pptx

  • 1.
  • 2.
    OBJECTIVES • Introduce MailMerge • Discuss the functions of a mail merge • Identify the components of a mail merge
  • 3.
    MAIL MERGE • isa useful tool that allows you to produce multiple letters, labels, envelopes, name tags, and more using information stored in a list, database, or spreadsheet.
  • 4.
    • The linkingof the data source to the document is done through merged fields. • The reason why mail merging is considered productive is because of the ability to send a letter, label and/or envelope to multiple persons at once
  • 5.
    2 Components ofMail Merge 1. Form Document documents that body of the message we want to convey or sent 2. Data File - This is where the - It is generally the individual information or data that needs to contains the main be plugged in (merged) to the form document is placed and maintained.
  • 6.
    When performing aMail Merge, you will need a Word document (you can start with an existing one or create a new one) and a recipient list, which is typically an Excel workbook.
  • 7.
    To use MailMerge: 1.Open an existing Word document, or create a new one. 2.From the Mailings tab, click the Start Mail Merge command and select Step by Step Mail Merge Wizard from the drop- down menu.
  • 9.
    The Mail Mergepane appears and will guide you through the six main steps to complete a merge. The following example demonstrates how to create a form letter and merge the letter with a recipient list.
  • 10.
    Step 1: • Choosethe type of document you want to create. In our example, we'll select Letters. Then click Next: Starting document to move to Step 2.
  • 11.
    Step 2: Select Usethe current document, then click Next: Select recipients to move to Step 3.
  • 12.
    Step 3: Now you'llneed an address list so Word can automatically place each address into the document. The list can be in an existing file, such as an Excel workbook, or you can type a new address list from within the Mail Merge Wizard.
  • 13.
    From the Mail Mergetask pane, select Use an existing list, then click Browse... to select the file.
  • 14.
  • 15.
    3. If the addresslist is in an Excel workbook, select the worksheet that contains the list and click OK
  • 16.
    4. In theMail Merge Recipients dialog box, you can check or uncheck each box to control which recipients are included in the merge. By default, all recipients should be selected. When you're done, click OK.
  • 17.
    5. From theMail Merge task pane, click Next: Write your letter to move to Step 4.
  • 18.
    If you don'thave an existing address list, you can click the Type a new list button and click Create. You can then type your address list.
  • 19.
    Step 4: • Nowyou're ready to write your letter. When it's printed, each copy of the letter will basically be the same; only the recipient data (such as the name and address) will be different. You'll need to add placeholders for the recipient data so Mail Merge knows exactly where to add the data.
  • 20.
    To insert recipientdata: 1. Place the insertion point in the document where you want the information to appear.
  • 22.
    2. Choose oneof the four placeholder options: Address block, Greeting line, Electronic postage, or More items.
  • 23.
    3. Depending onyour selection, a dialog box may appear with various options. Select the desired options and click OK.
  • 24.
    4. A placeholderwill appear in your document (for example, «AddressBlock»).
  • 25.
    5. Repeat thesesteps each time you need to enter information from your data record. In our example, we'll add a Greeting line.
  • 26.
    6. When you're done, clickNext: Preview your letters to move to Step 5.
  • 27.
    * For someletters, you'll only need to add an Address block and Greeting line. Sometimes, however, you may want to place recipient data within the body of the letter to personalize it even further.
  • 28.
    Step 5: 1. Previewthe letters to make sure the information from the recipient list appears correctly in the letter. You can use the left and right scroll arrows to view each document.
  • 30.
    2. Click Next: Complete themerge to move to Step 6.
  • 31.
    Step 6: 1.Click Print. ..to print the letters.
  • 32.
    2. A dialog boxwill appear. Click All, then click OK.
  • 33.
    3. The Printdialog box will appear. Adjust the print settings if needed, then click OK. The letters will be printed.