Tokki Soundbox Records Mother's Heartbeat
•
0 likes•213 views

The document provides instructions for using the Lubby Dubby Tokki doll. It includes details on the doll's components, how to record a mother's heartbeat using the included soundbox and microphone, instructions for playback and care, battery information, and limited warranty details. The goal is to help babies sleep by providing the comforting sound of their mother's heartbeat.

Recommended
Recommended
More Related Content
Similar to Tokki Soundbox Records Mother's Heartbeat
Similar to Tokki Soundbox Records Mother's Heartbeat (17)
More from EnableKorea,MoneyQ
More from EnableKorea,MoneyQ (20)
Recently uploaded
Recently uploaded (20)
Tokki Soundbox Records Mother's Heartbeat
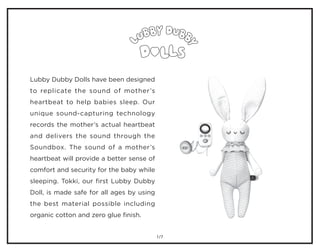
- 1. /7 Lubby Dubby Dolls have been designed to replicate the sound of mother’s heartbeat to help babies sleep. Our unique sound-capturing technology records the mother’s actual heartbeat and delivers the sound through the Soundbox. The sound of a mother’s heartbeat will provide a better sense of comfort and security for the baby while sleeping. Tokki, our first Lubby Dubby Doll, is made safe for all ages by using the best material possible including organic cotton and zero glue finish. 1
- 2. /7 TOKKI THE RABBIT COMPONENTS SPECIFICATION TOKKI The rabbit The Soundbox The Mic *Please read the instruction carefully before using the Lubby Dubby Doll for the first time. Located on the back of Tokki is a hidden pocket to securely place the Soundbox. After recording the mother’s heartbeat, put the Soundbox inside Tokki with the speaker facing out. If you wish to hang Tokki on a crib or elsewhere, you can untie and tie the knot located around Tokki’s neck. Size(inch)&weight(oz) TOKKI: 25.2inch, 6.4oz(average) Soundbox: 1.9(L)x2.6(W)x4.4(H), 7.2oz Mic: O2.4 x 1.4(T), 1.0oz Size(mm)&weight(g) TOKKI: 640mm(H), 180g(average) Soundbox: 48(L)x67(W)x111.7(H), 203g Mic: O60.4 x 35.2(T), 28g Battery 1.5V AA Alkaline battery x 3EA(Max 92 Hours) Power consumption Min 0.15 - Max 0.4W (at 4.5V) Recording time 30 seconds Play function Heartbeat & Melody (auto-loop) Display LED(Button lighting) 2
- 3. /7 SOUNDBOX & The MIC : FUNCTIONS This knob turns the power ON or OFF. A clicking sound should be at the start of ON and at the end of OFF. With the power on, the knob controls the volume. When on, the Soundbox is in default lock mode. With the power on, press to listen to the recorded heartbeat (automatically on loop). Heartbeat must be recorded first to be played. Power & Volume Heartbeat Melody Record Sensor Controller With the power on, press the button to play three prerecorded melodies on loop. Press again for next melody. The three melodies are: lullaby 1, lullaby 2 and white noise. To record, the Soundbox must be unlocked first. Then press this button to start recording. Pressing during recording will cancel recording. When connected to Soundbox, turn the controller to the desired recording volume of the Mic. Turning clockwise is volume up, counter- clockwise is down. A C DB E 3 +
- 4. /7 Find a quiet place. Connect and turn on. Ready? Press for 2 seconds. To cancel, press during recording. Press to listen to recording. If ok, turn off and disconnect. Look for your heartbeat. Unlock the soundbox. Adjust volume of recording. If not ok, unlock and re-record. & & 3 seconds. Volume Max - + 3 seconds. Wait. Slow blinking = Default lock Lit =Unlocked Flickering =Recording STEP 1. PREP STEP 2. FIND & TEST STEP 3. RECORD STEP 4. CHECK 1 1 3 1 1 2 2 4 2 2 3 3 E RECORDING: EASY STEPS 4
- 5. /7 STEP 1. PREP: STEP 3. RECORD (but calibrating first): UNLOCK: NAP/BED TIME: Place the Mic head on your left chest (directly on your skin) and find your heartbeat to record through the connected Soundbox. Move the Mic slowly across the chest and find the best quality heartbeat sound. Also adjust the recording level of the Mic with the ⓔ Sensor controller to obtain the best sound. Medium is the recommended level. If the heartbeat sounds faint, turn the level up; if there is excessive white noise, static or crackling noise, turn the level down. Some amount of white noise is completely normal and actually familiar to your baby. Press the ⓒ Heartbeat play button to listen to the recorded heartbeat which will be on auto-loop with smooth transition. Adjust the volume to listen to the recording. Place your ear close to the speaker to listen up close. Hearing some white noise is absolutely normal. Babies are used to hearing mother’s heartbeat with white noise. If you are happy with your recording, turn off the power and disconnect the Mic cable from the Soundbox. If unhappy, unlock the Soundbox and record your heartbeat again. STEP 2. FIND & TEST: STEP 4. CHECK: Find a quiet place to start recording. Connect the Mic cable to the Soundbox and turn on the power with the ⓐ Power knob by turning it clockwise at maximum volume. When on, the Soundbox is on default lock mode and will only be able to play the three melodies and the recorded heartbeat, if any. LED will blink slowly. Press buttons ⓒ and ⓓ together for 3 seconds to unlock the Soundbox to enable recording. LED will light up. Now the Soundbox will immediately play the sound currently being captured from the Mic. Adjust the speaker volume by turning the knob. Recording will take 30 seconds; please do not move or talk during the recording for optimum results. When ready, press the ⓓ Record button for 2 second to begin; the LED should start flickering and the Soundbox will go silent momentarily. This means the Mic is calibrating the beating heart. When calibration is over, the Soundbox will automatically start recording the heartbeat and then after 30 seconds immediately go into default lock mode to safeguard the recording. To cancel, press ⓓ during recording. Once the recording is completed and the default lock mode is enabled, the LED will blink slowly. To record the heartbeat, Soundbox must be unlocked first. Press buttons ⓒ and ⓓ together for 3 seconds. The ⓓ Record button will light up. Proceed with recording. Turn the power on, adjust the volume with the knob, and place the Soundbox, with speaker facing out, inside Tokki. ① ① ③ ③ ③ ④ ② ② ① ① ① ① ② ② TIPS & NOTES: • Long hair or clothing near the Mic may be reasons for crackling noise. • There is no need to press the Mic too firmly against the skin. It suffices to place it lightly onto the skin. • Having much static or crackling noise in the recording may use up more battery life. • T o p r e v e n t p o s s i b l e i n j u r y b y entanglement, keep the Mic in a safe place when not in use and away from children’s reach. Failure to comply may expose children to injury. • Always connect and disconnect the Mic with the power off. This is to protect the Soundbox and its speaker. • Ensure that the Mic is firmly connected to the Soundbox when recording. Crackling noises may result from improper connection. • You are recording this for the baby. Record in a comfortable position and with happy thoughts! DETAILED INSTRUCTIONS: SOUNDBOX 5
- 6. /7 BATTERIES Battery Installation Battery Warning (Requires 1.5v AA x3 Alkaline batteries and a screw driver) ① Before changing batteries, ensure that the power is off. ② Open the battery cover on the back of the Soundbox using a screw driver to loosen the screw. (Be careful not to lose the screw!) ③ Remove old batteries, if any, and install three 1.5v AA batteries (please check the polarity for proper installation.) ④ Replace the battery cover and refasten the cover with the screw to secure the battery box. ⑤ Dispose of batteries properly. • Turn off the power when not in use. • Use alkaline batteries, and do not use rechargeable batteries. • Do not mix different types of batteries: alkaline, standard (carbonzinc) or rechargeable (Ni-Cd, Ni- MH). • Do not mix new and used batteries. • Do not use damaged batteries. • Install batteries with the correct polarity. • Do not short-circuit the battery terminals. • Remove batteries during long periods of non-use. • Remove exhausted batteries and dispose accordingly. • Do not dispose of batteries in fire. • Do not charge non-rechargeable batteries. • Misusage of a battery may cause overheating or rupture. • If lachrymal fluid oozes out, do not touch the fluid with hands. • Upon physical contact with the fluid from the battery, consult a doctor immediately. 6 + + +
- 7. /7 User Guidelines ① Keep mechanical units (Soundbox and Mic) dry and free from liquid. ② Keep mechanical units out of direct sunlight and heat source. ③ Do not try to disassemble the mechanical units. ④ Do not place the mechanical units under heavy weight (including when inside Tokki). ⑤ Do not drop or crash the mechanical units (including when inside Tokki). ⑥ Physical damage on the Soundbox or the Mic may cause the device to stop or malfunction. ⑦ The sound quality of the heartbeat may change due to lack of battery power. Change the batteries to resolve such issue. ⑧ After recording the heartbeat, please keep the Mic and the instruction manuals in a safe place and away from children’s reach. Failure to comply may expose children to strangling. Washing - Please remove the Soundbox from Tokki prior to washing Tokki. - Please hand wash your Tokki using neutral detergent. After washing, lay Tokki flat to dry to help preserve the doll’s shape. WARNING: All packing materials which are not part of this toy should be discarded for your child’s safety. NOTE: Please keep the user’s manual as it contains important information. ATTENTION: To be used under the direct supervision of an adult. Limited Warranty This Warranty is applicable only to the original purchaser of Lubby Dubby Dolls and is non-transferable. This product is covered by a 6-month Warranty from the original purchase date, under normal use and service, against defective workmanship and materials. This warranty does not apply to following: Protect the environment by not disposing of this product with household waste (2012/19/EU). Check your local authority for recycling advice and facilities. a) Consumable parts, such as batteries b) Cosmetic damage, including but not limited to scratches and dents c) Damage caused by use with non-BEBE&BEBE produced part d) Damage caused by accident, misuse, unreasonable use, immersion in water, neglect, abuse, battery leakage, or improper installation, improper service, or other external causes e) Damage caused by operating the product outside the permitted or intended uses described in the owner’s manual f ) A product or part that has been modified and/or disassembled. g) Defects caused by normal wear and tear or otherwise due to the normal aging of the product h) If any serial number has been removed or defaced i ) Lost or stolen items/parts. Proof of purchase is required for warranty service. BEBE&BEBE Inc. reserves the right to provide repair or replacement components for infant and toddler products at its discretion. DO NOT return the product to the store or to BEBE&BEBE before discussing it with our Customer Service Department. Warranty claims must be made by contacting Lubby Dubby Dolls Customer Service. For fast and friendly service, e-mail us at service@bebenbebe.com If you have a problem with your product, and if the problem is covered under this warranty, service will be provided free of charge. However, it does not cover the cost of shipping or handling. If the problem is not covered by this warranty, the consumer must pay for all related expenses associated with the services rendered. BEBE&BEBE’s obligation under this warranty is limited to the repair or replacement of defective parts as is deemed necessary and as covered under this warranty. During the limited warranty period, product components such as parts, accessories or fabrics, may be discontinued or modified. This may result in replacement or repaired parts different from purchased model. We reserve the right to improve the design of any product without assuming any obligation to modify any product previously manufactured. This warranty is valid only in the original country of purchase. BEBE&BEBE will not ship replacement or repair parts out of country of purchase. 7