This document provides an introduction to Linux fundamentals. It covers Linux history and distributions, licensing, installing Linux in a virtual machine, navigating the command line, files and directories, shell expansion and variables, pipes and filters, vi text editor basics, scripting, and local user management. The document is intended to be used for instructor-led Linux training and includes exercises and solutions.


![Linux Fundamentals
vi
12.12. unbound variables ......................................................................................... 99
12.13. practice: shell variables ................................................................................ 100
12.14. solution: shell variables ................................................................................ 101
13. shell embedding and options ................................................................................... 102
13.1. shell embedding ............................................................................................ 103
13.2. shell options ................................................................................................ 104
13.3. practice: shell embedding ............................................................................... 105
13.4. solution: shell embedding ............................................................................... 106
14. shell history ........................................................................................................... 107
14.1. repeating the last command ............................................................................ 108
14.2. repeating other commands .............................................................................. 108
14.3. history ........................................................................................................ 108
14.4. !n ............................................................................................................... 108
14.5. Ctrl-r .......................................................................................................... 109
14.6. $HISTSIZE .................................................................................................. 109
14.7. $HISTFILE .................................................................................................. 109
14.8. $HISTFILESIZE ........................................................................................... 109
14.9. (optional)regular expressions ........................................................................... 110
14.10. (optional)repeating commands in ksh .............................................................. 110
14.11. practice: shell history ................................................................................... 111
14.12. solution: shell history ................................................................................... 112
15. file globbing .......................................................................................................... 113
15.1. * asterisk ..................................................................................................... 114
15.2. ? question mark ............................................................................................ 114
15.3. [] square brackets .......................................................................................... 115
15.4. a-z and 0-9 ranges ........................................................................................ 116
15.5. $LANG and square brackets ........................................................................... 116
15.6. preventing file globbing ................................................................................. 117
15.7. practice: shell globbing .................................................................................. 118
15.8. solution: shell globbing .................................................................................. 119
IV. pipes and commands ........................................................................................................ 121
16. I/O redirection ....................................................................................................... 123
16.1. stdin, stdout, and stderr .................................................................................. 124
16.2. output redirection .......................................................................................... 125
16.3. error redirection ............................................................................................ 127
16.4. output redirection and pipes ............................................................................ 128
16.5. joining stdout and stderr ................................................................................. 128
16.6. input redirection ........................................................................................... 129
16.7. confusing redirection ..................................................................................... 130
16.8. quick file clear ............................................................................................. 130
16.9. practice: input/output redirection ...................................................................... 131
16.10. solution: input/output redirection .................................................................... 132
17. filters .................................................................................................................... 133
17.1. cat .............................................................................................................. 134
17.2. tee .............................................................................................................. 134
17.3. grep ............................................................................................................ 134
17.4. cut .............................................................................................................. 136
17.5. tr ................................................................................................................ 136
17.6. wc .............................................................................................................. 137
17.7. sort ............................................................................................................. 138
17.8. uniq ............................................................................................................ 139
17.9. comm ......................................................................................................... 140
17.10. od ............................................................................................................. 141
17.11. sed ............................................................................................................ 142
17.12. pipe examples ............................................................................................. 143
17.13. practice: filters ............................................................................................ 144
17.14. solution: filters ............................................................................................ 145
18. basic Unix tools ..................................................................................................... 147](https://image.slidesharecdn.com/linuxfun-140715051047-phpapp01/85/Linux-fun-6-320.jpg)
![Linux Fundamentals
vii
18.1. find ............................................................................................................ 148
18.2. locate .......................................................................................................... 149
18.3. date ............................................................................................................ 149
18.4. cal .............................................................................................................. 150
18.5. sleep ........................................................................................................... 150
18.6. time ............................................................................................................ 151
18.7. gzip - gunzip ................................................................................................ 152
18.8. zcat - zmore ................................................................................................. 152
18.9. bzip2 - bunzip2 ............................................................................................ 153
18.10. bzcat - bzmore ............................................................................................ 153
18.11. practice: basic Unix tools .............................................................................. 154
18.12. solution: basic Unix tools ............................................................................. 155
19. regular expressions ................................................................................................ 157
19.1. regex versions .............................................................................................. 158
19.2. grep ............................................................................................................ 159
19.3. rename ........................................................................................................ 164
19.4. sed ............................................................................................................. 167
19.5. bash history ................................................................................................. 171
V. vi .................................................................................................................................. 172
20. Introduction to vi .................................................................................................. 174
20.1. command mode and insert mode ...................................................................... 175
20.2. start typing (a A i I o O) ................................................................................ 175
20.3. replace and delete a character (r x X) ............................................................... 176
20.4. undo and repeat (u .) ..................................................................................... 176
20.5. cut, copy and paste a line (dd yy p P) ............................................................... 176
20.6. cut, copy and paste lines (3dd 2yy) .................................................................. 177
20.7. start and end of a line (0 or ^ and $) ................................................................ 177
20.8. join two lines (J) and more ............................................................................. 177
20.9. words (w b) ................................................................................................. 178
20.10. save (or not) and exit (:w :q :q! ) .................................................................... 178
20.11. Searching (/ ?) ............................................................................................ 178
20.12. replace all ( :1,$ s/foo/bar/g ) ......................................................................... 179
20.13. reading files (:r :r !cmd) ................................................................................ 179
20.14. text buffers ................................................................................................ 179
20.15. multiple files .............................................................................................. 179
20.16. abbreviations .............................................................................................. 180
20.17. key mappings ............................................................................................. 181
20.18. setting options ............................................................................................ 181
20.19. practice: vi(m) ............................................................................................ 182
20.20. solution: vi(m) ............................................................................................ 183
VI. scripting ........................................................................................................................ 184
21. scripting introduction ............................................................................................. 186
21.1. prerequisites ................................................................................................. 187
21.2. hello world .................................................................................................. 187
21.3. she-bang ...................................................................................................... 187
21.4. comment ..................................................................................................... 188
21.5. variables ...................................................................................................... 188
21.6. sourcing a script ........................................................................................... 188
21.7. troubleshooting a script .................................................................................. 189
21.8. prevent setuid root spoofing ............................................................................ 189
21.9. practice: introduction to scripting ..................................................................... 190
21.10. solution: introduction to scripting ................................................................... 191
22. scripting loops ....................................................................................................... 192
22.1. test [ ] ......................................................................................................... 193
22.2. if then else .................................................................................................. 194
22.3. if then elif ................................................................................................... 194
22.4. for loop ....................................................................................................... 194
22.5. while loop ................................................................................................... 195](https://image.slidesharecdn.com/linuxfun-140715051047-phpapp01/85/Linux-fun-7-320.jpg)


![man pages
26
paul@laika:~$ whereis -m whois
whois: /usr/share/man/man1/whois.1.gz
This file is directly readable by man.
paul@laika:~$ man /usr/share/man/man1/whois.1.gz
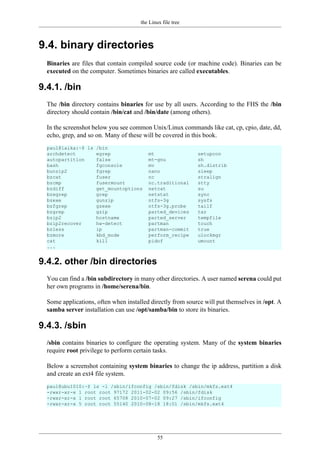
5.7. man sections
By now you will have noticed the numbers between the round brackets. man man will
explain to you that these are section numbers. Executable programs and shell commands
reside in section one.
1 Executable programs or shell commands
2 System calls (functions provided by the kernel)
3 Library calls (functions within program libraries)
4 Special files (usually found in /dev)
5 File formats and conventions eg /etc/passwd
6 Games
7 Miscellaneous (including macro packages and conventions), e.g. man(7)
8 System administration commands (usually only for root)
9 Kernel routines [Non standard]
5.8. man $section $file
Therefor, when referring to the man page of the passwd command, you will see it written
as passwd(1); when referring to the passwd file, you will see it written as passwd(5). The
screenshot explains how to open the man page in the correct section.
[paul@RHEL52 ~]$ man passwd # opens the first manual found
[paul@RHEL52 ~]$ man 5 passwd # opens a page from section 5
5.9. man man
If you want to know more about man, then Read The Fantastic Manual (RTFM).
Unfortunately, manual pages do not have the answer to everything...
paul@laika:~$ man woman
No manual entry for woman
5.10. mandb
Should you be convinced that a man page exists, but you can't access it, then try running
mandb on Debian/Mint.
root@laika:~# mandb
0 man subdirectories contained newer manual pages.
0 manual pages were added.](https://image.slidesharecdn.com/linuxfun-140715051047-phpapp01/85/Linux-fun-36-320.jpg)
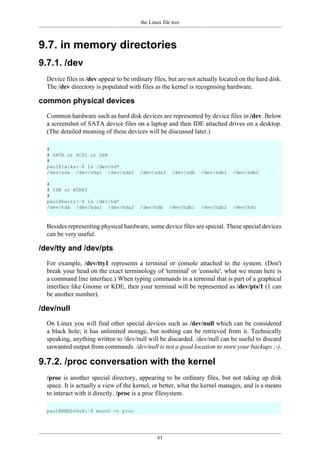
![man pages
27
0 stray cats were added.
0 old database entries were purged.
Or run makewhatis on CentOS/Redhat.
[root@centos65 ~]# apropos scsi
scsi: nothing appropriate
[root@server2 ~]# makewhatis
[root@server2 ~]# apropos scsi
hpsa (4) - HP Smart Array SCSI driver
lsscsi (8) - list SCSI devices (or hosts) and their attributes
sd (4) - Driver for SCSI Disk Drives
st (4) - SCSI tape device](https://image.slidesharecdn.com/linuxfun-140715051047-phpapp01/85/Linux-fun-37-320.jpg)


![working with files
42
paul@laika:~/test$ ls
123.txt ABC.txt
paul@laika:~/test$ rename 's/txt/png/' *.txt
paul@laika:~/test$ ls
123.png ABC.png
paul@laika:~/test$ rename 's/ABC/abc/' *.png
paul@laika:~/test$ ls
123.png abc.png
paul@laika:~/test$
On Red Hat Enterprise Linux (and many other Linux distributions like Ubuntu 8.04), the
syntax of rename is a bit different. The first example below renames all *.conf files replacing
any occurrence of conf with bak. The second example renames all (*) files replacing one
with ONE.
[paul@RHEL4a test]$ ls
one.conf two.conf
[paul@RHEL4a test]$ rename conf bak *.conf
[paul@RHEL4a test]$ ls
one.bak two.bak
[paul@RHEL4a test]$ rename one ONE *
[paul@RHEL4a test]$ ls
ONE.bak two.bak
[paul@RHEL4a test]$](https://image.slidesharecdn.com/linuxfun-140715051047-phpapp01/85/Linux-fun-52-320.jpg)


![the Linux file tree
54
9.1. filesystem hierarchy standard
Many Linux distributions partially follow the Filesystem Hierarchy Standard. The FHS
may help make more Unix/Linux file system trees conform better in the future. The FHS
is available online at http://www.pathname.com/fhs/ where we read: "The filesystem
hierarchy standard has been designed to be used by Unix distribution developers, package
developers, and system implementers. However, it is primarily intended to be a reference
and is not a tutorial on how to manage a Unix filesystem or directory hierarchy."
9.2. man hier
There are some differences in the filesystems between Linux distributions. For help about
your machine, enter man hier to find information about the file system hierarchy. This
manual will explain the directory structure on your computer.
9.3. the root directory /
All Linux systems have a directory structure that starts at the root directory. The root
directory is represented by a forward slash, like this: /. Everything that exists on your Linux
system can be found below this root directory. Let's take a brief look at the contents of the
root directory.
[paul@RHELv4u3 ~]$ ls /
bin dev home media mnt proc sbin srv tftpboot usr
boot etc lib misc opt root selinux sys tmp var](https://image.slidesharecdn.com/linuxfun-140715051047-phpapp01/85/Linux-fun-64-320.jpg)


![the Linux file tree
64
/proc/interrupts
On the x86 architecture, /proc/interrupts displays the interrupts.
paul@RHELv4u4:~$ cat /proc/interrupts
CPU0
0: 13876877 IO-APIC-edge timer
1: 15 IO-APIC-edge i8042
8: 1 IO-APIC-edge rtc
9: 0 IO-APIC-level acpi
12: 67 IO-APIC-edge i8042
14: 128 IO-APIC-edge ide0
15: 124320 IO-APIC-edge ide1
169: 111993 IO-APIC-level ioc0
177: 2428 IO-APIC-level eth0
NMI: 0
LOC: 13878037
ERR: 0
MIS: 0
On a machine with two CPU's, the file looks like this.
paul@laika:~$ cat /proc/interrupts
CPU0 CPU1
0: 860013 0 IO-APIC-edge timer
1: 4533 0 IO-APIC-edge i8042
7: 0 0 IO-APIC-edge parport0
8: 6588227 0 IO-APIC-edge rtc
10: 2314 0 IO-APIC-fasteoi acpi
12: 133 0 IO-APIC-edge i8042
14: 0 0 IO-APIC-edge libata
15: 72269 0 IO-APIC-edge libata
18: 1 0 IO-APIC-fasteoi yenta
19: 115036 0 IO-APIC-fasteoi eth0
20: 126871 0 IO-APIC-fasteoi libata, ohci1394
21: 30204 0 IO-APIC-fasteoi ehci_hcd:usb1, uhci_hcd:usb2
22: 1334 0 IO-APIC-fasteoi saa7133[0], saa7133[0]
24: 234739 0 IO-APIC-fasteoi nvidia
NMI: 72 42
LOC: 860000 859994
ERR: 0
/proc/kcore
The physical memory is represented in /proc/kcore. Do not try to cat this file, instead use a
debugger. The size of /proc/kcore is the same as your physical memory, plus four bytes.
paul@laika:~$ ls -lh /proc/kcore
-r-------- 1 root root 2.0G 2007-01-30 08:57 /proc/kcore
paul@laika:~$](https://image.slidesharecdn.com/linuxfun-140715051047-phpapp01/85/Linux-fun-74-320.jpg)


![the Linux file tree
68
9.9. /var variable data
Files that are unpredictable in size, such as log, cache and spool files, should be located in
/var.
9.9.1. /var/log
The /var/log directory serves as a central point to contain all log files.
[paul@RHEL4b ~]$ ls /var/log
acpid cron.2 maillog.2 quagga secure.4
amanda cron.3 maillog.3 radius spooler
anaconda.log cron.4 maillog.4 rpmpkgs spooler.1
anaconda.syslog cups mailman rpmpkgs.1 spooler.2
anaconda.xlog dmesg messages rpmpkgs.2 spooler.3
audit exim messages.1 rpmpkgs.3 spooler.4
boot.log gdm messages.2 rpmpkgs.4 squid
boot.log.1 httpd messages.3 sa uucp
boot.log.2 iiim messages.4 samba vbox
boot.log.3 iptraf mysqld.log scrollkeeper.log vmware-tools-guestd
boot.log.4 lastlog news secure wtmp
canna mail pgsql secure.1 wtmp.1
cron maillog ppp secure.2 Xorg.0.log
cron.1 maillog.1 prelink.log secure.3 Xorg.0.log.old
9.9.2. /var/log/messages
A typical first file to check when troubleshooting on Red Hat (and derivatives) is the /var/
log/messages file. By default this file will contain information on what just happened to the
system. The file is called /var/log/syslog on Debian and Ubuntu.
[root@RHEL4b ~]# tail /var/log/messages
Jul 30 05:13:56 anacron: anacron startup succeeded
Jul 30 05:13:56 atd: atd startup succeeded
Jul 30 05:13:57 messagebus: messagebus startup succeeded
Jul 30 05:13:57 cups-config-daemon: cups-config-daemon startup succeeded
Jul 30 05:13:58 haldaemon: haldaemon startup succeeded
Jul 30 05:14:00 fstab-sync[3560]: removed all generated mount points
Jul 30 05:14:01 fstab-sync[3628]: added mount point /media/cdrom for...
Jul 30 05:14:01 fstab-sync[3646]: added mount point /media/floppy for...
Jul 30 05:16:46 sshd(pam_unix)[3662]: session opened for user paul by...
Jul 30 06:06:37 su(pam_unix)[3904]: session opened for user root by paul
9.9.3. /var/cache
The /var/cache directory can contain cache data for several applications.
paul@ubu1010:~$ ls /var/cache/
apt dictionaries-common gdm man software-center
binfmts flashplugin-installer hald pm-utils
cups fontconfig jockey pppconfig
debconf fonts ldconfig samba
9.9.4. /var/spool
The /var/spool directory typically contains spool directories for mail and cron, but also
serves as a parent directory for other spool files (for example print spool files).](https://image.slidesharecdn.com/linuxfun-140715051047-phpapp01/85/Linux-fun-78-320.jpg)


![shell expansion
76
15. file globbing .................................................................................................................. 113
15.1. * asterisk ............................................................................................................. 114
15.2. ? question mark .................................................................................................... 114
15.3. [] square brackets .................................................................................................. 115
15.4. a-z and 0-9 ranges ................................................................................................ 116
15.5. $LANG and square brackets ................................................................................... 116
15.6. preventing file globbing ......................................................................................... 117
15.7. practice: shell globbing .......................................................................................... 118
15.8. solution: shell globbing .......................................................................................... 119](https://image.slidesharecdn.com/linuxfun-140715051047-phpapp01/85/Linux-fun-86-320.jpg)

![commands and arguments
78
10.1. arguments
One of the primary features of a shell is to perform a command line scan. When you enter
a command at the shell's command prompt and press the enter key, then the shell will start
scanning that line, cutting it up in arguments. While scanning the line, the shell may make
many changes to the arguments you typed.
This process is called shell expansion. When the shell has finished scanning and modifying
that line, then it will be executed.
10.2. white space removal
Parts that are separated by one or more consecutive white spaces (or tabs) are considered
separate arguments, any white space is removed. The first argument is the command to be
executed, the other arguments are given to the command. The shell effectively cuts your
command into one or more arguments.
This explains why the following four different command lines are the same after shell
expansion.
[paul@RHELv4u3 ~]$ echo Hello World
Hello World
[paul@RHELv4u3 ~]$ echo Hello World
Hello World
[paul@RHELv4u3 ~]$ echo Hello World
Hello World
[paul@RHELv4u3 ~]$ echo Hello World
Hello World
The echo command will display each argument it receives from the shell. The echo
command will also add a new white space between the arguments it received.](https://image.slidesharecdn.com/linuxfun-140715051047-phpapp01/85/Linux-fun-88-320.jpg)
![commands and arguments
79
10.3. single quotes
You can prevent the removal of white spaces by quoting the spaces. The contents of the
quoted string are considered as one argument. In the screenshot below the echo receives
only one argument.
[paul@RHEL4b ~]$ echo 'A line with single quotes'
A line with single quotes
[paul@RHEL4b ~]$
10.4. double quotes
You can also prevent the removal of white spaces by double quoting the spaces. Same as
above, echo only receives one argument.
[paul@RHEL4b ~]$ echo "A line with double quotes"
A line with double quotes
[paul@RHEL4b ~]$
Later in this book, when discussing variables we will see important differences between
single and double quotes.
10.5. echo and quotes
Quoted lines can include special escaped characters recognised by the echo command (when
using echo -e). The screenshot below shows how to use n for a newline and t for a tab
(usually eight white spaces).
[paul@RHEL4b ~]$ echo -e "A line with na newline"
A line with
a newline
[paul@RHEL4b ~]$ echo -e 'A line with na newline'
A line with
a newline
[paul@RHEL4b ~]$ echo -e "A line with ta tab"
A line with a tab
[paul@RHEL4b ~]$ echo -e 'A line with ta tab'
A line with a tab
[paul@RHEL4b ~]$
The echo command can generate more than white spaces, tabs and newlines. Look in the
man page for a list of options.](https://image.slidesharecdn.com/linuxfun-140715051047-phpapp01/85/Linux-fun-89-320.jpg)
![commands and arguments
80
10.6. commands
10.6.1. external or builtin commands ?
Not all commands are external to the shell, some are builtin. External commands are
programs that have their own binary and reside somewhere in the file system. Many external
commands are located in /bin or /sbin. Builtin commands are an integral part of the shell
program itself.
10.6.2. type
To find out whether a command given to the shell will be executed as an external command
or as a builtin command, use the type command.
paul@laika:~$ type cd
cd is a shell builtin
paul@laika:~$ type cat
cat is /bin/cat
As you can see, the cd command is builtin and the cat command is external.
You can also use this command to show you whether the command is aliased or not.
paul@laika:~$ type ls
ls is aliased to `ls --color=auto'
10.6.3. running external commands
Some commands have both builtin and external versions. When one of these commands is
executed, the builtin version takes priority. To run the external version, you must enter the
full path to the command.
paul@laika:~$ type -a echo
echo is a shell builtin
echo is /bin/echo
paul@laika:~$ /bin/echo Running the external echo command...
Running the external echo command...
10.6.4. which
The which command will search for binaries in the $PATH environment variable (variables
will be explained later). In the screenshot below, it is determined that cd is builtin, and ls,
cp, rm, mv, mkdir, pwd, and which are external commands.
[root@RHEL4b ~]# which cp ls cd mkdir pwd
/bin/cp
/bin/ls
/usr/bin/which: no cd in (/usr/kerberos/sbin:/usr/kerberos/bin:...
/bin/mkdir
/bin/pwd](https://image.slidesharecdn.com/linuxfun-140715051047-phpapp01/85/Linux-fun-90-320.jpg)
![commands and arguments
81
10.7. aliases
10.7.1. create an alias
The shell allows you to create aliases. Aliases are often used to create an easier to remember
name for an existing command or to easily supply parameters.
[paul@RHELv4u3 ~]$ cat count.txt
one
two
three
[paul@RHELv4u3 ~]$ alias dog=tac
[paul@RHELv4u3 ~]$ dog count.txt
three
two
one
10.7.2. abbreviate commands
An alias can also be useful to abbreviate an existing command.
paul@laika:~$ alias ll='ls -lh --color=auto'
paul@laika:~$ alias c='clear'
paul@laika:~$
10.7.3. default options
Aliases can be used to supply commands with default options. The example below shows
how to set the -i option default when typing rm.
[paul@RHELv4u3 ~]$ rm -i winter.txt
rm: remove regular file `winter.txt'? no
[paul@RHELv4u3 ~]$ rm winter.txt
[paul@RHELv4u3 ~]$ ls winter.txt
ls: winter.txt: No such file or directory
[paul@RHELv4u3 ~]$ touch winter.txt
[paul@RHELv4u3 ~]$ alias rm='rm -i'
[paul@RHELv4u3 ~]$ rm winter.txt
rm: remove regular empty file `winter.txt'? no
[paul@RHELv4u3 ~]$
Some distributions enable default aliases to protect users from accidentally erasing files ('rm
-i', 'mv -i', 'cp -i')
10.7.4. viewing aliases
You can provide one or more aliases as arguments to the alias command to get their
definitions. Providing no arguments gives a complete list of current aliases.
paul@laika:~$ alias c ll
alias c='clear'
alias ll='ls -lh --color=auto'](https://image.slidesharecdn.com/linuxfun-140715051047-phpapp01/85/Linux-fun-91-320.jpg)
![commands and arguments
82
10.7.5. unalias
You can undo an alias with the unalias command.
[paul@RHEL4b ~]$ which rm
/bin/rm
[paul@RHEL4b ~]$ alias rm='rm -i'
[paul@RHEL4b ~]$ which rm
alias rm='rm -i'
/bin/rm
[paul@RHEL4b ~]$ unalias rm
[paul@RHEL4b ~]$ which rm
/bin/rm
[paul@RHEL4b ~]$
10.8. displaying shell expansion
You can display shell expansion with set -x, and stop displaying it with set +x. You might
want to use this further on in this course, or when in doubt about exactly what the shell is
doing with your command.
[paul@RHELv4u3 ~]$ set -x
++ echo -ne '033]0;paul@RHELv4u3:~007'
[paul@RHELv4u3 ~]$ echo $USER
+ echo paul
paul
++ echo -ne '033]0;paul@RHELv4u3:~007'
[paul@RHELv4u3 ~]$ echo $USER
+ echo '$USER'
$USER
++ echo -ne '033]0;paul@RHELv4u3:~007'
[paul@RHELv4u3 ~]$ set +x
+ set +x
[paul@RHELv4u3 ~]$ echo $USER
paul](https://image.slidesharecdn.com/linuxfun-140715051047-phpapp01/85/Linux-fun-92-320.jpg)


![control operators
88
11.1. ; semicolon
You can put two or more commands on the same line separated by a semicolon ; . The shell
will scan the line until it reaches the semicolon. All the arguments before this semicolon
will be considered a separate command from all the arguments after the semicolon. Both
series will be executed sequentially with the shell waiting for each command to finish before
starting the next one.
[paul@RHELv4u3 ~]$ echo Hello
Hello
[paul@RHELv4u3 ~]$ echo World
World
[paul@RHELv4u3 ~]$ echo Hello ; echo World
Hello
World
[paul@RHELv4u3 ~]$
11.2. & ampersand
When a line ends with an ampersand &, the shell will not wait for the command to finish.
You will get your shell prompt back, and the command is executed in background. You will
get a message when this command has finished executing in background.
[paul@RHELv4u3 ~]$ sleep 20 &
[1] 7925
[paul@RHELv4u3 ~]$
...wait 20 seconds...
[paul@RHELv4u3 ~]$
[1]+ Done sleep 20
The technical explanation of what happens in this case is explained in the chapter about
processes.
11.3. $? dollar question mark
The exit code of the previous command is stored in the shell variable $?. Actually $? is a
shell parameter and not a variable, since you cannot assign a value to $?.
paul@debian5:~/test$ touch file1
paul@debian5:~/test$ echo $?
0
paul@debian5:~/test$ rm file1
paul@debian5:~/test$ echo $?
0
paul@debian5:~/test$ rm file1
rm: cannot remove `file1': No such file or directory
paul@debian5:~/test$ echo $?
1
paul@debian5:~/test$](https://image.slidesharecdn.com/linuxfun-140715051047-phpapp01/85/Linux-fun-98-320.jpg)
![control operators
89
11.4. && double ampersand
The shell will interpret && as a logical AND. When using && the second command is
executed only if the first one succeeds (returns a zero exit status).
paul@barry:~$ echo first && echo second
first
second
paul@barry:~$ zecho first && echo second
-bash: zecho: command not found
Another example of the same logical AND principle. This example starts with a working cd
followed by ls, then a non-working cd which is not followed by ls.
[paul@RHELv4u3 ~]$ cd gen && ls
file1 file3 File55 fileab FileAB fileabc
file2 File4 FileA Fileab fileab2
[paul@RHELv4u3 gen]$ cd gen && ls
-bash: cd: gen: No such file or directory
11.5. || double vertical bar
The || represents a logical OR. The second command is executed only when the first
command fails (returns a non-zero exit status).
paul@barry:~$ echo first || echo second ; echo third
first
third
paul@barry:~$ zecho first || echo second ; echo third
-bash: zecho: command not found
second
third
paul@barry:~$
Another example of the same logical OR principle.
[paul@RHELv4u3 ~]$ cd gen || ls
[paul@RHELv4u3 gen]$ cd gen || ls
-bash: cd: gen: No such file or directory
file1 file3 File55 fileab FileAB fileabc
file2 File4 FileA Fileab fileab2
11.6. combining && and ||
You can use this logical AND and logical OR to write an if-then-else structure on the
command line. This example uses echo to display whether the rm command was successful.
paul@laika:~/test$ rm file1 && echo It worked! || echo It failed!
It worked!
paul@laika:~/test$ rm file1 && echo It worked! || echo It failed!
rm: cannot remove `file1': No such file or directory
It failed!
paul@laika:~/test$](https://image.slidesharecdn.com/linuxfun-140715051047-phpapp01/85/Linux-fun-99-320.jpg)
![control operators
90
11.7. # pound sign
Everything written after a pound sign (#) is ignored by the shell. This is useful to write a
shell comment, but has no influence on the command execution or shell expansion.
paul@debian4:~$ mkdir test # we create a directory
paul@debian4:~$ cd test #### we enter the directory
paul@debian4:~/test$ ls # is it empty ?
paul@debian4:~/test$
11.8. escaping special characters
The backslash character enables the use of control characters, but without the shell
interpreting it, this is called escaping characters.
[paul@RHELv4u3 ~]$ echo hello ; world
hello ; world
[paul@RHELv4u3 ~]$ echo hello world
hello world
[paul@RHELv4u3 ~]$ echo escaping # & " '
escaping # & " '
[paul@RHELv4u3 ~]$ echo escaping ?*"'
escaping ?*"'
11.8.1. end of line backslash
Lines ending in a backslash are continued on the next line. The shell does not interpret the
newline character and will wait on shell expansion and execution of the command line until
a newline without backslash is encountered.
[paul@RHEL4b ~]$ echo This command line
> is split in three
> parts
This command line is split in three parts
[paul@RHEL4b ~]$](https://image.slidesharecdn.com/linuxfun-140715051047-phpapp01/85/Linux-fun-100-320.jpg)


![shell variables
94
12.1. $ dollar sign
Another important character interpreted by the shell is the dollar sign $. The shell will look
for an environment variable named like the string following the dollar sign and replace it
with the value of the variable (or with nothing if the variable does not exist).
These are some examples using $HOSTNAME, $USER, $UID, $SHELL, and $HOME.
[paul@RHELv4u3 ~]$ echo This is the $SHELL shell
This is the /bin/bash shell
[paul@RHELv4u3 ~]$ echo This is $SHELL on computer $HOSTNAME
This is /bin/bash on computer RHELv4u3.localdomain
[paul@RHELv4u3 ~]$ echo The userid of $USER is $UID
The userid of paul is 500
[paul@RHELv4u3 ~]$ echo My homedir is $HOME
My homedir is /home/paul
12.2. case sensitive
This example shows that shell variables are case sensitive!
[paul@RHELv4u3 ~]$ echo Hello $USER
Hello paul
[paul@RHELv4u3 ~]$ echo Hello $user
Hello
12.3. creating variables
This example creates the variable $MyVar and sets its value. It then uses echo to verify
the value.
[paul@RHELv4u3 gen]$ MyVar=555
[paul@RHELv4u3 gen]$ echo $MyVar
555
[paul@RHELv4u3 gen]$](https://image.slidesharecdn.com/linuxfun-140715051047-phpapp01/85/Linux-fun-104-320.jpg)
![shell variables
95
12.4. quotes
Notice that double quotes still allow the parsing of variables, whereas single quotes prevent
this.
[paul@RHELv4u3 ~]$ MyVar=555
[paul@RHELv4u3 ~]$ echo $MyVar
555
[paul@RHELv4u3 ~]$ echo "$MyVar"
555
[paul@RHELv4u3 ~]$ echo '$MyVar'
$MyVar
The bash shell will replace variables with their value in double quoted lines, but not in single
quoted lines.
paul@laika:~$ city=Burtonville
paul@laika:~$ echo "We are in $city today."
We are in Burtonville today.
paul@laika:~$ echo 'We are in $city today.'
We are in $city today.
12.5. set
You can use the set command to display a list of environment variables. On Ubuntu and
Debian systems, the set command will also list shell functions after the shell variables. Use
set | more to see the variables then.
12.6. unset
Use the unset command to remove a variable from your shell environment.
[paul@RHEL4b ~]$ MyVar=8472
[paul@RHEL4b ~]$ echo $MyVar
8472
[paul@RHEL4b ~]$ unset MyVar
[paul@RHEL4b ~]$ echo $MyVar
[paul@RHEL4b ~]$](https://image.slidesharecdn.com/linuxfun-140715051047-phpapp01/85/Linux-fun-105-320.jpg)
![shell variables
96
12.7. $PS1
The $PS1 variable determines your shell prompt. You can use backslash escaped special
characters like u for the username or w for the working directory. The bash manual has
a complete reference.
In this example we change the value of $PS1 a couple of times.
paul@deb503:~$ PS1=prompt
prompt
promptPS1='prompt '
prompt
prompt PS1='> '
>
> PS1='u@h$ '
paul@deb503$
paul@deb503$ PS1='u@h:W$'
paul@deb503:~$
To avoid unrecoverable mistakes, you can set normal user prompts to green and the root
prompt to red. Add the following to your .bashrc for a green user prompt:
# color prompt by paul
RED='[033[01;31m]'
WHITE='[033[01;00m]'
GREEN='[033[01;32m]'
BLUE='[033[01;34m]'
export PS1="${debian_chroot:+($debian_chroot)}$GREENu$WHITE@$BLUEh$WHITEw$ "](https://image.slidesharecdn.com/linuxfun-140715051047-phpapp01/85/Linux-fun-106-320.jpg)
![shell variables
97
12.8. $PATH
The $PATH variable is determines where the shell is looking for commands to execute
(unless the command is builtin or aliased). This variable contains a list of directories,
separated by colons.
[[paul@RHEL4b ~]$ echo $PATH
/usr/kerberos/bin:/usr/local/bin:/bin:/usr/bin:
The shell will not look in the current directory for commands to execute! (Looking for
executables in the current directory provided an easy way to hack PC-DOS computers). If
you want the shell to look in the current directory, then add a . at the end of your $PATH.
[paul@RHEL4b ~]$ PATH=$PATH:.
[paul@RHEL4b ~]$ echo $PATH
/usr/kerberos/bin:/usr/local/bin:/bin:/usr/bin:.
[paul@RHEL4b ~]$
Your path might be different when using su instead of su - because the latter will take on
the environment of the target user. The root user typically has /sbin directories added to the
$PATH variable.
[paul@RHEL3 ~]$ su
Password:
[root@RHEL3 paul]# echo $PATH
/usr/local/bin:/bin:/usr/bin:/usr/X11R6/bin
[root@RHEL3 paul]# exit
[paul@RHEL3 ~]$ su -
Password:
[root@RHEL3 ~]# echo $PATH
/usr/local/sbin:/usr/local/bin:/sbin:/bin:/usr/sbin:/usr/bin:
[root@RHEL3 ~]#](https://image.slidesharecdn.com/linuxfun-140715051047-phpapp01/85/Linux-fun-107-320.jpg)
![shell variables
98
12.9. env
The env command without options will display a list of exported variables. The difference
with set with options is that set lists all variables, including those not exported to child shells.
But env can also be used to start a clean shell (a shell without any inherited environment).
The env -i command clears the environment for the subshell.
Notice in this screenshot that bash will set the $SHELL variable on startup.
[paul@RHEL4b ~]$ bash -c 'echo $SHELL $HOME $USER'
/bin/bash /home/paul paul
[paul@RHEL4b ~]$ env -i bash -c 'echo $SHELL $HOME $USER'
/bin/bash
[paul@RHEL4b ~]$
You can use the env command to set the $LANG, or any other, variable for just one instance
of bash with one command. The example below uses this to show the influence of the
$LANG variable on file globbing (see the chapter on file globbing).
[paul@RHEL4b test]$ env LANG=C bash -c 'ls File[a-z]'
Filea Fileb
[paul@RHEL4b test]$ env LANG=en_US.UTF-8 bash -c 'ls File[a-z]'
Filea FileA Fileb FileB
[paul@RHEL4b test]$
12.10. export
You can export shell variables to other shells with the export command. This will export
the variable to child shells.
[paul@RHEL4b ~]$ var3=three
[paul@RHEL4b ~]$ var4=four
[paul@RHEL4b ~]$ export var4
[paul@RHEL4b ~]$ echo $var3 $var4
three four
[paul@RHEL4b ~]$ bash
[paul@RHEL4b ~]$ echo $var3 $var4
four
But it will not export to the parent shell (previous screenshot continued).
[paul@RHEL4b ~]$ export var5=five
[paul@RHEL4b ~]$ echo $var3 $var4 $var5
four five
[paul@RHEL4b ~]$ exit
exit
[paul@RHEL4b ~]$ echo $var3 $var4 $var5
three four
[paul@RHEL4b ~]$](https://image.slidesharecdn.com/linuxfun-140715051047-phpapp01/85/Linux-fun-108-320.jpg)
![shell variables
99
12.11. delineate variables
Until now, we have seen that bash interprets a variable starting from a dollar sign, continuing
until the first occurrence of a non-alphanumeric character that is not an underscore. In some
situations, this can be a problem. This issue can be resolved with curly braces like in this
example.
[paul@RHEL4b ~]$ prefix=Super
[paul@RHEL4b ~]$ echo Hello $prefixman and $prefixgirl
Hello and
[paul@RHEL4b ~]$ echo Hello ${prefix}man and ${prefix}girl
Hello Superman and Supergirl
[paul@RHEL4b ~]$
12.12. unbound variables
The example below tries to display the value of the $MyVar variable, but it fails because the
variable does not exist. By default the shell will display nothing when a variable is unbound
(does not exist).
[paul@RHELv4u3 gen]$ echo $MyVar
[paul@RHELv4u3 gen]$
There is, however, the nounset shell option that you can use to generate an error when a
variable does not exist.
paul@laika:~$ set -u
paul@laika:~$ echo $Myvar
bash: Myvar: unbound variable
paul@laika:~$ set +u
paul@laika:~$ echo $Myvar
paul@laika:~$
In the bash shell set -u is identical to set -o nounset and likewise set +u is identical to set
+o nounset.](https://image.slidesharecdn.com/linuxfun-140715051047-phpapp01/85/Linux-fun-109-320.jpg)


![shell embedding and options
103
13.1. shell embedding
Shells can be embedded on the command line, or in other words, the command line scan
can spawn new processes containing a fork of the current shell. You can use variables to
prove that new shells are created. In the screenshot below, the variable $var1 only exists in
the (temporary) sub shell.
[paul@RHELv4u3 gen]$ echo $var1
[paul@RHELv4u3 gen]$ echo $(var1=5;echo $var1)
5
[paul@RHELv4u3 gen]$ echo $var1
[paul@RHELv4u3 gen]$
You can embed a shell in an embedded shell, this is called nested embedding of shells.
This screenshot shows an embedded shell inside an embedded shell.
paul@deb503:~$ A=shell
paul@deb503:~$ echo $C$B$A $(B=sub;echo $C$B$A; echo $(C=sub;echo $C$B$A))
shell subshell subsubshell
13.1.1. backticks
Single embedding can be useful to avoid changing your current directory. The screenshot
below uses backticks instead of dollar-bracket to embed.
[paul@RHELv4u3 ~]$ echo `cd /etc; ls -d * | grep pass`
passwd passwd- passwd.OLD
[paul@RHELv4u3 ~]$
You can only use the $() notation to nest embedded shells, backticks cannot do this.
13.1.2. backticks or single quotes
Placing the embedding between backticks uses one character less than the dollar and
parenthesis combo. Be careful however, backticks are often confused with single quotes.
The technical difference between ' and ` is significant!
[paul@RHELv4u3 gen]$ echo `var1=5;echo $var1`
5
[paul@RHELv4u3 gen]$ echo 'var1=5;echo $var1'
var1=5;echo $var1
[paul@RHELv4u3 gen]$](https://image.slidesharecdn.com/linuxfun-140715051047-phpapp01/85/Linux-fun-113-320.jpg)
![shell embedding and options
104
13.2. shell options
Both set and unset are builtin shell commands. They can be used to set options of the bash
shell itself. The next example will clarify this. By default, the shell will treat unset variables
as a variable having no value. By setting the -u option, the shell will treat any reference to
unset variables as an error. See the man page of bash for more information.
[paul@RHEL4b ~]$ echo $var123
[paul@RHEL4b ~]$ set -u
[paul@RHEL4b ~]$ echo $var123
-bash: var123: unbound variable
[paul@RHEL4b ~]$ set +u
[paul@RHEL4b ~]$ echo $var123
[paul@RHEL4b ~]$
To list all the set options for your shell, use echo $-. The noclobber (or -C) option will be
explained later in this book (in the I/O redirection chapter).
[paul@RHEL4b ~]$ echo $-
himBH
[paul@RHEL4b ~]$ set -C ; set -u
[paul@RHEL4b ~]$ echo $-
himuBCH
[paul@RHEL4b ~]$ set +C ; set +u
[paul@RHEL4b ~]$ echo $-
himBH
[paul@RHEL4b ~]$
When typing set without options, you get a list of all variables without function when the
shell is on posix mode. You can set bash in posix mode typing set -o posix.](https://image.slidesharecdn.com/linuxfun-140715051047-phpapp01/85/Linux-fun-114-320.jpg)
![shell embedding and options
105
13.3. practice: shell embedding
1. Find the list of shell options in the man page of bash. What is the difference between set
-u and set -o nounset?
2. Activate nounset in your shell. Test that it shows an error message when using non-
existing variables.
3. Deactivate nounset.
4. Execute cd /var and ls in an embedded shell.
The echo command is only needed to show the result of the ls command. Omitting will result
in the shell trying to execute the first file as a command.
5. Create the variable embvar in an embedded shell and echo it. Does the variable exist in
your current shell now ?
6. Explain what "set -x" does. Can this be useful ?
(optional)7. Given the following screenshot, add exactly four characters to that command
line so that the total output is FirstMiddleLast.
[paul@RHEL4b ~]$ echo First; echo Middle; echo Last
8. Display a long listing (ls -l) of the passwd command using the which command inside
an embedded shell.](https://image.slidesharecdn.com/linuxfun-140715051047-phpapp01/85/Linux-fun-115-320.jpg)
![shell embedding and options
106
13.4. solution: shell embedding
1. Find the list of shell options in the man page of bash. What is the difference between set
-u and set -o nounset?
read the manual of bash (man bash), search for nounset -- both mean the same thing.
2. Activate nounset in your shell. Test that it shows an error message when using non-
existing variables.
set -u
OR
set -o nounset
Both these lines have the same effect.
3. Deactivate nounset.
set +u
OR
set +o nounset
4. Execute cd /var and ls in an embedded shell.
echo $(cd /var ; ls)
The echo command is only needed to show the result of the ls command. Omitting will result
in the shell trying to execute the first file as a command.
5. Create the variable embvar in an embedded shell and echo it. Does the variable exist in
your current shell now ?
echo $(embvar=emb;echo $embvar) ; echo $embvar #the last echo fails
$embvar does not exist in your current shell
6. Explain what "set -x" does. Can this be useful ?
It displays shell expansion for troubleshooting your command.
(optional)7. Given the following screenshot, add exactly four characters to that command
line so that the total output is FirstMiddleLast.
[paul@RHEL4b ~]$ echo First; echo Middle; echo Last
echo -n First; echo -n Middle; echo Last
8. Display a long listing (ls -l) of the passwd command using the which command inside
an embedded shell.
ls -l $(which passwd)](https://image.slidesharecdn.com/linuxfun-140715051047-phpapp01/85/Linux-fun-116-320.jpg)


![file globbing
114
15.1. * asterisk
The asterisk * is interpreted by the shell as a sign to generate filenames, matching the asterisk
to any combination of characters (even none). When no path is given, the shell will use
filenames in the current directory. See the man page of glob(7) for more information. (This
is part of LPI topic 1.103.3.)
[paul@RHELv4u3 gen]$ ls
file1 file2 file3 File4 File55 FileA fileab Fileab FileAB fileabc
[paul@RHELv4u3 gen]$ ls File*
File4 File55 FileA Fileab FileAB
[paul@RHELv4u3 gen]$ ls file*
file1 file2 file3 fileab fileabc
[paul@RHELv4u3 gen]$ ls *ile55
File55
[paul@RHELv4u3 gen]$ ls F*ile55
File55
[paul@RHELv4u3 gen]$ ls F*55
File55
[paul@RHELv4u3 gen]$
15.2. ? question mark
Similar to the asterisk, the question mark ? is interpreted by the shell as a sign to generate
filenames, matching the question mark with exactly one character.
[paul@RHELv4u3 gen]$ ls
file1 file2 file3 File4 File55 FileA fileab Fileab FileAB fileabc
[paul@RHELv4u3 gen]$ ls File?
File4 FileA
[paul@RHELv4u3 gen]$ ls Fil?4
File4
[paul@RHELv4u3 gen]$ ls Fil??
File4 FileA
[paul@RHELv4u3 gen]$ ls File??
File55 Fileab FileAB
[paul@RHELv4u3 gen]$](https://image.slidesharecdn.com/linuxfun-140715051047-phpapp01/85/Linux-fun-124-320.jpg)
![file globbing
115
15.3. [] square brackets
The square bracket [ is interpreted by the shell as a sign to generate filenames, matching
any of the characters between [ and the first subsequent ]. The order in this list between the
brackets is not important. Each pair of brackets is replaced by exactly one character.
[paul@RHELv4u3 gen]$ ls
file1 file2 file3 File4 File55 FileA fileab Fileab FileAB fileabc
[paul@RHELv4u3 gen]$ ls File[5A]
FileA
[paul@RHELv4u3 gen]$ ls File[A5]
FileA
[paul@RHELv4u3 gen]$ ls File[A5][5b]
File55
[paul@RHELv4u3 gen]$ ls File[a5][5b]
File55 Fileab
[paul@RHELv4u3 gen]$ ls File[a5][5b][abcdefghijklm]
ls: File[a5][5b][abcdefghijklm]: No such file or directory
[paul@RHELv4u3 gen]$ ls file[a5][5b][abcdefghijklm]
fileabc
[paul@RHELv4u3 gen]$
You can also exclude characters from a list between square brackets with the exclamation
mark !. And you are allowed to make combinations of these wild cards.
[paul@RHELv4u3 gen]$ ls
file1 file2 file3 File4 File55 FileA fileab Fileab FileAB fileabc
[paul@RHELv4u3 gen]$ ls file[a5][!Z]
fileab
[paul@RHELv4u3 gen]$ ls file[!5]*
file1 file2 file3 fileab fileabc
[paul@RHELv4u3 gen]$ ls file[!5]?
fileab
[paul@RHELv4u3 gen]$](https://image.slidesharecdn.com/linuxfun-140715051047-phpapp01/85/Linux-fun-125-320.jpg)
![file globbing
116
15.4. a-z and 0-9 ranges
The bash shell will also understand ranges of characters between brackets.
[paul@RHELv4u3 gen]$ ls
file1 file3 File55 fileab FileAB fileabc
file2 File4 FileA Fileab fileab2
[paul@RHELv4u3 gen]$ ls file[a-z]*
fileab fileab2 fileabc
[paul@RHELv4u3 gen]$ ls file[0-9]
file1 file2 file3
[paul@RHELv4u3 gen]$ ls file[a-z][a-z][0-9]*
fileab2
[paul@RHELv4u3 gen]$
15.5. $LANG and square brackets
But, don't forget the influence of the LANG variable. Some languages include lower case
letters in an upper case range (and vice versa).
paul@RHELv4u4:~/test$ ls [A-Z]ile?
file1 file2 file3 File4
paul@RHELv4u4:~/test$ ls [a-z]ile?
file1 file2 file3 File4
paul@RHELv4u4:~/test$ echo $LANG
en_US.UTF-8
paul@RHELv4u4:~/test$ LANG=C
paul@RHELv4u4:~/test$ echo $LANG
C
paul@RHELv4u4:~/test$ ls [a-z]ile?
file1 file2 file3
paul@RHELv4u4:~/test$ ls [A-Z]ile?
File4
paul@RHELv4u4:~/test$
If $LC_ALL is set, then this will also need to be reset to prevent file globbing.](https://image.slidesharecdn.com/linuxfun-140715051047-phpapp01/85/Linux-fun-126-320.jpg)


![file globbing
119
15.8. solution: shell globbing
1. Create a test directory and enter it.
mkdir testdir; cd testdir
2. Create files file1 file10 file11 file2 File2 File3 file33 fileAB filea fileA fileAAA file( file
2 (the last one has 6 characters including a space)
touch file1 file10 file11 file2 File2 File3
touch file33 fileAB filea fileA fileAAA
touch "file("
touch "file 2"
3. List (with ls) all files starting with file
ls file*
4. List (with ls) all files starting with File
ls File*
5. List (with ls) all files starting with file and ending in a number.
ls file*[0-9]
6. List (with ls) all files starting with file and ending with a letter
ls file*[a-z]
7. List (with ls) all files starting with File and having a digit as fifth character.
ls File[0-9]*
8. List (with ls) all files starting with File and having a digit as fifth character and nothing
else.
ls File[0-9]
9. List (with ls) all files starting with a letter and ending in a number.
ls [a-z]*[0-9]
10. List (with ls) all files that have exactly five characters.
ls ?????
11. List (with ls) all files that start with f or F and end with 3 or A.
ls [fF]*[3A]
12. List (with ls) all files that start with f have i or R as second character and end in a number.
ls f[iR]*[0-9]
13. List all files that do not start with the letter F.
ls [!F]*](https://image.slidesharecdn.com/linuxfun-140715051047-phpapp01/85/Linux-fun-129-320.jpg)


![I/O redirection
125
16.2. output redirection
16.2.1. > stdout
stdout can be redirected with a greater than sign. While scanning the line, the shell will
see the > sign and will clear the file.
The > notation is in fact the abbreviation of 1> (stdout being referred to as stream 1).
[paul@RHELv4u3 ~]$ echo It is cold today!
It is cold today!
[paul@RHELv4u3 ~]$ echo It is cold today! > winter.txt
[paul@RHELv4u3 ~]$ cat winter.txt
It is cold today!
[paul@RHELv4u3 ~]$
Note that the bash shell effectively removes the redirection from the command line before
argument 0 is executed. This means that in the case of this command:
echo hello > greetings.txt
the shell only counts two arguments (echo = argument 0, hello = argument 1). The redirection
is removed before the argument counting takes place.
16.2.2. output file is erased
While scanning the line, the shell will see the > sign and will clear the file! Since this
happens before resolving argument 0, this means that even when the command fails, the
file will have been cleared!
[paul@RHELv4u3 ~]$ cat winter.txt
It is cold today!
[paul@RHELv4u3 ~]$ zcho It is cold today! > winter.txt
-bash: zcho: command not found
[paul@RHELv4u3 ~]$ cat winter.txt
[paul@RHELv4u3 ~]$](https://image.slidesharecdn.com/linuxfun-140715051047-phpapp01/85/Linux-fun-135-320.jpg)
![I/O redirection
126
16.2.3. noclobber
Erasing a file while using > can be prevented by setting the noclobber option.
[paul@RHELv4u3 ~]$ cat winter.txt
It is cold today!
[paul@RHELv4u3 ~]$ set -o noclobber
[paul@RHELv4u3 ~]$ echo It is cold today! > winter.txt
-bash: winter.txt: cannot overwrite existing file
[paul@RHELv4u3 ~]$ set +o noclobber
[paul@RHELv4u3 ~]$
16.2.4. overruling noclobber
The noclobber can be overruled with >|.
[paul@RHELv4u3 ~]$ set -o noclobber
[paul@RHELv4u3 ~]$ echo It is cold today! > winter.txt
-bash: winter.txt: cannot overwrite existing file
[paul@RHELv4u3 ~]$ echo It is very cold today! >| winter.txt
[paul@RHELv4u3 ~]$ cat winter.txt
It is very cold today!
[paul@RHELv4u3 ~]$
16.2.5. >> append
Use >> to append output to a file.
[paul@RHELv4u3 ~]$ echo It is cold today! > winter.txt
[paul@RHELv4u3 ~]$ cat winter.txt
It is cold today!
[paul@RHELv4u3 ~]$ echo Where is the summer ? >> winter.txt
[paul@RHELv4u3 ~]$ cat winter.txt
It is cold today!
Where is the summer ?
[paul@RHELv4u3 ~]$](https://image.slidesharecdn.com/linuxfun-140715051047-phpapp01/85/Linux-fun-136-320.jpg)
![I/O redirection
127
16.3. error redirection
16.3.1. 2> stderr
Redirecting stderr is done with 2>. This can be very useful to prevent error messages from
cluttering your screen.
The screenshot below shows redirection of stdout to a file, and stderr to /dev/null. Writing
1> is the same as >.
[paul@RHELv4u3 ~]$ find / > allfiles.txt 2> /dev/null
[paul@RHELv4u3 ~]$
16.3.2. 2>&1
To redirect both stdout and stderr to the same file, use 2>&1.
[paul@RHELv4u3 ~]$ find / > allfiles_and_errors.txt 2>&1
[paul@RHELv4u3 ~]$
Note that the order of redirections is significant. For example, the command
ls > dirlist 2>&1
directs both standard output (file descriptor 1) and standard error (file descriptor 2) to the
file dirlist, while the command
ls 2>&1 > dirlist
directs only the standard output to file dirlist, because the standard error made a copy of the
standard output before the standard output was redirected to dirlist.](https://image.slidesharecdn.com/linuxfun-140715051047-phpapp01/85/Linux-fun-137-320.jpg)

![I/O redirection
129
16.6. input redirection
16.6.1. < stdin
Redirecting stdin is done with < (short for 0<).
[paul@RHEL4b ~]$ cat < text.txt
one
two
[paul@RHEL4b ~]$ tr 'onetw' 'ONEZZ' < text.txt
ONE
ZZO
[paul@RHEL4b ~]$
16.6.2. << here document
The here document (sometimes called here-is-document) is a way to append input until a
certain sequence (usually EOF) is encountered. The EOF marker can be typed literally or
can be called with Ctrl-D.
[paul@RHEL4b ~]$ cat <<EOF > text.txt
> one
> two
> EOF
[paul@RHEL4b ~]$ cat text.txt
one
two
[paul@RHEL4b ~]$ cat <<brol > text.txt
> brel
> brol
[paul@RHEL4b ~]$ cat text.txt
brel
[paul@RHEL4b ~]$
16.6.3. <<< here string
The here string can be used to directly pass strings to a command. The result is the same
as using echo string | command (but you have one less process running).
paul@ubu1110~$ base64 <<< linux-training.be
bGludXgtdHJhaW5pbmcuYmUK
paul@ubu1110~$ base64 -d <<< bGludXgtdHJhaW5pbmcuYmUK
linux-training.be
See rfc 3548 for more information about base64.](https://image.slidesharecdn.com/linuxfun-140715051047-phpapp01/85/Linux-fun-139-320.jpg)


![filters
134
17.1. cat
When between two pipes, the cat command does nothing (except putting stdin on stdout.
[paul@RHEL4b pipes]$ tac count.txt | cat | cat | cat | cat | cat
five
four
three
two
one
[paul@RHEL4b pipes]$
17.2. tee
Writing long pipes in Unix is fun, but sometimes you may want intermediate results. This
is were tee comes in handy. The tee filter puts stdin on stdout and also into a file. So tee is
almost the same as cat, except that it has two identical outputs.
[paul@RHEL4b pipes]$ tac count.txt | tee temp.txt | tac
one
two
three
four
five
[paul@RHEL4b pipes]$ cat temp.txt
five
four
three
two
one
[paul@RHEL4b pipes]$
17.3. grep
The grep filter is famous among Unix users. The most common use of grep is to filter lines
of text containing (or not containing) a certain string.
[paul@RHEL4b pipes]$ cat tennis.txt
Amelie Mauresmo, Fra
Kim Clijsters, BEL
Justine Henin, Bel
Serena Williams, usa
Venus Williams, USA
[paul@RHEL4b pipes]$ cat tennis.txt | grep Williams
Serena Williams, usa
Venus Williams, USA
You can write this without the cat.
[paul@RHEL4b pipes]$ grep Williams tennis.txt
Serena Williams, usa
Venus Williams, USA
One of the most useful options of grep is grep -i which filters in a case insensitive way.
[paul@RHEL4b pipes]$ grep Bel tennis.txt
Justine Henin, Bel
[paul@RHEL4b pipes]$ grep -i Bel tennis.txt](https://image.slidesharecdn.com/linuxfun-140715051047-phpapp01/85/Linux-fun-144-320.jpg)
![filters
135
Kim Clijsters, BEL
Justine Henin, Bel
[paul@RHEL4b pipes]$
Another very useful option is grep -v which outputs lines not matching the string.
[paul@RHEL4b pipes]$ grep -v Fra tennis.txt
Kim Clijsters, BEL
Justine Henin, Bel
Serena Williams, usa
Venus Williams, USA
[paul@RHEL4b pipes]$
And of course, both options can be combined to filter all lines not containing a case
insensitive string.
[paul@RHEL4b pipes]$ grep -vi usa tennis.txt
Amelie Mauresmo, Fra
Kim Clijsters, BEL
Justine Henin, Bel
[paul@RHEL4b pipes]$
With grep -A1 one line after the result is also displayed.
paul@debian5:~/pipes$ grep -A1 Henin tennis.txt
Justine Henin, Bel
Serena Williams, usa
With grep -B1 one line before the result is also displayed.
paul@debian5:~/pipes$ grep -B1 Henin tennis.txt
Kim Clijsters, BEL
Justine Henin, Bel
With grep -C1 (context) one line before and one after are also displayed. All three options
(A,B, and C) can display any number of lines (using e.g. A2, B4 or C20).
paul@debian5:~/pipes$ grep -C1 Henin tennis.txt
Kim Clijsters, BEL
Justine Henin, Bel
Serena Williams, usa](https://image.slidesharecdn.com/linuxfun-140715051047-phpapp01/85/Linux-fun-145-320.jpg)
![filters
136
17.4. cut
The cut filter can select columns from files, depending on a delimiter or a count of bytes.
The screenshot below uses cut to filter for the username and userid in the /etc/passwd file.
It uses the colon as a delimiter, and selects fields 1 and 3.
[[paul@RHEL4b pipes]$ cut -d: -f1,3 /etc/passwd | tail -4
Figo:510
Pfaff:511
Harry:516
Hermione:517
[paul@RHEL4b pipes]$
When using a space as the delimiter for cut, you have to quote the space.
[paul@RHEL4b pipes]$ cut -d" " -f1 tennis.txt
Amelie
Kim
Justine
Serena
Venus
[paul@RHEL4b pipes]$
This example uses cut to display the second to the seventh character of /etc/passwd.
[paul@RHEL4b pipes]$ cut -c2-7 /etc/passwd | tail -4
igo:x:
faff:x
arry:x
ermion
[paul@RHEL4b pipes]$
17.5. tr
You can translate characters with tr. The screenshot shows the translation of all occurrences
of e to E.
[paul@RHEL4b pipes]$ cat tennis.txt | tr 'e' 'E'
AmEliE MaurEsmo, Fra
Kim ClijstErs, BEL
JustinE HEnin, BEl
SErEna Williams, usa
VEnus Williams, USA
Here we set all letters to uppercase by defining two ranges.
[paul@RHEL4b pipes]$ cat tennis.txt | tr 'a-z' 'A-Z'
AMELIE MAURESMO, FRA
KIM CLIJSTERS, BEL
JUSTINE HENIN, BEL
SERENA WILLIAMS, USA
VENUS WILLIAMS, USA
[paul@RHEL4b pipes]$
Here we translate all newlines to spaces.
[paul@RHEL4b pipes]$ cat count.txt
one
two](https://image.slidesharecdn.com/linuxfun-140715051047-phpapp01/85/Linux-fun-146-320.jpg)
![filters
137
three
four
five
[paul@RHEL4b pipes]$ cat count.txt | tr 'n' ' '
one two three four five [paul@RHEL4b pipes]$
The tr -s filter can also be used to squeeze multiple occurrences of a character to one.
[paul@RHEL4b pipes]$ cat spaces.txt
one two three
four five six
[paul@RHEL4b pipes]$ cat spaces.txt | tr -s ' '
one two three
four five six
[paul@RHEL4b pipes]$
You can also use tr to 'encrypt' texts with rot13.
[paul@RHEL4b pipes]$ cat count.txt | tr 'a-z' 'nopqrstuvwxyzabcdefghijklm'
bar
gjb
guerr
sbhe
svir
[paul@RHEL4b pipes]$ cat count.txt | tr 'a-z' 'n-za-m'
bar
gjb
guerr
sbhe
svir
[paul@RHEL4b pipes]$
This last example uses tr -d to delete characters.
paul@debian5:~/pipes$ cat tennis.txt | tr -d e
Amli Maursmo, Fra
Kim Clijstrs, BEL
Justin Hnin, Bl
Srna Williams, usa
Vnus Williams, USA
17.6. wc
Counting words, lines and characters is easy with wc.
[paul@RHEL4b pipes]$ wc tennis.txt
5 15 100 tennis.txt
[paul@RHEL4b pipes]$ wc -l tennis.txt
5 tennis.txt
[paul@RHEL4b pipes]$ wc -w tennis.txt
15 tennis.txt
[paul@RHEL4b pipes]$ wc -c tennis.txt
100 tennis.txt
[paul@RHEL4b pipes]$](https://image.slidesharecdn.com/linuxfun-140715051047-phpapp01/85/Linux-fun-147-320.jpg)
![filters
138
17.7. sort
The sort filter will default to an alphabetical sort.
paul@debian5:~/pipes$ cat music.txt
Queen
Brel
Led Zeppelin
Abba
paul@debian5:~/pipes$ sort music.txt
Abba
Brel
Led Zeppelin
Queen
But the sort filter has many options to tweak its usage. This example shows sorting different
columns (column 1 or column 2).
[paul@RHEL4b pipes]$ sort -k1 country.txt
Belgium, Brussels, 10
France, Paris, 60
Germany, Berlin, 100
Iran, Teheran, 70
Italy, Rome, 50
[paul@RHEL4b pipes]$ sort -k2 country.txt
Germany, Berlin, 100
Belgium, Brussels, 10
France, Paris, 60
Italy, Rome, 50
Iran, Teheran, 70
The screenshot below shows the difference between an alphabetical sort and a numerical
sort (both on the third column).
[paul@RHEL4b pipes]$ sort -k3 country.txt
Belgium, Brussels, 10
Germany, Berlin, 100
Italy, Rome, 50
France, Paris, 60
Iran, Teheran, 70
[paul@RHEL4b pipes]$ sort -n -k3 country.txt
Belgium, Brussels, 10
Italy, Rome, 50
France, Paris, 60
Iran, Teheran, 70
Germany, Berlin, 100](https://image.slidesharecdn.com/linuxfun-140715051047-phpapp01/85/Linux-fun-148-320.jpg)


![filters
143
17.12. pipe examples
17.12.1. who | wc
How many users are logged on to this system ?
[paul@RHEL4b pipes]$ who
root tty1 Jul 25 10:50
paul pts/0 Jul 25 09:29 (laika)
Harry pts/1 Jul 25 12:26 (barry)
paul pts/2 Jul 25 12:26 (pasha)
[paul@RHEL4b pipes]$ who | wc -l
4
17.12.2. who | cut | sort
Display a sorted list of logged on users.
[paul@RHEL4b pipes]$ who | cut -d' ' -f1 | sort
Harry
paul
paul
root
Display a sorted list of logged on users, but every user only once .
[paul@RHEL4b pipes]$ who | cut -d' ' -f1 | sort | uniq
Harry
paul
root
17.12.3. grep | cut
Display a list of all bash user accounts on this computer. Users accounts are explained in
detail later.
paul@debian5:~$ grep bash /etc/passwd
root:x:0:0:root:/root:/bin/bash
paul:x:1000:1000:paul,,,:/home/paul:/bin/bash
serena:x:1001:1001::/home/serena:/bin/bash
paul@debian5:~$ grep bash /etc/passwd | cut -d: -f1
root
paul
serena](https://image.slidesharecdn.com/linuxfun-140715051047-phpapp01/85/Linux-fun-153-320.jpg)


![basic Unix tools
149
18.2. locate
The locate tool is very different from find in that it uses an index to locate files. This is a
lot faster than traversing all the directories, but it also means that it is always outdated. If
the index does not exist yet, then you have to create it (as root on Red Hat Enterprise Linux)
with the updatedb command.
[paul@RHEL4b ~]$ locate Samba
warning: locate: could not open database: /var/lib/slocate/slocate.db:...
warning: You need to run the 'updatedb' command (as root) to create th...
Please have a look at /etc/updatedb.conf to enable the daily cron job.
[paul@RHEL4b ~]$ updatedb
fatal error: updatedb: You are not authorized to create a default sloc...
[paul@RHEL4b ~]$ su -
Password:
[root@RHEL4b ~]# updatedb
[root@RHEL4b ~]#
Most Linux distributions will schedule the updatedb to run once every day.
18.3. date
The date command can display the date, time, time zone and more.
paul@rhel55 ~$ date
Sat Apr 17 12:44:30 CEST 2010
A date string can be customised to display the format of your choice. Check the man page
for more options.
paul@rhel55 ~$ date +'%A %d-%m-%Y'
Saturday 17-04-2010
Time on any Unix is calculated in number of seconds since 1969 (the first second being the
first second of the first of January 1970). Use date +%s to display Unix time in seconds.
paul@rhel55 ~$ date +%s
1271501080
When will this seconds counter reach two thousand million ?
paul@rhel55 ~$ date -d '1970-01-01 + 2000000000 seconds'
Wed May 18 04:33:20 CEST 2033](https://image.slidesharecdn.com/linuxfun-140715051047-phpapp01/85/Linux-fun-159-320.jpg)


![Introduction to vi
179
command action
?string backward search for string
n go to next occurrence of search string
/^string forward search string at beginning of line
/string$ forward search string at end of line
/br[aeio]l search for bral brel bril and brol
/<he> search for the word he (and not for here or the)
20.12. replace all ( :1,$ s/foo/bar/g )
To replace all occurrences of the string foo with bar, first switch to ex mode with : . Then
tell vi which lines to use, for example 1,$ will do the replace all from the first to the last
line. You can write 1,5 to only process the first five lines. The s/foo/bar/g will replace all
occurrences of foo with bar.
Table 20.12. replace
command action
:4,8 s/foo/bar/g replace foo with bar on lines 4 to 8
:1,$ s/foo/bar/g replace foo with bar on all lines
20.13. reading files (:r :r !cmd)
When in command mode, :r foo will read the file named foo, :r !foo will execute the
command foo. The result will be put at the current location. Thus :r !ls will put a listing of
the current directory in your text file.
Table 20.13. read files and input
command action
:r fname (read) file fname and paste contents
:r !cmd execute cmd and paste its output
20.14. text buffers
There are 36 buffers in vi to store text. You can use them with the " character.
Table 20.14. text buffers
command action
"add delete current line and put text in buffer a
"g7yy copy seven lines into buffer g
"ap paste from buffer a
20.15. multiple files
You can edit multiple files with vi. Here are some tips.](https://image.slidesharecdn.com/linuxfun-140715051047-phpapp01/85/Linux-fun-189-320.jpg)


![185
Table of Contents
21. scripting introduction ..................................................................................................... 186
21.1. prerequisites ......................................................................................................... 187
21.2. hello world .......................................................................................................... 187
21.3. she-bang .............................................................................................................. 187
21.4. comment ............................................................................................................. 188
21.5. variables .............................................................................................................. 188
21.6. sourcing a script ................................................................................................... 188
21.7. troubleshooting a script .......................................................................................... 189
21.8. prevent setuid root spoofing .................................................................................... 189
21.9. practice: introduction to scripting ............................................................................. 190
21.10. solution: introduction to scripting ........................................................................... 191
22. scripting loops ............................................................................................................... 192
22.1. test [ ] ................................................................................................................. 193
22.2. if then else .......................................................................................................... 194
22.3. if then elif ........................................................................................................... 194
22.4. for loop ............................................................................................................... 194
22.5. while loop ........................................................................................................... 195
22.6. until loop ............................................................................................................ 195
22.7. practice: scripting tests and loops ............................................................................. 196
22.8. solution: scripting tests and loops ............................................................................ 197
23. scripting parameters ...................................................................................................... 199
23.1. script parameters ................................................................................................... 200
23.2. shift through parameters ......................................................................................... 201
23.3. runtime input ....................................................................................................... 201
23.4. sourcing a config file ............................................................................................. 202
23.5. get script options with getopts ................................................................................. 203
23.6. get shell options with shopt .................................................................................... 204
23.7. practice: parameters and options .............................................................................. 205
23.8. solution: parameters and options .............................................................................. 206
24. more scripting ............................................................................................................... 207
24.1. eval .................................................................................................................... 208
24.2. (( )) .................................................................................................................... 208
24.3. let ...................................................................................................................... 209
24.4. case .................................................................................................................... 210
24.5. shell functions ...................................................................................................... 211
24.6. practice : more scripting ......................................................................................... 212
24.7. solution : more scripting ......................................................................................... 213](https://image.slidesharecdn.com/linuxfun-140715051047-phpapp01/85/Linux-fun-195-320.jpg)

![scripting introduction
187
21.1. prerequisites
You should have read and understood part III shell expansion and part IV pipes and
commands before starting this chapter.
21.2. hello world
Just like in every programming course, we start with a simple hello_world script. The
following script will output Hello World.
echo Hello World
After creating this simple script in vi or with echo, you'll have to chmod +x hello_world
to make it executable. And unless you add the scripts directory to your path, you'll have to
type the path to the script for the shell to be able to find it.
[paul@RHEL4a ~]$ echo echo Hello World > hello_world
[paul@RHEL4a ~]$ chmod +x hello_world
[paul@RHEL4a ~]$ ./hello_world
Hello World
[paul@RHEL4a ~]$
21.3. she-bang
Let's expand our example a little further by putting #!/bin/bash on the first line of the script.
The #! is called a she-bang (sometimes called sha-bang), where the she-bang is the first
two characters of the script.
#!/bin/bash
echo Hello World
You can never be sure which shell a user is running. A script that works flawlessly in bash
might not work in ksh, csh, or dash. To instruct a shell to run your script in a certain shell,
you can start your script with a she-bang followed by the shell it is supposed to run in. This
script will run in a bash shell.
#!/bin/bash
echo -n hello
echo A bash subshell `echo -n hello`
This script will run in a Korn shell (unless /bin/ksh is a hard link to /bin/bash). The /etc/
shells file contains a list of shells on your system.
#!/bin/ksh
echo -n hello
echo a Korn subshell `echo -n hello`](https://image.slidesharecdn.com/linuxfun-140715051047-phpapp01/85/Linux-fun-197-320.jpg)
![scripting introduction
188
21.4. comment
Let's expand our example a little further by adding comment lines.
#!/bin/bash
#
# Hello World Script
#
echo Hello World
21.5. variables
Here is a simple example of a variable inside a script.
#!/bin/bash
#
# simple variable in script
#
var1=4
echo var1 = $var1
Scripts can contain variables, but since scripts are run in their own shell, the variables do
not survive the end of the script.
[paul@RHEL4a ~]$ echo $var1
[paul@RHEL4a ~]$ ./vars
var1 = 4
[paul@RHEL4a ~]$ echo $var1
[paul@RHEL4a ~]$
21.6. sourcing a script
Luckily, you can force a script to run in the same shell; this is called sourcing a script.
[paul@RHEL4a ~]$ source ./vars
var1 = 4
[paul@RHEL4a ~]$ echo $var1
4
[paul@RHEL4a ~]$
The above is identical to the below.
[paul@RHEL4a ~]$ . ./vars
var1 = 4
[paul@RHEL4a ~]$ echo $var1
4
[paul@RHEL4a ~]$](https://image.slidesharecdn.com/linuxfun-140715051047-phpapp01/85/Linux-fun-198-320.jpg)


![scripting loops
193
22.1. test [ ]
The test command can test whether something is true or false. Let's start by testing whether
10 is greater than 55.
[paul@RHEL4b ~]$ test 10 -gt 55 ; echo $?
1
[paul@RHEL4b ~]$
The test command returns 1 if the test fails. And as you see in the next screenshot, test returns
0 when a test succeeds.
[paul@RHEL4b ~]$ test 56 -gt 55 ; echo $?
0
[paul@RHEL4b ~]$
If you prefer true and false, then write the test like this.
[paul@RHEL4b ~]$ test 56 -gt 55 && echo true || echo false
true
[paul@RHEL4b ~]$ test 6 -gt 55 && echo true || echo false
false
The test command can also be written as square brackets, the screenshot below is identical
to the one above.
[paul@RHEL4b ~]$ [ 56 -gt 55 ] && echo true || echo false
true
[paul@RHEL4b ~]$ [ 6 -gt 55 ] && echo true || echo false
false
Below are some example tests. Take a look at man test to see more options for tests.
[ -d foo ] Does the directory foo exist ?
[ -e bar ] Does the file bar exist ?
[ '/etc' = $PWD ] Is the string /etc equal to the variable $PWD ?
[ $1 != 'secret' ] Is the first parameter different from secret ?
[ 55 -lt $bar ] Is 55 less than the value of $bar ?
[ $foo -ge 1000 ] Is the value of $foo greater or equal to 1000 ?
[ "abc" < $bar ] Does abc sort before the value of $bar ?
[ -f foo ] Is foo a regular file ?
[ -r bar ] Is bar a readable file ?
[ foo -nt bar ] Is file foo newer than file bar ?
[ -o nounset ] Is the shell option nounset set ?
Tests can be combined with logical AND and OR.
paul@RHEL4b:~$ [ 66 -gt 55 -a 66 -lt 500 ] && echo true || echo false
true
paul@RHEL4b:~$ [ 66 -gt 55 -a 660 -lt 500 ] && echo true || echo false
false
paul@RHEL4b:~$ [ 66 -gt 55 -o 660 -lt 500 ] && echo true || echo false
true](https://image.slidesharecdn.com/linuxfun-140715051047-phpapp01/85/Linux-fun-203-320.jpg)
![scripting loops
194
22.2. if then else
The if then else construction is about choice. If a certain condition is met, then execute
something, else execute something else. The example below tests whether a file exists, and
if the file exists then a proper message is echoed.
#!/bin/bash
if [ -f isit.txt ]
then echo isit.txt exists!
else echo isit.txt not found!
fi
If we name the above script 'choice', then it executes like this.
[paul@RHEL4a scripts]$ ./choice
isit.txt not found!
[paul@RHEL4a scripts]$ touch isit.txt
[paul@RHEL4a scripts]$ ./choice
isit.txt exists!
[paul@RHEL4a scripts]$
22.3. if then elif
You can nest a new if inside an else with elif. This is a simple example.
#!/bin/bash
count=42
if [ $count -eq 42 ]
then
echo "42 is correct."
elif [ $count -gt 42 ]
then
echo "Too much."
else
echo "Not enough."
fi
22.4. for loop
The example below shows the syntax of a classical for loop in bash.
for i in 1 2 4
do
echo $i
done
An example of a for loop combined with an embedded shell.
#!/bin/ksh
for counter in `seq 1 20`
do
echo counting from 1 to 20, now at $counter
sleep 1
done
The same example as above can be written without the embedded shell using the bash
{from..to} shorthand.](https://image.slidesharecdn.com/linuxfun-140715051047-phpapp01/85/Linux-fun-204-320.jpg)
![scripting loops
195
#!/bin/bash
for counter in {1..20}
do
echo counting from 1 to 20, now at $counter
sleep 1
done
This for loop uses file globbing (from the shell expansion). Putting the instruction on the
command line has identical functionality.
kahlan@solexp11$ ls
count.ksh go.ksh
kahlan@solexp11$ for file in *.ksh ; do cp $file $file.backup ; done
kahlan@solexp11$ ls
count.ksh count.ksh.backup go.ksh go.ksh.backup
22.5. while loop
Below a simple example of a while loop.
i=100;
while [ $i -ge 0 ] ;
do
echo Counting down, from 100 to 0, now at $i;
let i--;
done
Endless loops can be made with while true or while : , where the colon is the equivalent
of no operation in the Korn and bash shells.
#!/bin/ksh
# endless loop
while :
do
echo hello
sleep 1
done
22.6. until loop
Below a simple example of an until loop.
let i=100;
until [ $i -le 0 ] ;
do
echo Counting down, from 100 to 1, now at $i;
let i--;
done](https://image.slidesharecdn.com/linuxfun-140715051047-phpapp01/85/Linux-fun-205-320.jpg)

![scripting loops
197
22.8. solution: scripting tests and loops
1. Write a script that uses a for loop to count from 3 to 7.
#!/bin/bash
for i in 3 4 5 6 7
do
echo Counting from 3 to 7, now at $i
done
2. Write a script that uses a for loop to count from 1 to 17000.
#!/bin/bash
for i in `seq 1 17000`
do
echo Counting from 1 to 17000, now at $i
done
3. Write a script that uses a while loop to count from 3 to 7.
#!/bin/bash
i=3
while [ $i -le 7 ]
do
echo Counting from 3 to 7, now at $i
let i=i+1
done
4. Write a script that uses an until loop to count down from 8 to 4.
#!/bin/bash
i=8
until [ $i -lt 4 ]
do
echo Counting down from 8 to 4, now at $i
let i=i-1
done
5. Write a script that counts the number of files ending in .txt in the current directory.
#!/bin/bash
let i=0
for file in *.txt
do
let i++
done
echo "There are $i files ending in .txt"
6. Wrap an if statement around the script so it is also correct when there are zero files ending
in .txt.
#!/bin/bash
ls *.txt > /dev/null 2>&1
if [ $? -ne 0 ]](https://image.slidesharecdn.com/linuxfun-140715051047-phpapp01/85/Linux-fun-207-320.jpg)


![scripting parameters
200
23.1. script parameters
A bash shell script can have parameters. The numbering you see in the script below
continues if you have more parameters. You also have special parameters containing the
number of parameters, a string of all of them, and also the process id, and the last return
code. The man page of bash has a full list.
#!/bin/bash
echo The first argument is $1
echo The second argument is $2
echo The third argument is $3
echo $ $$ PID of the script
echo # $# count arguments
echo ? $? last return code
echo * $* all the arguments
Below is the output of the script above in action.
[paul@RHEL4a scripts]$ ./pars one two three
The first argument is one
The second argument is two
The third argument is three
$ 5610 PID of the script
# 3 count arguments
? 0 last return code
* one two three all the arguments
Once more the same script, but with only two parameters.
[paul@RHEL4a scripts]$ ./pars 1 2
The first argument is 1
The second argument is 2
The third argument is
$ 5612 PID of the script
# 2 count arguments
? 0 last return code
* 1 2 all the arguments
[paul@RHEL4a scripts]$
Here is another example, where we use $0. The $0 parameter contains the name of the script.
paul@debian6~$ cat myname
echo this script is called $0
paul@debian6~$ ./myname
this script is called ./myname
paul@debian6~$ mv myname test42
paul@debian6~$ ./test42
this script is called ./test42](https://image.slidesharecdn.com/linuxfun-140715051047-phpapp01/85/Linux-fun-210-320.jpg)
![scripting parameters
201
23.2. shift through parameters
The shift statement can parse all parameters one by one. This is a sample script.
kahlan@solexp11$ cat shift.ksh
#!/bin/ksh
if [ "$#" == "0" ]
then
echo You have to give at least one parameter.
exit 1
fi
while (( $# ))
do
echo You gave me $1
shift
done
Below is some sample output of the script above.
kahlan@solexp11$ ./shift.ksh one
You gave me one
kahlan@solexp11$ ./shift.ksh one two three 1201 "33 42"
You gave me one
You gave me two
You gave me three
You gave me 1201
You gave me 33 42
kahlan@solexp11$ ./shift.ksh
You have to give at least one parameter.
23.3. runtime input
You can ask the user for input with the read command in a script.
#!/bin/bash
echo -n Enter a number:
read number](https://image.slidesharecdn.com/linuxfun-140715051047-phpapp01/85/Linux-fun-211-320.jpg)
![scripting parameters
202
23.4. sourcing a config file
The source (as seen in the shell chapters) can be used to source a configuration file.
Below a sample configuration file for an application.
[paul@RHEL4a scripts]$ cat myApp.conf
# The config file of myApp
# Enter the path here
myAppPath=/var/myApp
# Enter the number of quines here
quines=5
And her an application that uses this file.
[paul@RHEL4a scripts]$ cat myApp.bash
#!/bin/bash
#
# Welcome to the myApp application
#
. ./myApp.conf
echo There are $quines quines
The running application can use the values inside the sourced configuration file.
[paul@RHEL4a scripts]$ ./myApp.bash
There are 5 quines
[paul@RHEL4a scripts]$](https://image.slidesharecdn.com/linuxfun-140715051047-phpapp01/85/Linux-fun-212-320.jpg)


![scripting parameters
206
23.8. solution: parameters and options
1. Write a script that receives four parameters, and outputs them in reverse order.
echo $4 $3 $2 $1
2. Write a script that receives two parameters (two filenames) and outputs whether those
files exist.
#!/bin/bash
if [ -f $1 ]
then echo $1 exists!
else echo $1 not found!
fi
if [ -f $2 ]
then echo $2 exists!
else echo $2 not found!
fi
3. Write a script that asks for a filename. Verify existence of the file, then verify that you
own the file, and whether it is writable. If not, then make it writable.
4. Make a configuration file for the previous script. Put a logging switch in the config file,
logging means writing detailed output of everything the script does to a log file in /tmp.](https://image.slidesharecdn.com/linuxfun-140715051047-phpapp01/85/Linux-fun-216-320.jpg)


![more scripting
209
24.3. let
The let built-in shell function instructs the shell to perform an evaluation of arithmetic
expressions. It will return 0 unless the last arithmetic expression evaluates to 0.
[paul@RHEL4b ~]$ let x="3 + 4" ; echo $x
7
[paul@RHEL4b ~]$ let x="10 + 100/10" ; echo $x
20
[paul@RHEL4b ~]$ let x="10-2+100/10" ; echo $x
18
[paul@RHEL4b ~]$ let x="10*2+100/10" ; echo $x
30
The shell can also convert between different bases.
[paul@RHEL4b ~]$ let x="0xFF" ; echo $x
255
[paul@RHEL4b ~]$ let x="0xC0" ; echo $x
192
[paul@RHEL4b ~]$ let x="0xA8" ; echo $x
168
[paul@RHEL4b ~]$ let x="8#70" ; echo $x
56
[paul@RHEL4b ~]$ let x="8#77" ; echo $x
63
[paul@RHEL4b ~]$ let x="16#c0" ; echo $x
192
There is a difference between assigning a variable directly, or using let to evaluate the
arithmetic expressions (even if it is just assigning a value).
kahlan@solexp11$ dec=15 ; oct=017 ; hex=0x0f
kahlan@solexp11$ echo $dec $oct $hex
15 017 0x0f
kahlan@solexp11$ let dec=15 ; let oct=017 ; let hex=0x0f
kahlan@solexp11$ echo $dec $oct $hex
15 15 15](https://image.slidesharecdn.com/linuxfun-140715051047-phpapp01/85/Linux-fun-219-320.jpg)
![more scripting
210
24.4. case
You can sometimes simplify nested if statements with a case construct.
[paul@RHEL4b ~]$ ./help
What animal did you see ? lion
You better start running fast!
[paul@RHEL4b ~]$ ./help
What animal did you see ? dog
Don't worry, give it a cookie.
[paul@RHEL4b ~]$ cat help
#!/bin/bash
#
# Wild Animals Helpdesk Advice
#
echo -n "What animal did you see ? "
read animal
case $animal in
"lion" | "tiger")
echo "You better start running fast!"
;;
"cat")
echo "Let that mouse go..."
;;
"dog")
echo "Don't worry, give it a cookie."
;;
"chicken" | "goose" | "duck" )
echo "Eggs for breakfast!"
;;
"liger")
echo "Approach and say 'Ah you big fluffy kitty...'."
;;
"babelfish")
echo "Did it fall out your ear ?"
;;
*)
echo "You discovered an unknown animal, name it!"
;;
esac
[paul@RHEL4b ~]$](https://image.slidesharecdn.com/linuxfun-140715051047-phpapp01/85/Linux-fun-220-320.jpg)


![more scripting
213
24.7. solution : more scripting
1. Write a script that asks for two numbers, and outputs the sum and product (as shown here).
Enter a number: 5
Enter another number: 2
Sum: 5 + 2 = 7
Product: 5 x 2 = 10
#!/bin/bash
echo -n "Enter a number : "
read n1
echo -n "Enter another number : "
read n2
let sum="$n1+$n2"
let pro="$n1*$n2"
echo -e "Sumt: $n1 + $n2 = $sum"
echo -e "Productt: $n1 * $n2 = $pro"
2. Improve the previous script to test that the numbers are between 1 and 100, exit with an
error if necessary.
echo -n "Enter a number between 1 and 100 : "
read n1
if [ $n1 -lt 1 -o $n1 -gt 100 ]
then
echo Wrong number...
exit 1
fi
3. Improve the previous script to congratulate the user if the sum equals the product.
if [ $sum -eq $pro ]
then echo Congratulations $sum == $pro
fi
4. Write a script with a case insensitive case statement, using the shopt nocasematch option.
The nocasematch option is reset to the value it had before the scripts started.
#!/bin/bash
#
# Wild Animals Case Insensitive Helpdesk Advice
#
if shopt -q nocasematch; then
nocase=yes;
else
nocase=no;
shopt -s nocasematch;
fi
echo -n "What animal did you see ? "
read animal
case $animal in](https://image.slidesharecdn.com/linuxfun-140715051047-phpapp01/85/Linux-fun-223-320.jpg)
![more scripting
214
"lion" | "tiger")
echo "You better start running fast!"
;;
"cat")
echo "Let that mouse go..."
;;
"dog")
echo "Don't worry, give it a cookie."
;;
"chicken" | "goose" | "duck" )
echo "Eggs for breakfast!"
;;
"liger")
echo "Approach and say 'Ah you big fluffy kitty.'"
;;
"babelfish")
echo "Did it fall out your ear ?"
;;
*)
echo "You discovered an unknown animal, name it!"
;;
esac
if [ nocase = yes ] ; then
shopt -s nocasematch;
else
shopt -u nocasematch;
fi
5. If time permits (or if you are waiting for other students to finish this practice), take a look
at Linux system scripts in /etc/init.d and /etc/rc.d and try to understand them. Where does
execution of a script start in /etc/init.d/samba ? There are also some hidden scripts in ~, we
will discuss them later.](https://image.slidesharecdn.com/linuxfun-140715051047-phpapp01/85/Linux-fun-224-320.jpg)


![users
218
25.1. identify yourself
25.1.1. whoami
The whoami command tells you your username.
[root@RHEL5 ~]# whoami
root
[root@RHEL5 ~]# su - paul
[paul@RHEL5 ~]$ whoami
paul
25.1.2. who
The who command will give you information about who is logged on the system.
[paul@RHEL5 ~]$ who
root tty1 2008-06-24 13:24
sandra pts/0 2008-06-24 14:05 (192.168.1.34)
paul pts/1 2008-06-24 16:23 (192.168.1.37)
25.1.3. who am i
With who am i the who command will display only the line pointing to your current session.
[paul@RHEL5 ~]$ who am i
paul pts/1 2008-06-24 16:23 (192.168.1.34)
25.1.4. w
The w command shows you who is logged on and what they are doing.
$ w
05:13:36 up 3 min, 4 users, load average: 0.48, 0.72, 0.33
USER TTY FROM LOGIN@ IDLE JCPU PCPU WHAT
root tty1 - 05:11 2.00s 0.32s 0.27s find / -name shad
inge pts/0 192.168.1.33 05:12 0.00s 0.02s 0.02s -ksh
paul pts/2 192.168.1.34 05:13 25.00s 0.07s 0.04s top
25.1.5. id
The id command will give you your user id, primary group id, and a list of the groups that
you belong to.
root@laika:~# id
uid=0(root) gid=0(root) groups=0(root)
root@laika:~# su - brel
brel@laika:~$ id
uid=1001(brel) gid=1001(brel) groups=1001(brel),1008(chanson),11578(wolf)](https://image.slidesharecdn.com/linuxfun-140715051047-phpapp01/85/Linux-fun-228-320.jpg)
![users
219
25.2. users
25.2.1. user management
User management on any Unix can be done in three complimentary ways. You can use
the graphical tools provided by your distribution. These tools have a look and feel that
depends on the distribution. If you are a novice Linux user on your home system, then use
the graphical tool that is provided by your distribution. This will make sure that you do not
run into problems.
Another option is to use command line tools like useradd, usermod, gpasswd, passwd and
others. Server administrators are likely to use these tools, since they are familiar and very
similar across many different distributions. This chapter will focus on these command line
tools.
A third and rather extremist way is to edit the local configuration files directly using vi (or
vipw/vigr). Do not attempt this as a novice on production systems!
25.2.2. /etc/passwd
The local user database on Linux (and on most Unixes) is /etc/passwd.
[root@RHEL5 ~]# tail /etc/passwd
inge:x:518:524:art dealer:/home/inge:/bin/ksh
ann:x:519:525:flute player:/home/ann:/bin/bash
frederik:x:520:526:rubius poet:/home/frederik:/bin/bash
steven:x:521:527:roman emperor:/home/steven:/bin/bash
pascale:x:522:528:artist:/home/pascale:/bin/ksh
geert:x:524:530:kernel developer:/home/geert:/bin/bash
wim:x:525:531:master damuti:/home/wim:/bin/bash
sandra:x:526:532:radish stresser:/home/sandra:/bin/bash
annelies:x:527:533:sword fighter:/home/annelies:/bin/bash
laura:x:528:534:art dealer:/home/laura:/bin/ksh
As you can see, this file contains seven columns separated by a colon. The columns contain
the username, an x, the user id, the primary group id, a description, the name of the home
directory, and the login shell.
25.2.3. root
The root user also called the superuser is the most powerful account on your Linux system.
This user can do almost anything, including the creation of other users. The root user always
has userid 0 (regardless of the name of the account).
[root@RHEL5 ~]# head -1 /etc/passwd
root:x:0:0:root:/root:/bin/bash](https://image.slidesharecdn.com/linuxfun-140715051047-phpapp01/85/Linux-fun-229-320.jpg)
![users
220
25.2.4. useradd
You can add users with the useradd command. The example below shows how to add a
user named yanina (last parameter) and at the same time forcing the creation of the home
directory (-m), setting the name of the home directory (-d), and setting a description (-c).
[root@RHEL5 ~]# useradd -m -d /home/yanina -c "yanina wickmayer" yanina
[root@RHEL5 ~]# tail -1 /etc/passwd
yanina:x:529:529:yanina wickmayer:/home/yanina:/bin/bash
The user named yanina received userid 529 and primary group id 529.
25.2.5. /etc/default/useradd
Both Red Hat Enterprise Linux and Debian/Ubuntu have a file called /etc/default/useradd
that contains some default user options. Besides using cat to display this file, you can also
use useradd -D.
[root@RHEL4 ~]# useradd -D
GROUP=100
HOME=/home
INACTIVE=-1
EXPIRE=
SHELL=/bin/bash
SKEL=/etc/skel
25.2.6. userdel
You can delete the user yanina with userdel. The -r option of userdel will also remove the
home directory.
[root@RHEL5 ~]# userdel -r yanina
25.2.7. usermod
You can modify the properties of a user with the usermod command. This example uses
usermod to change the description of the user harry.
[root@RHEL4 ~]# tail -1 /etc/passwd
harry:x:516:520:harry potter:/home/harry:/bin/bash
[root@RHEL4 ~]# usermod -c 'wizard' harry
[root@RHEL4 ~]# tail -1 /etc/passwd
harry:x:516:520:wizard:/home/harry:/bin/bash](https://image.slidesharecdn.com/linuxfun-140715051047-phpapp01/85/Linux-fun-230-320.jpg)
![users
221
25.3. passwords
25.3.1. passwd
Passwords of users can be set with the passwd command. Users will have to provide their
old password before twice entering the new one.
[harry@RHEL4 ~]$ passwd
Changing password for user harry.
Changing password for harry
(current) UNIX password:
New UNIX password:
BAD PASSWORD: it's WAY too short
New UNIX password:
Retype new UNIX password:
passwd: all authentication tokens updated successfully.
[harry@RHEL4 ~]$
As you can see, the passwd tool will do some basic verification to prevent users from using
too simple passwords. The root user does not have to follow these rules (there will be
a warning though). The root user also does not have to provide the old password before
entering the new password twice.
25.3.2. /etc/shadow
User passwords are encrypted and kept in /etc/shadow. The /etc/shadow file is read only
and can only be read by root. We will see in the file permissions section how it is possible
for users to change their password. For now, you will have to know that users can change
their password with the /usr/bin/passwd command.
[root@RHEL5 ~]# tail /etc/shadow
inge:$1$yWMSimOV$YsYvcVKqByFVYLKnU3ncd0:14054:0:99999:7:::
ann:!!:14054:0:99999:7:::
frederik:!!:14054:0:99999:7:::
steven:!!:14054:0:99999:7:::
pascale:!!:14054:0:99999:7:::
geert:!!:14054:0:99999:7:::
wim:!!:14054:0:99999:7:::
sandra:!!:14054:0:99999:7:::
annelies:!!:14054:0:99999:7:::
laura:$1$Tvby1Kpa$lL.WzgobujUS3LClIRmdv1:14054:0:99999:7:::
The /etc/shadow file contains nine colon separated columns. The nine fields contain (from
left to right) the user name, the encrypted password (note that only inge and laura have an
encrypted password), the day the password was last changed (day 1 is January 1, 1970),
number of days the password must be left unchanged, password expiry day, warning number
of days before password expiry, number of days after expiry before disabling the account,
and the day the account was disabled (again, since 1970). The last field has no meaning yet.](https://image.slidesharecdn.com/linuxfun-140715051047-phpapp01/85/Linux-fun-231-320.jpg)
![users
222
25.3.3. password encryption
encryption with passwd
Passwords are stored in an encrypted format. This encryption is done by the crypt function.
The easiest (and recommended) way to add a user with a password to the system is to add
the user with the useradd -m user command, and then set the user's password with passwd.
[root@RHEL4 ~]# useradd -m xavier
[root@RHEL4 ~]# passwd xavier
Changing password for user xavier.
New UNIX password:
Retype new UNIX password:
passwd: all authentication tokens updated successfully.
[root@RHEL4 ~]#
encryption with openssl
Another way to create users with a password is to use the -p option of useradd, but that
option requires an encrypted password. You can generate this encrypted password with the
openssl passwd command.
[root@RHEL4 ~]# openssl passwd stargate
ZZNX16QZVgUQg
[root@RHEL4 ~]# useradd -m -p ZZNX16QZVgUQg mohamed
encryption with crypt
A third option is to create your own C program using the crypt function, and compile this
into a command.
[paul@laika ~]$ cat MyCrypt.c
#include <stdio.h>
#define __USE_XOPEN
#include <unistd.h>
int main(int argc, char** argv)
{
if(argc==3)
{
printf("%sn", crypt(argv[1],argv[2]));
}
else
{
printf("Usage: MyCrypt $password $saltn" );
}
return 0;
}
This little program can be compiled with gcc like this.
[paul@laika ~]$ gcc MyCrypt.c -o MyCrypt -lcrypt](https://image.slidesharecdn.com/linuxfun-140715051047-phpapp01/85/Linux-fun-232-320.jpg)

![users
224
25.3.4. password defaults
/etc/login.defs
The /etc/login.defs file contains some default settings for user passwords like password
aging and length settings. (You will also find the numerical limits of user ids and group ids
and whether or not a home directory should be created by default).
[root@RHEL4 ~]# grep -i pass /etc/login.defs
# Password aging controls:
# PASS_MAX_DAYS Maximum number of days a password may be used.
# PASS_MIN_DAYS Minimum number of days allowed between password changes.
# PASS_MIN_LEN Minimum acceptable password length.
# PASS_WARN_AGE Number of days warning given before a password expires.
PASS_MAX_DAYS 99999
PASS_MIN_DAYS 0
PASS_MIN_LEN 5
PASS_WARN_AGE 7
chage
The chage command can be used to set an expiration date for a user account (-E), set a
minimum (-m) and maximum (-M) password age, a password expiration date, and set the
number of warning days before the password expiration date. Much of this functionality is
also available from the passwd command. The -l option of chage will list these settings for
a user.
[root@RHEL4 ~]# chage -l harry
Minimum: 0
Maximum: 99999
Warning: 7
Inactive: -1
Last Change: Jul 23, 2007
Password Expires: Never
Password Inactive: Never
Account Expires: Never
[root@RHEL4 ~]#
25.3.5. disabling a password
Passwords in /etc/shadow cannot begin with an exclamation mark. When the second field
in /etc/passwd starts with an exclamation mark, then the password can not be used.
Using this feature is often called locking, disabling, or suspending a user account. Besides
vi (or vipw) you can also accomplish this with usermod.
The first line in the next screenshot will disable the password of user harry, making it
impossible for harry to authenticate using this password.
[root@RHEL4 ~]# usermod -L harry
[root@RHEL4 ~]# tail -1 /etc/shadow
harry:!$1$143TO9IZ$RLm/FpQkpDrV4/Tkhku5e1:13717:0:99999:7:::](https://image.slidesharecdn.com/linuxfun-140715051047-phpapp01/85/Linux-fun-234-320.jpg)
![users
225
The root user (and users with sudo rights on su) still will be able to su to harry (because
the password is not needed here). Also note that harry will still be able to login if he has
set up passwordless ssh!
[root@RHEL4 ~]# su - harry
[harry@RHEL4 ~]$
You can unlock the account again with usermod -U.
Watch out for tiny differences in the command line options of passwd, usermod,
and useradd on different distributions! Verify the local files when using features like
"disabling, suspending, or locking" users and passwords!
25.3.6. editing local files
If you still want to manually edit the /etc/passwd or /etc/shadow, after knowing these
commands for password management, then use vipw instead of vi(m) directly. The vipw
tool will do proper locking of the file.
[root@RHEL5 ~]# vipw /etc/passwd
vipw: the password file is busy (/etc/ptmp present)](https://image.slidesharecdn.com/linuxfun-140715051047-phpapp01/85/Linux-fun-235-320.jpg)
![users
226
25.4. home directories
25.4.1. creating home directories
The easiest way to create a home directory is to supply the -m option with useradd (it is
likely set as a default option on Linux).
A less easy way is to create a home directory manually with mkdir which also requires
setting the owner and the permissions on the directory with chmod and chown (both
commands are discussed in detail in another chapter).
[root@RHEL5 ~]# mkdir /home/laura
[root@RHEL5 ~]# chown laura:laura /home/laura
[root@RHEL5 ~]# chmod 700 /home/laura
[root@RHEL5 ~]# ls -ld /home/laura/
drwx------ 2 laura laura 4096 Jun 24 15:17 /home/laura/
25.4.2. /etc/skel/
When using useradd the -m option, the /etc/skel/ directory is copied to the newly created
home directory. The /etc/skel/ directory contains some (usually hidden) files that contain
profile settings and default values for applications. In this way /etc/skel/ serves as a default
home directory and as a default user profile.
[root@RHEL5 ~]# ls -la /etc/skel/
total 48
drwxr-xr-x 2 root root 4096 Apr 1 00:11 .
drwxr-xr-x 97 root root 12288 Jun 24 15:36 ..
-rw-r--r-- 1 root root 24 Jul 12 2006 .bash_logout
-rw-r--r-- 1 root root 176 Jul 12 2006 .bash_profile
-rw-r--r-- 1 root root 124 Jul 12 2006 .bashrc
25.4.3. deleting home directories
The -r option of userdel will make sure that the home directory is deleted together with the
user account.
[root@RHEL5 ~]# ls -ld /home/wim/
drwx------ 2 wim wim 4096 Jun 24 15:19 /home/wim/
[root@RHEL5 ~]# userdel -r wim
[root@RHEL5 ~]# ls -ld /home/wim/
ls: /home/wim/: No such file or directory](https://image.slidesharecdn.com/linuxfun-140715051047-phpapp01/85/Linux-fun-236-320.jpg)
![users
227
25.5. user shell
25.5.1. login shell
The /etc/passwd file specifies the login shell for the user. In the screenshot below you can
see that user annelies will log in with the /bin/bash shell, and user laura with the /bin/ksh
shell.
[root@RHEL5 ~]# tail -2 /etc/passwd
annelies:x:527:533:sword fighter:/home/annelies:/bin/bash
laura:x:528:534:art dealer:/home/laura:/bin/ksh
You can use the usermod command to change the shell for a user.
[root@RHEL5 ~]# usermod -s /bin/bash laura
[root@RHEL5 ~]# tail -1 /etc/passwd
laura:x:528:534:art dealer:/home/laura:/bin/bash
25.5.2. chsh
Users can change their login shell with the chsh command. First, user harry obtains a list of
available shells (he could also have done a cat /etc/shells) and then changes his login shell
to the Korn shell (/bin/ksh). At the next login, harry will default into ksh instead of bash.
[harry@RHEL4 ~]$ chsh -l
/bin/sh
/bin/bash
/sbin/nologin
/bin/ash
/bin/bsh
/bin/ksh
/usr/bin/ksh
/usr/bin/pdksh
/bin/tcsh
/bin/csh
/bin/zsh
[harry@RHEL4 ~]$ chsh -s /bin/ksh
Changing shell for harry.
Password:
Shell changed.
[harry@RHEL4 ~]$](https://image.slidesharecdn.com/linuxfun-140715051047-phpapp01/85/Linux-fun-237-320.jpg)
![users
228
25.6. switch users with su
25.6.1. su to another user
The su command allows a user to run a shell as another user.
[paul@RHEL4b ~]$ su harry
Password:
[harry@RHEL4b paul]$
25.6.2. su to root
Yes you can alsu su to become root, when you know the root password.
[harry@RHEL4b paul]$ su root
Password:
[root@RHEL4b paul]#
25.6.3. su as root
Unless you are logged in as root, running a shell as another user requires that you know
the password of that user. The root user can become any user without knowing the user's
password.
[root@RHEL4b paul]# su serena
[serena@RHEL4b paul]$
25.6.4. su - $username
By default, the su command maintains the same shell environment. To become another user
and also get the target user's environment, issue the su - command followed by the target
username.
[paul@RHEL4b ~]$ su - harry
Password:
[harry@RHEL4b ~]$
25.6.5. su -
When no username is provided to su or su -, the command will assume root is the target.
[harry@RHEL4b ~]$ su -
Password:
[root@RHEL4b ~]#
25.7. run a program as another user
25.7.1. about sudo
The sudo program allows a user to start a program with the credentials of another user.
Before this works, the system administrator has to set up the /etc/sudoers file. This can be
useful to delegate administrative tasks to another user (without giving the root password).](https://image.slidesharecdn.com/linuxfun-140715051047-phpapp01/85/Linux-fun-238-320.jpg)
![users
229
The screenshot below shows the usage of sudo. User paul received the right to run useradd
with the credentials of root. This allows paul to create new users on the system without
becoming root and without knowing the root password.
paul@laika:~$ useradd -m inge
useradd: unable to lock password file
paul@laika:~$ sudo useradd -m inge
[sudo] password for paul:
paul@laika:~$
25.7.2. setuid on sudo
The sudo binary has the setuid bit set, so any user can run it with the effective userid of root.
paul@laika:~$ ls -l `which sudo`
-rwsr-xr-x 2 root root 107872 2008-05-15 02:41 /usr/bin/sudo
paul@laika:~$
25.7.3. visudo
Check the man page of visudo before playing with the /etc/sudoers file.
25.7.4. sudo su
On some Linux systems like Ubuntu and Kubuntu, the root user does not have a password
set. This means that it is not possible to login as root (extra security). To perform tasks as
root, the first user is given all sudo rights via the /etc/sudoers. In fact all users that are
members of the admin group can use sudo to run all commands as root.
root@laika:~# grep admin /etc/sudoers
# Members of the admin group may gain root privileges
%admin ALL=(ALL) ALL
The end result of this is that the user can type sudo su - and become root without having to
enter the root password. The sudo command does require you to enter your own password.
Thus the password prompt in the screenshot below is for sudo, not for su.
paul@laika:~$ sudo su -
Password:
root@laika:~#](https://image.slidesharecdn.com/linuxfun-140715051047-phpapp01/85/Linux-fun-239-320.jpg)

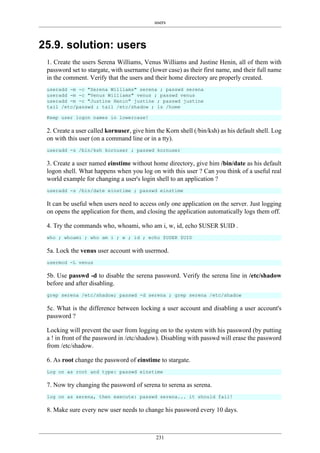

![users
233
25.10. shell environment
It is nice to have these preset and custom aliases and variables, but where do they all come
from ? The shell uses a number of startup files that are checked (and executed) whenever
the shell is invoked. What follows is an overview of startup scripts.
25.10.1. /etc/profile
Both the bash and the ksh shell will verify the existence of /etc/profile and execute it if
it exists.
When reading this script, you might notice (at least on Debian Lenny and on Red Hat
Enterprise Linux 5) that it builds the PATH environment variable. The script might also
change the PS1 variable, set the HOSTNAME and execute even more scripts like /etc/
inputrc
You can use this script to set aliases and variables for every user on the system.
25.10.2. ~/.bash_profile
When this file exists in the users home directory, then bash will execute it. On Debian Linux
it does not exist by default.
RHEL5 uses a brief ~/.bash_profile where it checks for the existence of ~/.bashrc and then
executes it. It also adds $HOME/bin to the $PATH variable.
[serena@rhel53 ~]$ cat .bash_profile
# .bash_profile
# Get the aliases and functions
if [ -f ~/.bashrc ]; then
. ~/.bashrc
fi
# User specific environment and startup programs
PATH=$PATH:$HOME/bin
export PATH
25.10.3. ~/.bash_login
When .bash_profile does not exist, then bash will check for ~/.bash_login and execute it.
Neither Debian nor Red Hat have this file by default.
25.10.4. ~/.profile
When neither ~/.bash_profile and ~/.bash_login exist, then bash will verify the existence
of ~/.profile and execute it. This file does not exist by default on Red Hat.](https://image.slidesharecdn.com/linuxfun-140715051047-phpapp01/85/Linux-fun-243-320.jpg)
![users
234
On Debian this script can execute ~/.bashrc and will add $HOME/bin to the $PATH
variable.
serena@deb503:~$ tail -12 .profile
# if running bash
if [ -n "$BASH_VERSION" ]; then
# include .bashrc if it exists
if [ -f "$HOME/.bashrc" ]; then
. "$HOME/.bashrc"
fi
fi
# set PATH so it includes user's private bin if it exists
if [ -d "$HOME/bin" ] ; then
PATH="$HOME/bin:$PATH"
fi
25.10.5. ~/.bashrc
As seen in the previous points, the ~/.bashrc script might be executed by other scripts. Let
us take a look at what it does by default.
Red Hat uses a very simple ~/.bashrc, checking for /etc/bashrc and executing it. It also
leaves room for custom aliases and functions.
[serena@rhel53 ~]$ more .bashrc
# .bashrc
# Source global definitions
if [ -f /etc/bashrc ]; then
. /etc/bashrc
fi
# User specific aliases and functions
On Debian this script is quite a bit longer and configures $PS1, some history variables and
a number af active and inactive aliases.
serena@deb503:~$ ls -l .bashrc
-rw-r--r-- 1 serena serena 3116 2008-05-12 21:02 .bashrc](https://image.slidesharecdn.com/linuxfun-140715051047-phpapp01/85/Linux-fun-244-320.jpg)
![users
235
25.10.6. ~/.bash_logout
When exiting bash, it can execute ~/.bash_logout. Debian and Red Hat both use this
opportunity to clear the screen.
serena@deb503:~$ cat .bash_logout
# ~/.bash_logout: executed by bash(1) when login shell exits.
# when leaving the console clear the screen to increase privacy
if [ "$SHLVL" = 1 ]; then
[ -x /usr/bin/clear_console ] && /usr/bin/clear_console -q
fi
[serena@rhel53 ~]$ cat .bash_logout
# ~/.bash_logout
/usr/bin/clear
25.10.7. Debian overview
Below is a table overview of when Debian is running any of these bash startup scripts.
Table 25.1. Debian User Environment
script su su - ssh gdm
~./bashrc no yes yes yes
~/.profile no yes yes yes
/etc/profile no yes yes yes
/etc/bash.bashrc yes no no yes
25.10.8. RHEL5 overview
Below is a table overview of when Red Hat Enterprise Linux 5 is running any of these bash
startup scripts.
Table 25.2. Red Hat User Environment
script su su - ssh gdm
~./bashrc yes yes yes yes
~/.bash_profile no yes yes yes
/etc/profile no yes yes yes
/etc/bashrc yes yes yes yes](https://image.slidesharecdn.com/linuxfun-140715051047-phpapp01/85/Linux-fun-245-320.jpg)


![groups
238
26.4. usermod
Group membership can be modified with the useradd or usermod command.
root@laika:~# usermod -a -G tennis inge
root@laika:~# usermod -a -G tennis katrien
root@laika:~# usermod -a -G salsa katrien
root@laika:~# usermod -a -G snooker sandra
root@laika:~# usermod -a -G formula1 annelies
root@laika:~# tail -5 /etc/group
tennis:x:1006:inge,katrien
football:x:1007:
snooker:x:1008:sandra
formula1:x:1009:annelies
salsa:x:1010:katrien
root@laika:~#
Be careful when using usermod to add users to groups. By default, the usermod command
will remove the user from every group of which he is a member if the group is not listed in
the command! Using the -a (append) switch prevents this behaviour.
26.5. groupmod
You can change the group name with the groupmod command.
root@laika:~# groupmod -n darts snooker
root@laika:~# tail -5 /etc/group
tennis:x:1006:inge,katrien
football:x:1007:
formula1:x:1009:annelies
salsa:x:1010:katrien
darts:x:1008:sandra
26.6. groupdel
You can permanently remove a group with the groupdel command.
root@laika:~# groupdel tennis
root@laika:~#
26.7. groups
A user can type the groups command to see a list of groups where the user belongs to.
[harry@RHEL4b ~]$ groups
harry sports
[harry@RHEL4b ~]$](https://image.slidesharecdn.com/linuxfun-140715051047-phpapp01/85/Linux-fun-248-320.jpg)
![groups
239
26.8. gpasswd
You can delegate control of group membership to another user with the gpasswd command.
In the example below we delegate permissions to add and remove group members to serena
for the sports group. Then we su to serena and add harry to the sports group.
[root@RHEL4b ~]# gpasswd -A serena sports
[root@RHEL4b ~]# su - serena
[serena@RHEL4b ~]$ id harry
uid=516(harry) gid=520(harry) groups=520(harry)
[serena@RHEL4b ~]$ gpasswd -a harry sports
Adding user harry to group sports
[serena@RHEL4b ~]$ id harry
uid=516(harry) gid=520(harry) groups=520(harry),522(sports)
[serena@RHEL4b ~]$ tail -1 /etc/group
sports:x:522:serena,venus,harry
[serena@RHEL4b ~]$
Group administrators do not have to be a member of the group. They can remove themselves
from a group, but this does not influence their ability to add or remove members.
[serena@RHEL4b ~]$ gpasswd -d serena sports
Removing user serena from group sports
[serena@RHEL4b ~]$ exit
Information about group administrators is kept in the /etc/gshadow file.
[root@RHEL4b ~]# tail -1 /etc/gshadow
sports:!:serena:venus,harry
[root@RHEL4b ~]#
To remove all group administrators from a group, use the gpasswd command to set an empty
administrators list.
[root@RHEL4b ~]# gpasswd -A "" sports
26.9. vigr
Similar to vipw, the vigr command can be used to manually edit the /etc/group file, since
it will do proper locking of the file. Only experienced senior administrators should use vi
or vigr to manage groups.](https://image.slidesharecdn.com/linuxfun-140715051047-phpapp01/85/Linux-fun-249-320.jpg)


![standard file permissions
252
27.3.6. umask
When creating a file or directory, a set of default permissions are applied. These default
permissions are determined by the umask. The umask specifies permissions that you do
not want set on by default. You can display the umask with the umask command.
[Harry@RHEL4b ~]$ umask
0002
[Harry@RHEL4b ~]$ touch test
[Harry@RHEL4b ~]$ ls -l test
-rw-rw-r-- 1 Harry Harry 0 Jul 24 06:03 test
[Harry@RHEL4b ~]$
As you can also see, the file is also not executable by default. This is a general security
feature among Unixes; newly created files are never executable by default. You have to
explicitly do a chmod +x to make a file executable. This also means that the 1 bit in the
umask has no meaning--a umask of 0022 is the same as 0033.
27.3.7. mkdir -m
When creating directories with mkdir you can use the -m option to set the mode. This
screenshot explains.
paul@debian5~$ mkdir -m 700 MyDir
paul@debian5~$ mkdir -m 777 Public
paul@debian5~$ ls -dl MyDir/ Public/
drwx------ 2 paul paul 4096 2011-10-16 19:16 MyDir/
drwxrwxrwx 2 paul paul 4096 2011-10-16 19:16 Public/](https://image.slidesharecdn.com/linuxfun-140715051047-phpapp01/85/Linux-fun-262-320.jpg)


![advanced file permissions
260
28.5. solution: sticky, setuid and setgid bits
1a. Set up a directory, owned by the group sports.
groupadd sports
mkdir /home/sports
chown root:sports /home/sports
1b. Members of the sports group should be able to create files in this directory.
chmod 770 /home/sports
1c. All files created in this directory should be group-owned by the sports group.
chmod 2770 /home/sports
1d. Users should be able to delete only their own user-owned files.
chmod +t /home/sports
1e. Test that this works!
Log in with different users (group members and others and root), create files and watch the
permissions. Try changing and deleting files...
2. Verify the permissions on /usr/bin/passwd. Remove the setuid, then try changing your
password as a normal user. Reset the permissions back and try again.
root@deb503:~# ls -l /usr/bin/passwd
-rwsr-xr-x 1 root root 31704 2009-11-14 15:41 /usr/bin/passwd
root@deb503:~# chmod 755 /usr/bin/passwd
root@deb503:~# ls -l /usr/bin/passwd
-rwxr-xr-x 1 root root 31704 2009-11-14 15:41 /usr/bin/passwd
A normal user cannot change password now.
root@deb503:~# chmod 4755 /usr/bin/passwd
root@deb503:~# ls -l /usr/bin/passwd
-rwsr-xr-x 1 root root 31704 2009-11-14 15:41 /usr/bin/passwd
3. If time permits (or if you are waiting for other students to finish this practice), read about
file attributes in the man page of chattr and lsattr. Try setting the i attribute on a file and
test that it works.
paul@laika:~$ sudo su -
[sudo] password for paul:
root@laika:~# mkdir attr
root@laika:~# cd attr/
root@laika:~/attr# touch file42
root@laika:~/attr# lsattr
------------------ ./file42
root@laika:~/attr# chattr +i file42](https://image.slidesharecdn.com/linuxfun-140715051047-phpapp01/85/Linux-fun-270-320.jpg)


![275
Appendix A. keyboard settings
A.1. about keyboard layout
Many people (like US-Americans) prefer the default US-qwerty keyboard layout. So when
you are not from the USA and want a local keyboard layout on your system, then the best
practice is to select this keyboard at installation time. Then the keyboard layout will always
be correct. Also, whenever you use ssh to remotely manage a Linux system, your local
keyboard layout will be used, independent of the server keyboard configuration. So you will
not find much information on changing keyboard layout on the fly on linux, because not
many people need it. Below are some tips to help you.
A.2. X Keyboard Layout
This is the relevant portion in /etc/X11/xorg.conf, first for Belgian azerty, then for US-
qwerty.
[paul@RHEL5 ~]$ grep -i xkb /etc/X11/xorg.conf
Option "XkbModel" "pc105"
Option "XkbLayout" "be"
[paul@RHEL5 ~]$ grep -i xkb /etc/X11/xorg.conf
Option "XkbModel" "pc105"
Option "XkbLayout" "us"
When in Gnome or KDE or any other graphical environment, look in the graphical menu in
preferences, there will be a keyboard section to choose your layout. Use the graphical menu
instead of editing xorg.conf.
A.3. shell keyboard layout
When in bash, take a look in the /etc/sysconfig/keyboard file. Below a sample US-qwerty
configuration, followed by a Belgian azerty configuration.
[paul@RHEL5 ~]$ cat /etc/sysconfig/keyboard
KEYBOARDTYPE="pc"
KEYTABLE="us"
[paul@RHEL5 ~]$ cat /etc/sysconfig/keyboard
KEYBOARDTYPE="pc"
KEYTABLE="be-latin1"
The keymaps themselves can be found in /usr/share/keymaps or /lib/kbd/keymaps.
[paul@RHEL5 ~]$ ls -l /lib/kbd/keymaps/
total 52
drwxr-xr-x 2 root root 4096 Apr 1 00:14 amiga](https://image.slidesharecdn.com/linuxfun-140715051047-phpapp01/85/Linux-fun-285-320.jpg)

![277
Appendix B. hardware
B.1. buses
B.1.1. about buses
Hardware components communicate with the Central Processing Unit or cpu over a bus.
The most common buses today are usb, pci, agp, pci-express and pcmcia aka pc-card.
These are all Plag and Play buses.
Older x86 computers often had isa buses, which can be configured using jumpers or dip
switches.
B.1.2. /proc/bus
To list the buses recognised by the Linux kernel on your computer, look at the contents of
the /proc/bus/ directory (screenshot from Ubuntu 7.04 and RHEL4u4 below).
root@laika:~# ls /proc/bus/
input pccard pci usb
[root@RHEL4b ~]# ls /proc/bus/
input pci usb
Can you guess which of these two screenshots was taken on a laptop ?
B.1.3. /usr/sbin/lsusb
To list all the usb devices connected to your system, you could read the contents of /proc/
bus/usb/devices (if it exists) or you could use the more readable output of lsusb, which is
executed here on a SPARC system with Ubuntu.
root@shaka:~# lsusb
Bus 001 Device 002: ID 0430:0100 Sun Microsystems, Inc. 3-button Mouse
Bus 001 Device 003: ID 0430:0005 Sun Microsystems, Inc. Type 6 Keyboard
Bus 001 Device 001: ID 04b0:0136 Nikon Corp. Coolpix 7900 (storage)
root@shaka:~#
B.1.4. /var/lib/usbutils/usb.ids
The /var/lib/usbutils/usb.ids file contains a gzipped list of all known usb devices.
paul@barry:~$ zmore /var/lib/usbutils/usb.ids | head
------> /var/lib/usbutils/usb.ids <------
#
# List of USB ID's
#
# Maintained by Vojtech Pavlik <vojtech@suse.cz>](https://image.slidesharecdn.com/linuxfun-140715051047-phpapp01/85/Linux-fun-287-320.jpg)

![hardware
279
23: 632444 1 IO-APIC-fasteoi nvidia
24: 1585 1 IO-APIC-fasteoi VIA82XX-MODEM, VIA8237
B.2.3. dmesg
You can also use dmesg to find irq's allocated at boot time.
paul@laika:~$ dmesg | grep "irq 1[45]"
[ 28.930069] ata3: PATA max UDMA/133 cmd 0x1f0 ctl 0x3f6 bmdma 0x2090 irq 14
[ 28.930071] ata4: PATA max UDMA/133 cmd 0x170 ctl 0x376 bmdma 0x2098 irq 15
B.3. io ports
B.3.1. about io ports
Communication in the other direction, from CPU to device, happens through IO ports. The
CPU writes data or control codes to the IO port of the device. But this is not only a one way
communication, the CPU can also use a device's IO port to read status information about the
device. Unlike interrupts, ports cannot be shared!
B.3.2. /proc/ioports
You can see a listing of your system's IO ports via /proc/ioports.
[root@RHEL4b ~]# cat /proc/ioports
0000-001f : dma1
0020-0021 : pic1
0040-0043 : timer0
0050-0053 : timer1
0060-006f : keyboard
0070-0077 : rtc
0080-008f : dma page reg
00a0-00a1 : pic2
00c0-00df : dma2
00f0-00ff : fpu
0170-0177 : ide1
02f8-02ff : serial
...
B.4. dma
B.4.1. about dma
A device that needs a lot of data, interrupts and ports can pose a heavy load on the cpu. With
dma or Direct Memory Access a device can gain (temporary) access to a specific range
of the ram memory.
B.4.2. /proc/dma
Looking at /proc/dma might not give you the information that you want, since it only
contains currently assigned dma channels for isa devices.](https://image.slidesharecdn.com/linuxfun-140715051047-phpapp01/85/Linux-fun-289-320.jpg)
![hardware
280
root@laika:~# cat /proc/dma
1: parport0
4: cascade
pci devices that are using dma are not listed in /proc/dma, in this case dmesg can be useful.
The screenshot below shows that during boot the parallel port received dma channel 1, and
the Infrared port received dma channel 3.
root@laika:~# dmesg | egrep -C 1 'dma 1|dma 3'
[ 20.576000] parport: PnPBIOS parport detected.
[ 20.580000] parport0: PC-style at 0x378 (0x778), irq 7, dma 1...
[ 20.764000] irda_init()
--
[ 21.204000] pnp: Device 00:0b activated.
[ 21.204000] nsc_ircc_pnp_probe() : From PnP, found firbase 0x2F8...
[ 21.204000] nsc-ircc, chip->init](https://image.slidesharecdn.com/linuxfun-140715051047-phpapp01/85/Linux-fun-290-320.jpg)